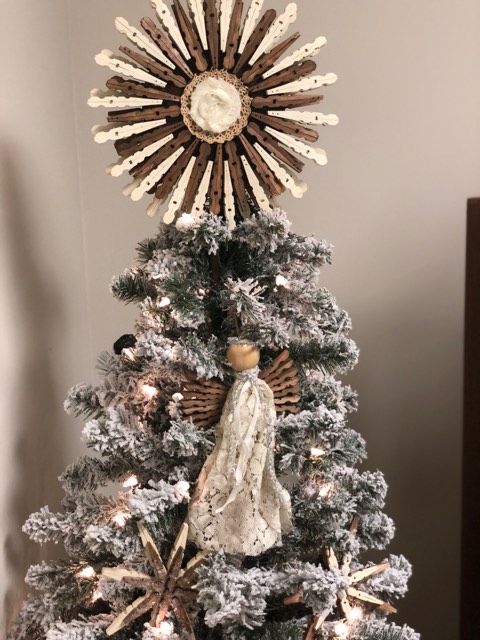
If you’r looking for a unique tree topper then you’re going to love this DIY! You can create this tree topper to be any color or size that you want.
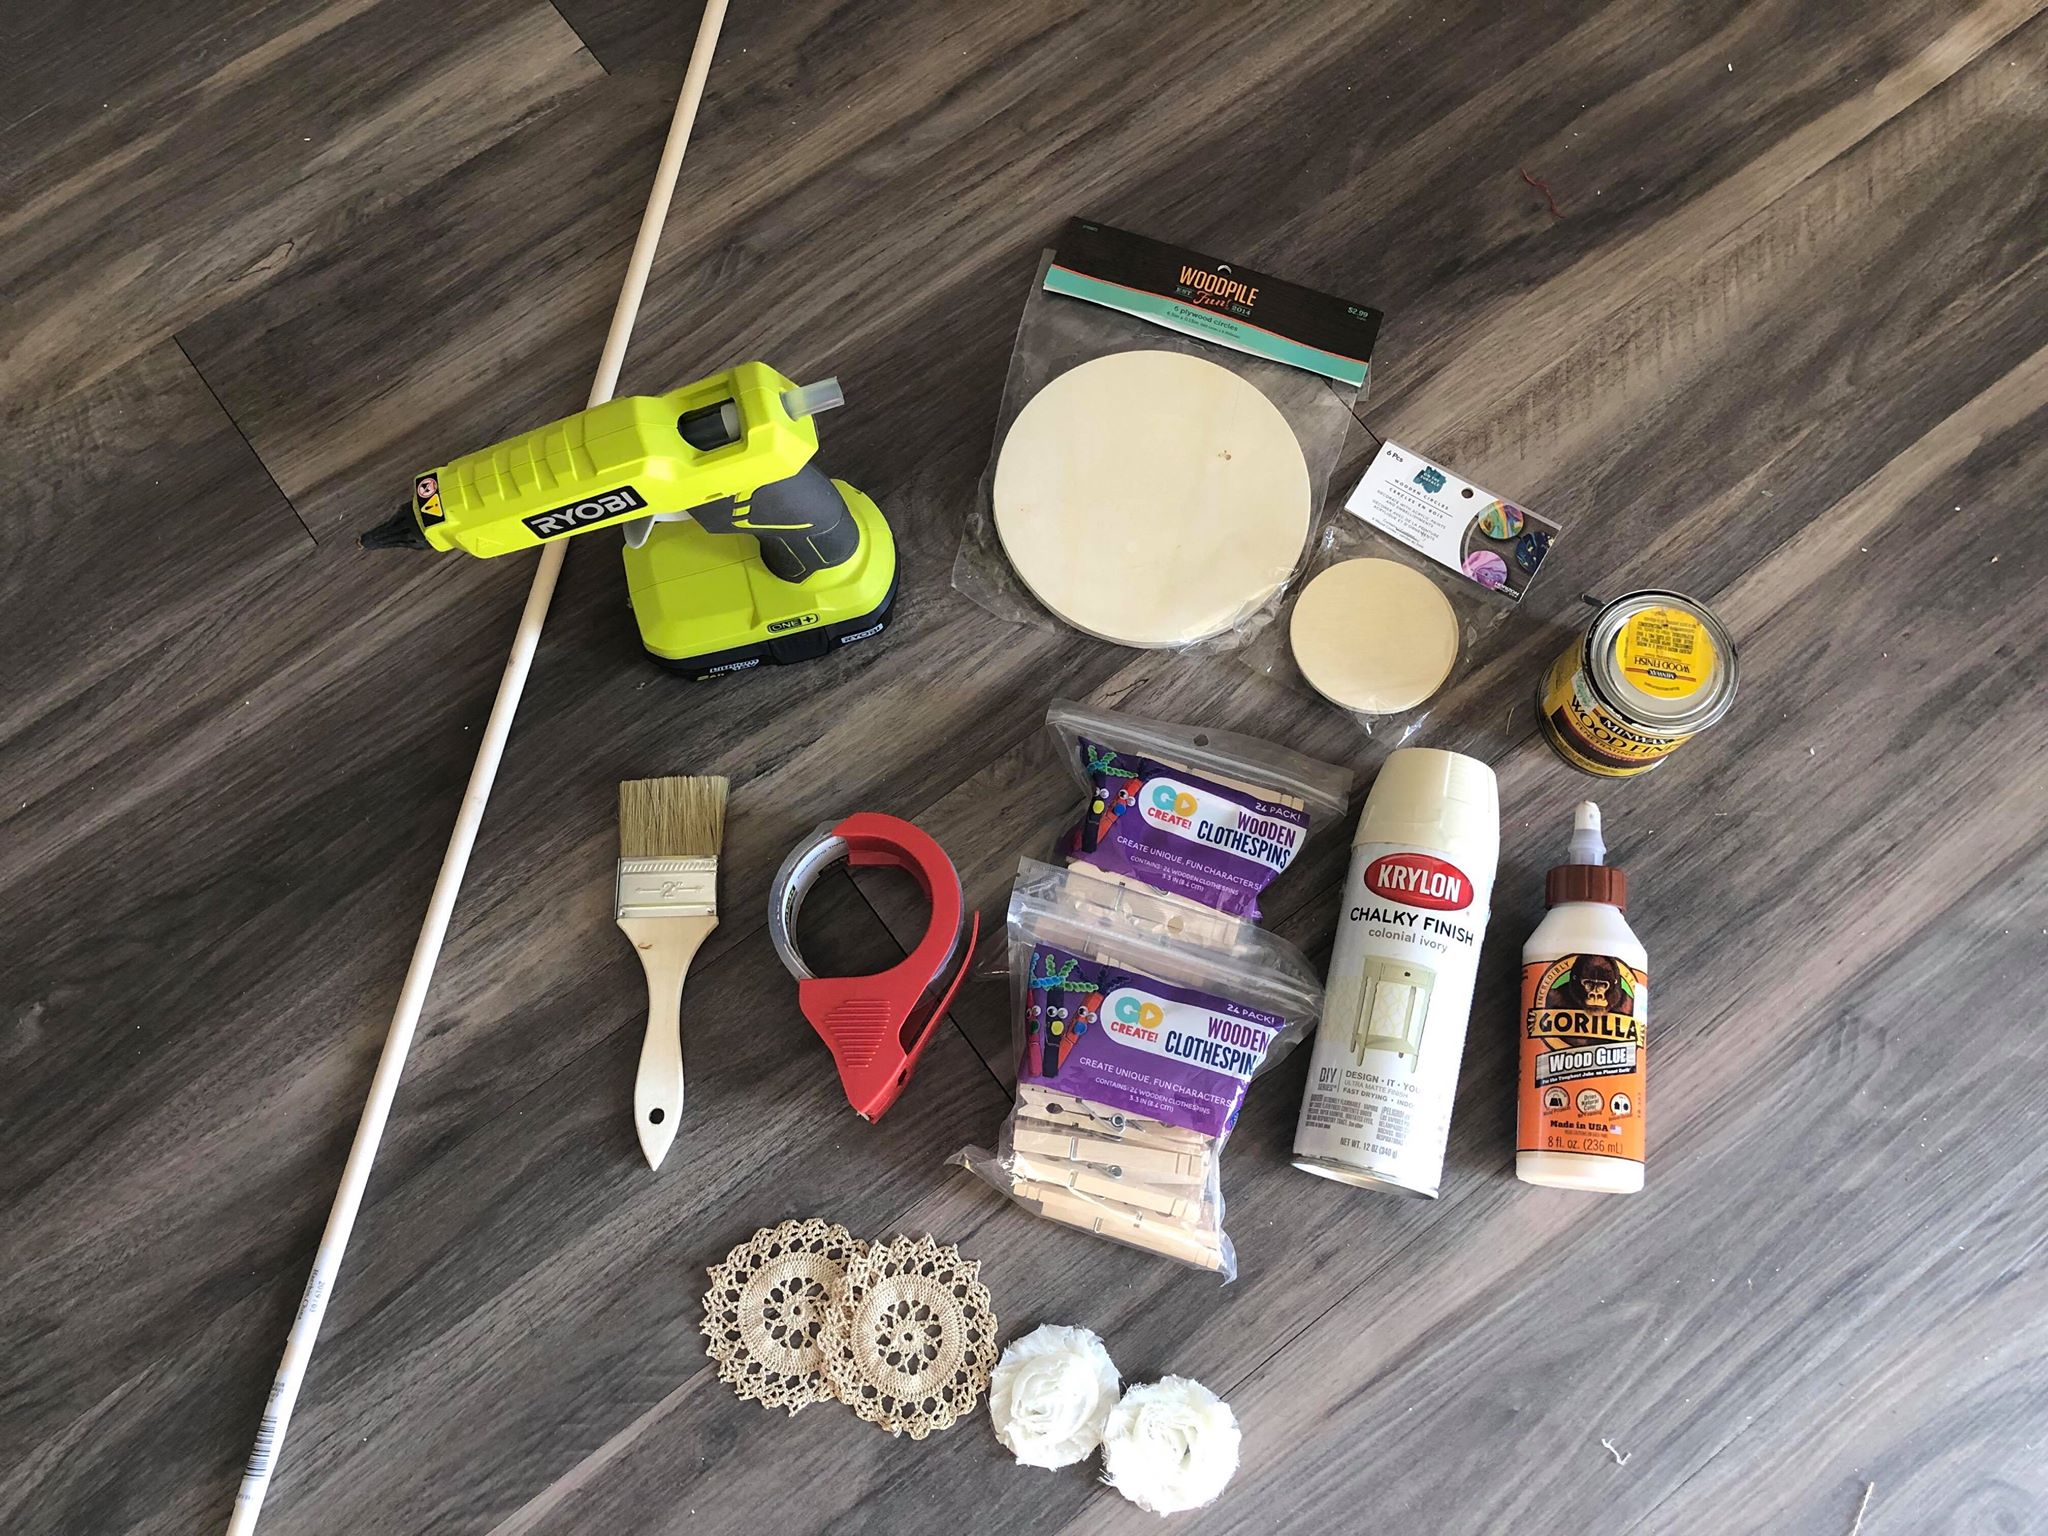
The supplies you will need are:
1. A wooden dowel. You can use any size dowel you want. I got a thicker dowel so it will be more secure on top of my tree.
2. Wooden circles (I am using a larger wooden circle that is 6 inches from Hobby Lobby and a smaller wooden circle that is 3 inches from Walmart)
3. Wood glue
4. Glue gun and I like the wood glue sticks.
5. Clothespins (you will need 42 and I got mine from Walmart)
6. Packing tape
7. Spray paint (optional)
8. Stain (optional)
9. Doilies (optional)
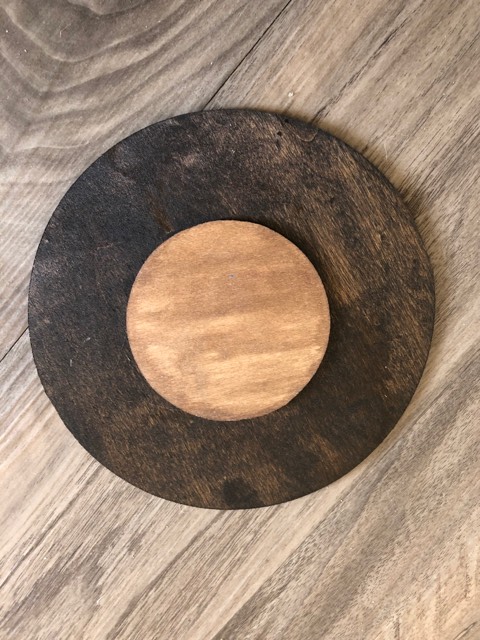
The first thing I did was stain my 2 wooden circles. I stained back and front. Then I took apart all 42 clothes pins. I want my tree topper to be 2 different colors so I will be making two separate piles of 21 clothespins in each pile.
I stained one pile of clothespins and spray painted the other pile with cream spray paint. I found it easier to stain my pieces before gluing them together. I glued my other pieces together and then spray painted them. You can paint and stain before gluing your pieces together or glue together and then paint and stain. I just found that they looked better being stained before being glued together.
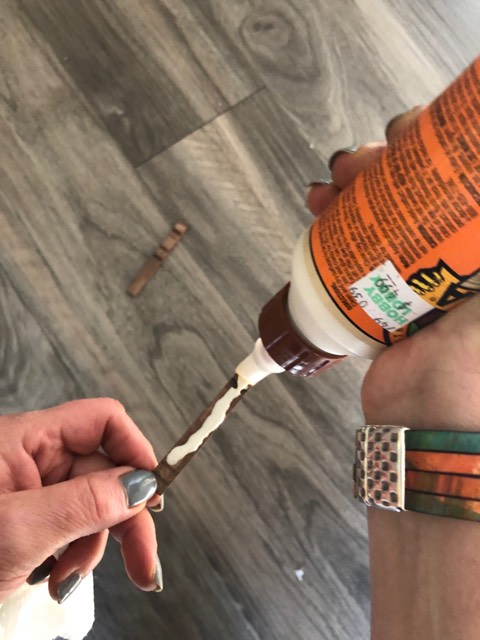
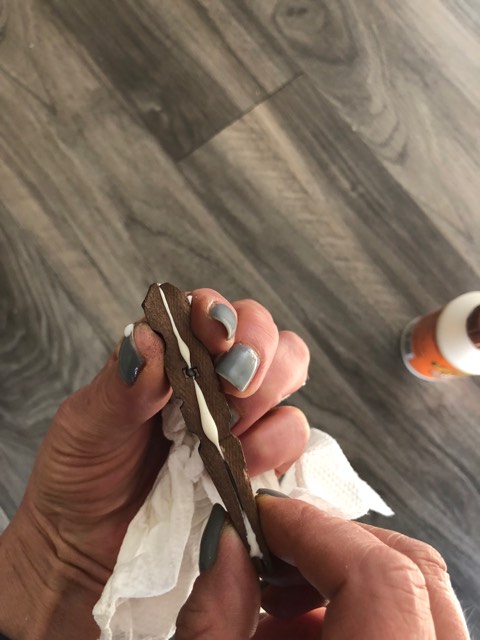
I glued my clothes pin pieces together with gorilla wood glue. You need to glue your clothespin pieces back together after taking them apart and discarding the metal center piece.
You will now have 42 clothespins glued together. I have 21 stained and 21 painted cream.
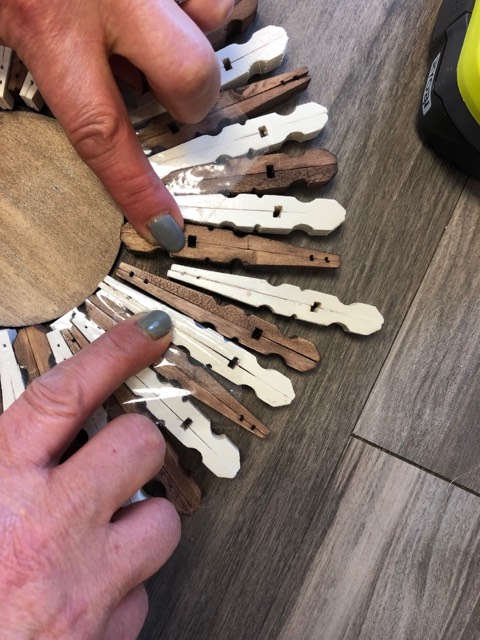
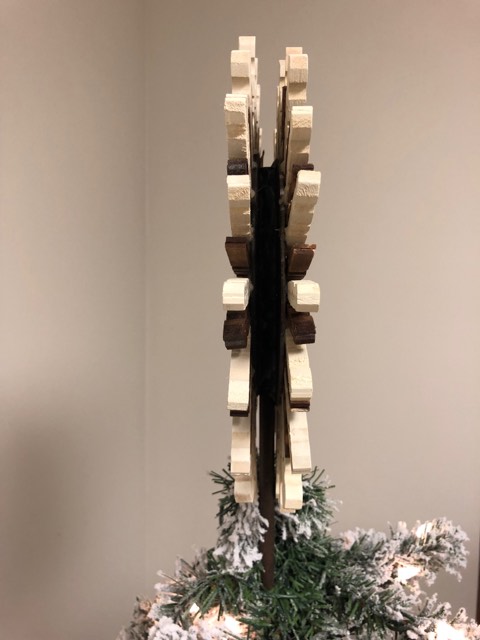
Now I am placing all my stained clothespins onto my outer wooden circle and I will make sure they touch the end of my inner wooden circle. I will also alternate the ends of my clothespins as I go around.
After all my stained clothespins are in place I then add all my cream clothespins. I will be facing all my cream clothespins in the same direction. You should now have all your clothespins onto your outer wooden circle and touching the end of your inner wooden circle.
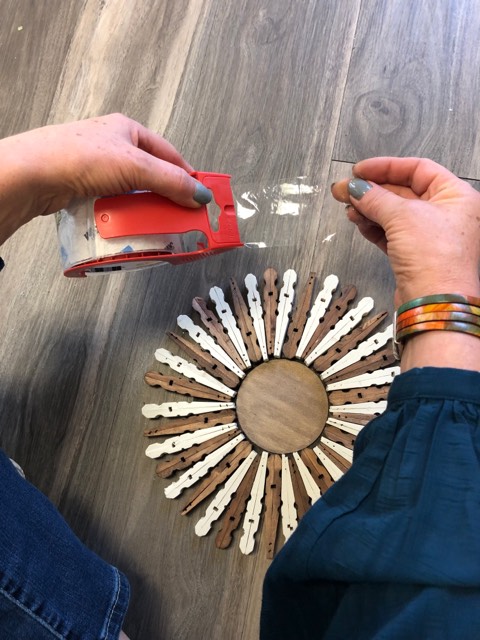
Once they are all in place I then added pieces of shipping tape on top to hold them all in place.

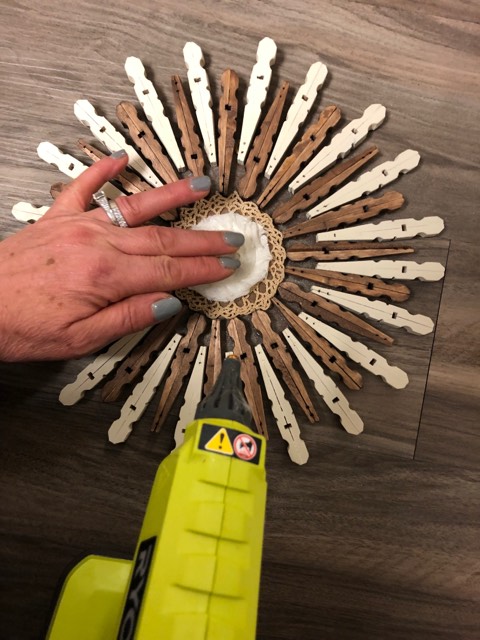
The purpose of this step is so that you can pull out one cream clothes pin at a time and glue into place. I am pulling the cream ones out further to give the tree topper more if a starburst look. I found this the only way to make sure that all my clothespins stay the same distant apart and all look even. I will lift pieces of tape at a time and glue each clothespin into place.

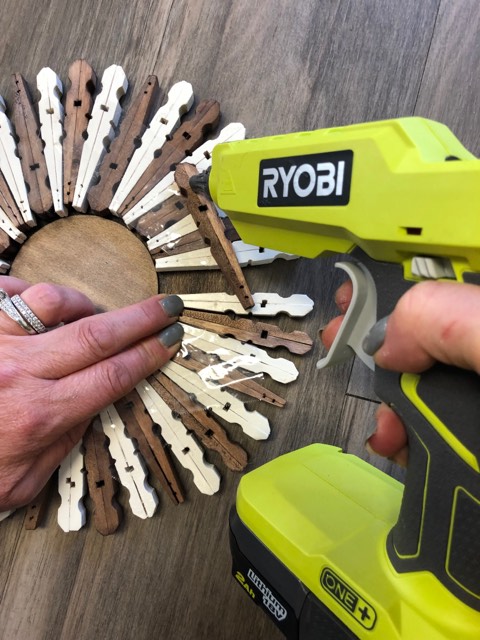
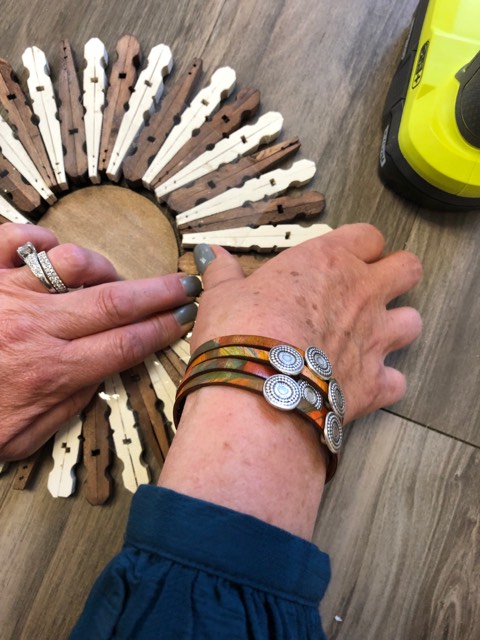
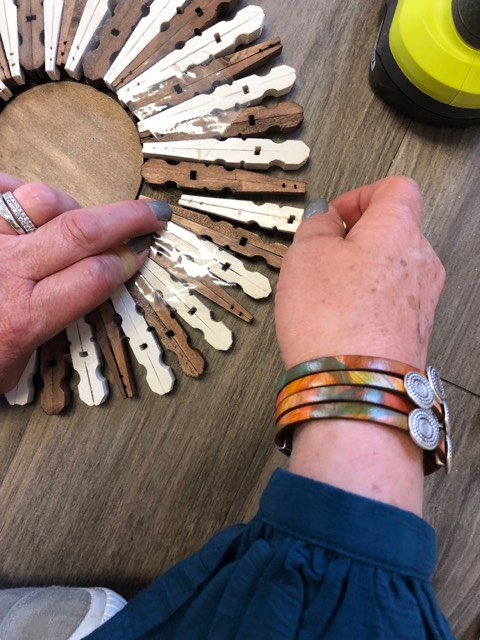
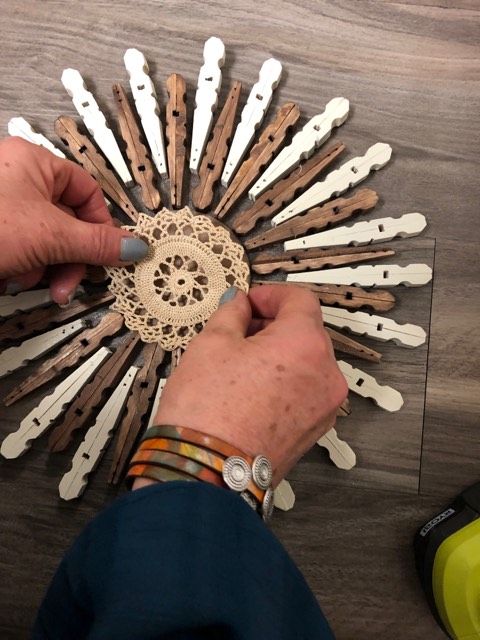
You will continue this process around the whole circle. Once all my clothespins are glued into place I then added some doilies to center.
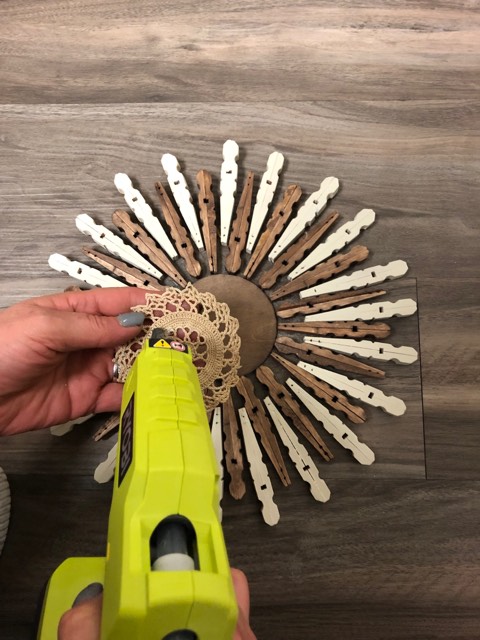
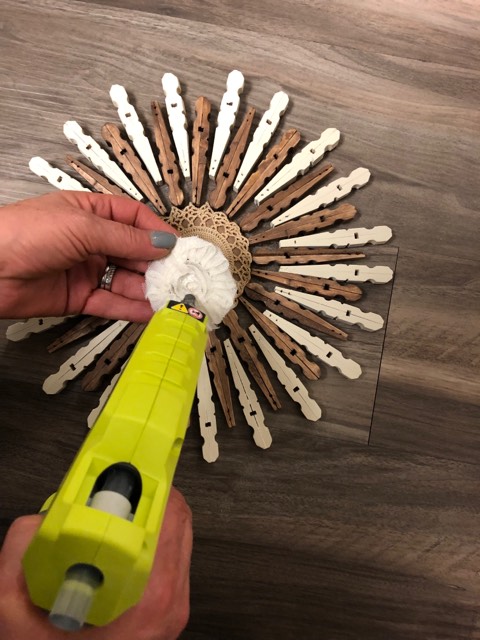

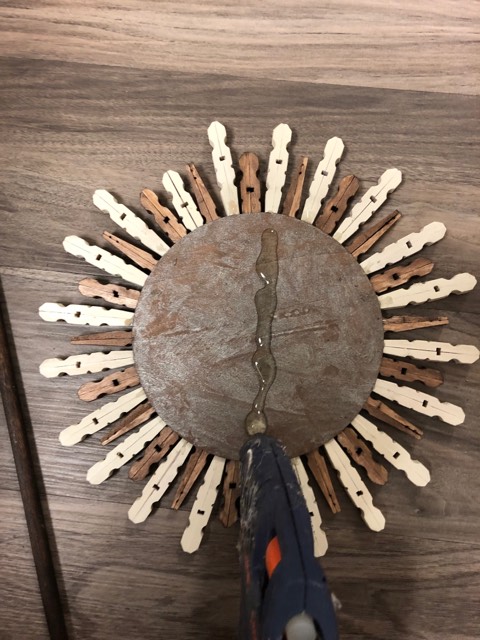
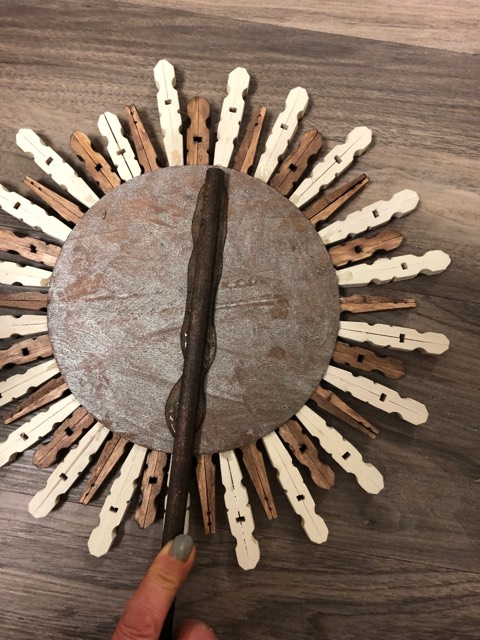
I then added glue to the back and secured my dowel into place.
Because my tree is on a rotating stand I made 2 of the front pieces and glued one to the back. Now my tree topper is double sided.
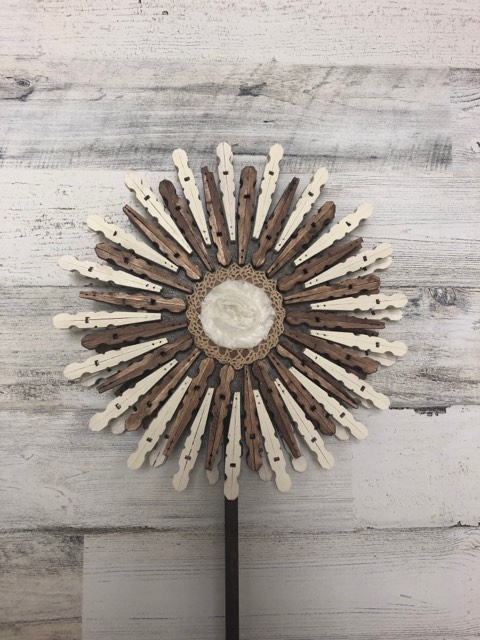

I hope you all enjoy this DIY and give it a try!!
Beautiful!! But would b way too big for my little 4ft tree. 😔
It is Beautiful ! I have put it in my definitely going to make book. Love It!
I get inspired with your ideals Barb this is so neat
This would make a great clock for year round
Love, love, love this! Thank you so much for sharing how you made it. I can’t wait to try it!
I love the shabby tree. Barb is so upbeat, and so stinking cute. She gives so many of us joy and fun. ❤️❤️❤️❤️
Love this and your website Barb!
You are so creative! Delighted to have been directed to your site by my cousin!
Looks like some cute crafts
How do I join your blog to follow it?
Beautiful!
Love this idea
This is a beautiful tree topper. I’m wondering, I think I missed something. How did you get it to stand up straight with just a dowel? Did you use a twister tie around the trunk of the tree? I think I would like to incorporate these into my business sales. I’m assuming because this is a public tutorial that it is permissible to sell, correct? I’d love to make them on a pole and seal them for outdoor use in a garden or planter. I love your ideas, and that you incorporate ideas of your followers. You are such a creative soul, and a wonderful speaker. Thank you for all of your Shabby Tree tips.
Loved this
Thank you so very much for your inspiration.