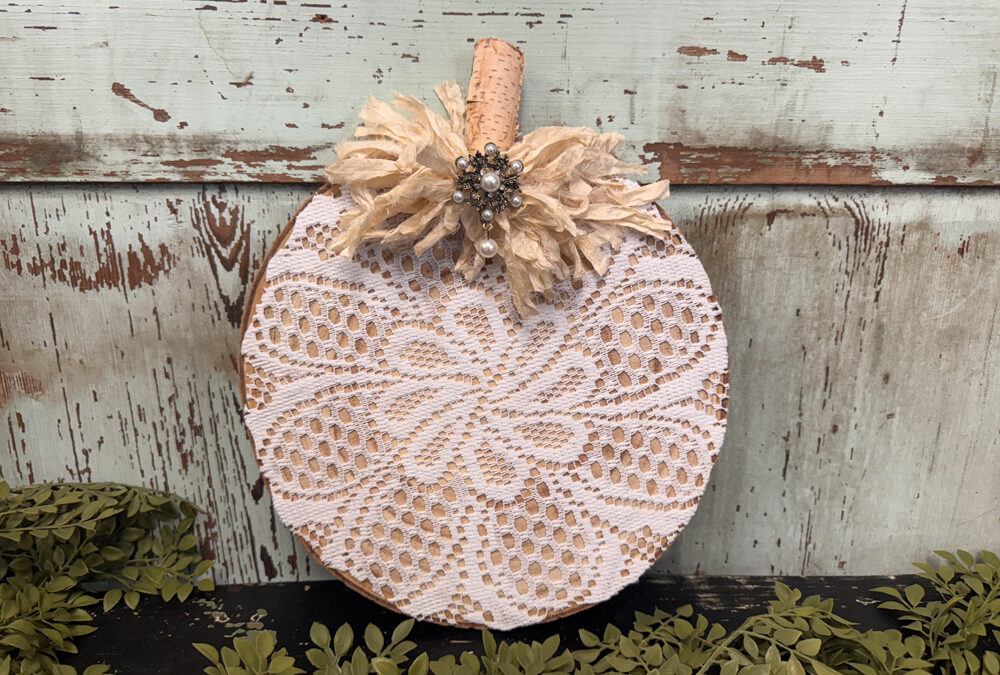
If you’ve been following along, you know I’m always on the lookout for ways to turn simple Dollar Tree finds into something completely unique. Well, I couldn’t resist grabbing a delicate little doily and a plain wood disc, and together they turned into the sweetest pumpkin! This DIY is quick, budget-friendly, and has that perfect mix of rustic charm and shabby style. You’re going to love how easy it is to make—and how pretty it looks when you’re done!
Here’s what you’ll need to whip up this sweet pumpkin:
-
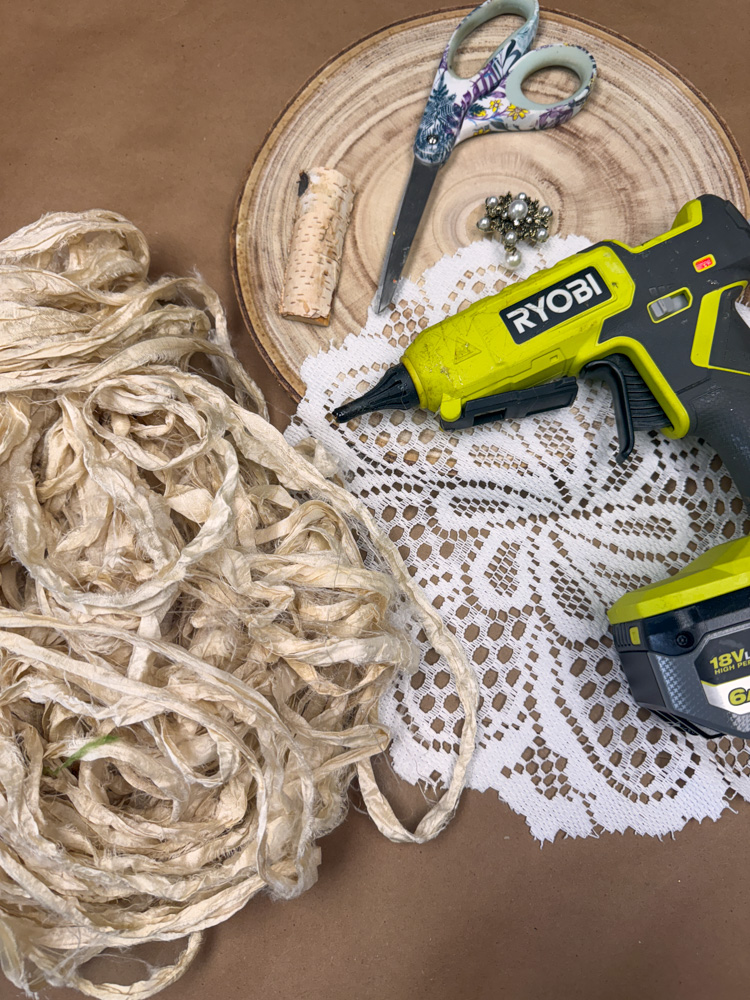
A 12–13 inch large wood slice (mine came in a set of 3 from Amazon—link below!)
-
A doily (Dollar Tree has great ones for cheap!)
-
A wooden birch stem (I grabbed mine at Hobby Lobby)
-
A sparkly piece of bling with a pin back (mine’s from Totally Dazzled)
-
Ivory recycled silk ribbon (from our website—so soft and pretty!)
-
A trusty glue gun
-
Scissors
I love this supply list because it’s short and sweet, and chances are you might already have a few of these things at home.
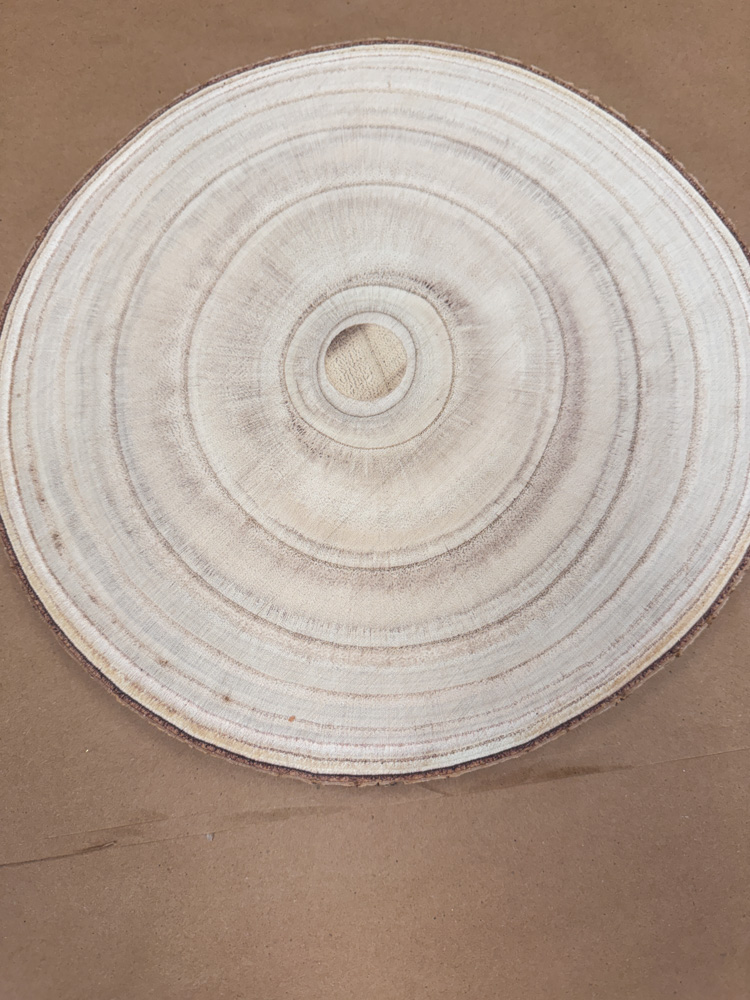
Let’s start with the base! I ordered my wood slices right off Amazon and they came in a pack of three, which is perfect because I know I’ll end up making more pumpkins or even a Christmas project later on. They’re nice and thick, and they give such a natural, rustic look to the finished piece. You can find the link below.
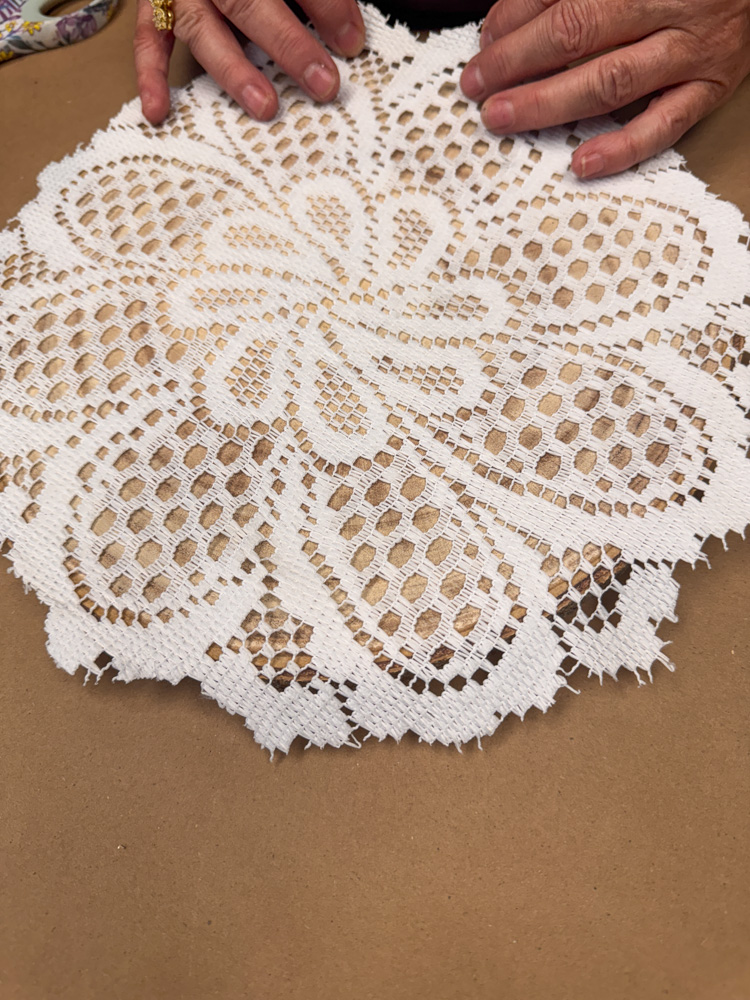
Now for the fun part—dressing up our pumpkin! I placed the doily right in the center of the wood slice. The pretty lace instantly gives it that shabby look.

To secure it, I folded half of the doily up, added some hot glue to the thicker center section, and pressed it down. I repeated this on the other side so it was nice and secure.

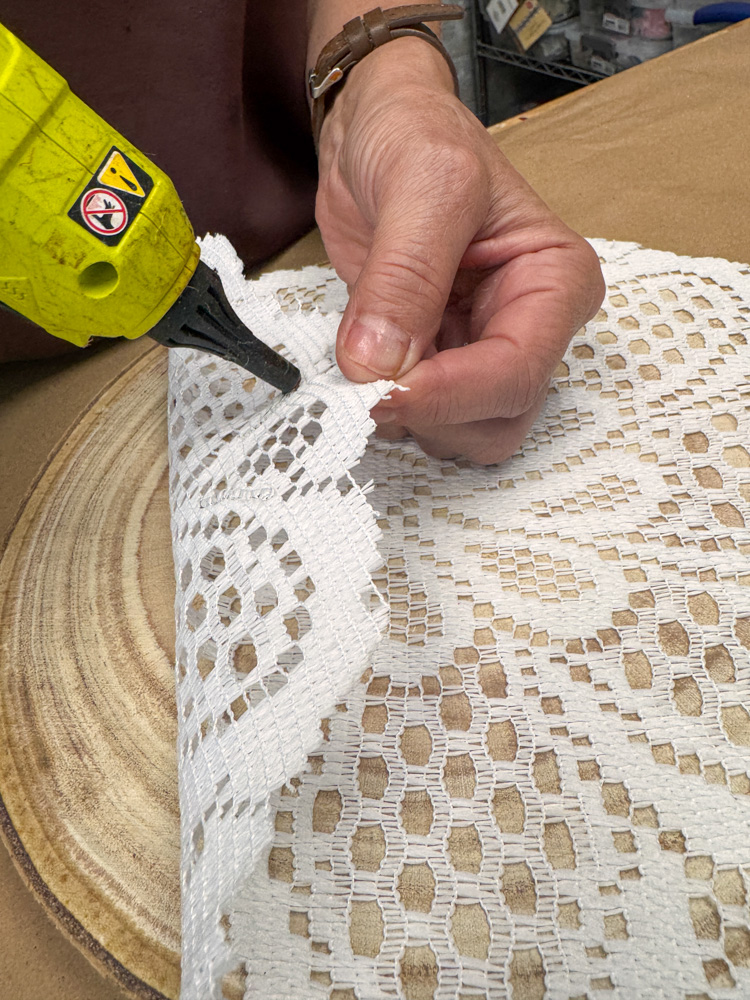
After that, I went around the edges, adding little dots of hot glue—again focusing on those thicker parts of the doily so it would really hold.
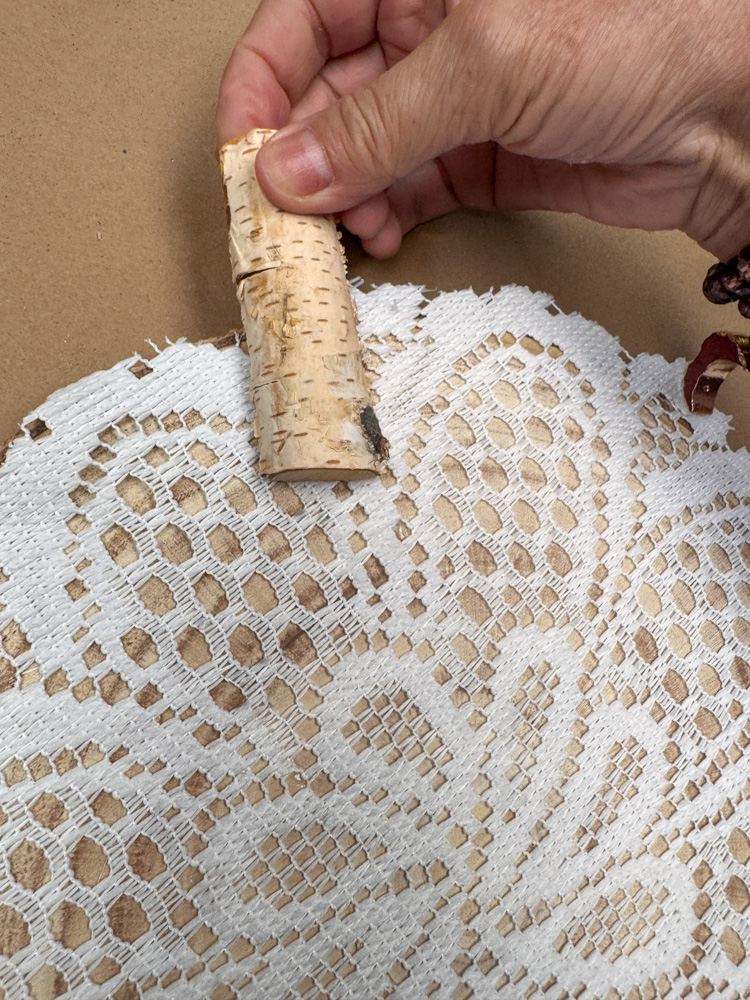
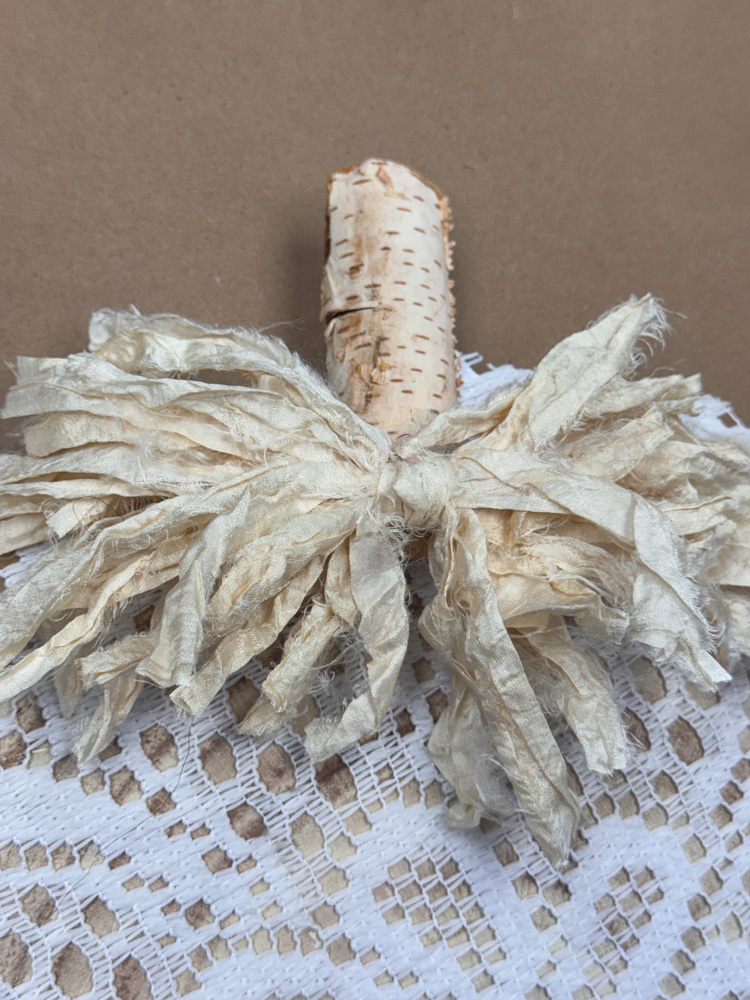
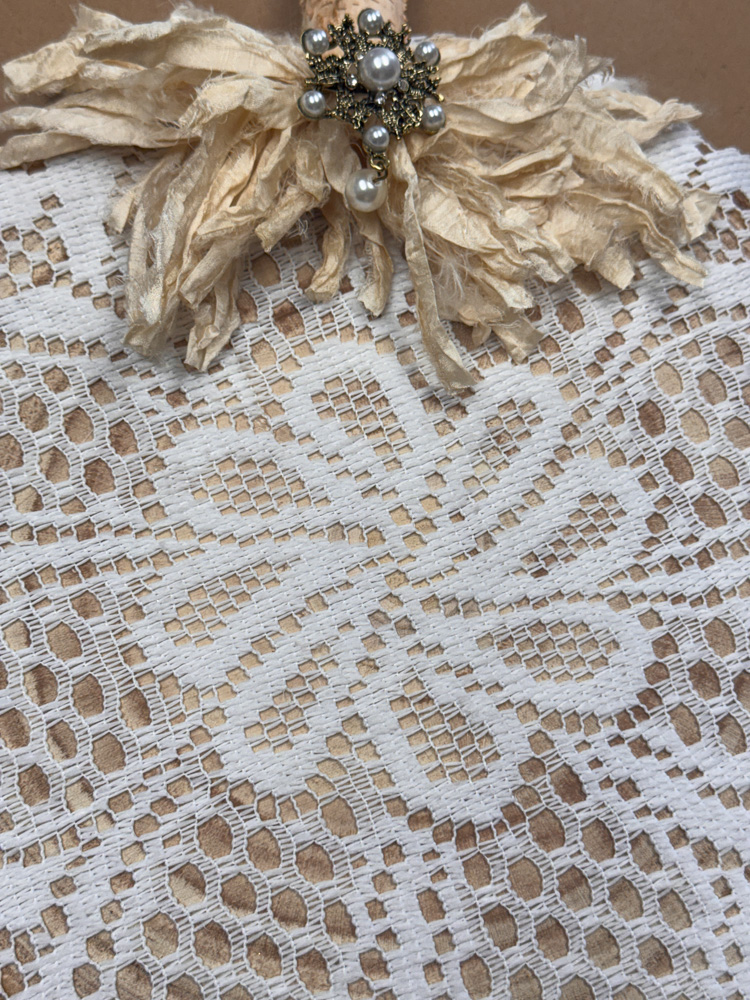
Every pumpkin needs a stem, right? I grabbed a little birch stem from Hobby Lobby and glued it right to the top center of the doily-covered disc. It instantly pulled the whole look together and made it feel more like a real pumpkin.

Now for the bow! This is where the magic happens. I used the ivory recycled silk ribbon from our website. https://theshabbytreeboutique.com/shop-mBiWY/p/ivory-recycled-silk-ribbon
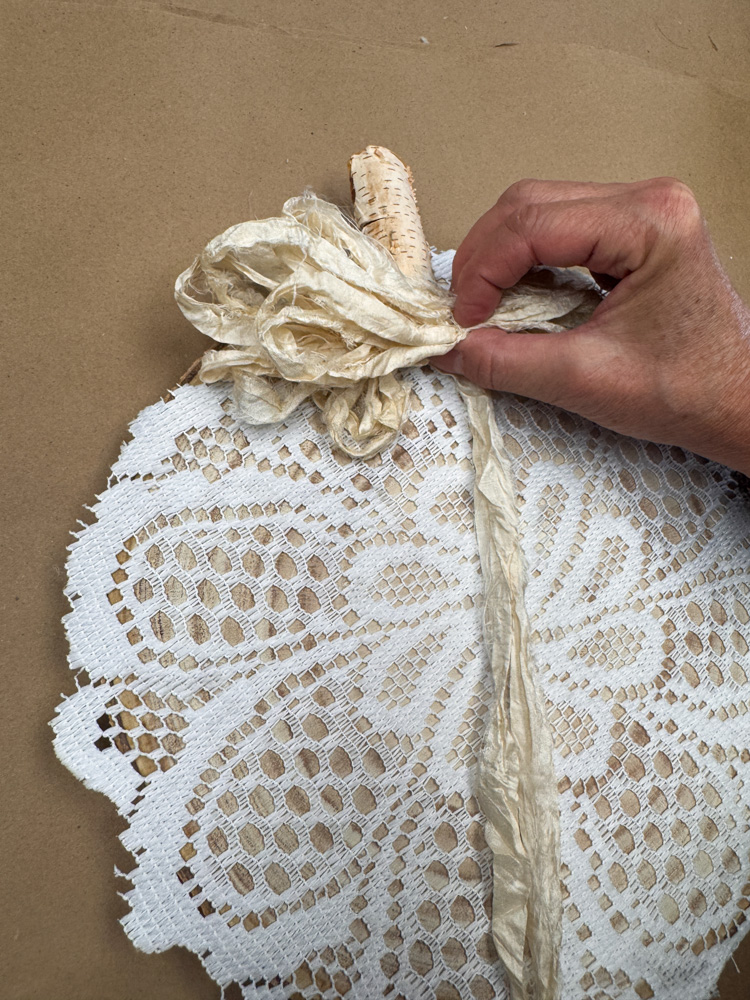
To make the bow, I just weaved the ribbon back and forth, pinching it in the middle so loops formed on both sides.
Then I grabbed the two longer ends, wrapped them around the center several times, and tied them tight to hold everything together.
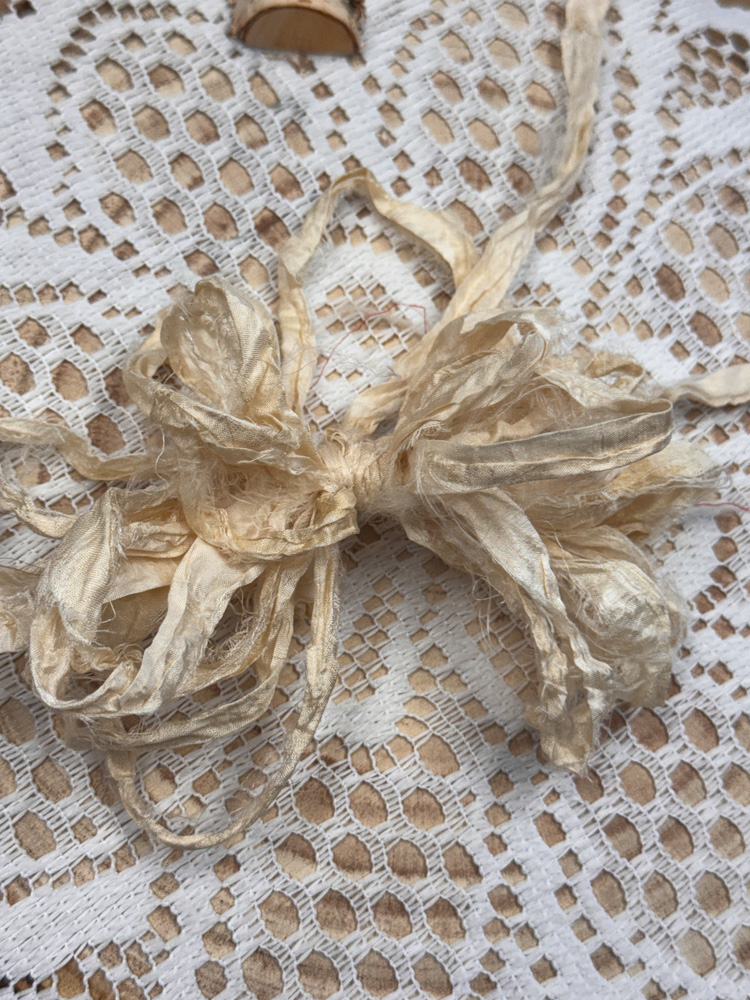
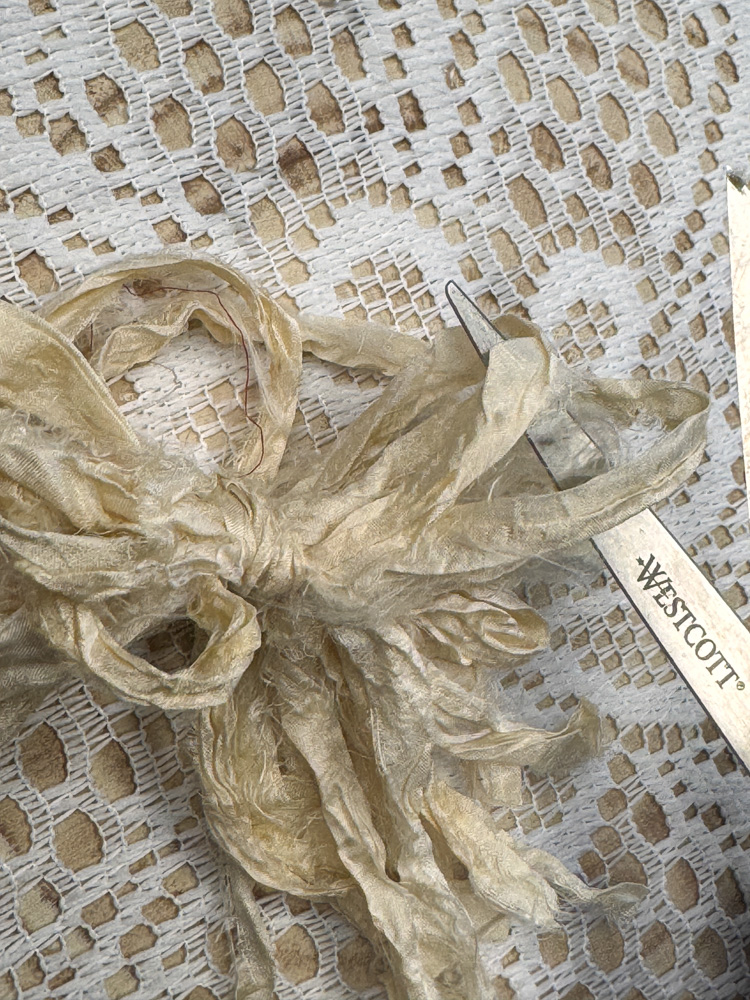
Here’s the twist—I decided I didn’t want the loops, so I cut them! That gave me all these fun, scrappy pieces sticking out every which way, and I love how it looks a little messy but still pretty.

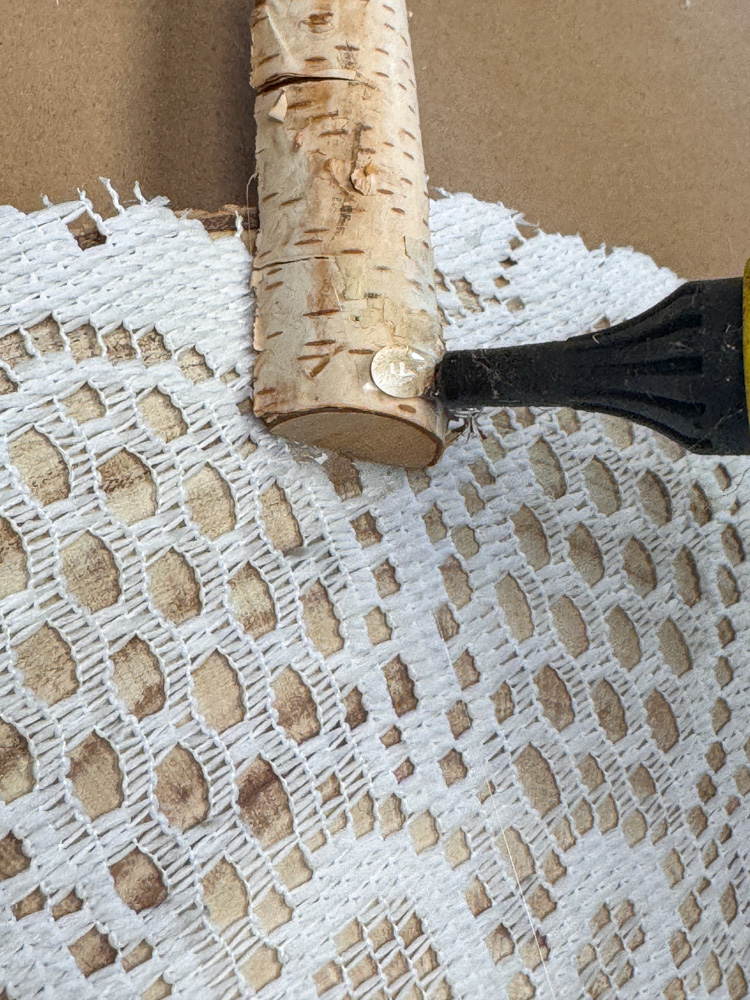
Once the bow was ready, I added a little hot glue right in the center of the stem and pressed it on. The ribbon against the birch wood looks so rustic and sweet!
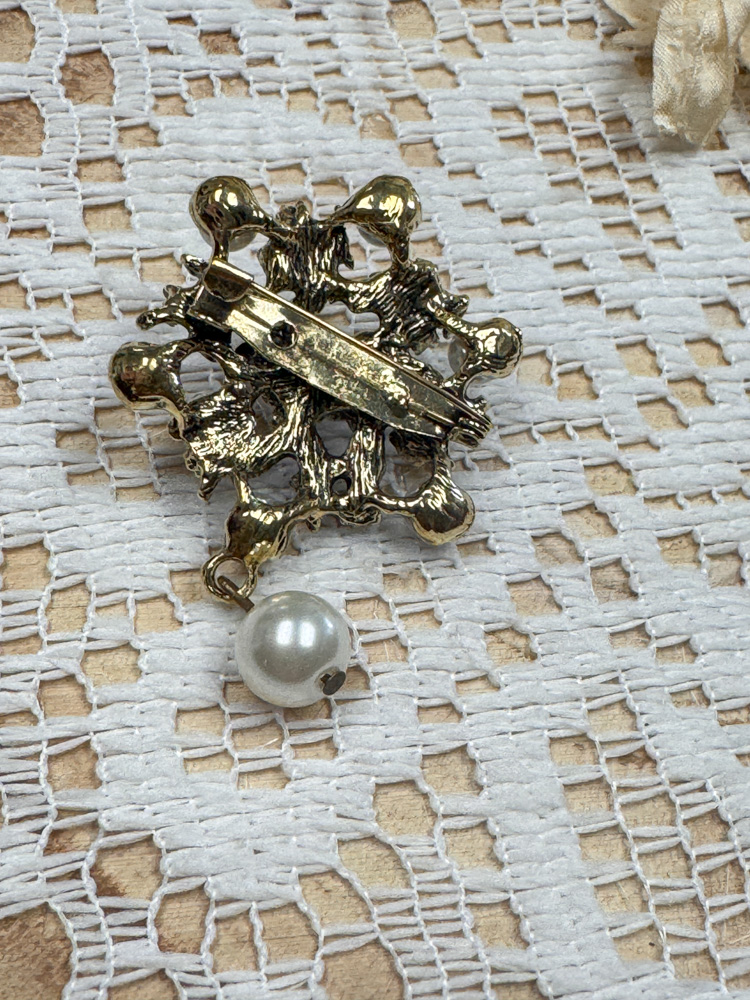
Of course, I had to add a little sparkle—so I pinned a piece of Totally Dazzled bling right in the center of the bow. The best part? Since it’s a pin, I can swap it out later or use it on another project
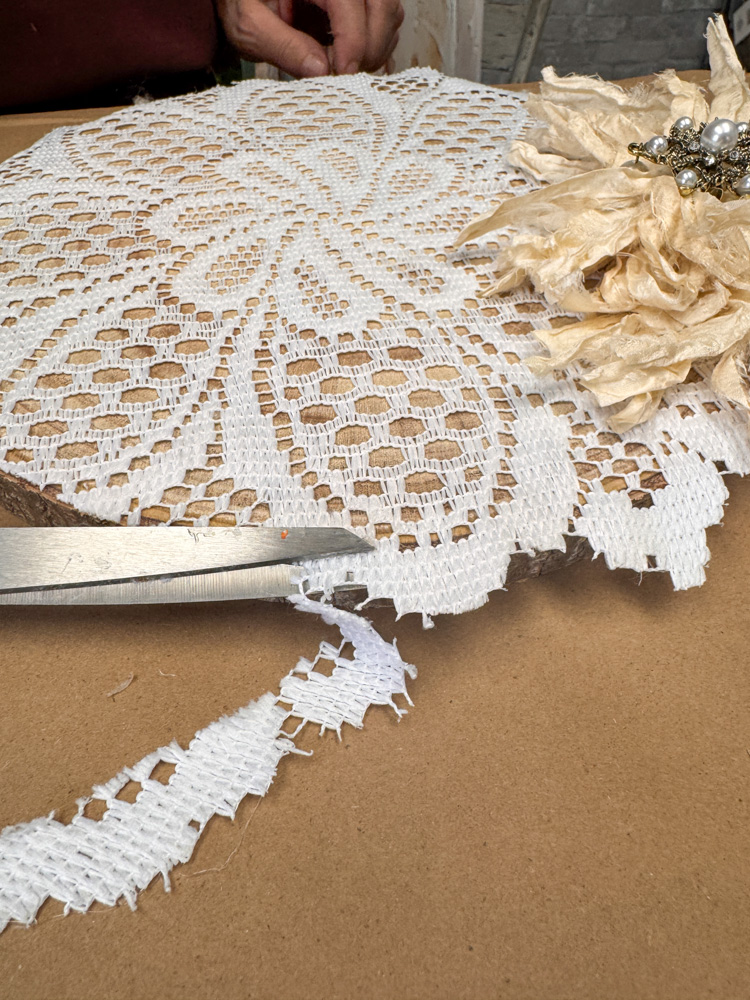
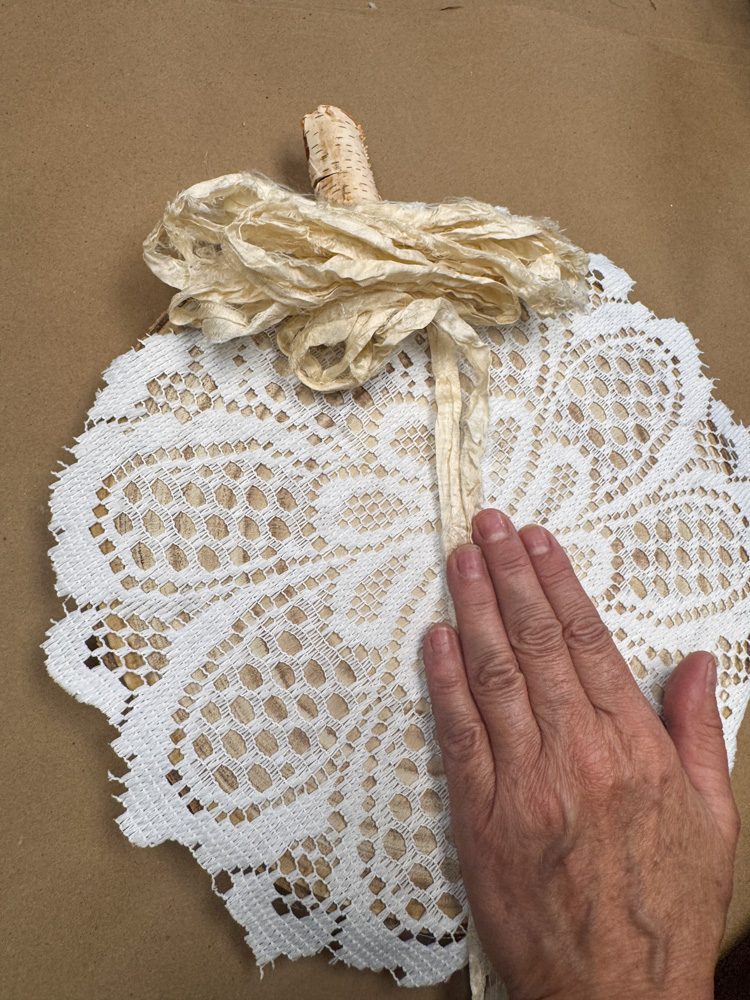
At the very end, I decided I wanted to see more of that wood slice showing, so I trimmed my doily right along the edges. That gave it the perfect balance of lace and wood.
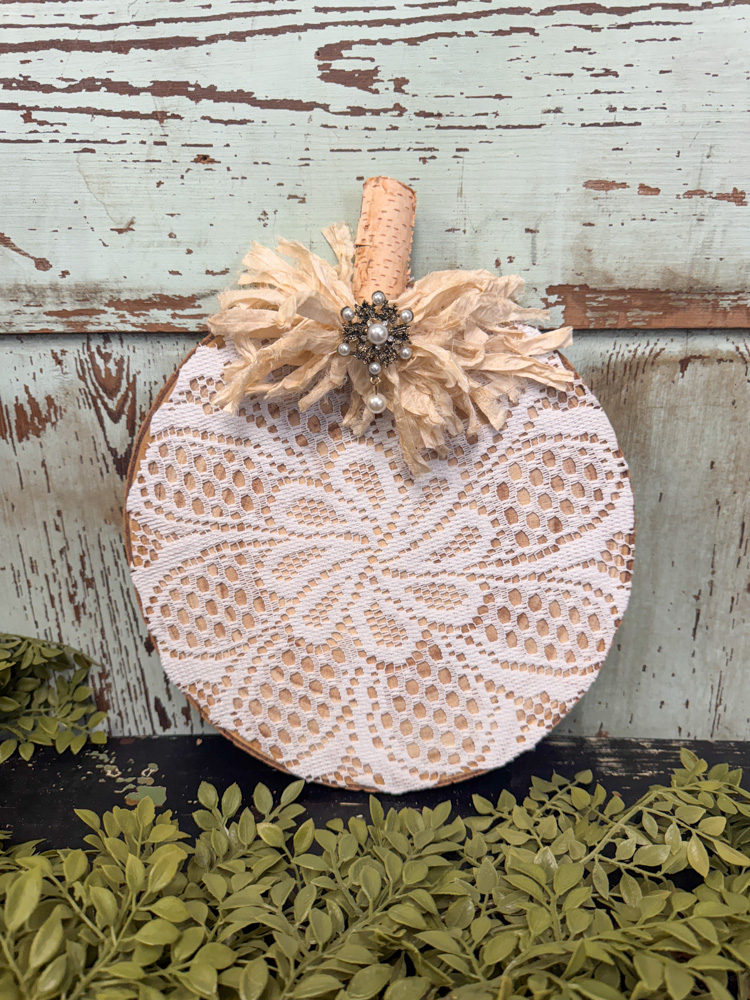
And that’s it, friends! Who would’ve thought a simple Dollar Tree doily and a plain wood slice could turn into the sweetest little pumpkin? 🎃 I just love how it mixes rustic and shabby with a hint of sparkle. The best part is how easy it is—you can make one in no time, and each pumpkin will have its own unique personality.
I hope this inspires you to look at everyday items a little differently and see the potential they hold. Whether you make one for your mantel, your front porch, or even as a gift, this pumpkin is sure to bring a smile. If you try it out, let me know—I’d love to see your creations on the Crafting With The Shabby Tree!

This blog may contain affiliate links, which means I could earn a small commission if you make a purchase through them—at no extra cost to you. Thanks for supporting what I do!
Barb, this turned out beautiful!
Very cute pumpkin!! 🧡🌲