It is always fun to get creative with items you might having lying around your home. We have used simple cardboard to create things here at The Shabby Tree. I thought it would be fun to create a 3D pumpkin using cardboard.
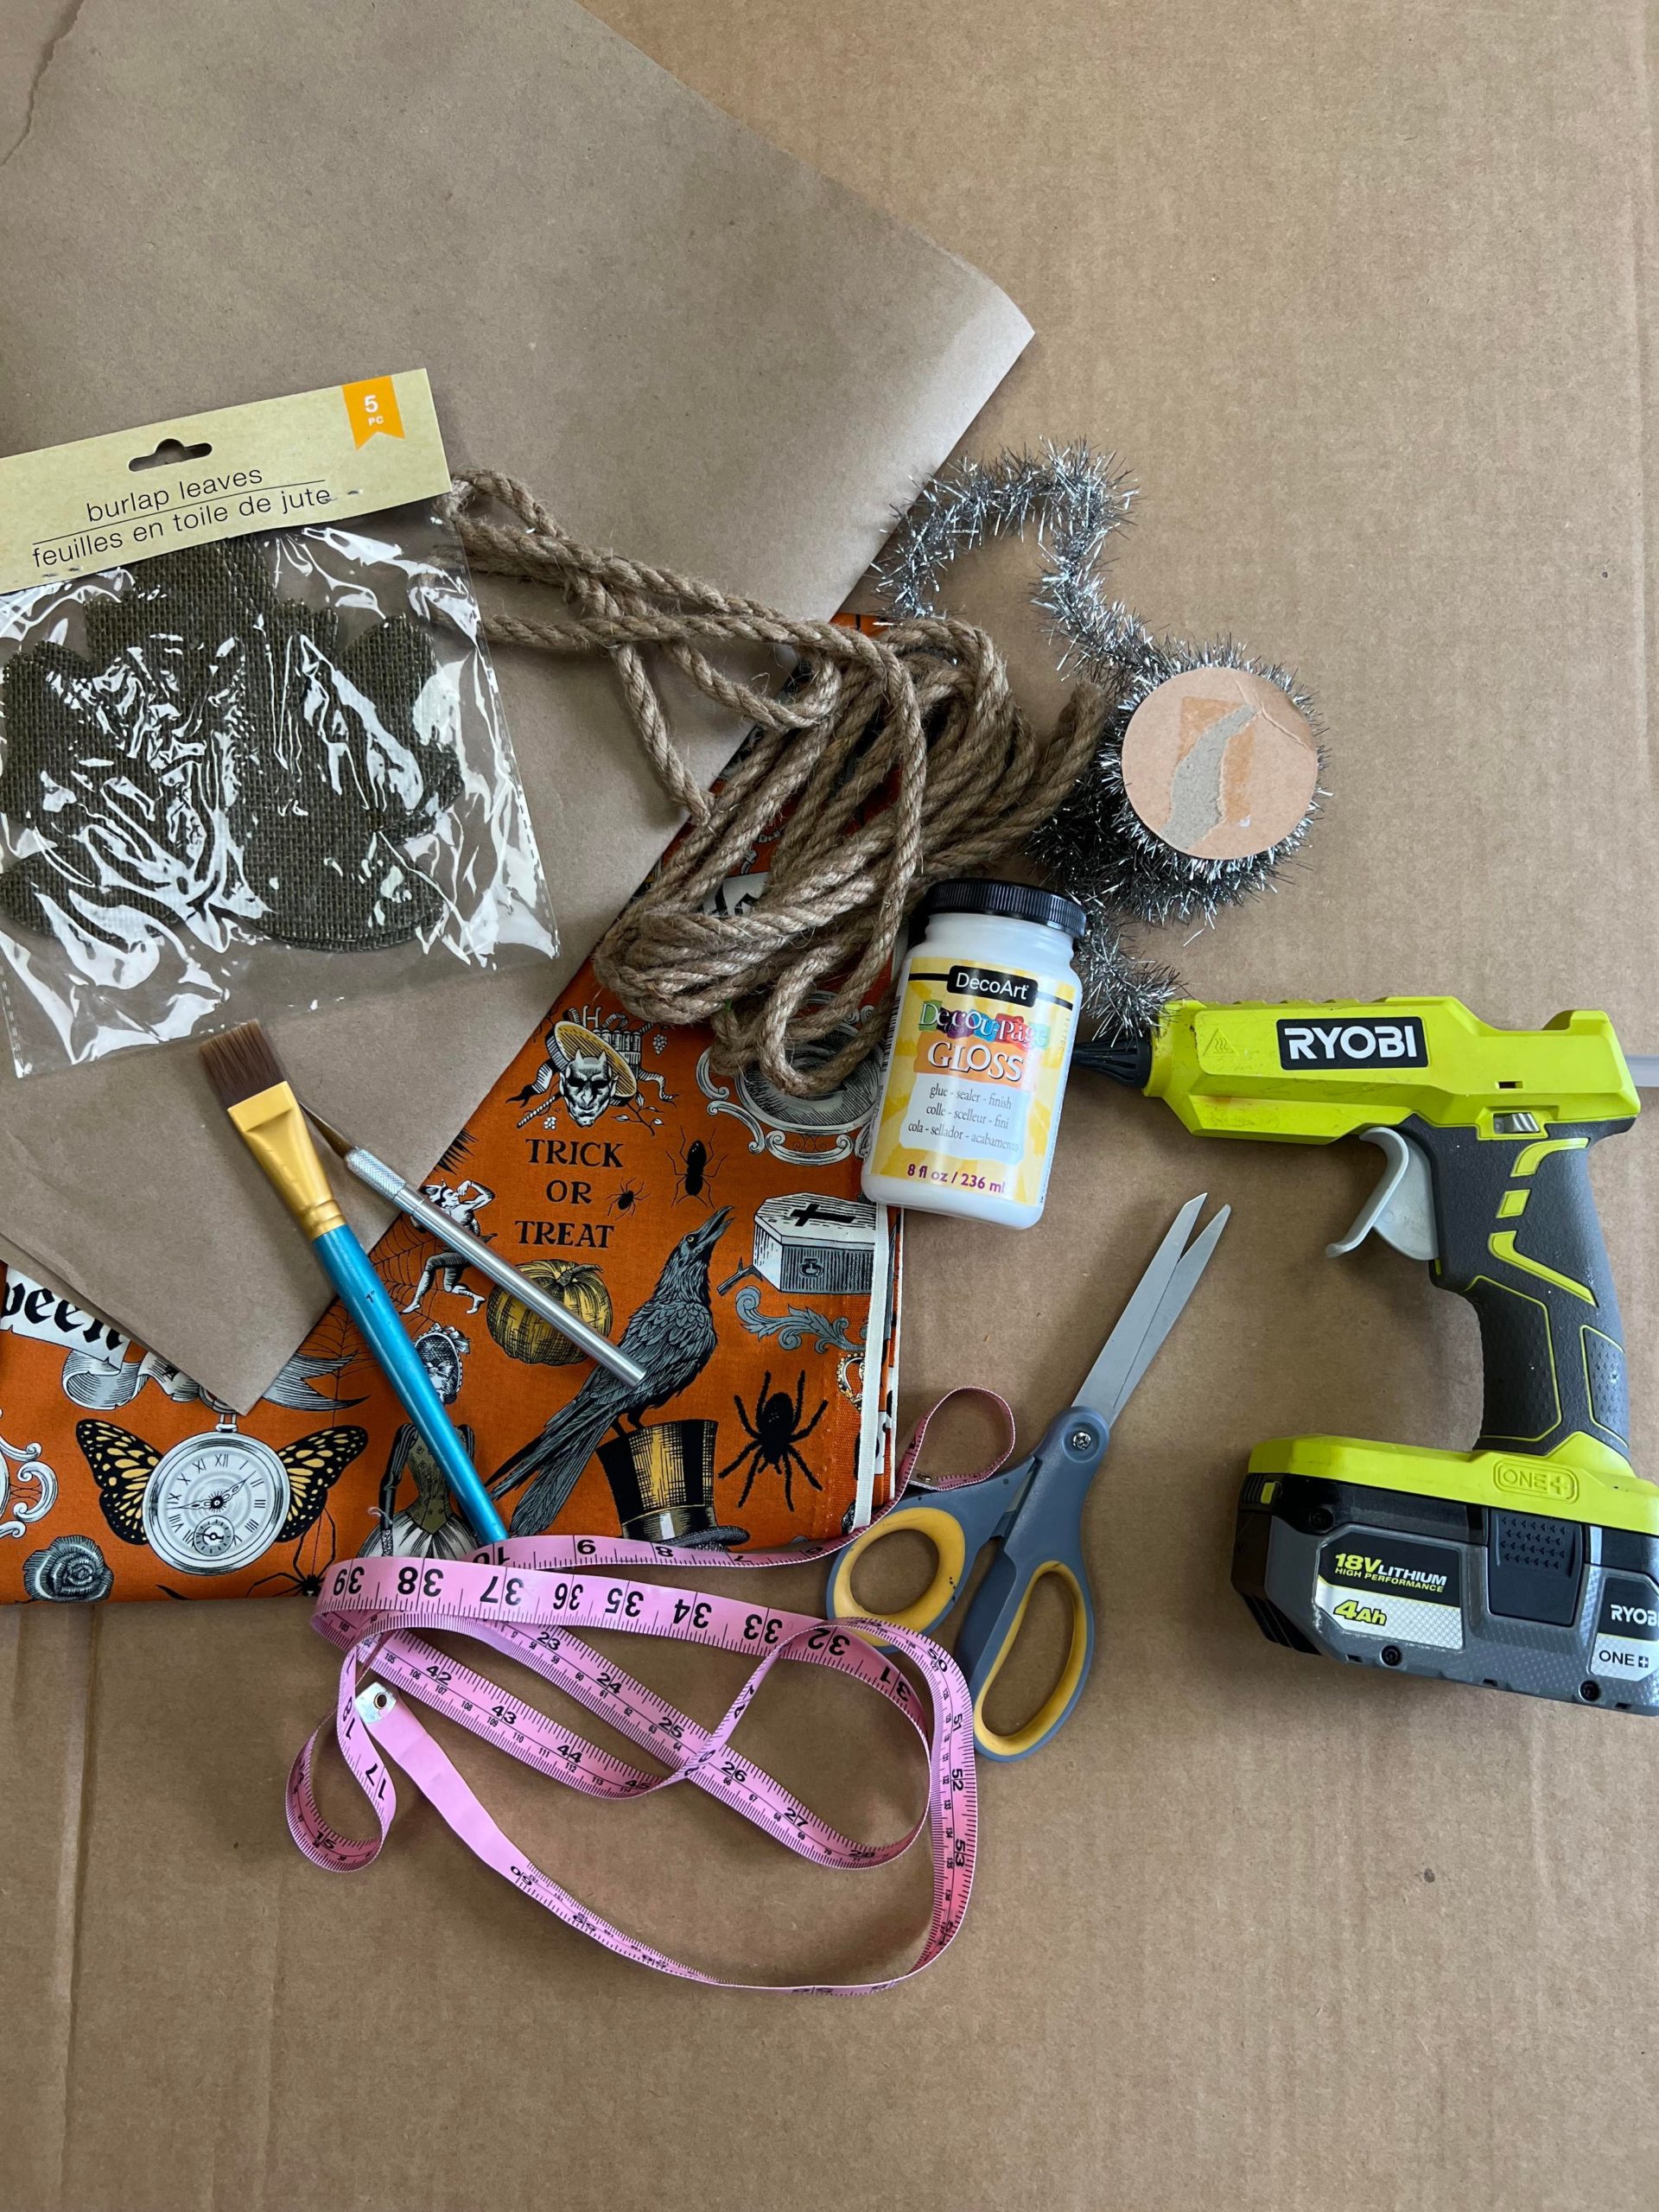
The supplies that I’ll be using are:
1. Cardboard
2. Hot glue
3. Halloween material ( I purchased my material from Joann’s
4. Tinsel
5. Xacto knife
6. Scissors
7. Paint brush
8. Decoupage
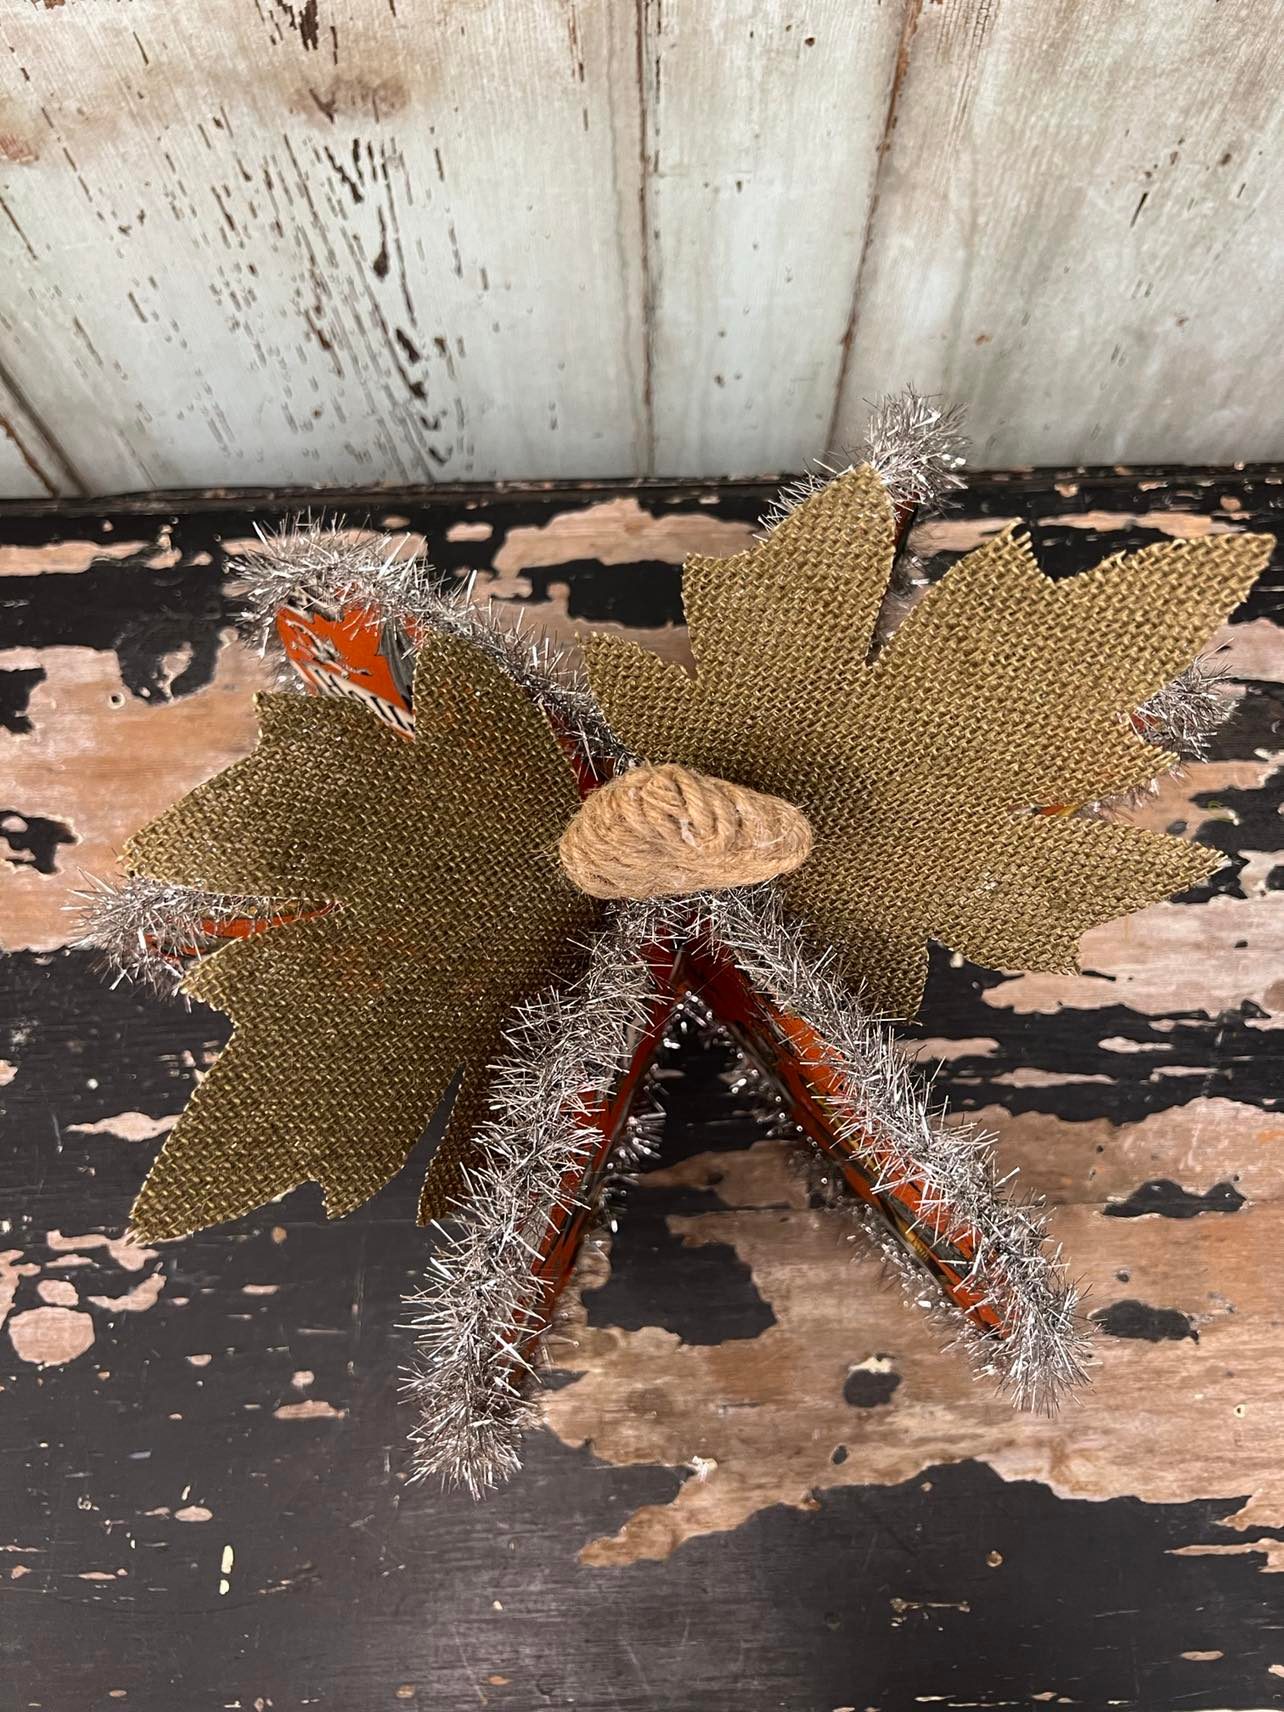
9. Jute 10. Burlap leaves from the Dollar Tree
11. Paper to create a pattern

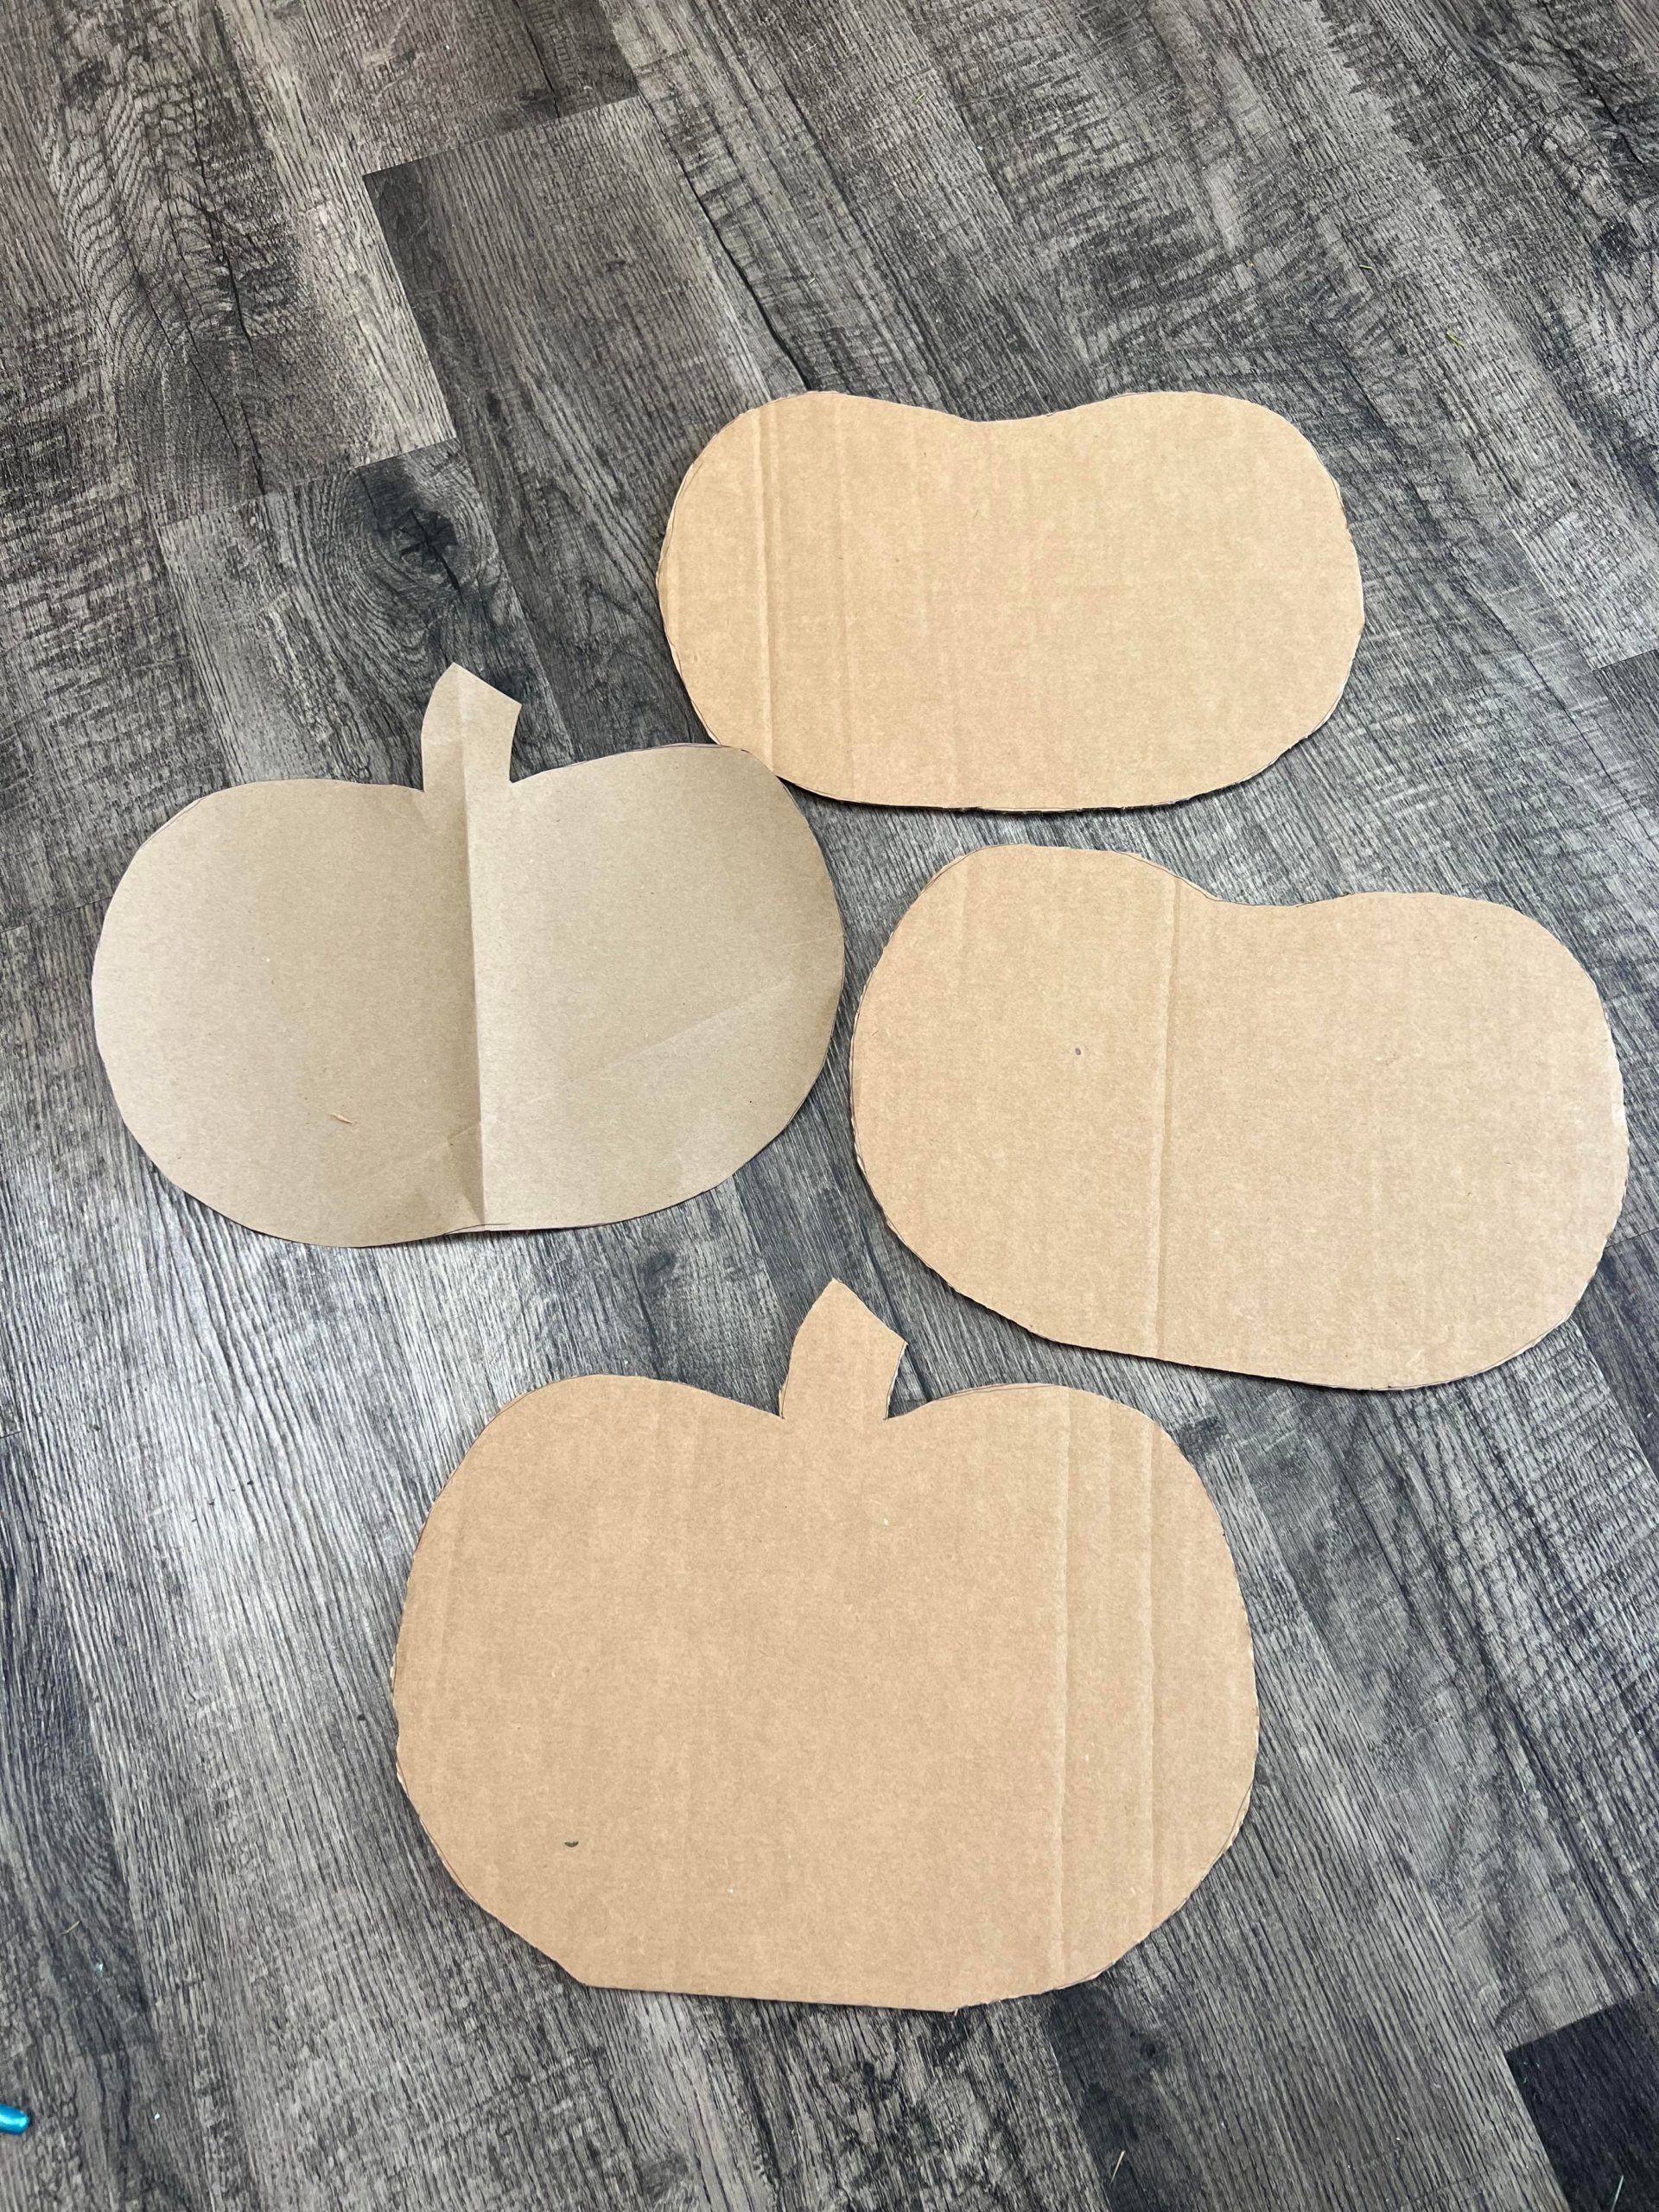
I created a pumpkin pattern out of a sheet of paper. My pumpkin is 12 inches wide and 8 1/2 tall not including the stem. You can make your pumpkin any size which is why this pumpkin is so much fun to make.
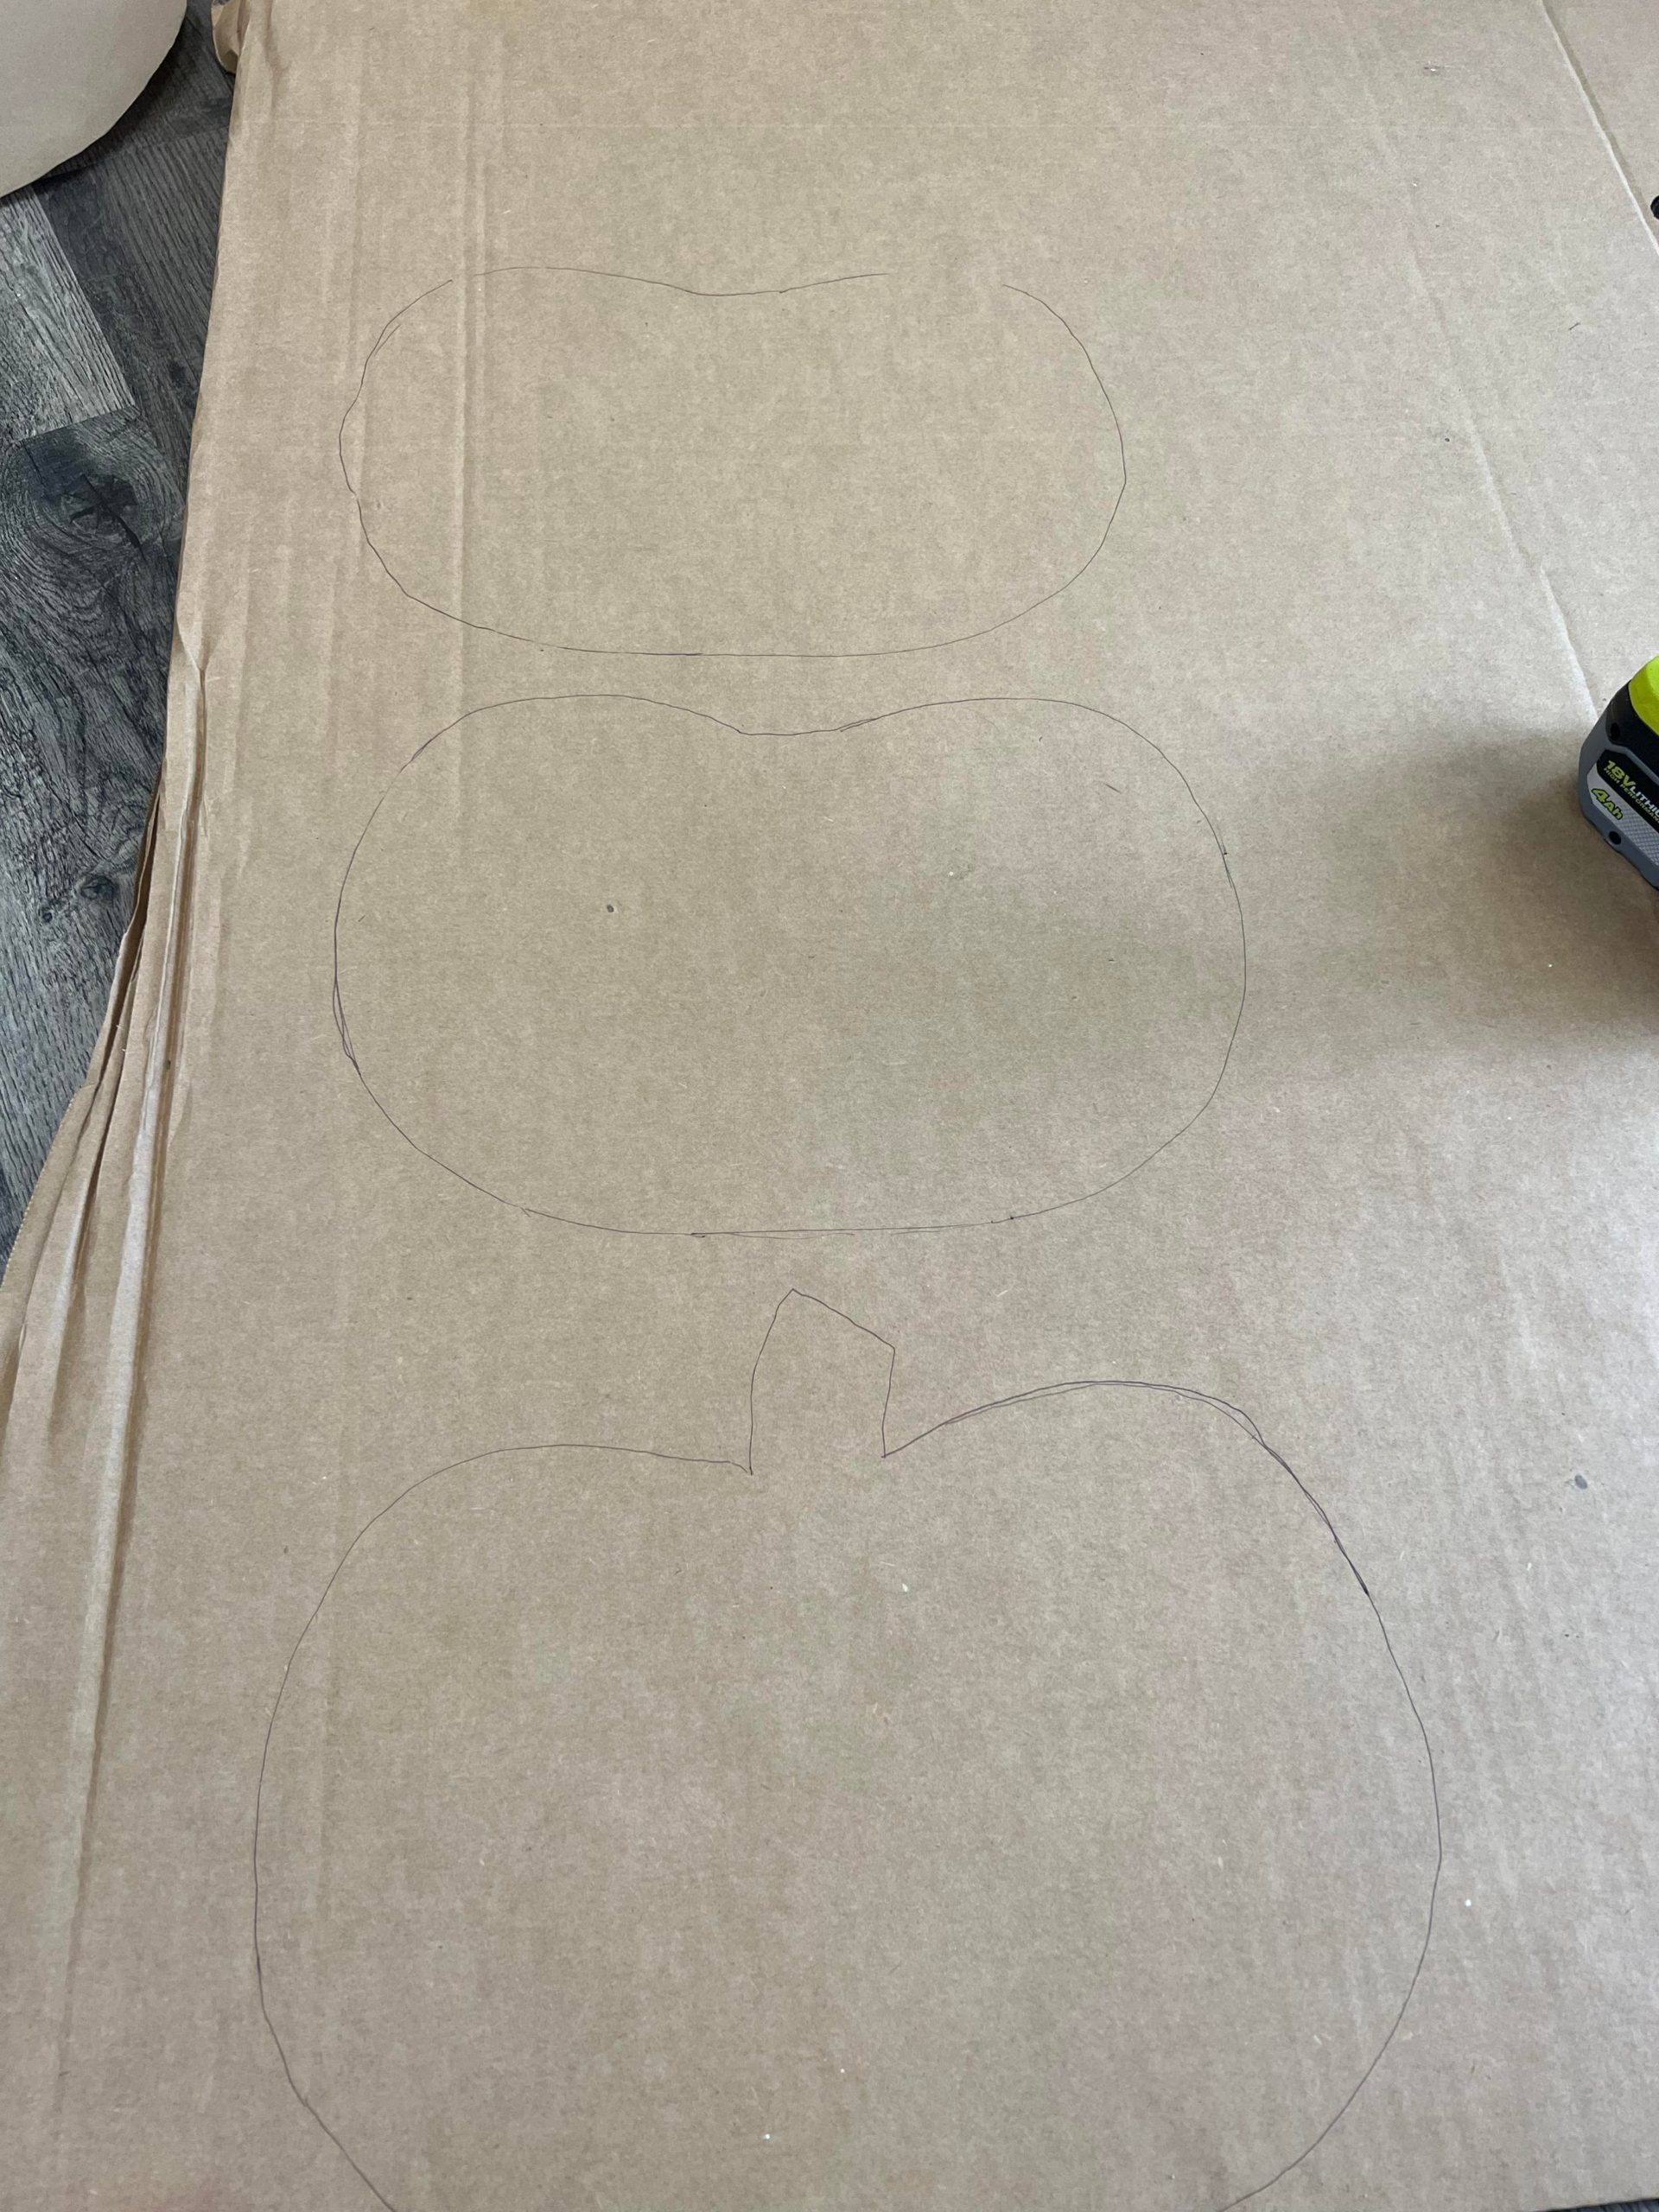

You want to trace 3 of the patterns into cardboard. One pattern with the stem and the other 2 without the stem.
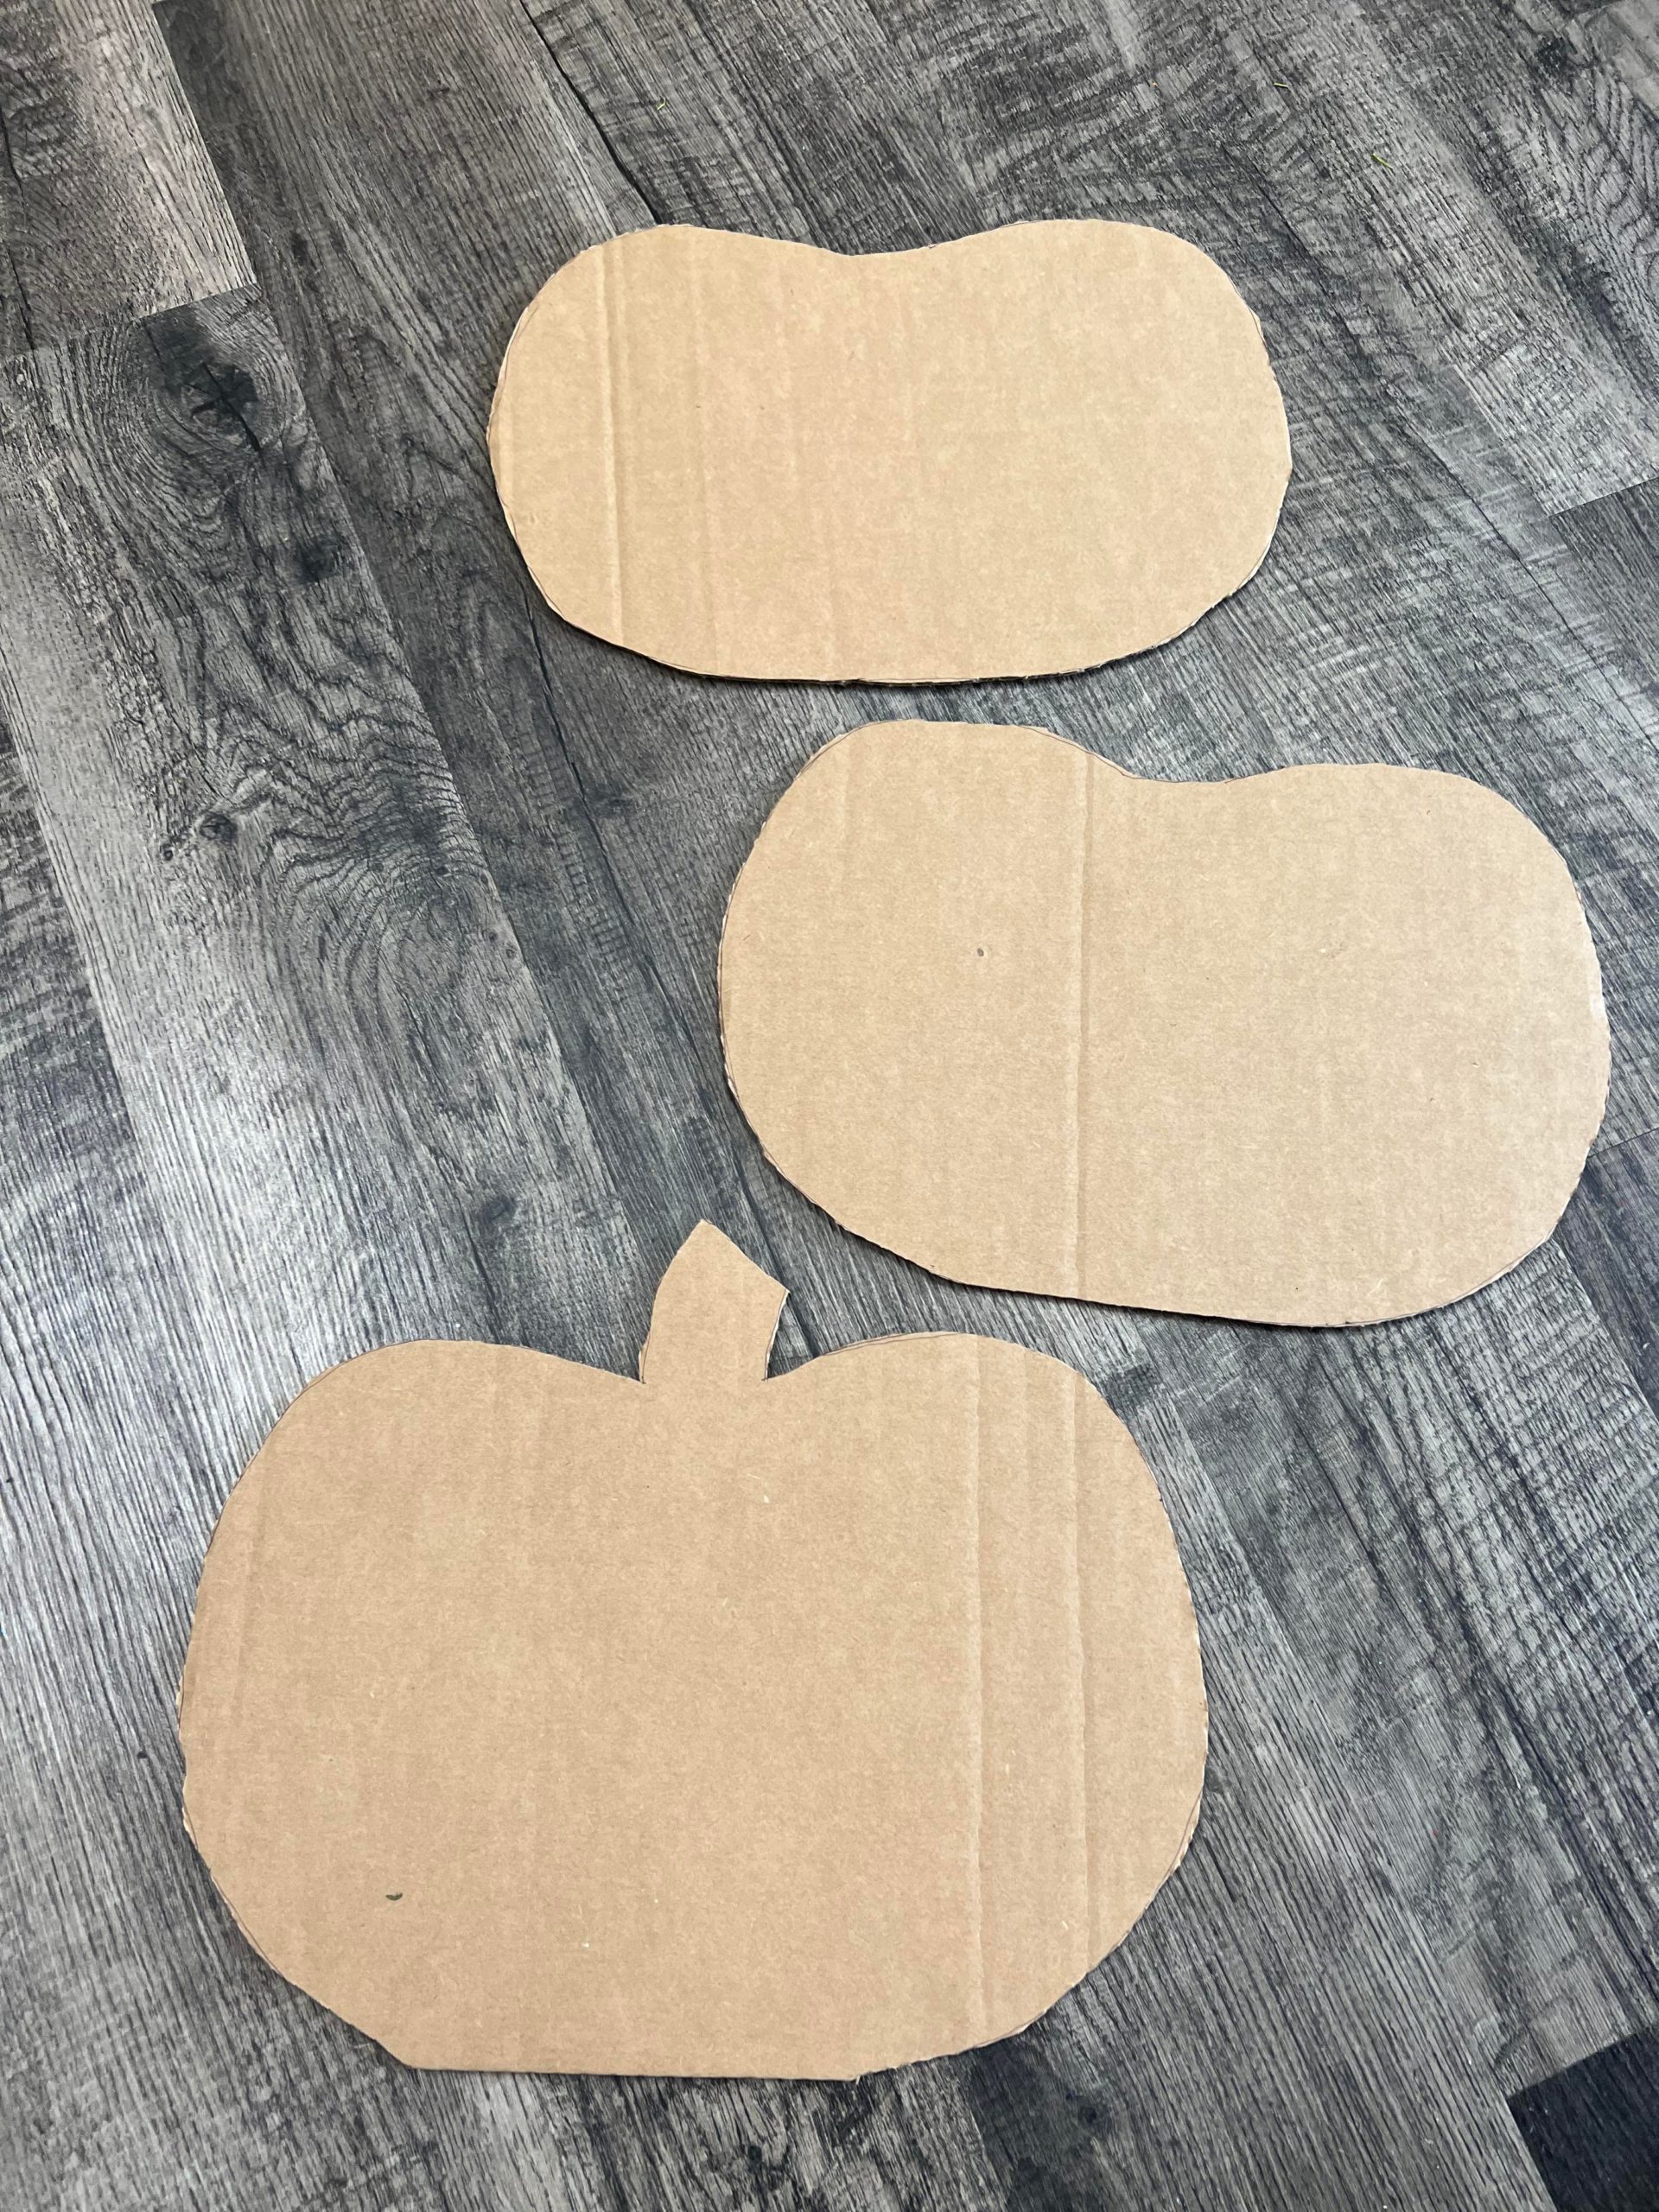
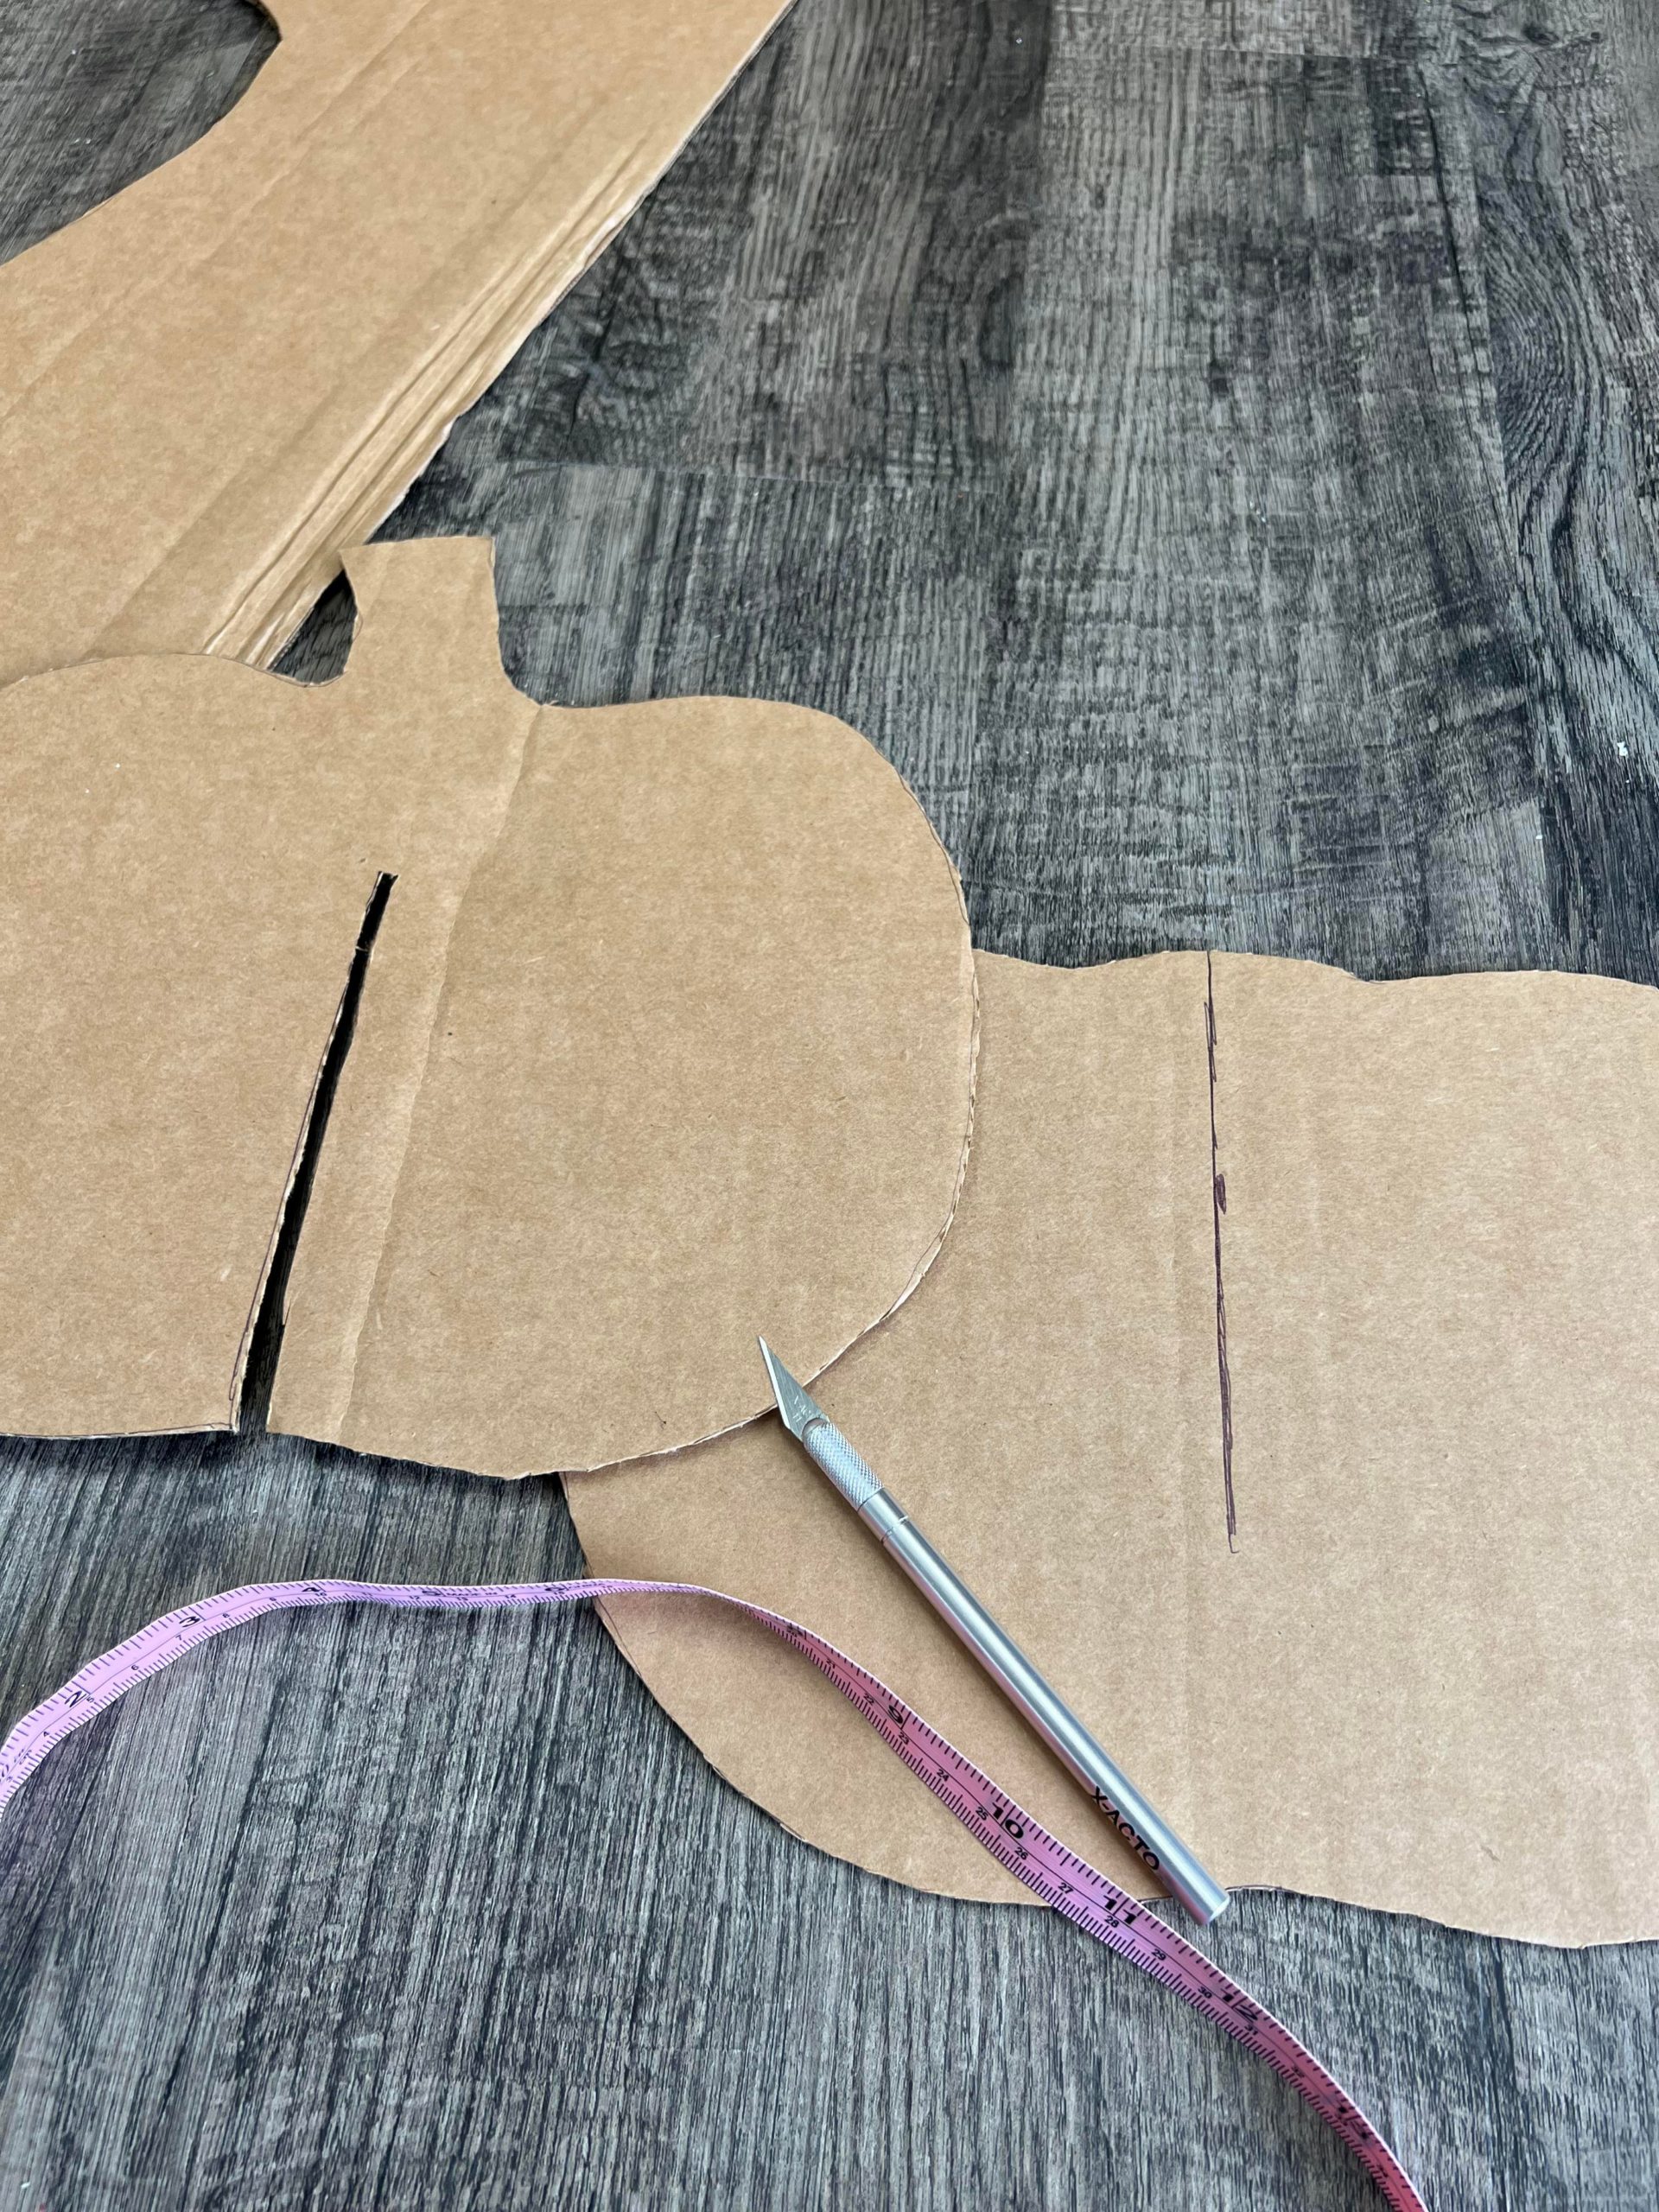
Once you have all 3 pumpkins cut out you will want to create slits into each pumpkin.
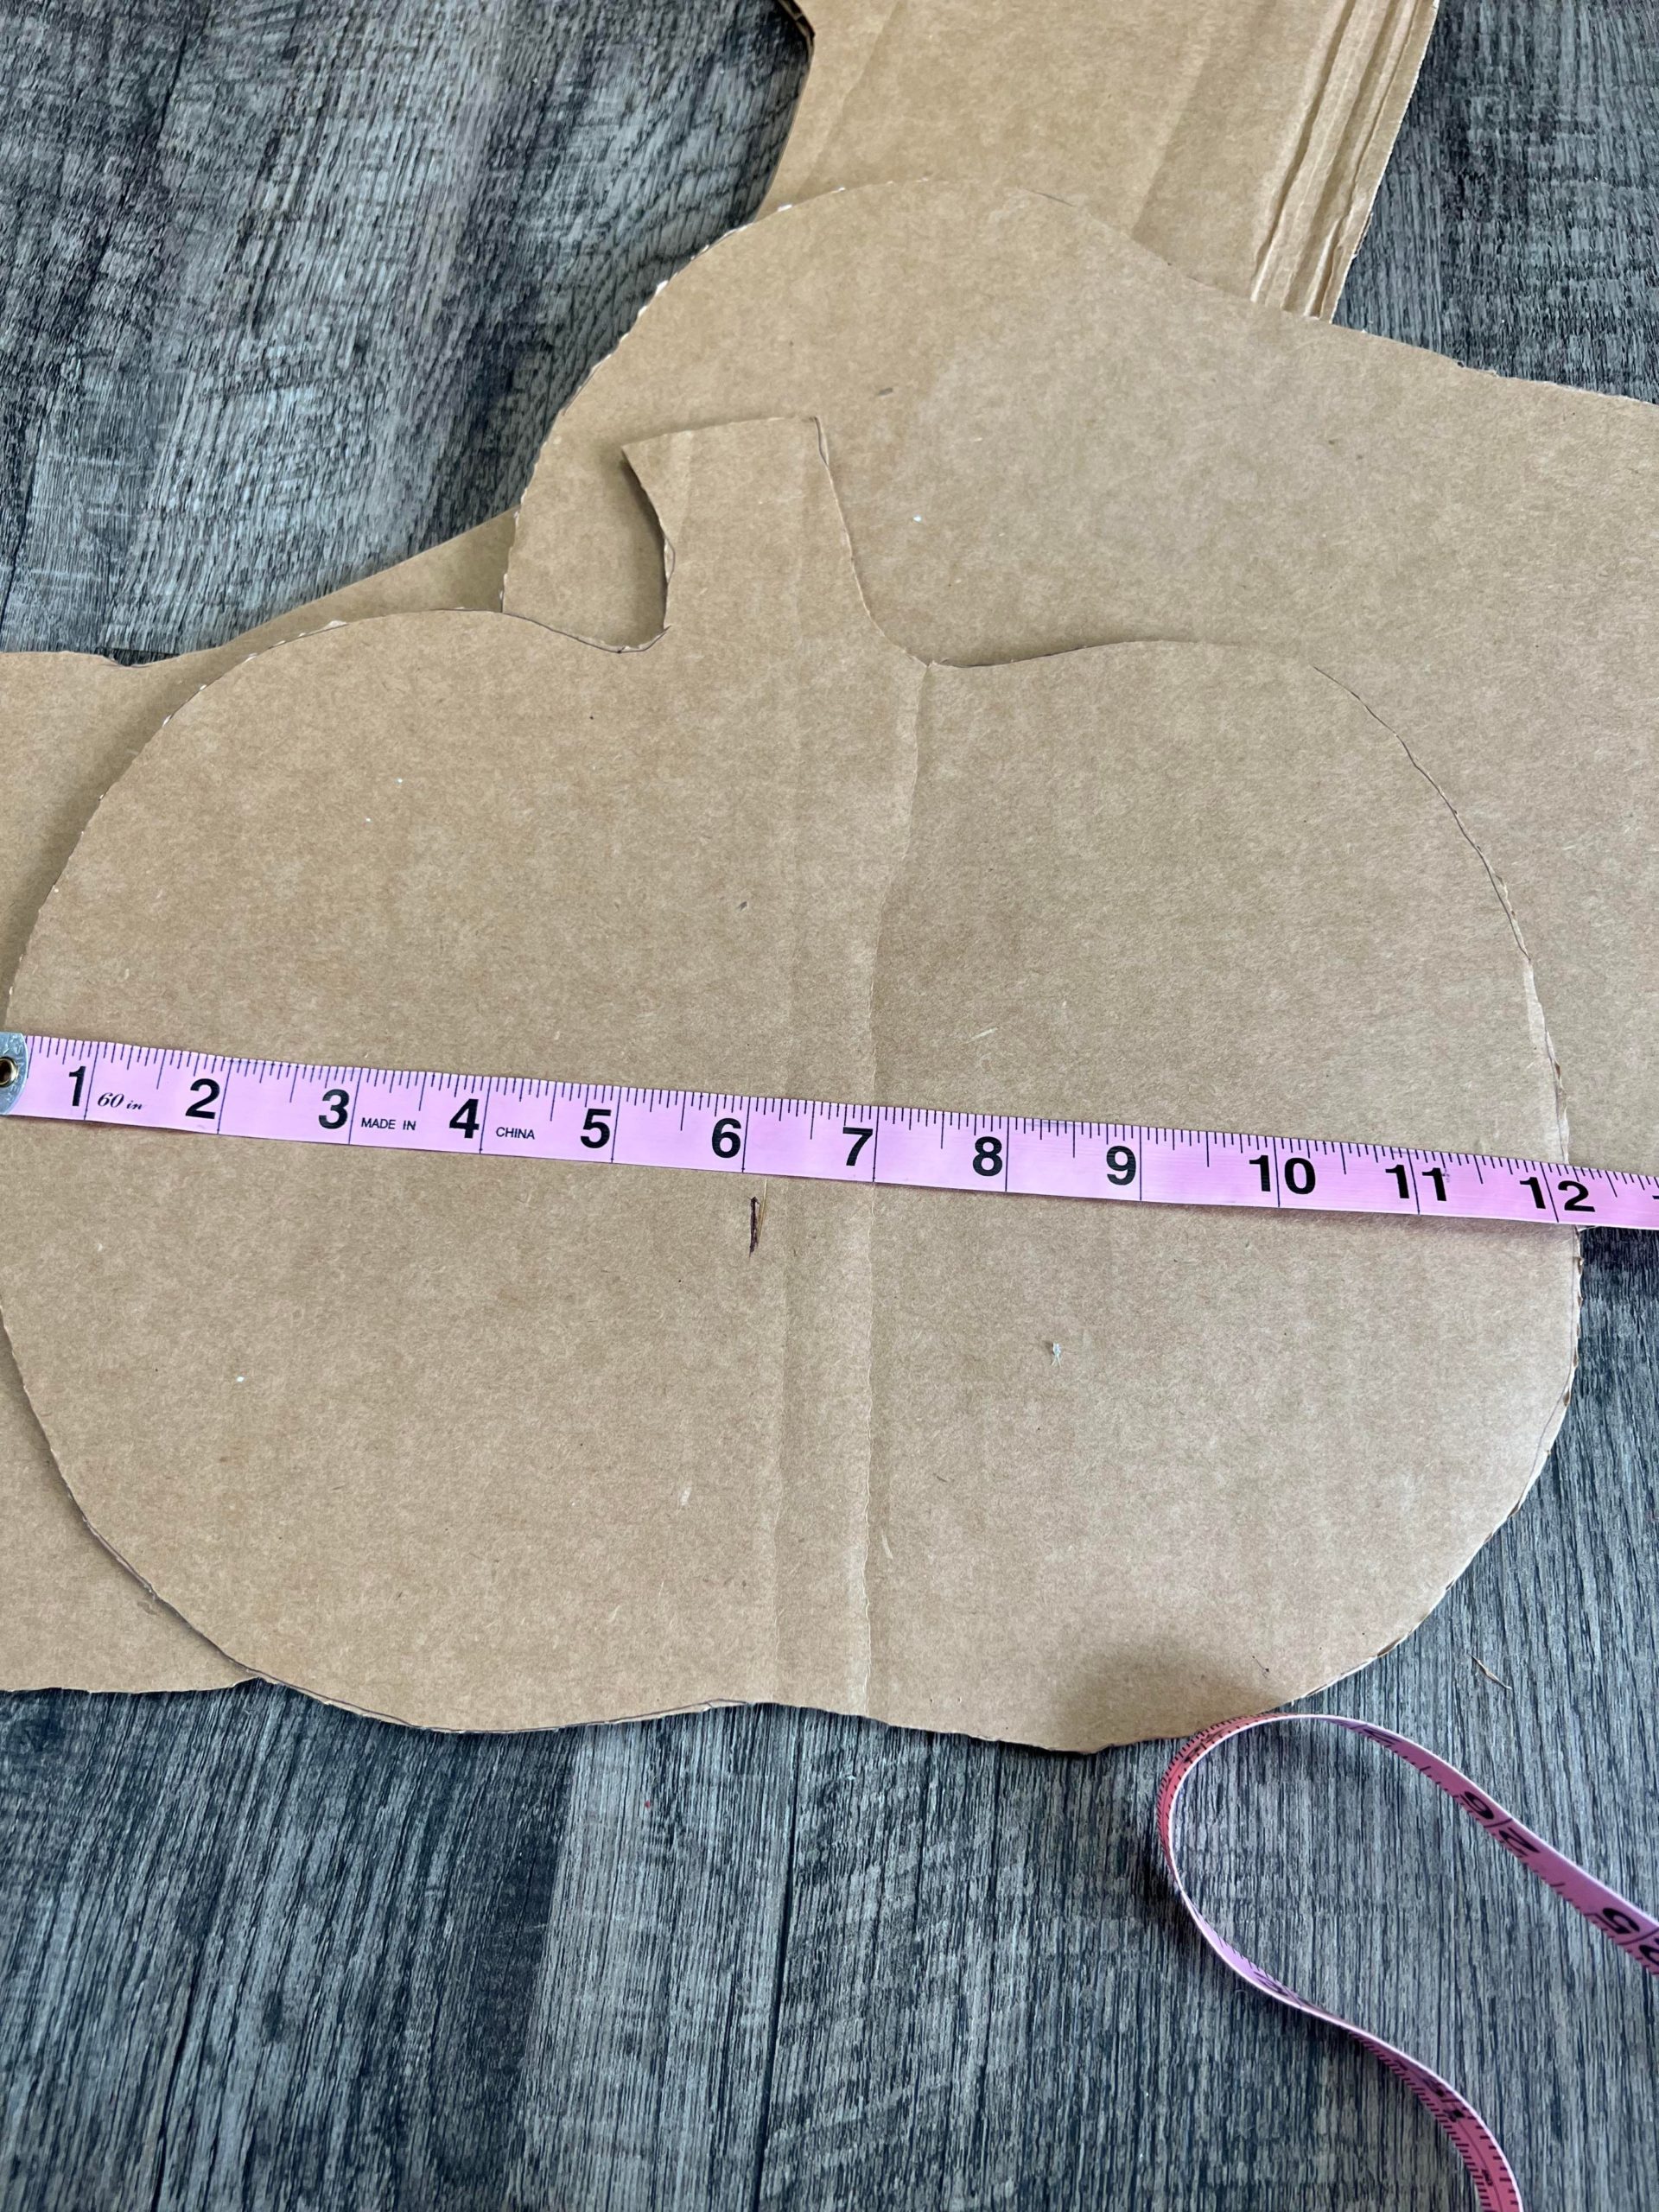
Find the center of the pumpkin and you will want to cut different slits into each pumpkin. The pumpkin with the stem will get a slit from the bottom center up. My slit goes 6 inches up from the bottom.
The other pumpkin will get a 6 inch slit down from the top center.
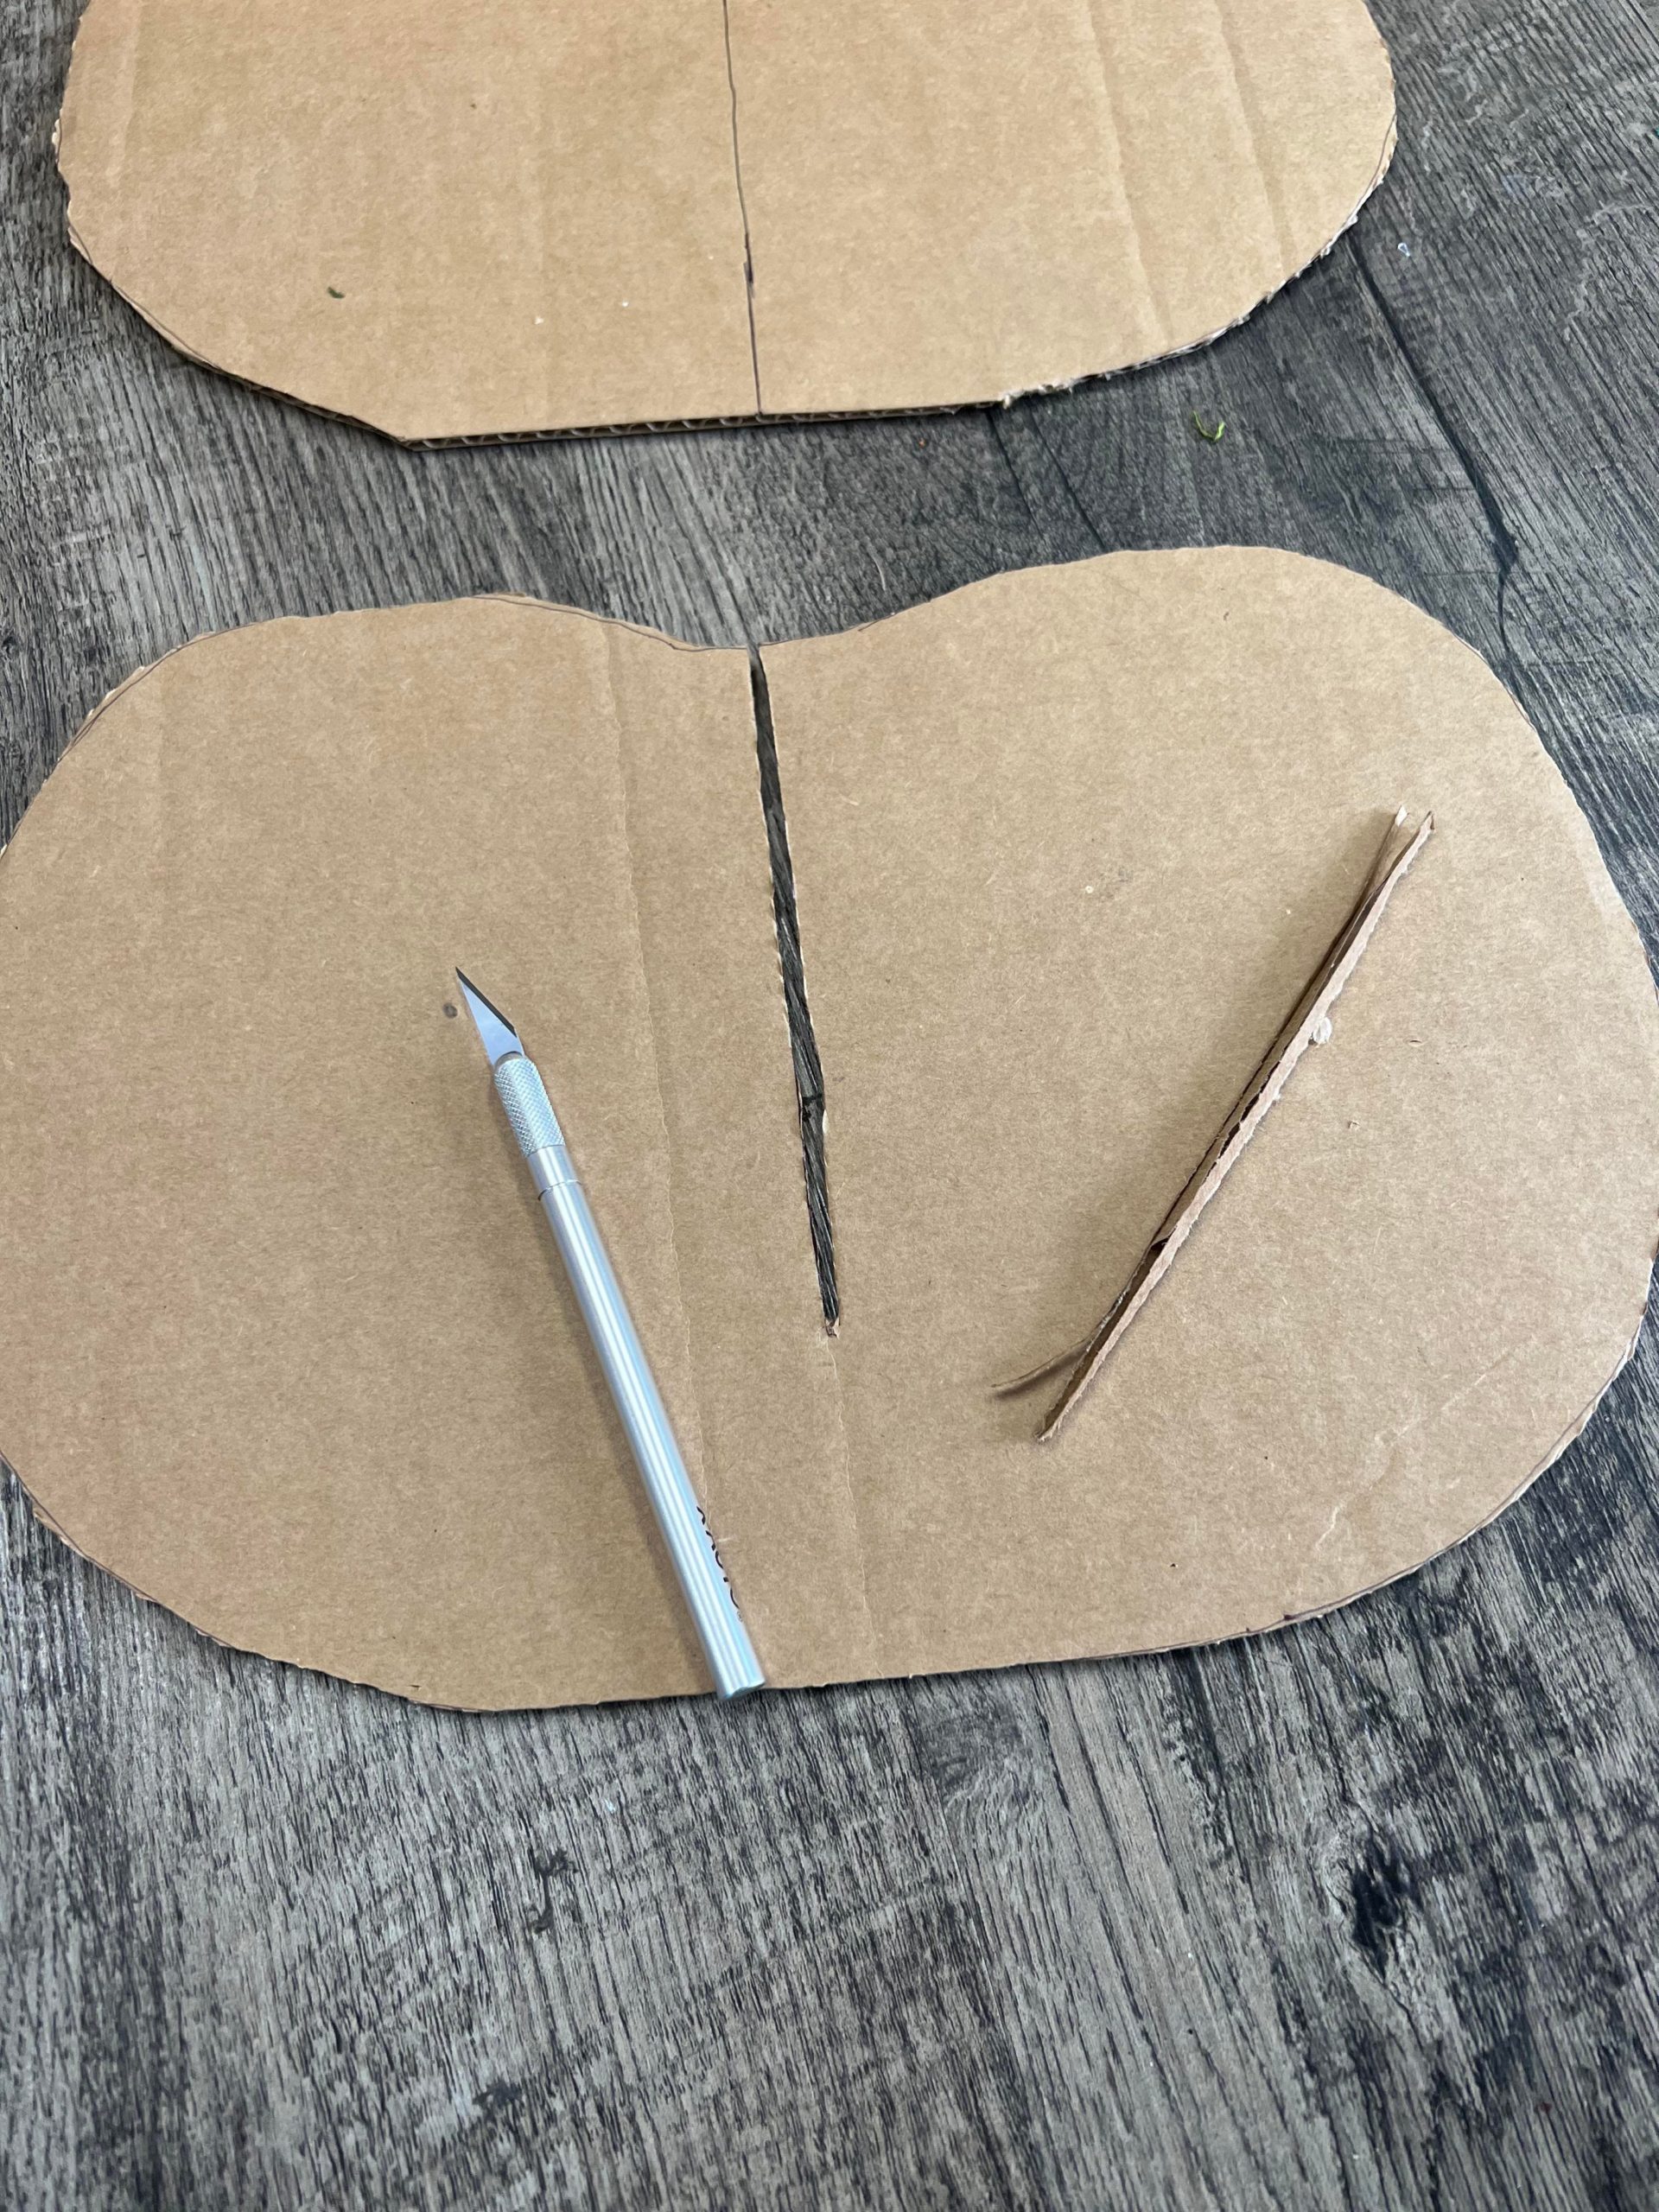
You want to make your slits wide enough for another cardboard pumpkin to slide into.
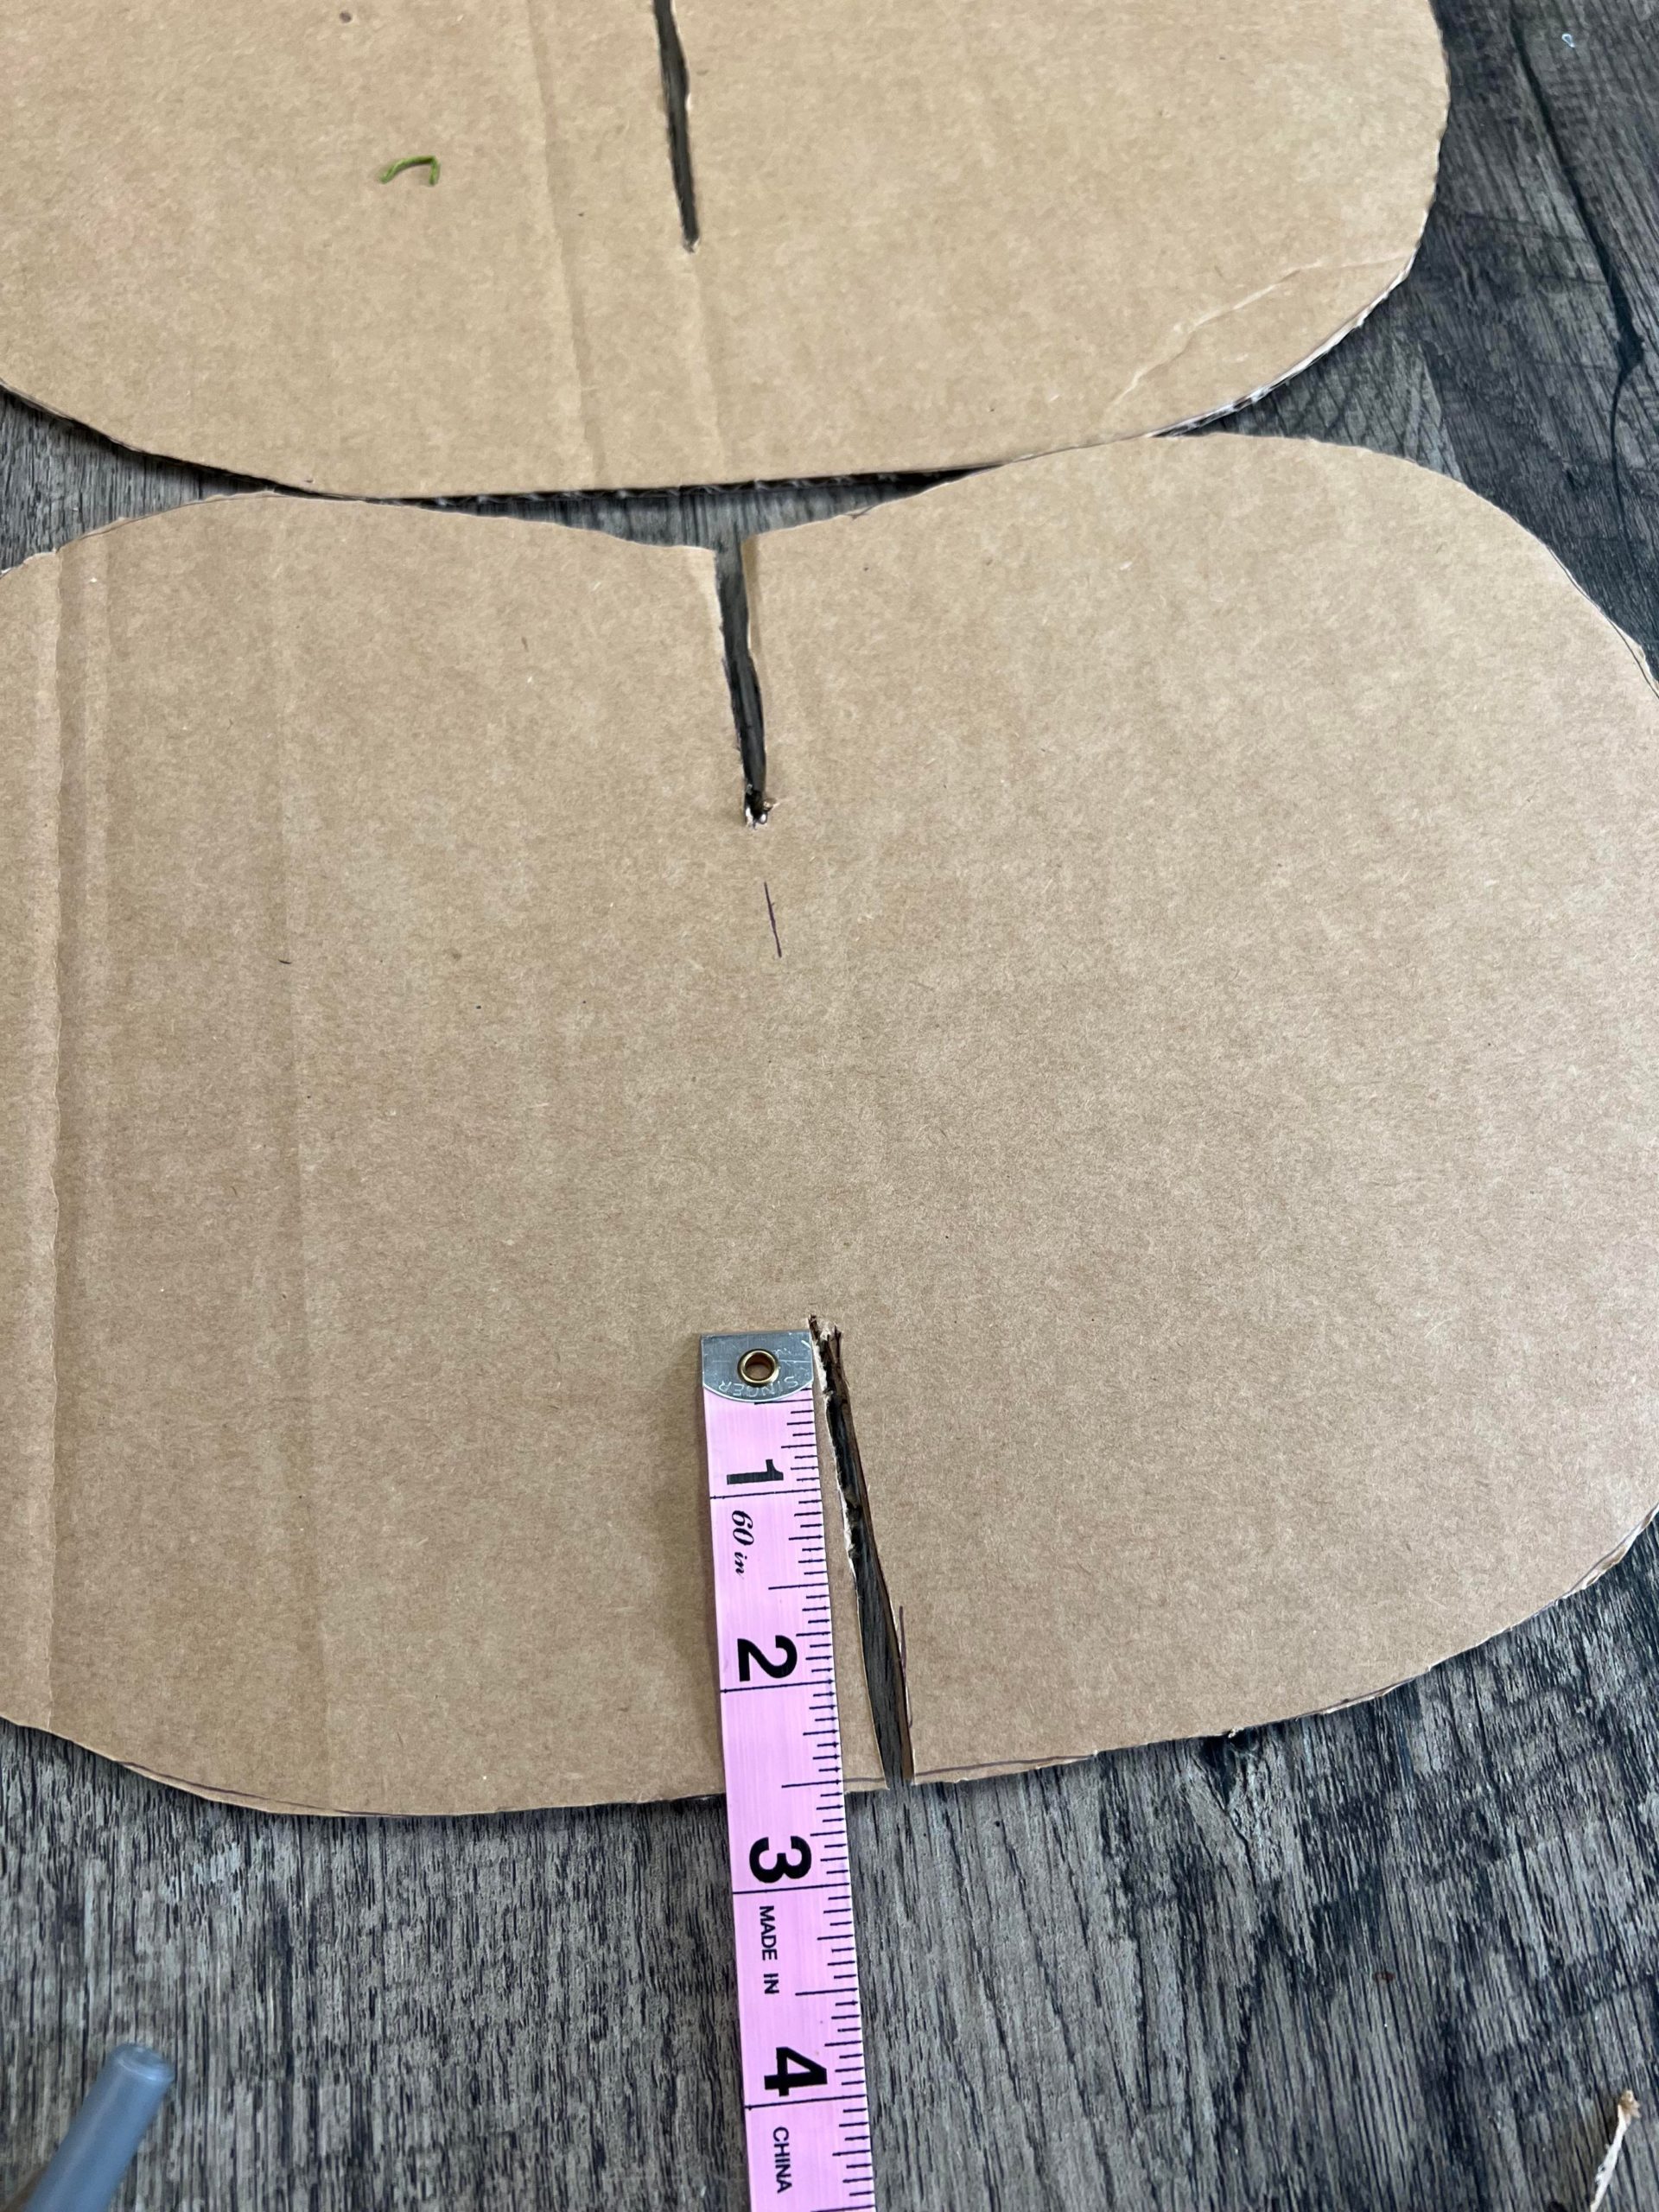
The last pumpkin will get a slit from center bottom and center top. My slits are 2 1/2 inches long.
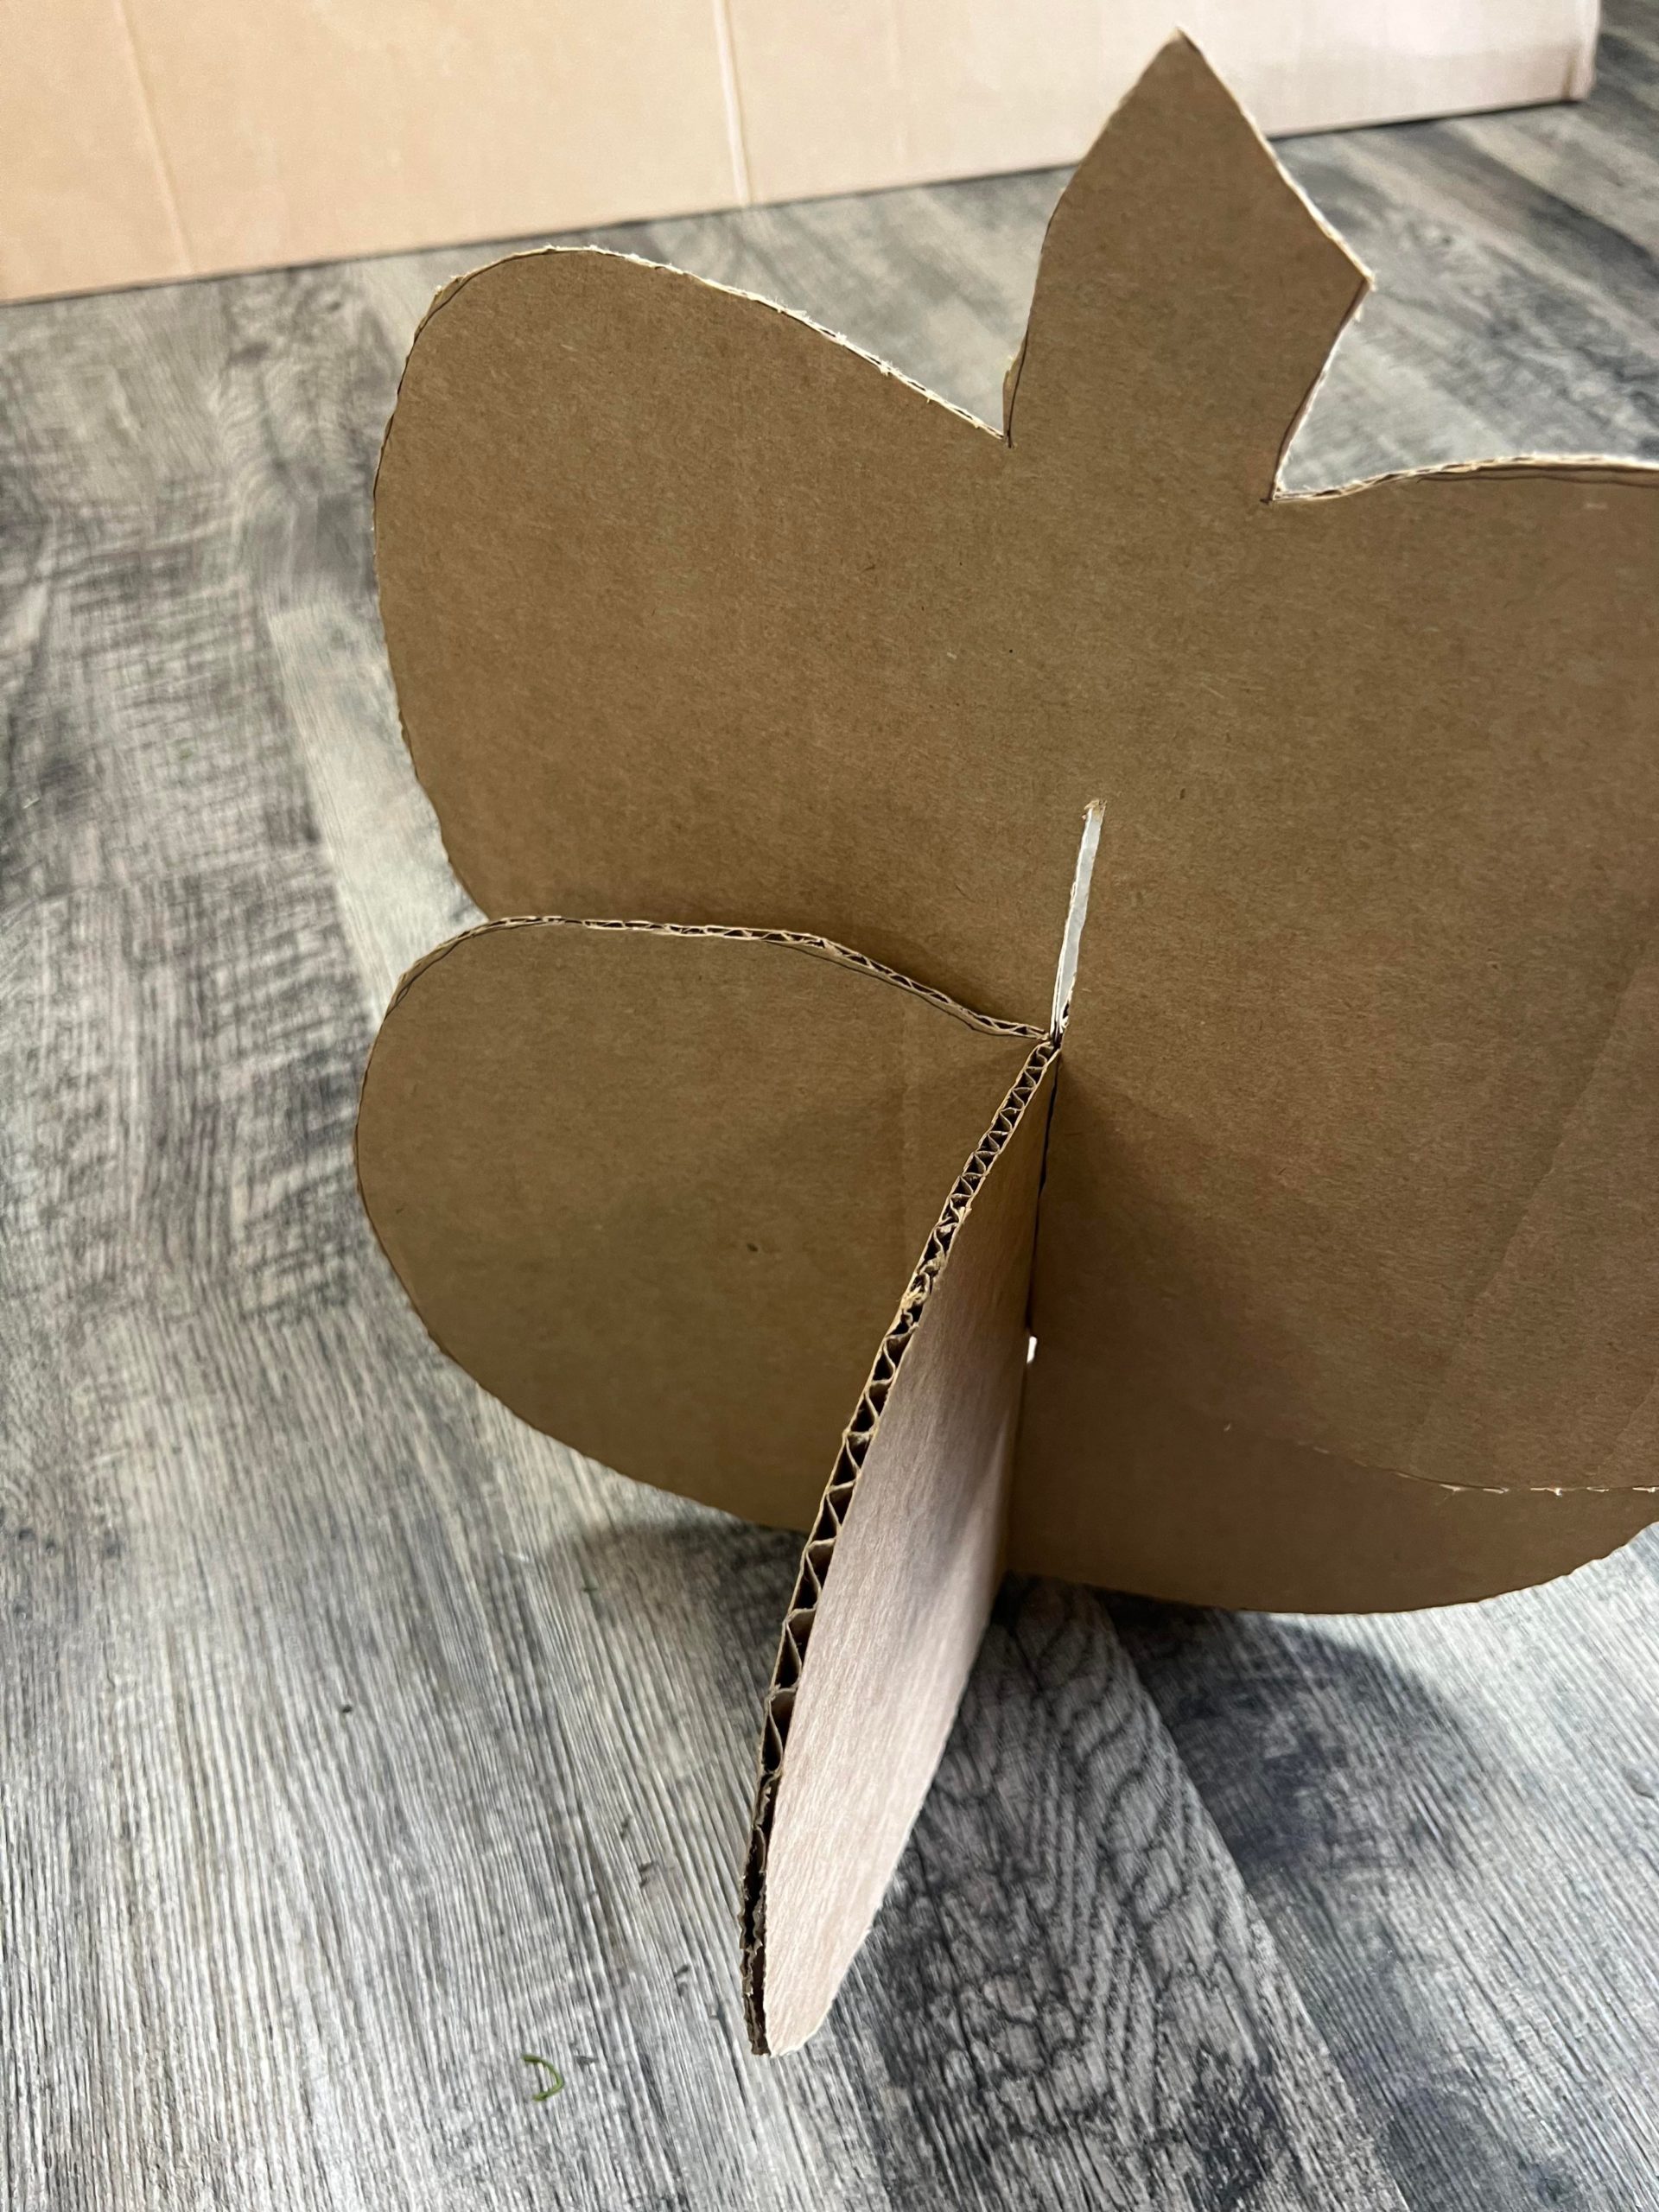
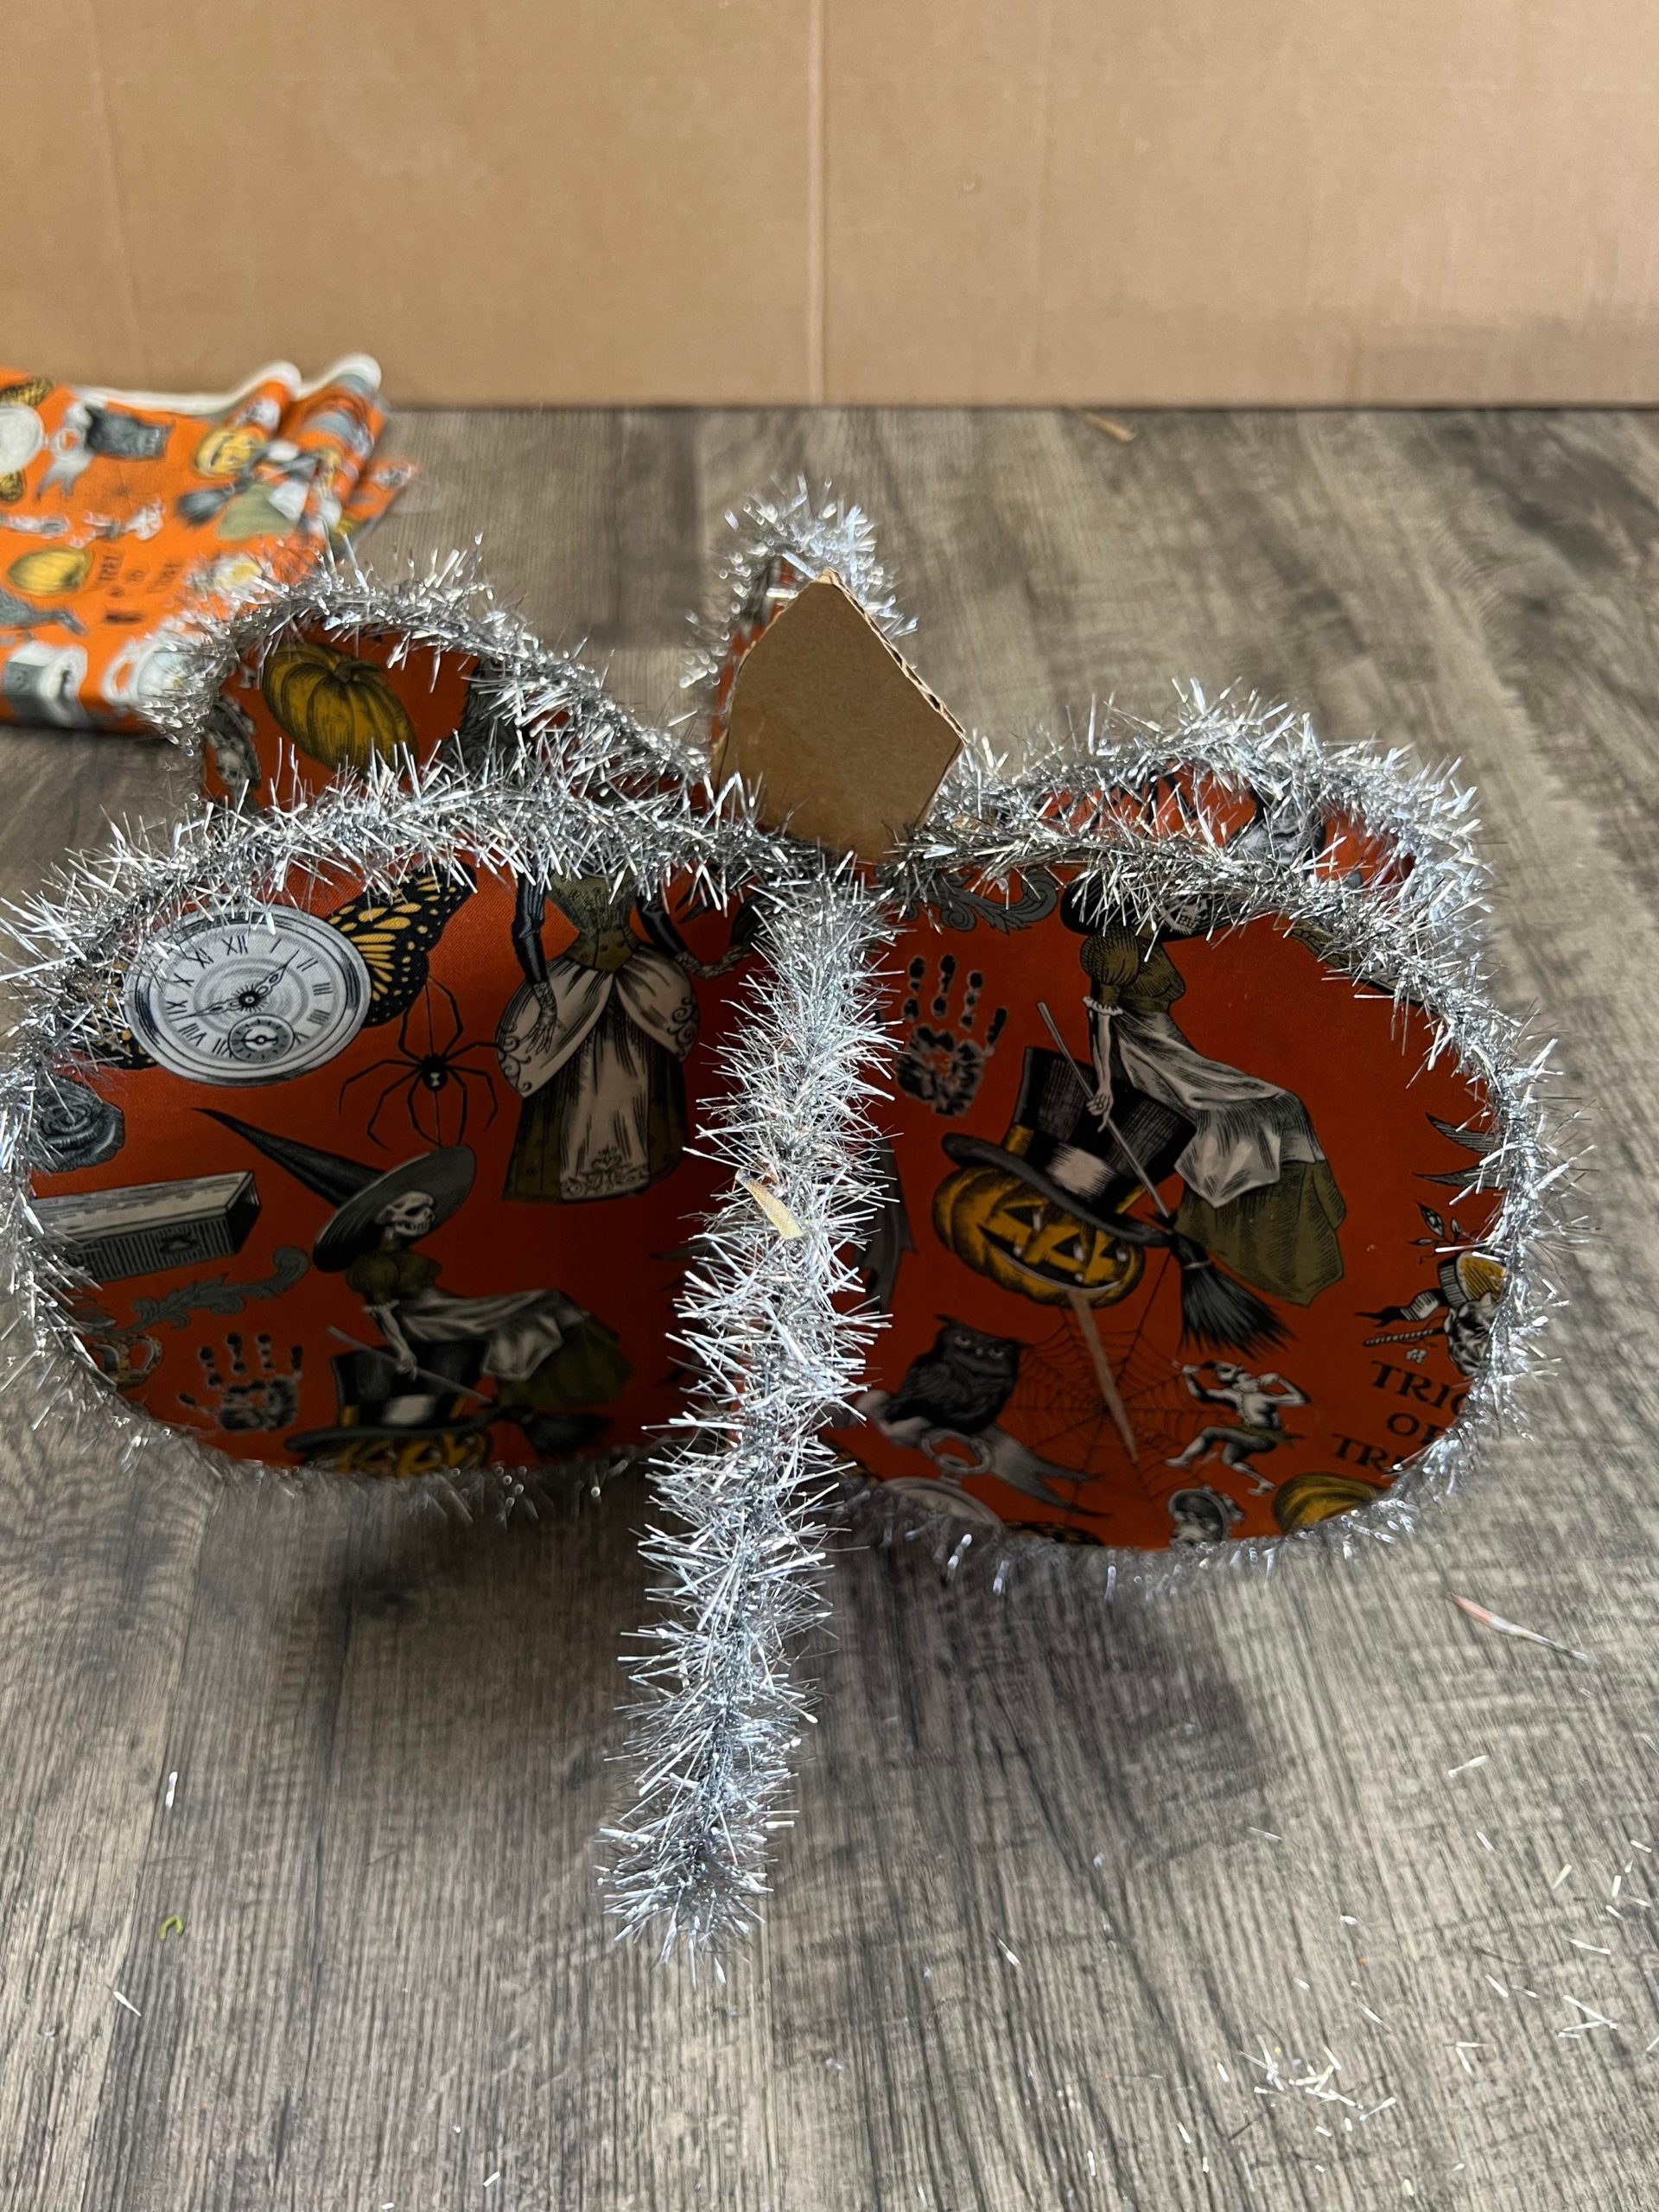
You will slide the pumpkins into each other creating a 3D pumpkin.

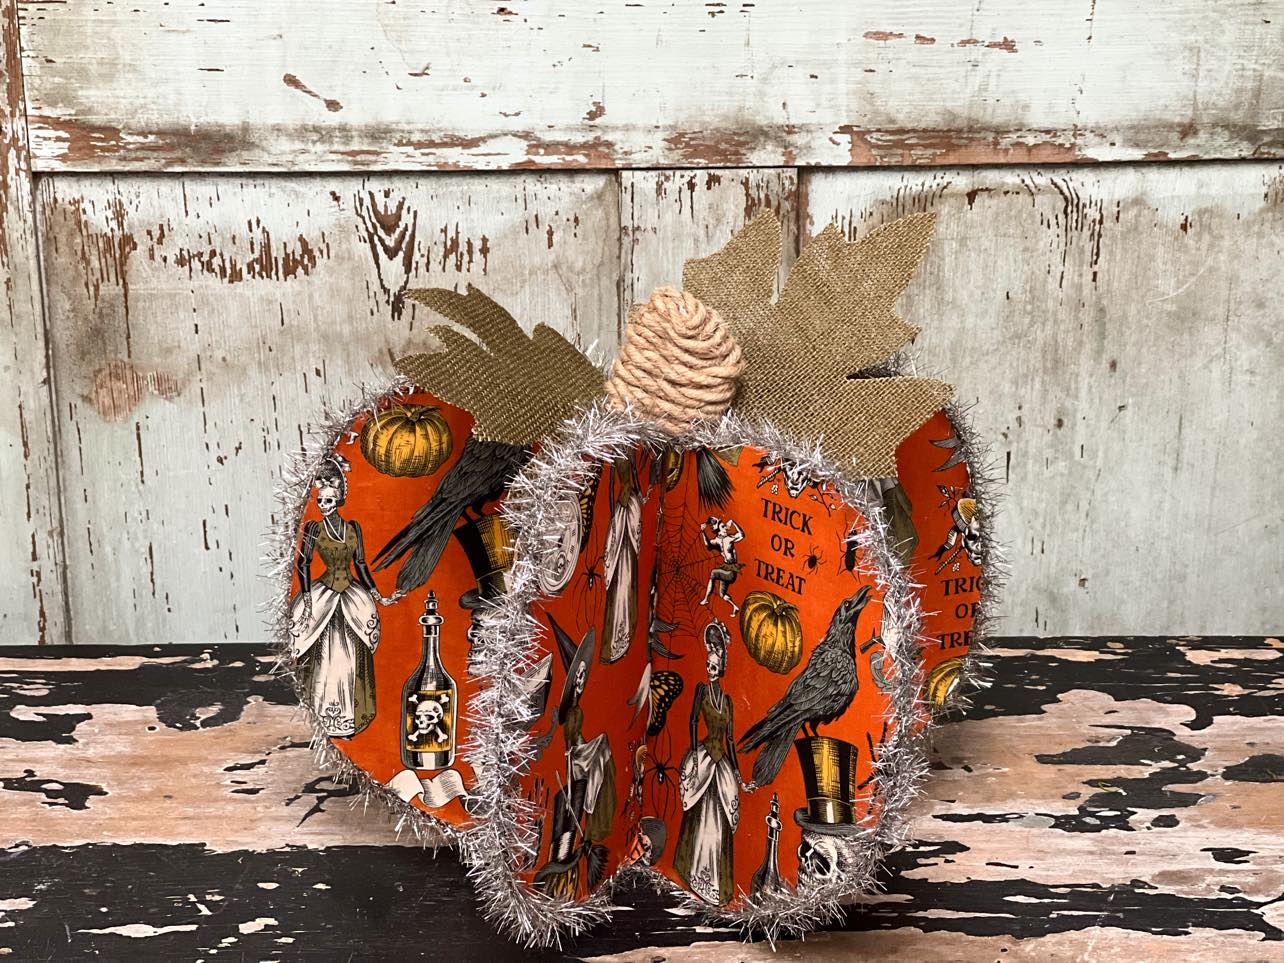
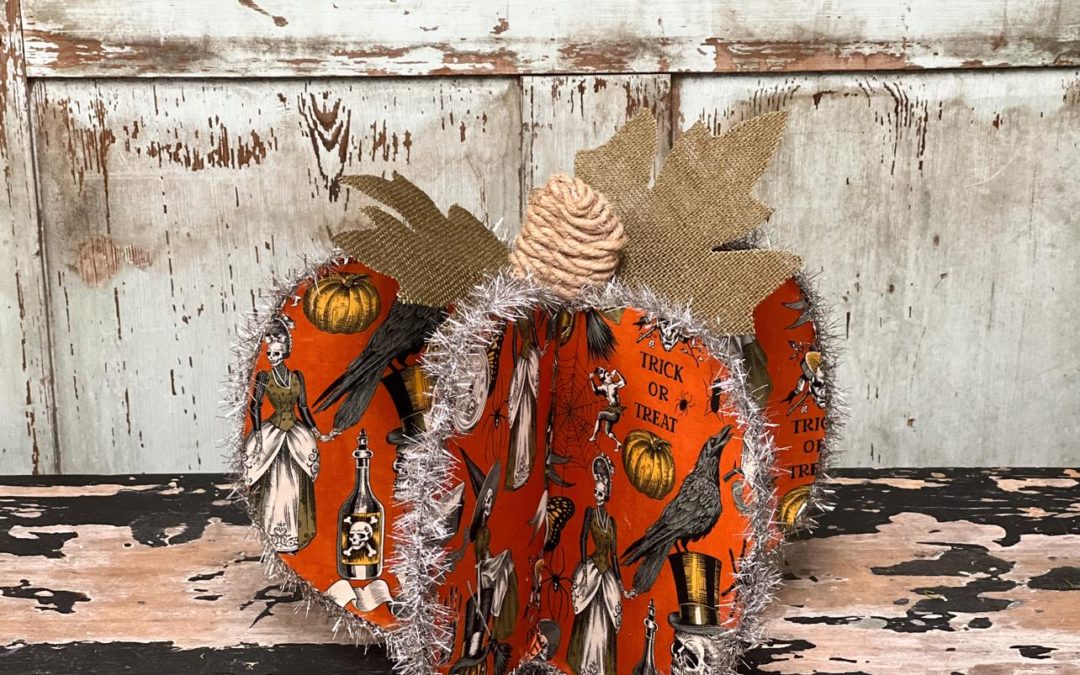
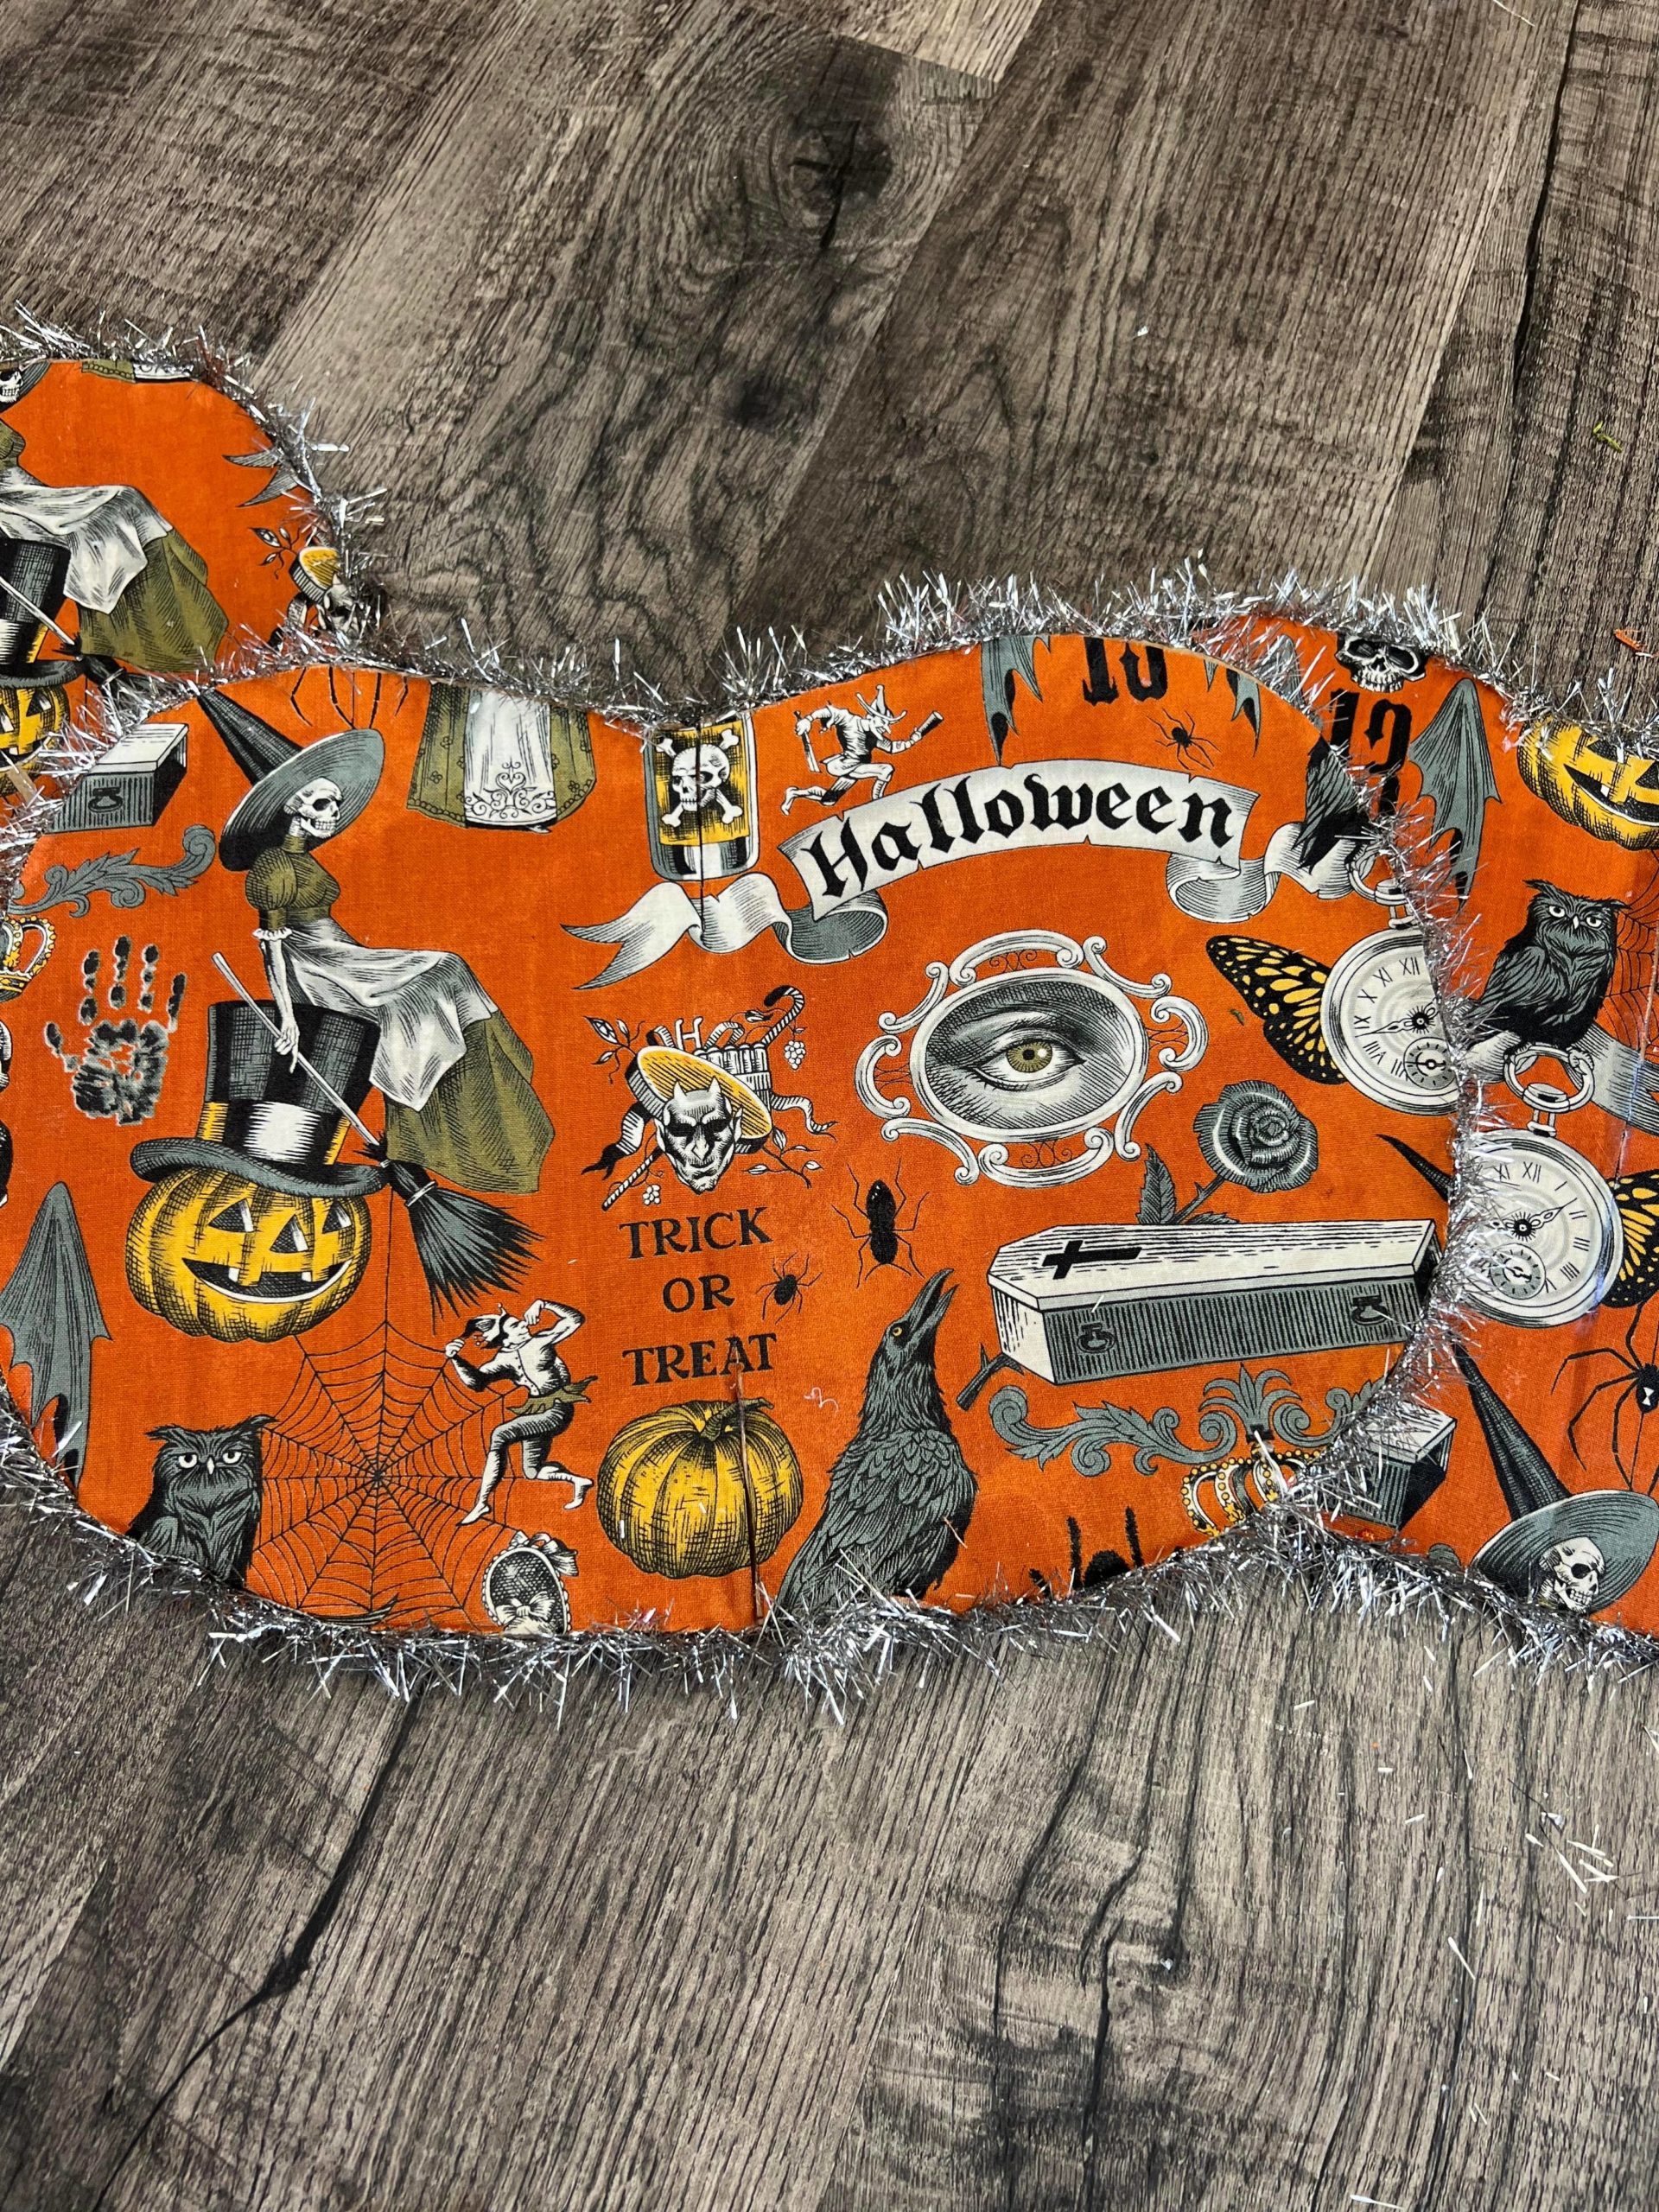
You can paint your pumpkin or add material to your pumpkin. I decided to decoupage a Halloween print material to all the cardboard pumpkin pieces.
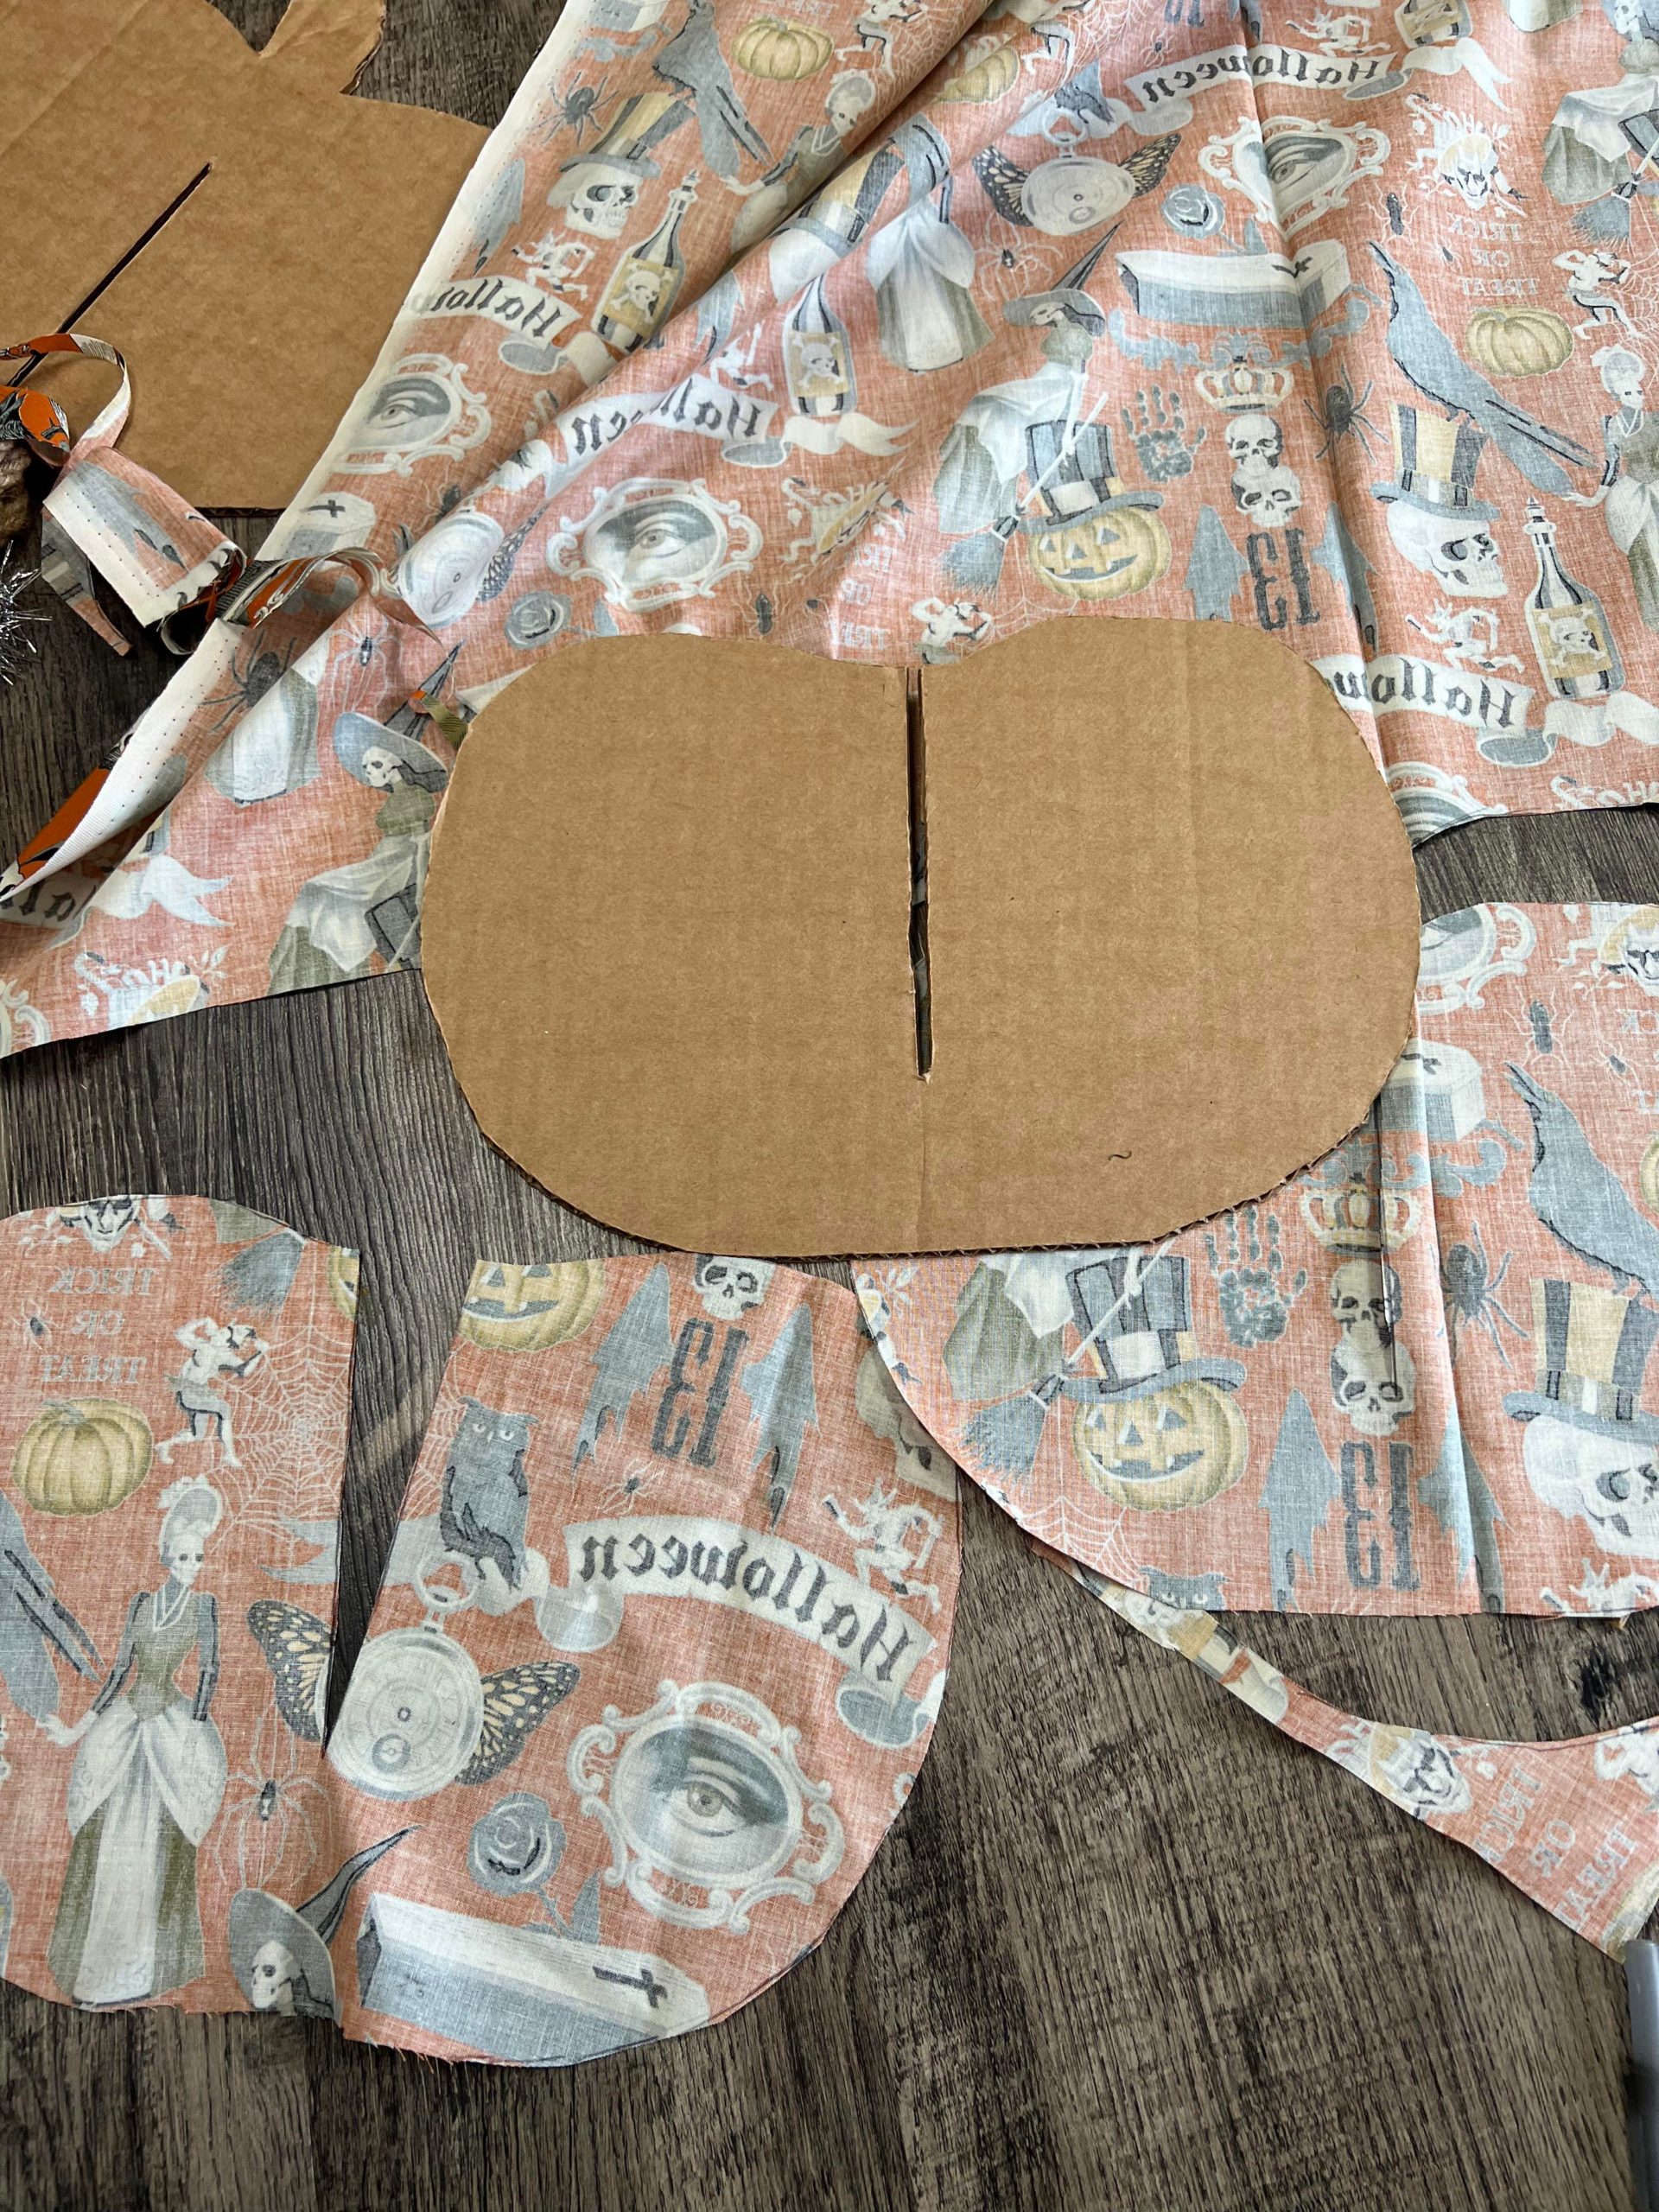
I traced the pumpkins onto the material and then decoupaged the material onto the cardboard.

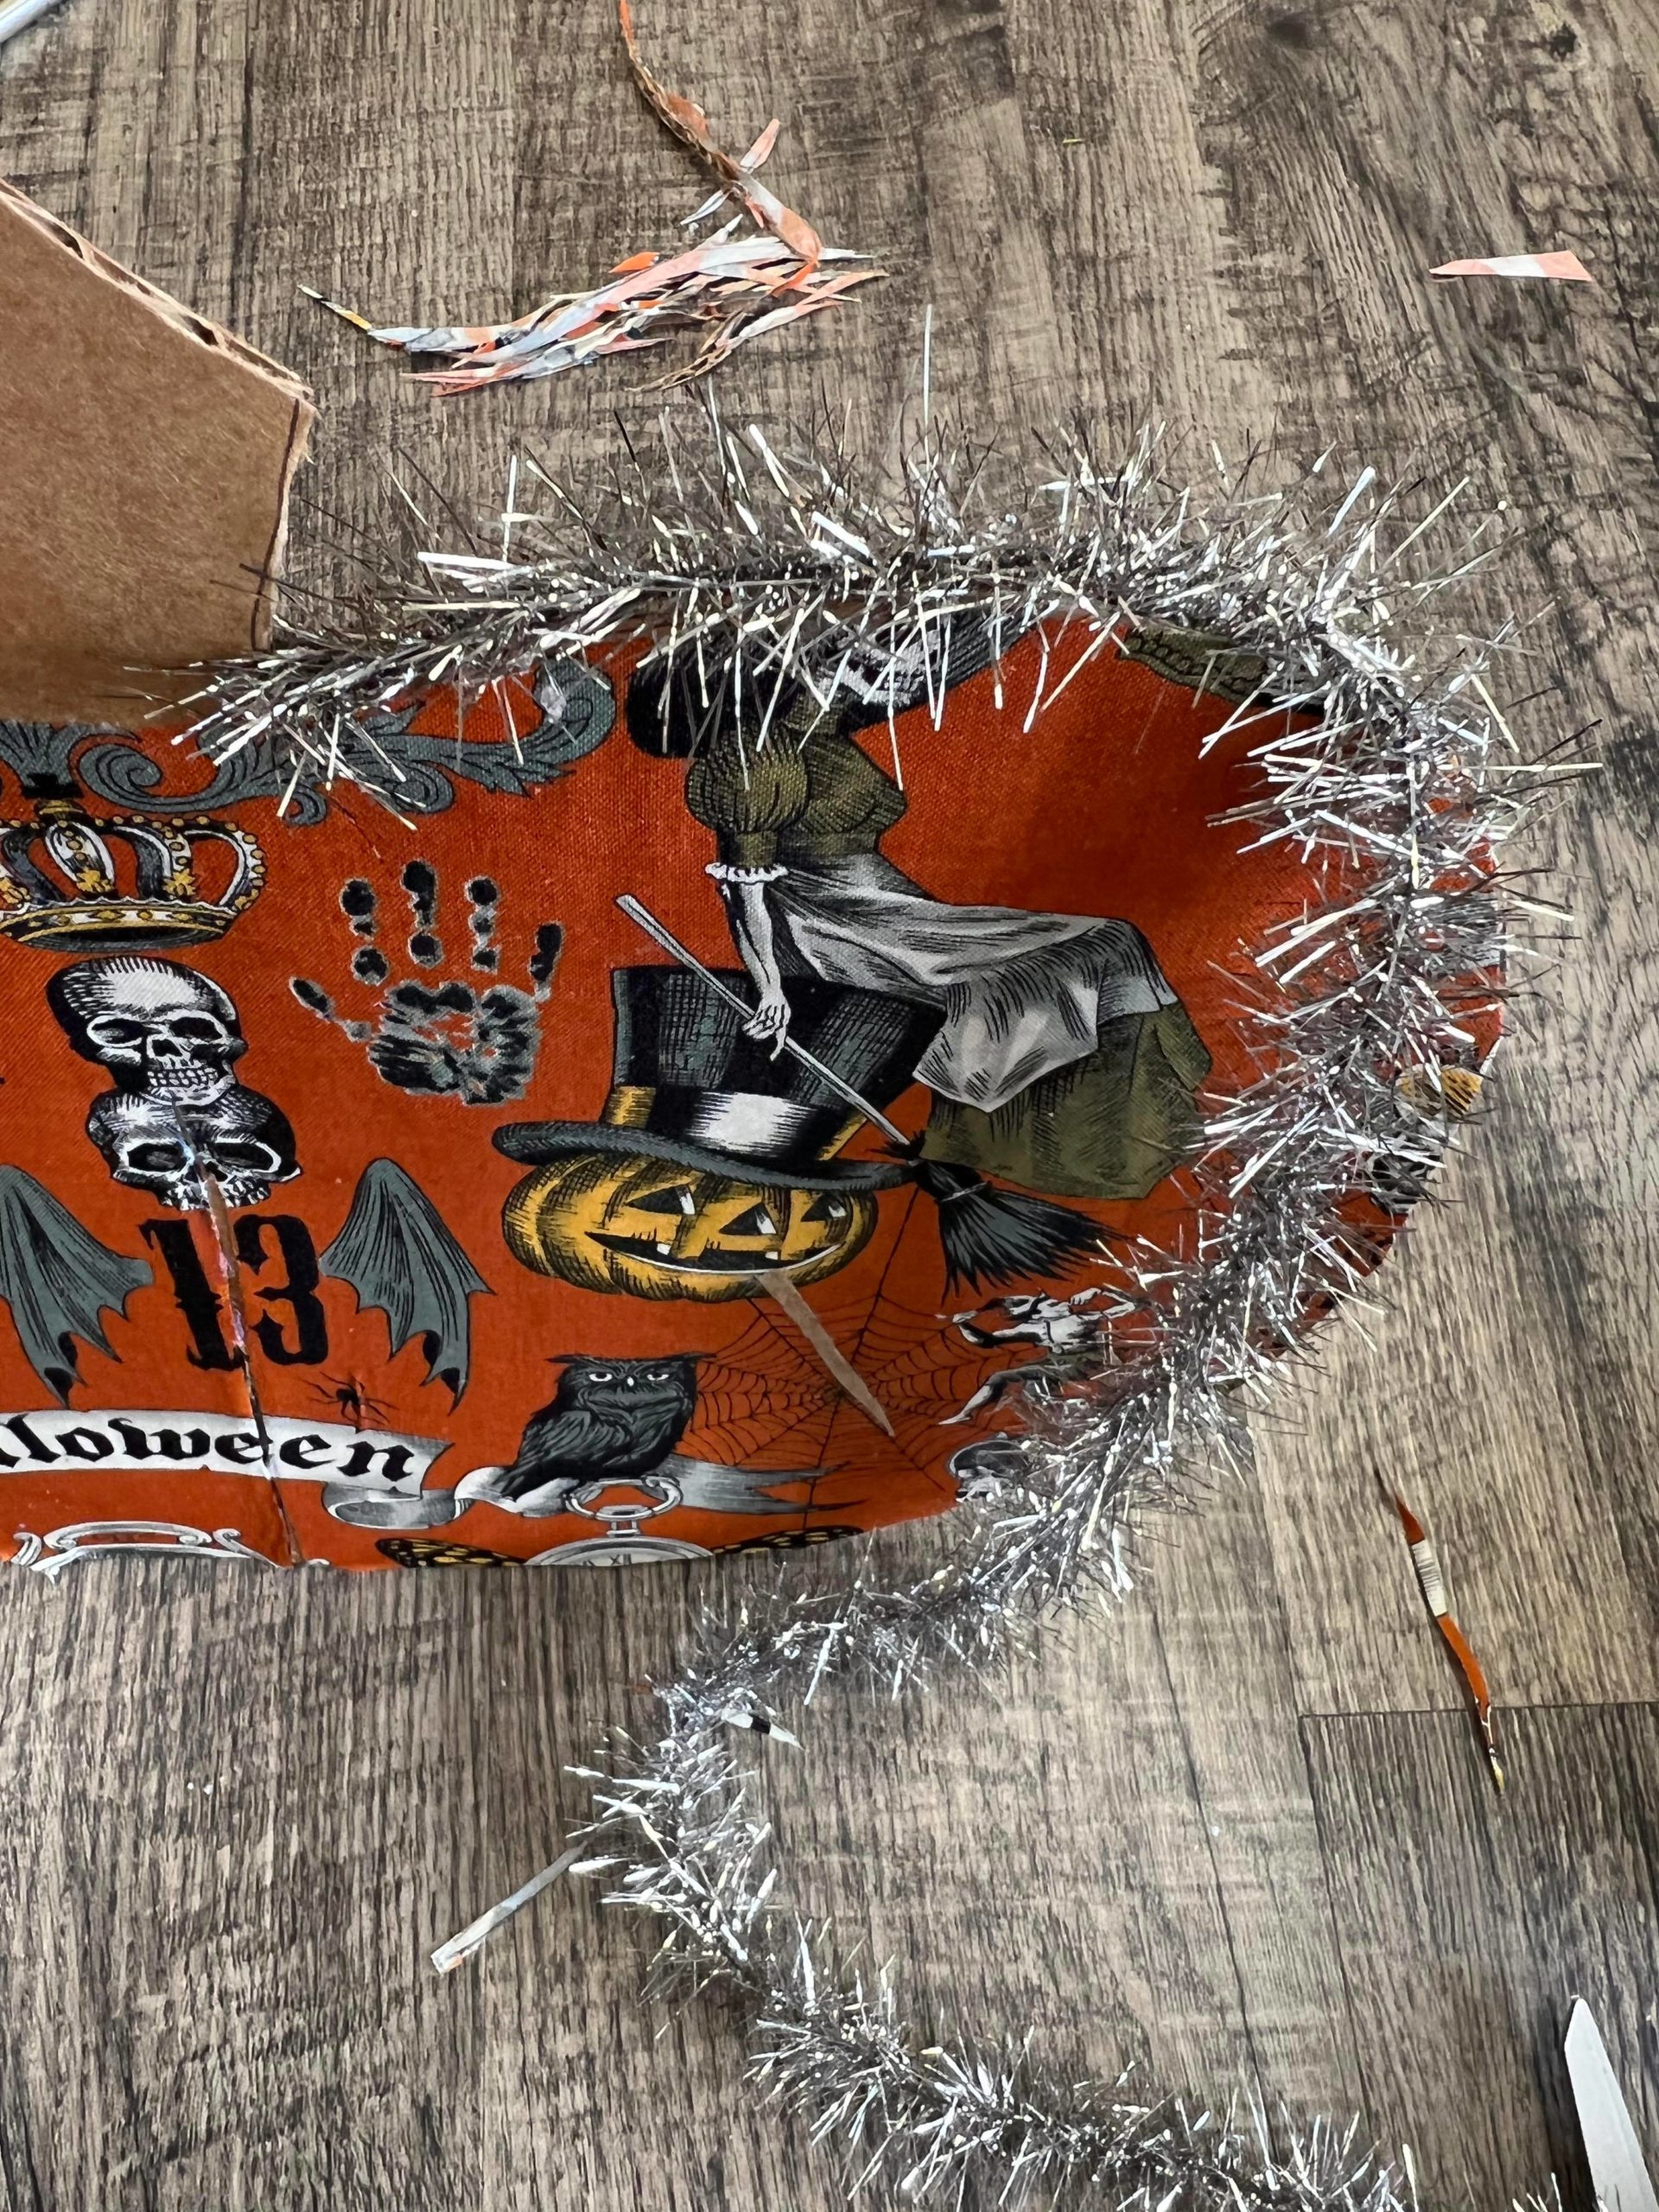
I added the silver tinsel to the edge of each pumpkin piece. Be sure to cut the tinsel at each slit.
I added the jute to the stem.
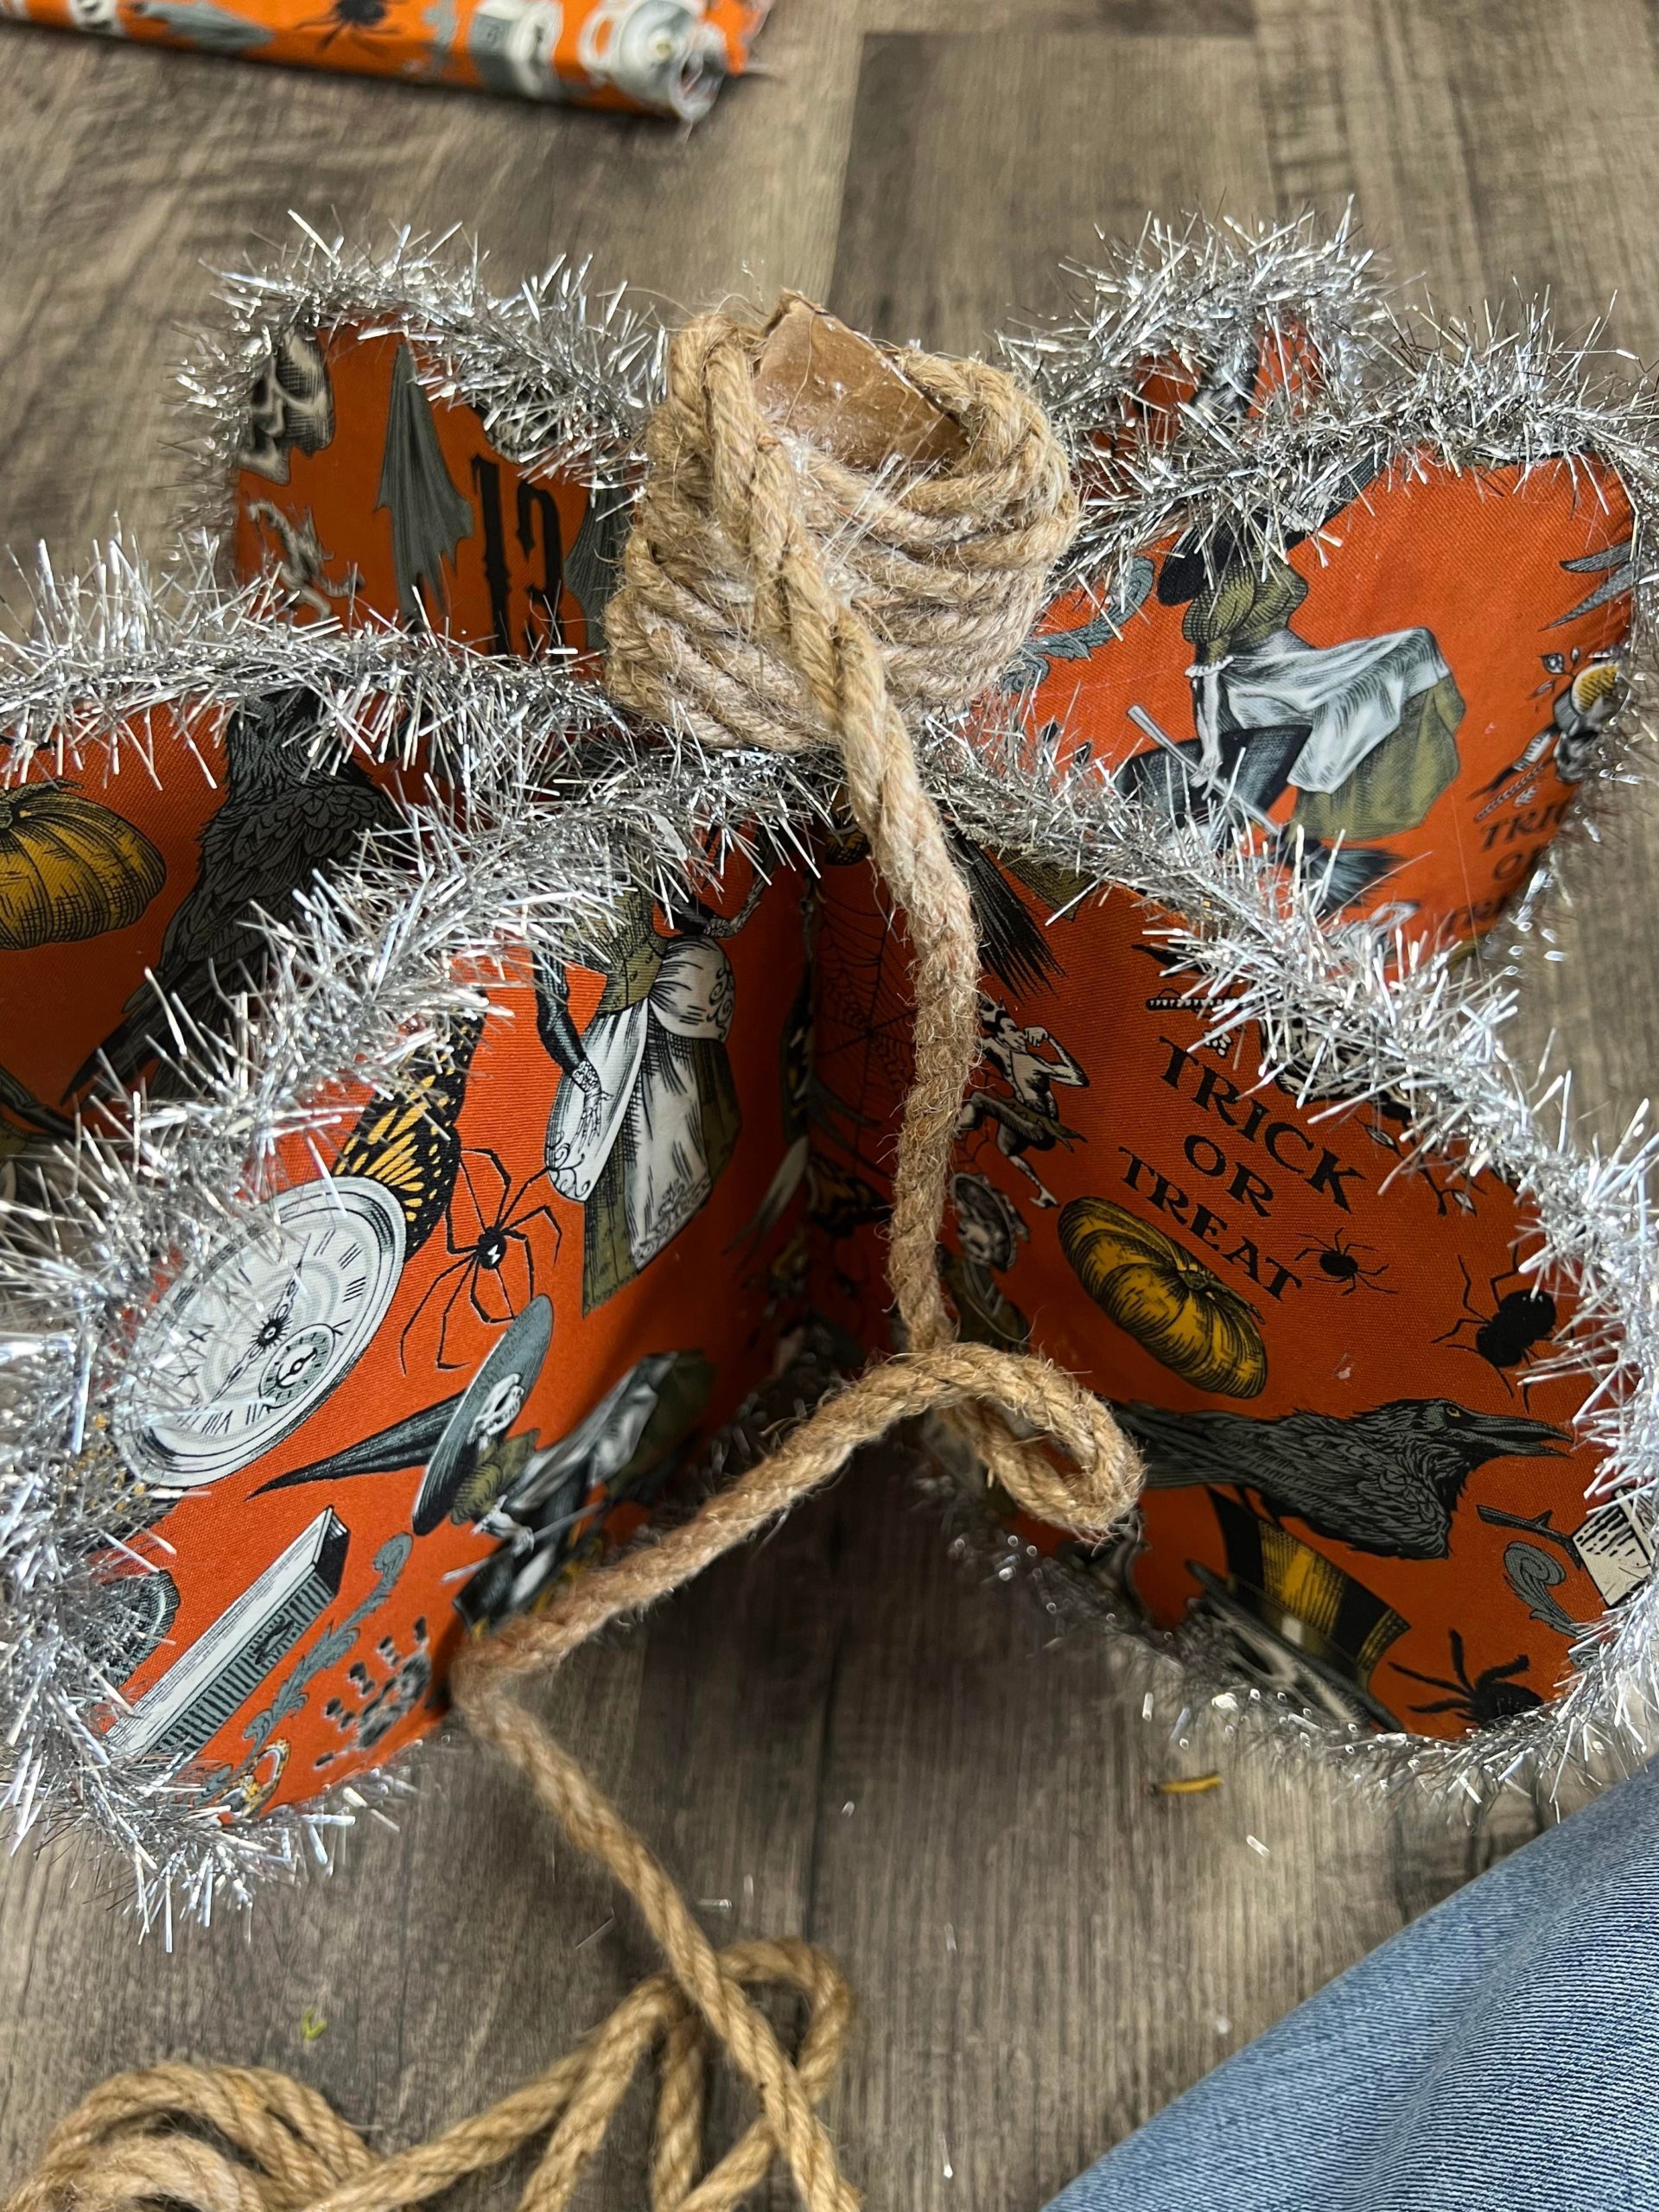
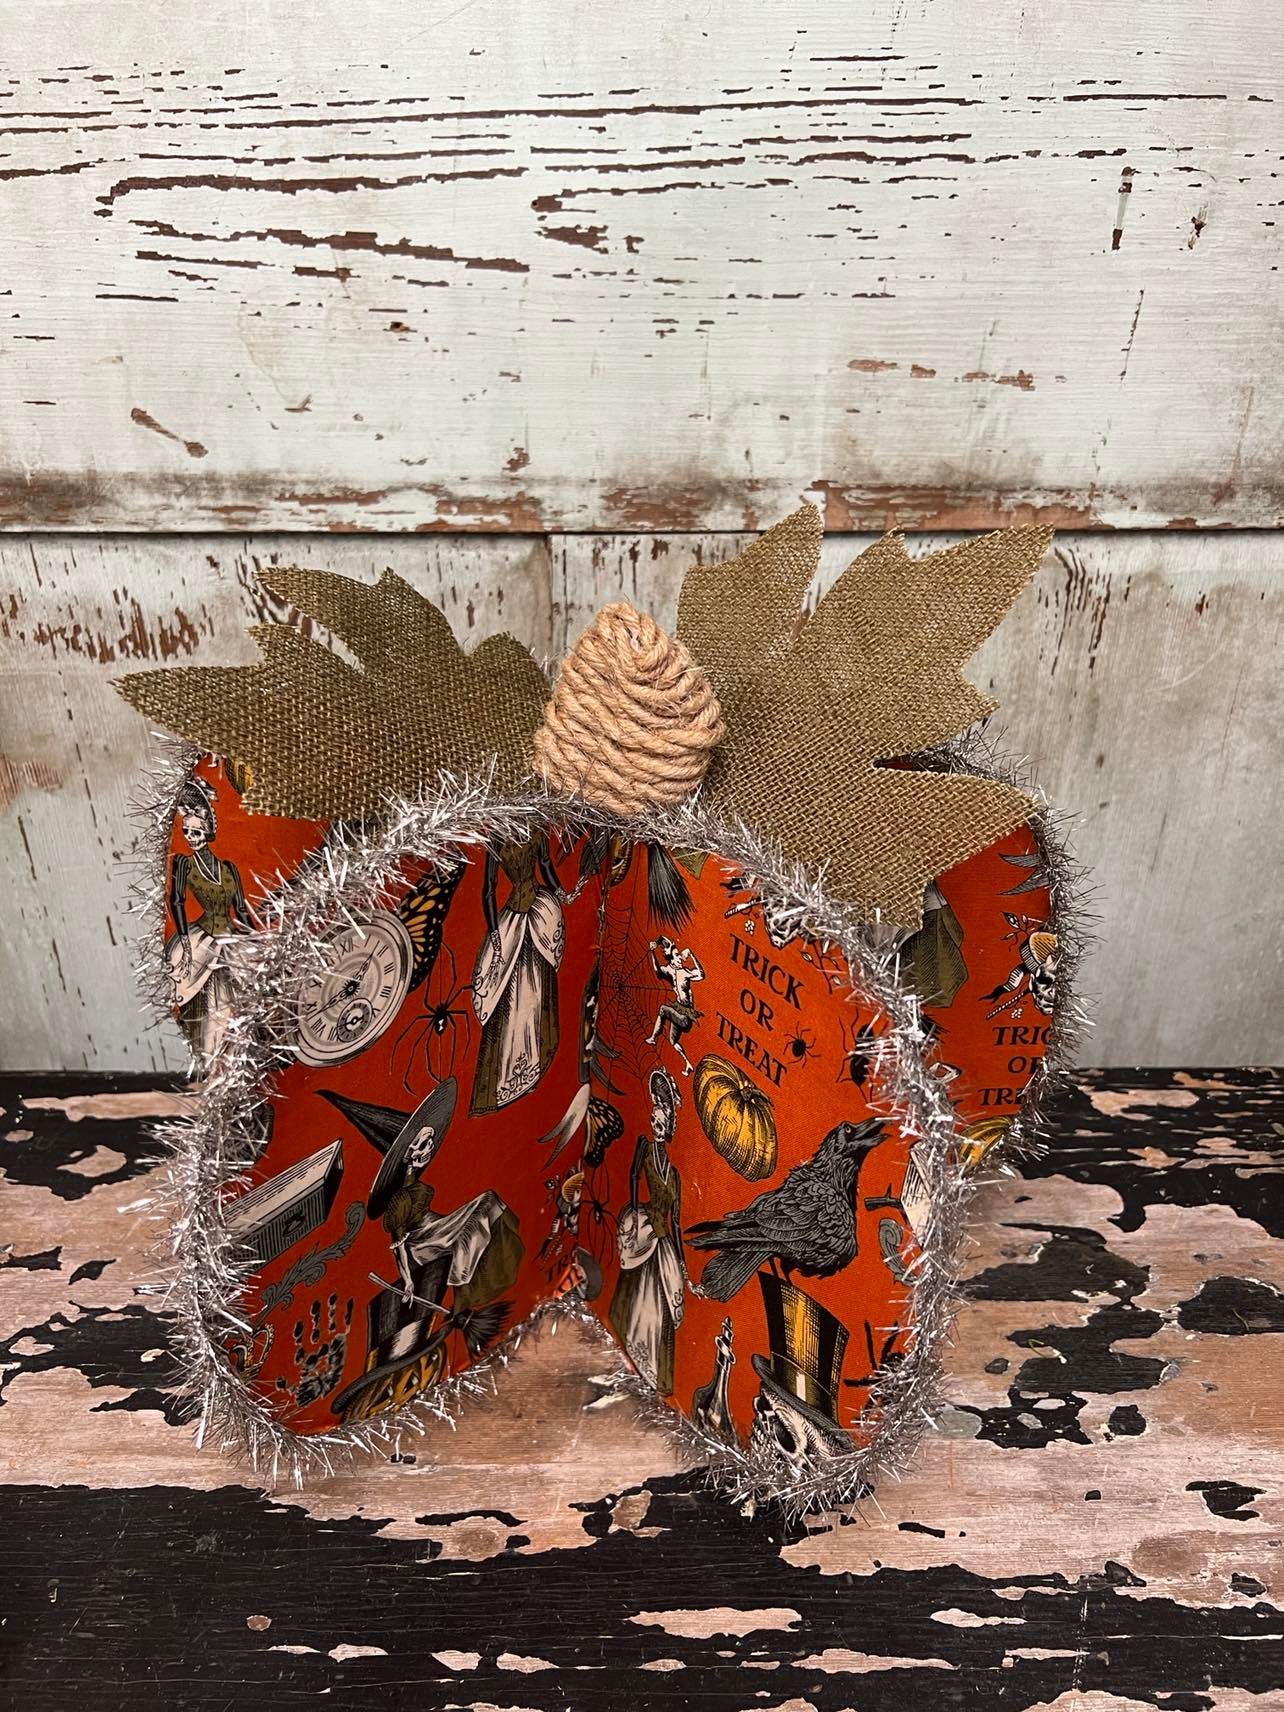
I glued on 2 burlap leaves from the Dollar Tree. This pumpkin is very easy to make and you can make them all different sizes.
I hope you will get creative and give this pumpkin a try.