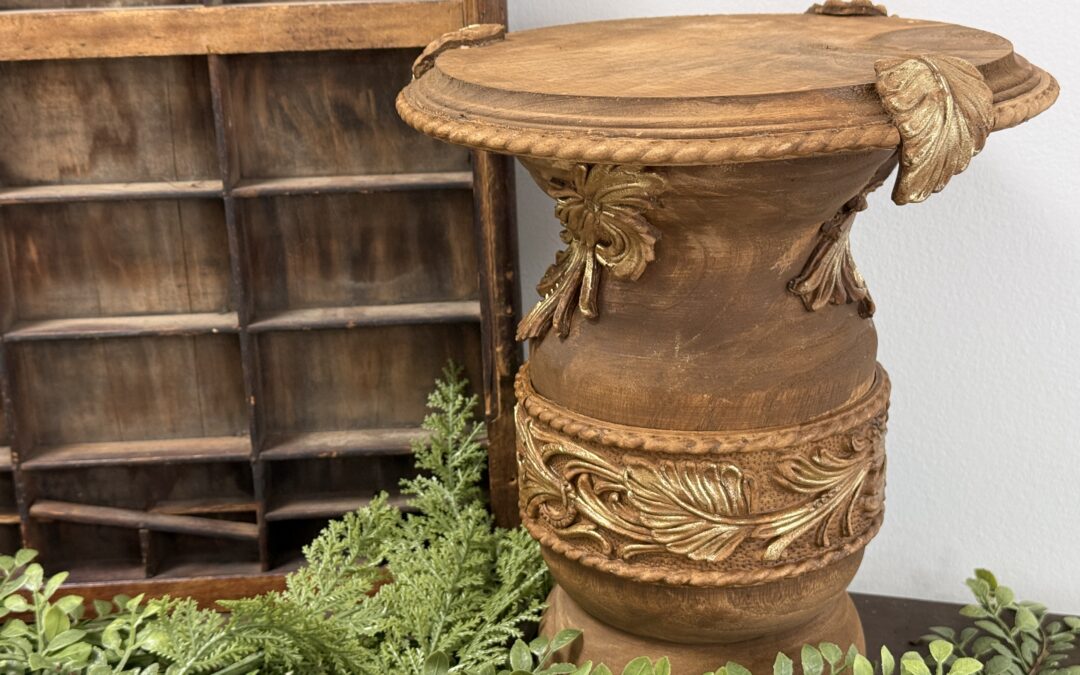
If you’ve been following The Shabby Tree for a while, then you already know how much I love WoodUbend! We recently started carrying it in our boutique, and I couldn’t wait to share another fun and creative way to use it. Today, I’m going to show you how you can give WoodUbend a completely different look and create something truly unique!
If you haven’t heard of WoodUbend, it’s an amazing product that looks and feels like wood. The magic happens when heat is applied—it becomes flexible and moldable, allowing you to bend and shape it to fit a variety of surfaces and projects. It’s a fun and easy way to add beautiful details to your crafts and home decor creations!
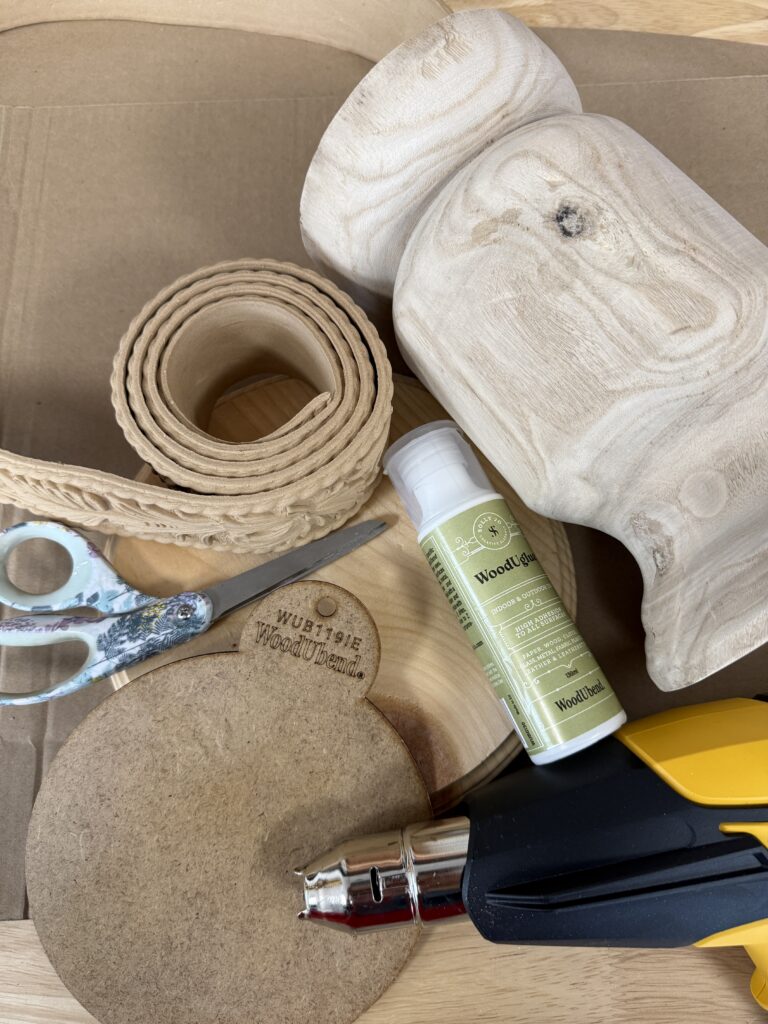
Here is what I used for this DIY:
1. A wooden vessel
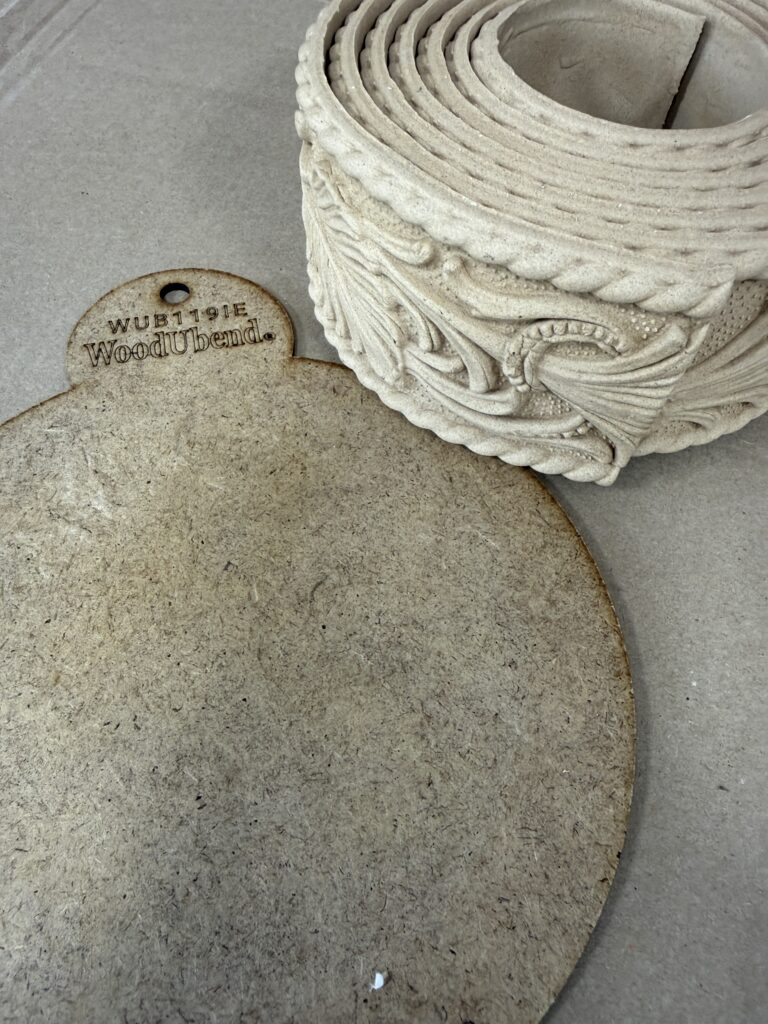
2. A wooden disc
3. A heatgun
4. Wood glue
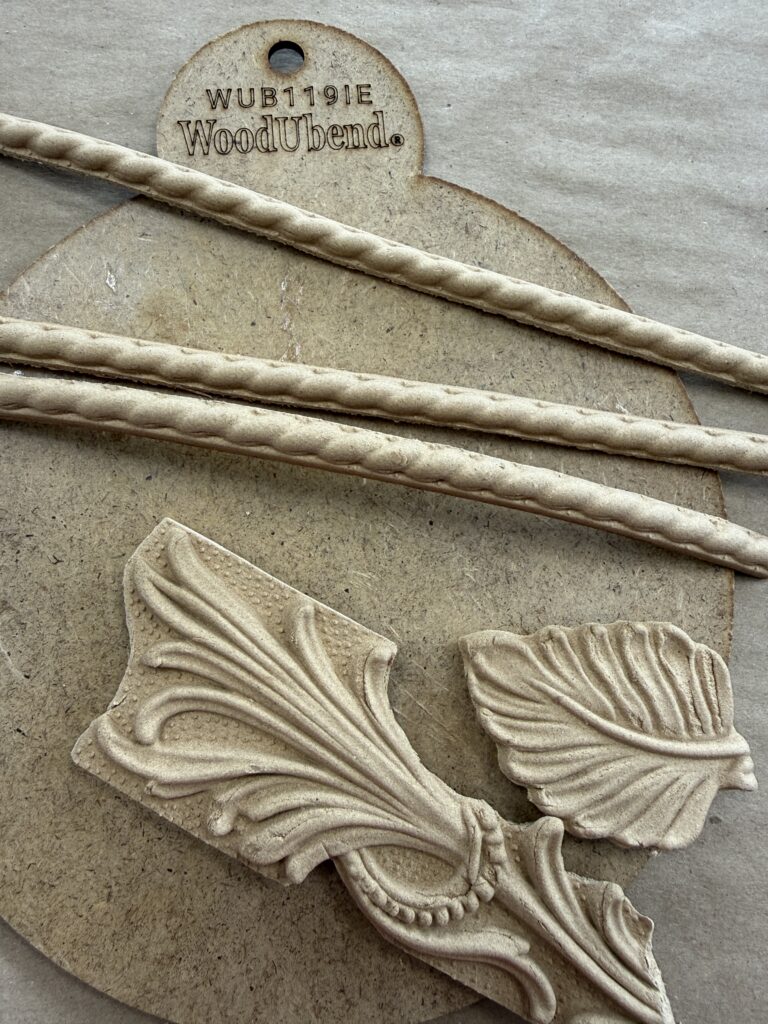
5. WoodUbend
6. Scissors
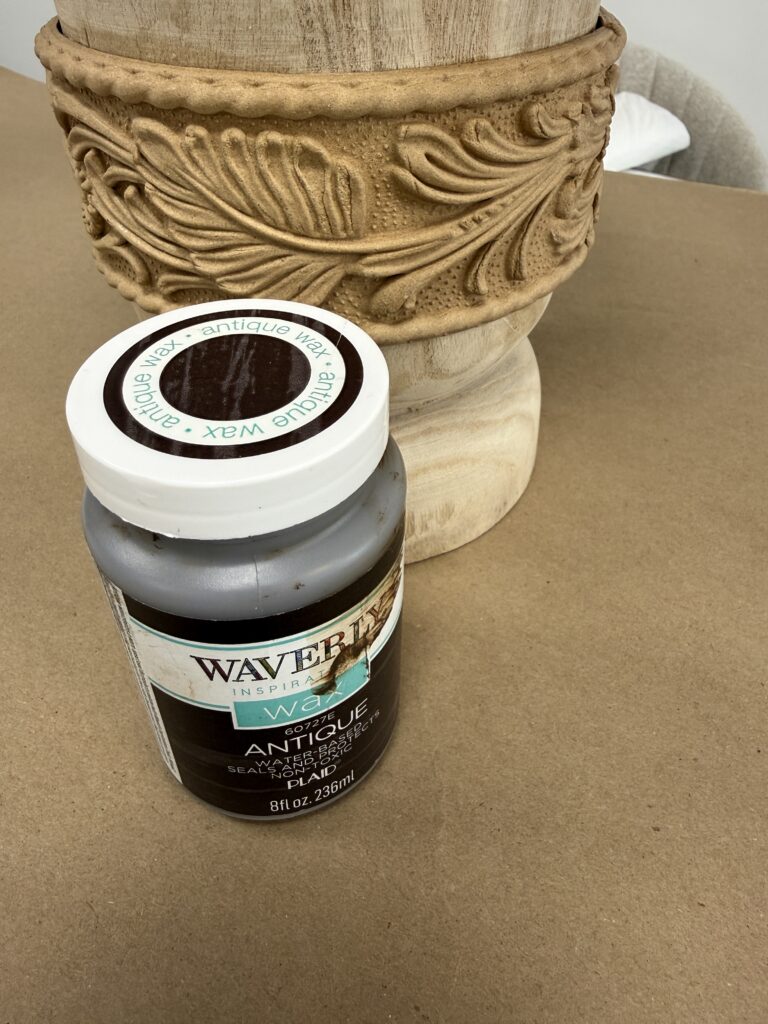
7. I also ended up using antique wax and paint brushes
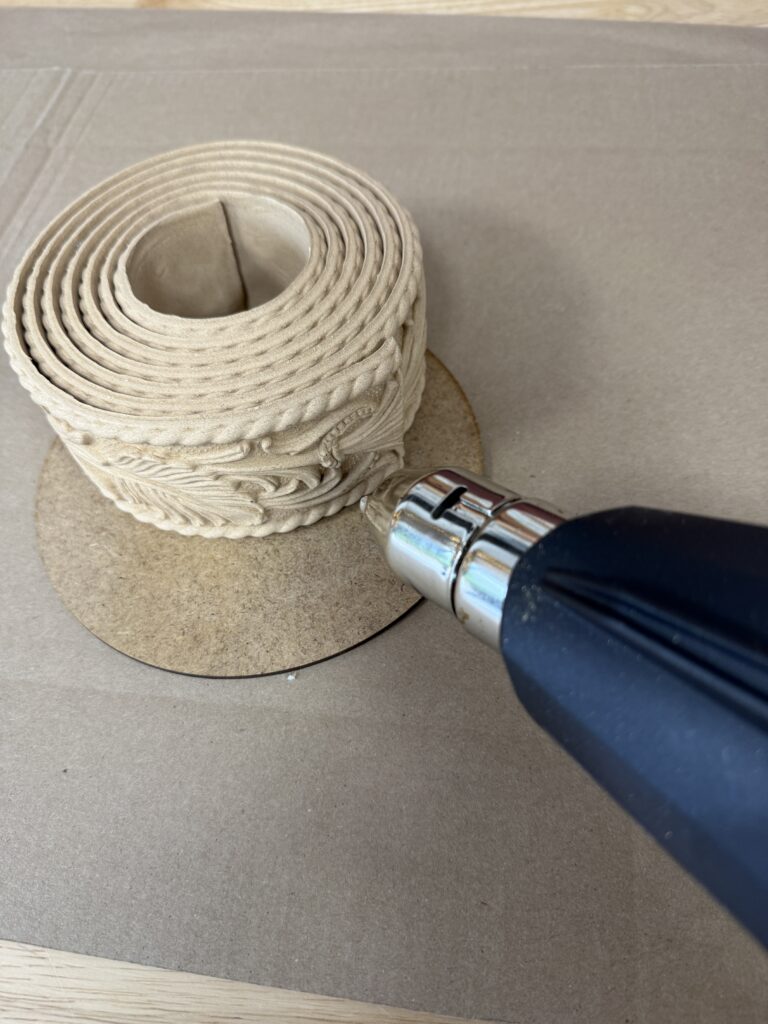
I started by applying heat to the roll of WoodUbend, going back and forth.
You can find my heat gun here: https://walmrt.us/4axNOR1
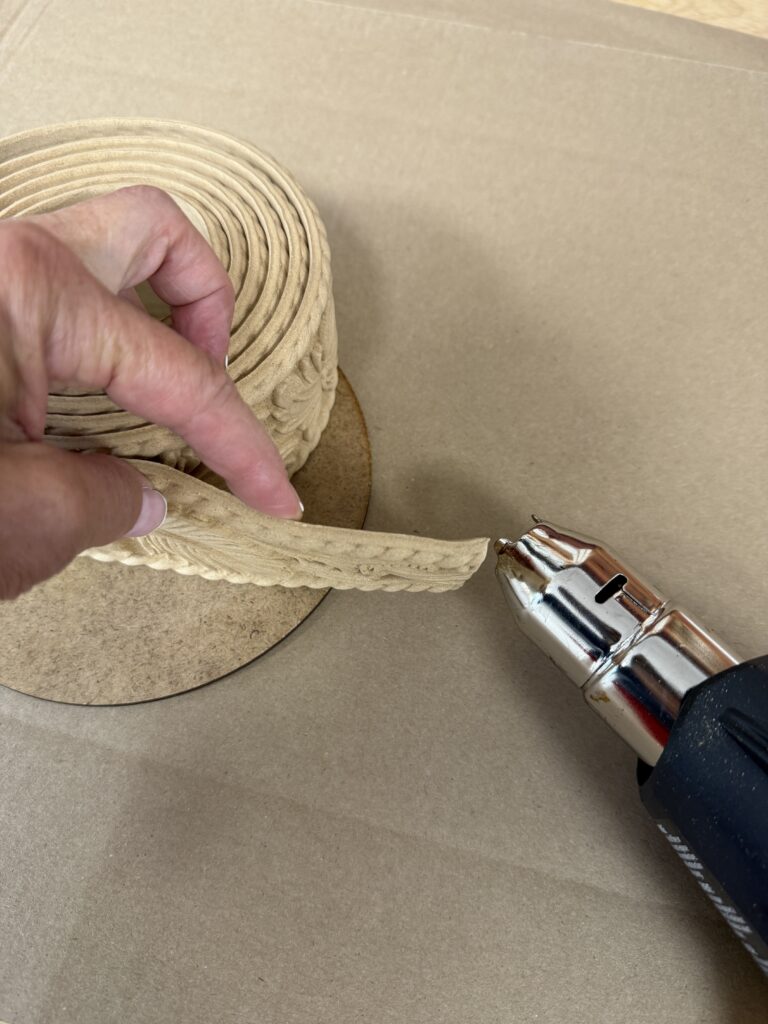
As it starts to heat up, you will notice that you are able to start moving it off the roll.
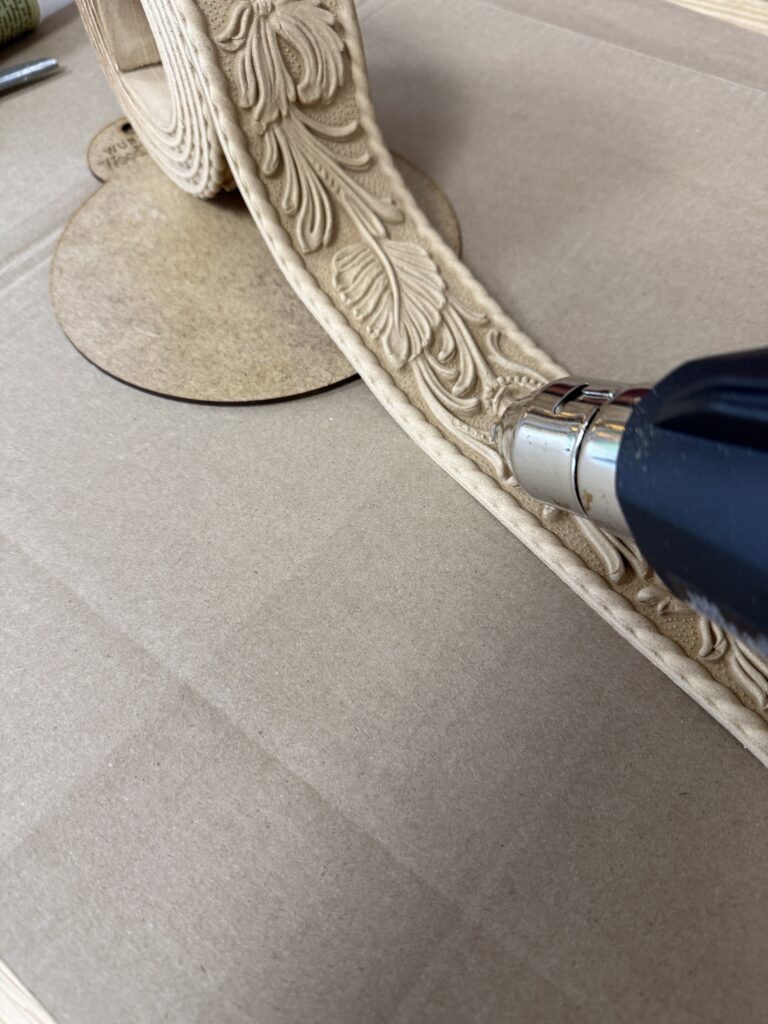
Eventually you are able to lay the piece flat.
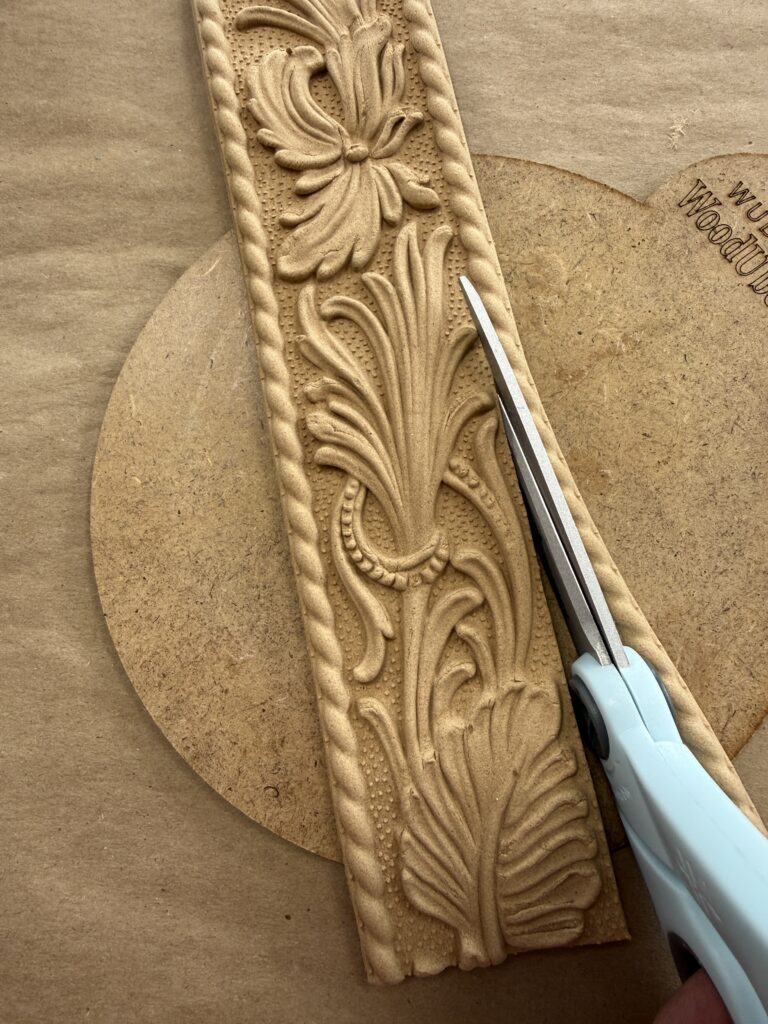
Once the piece is heated up, you are able to cut it with scissors! I cut off the piece that I knew I would need and then started cutting out the elements that I wanted to use.
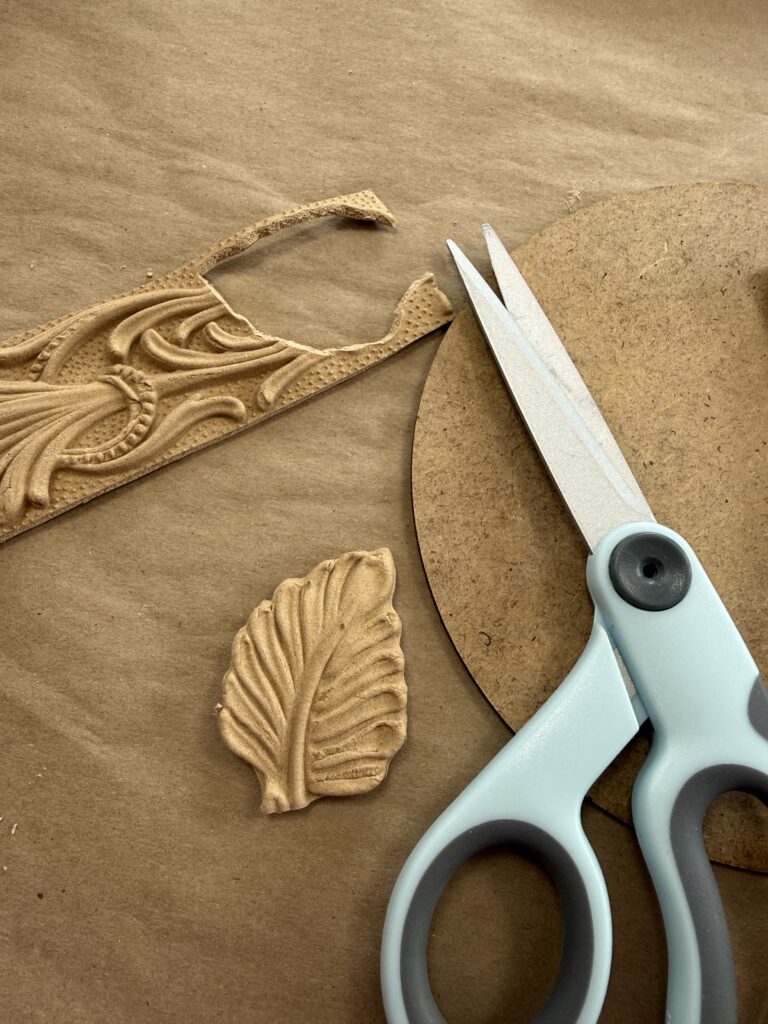
After I cut off the trim, I went ahead and cut out a leaf to use later on!
This is what everything looked like once I had all of the pieces cut out. If the WoodUbend cools down while you’re working, don’t worry! Simply apply a little more heat with your heat gun, and it will become soft and flexible again, making it easy to continue shaping and molding as needed.
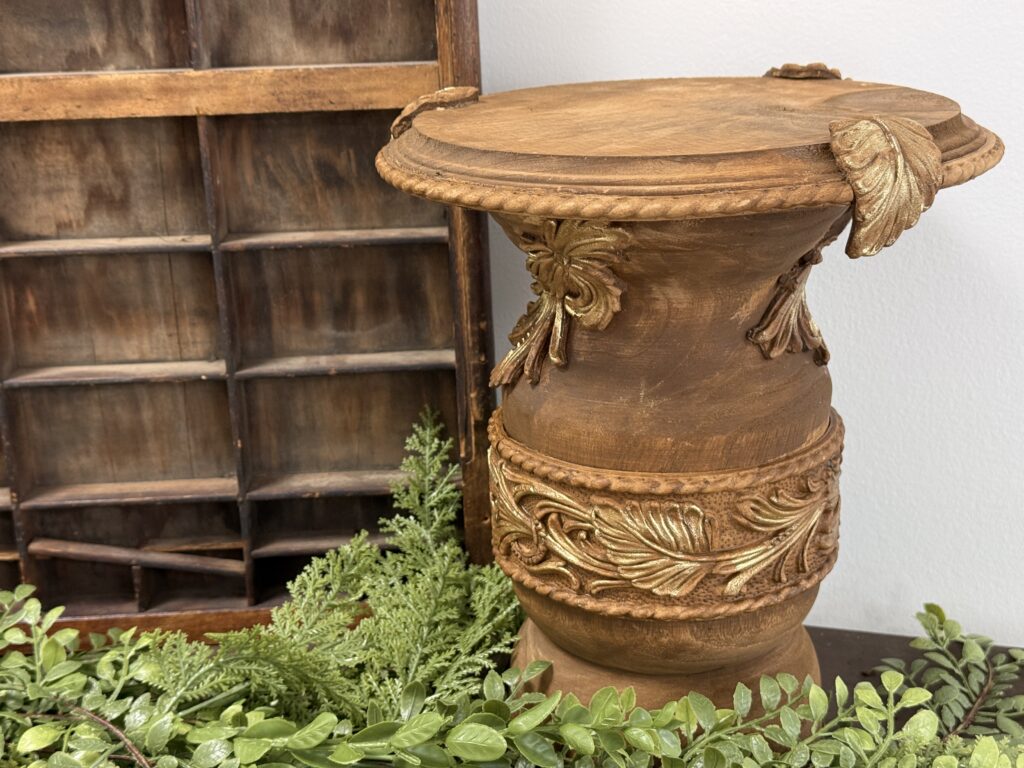
I heated up another piece of the WoodUbend and used the wood glue to attach it to the wooden vessel.
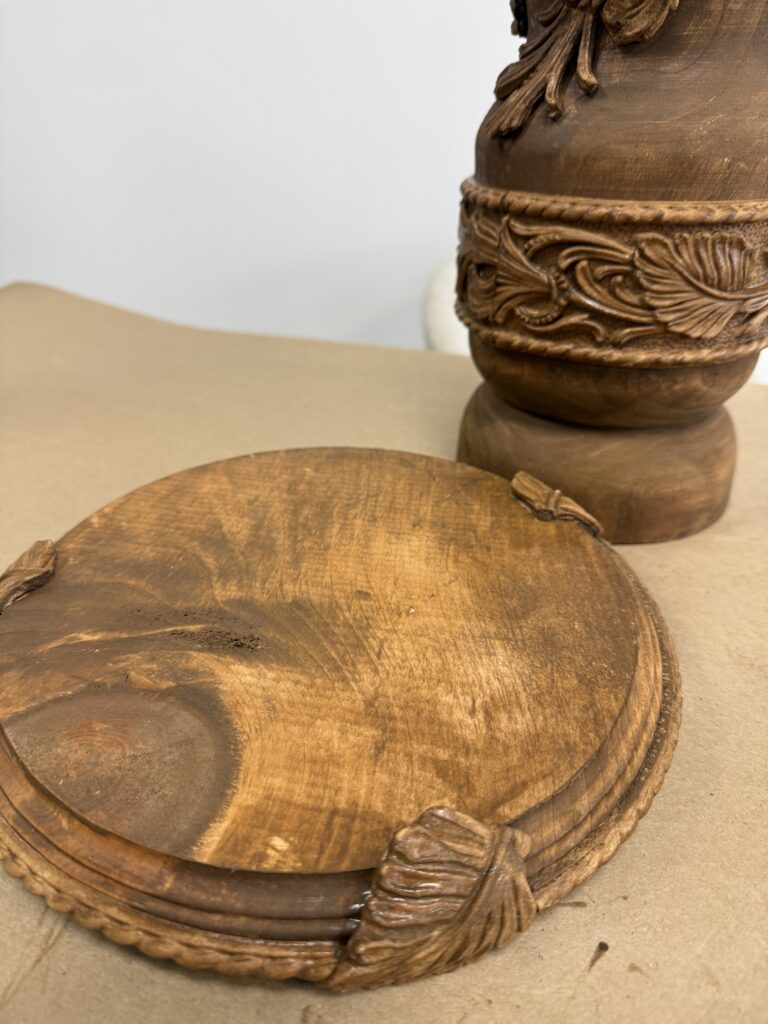
I used the pieces that I cut out of the WoodUbend on the wooden disc as trim and accents. Once that was all attached and the glue was dry, I went over everything with the antique wax to really give everything dimension.
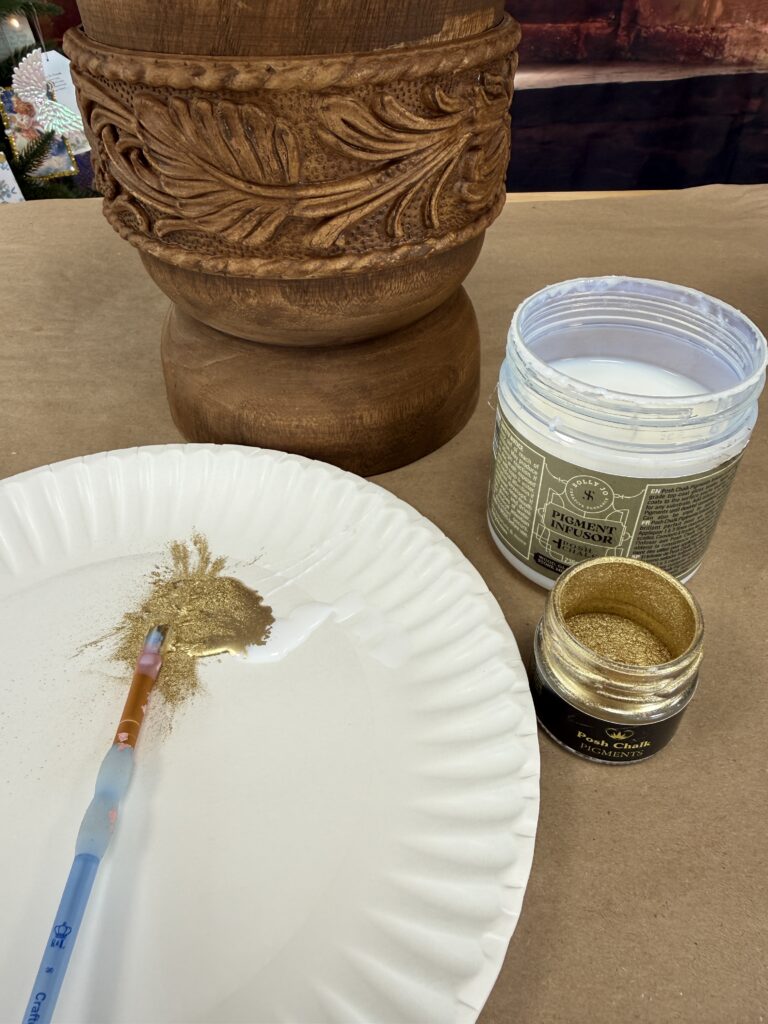
Next I needed some gold to really make this piece pop. I mixed up some of my pigment and pigment infusor from WoodUbend and gently brushed it over the details of the piece.
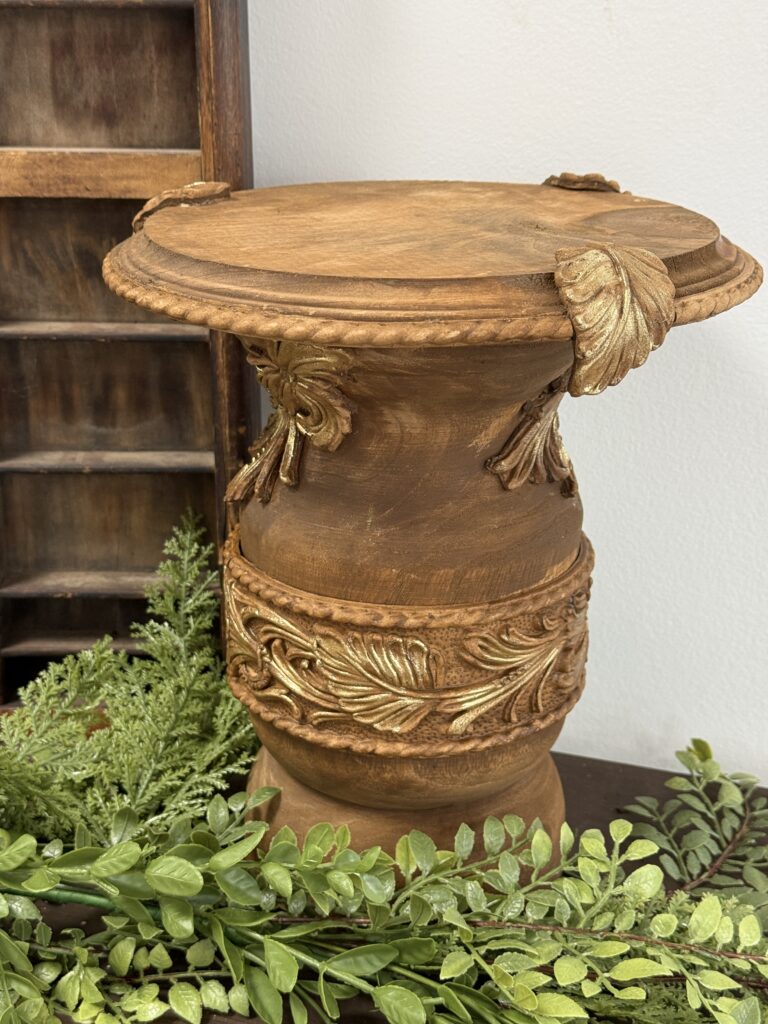
This turned out so cute and is a unique way to get creative with WoodUbend. I am so excited that we are now carrying several different styles of WoodUbend trim. I hope that you get creative and give it a try!
You can find the WoodUbend that we are carrying here on our website: https://theshabbytreeboutique.com/woodubend/
This is so amazing!!! Such an incredible creation!! I love the Woid U Bend!!!
Hi Barb! This turned out so pretty! It looks very high end and so unique! Truly a One of a Kind piece!
Beautiful!
I love it!! I missed the live so I will go back and watch the video. ❤️🌲
I really liked how elevated the piece became with the addition of the sections you cut from the strip of wood u bend. Very nice and unique! Would love it to display a small tree in my home.
Absolutely love this! I would place this on my antique trunk that lives in my living room and greenery and a candle.
It’s beautiful! I would use it as a riser to hold a tray on my table
I watched your live for this! It is so beautiful and one of my favorite crafts! Would be beautiful in my home!
Barb, I saw your live when you were doing this. It turned out amazing. I have said it over and over again, God has blessed you with an amazing talent. This is beautiful using the wood u bend. I would display on my den mantel , it’s a great room as we don’t have a living room.I think because we spend a lot of time in there. I could see more often.
Beautiful piece. Glad you introduced us to WoodUBend and that you were able to get some for the Boutique