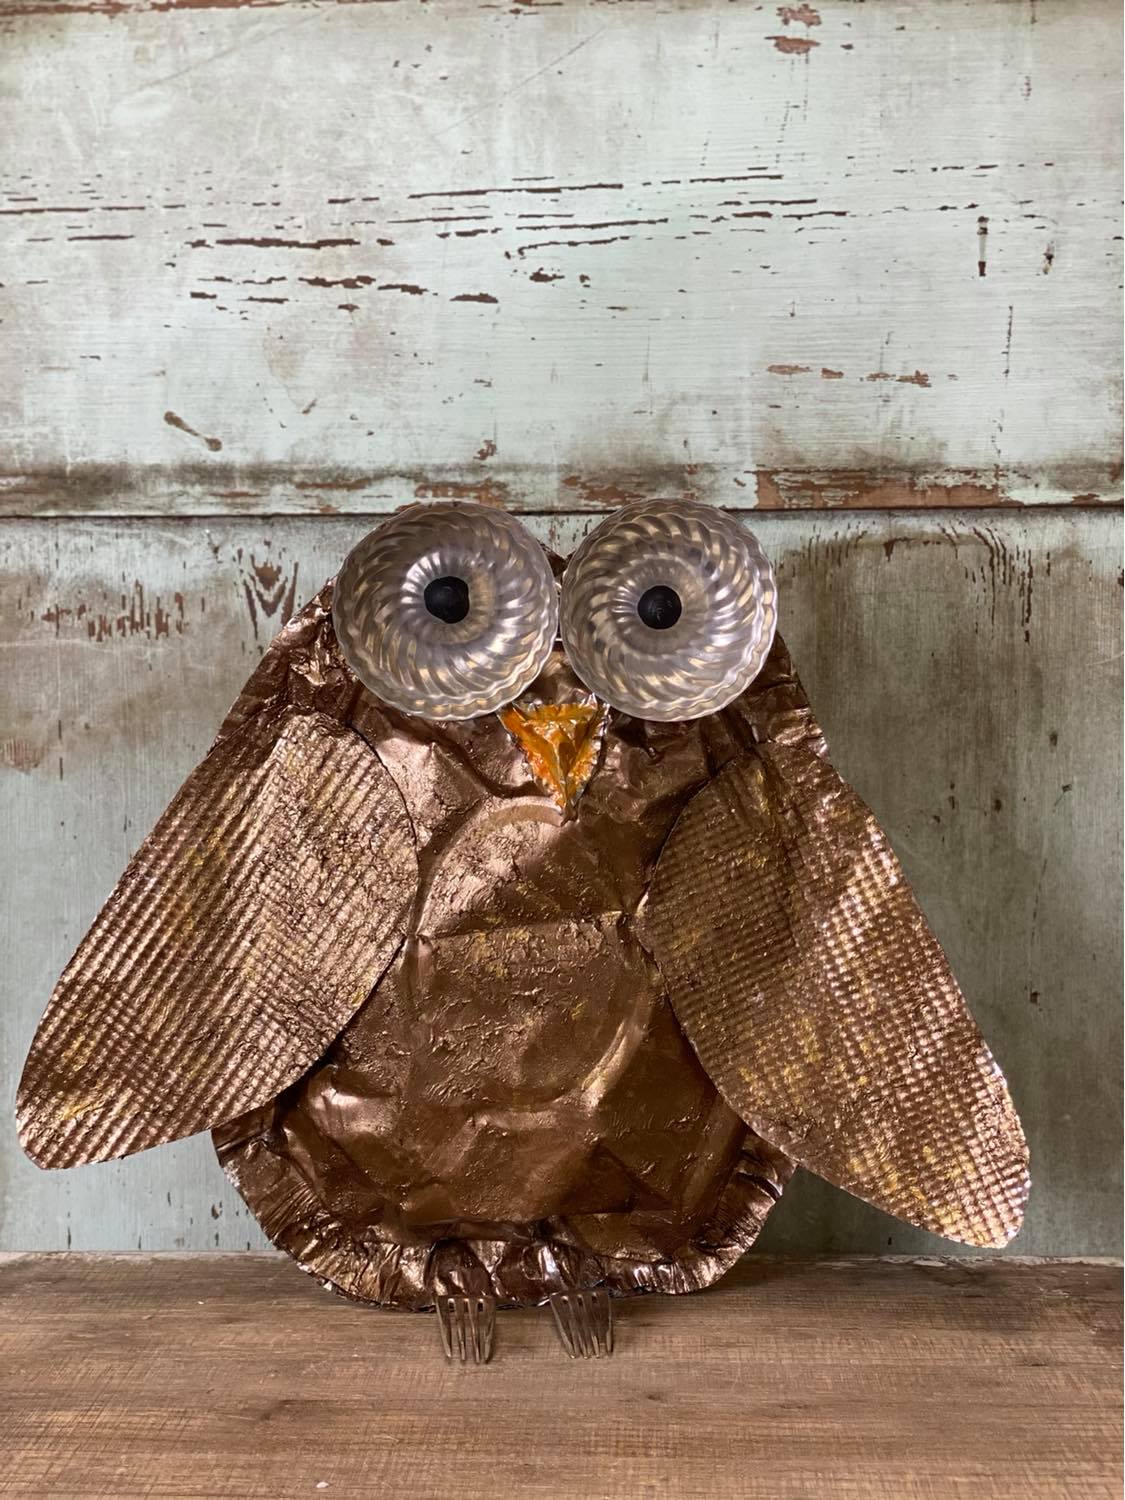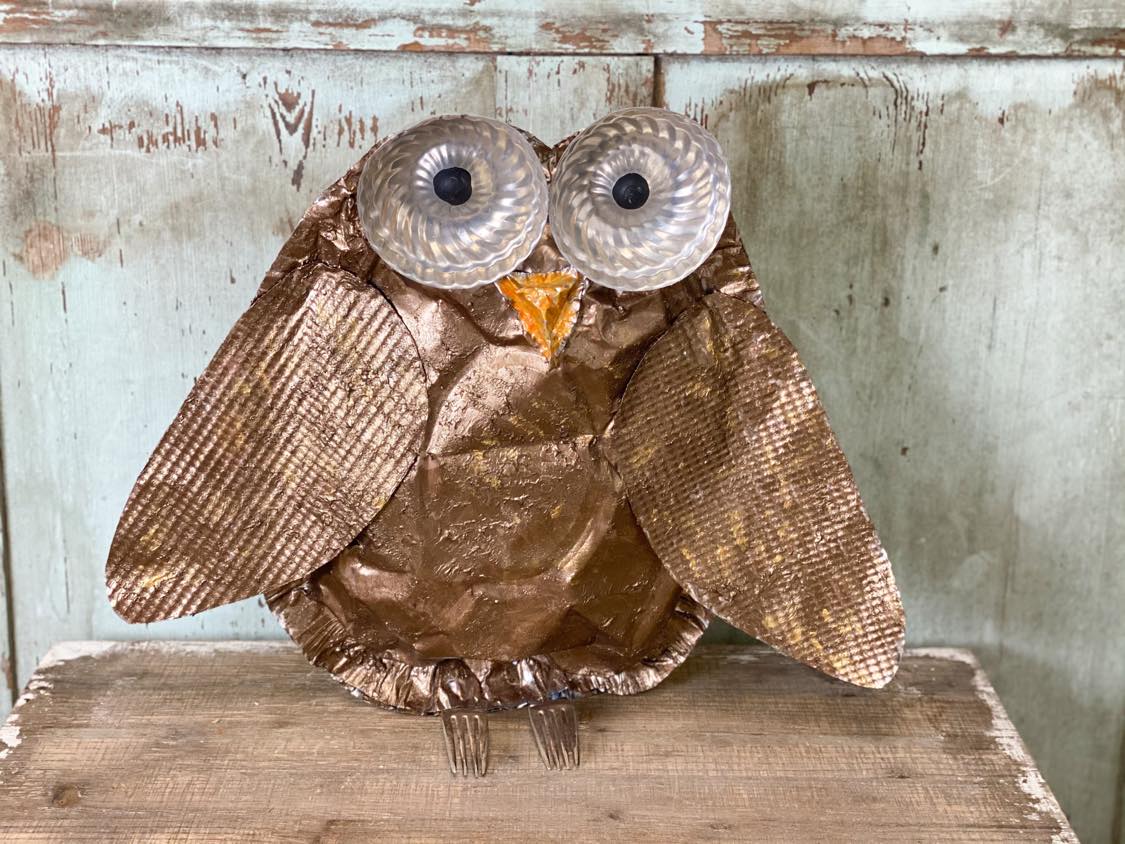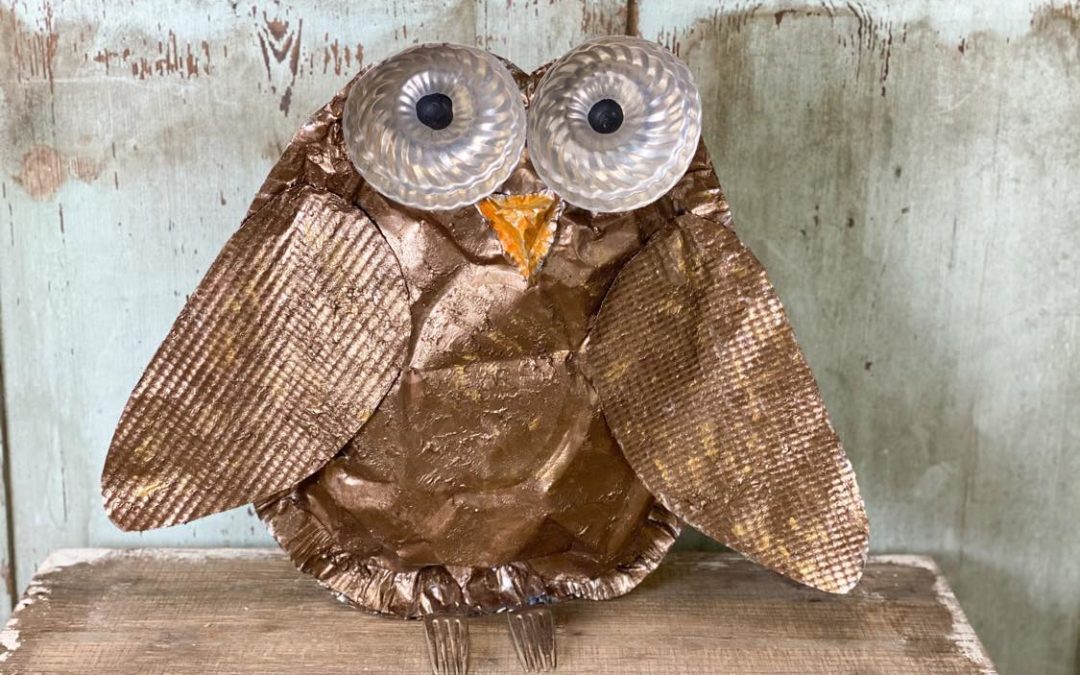
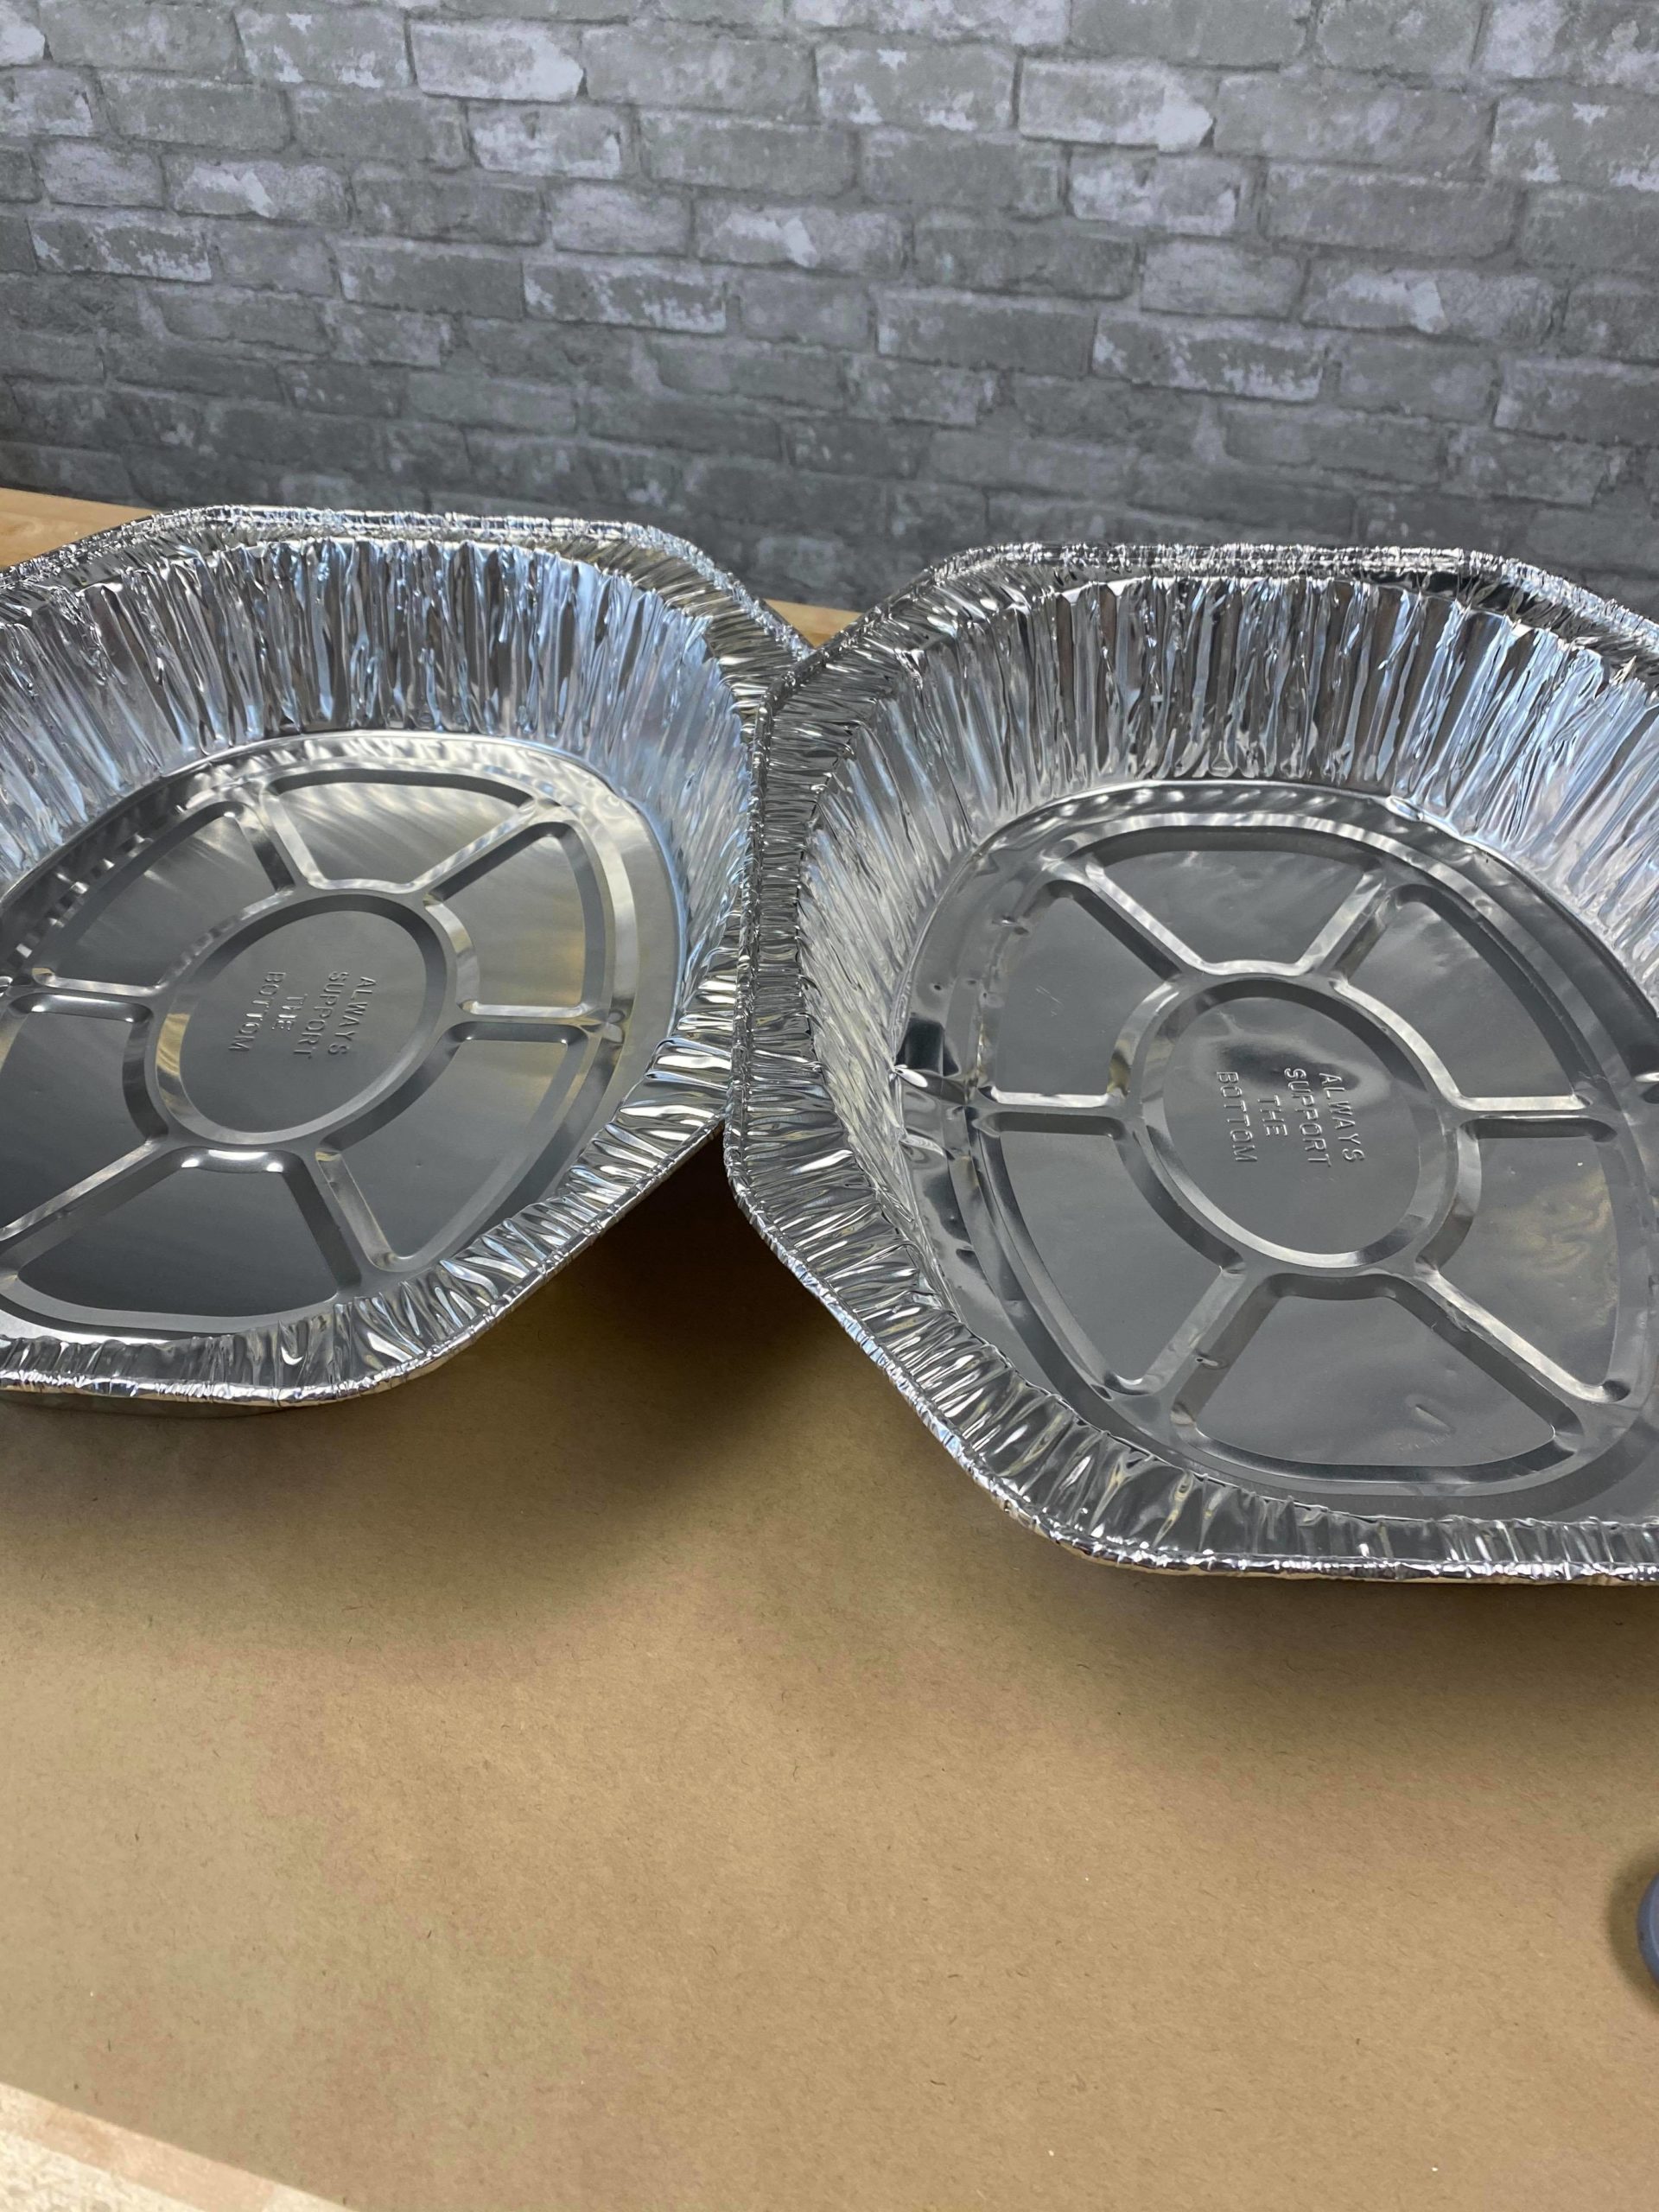
We are always creating fun and unique items here at The Shabby Tree and we use a lot of everyday items to create them. I found myself in the Dollar Tree again this week and the aluminum oval roasting pan caught my eye. I new as soon as I saw it that it would make the perfect body for an owl. This owl can be used in your home or even outside for a fun decoration.
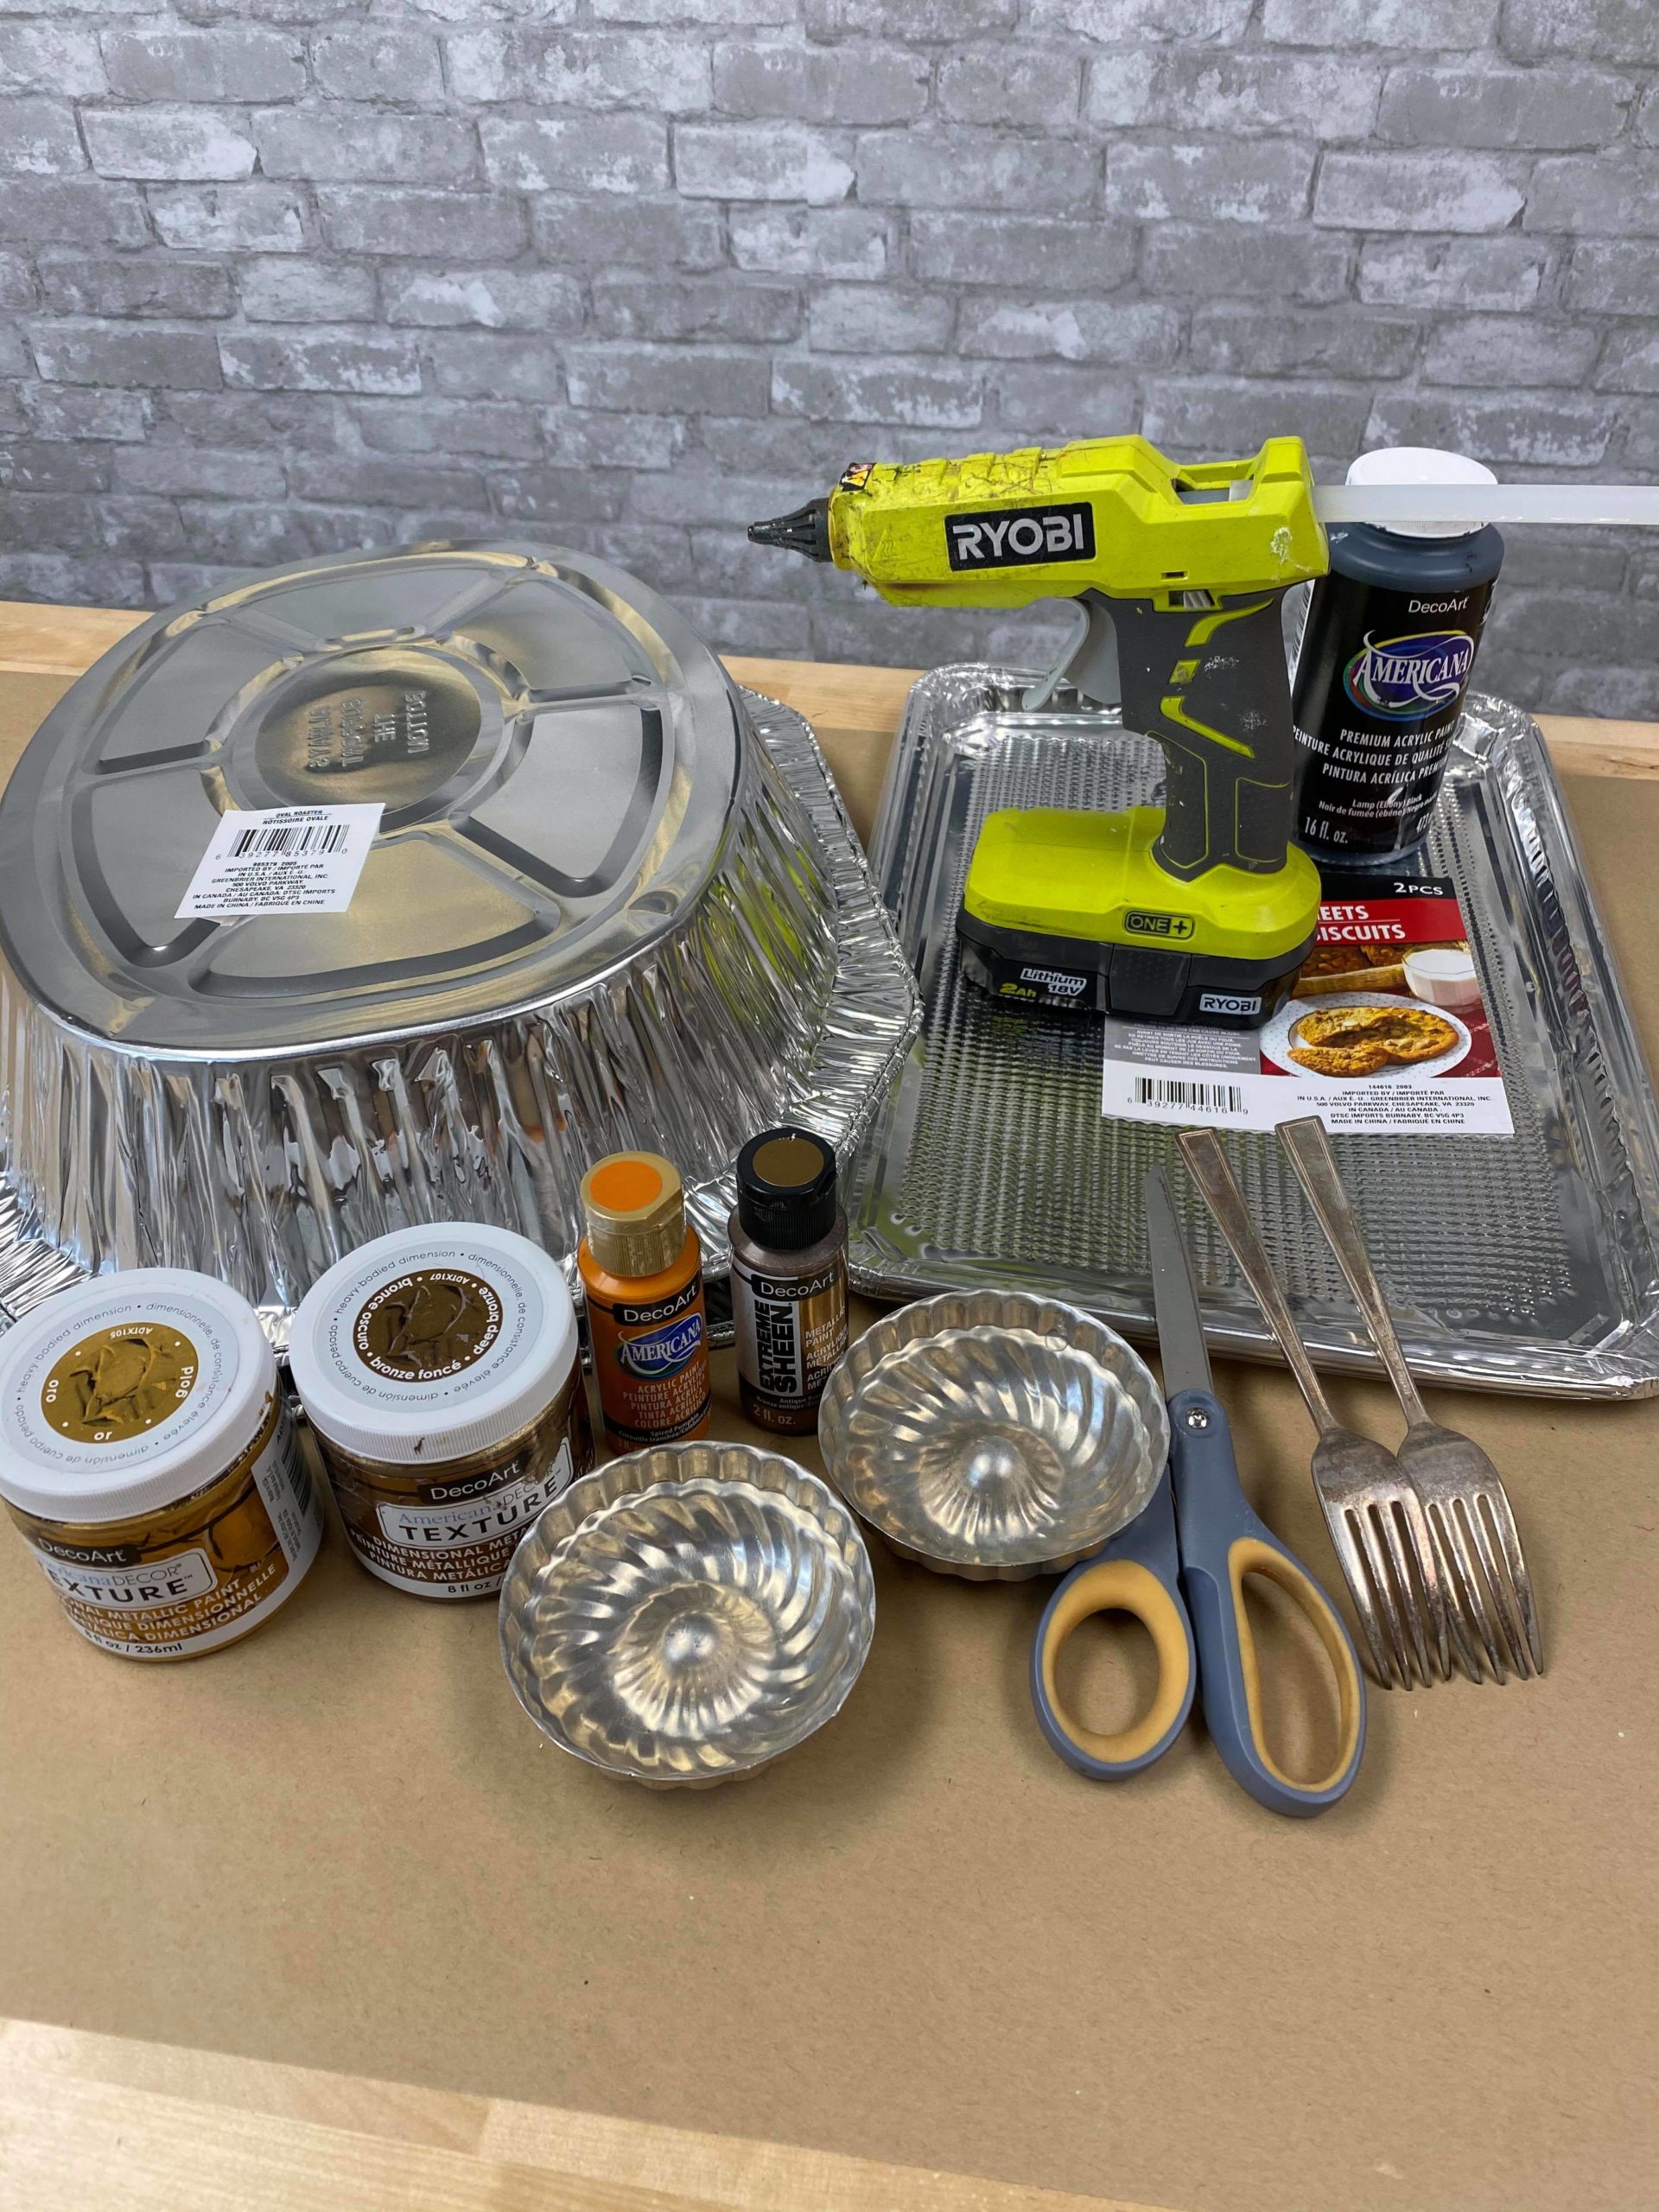
The supplies I will be using are:
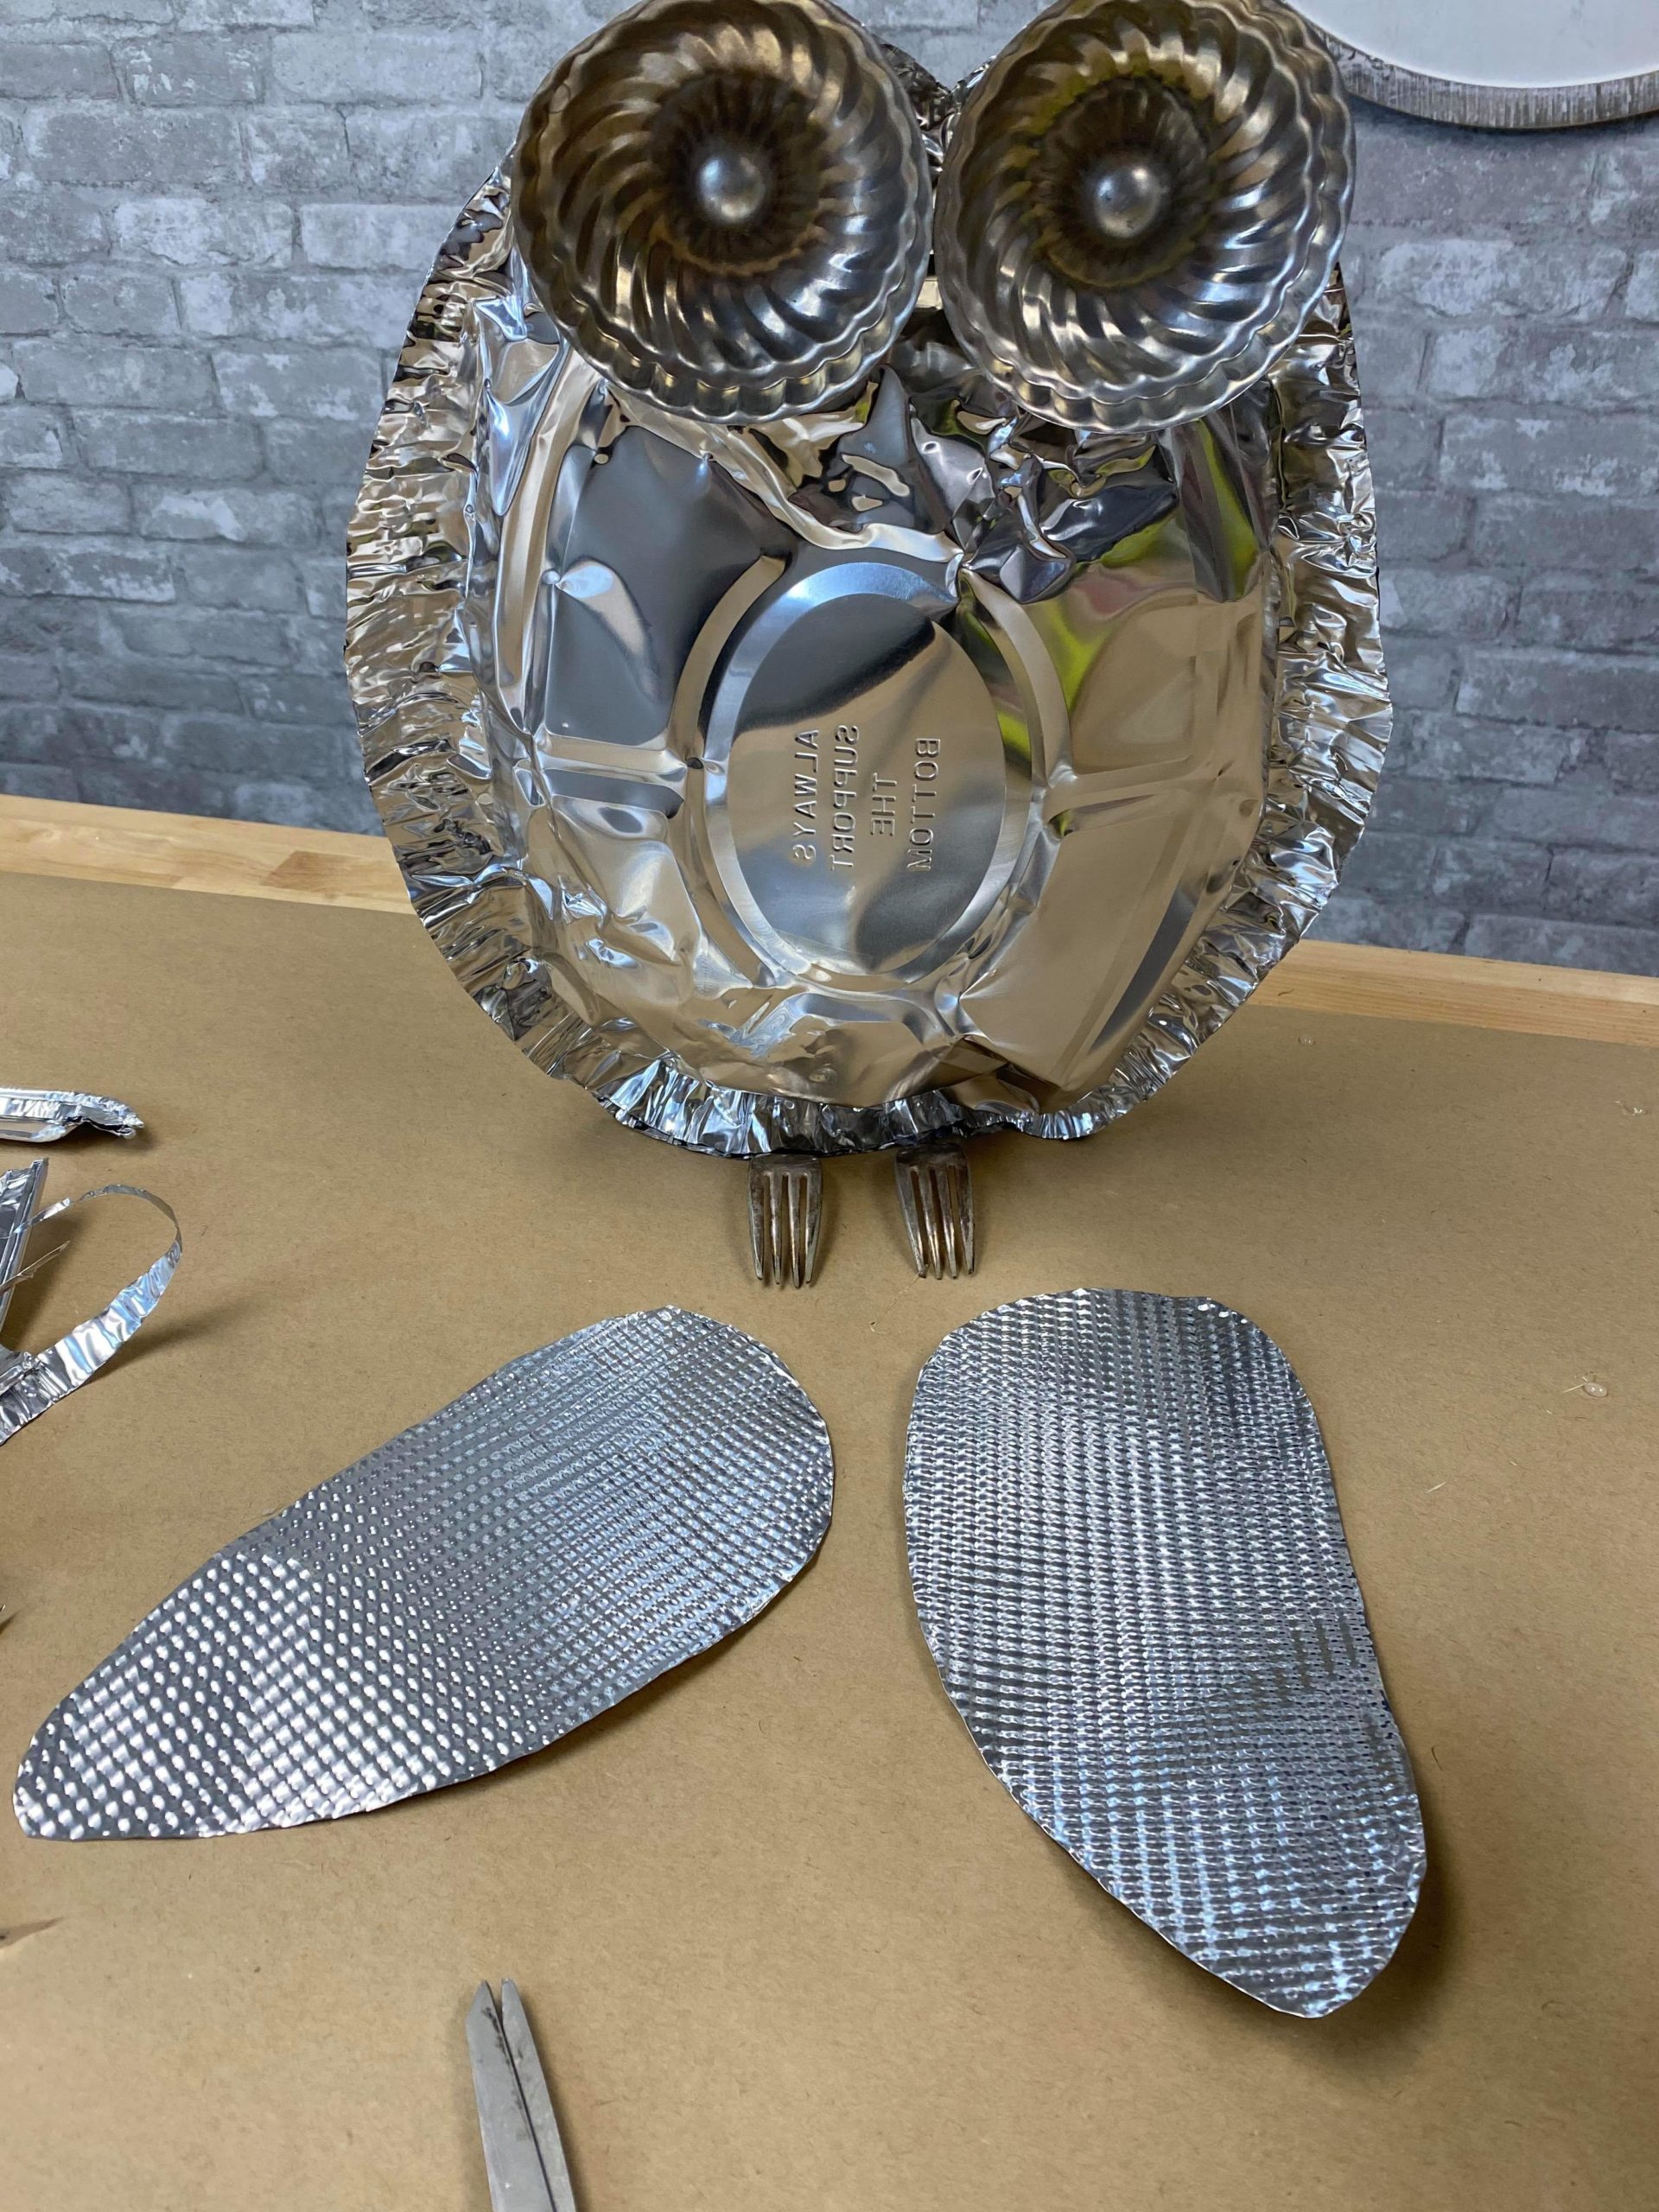
1. Two aluminum oval roasting pans from the Dollar Tree
2. One set of aluminum cookie sheets from the Dollar Tree
3. Hot glue gun
4. Scissors
5. Two forks
6. Antique bronze paint
7. Black and orange paint
8. DecoArt Texture (colors bronze and gold)
9. Two tart tins
10. Paint brush
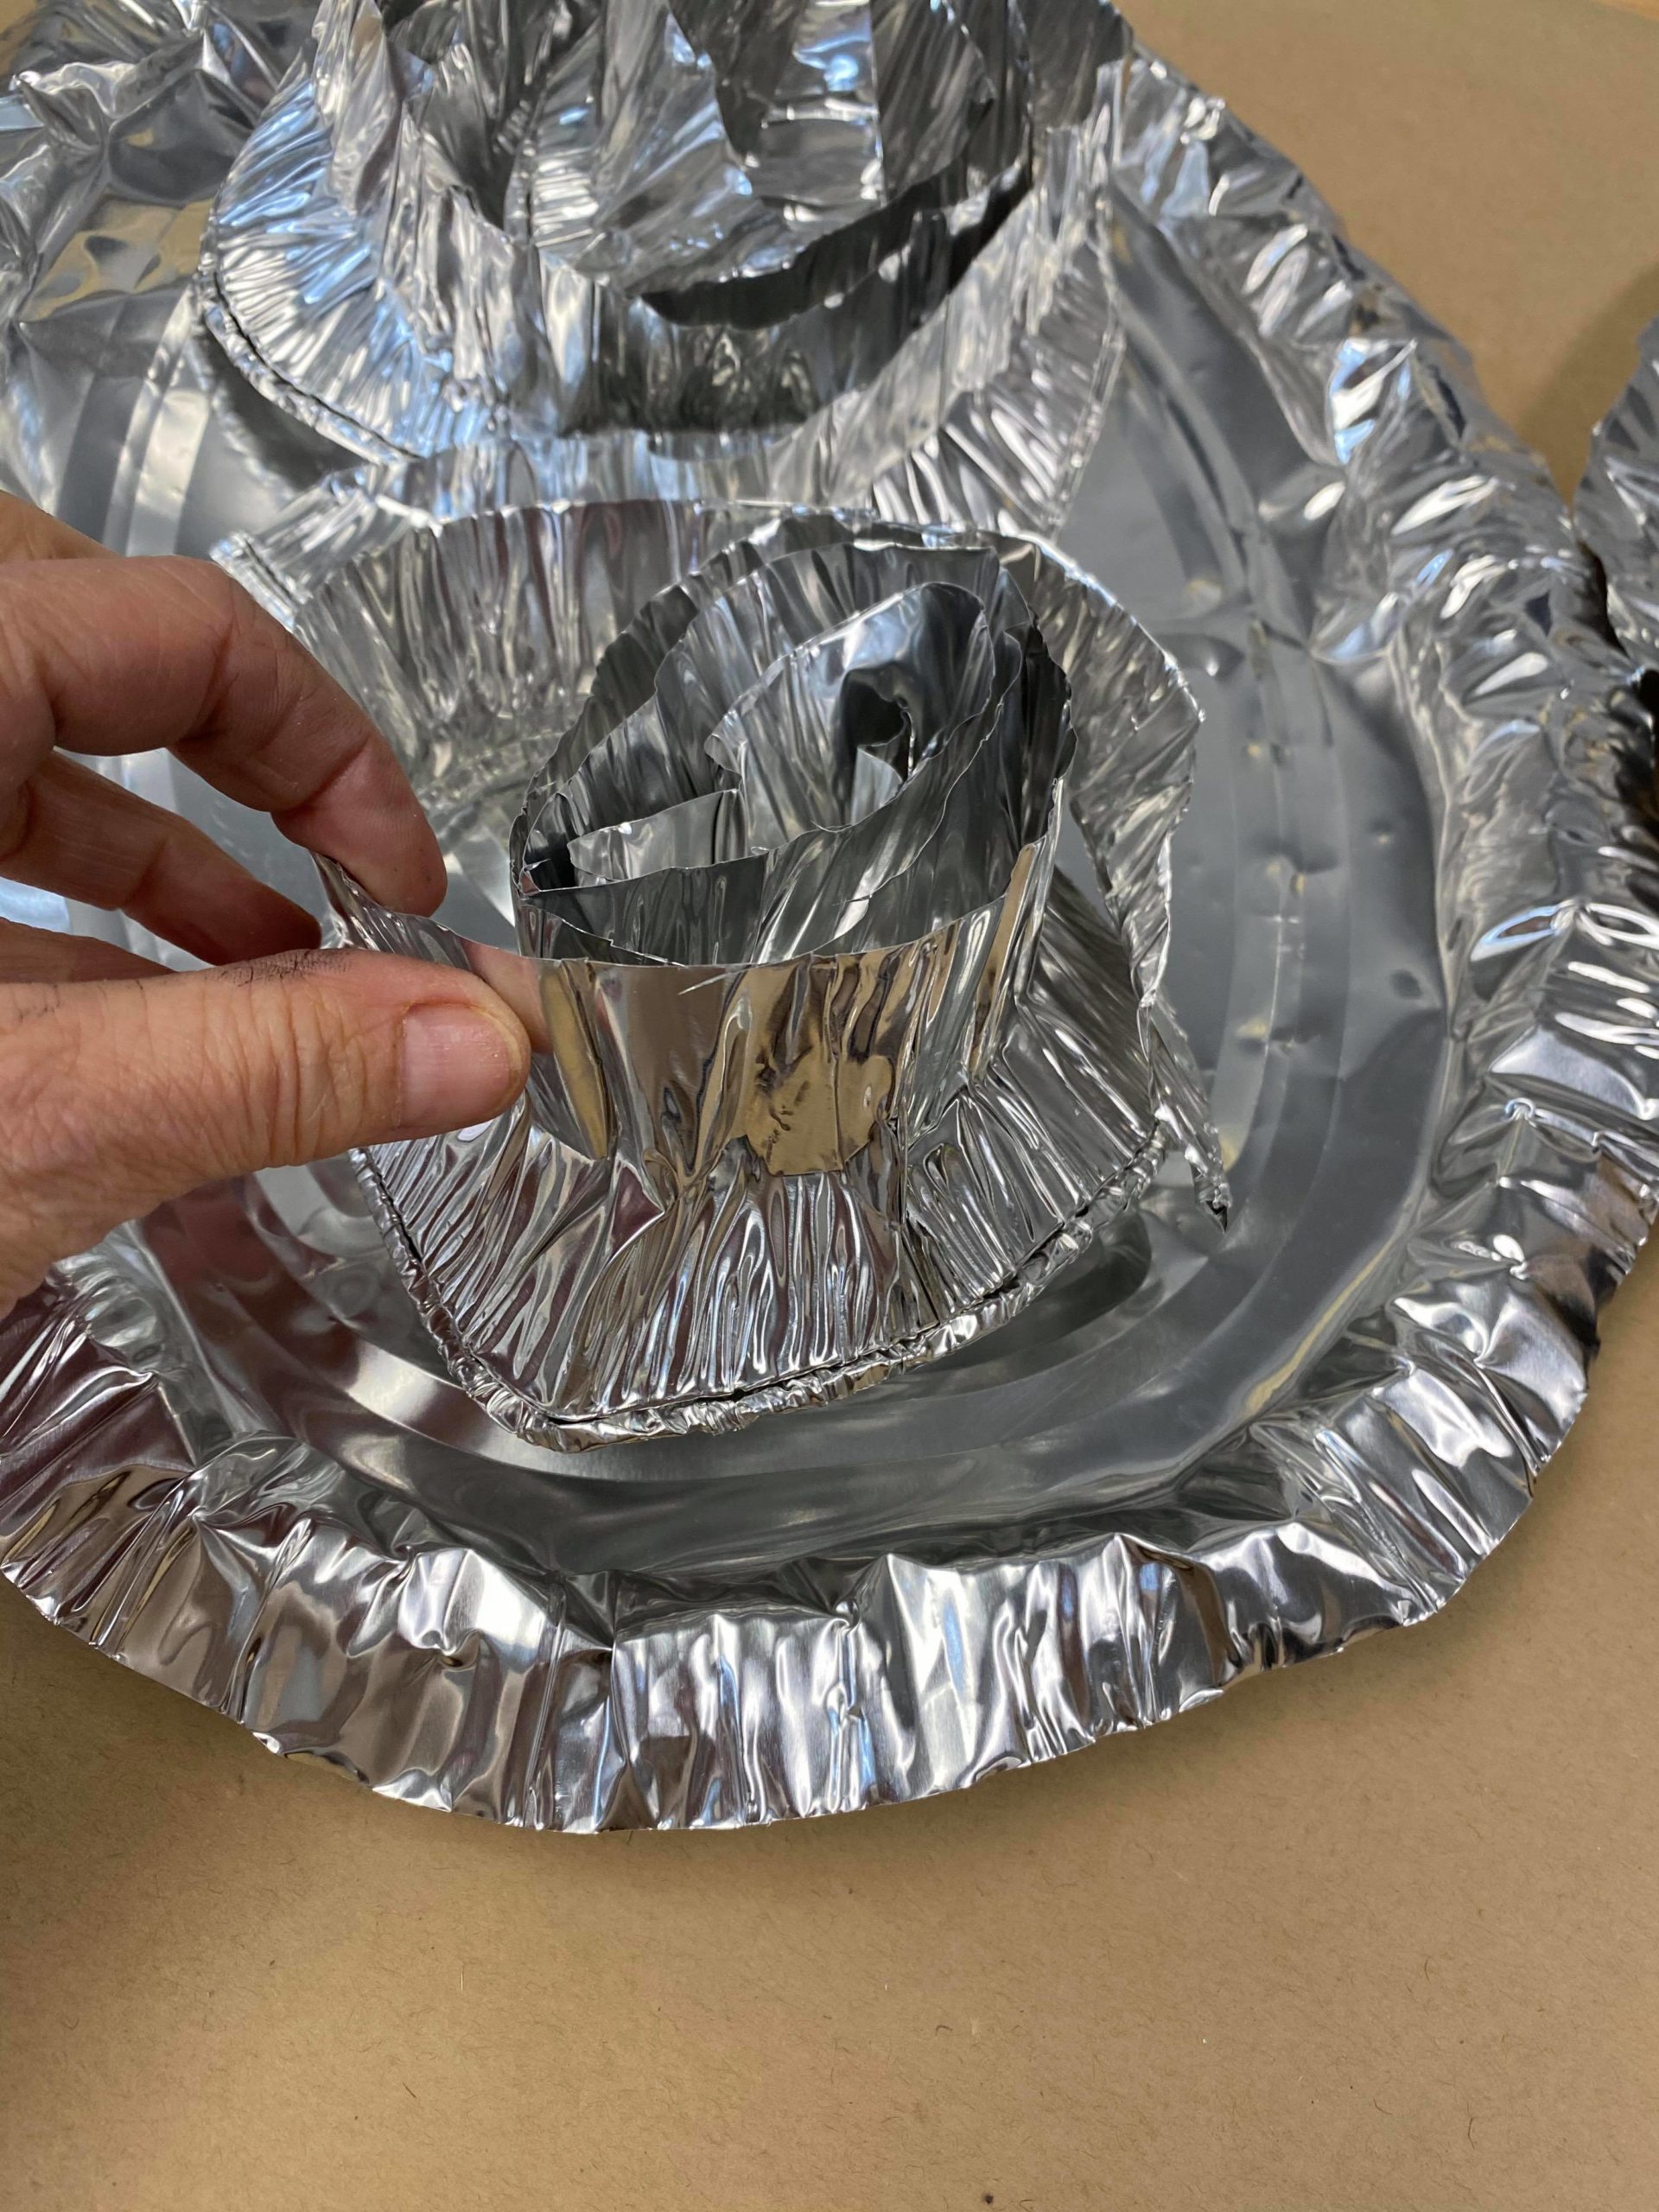
The first step will be to cut some of the outer edge of the roasting pan off.
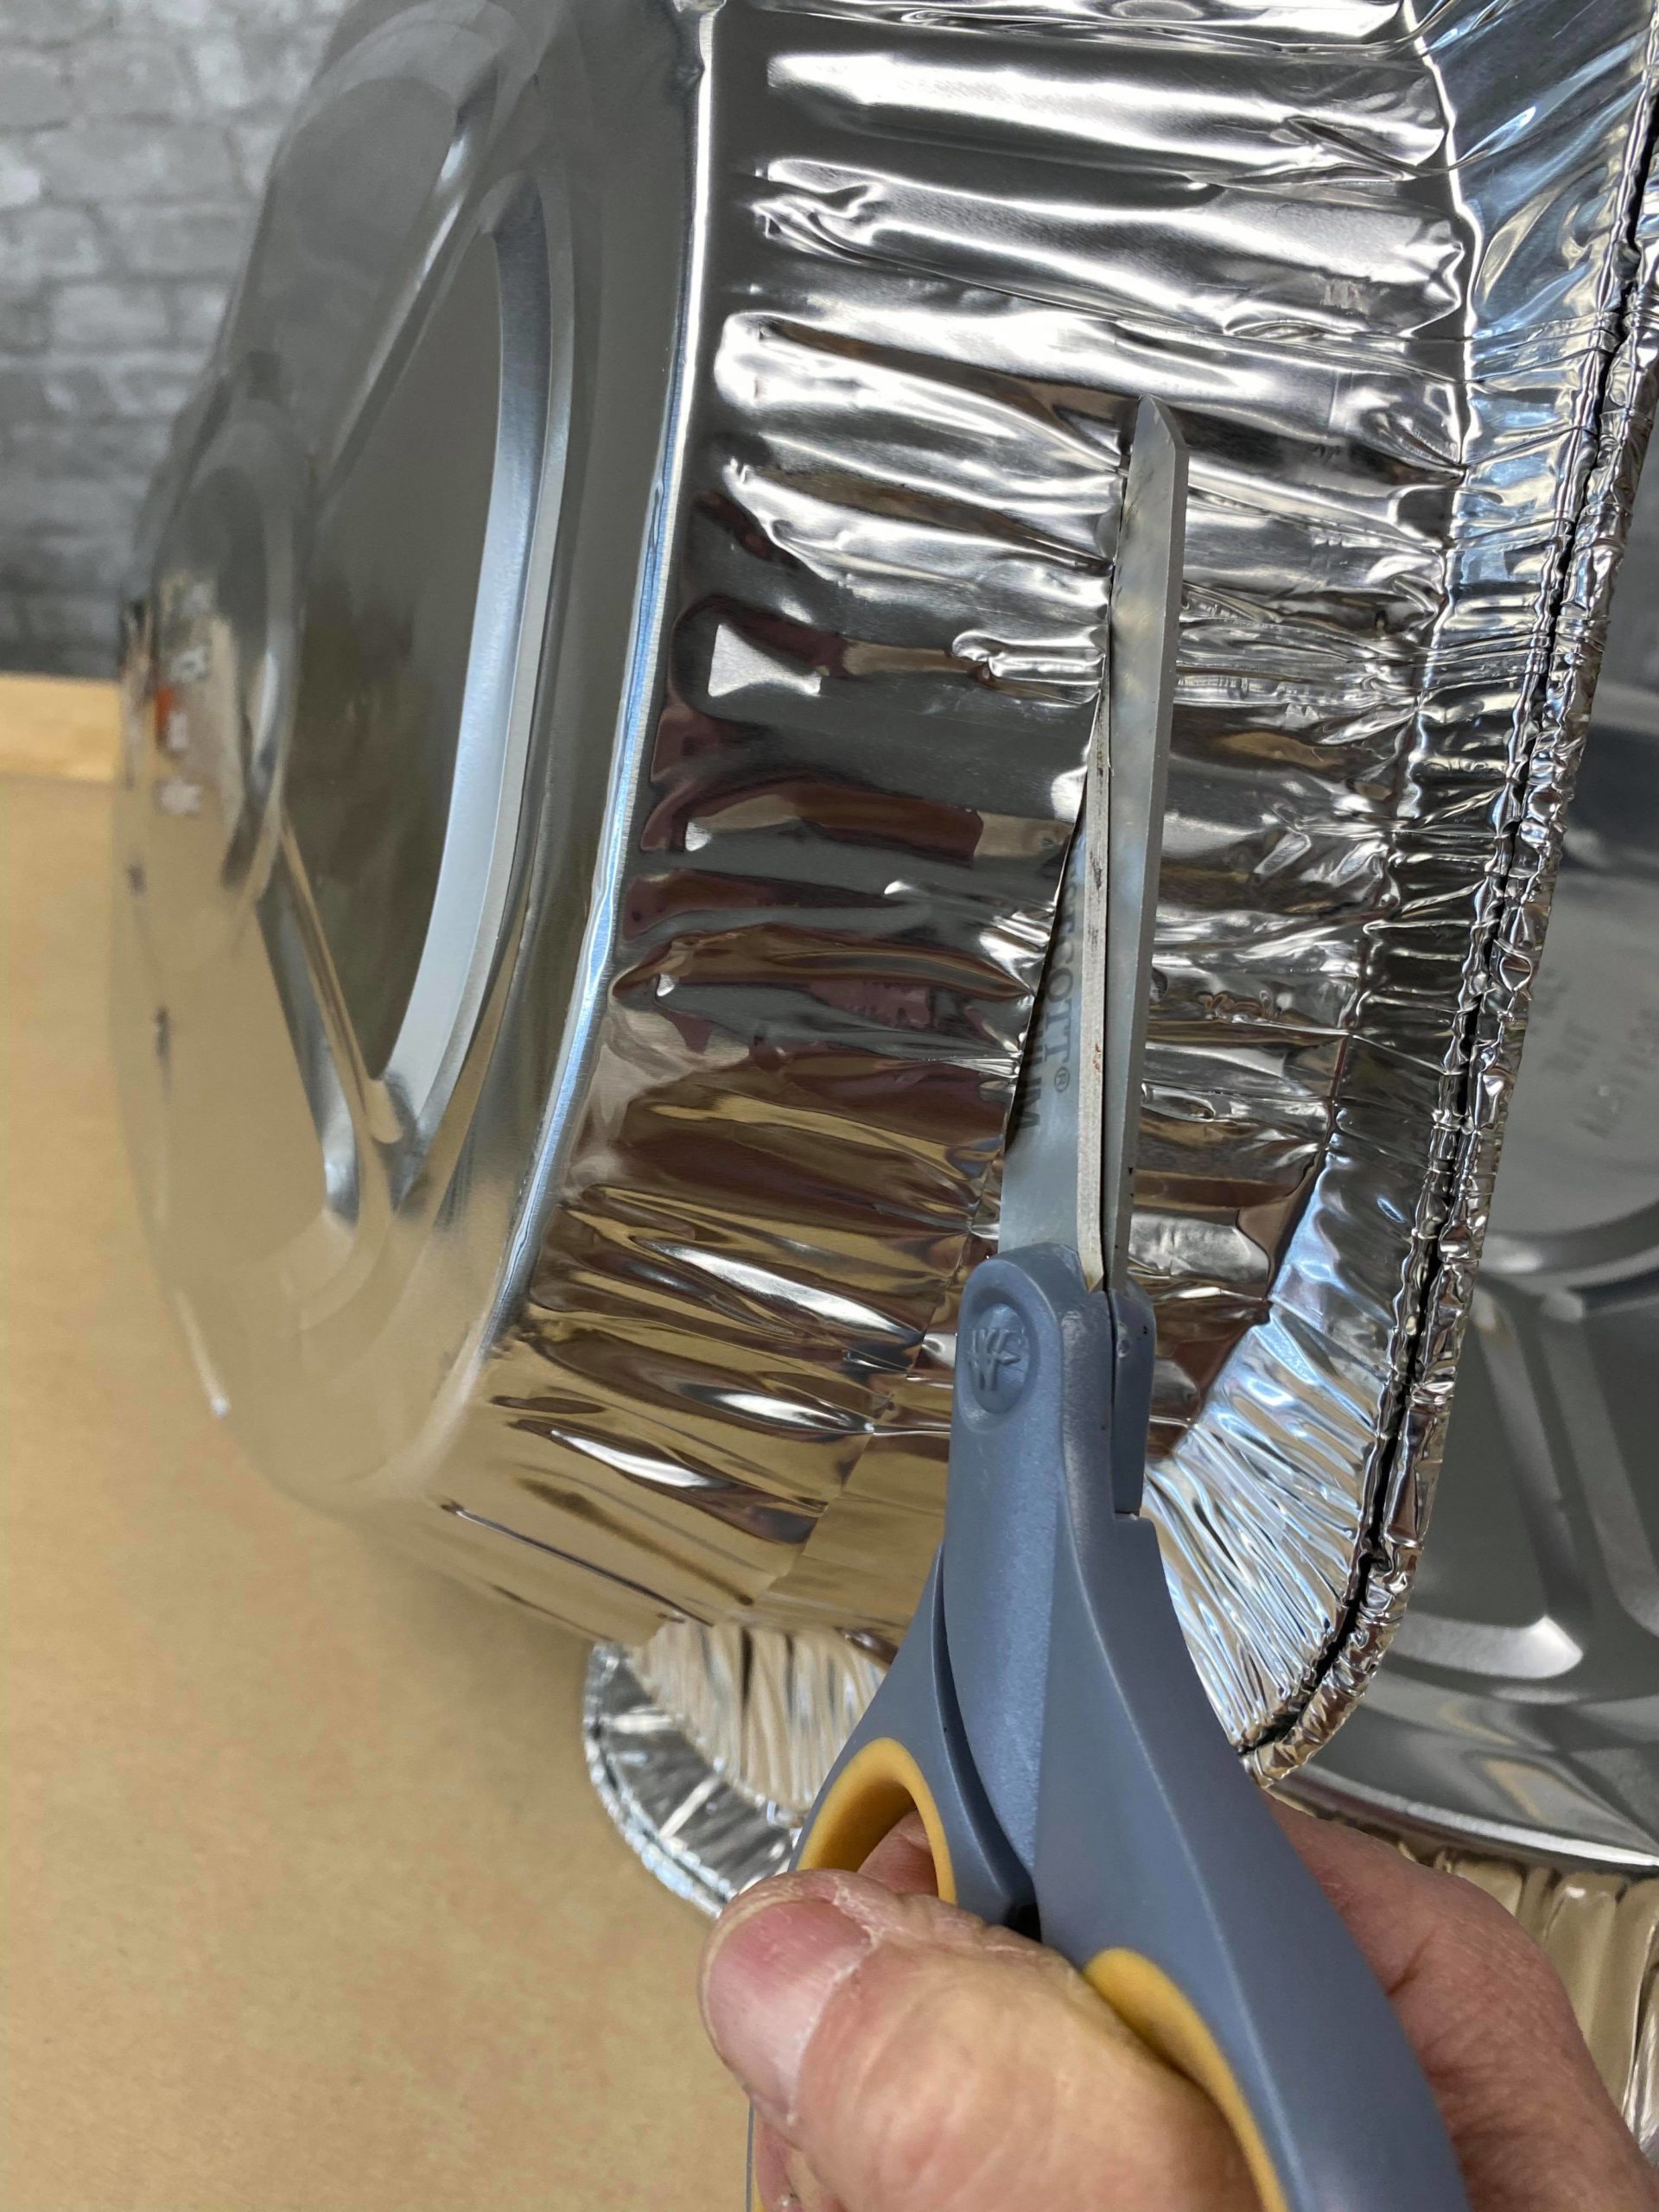
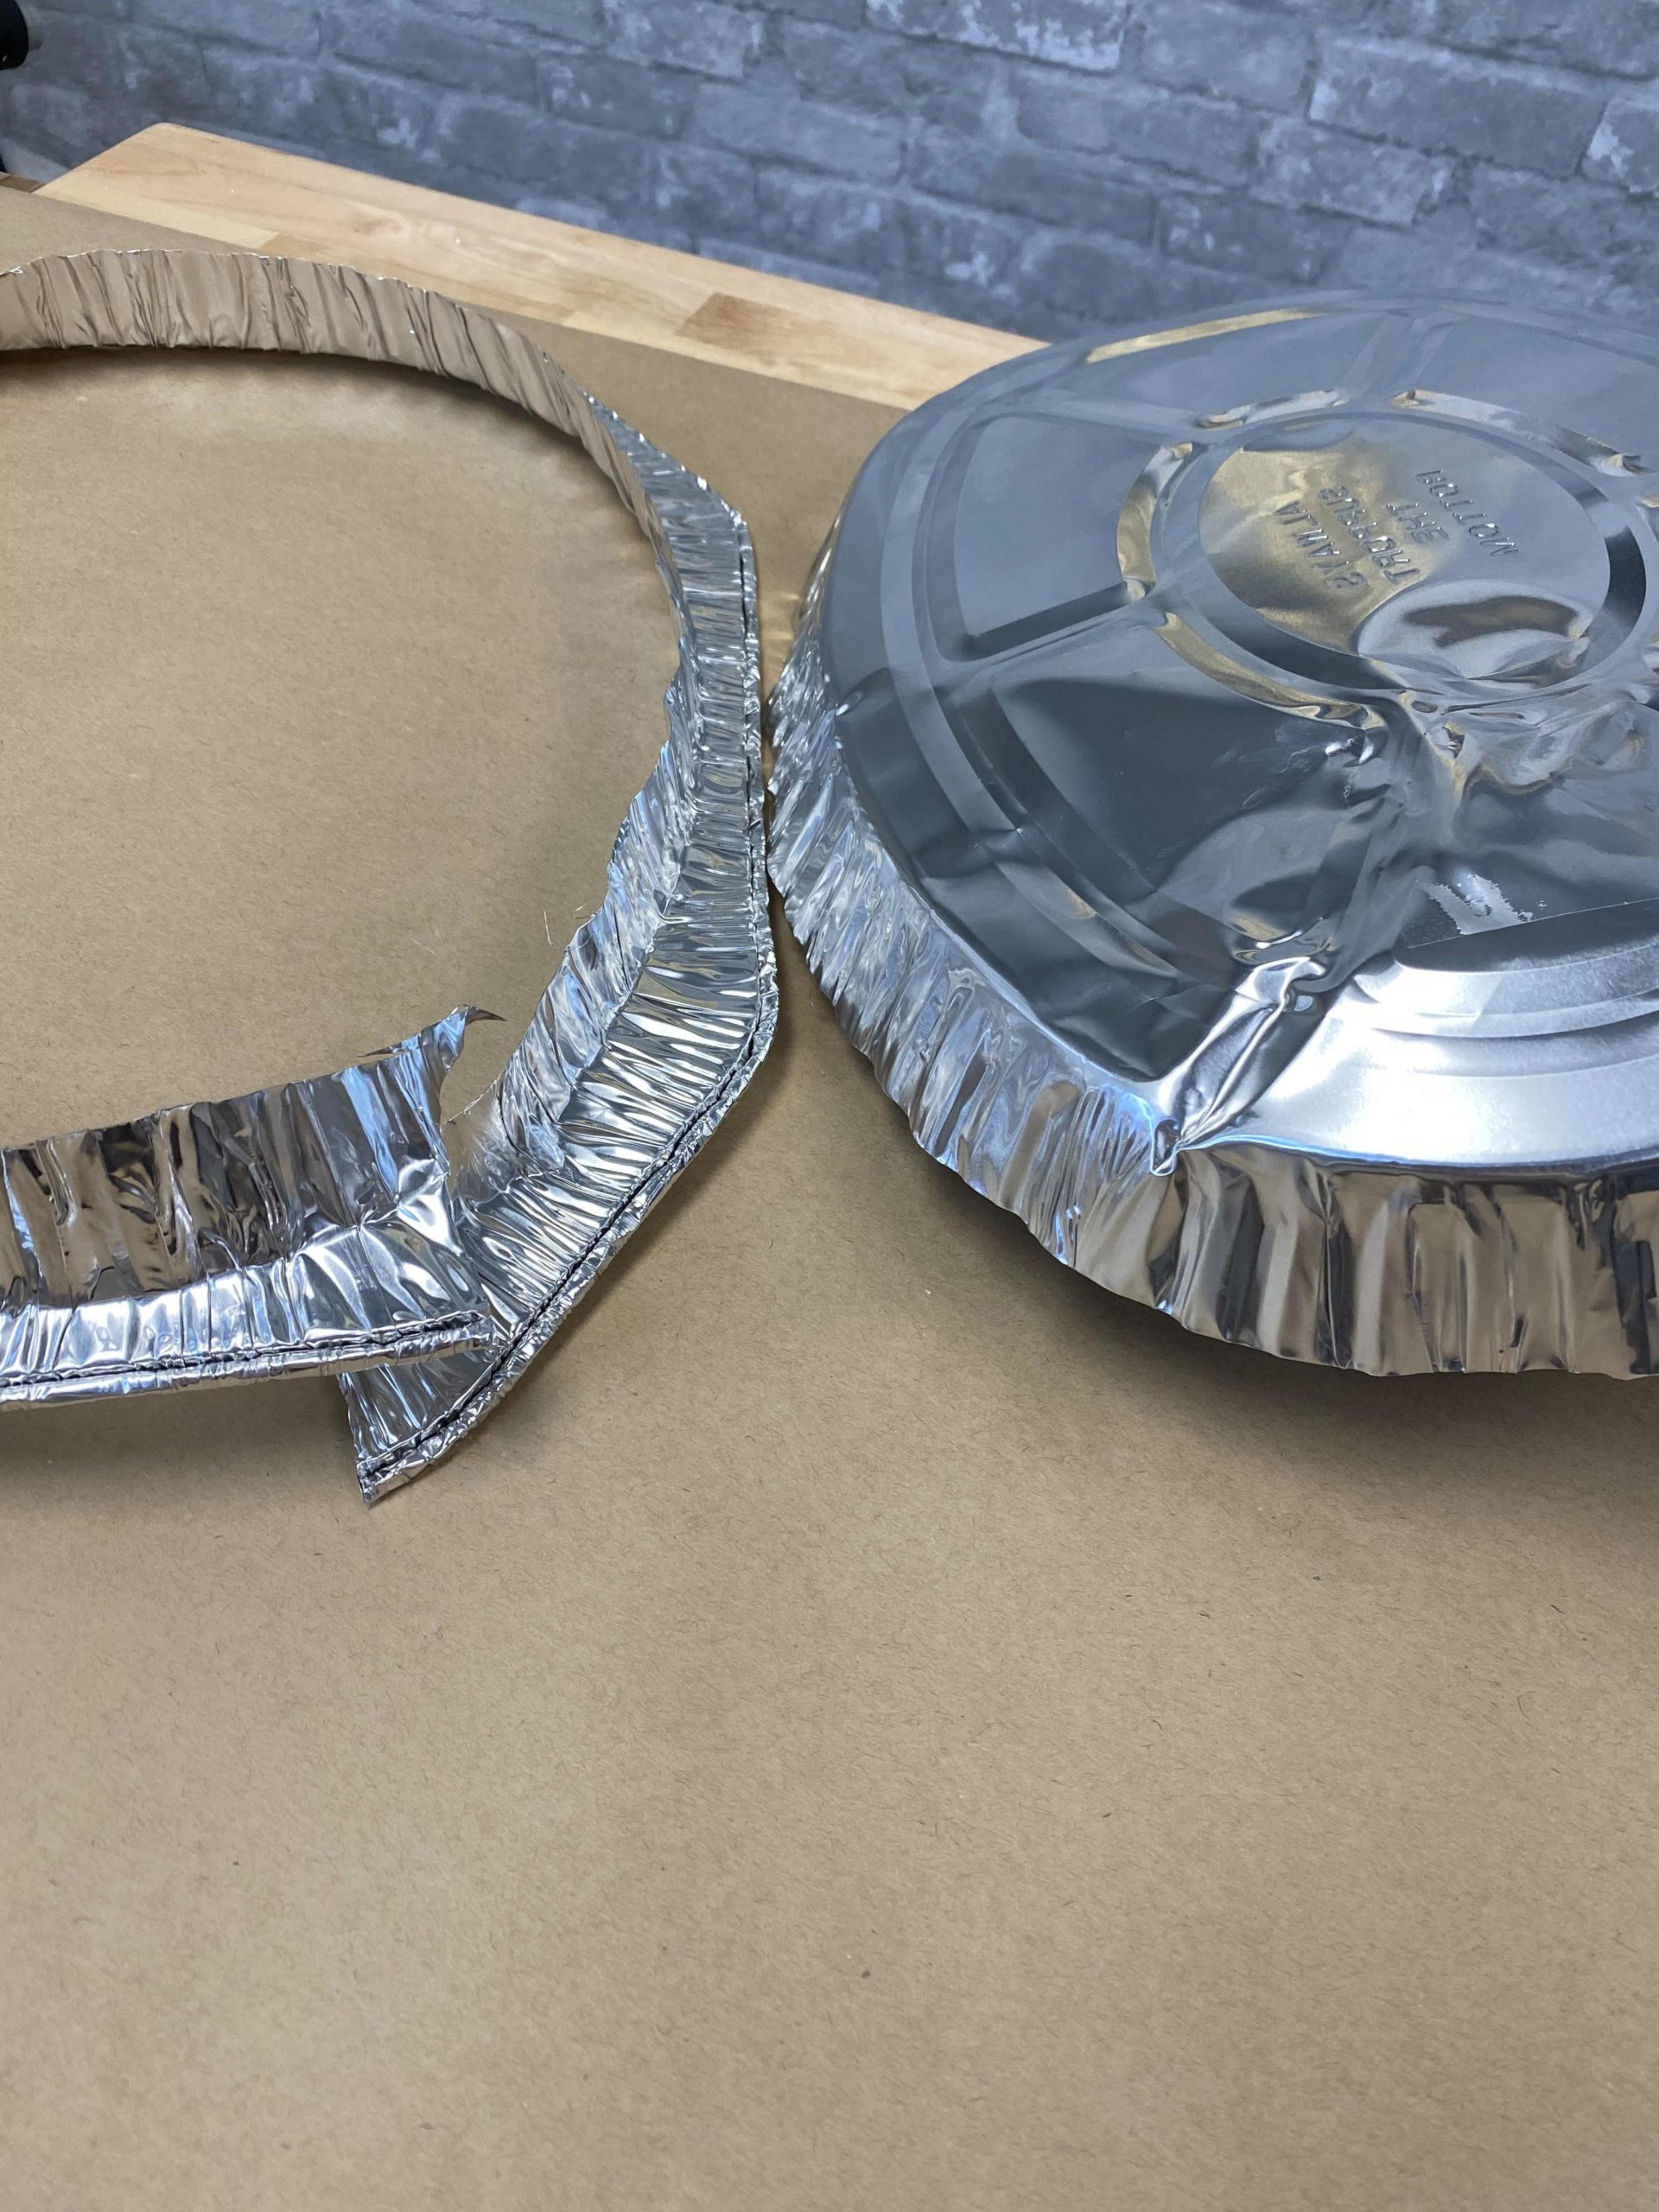
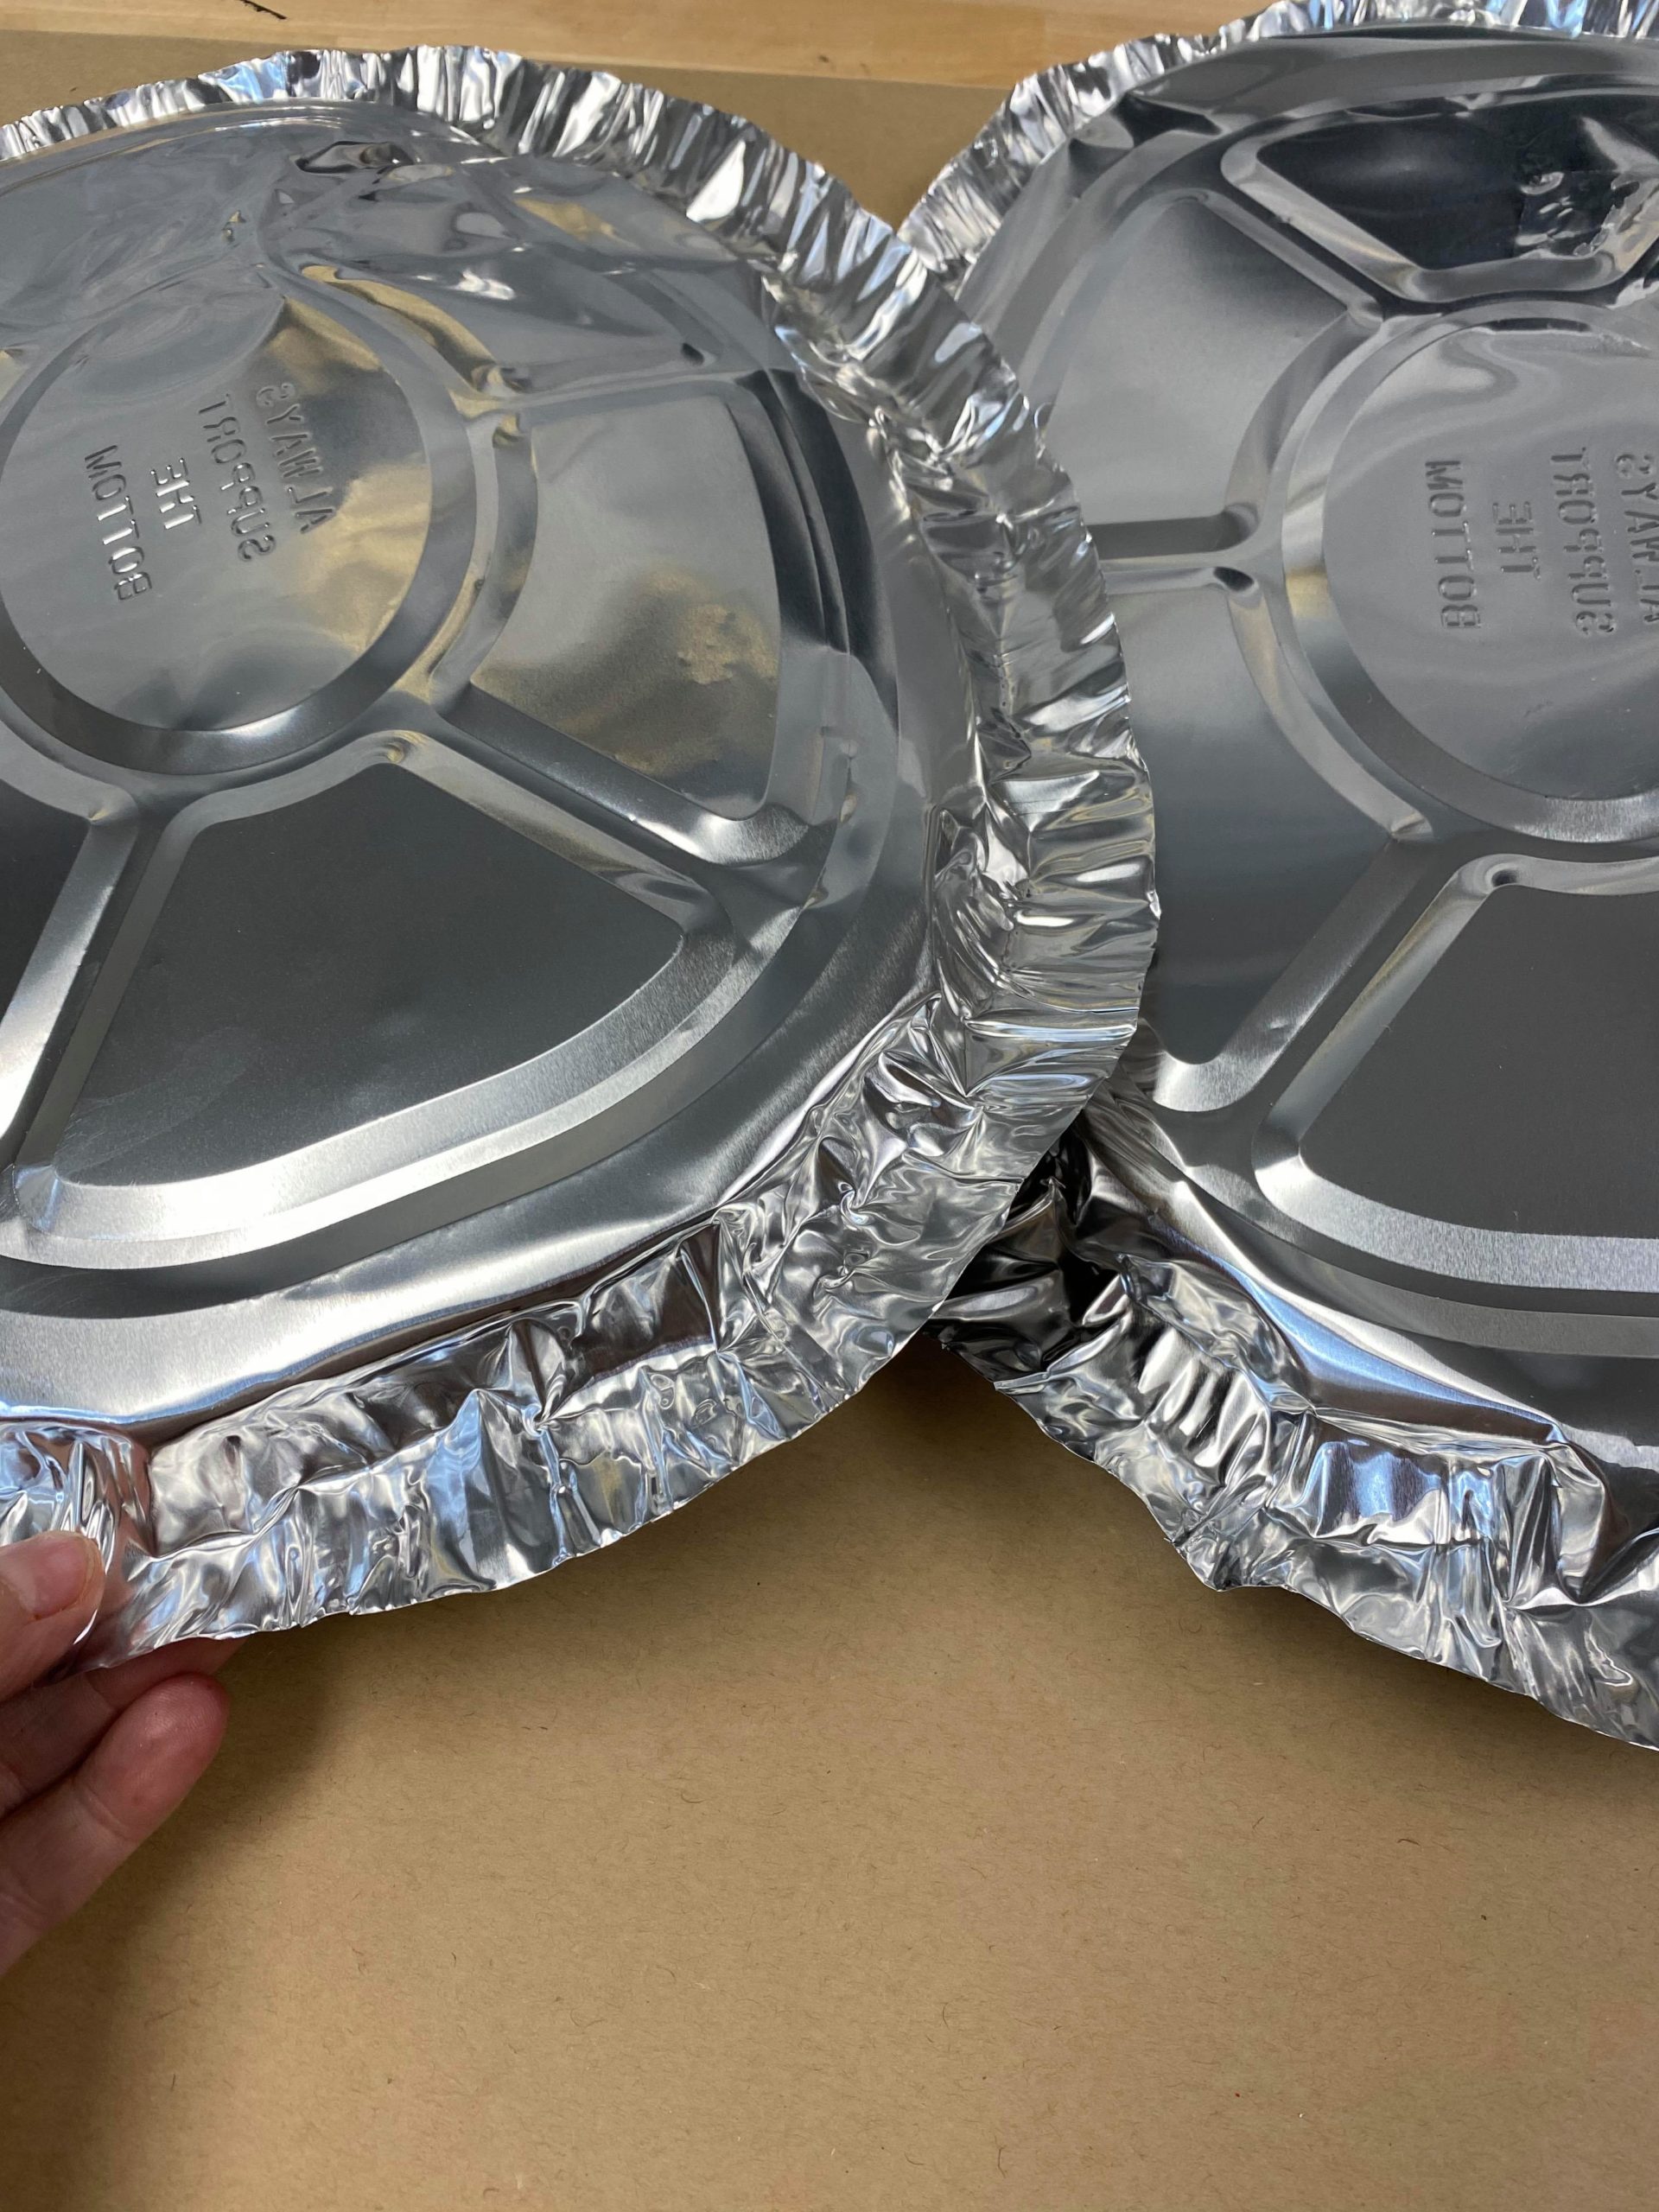
You will want to do this to both pans. You will now want to fold the outer rim of the pans outward. You need to form a rim on each pan so that you can glue them together.
I rolled the pieces that I cut off of the pans and placed them in between the pans before glueing them together. This will act as a filler for your owl.
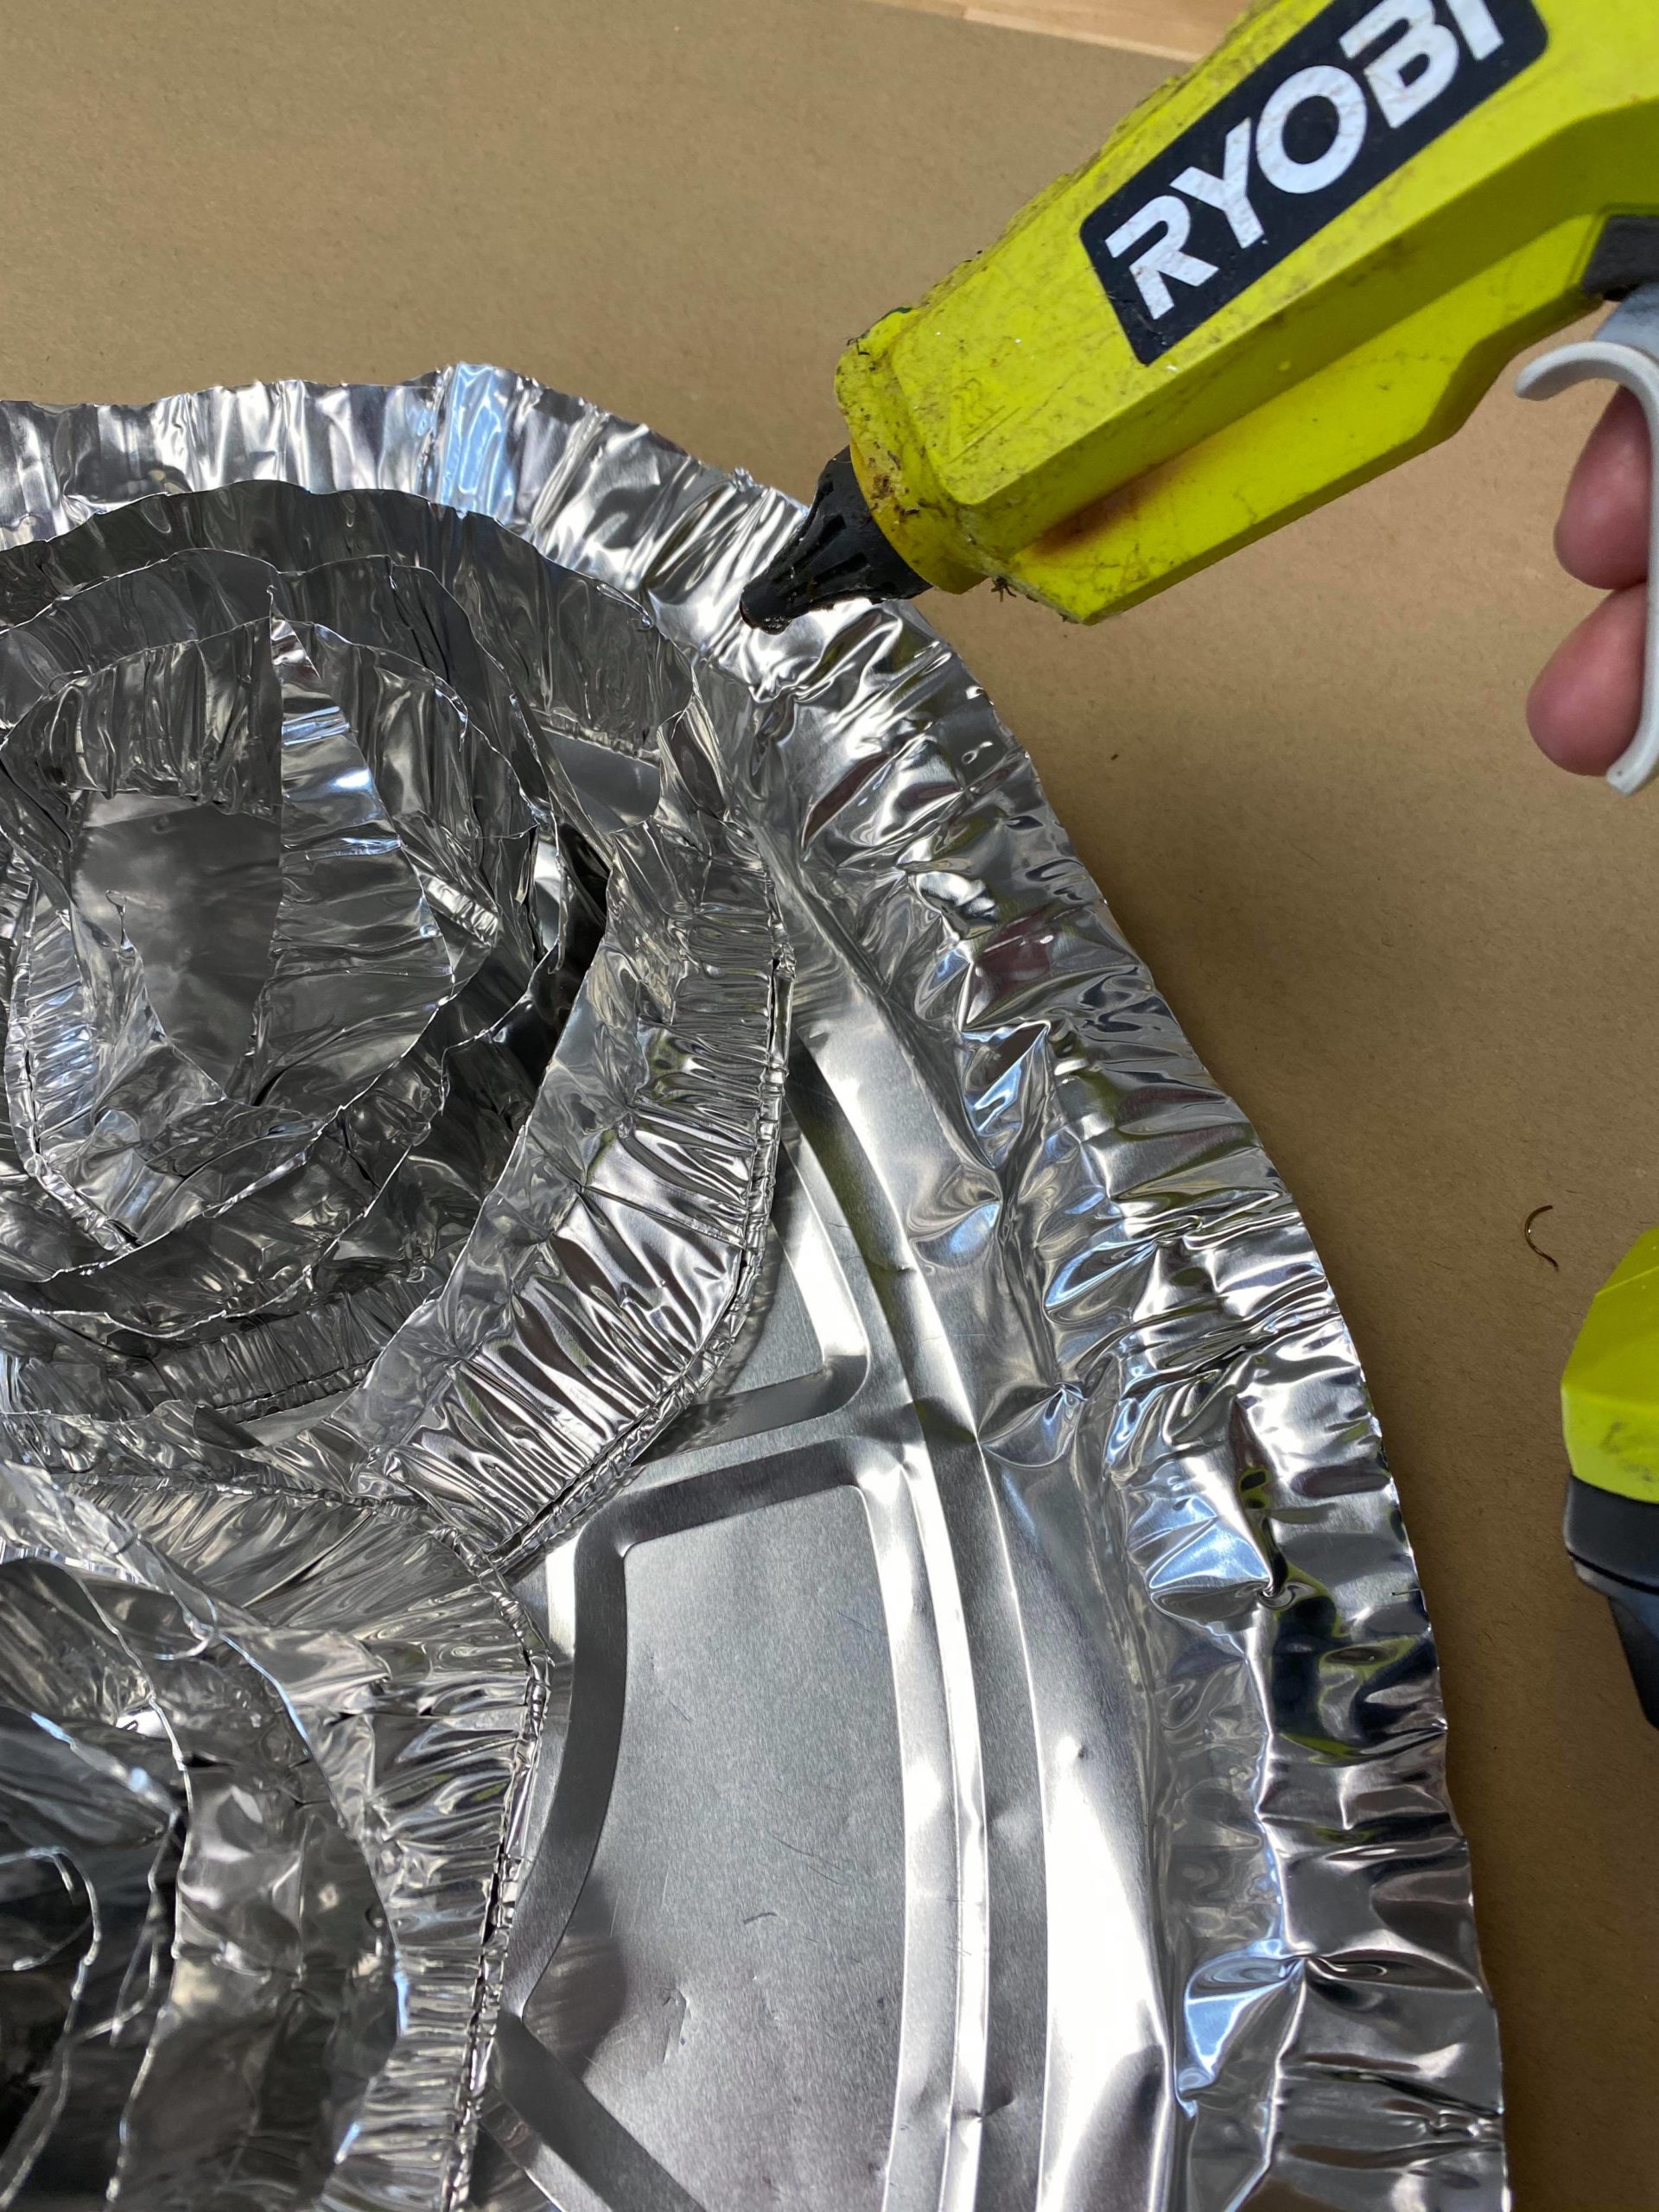
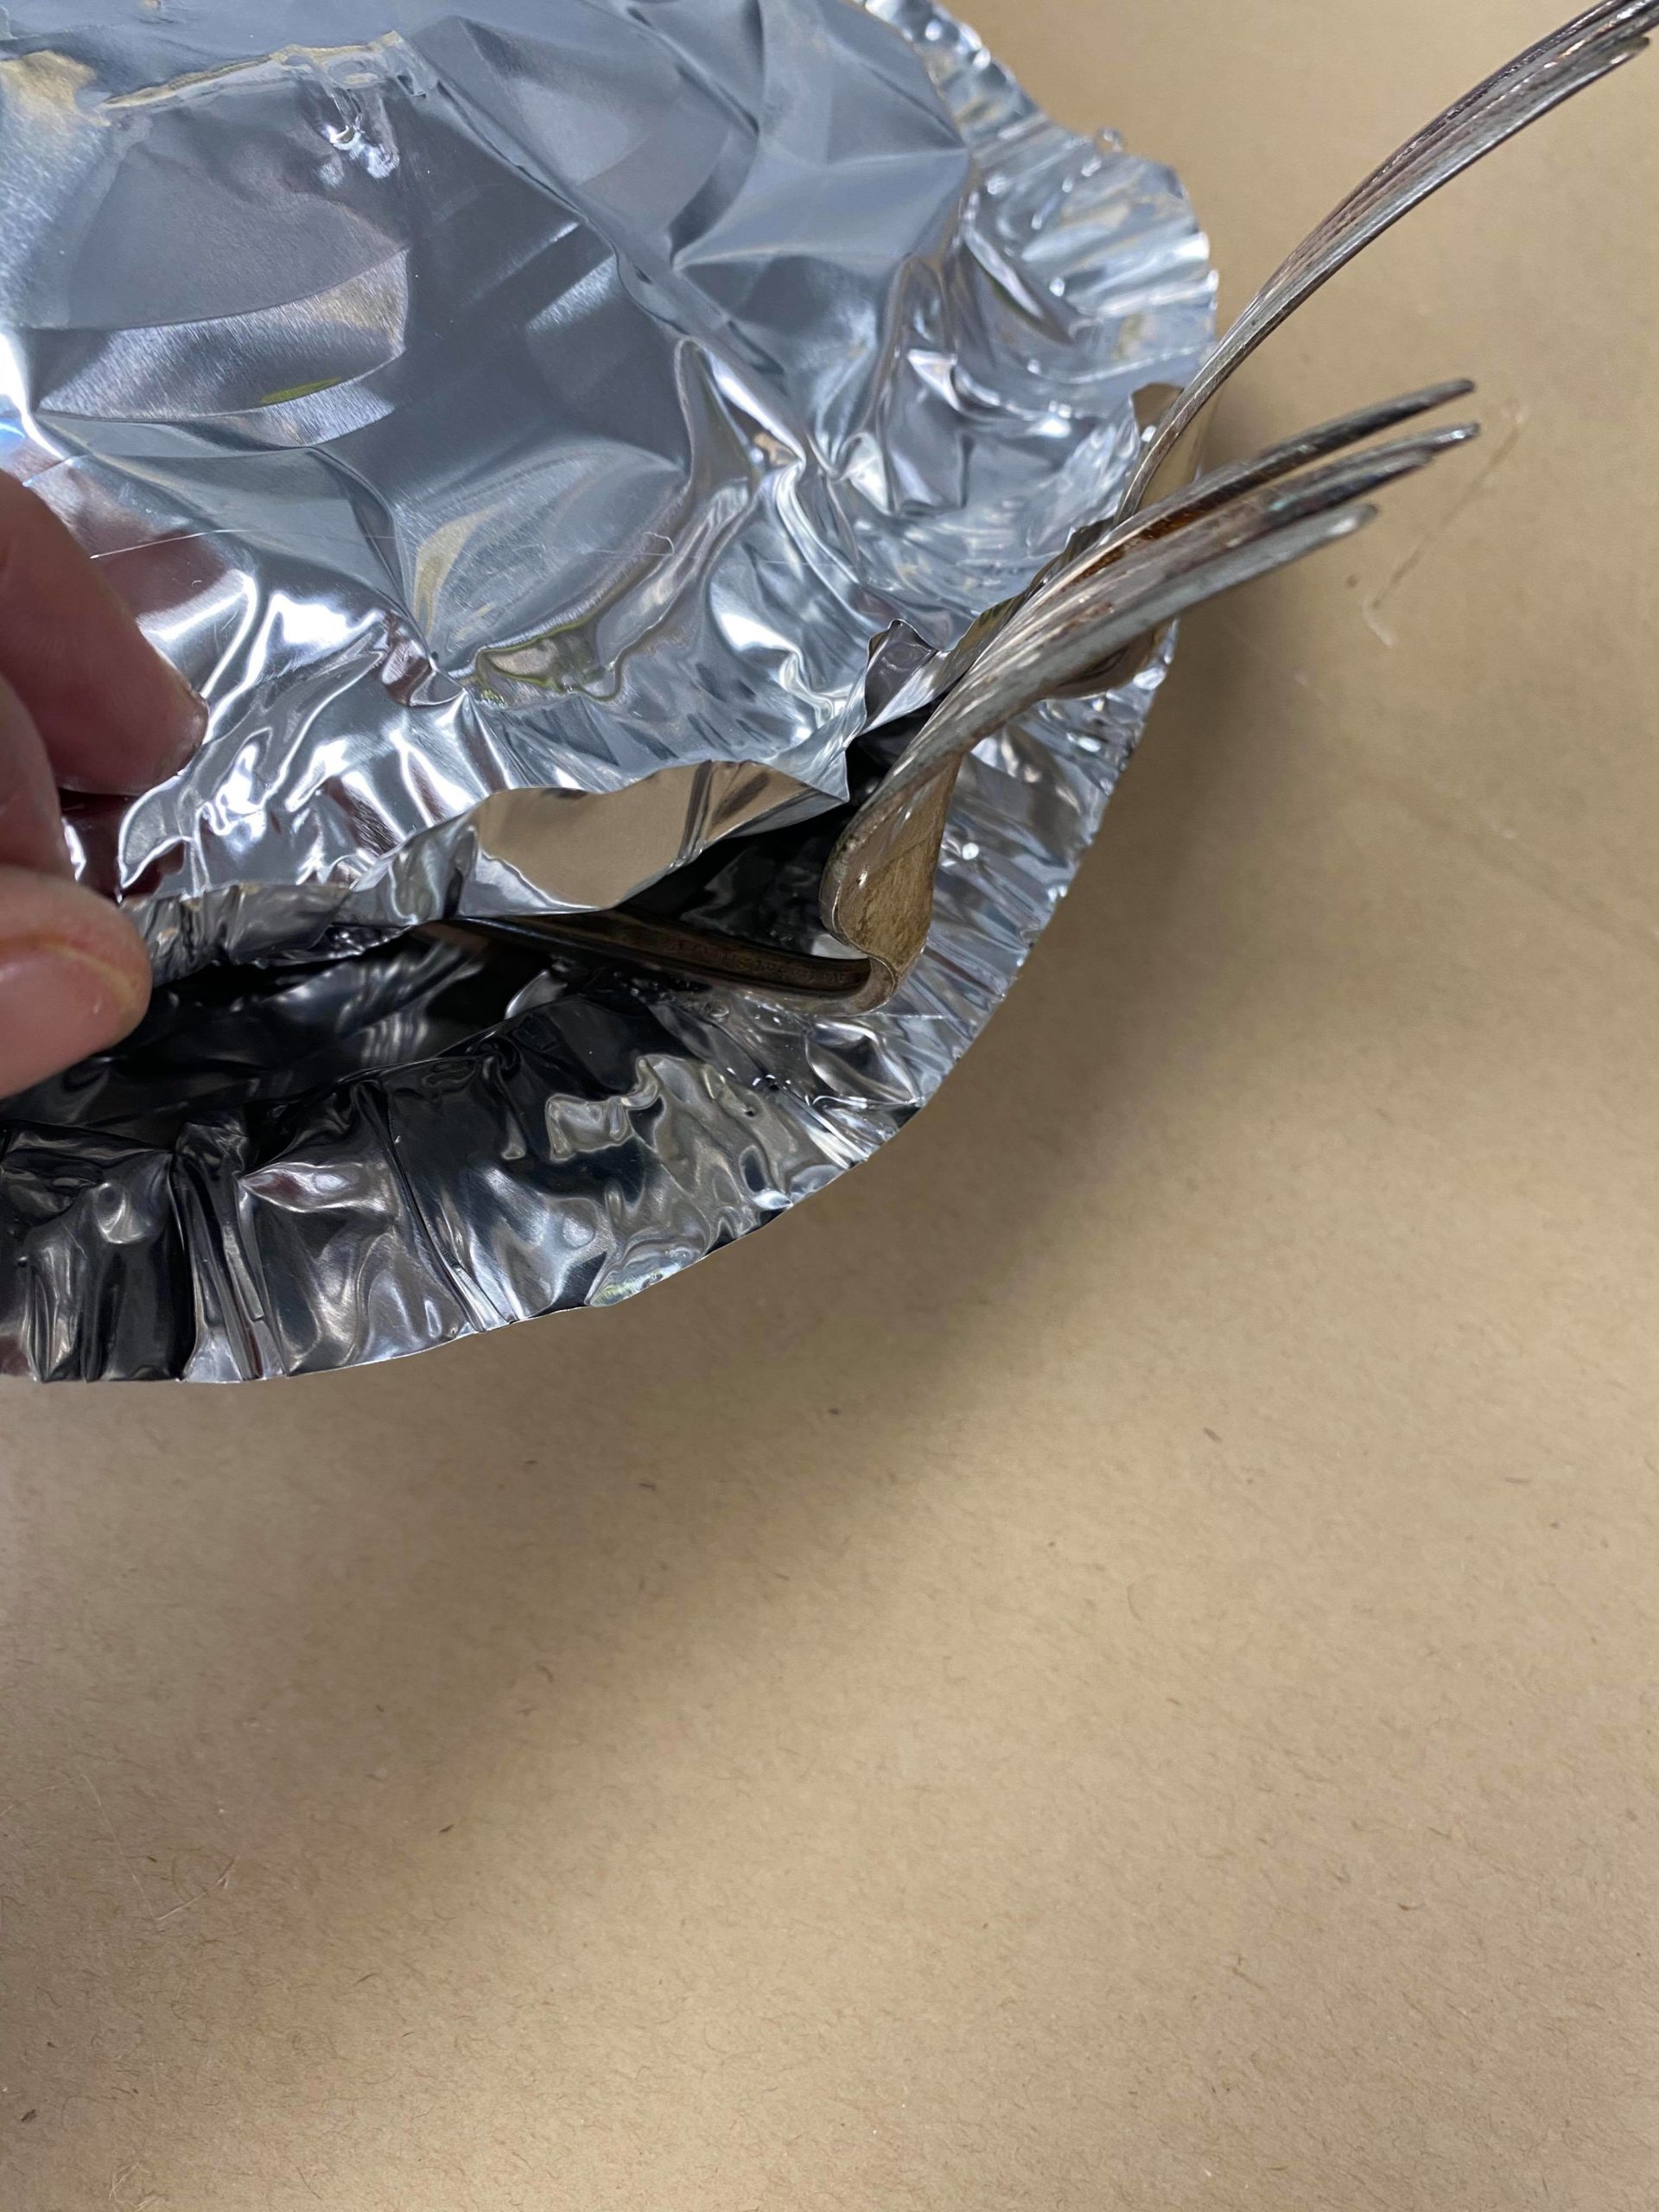
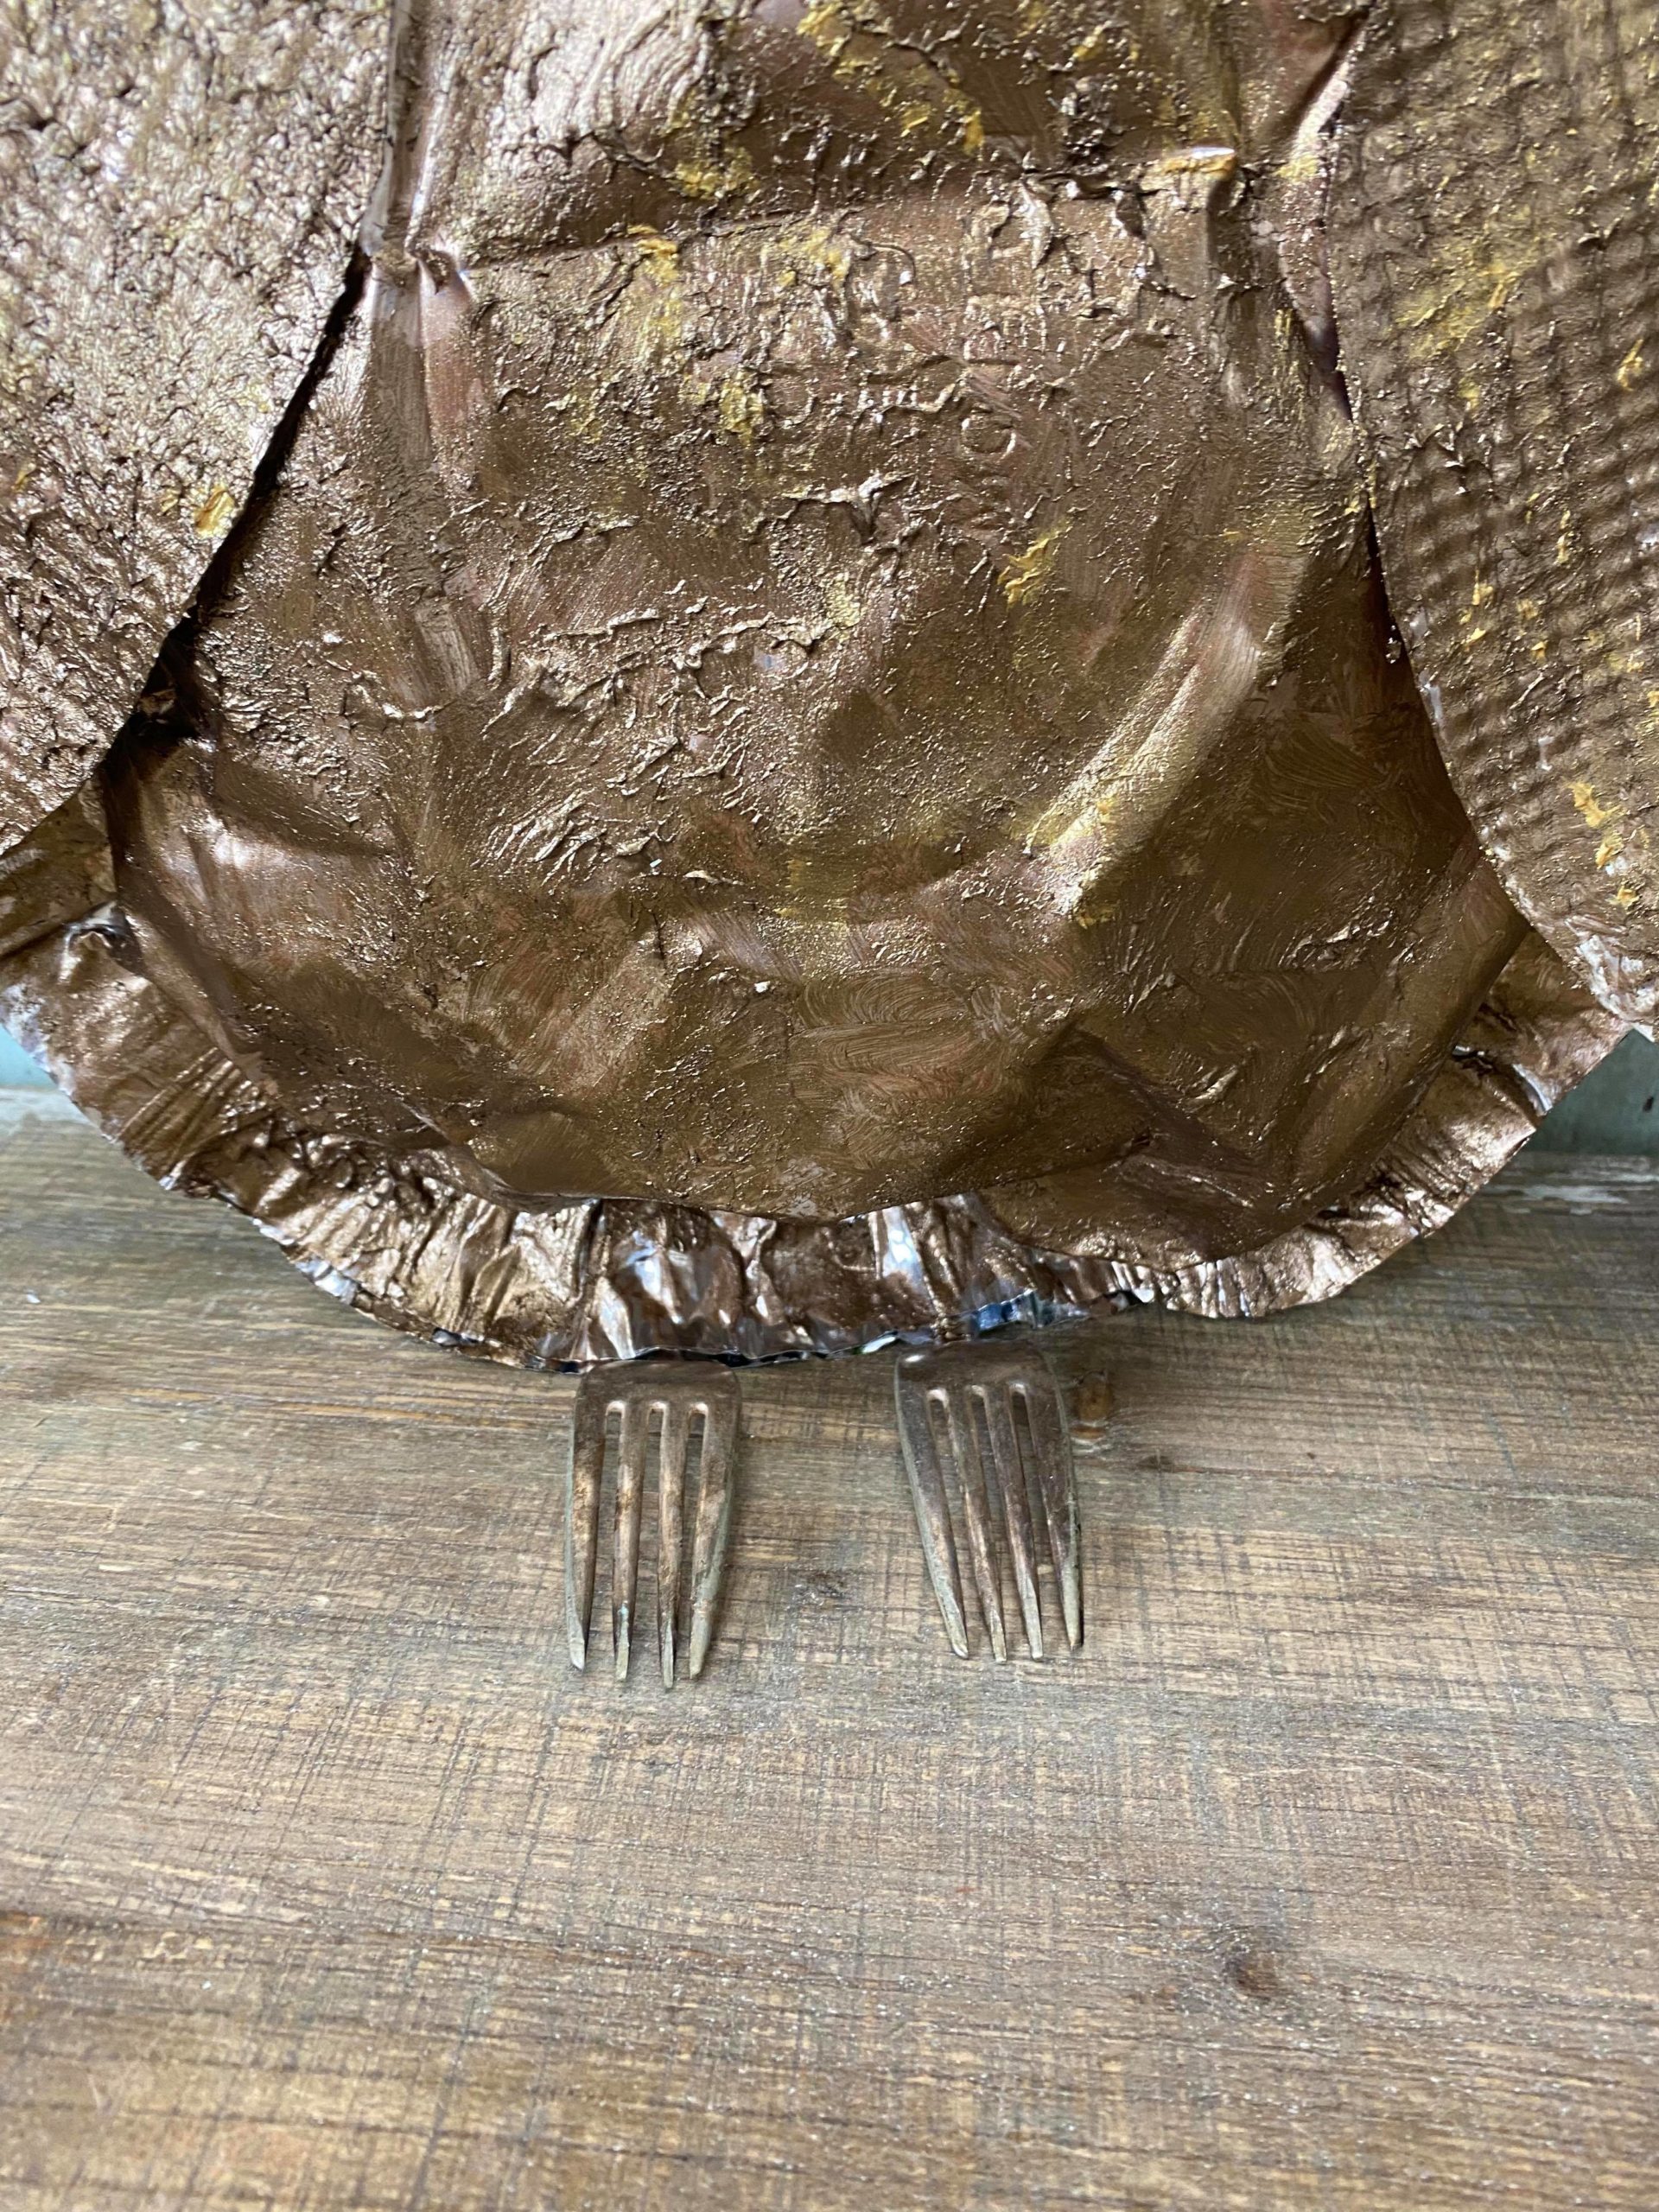
You will add the hot glue around the edge of the pan and attach the two pans together. Be sure to leave an opening at the bottom to add the forks.
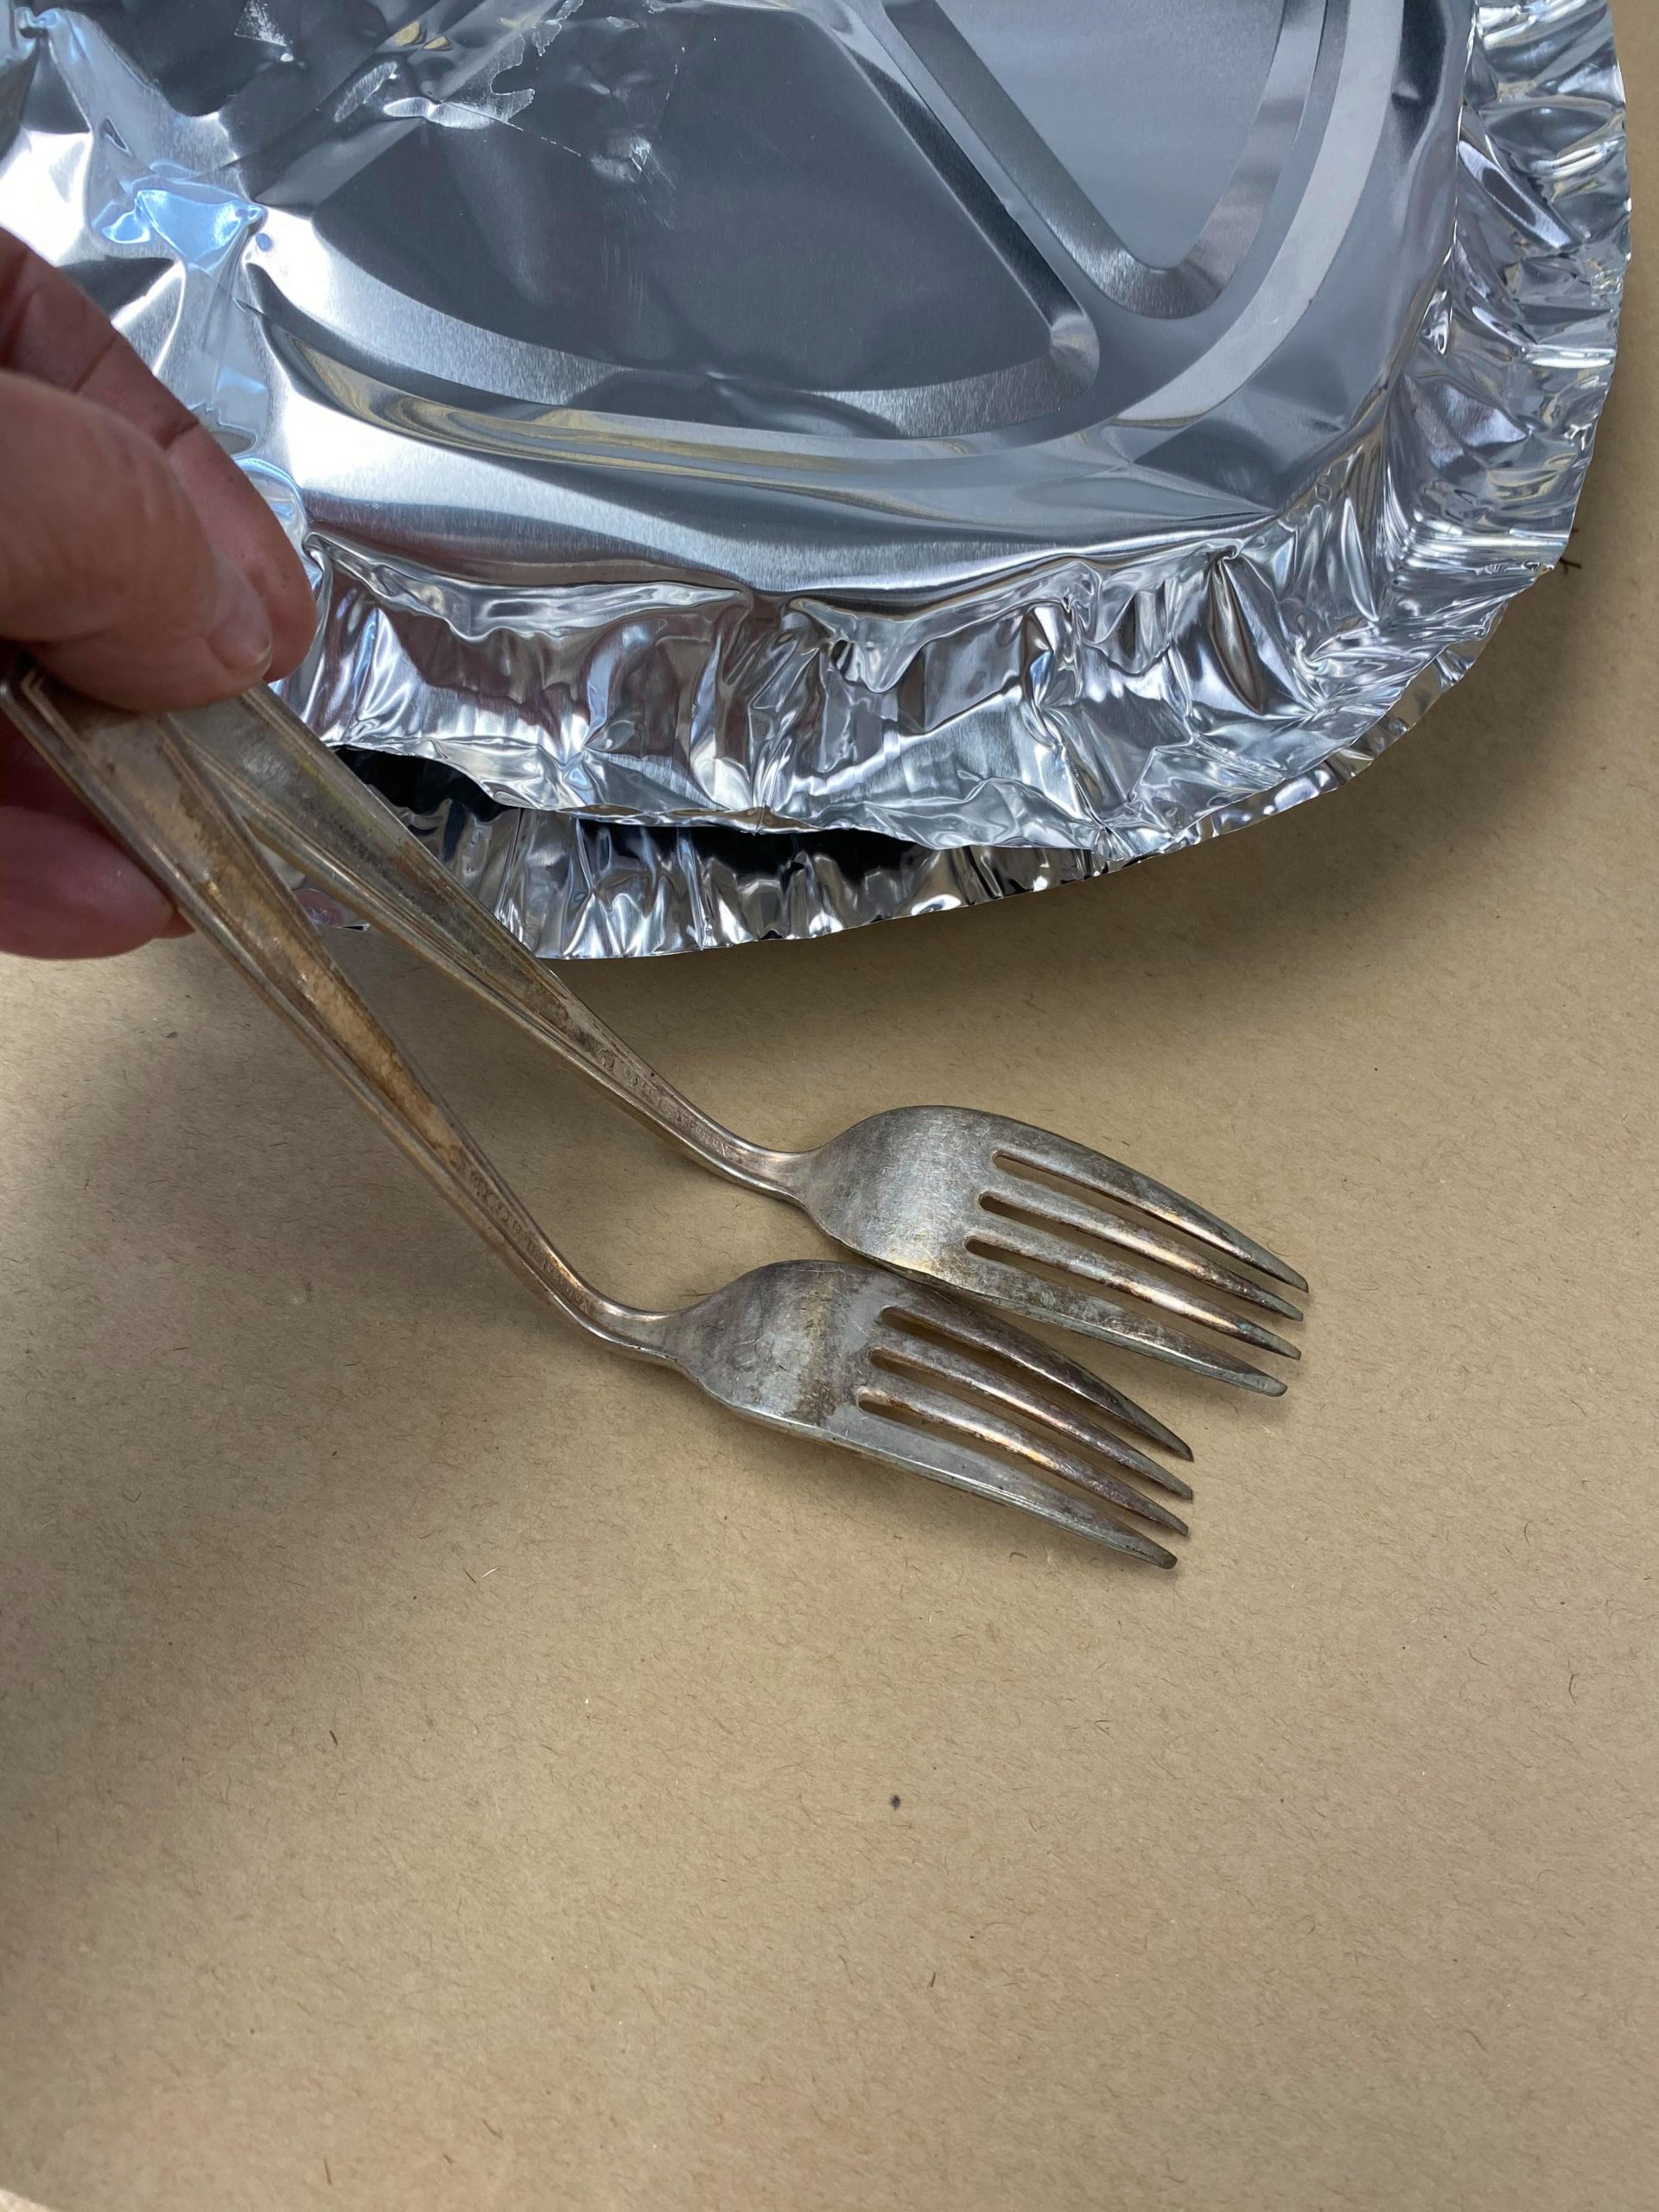
You will want to bend the forks so that they form the feet to your owl.
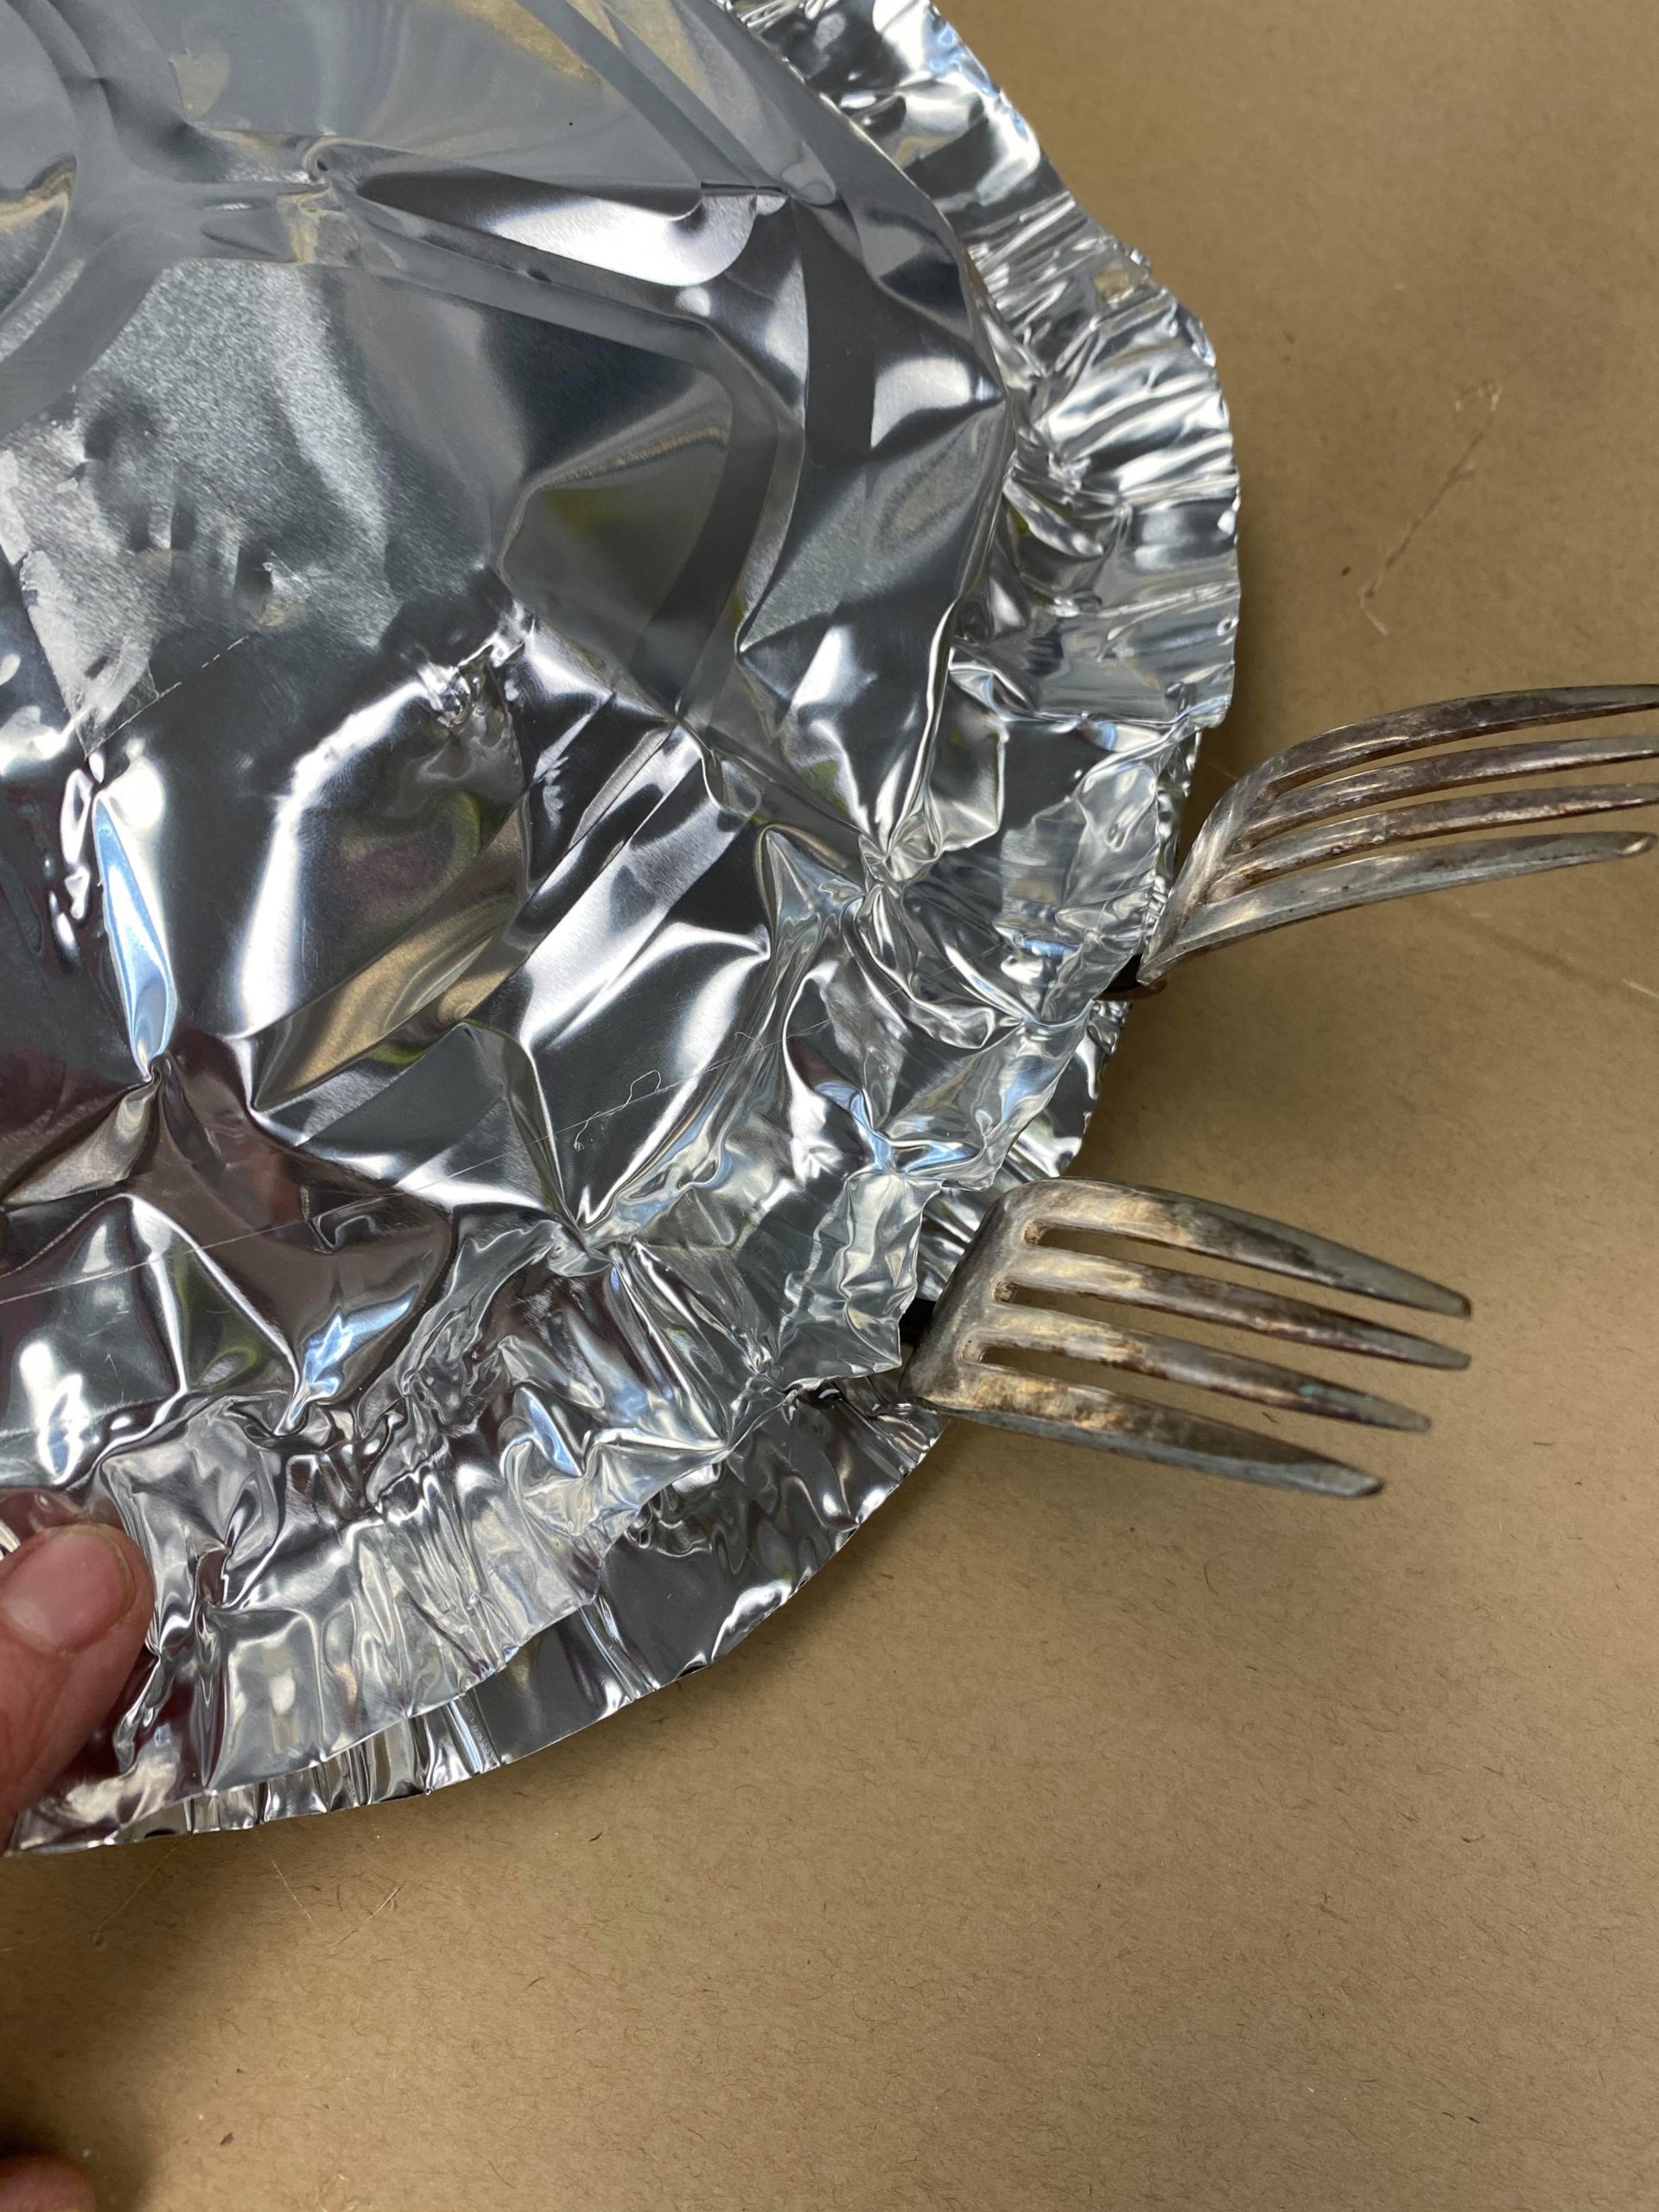
Insert them into the bottom part of the pans and glue them in place.
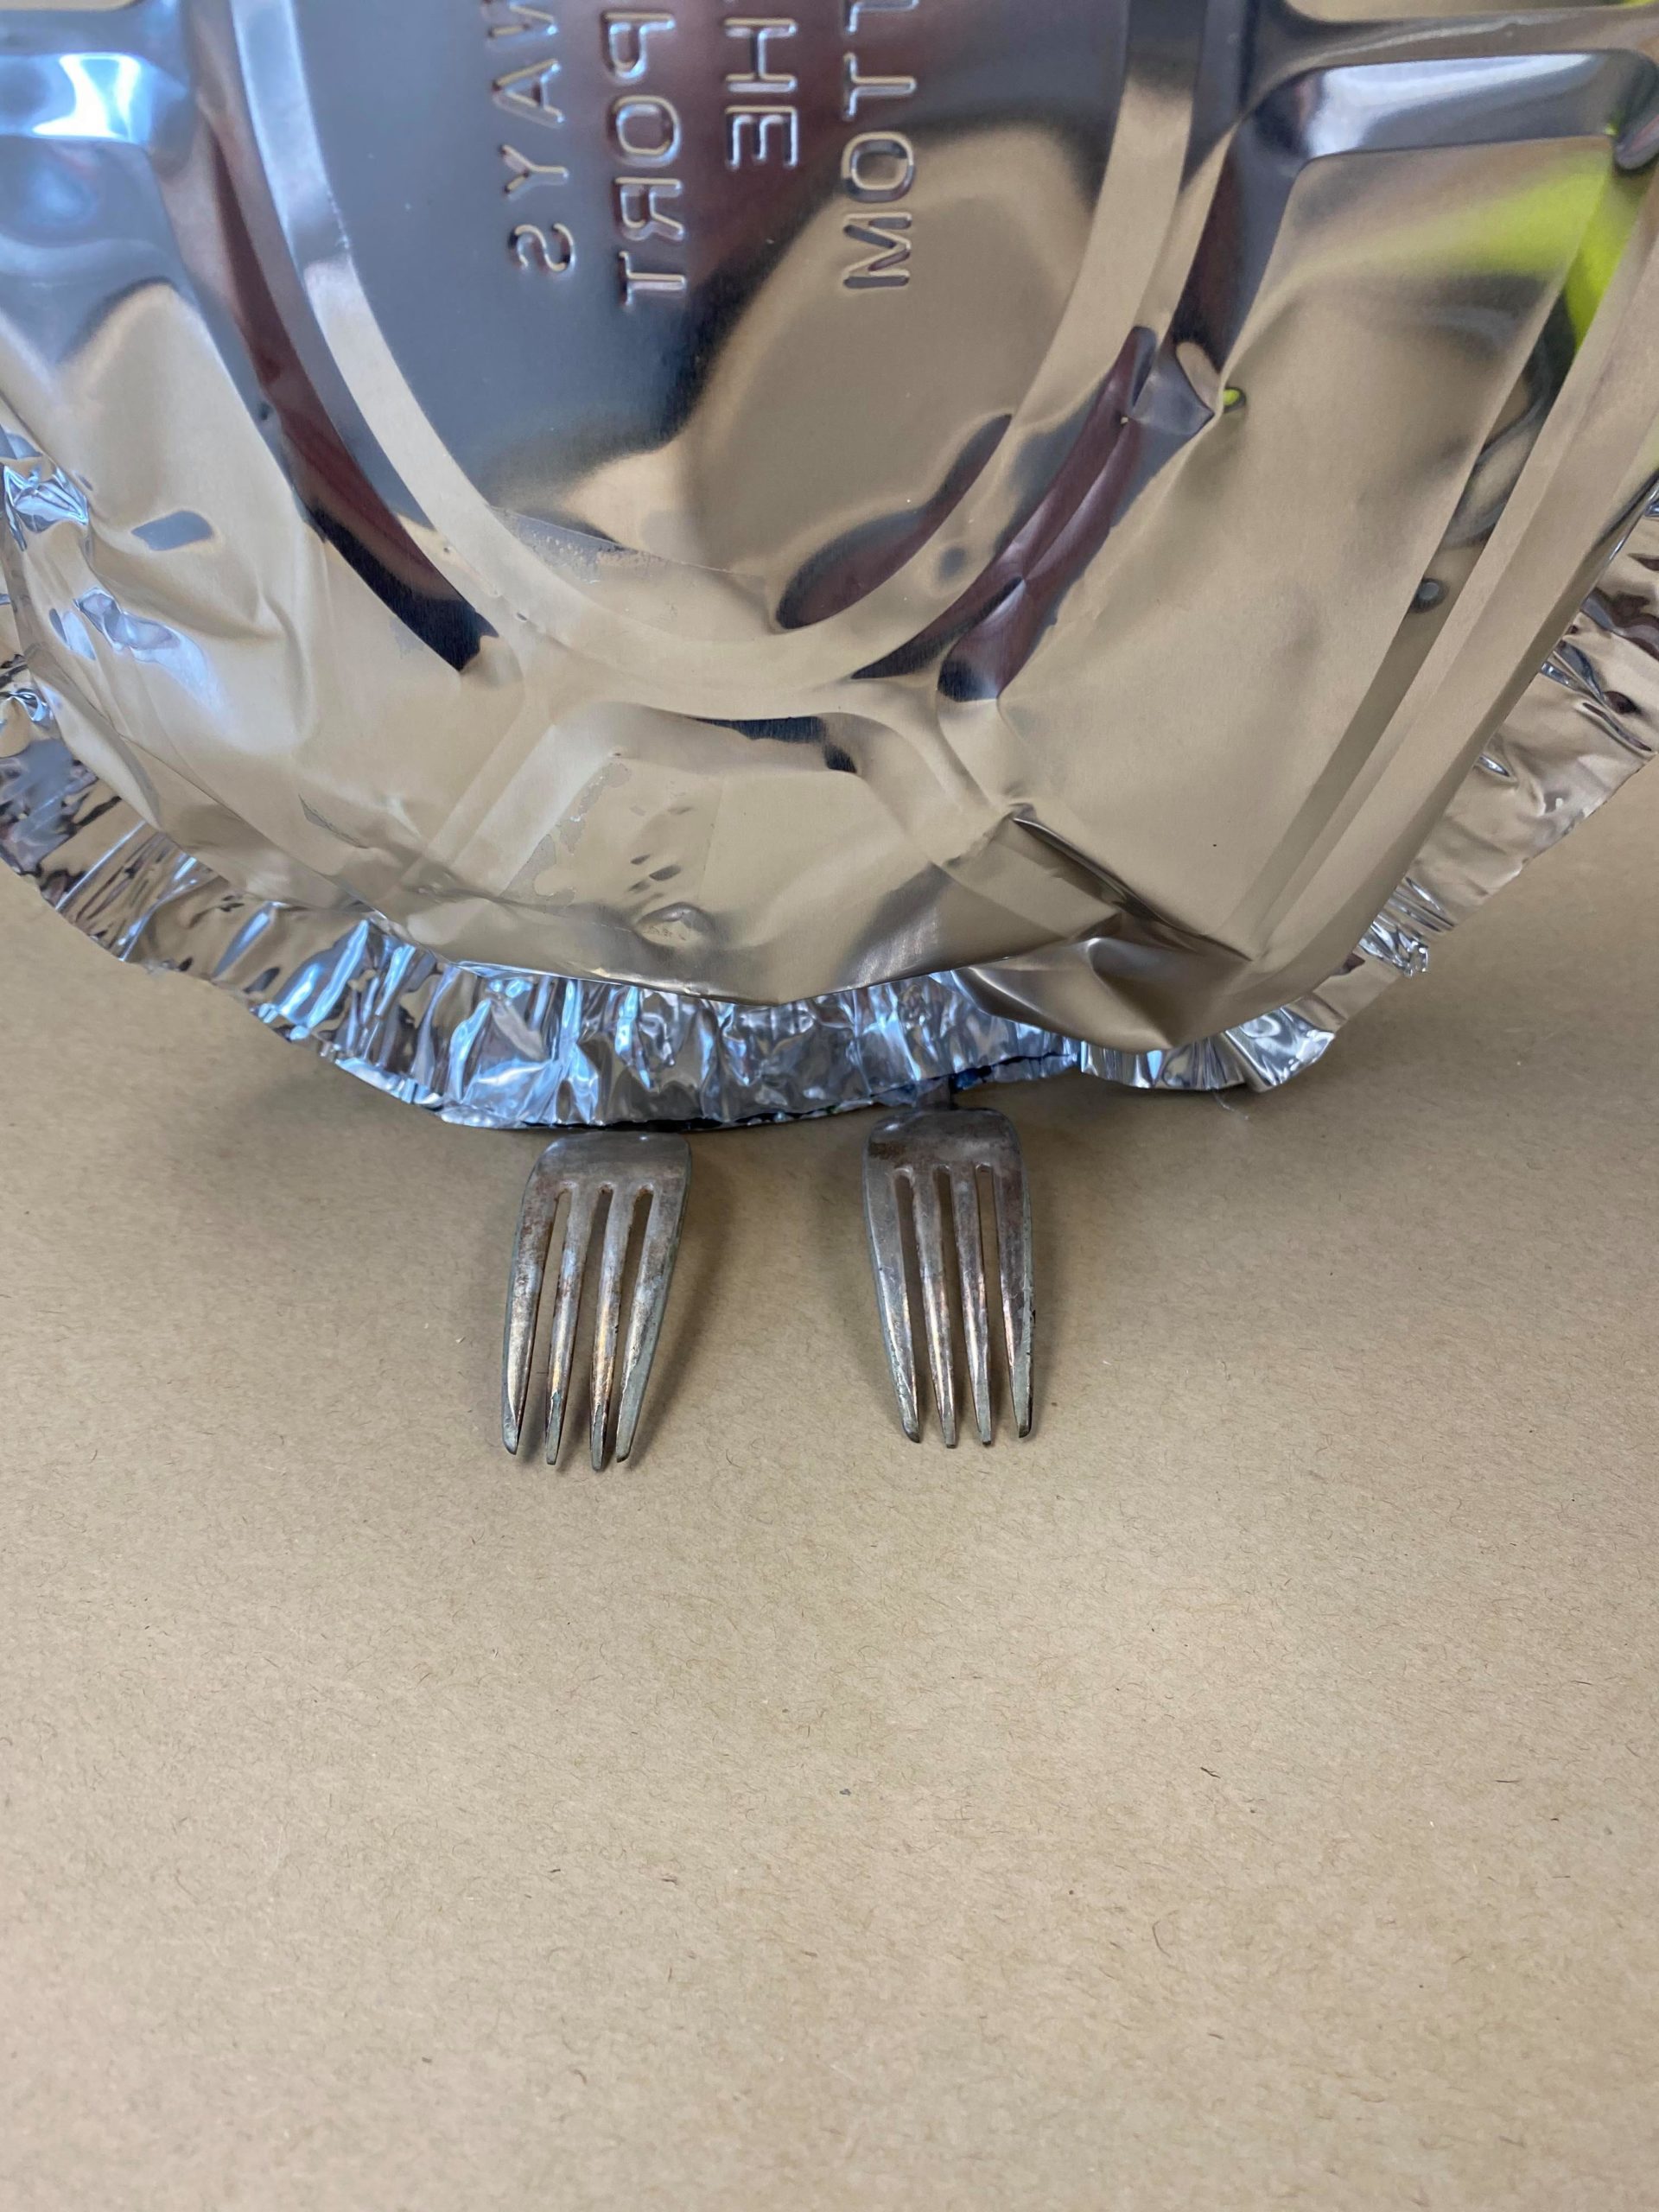
If you press down on the pans and the feet your owl should stand up.

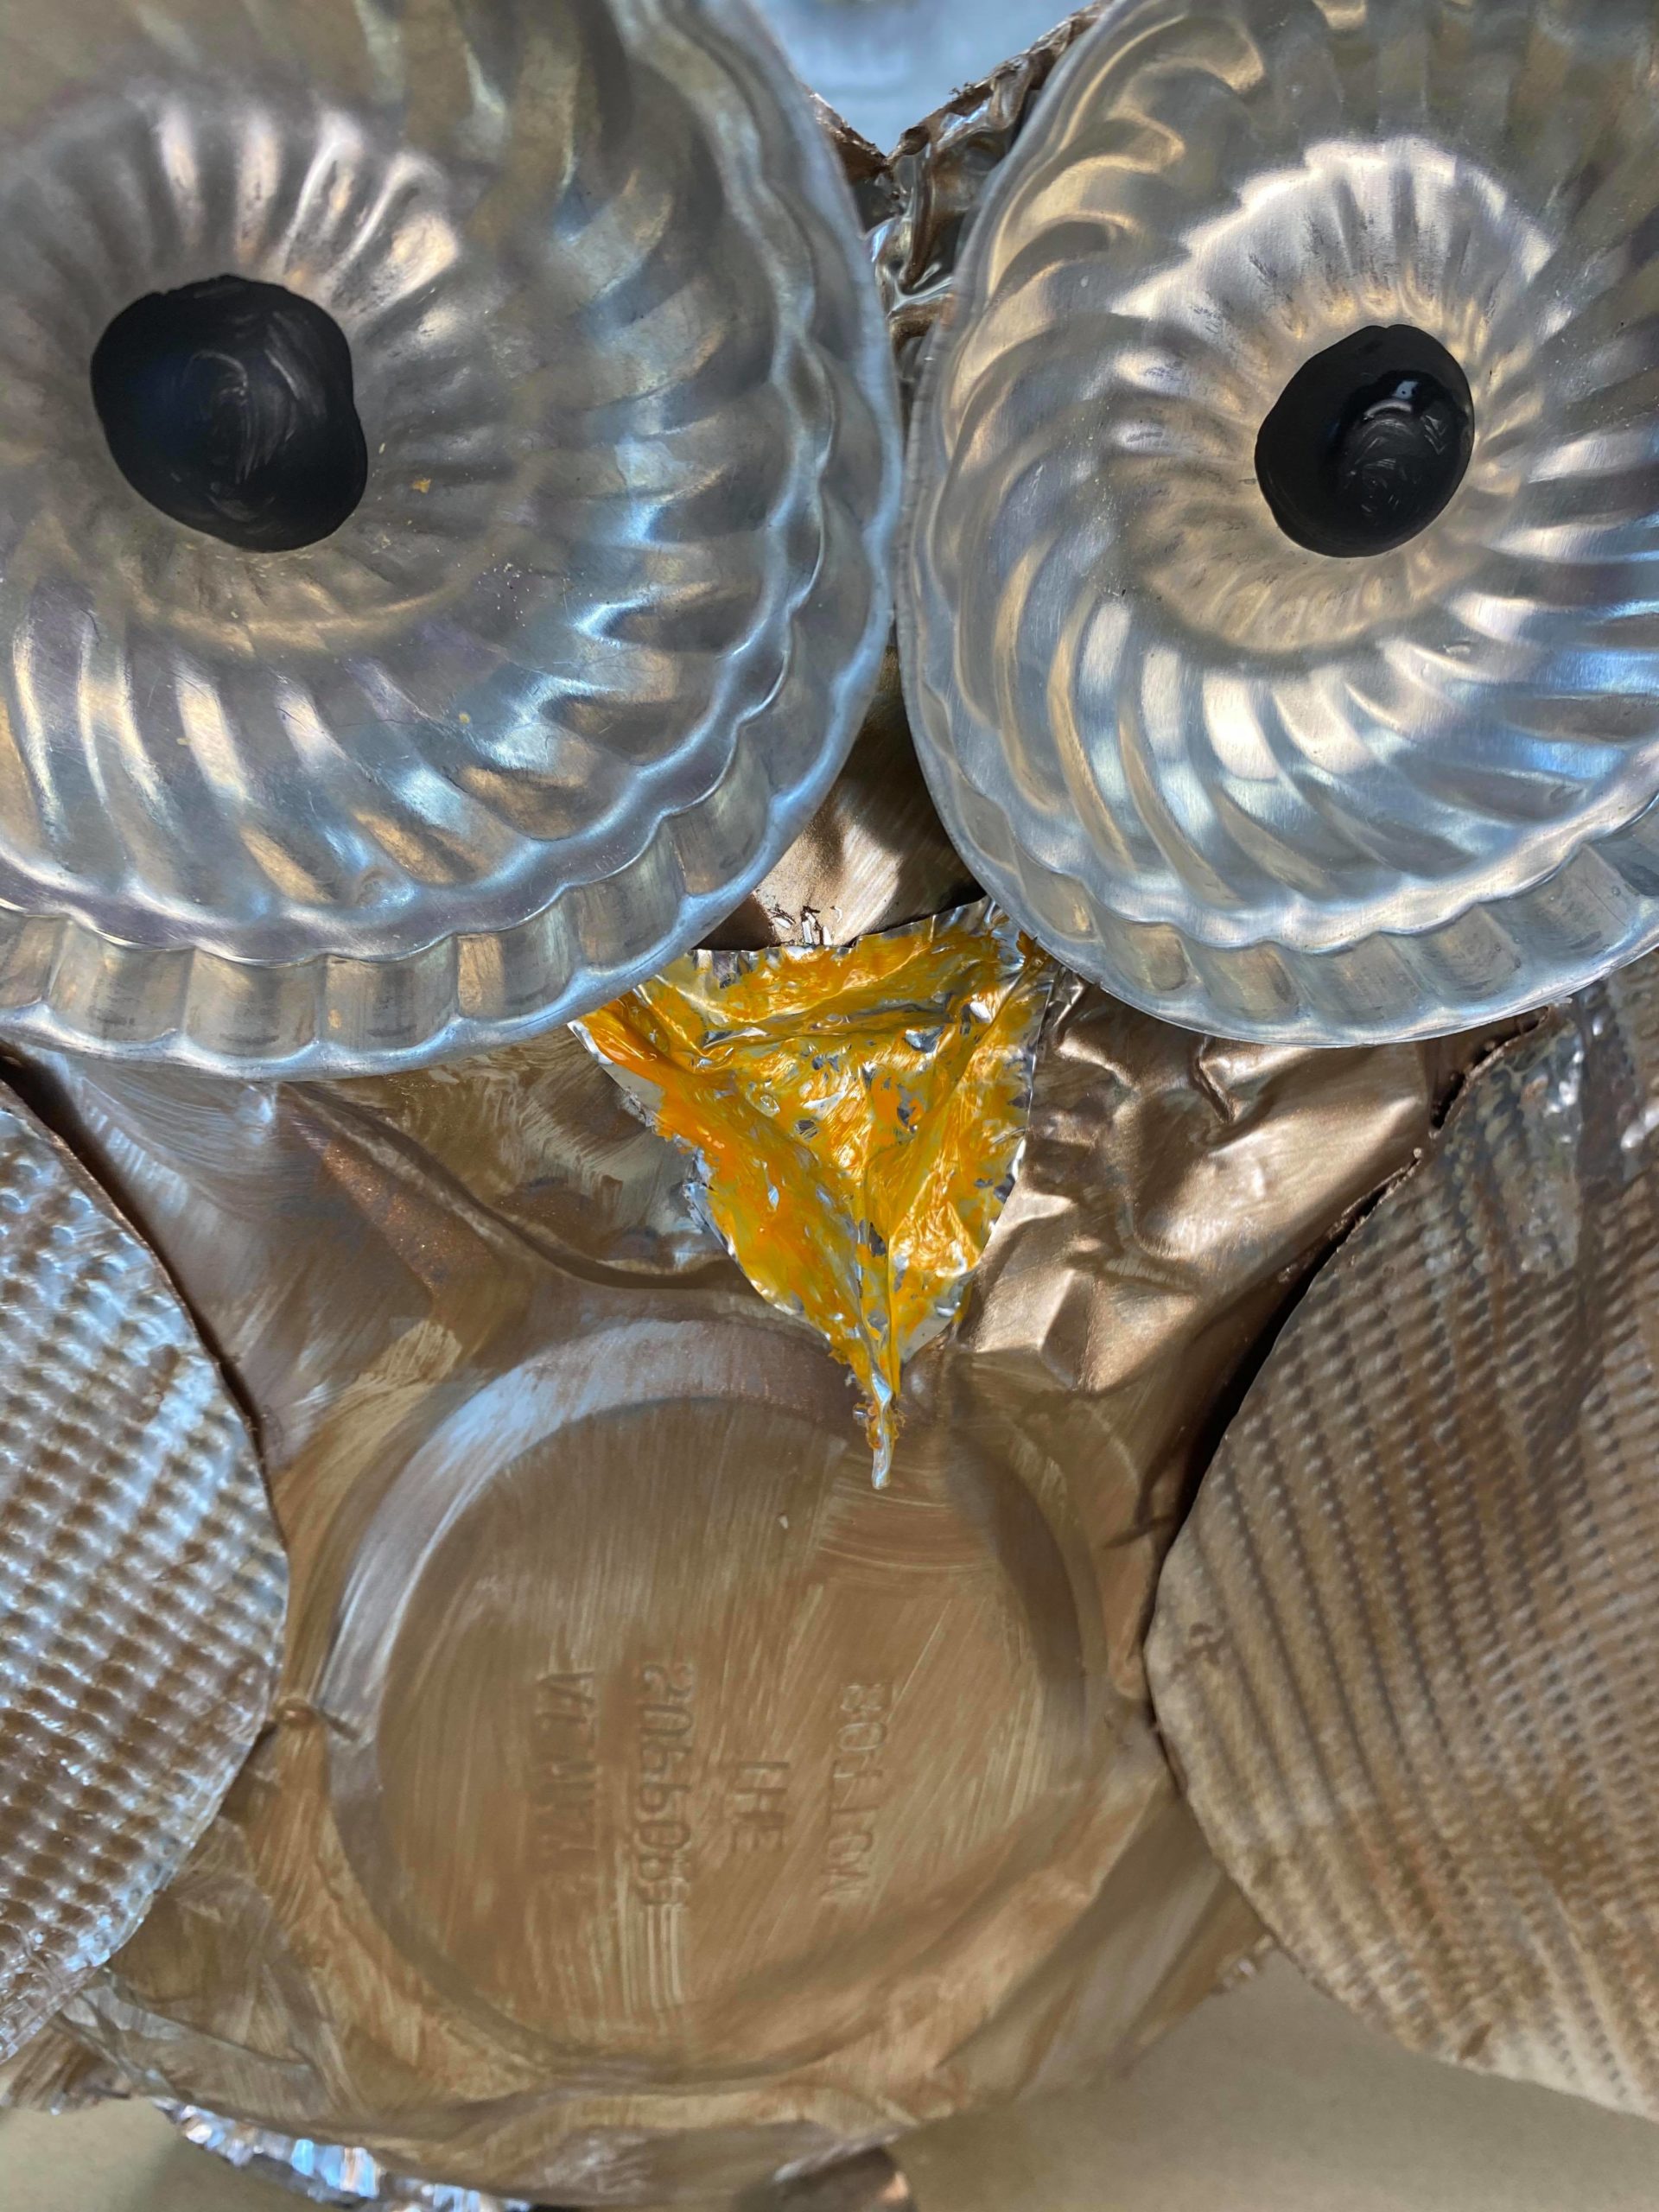
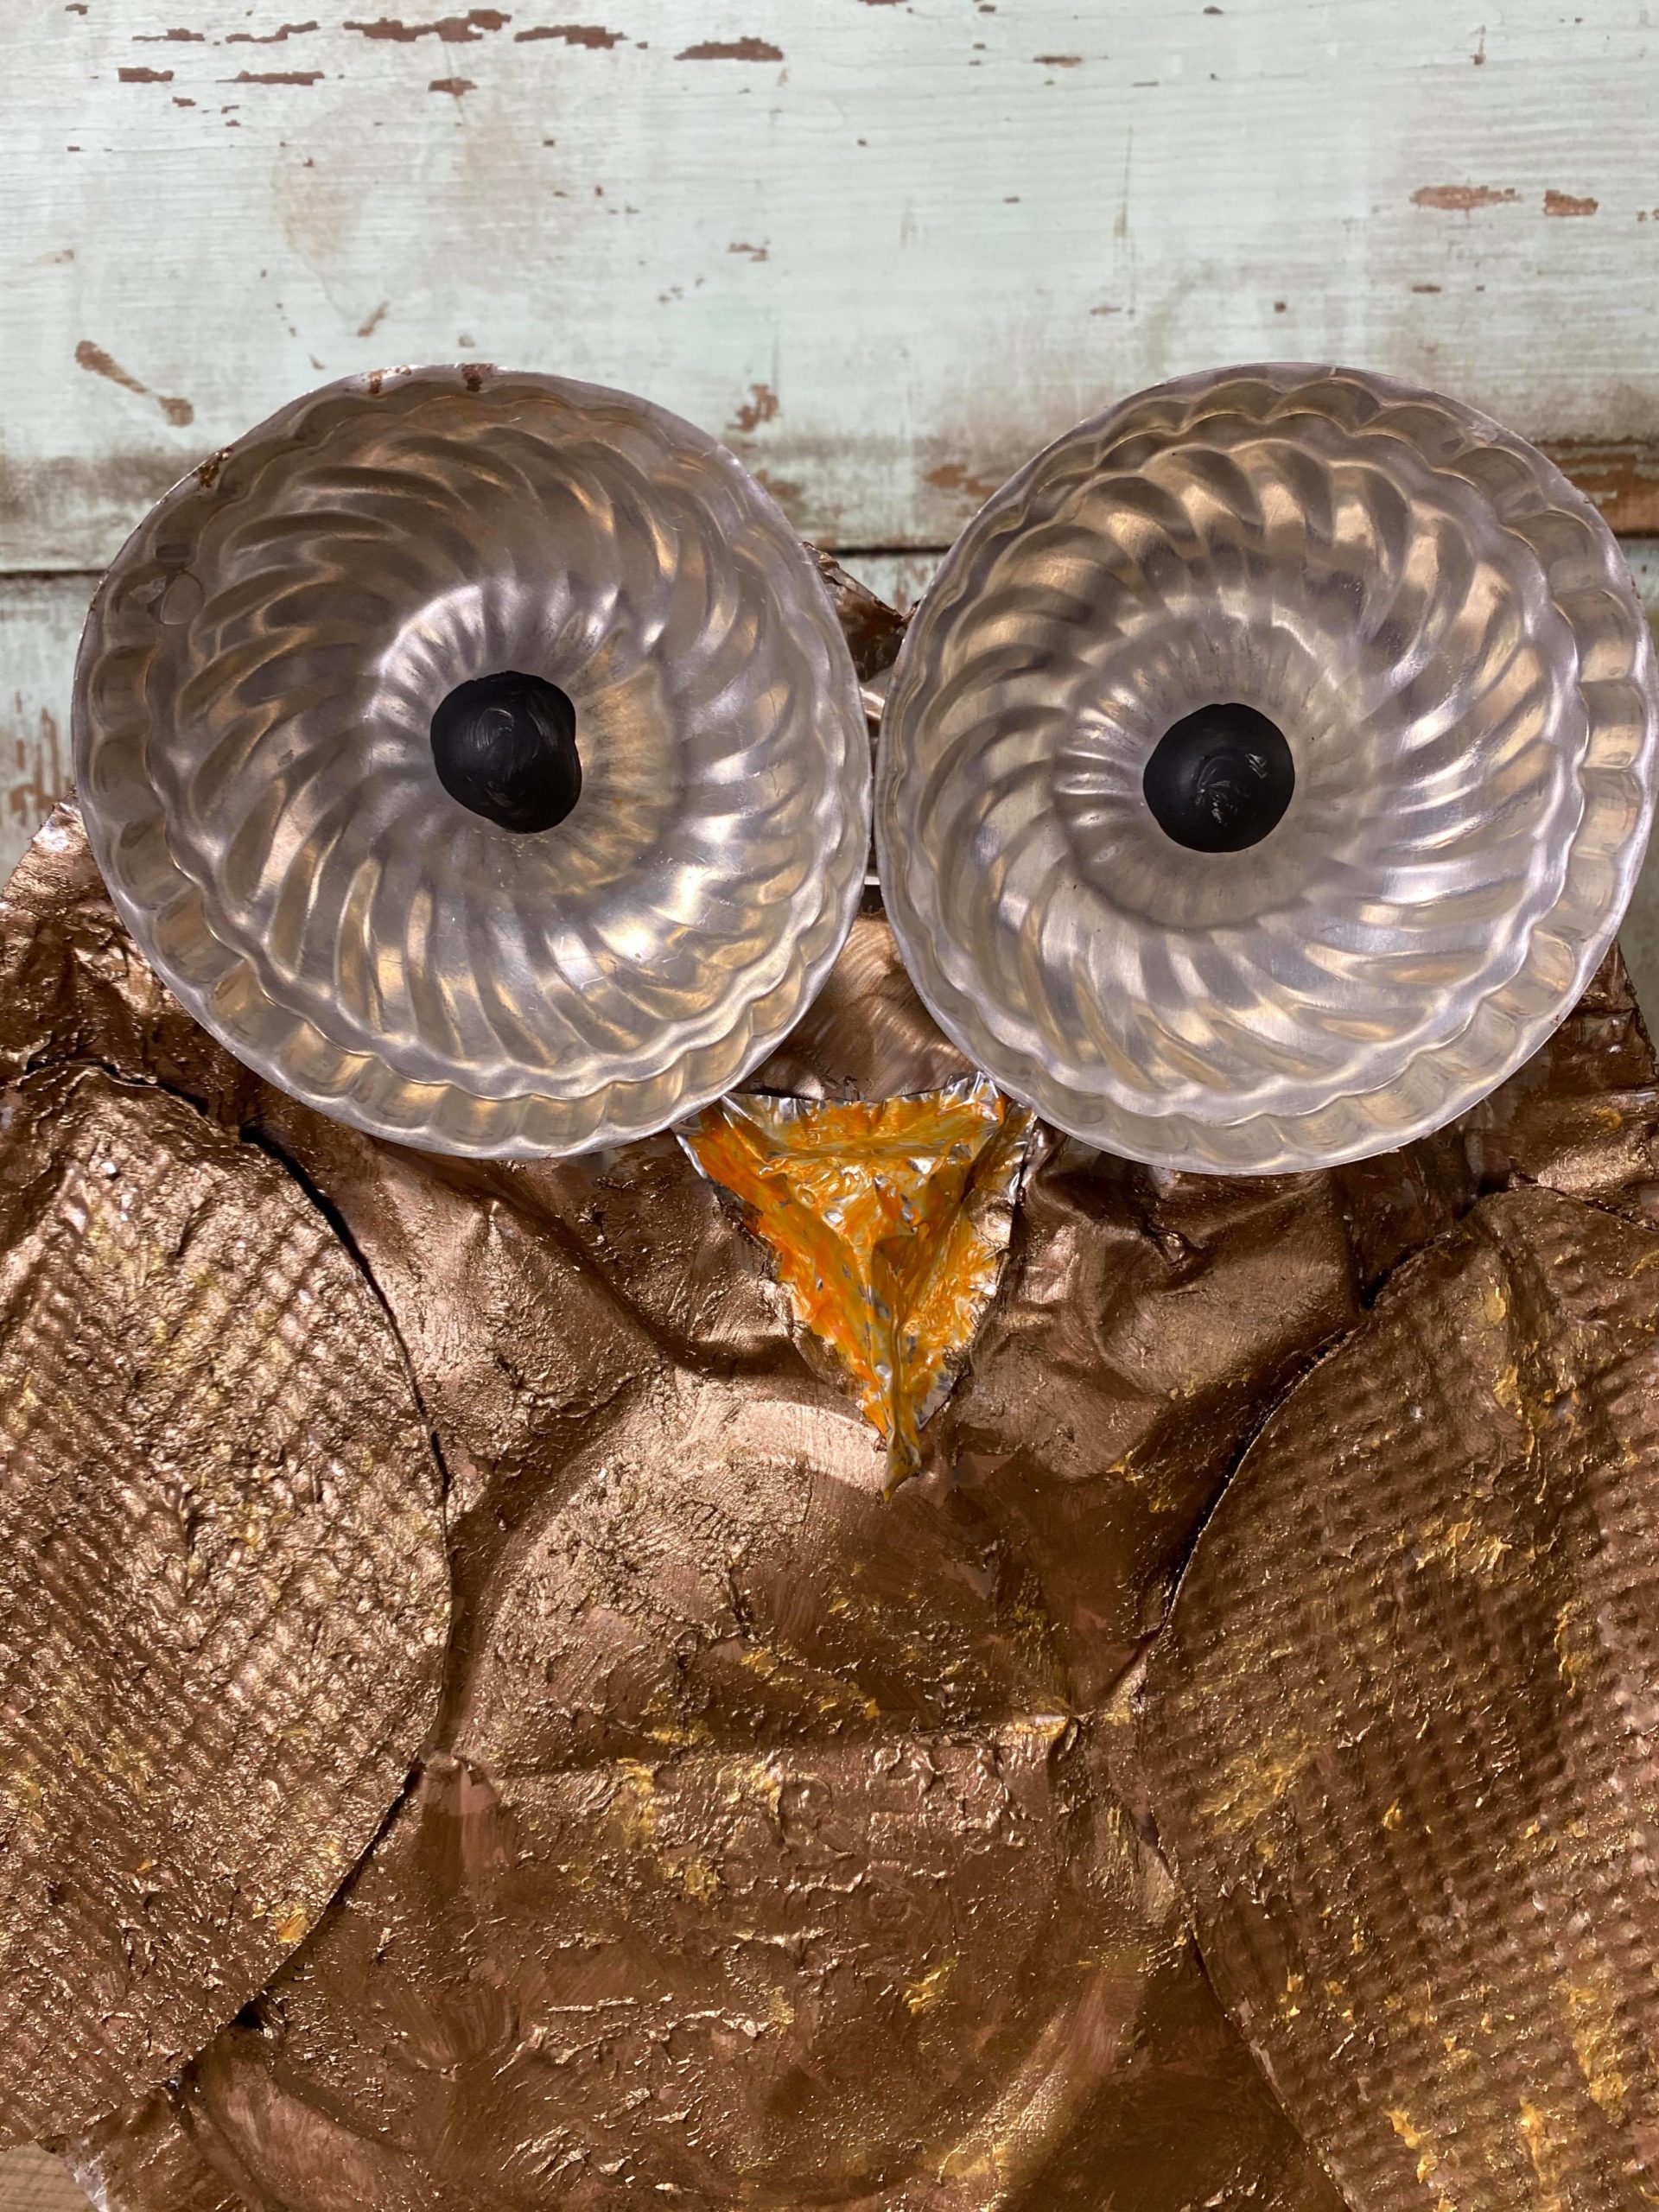
I then added hot glue to the back side of my tart tins and glued them in place.

Once the eyes are glued in place you will want to trim around the top of the eyes.
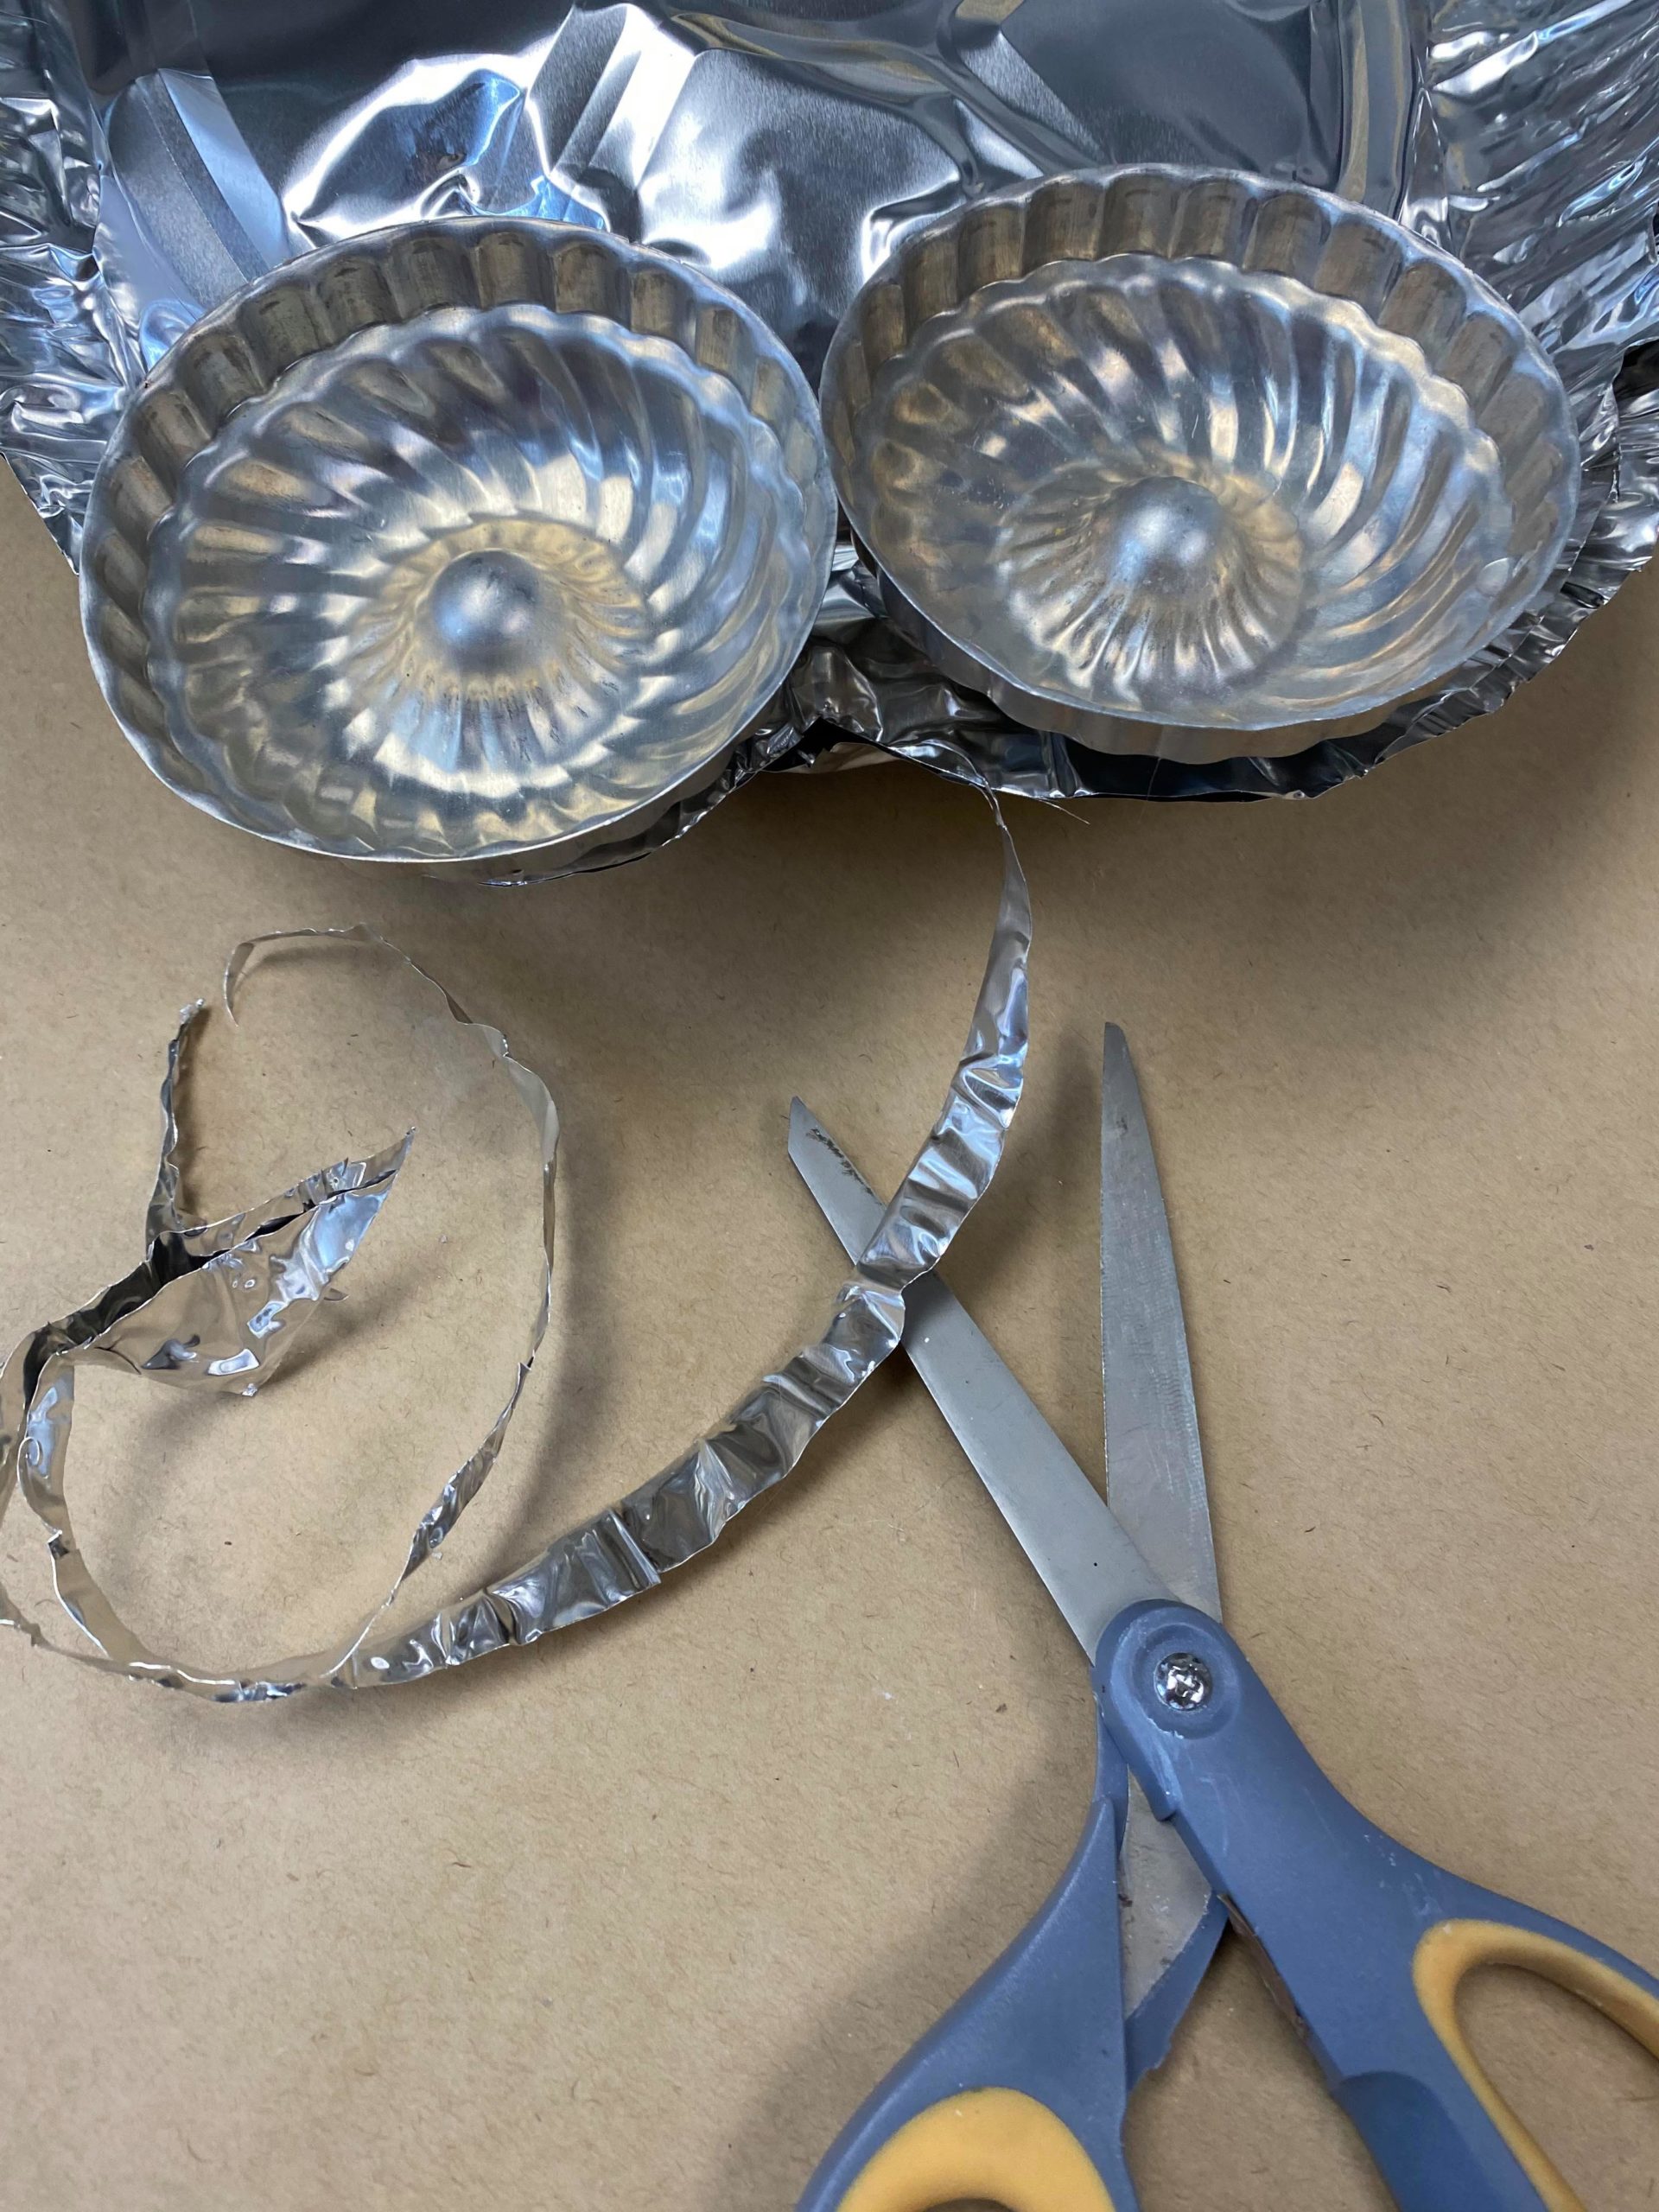
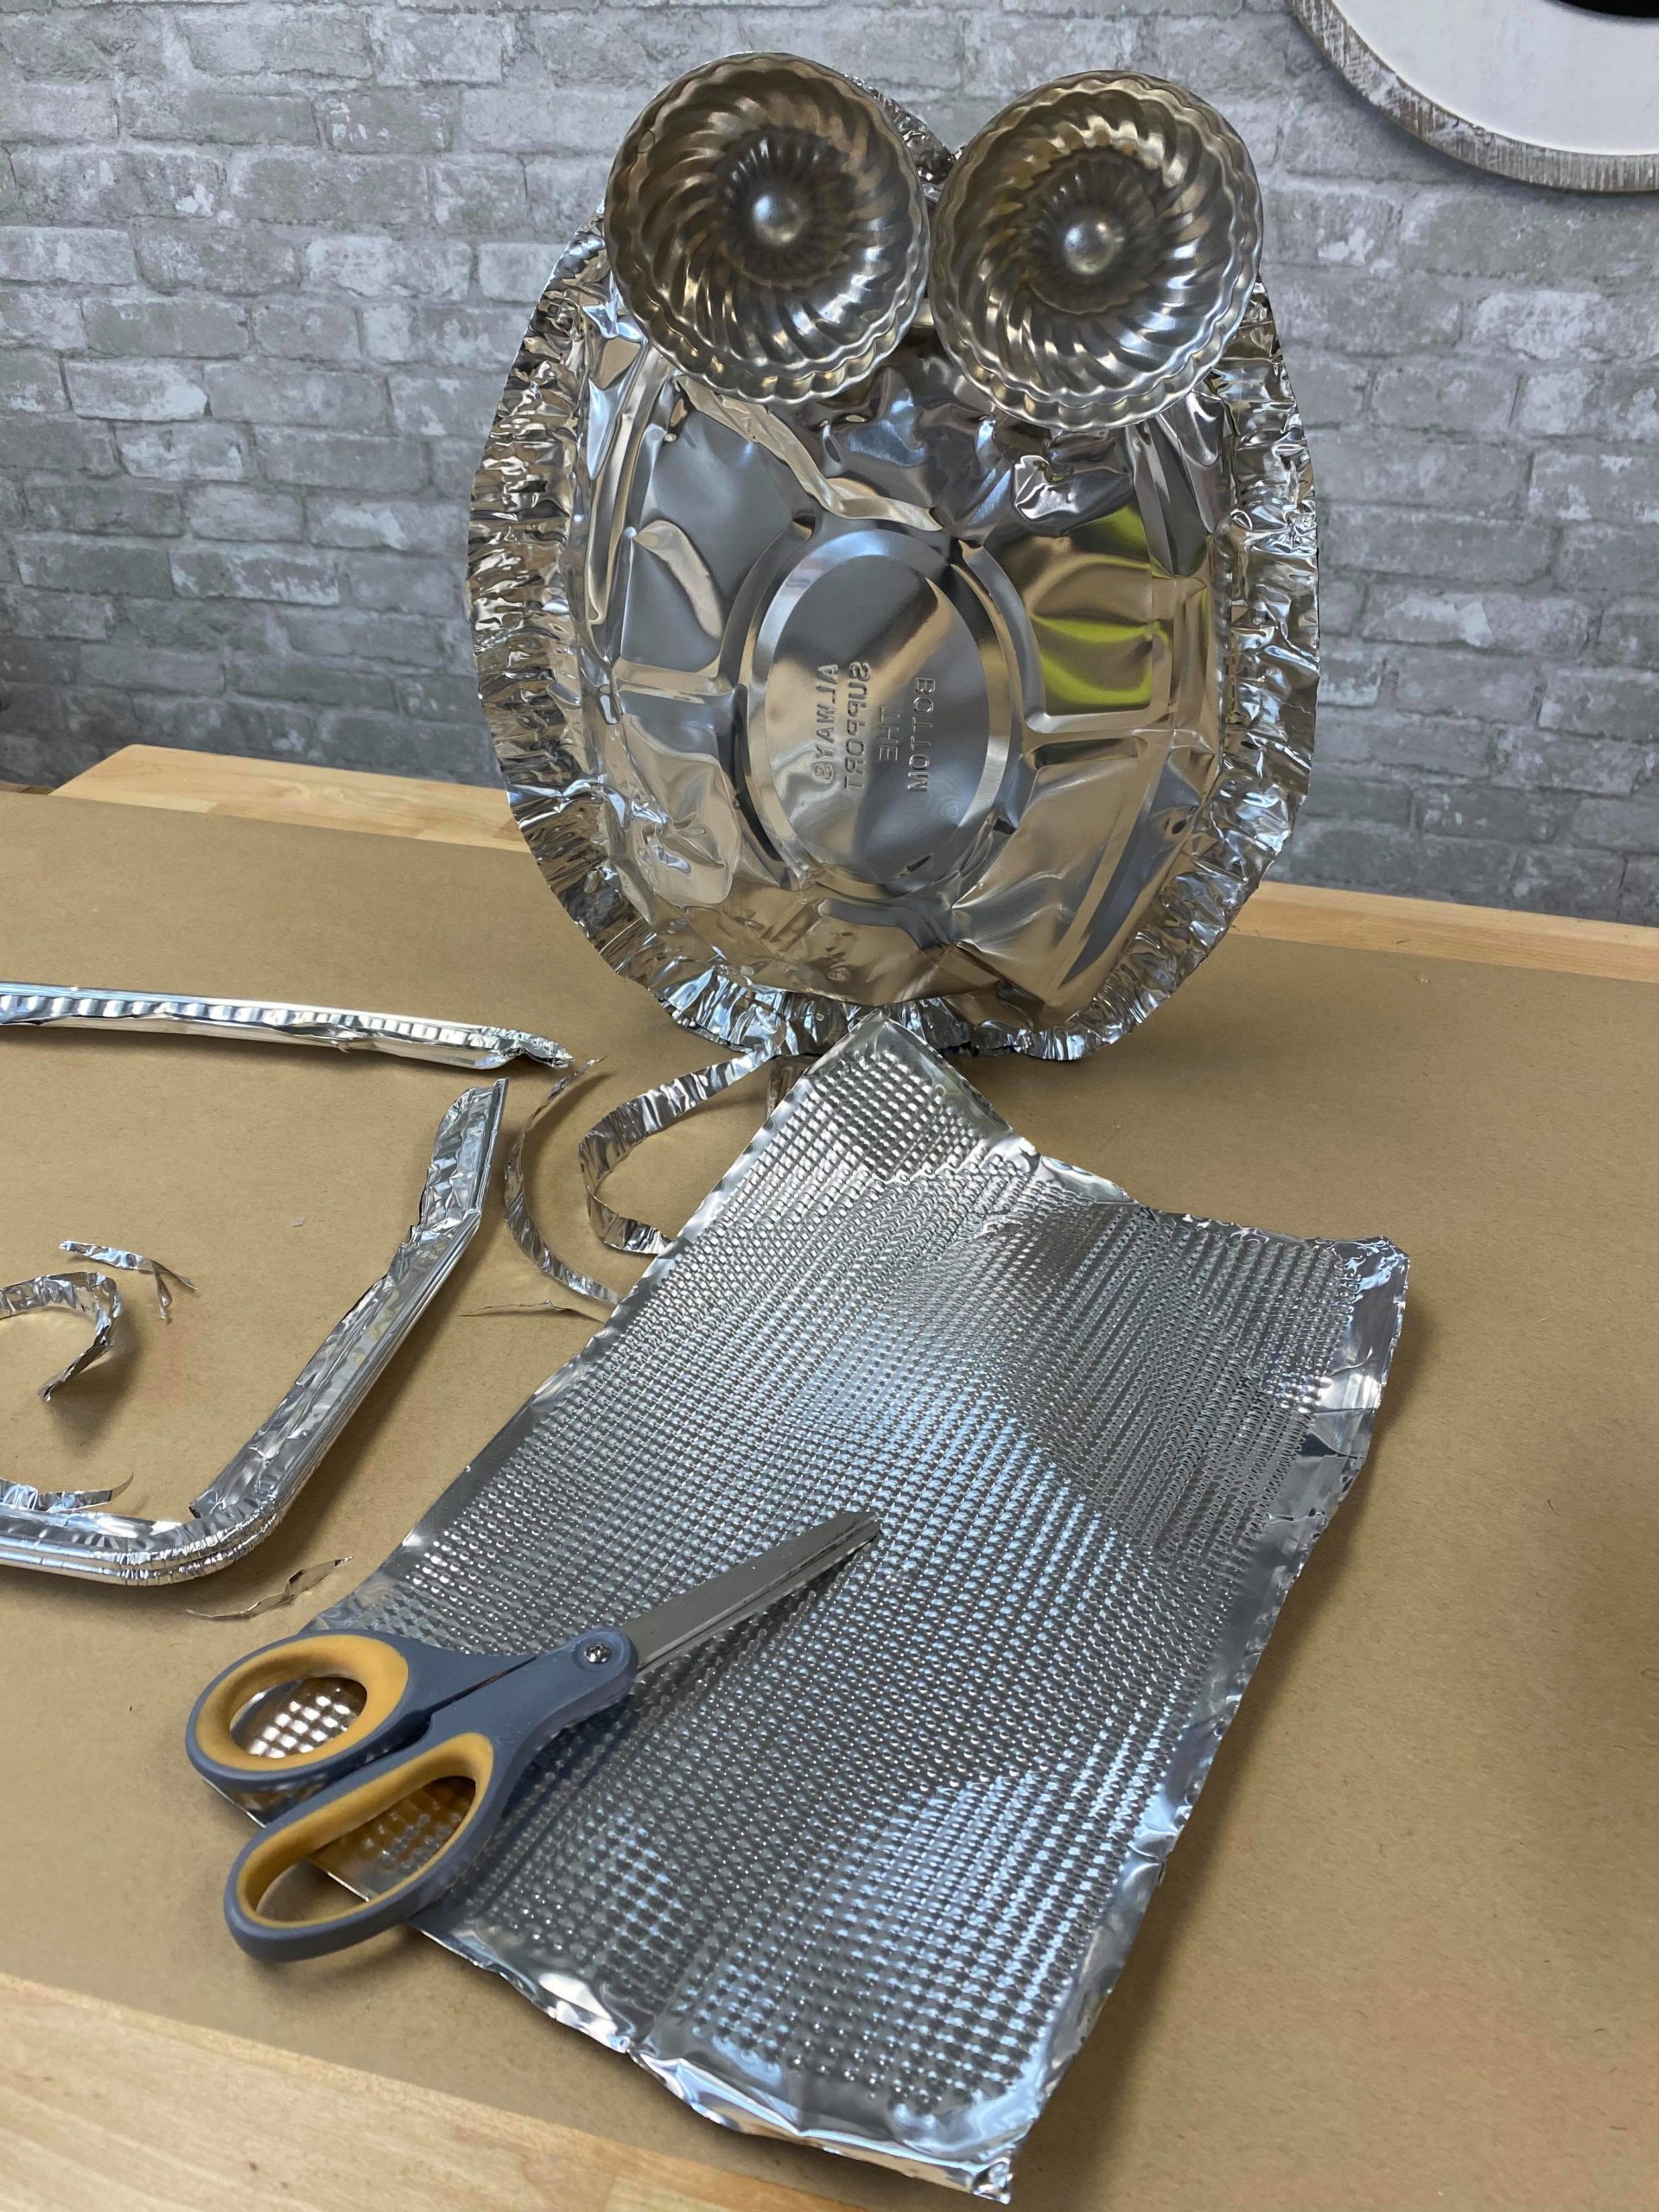
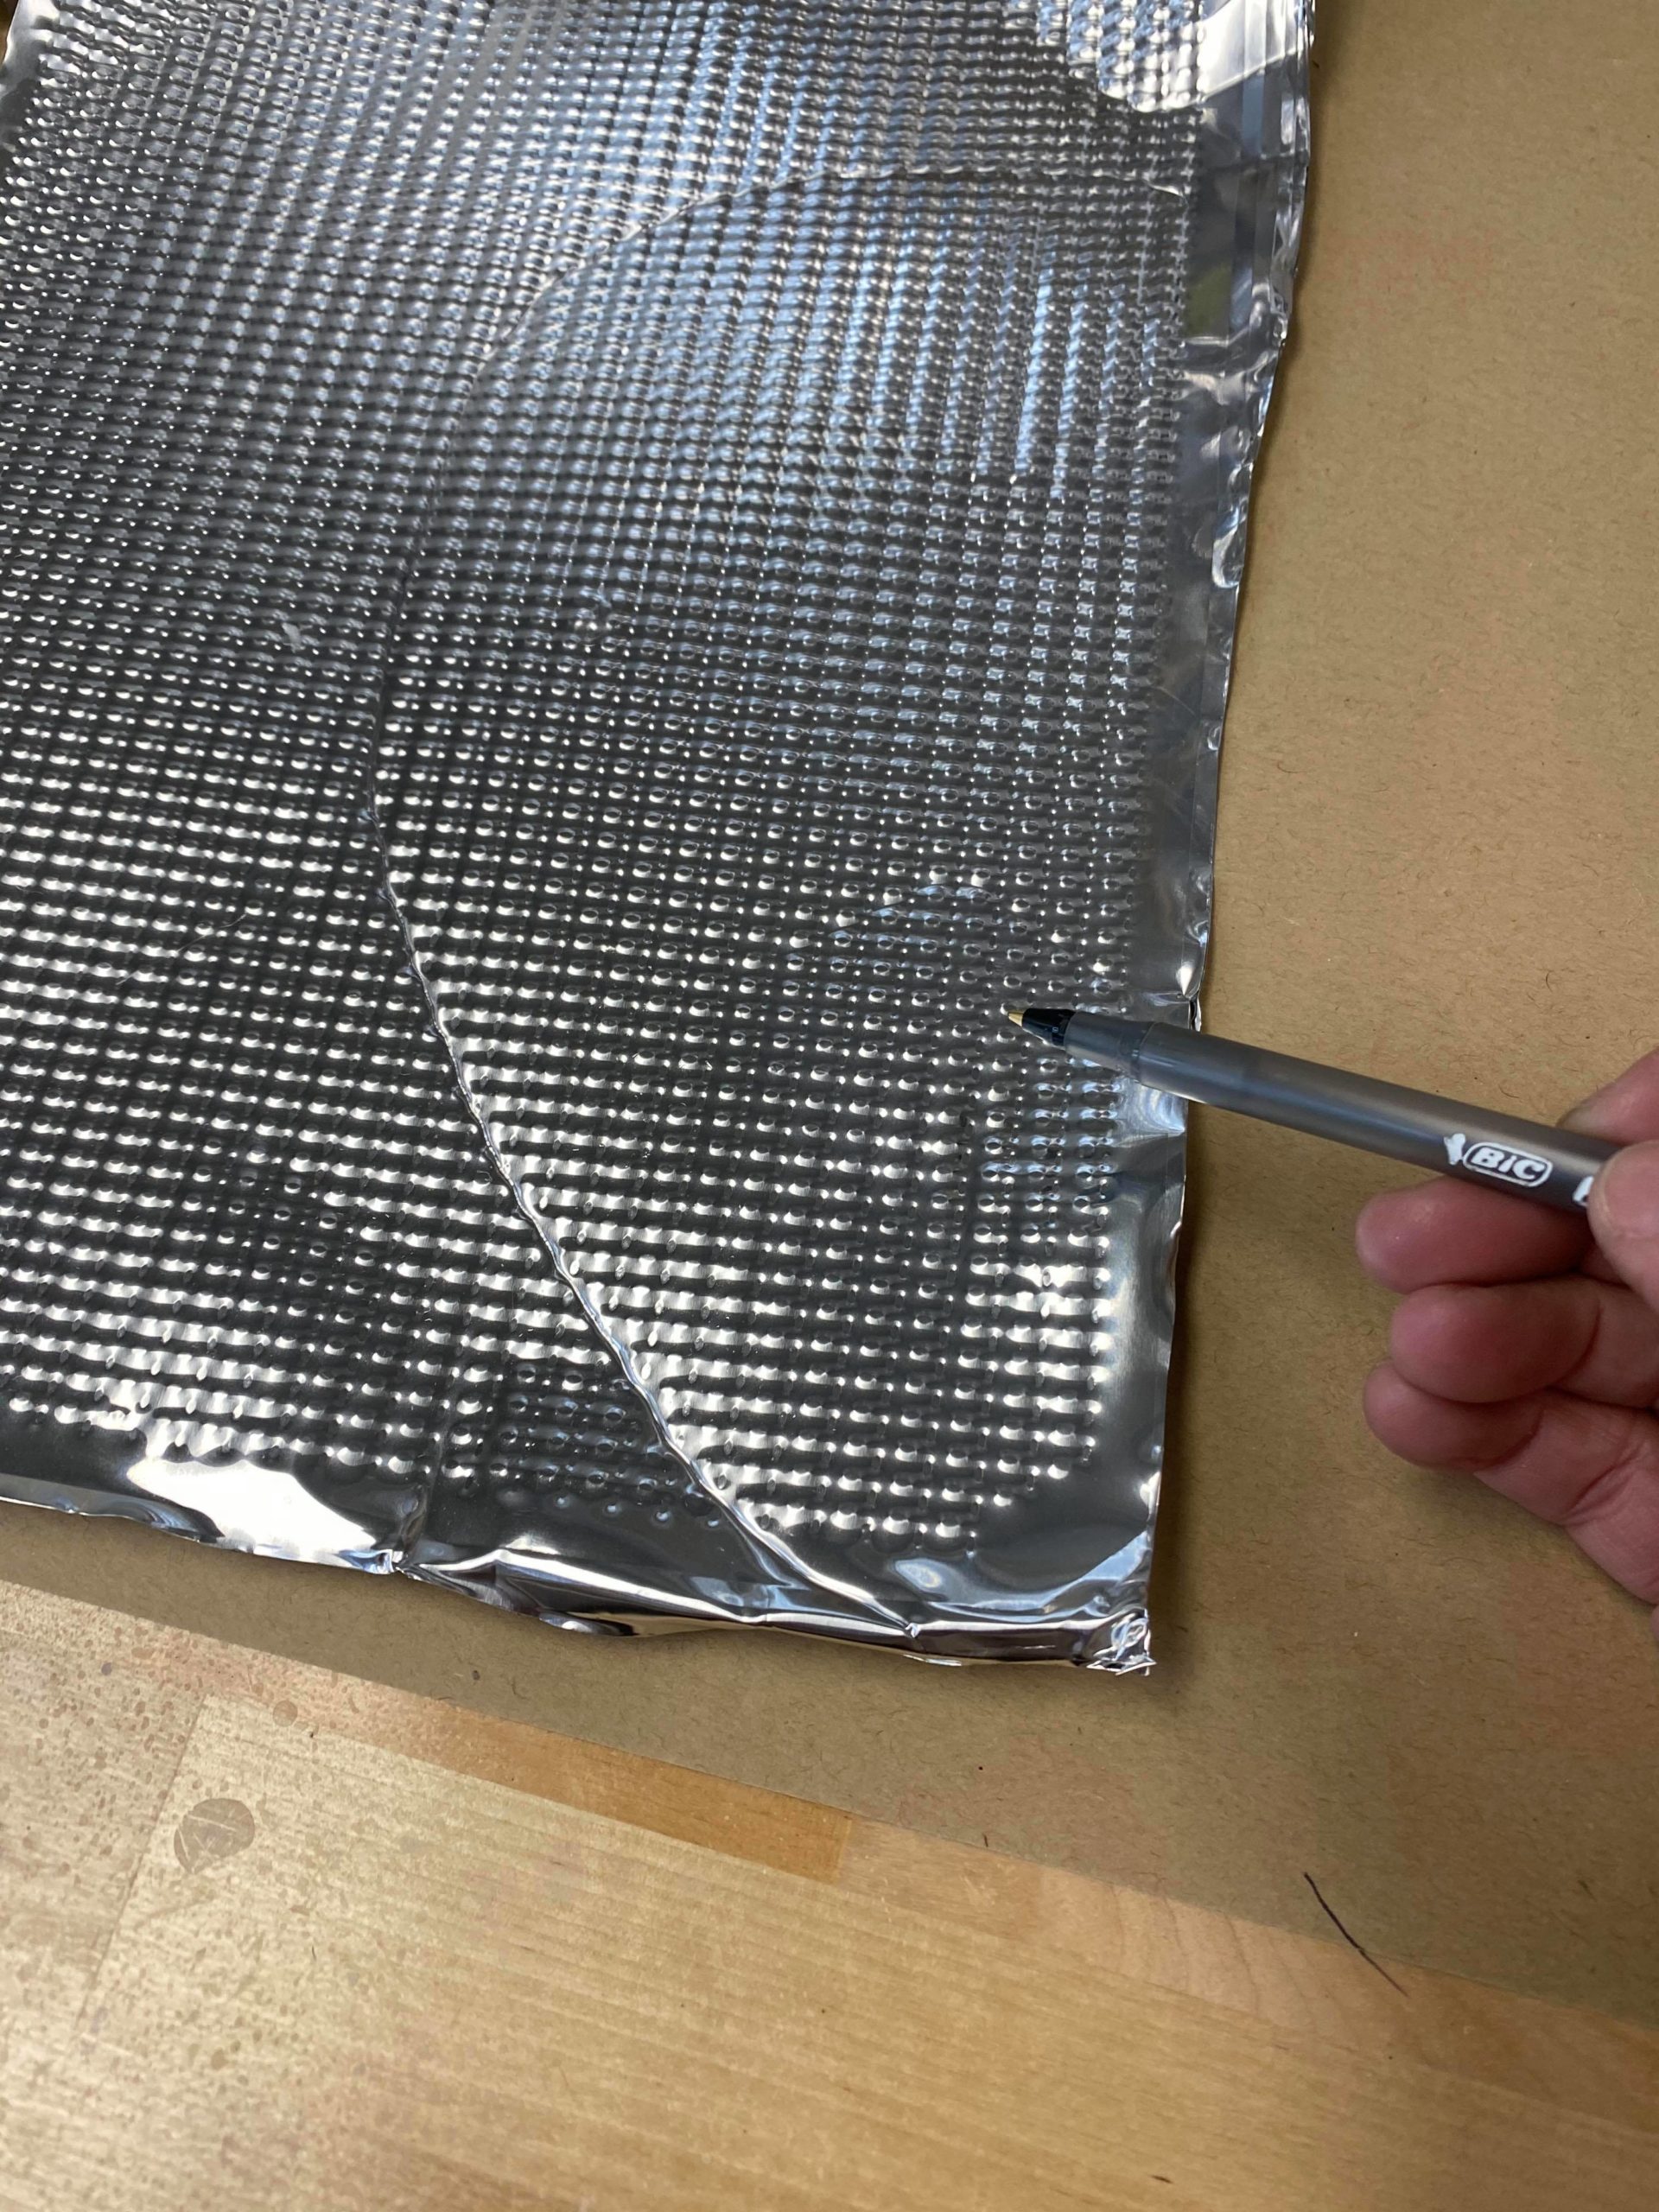
You will then cut two wings out of the cookie sheets. You can cut your wings any size you want.
Once the wings are cut you will then add a coat of paint to your owl before glueing on the wings.
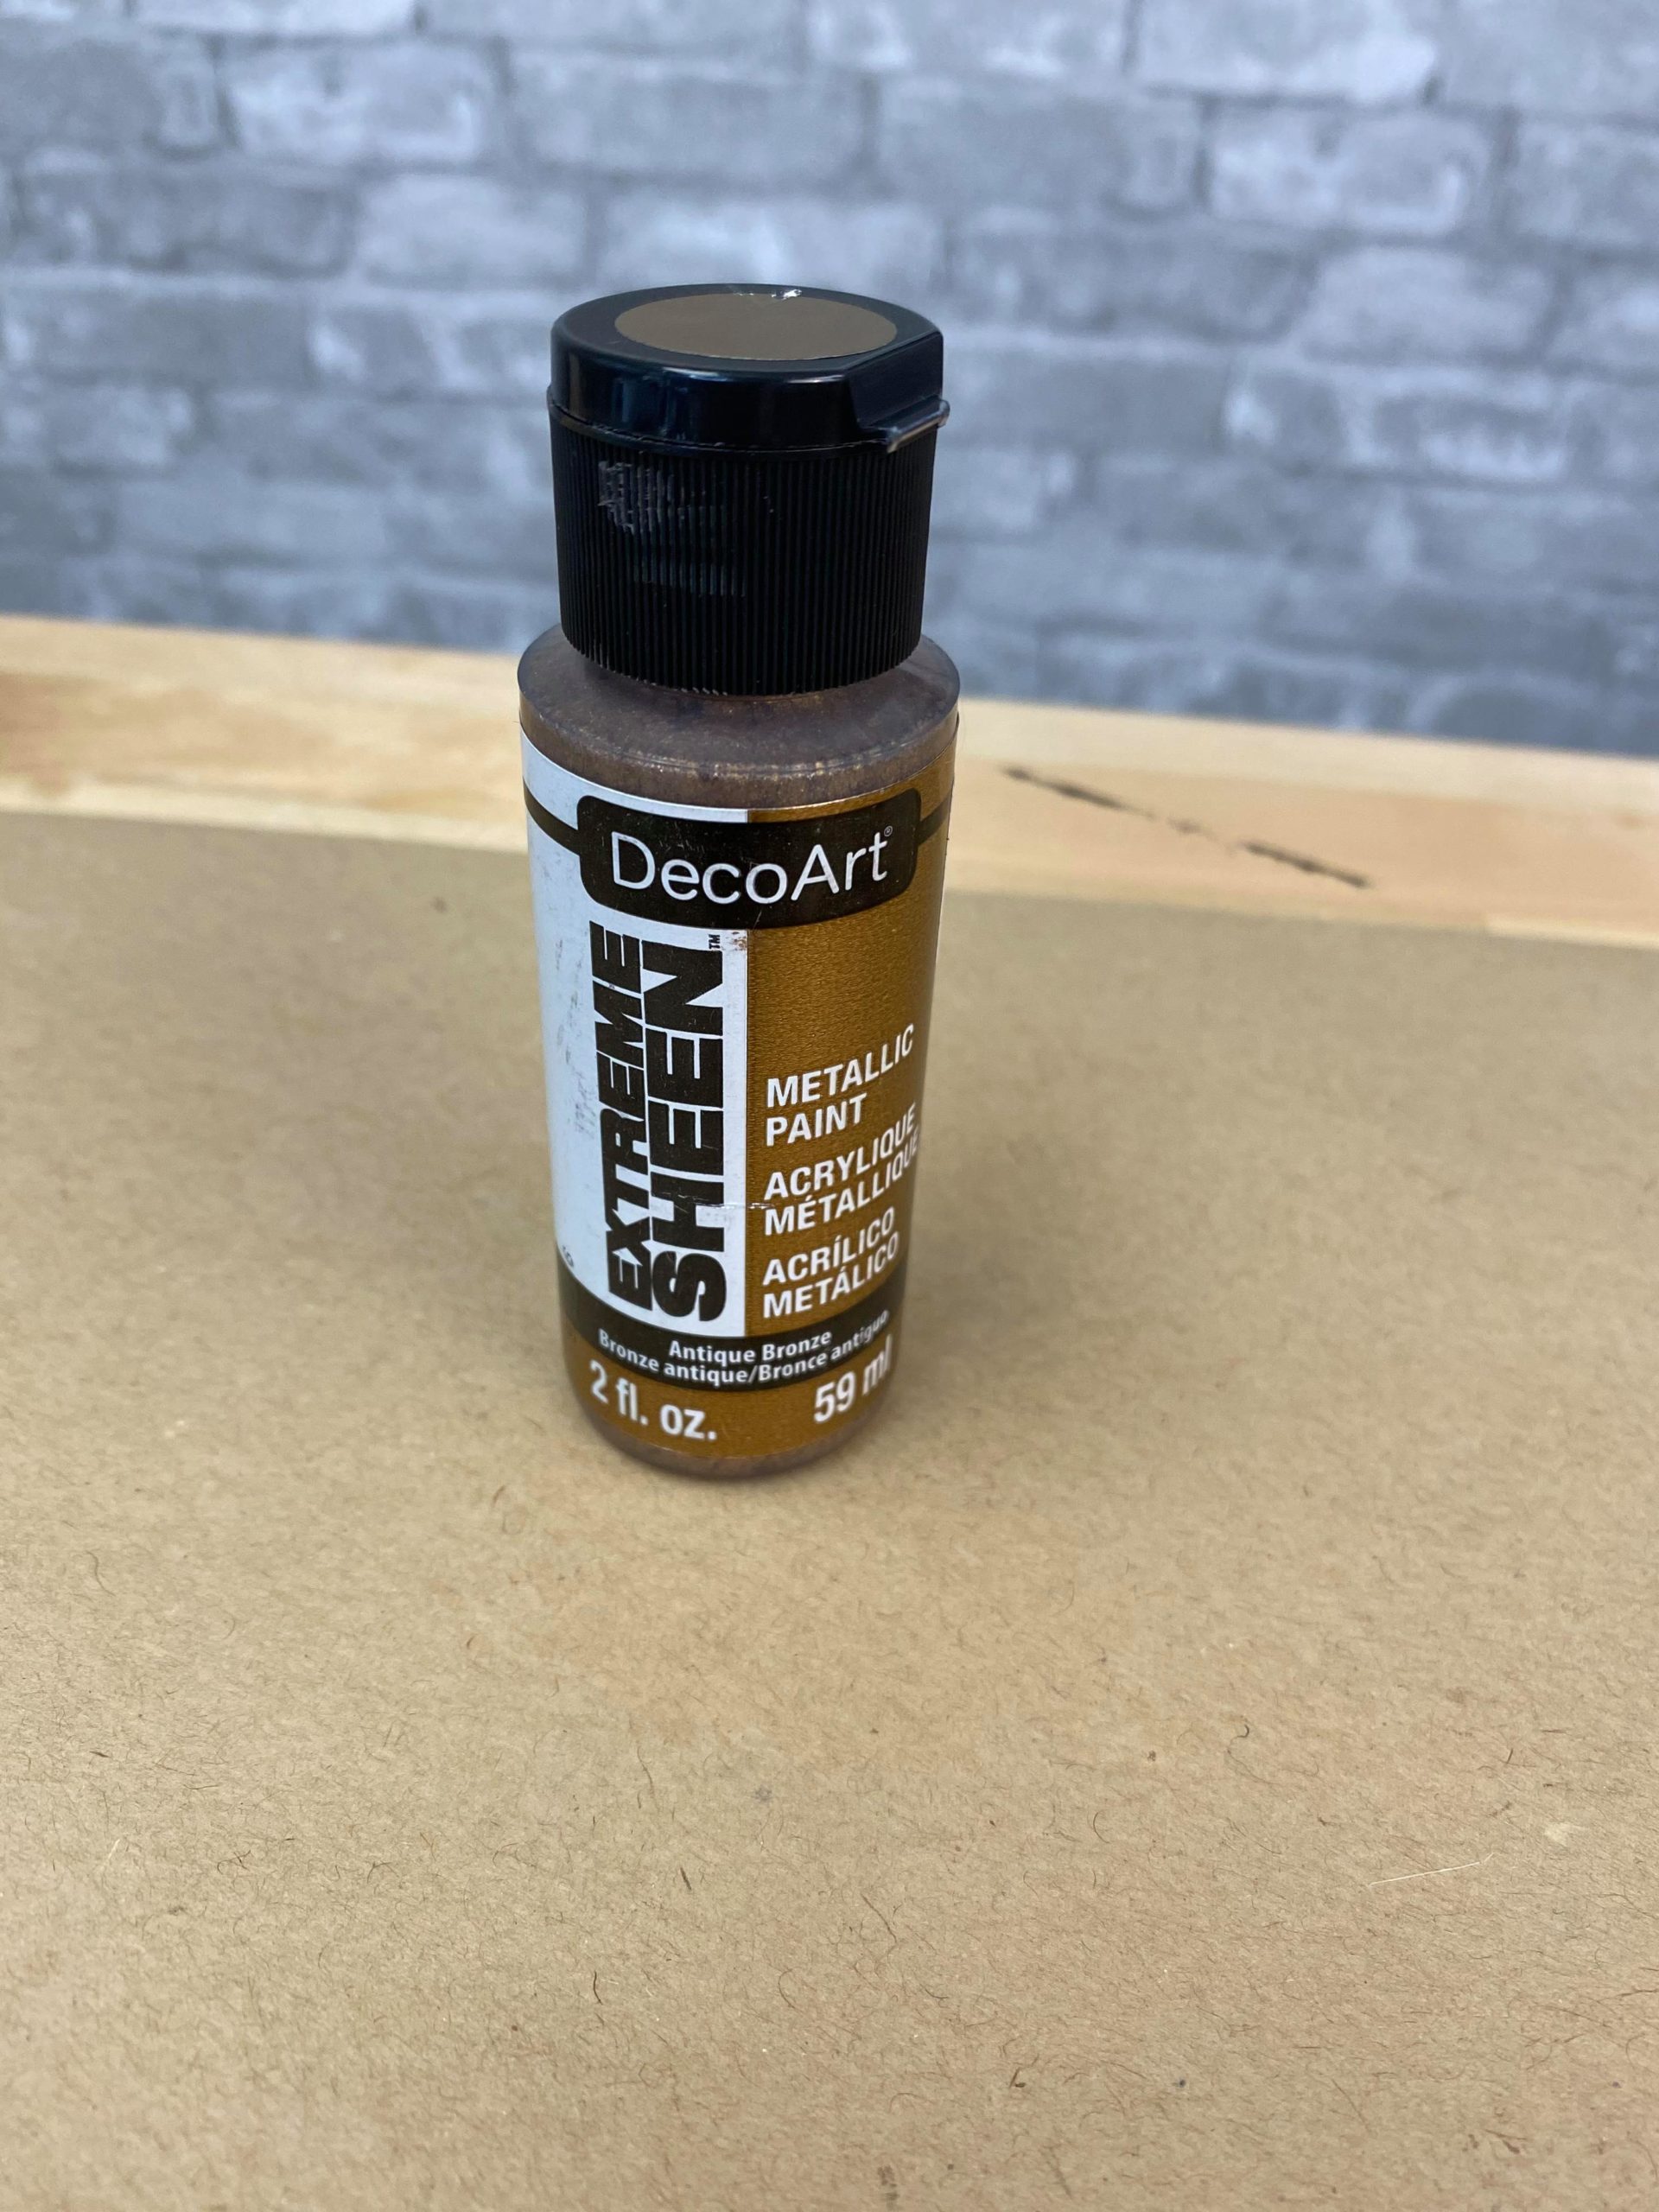
I am using an antique bronze by DecoArt.

I added one coat to the body of the owl and the wings. I did not paint the tart tins.
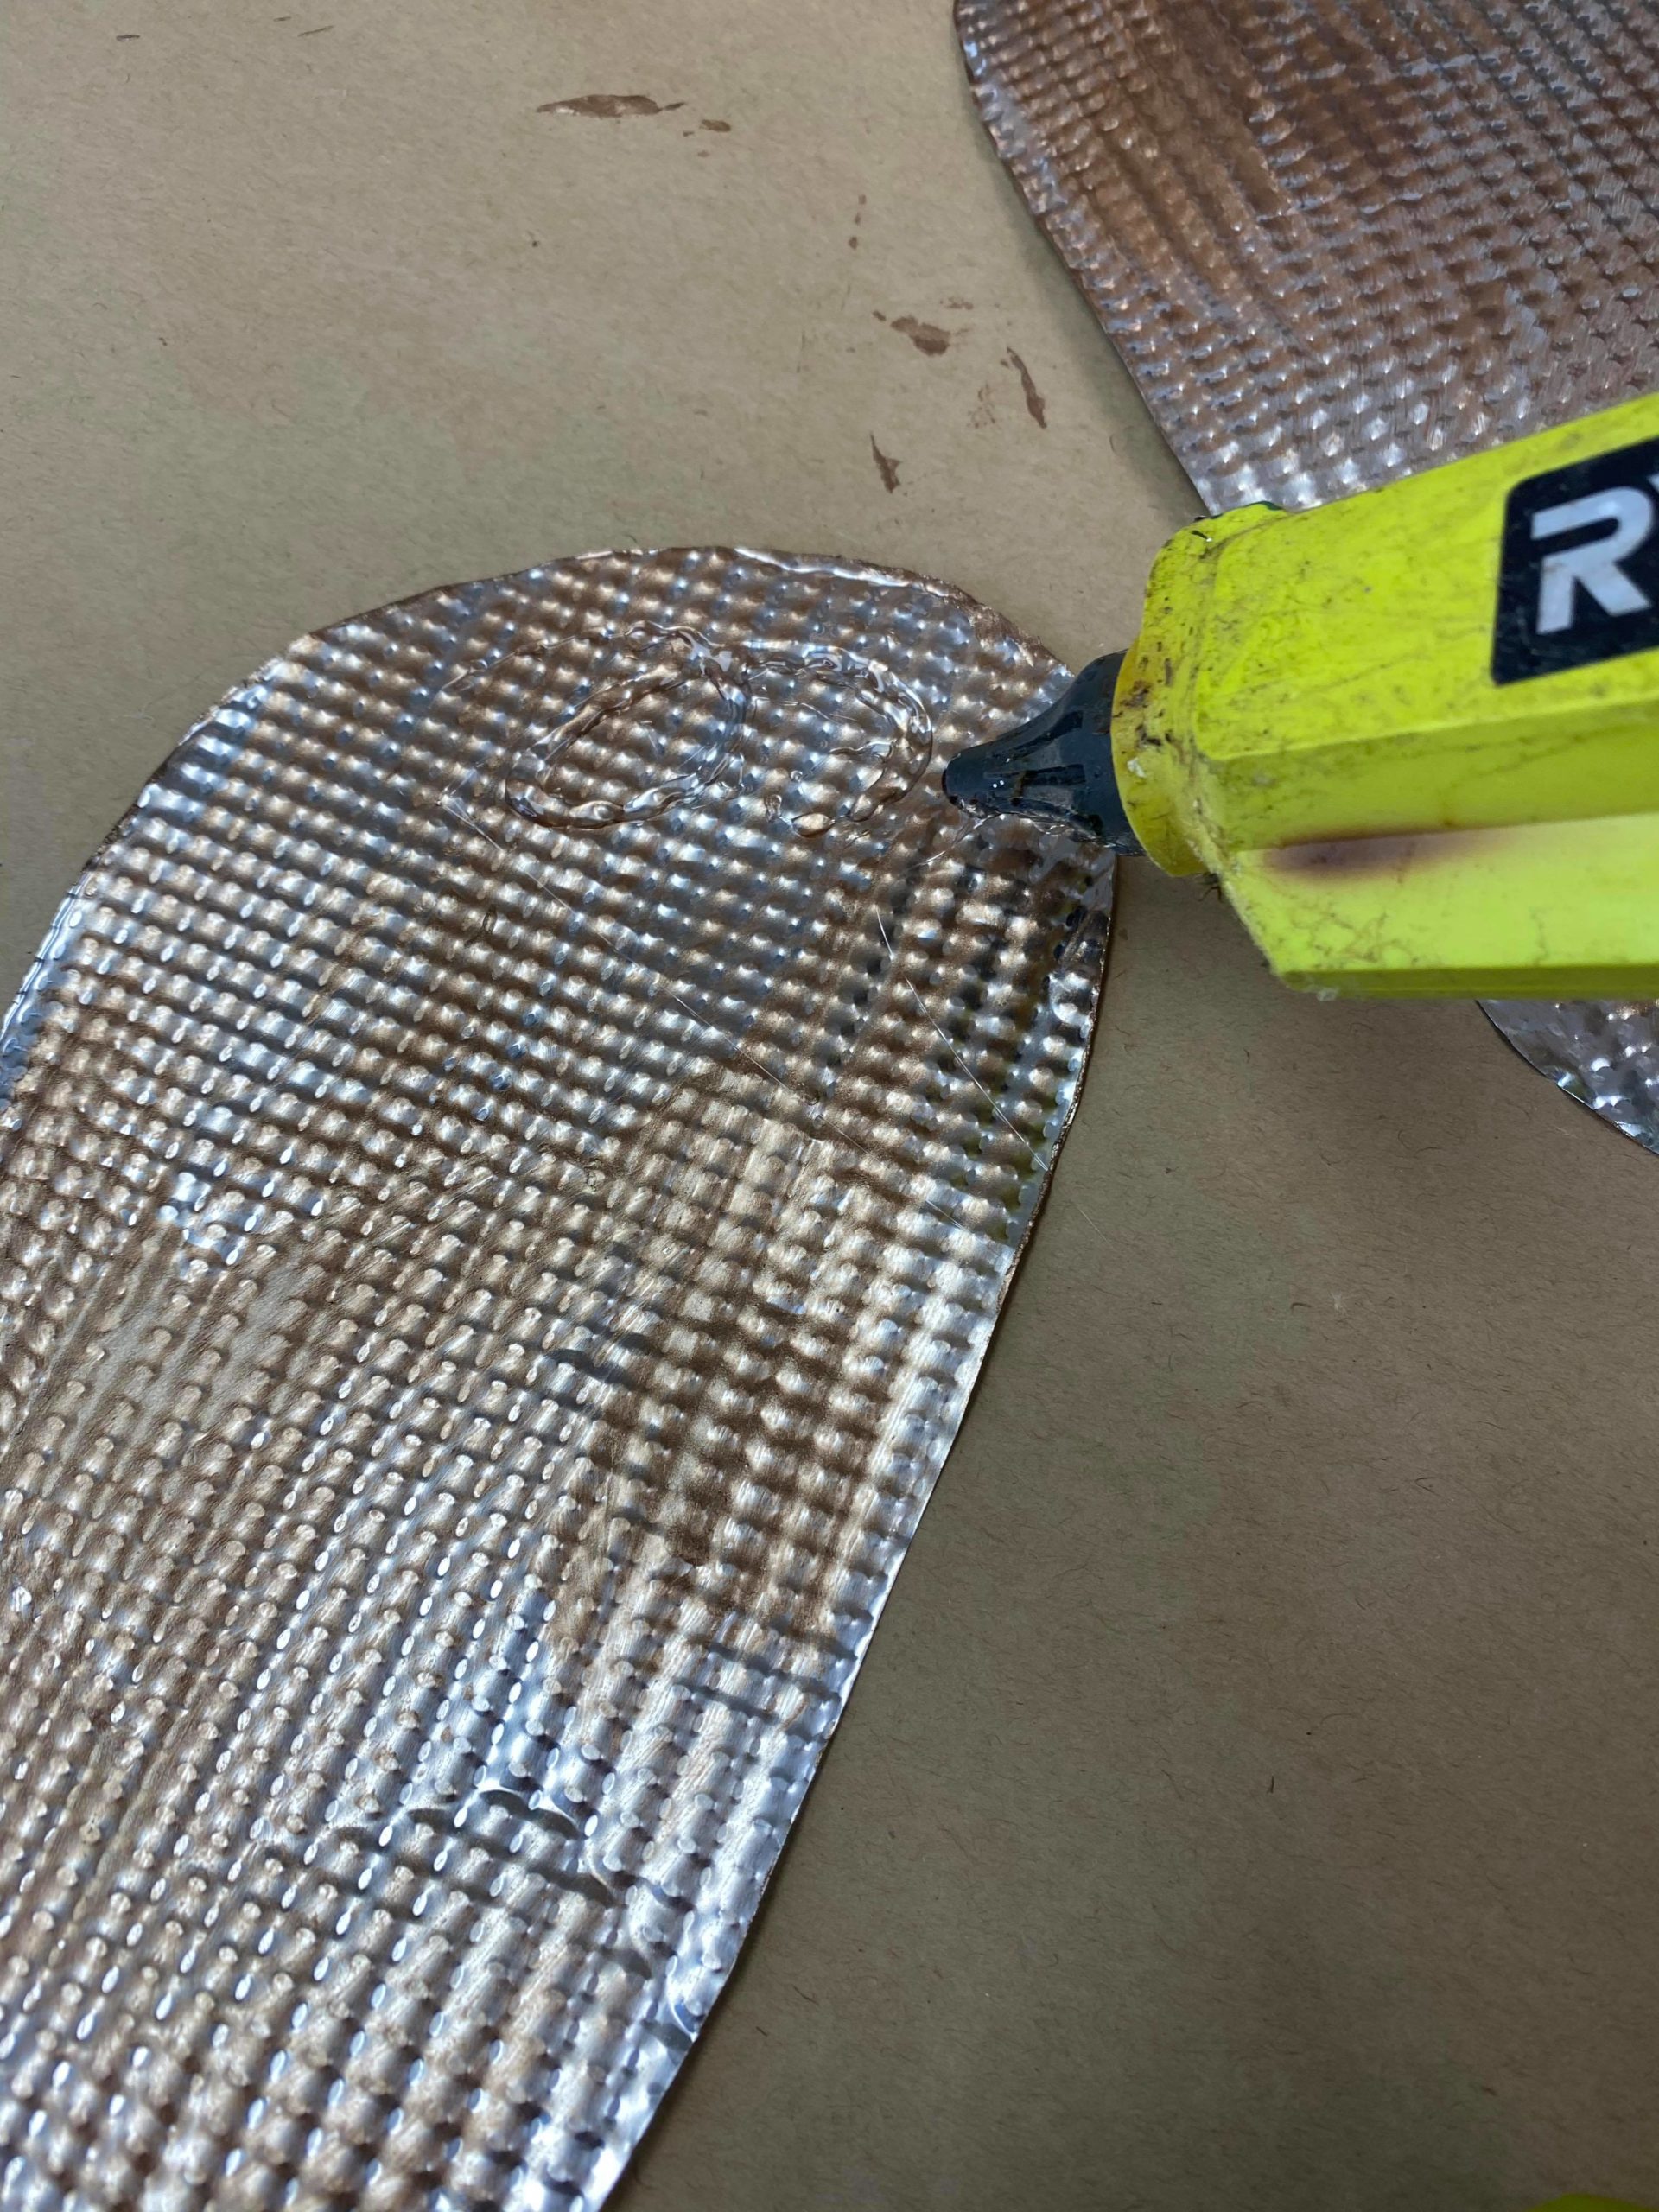
I added hot glue to the top part of the wings and glued them in place.
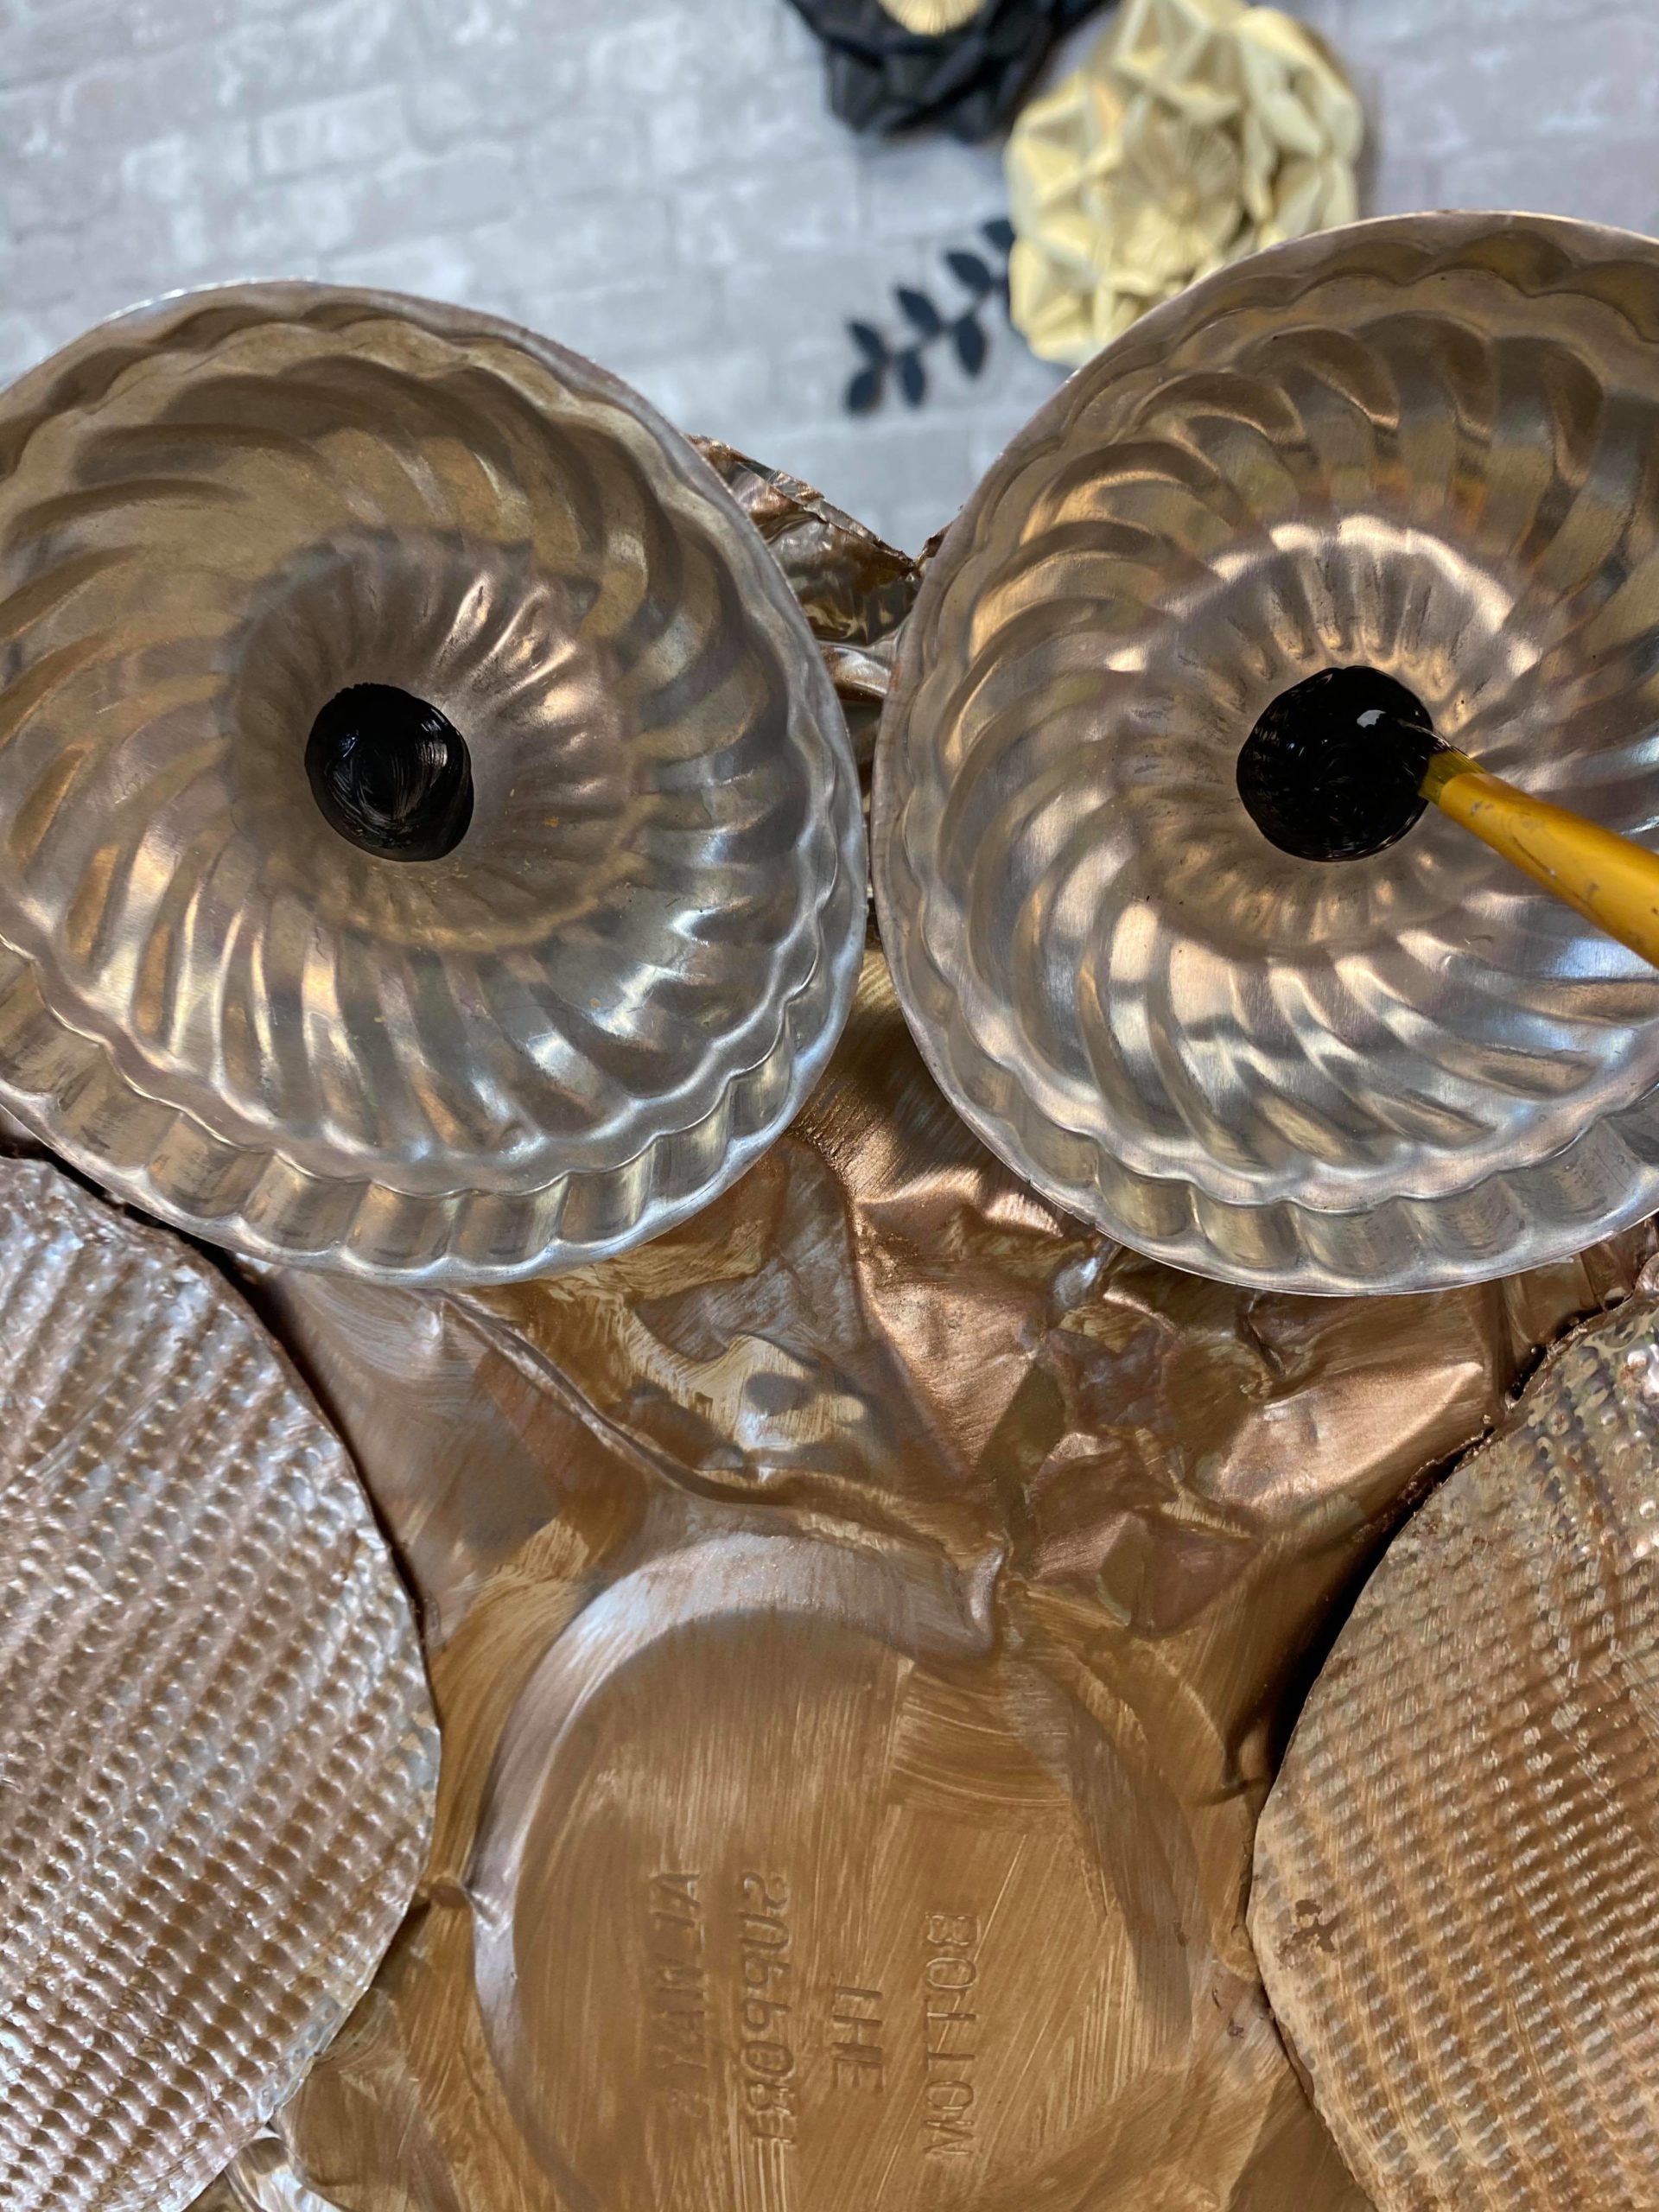
I added black paint to the center of the tart tins.
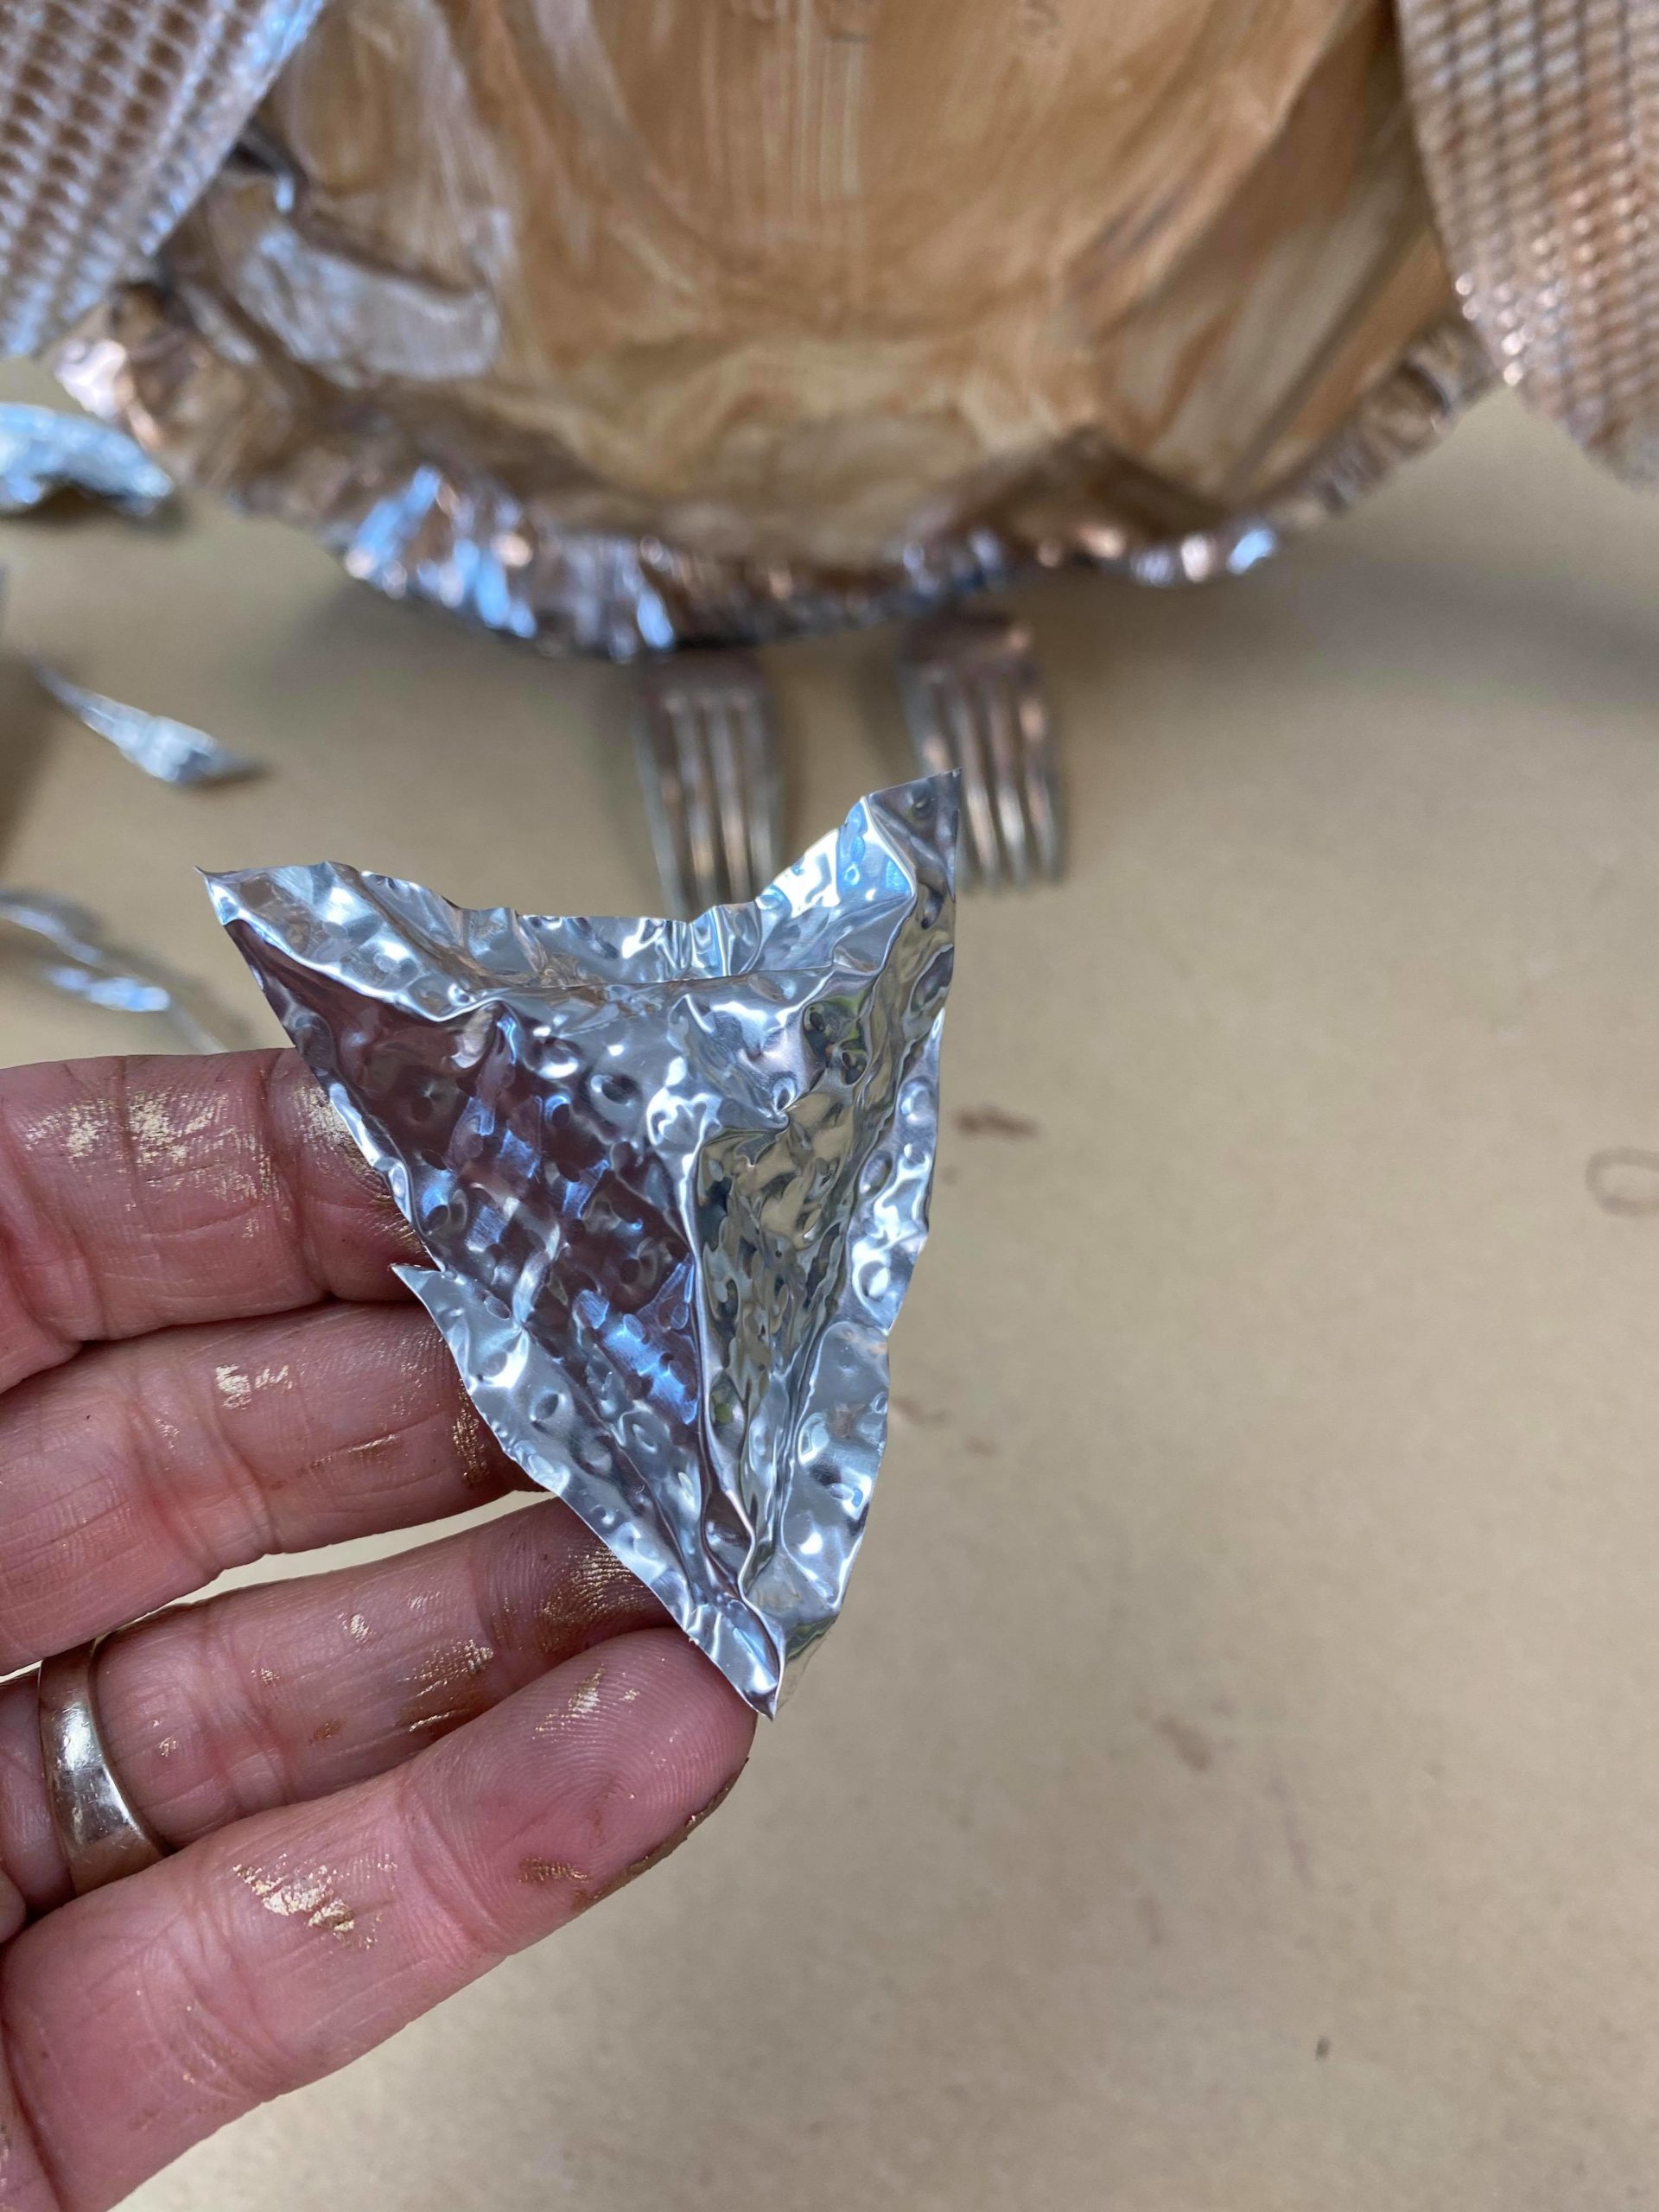
I cut a small triangle out of the cookie sheet for the beak. You will want to fold the ends to form a rim that will allow you to glue it onto the owl.
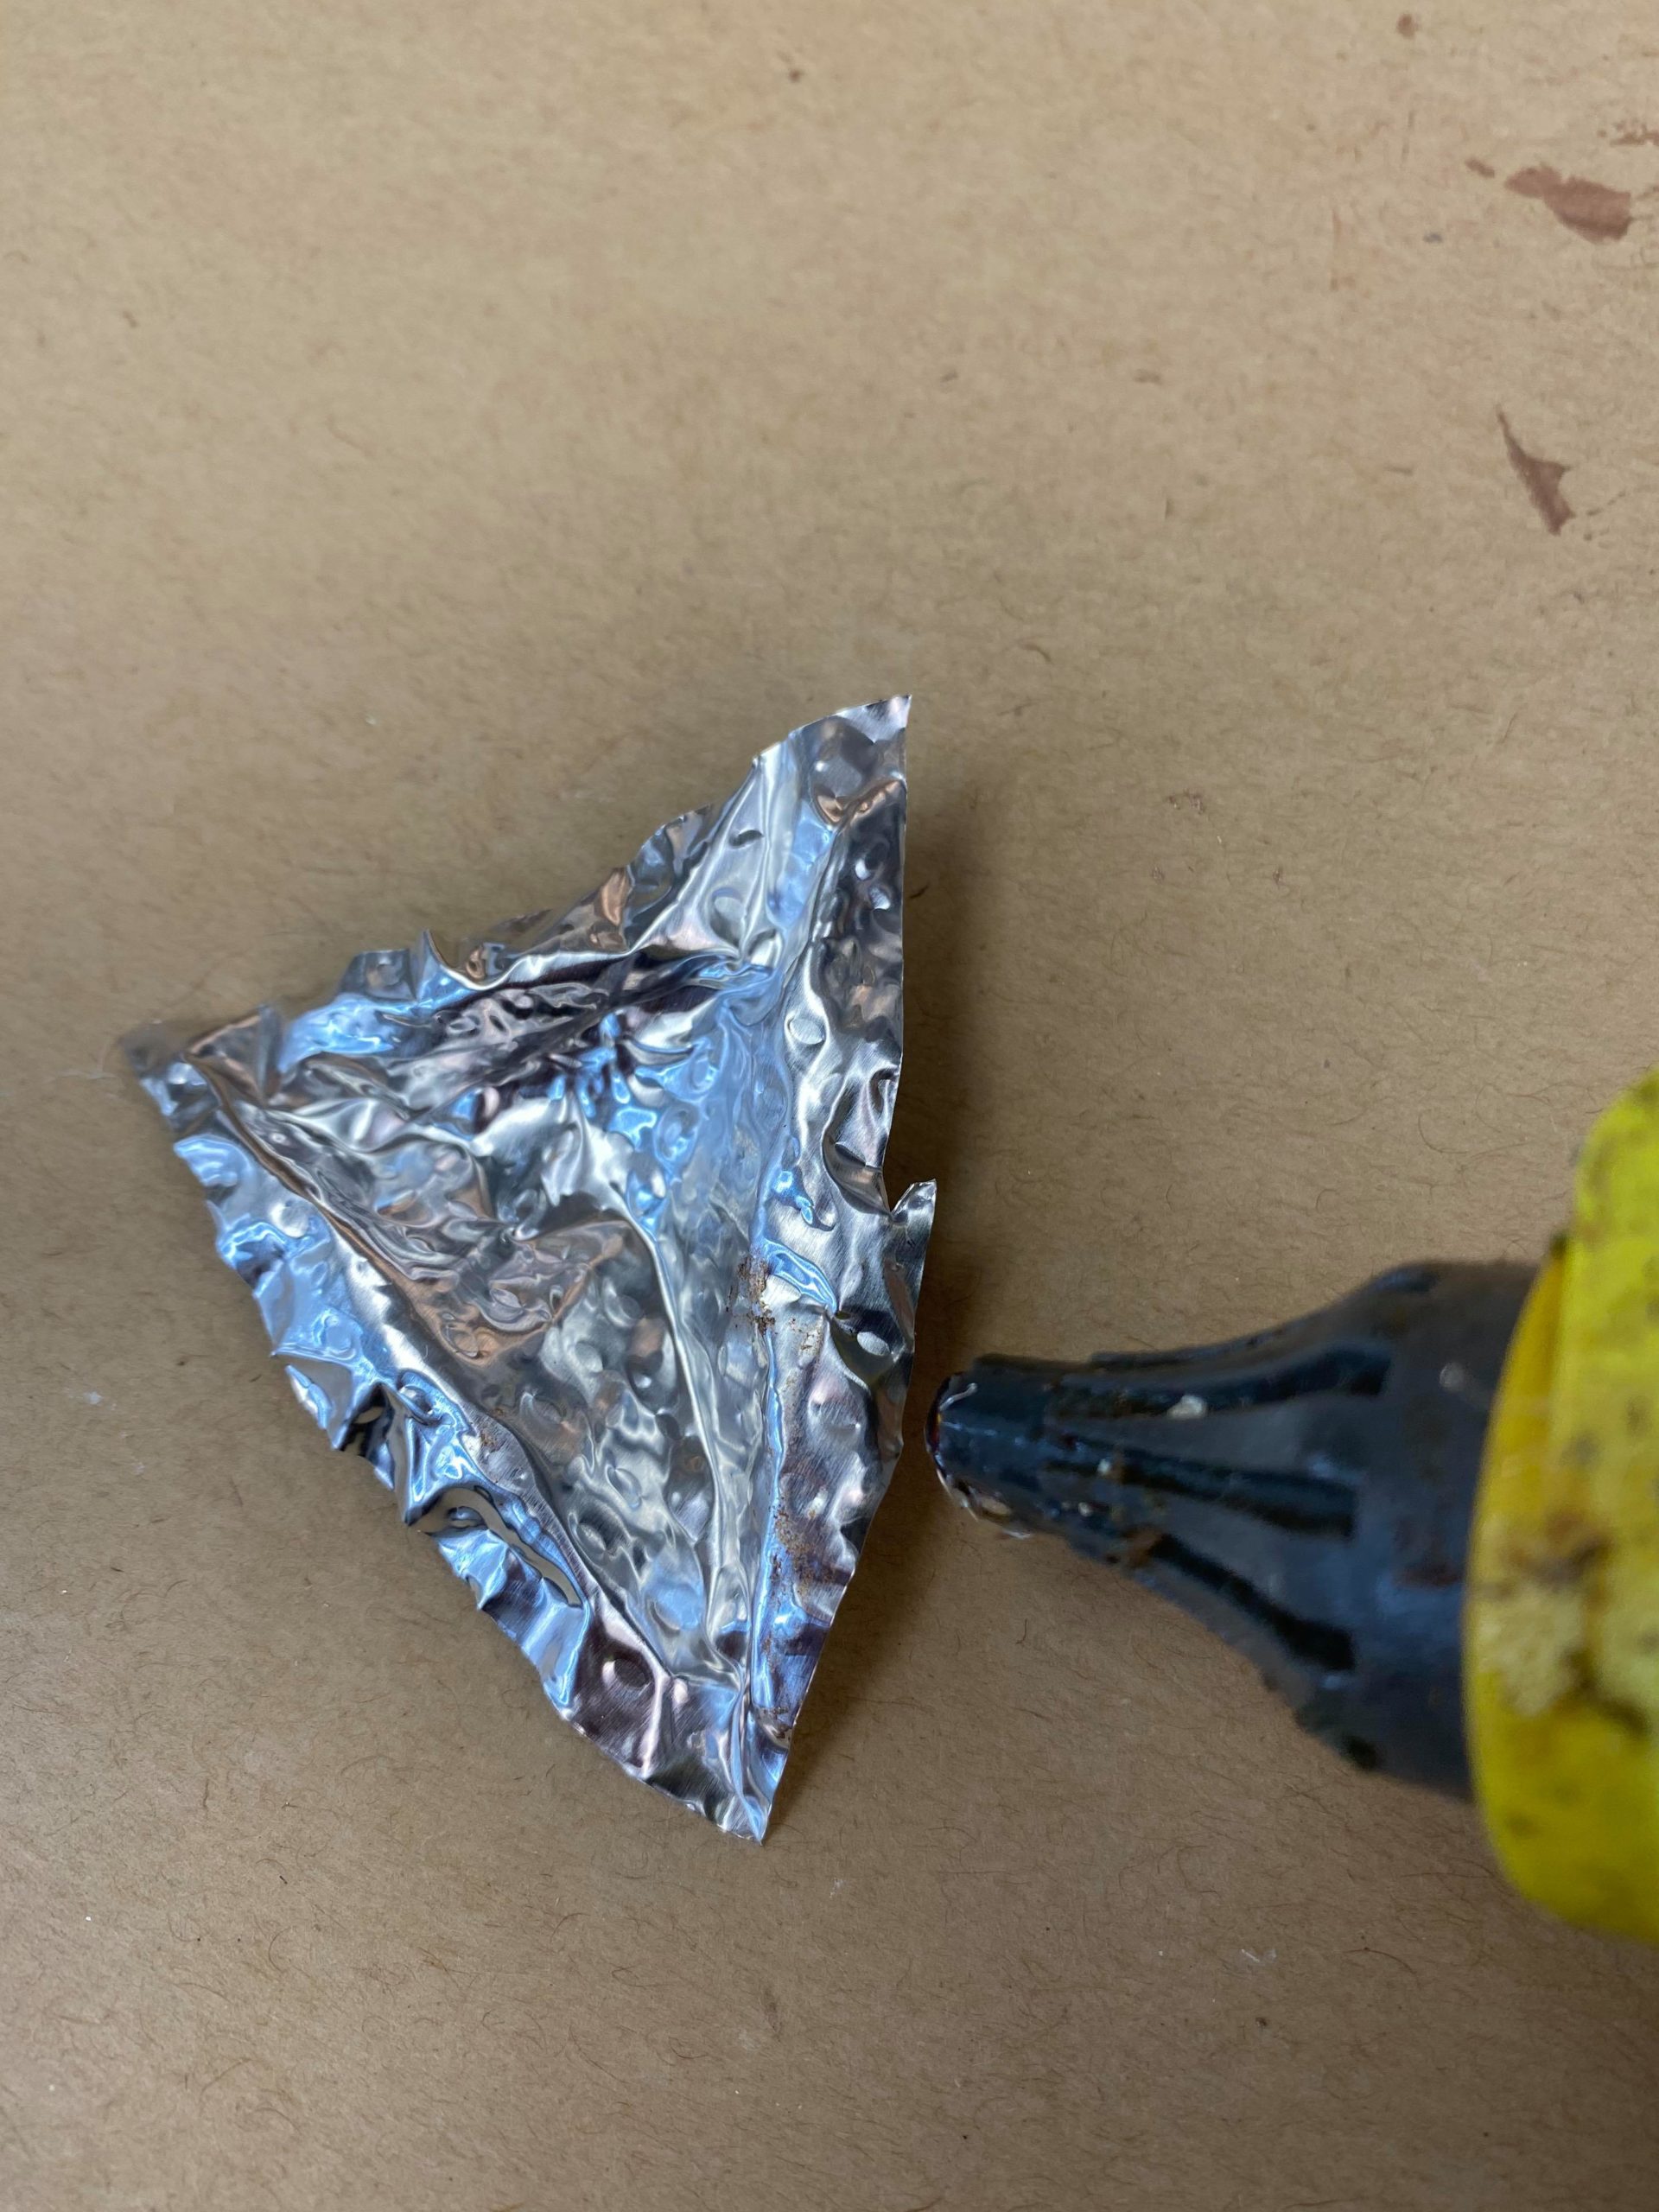
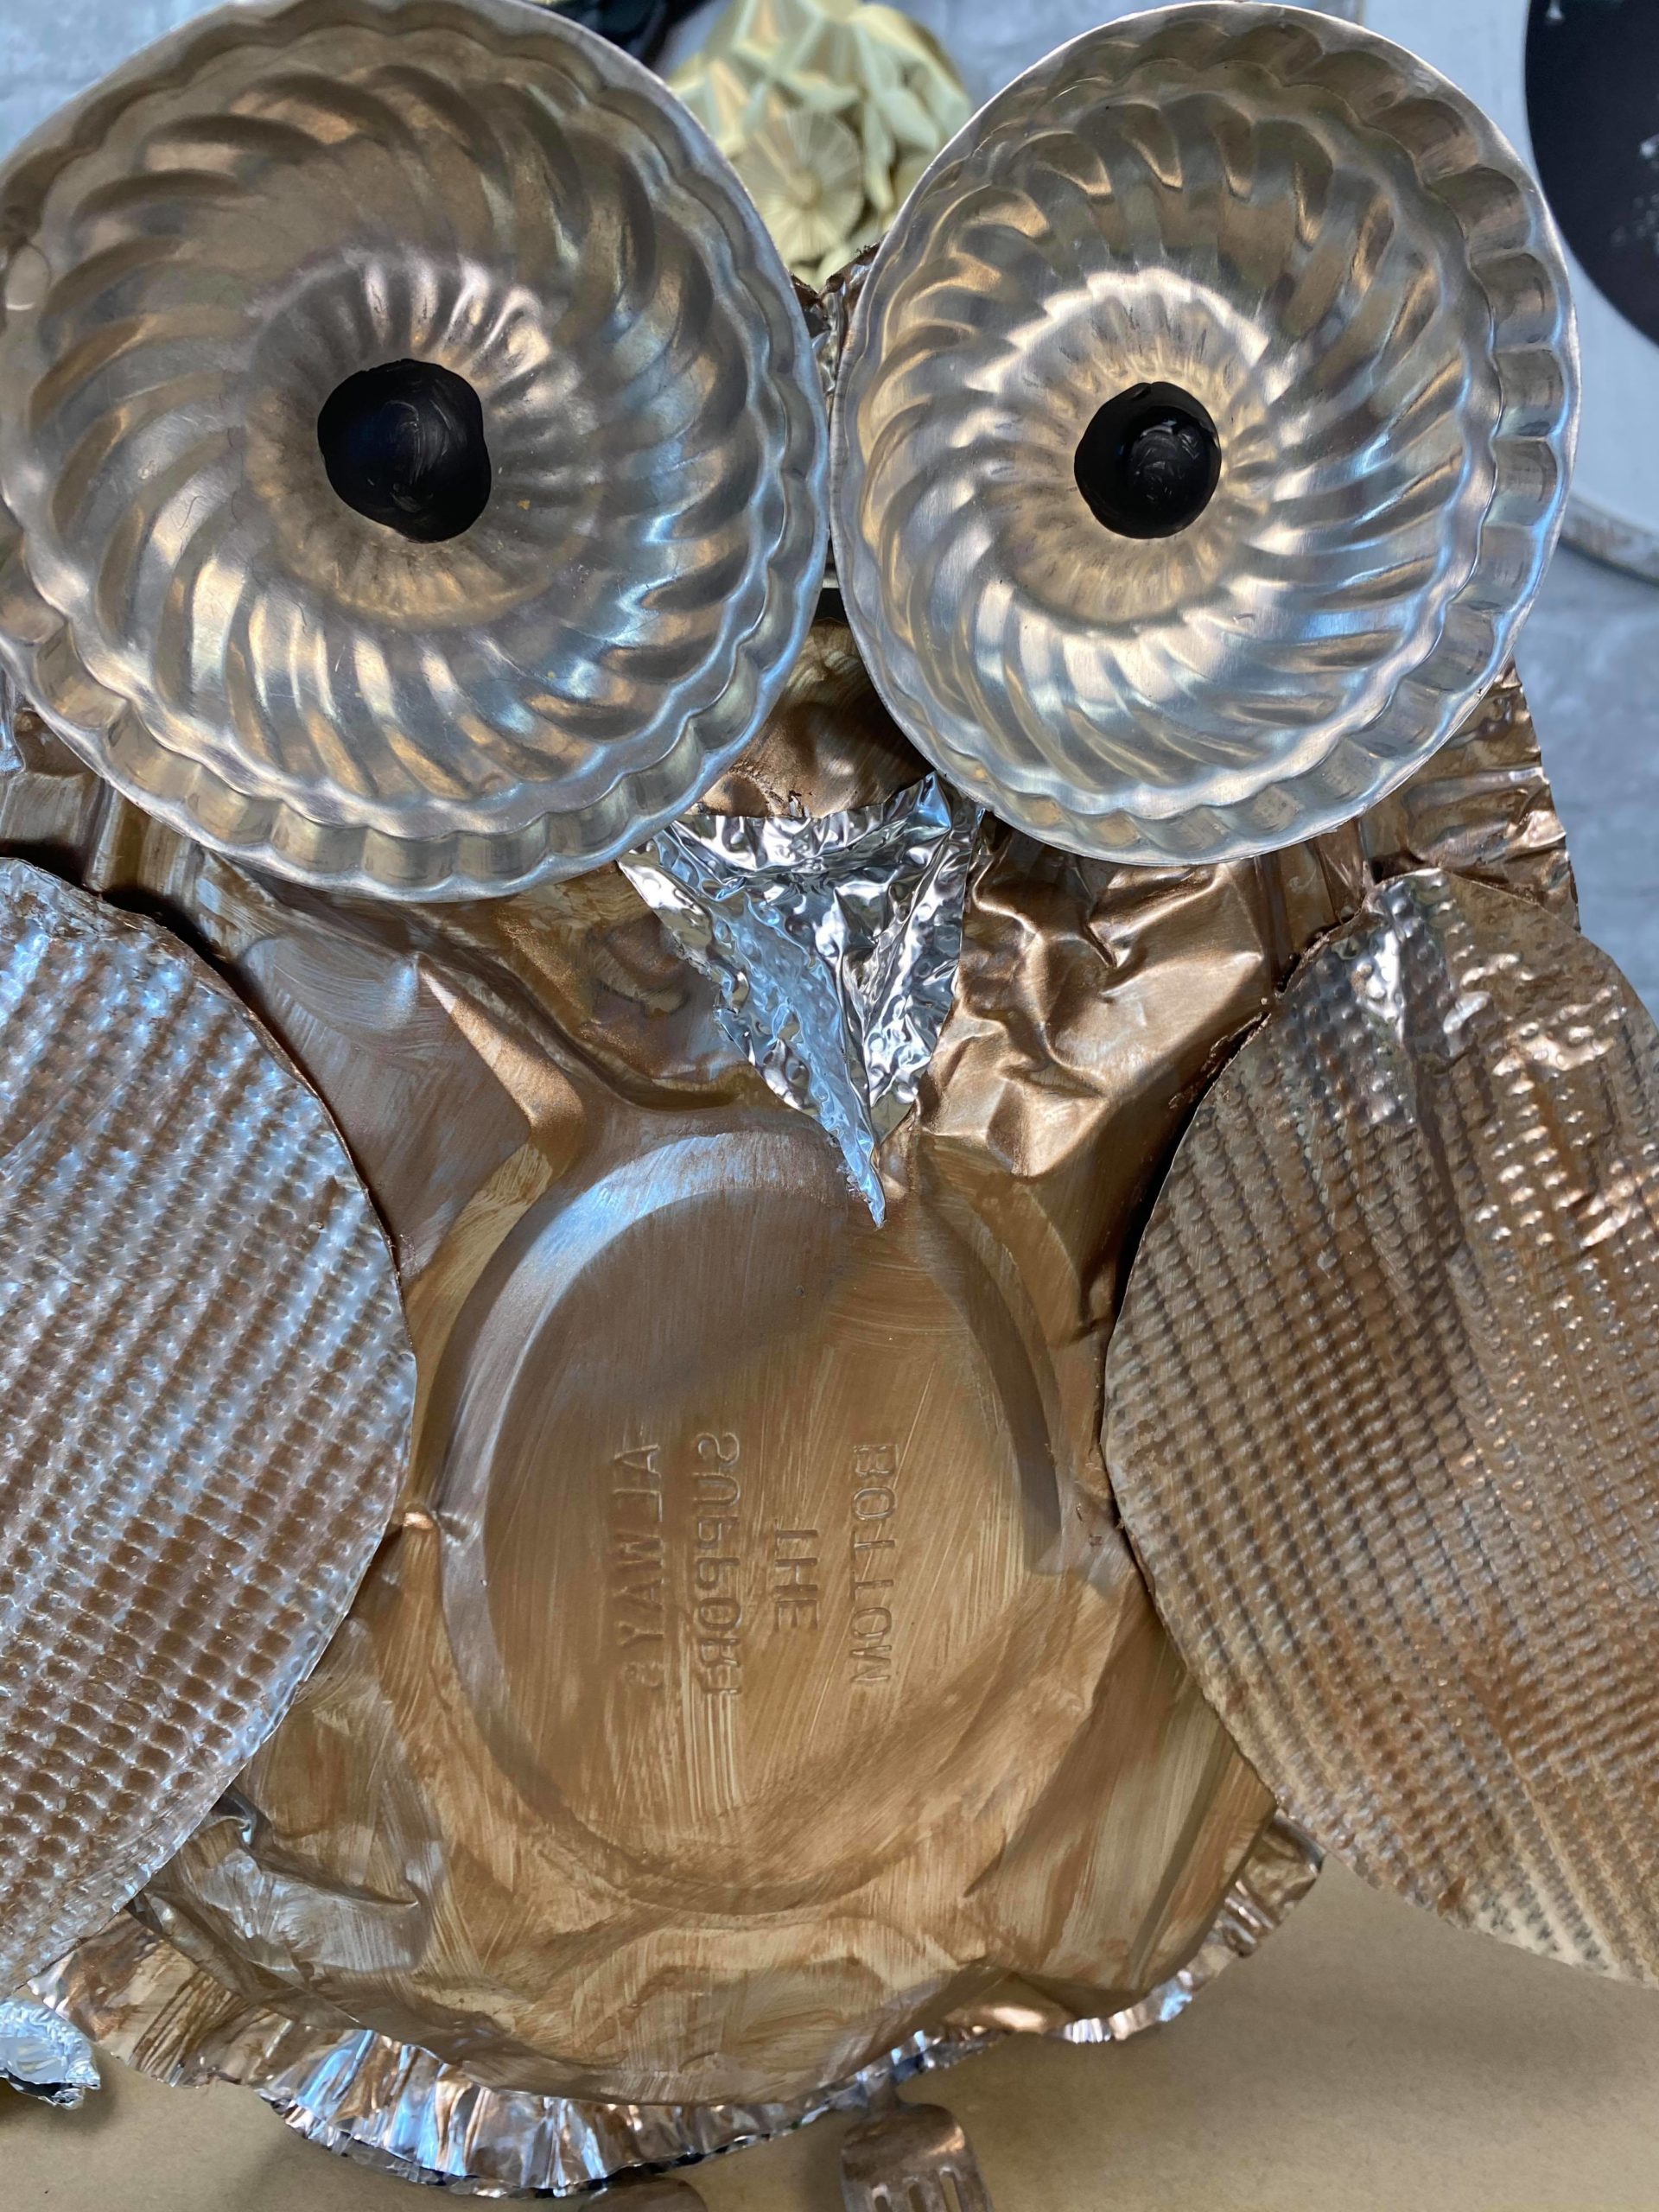
Once it was glued in place I then added a little orange paint to it.
I did not like that you can see the writing in the center of the pan so I added some texture paint over the body of the owl.
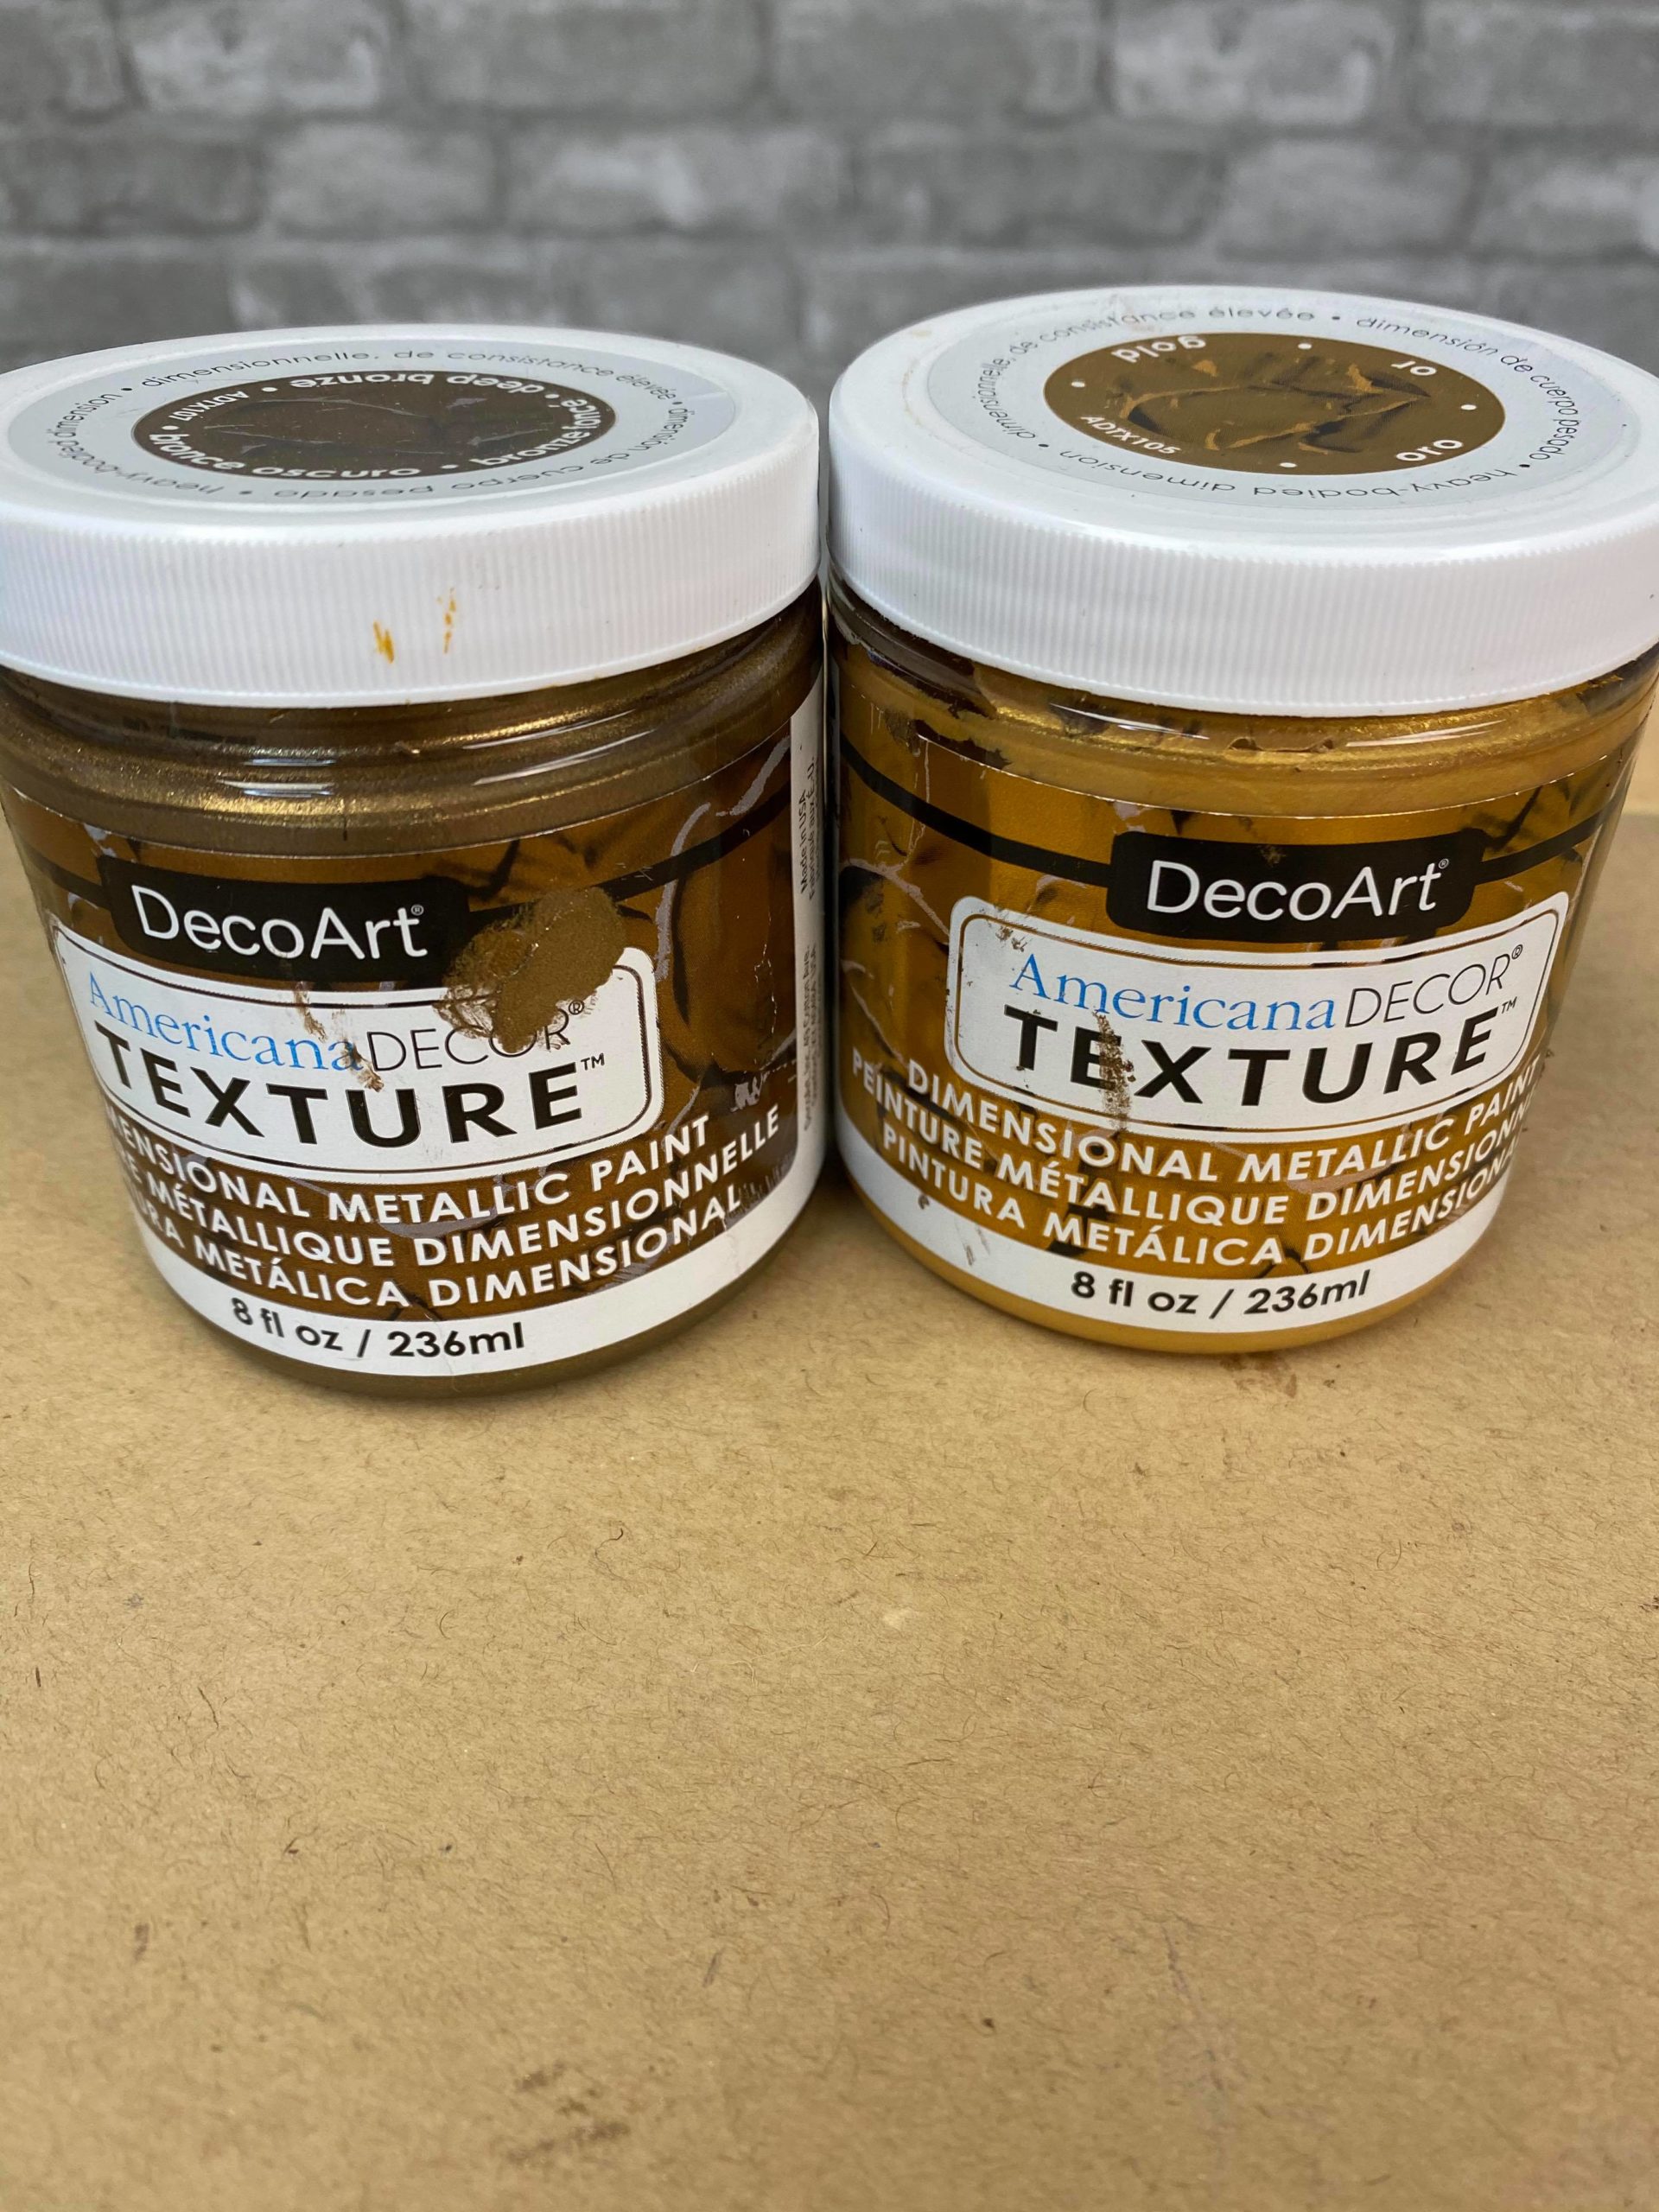
I used Texture by DecoArt and I used the colors bronze and gold.
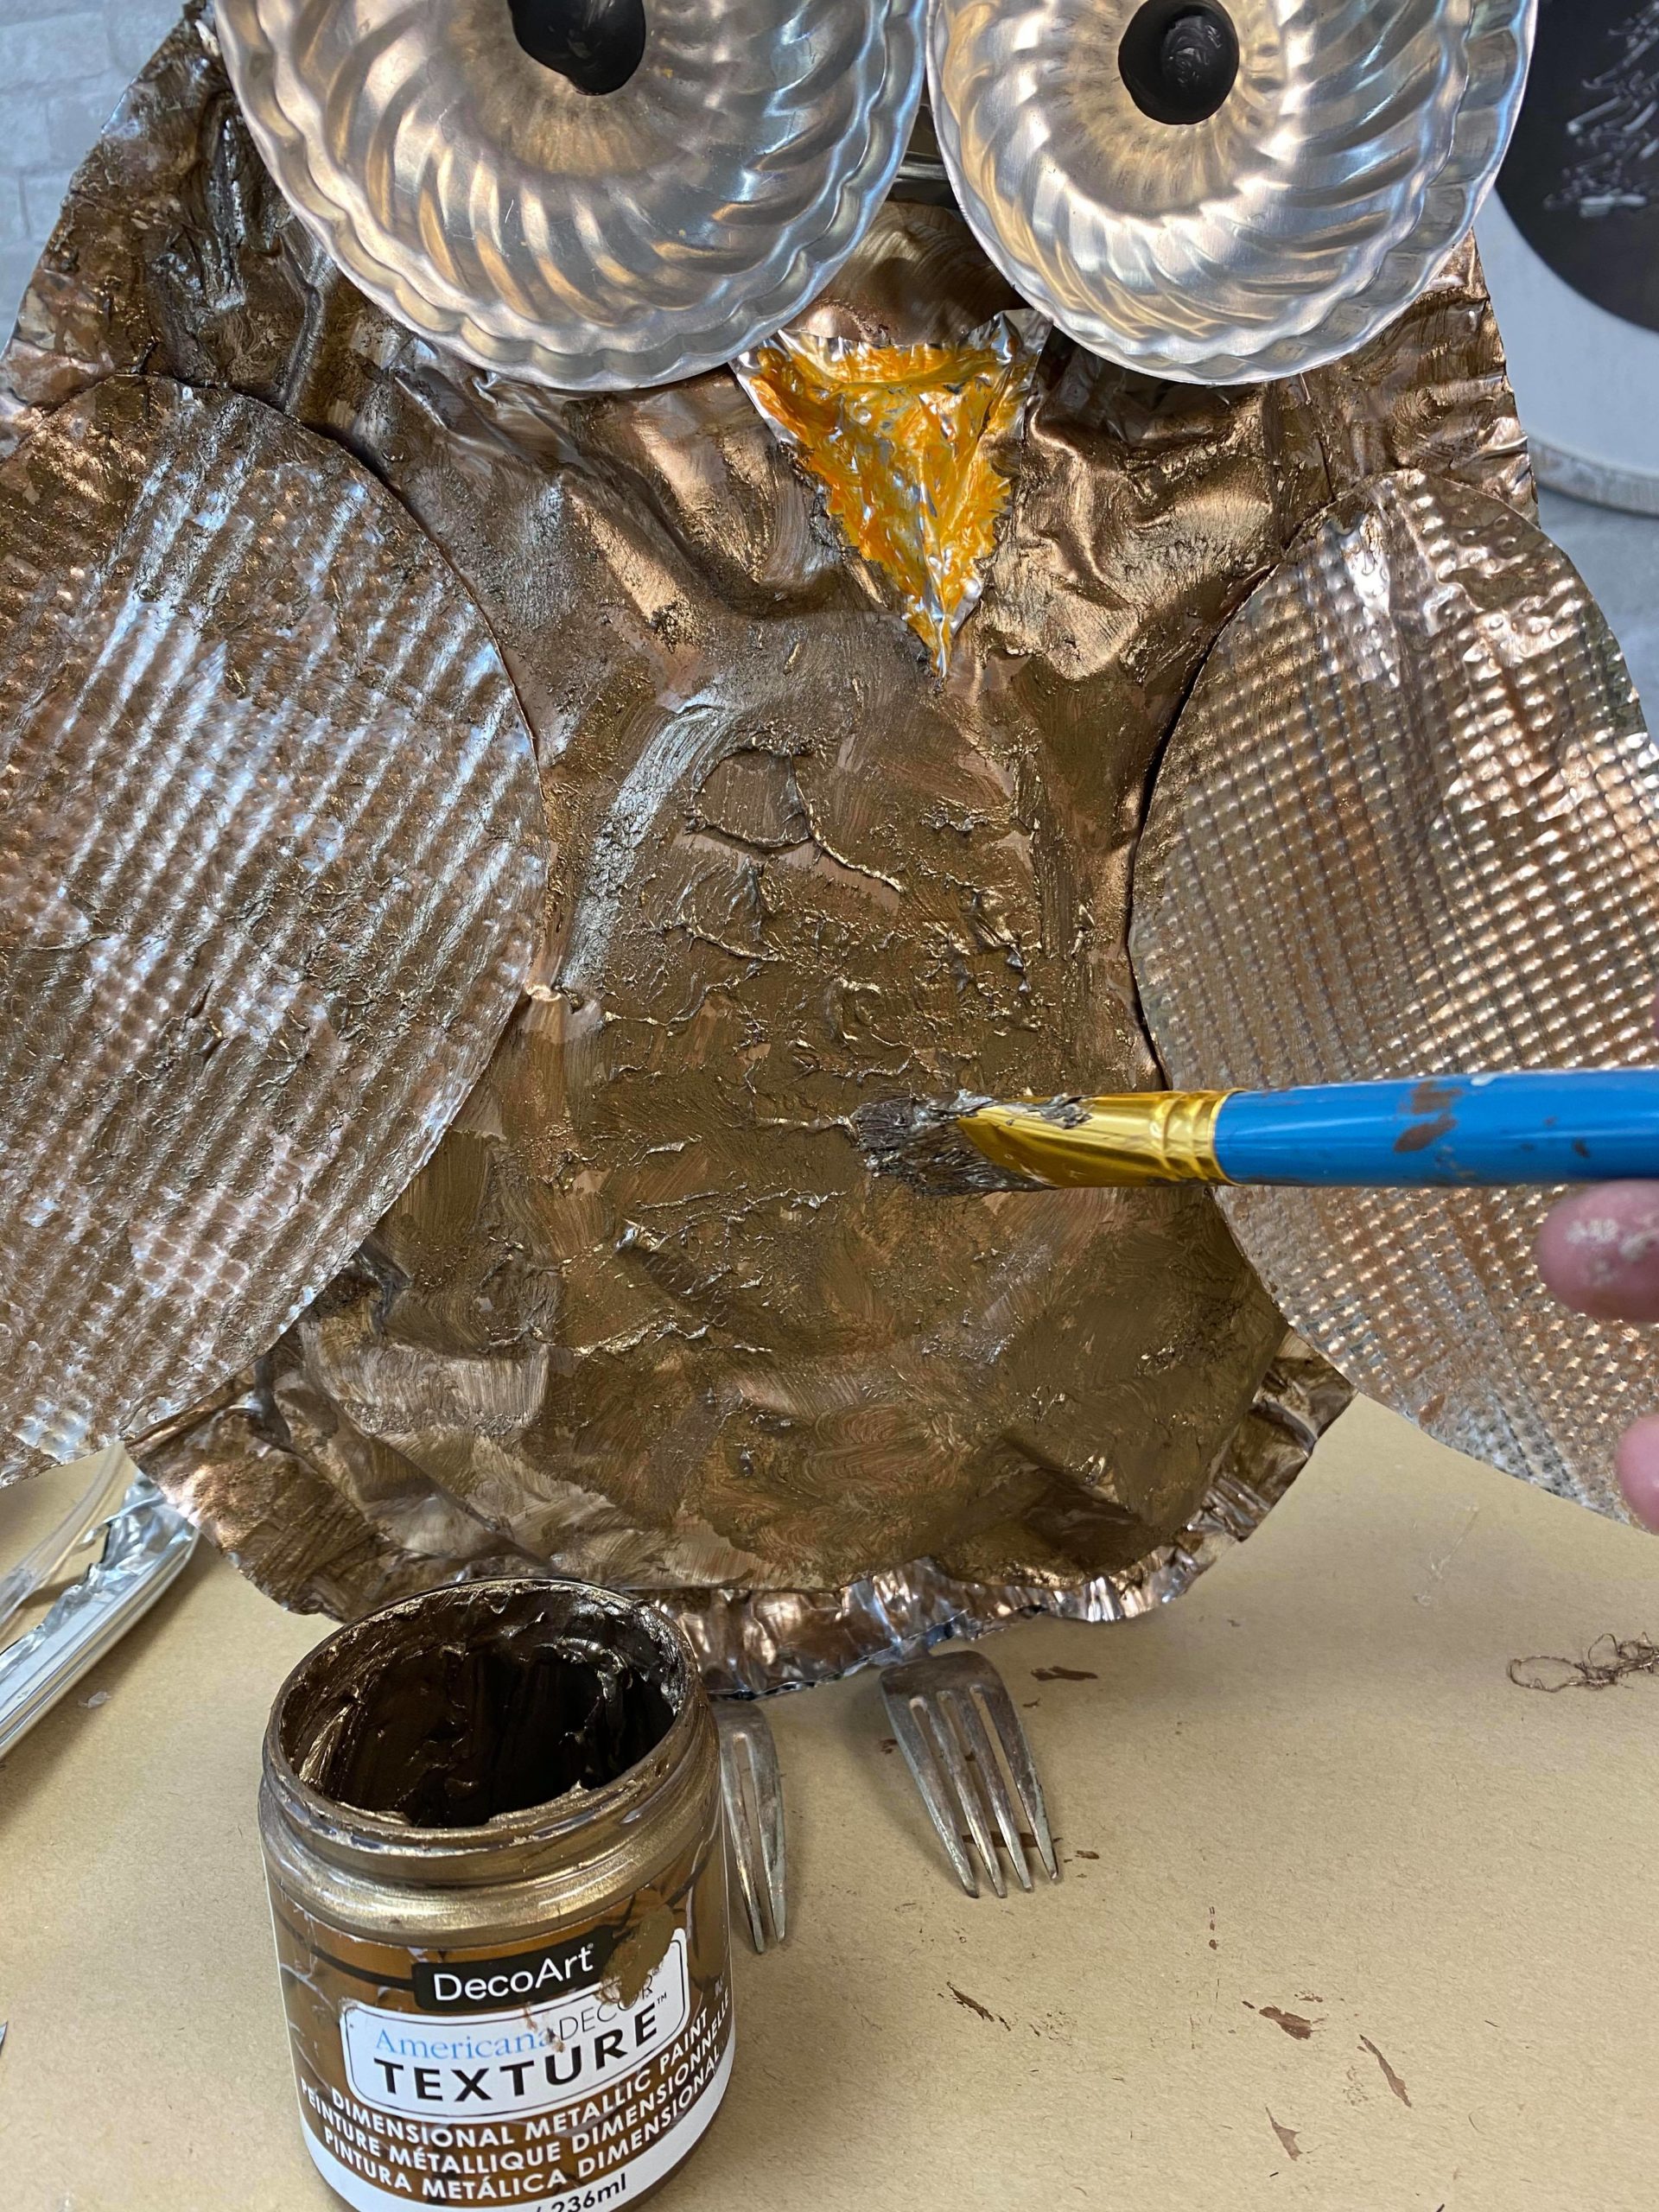
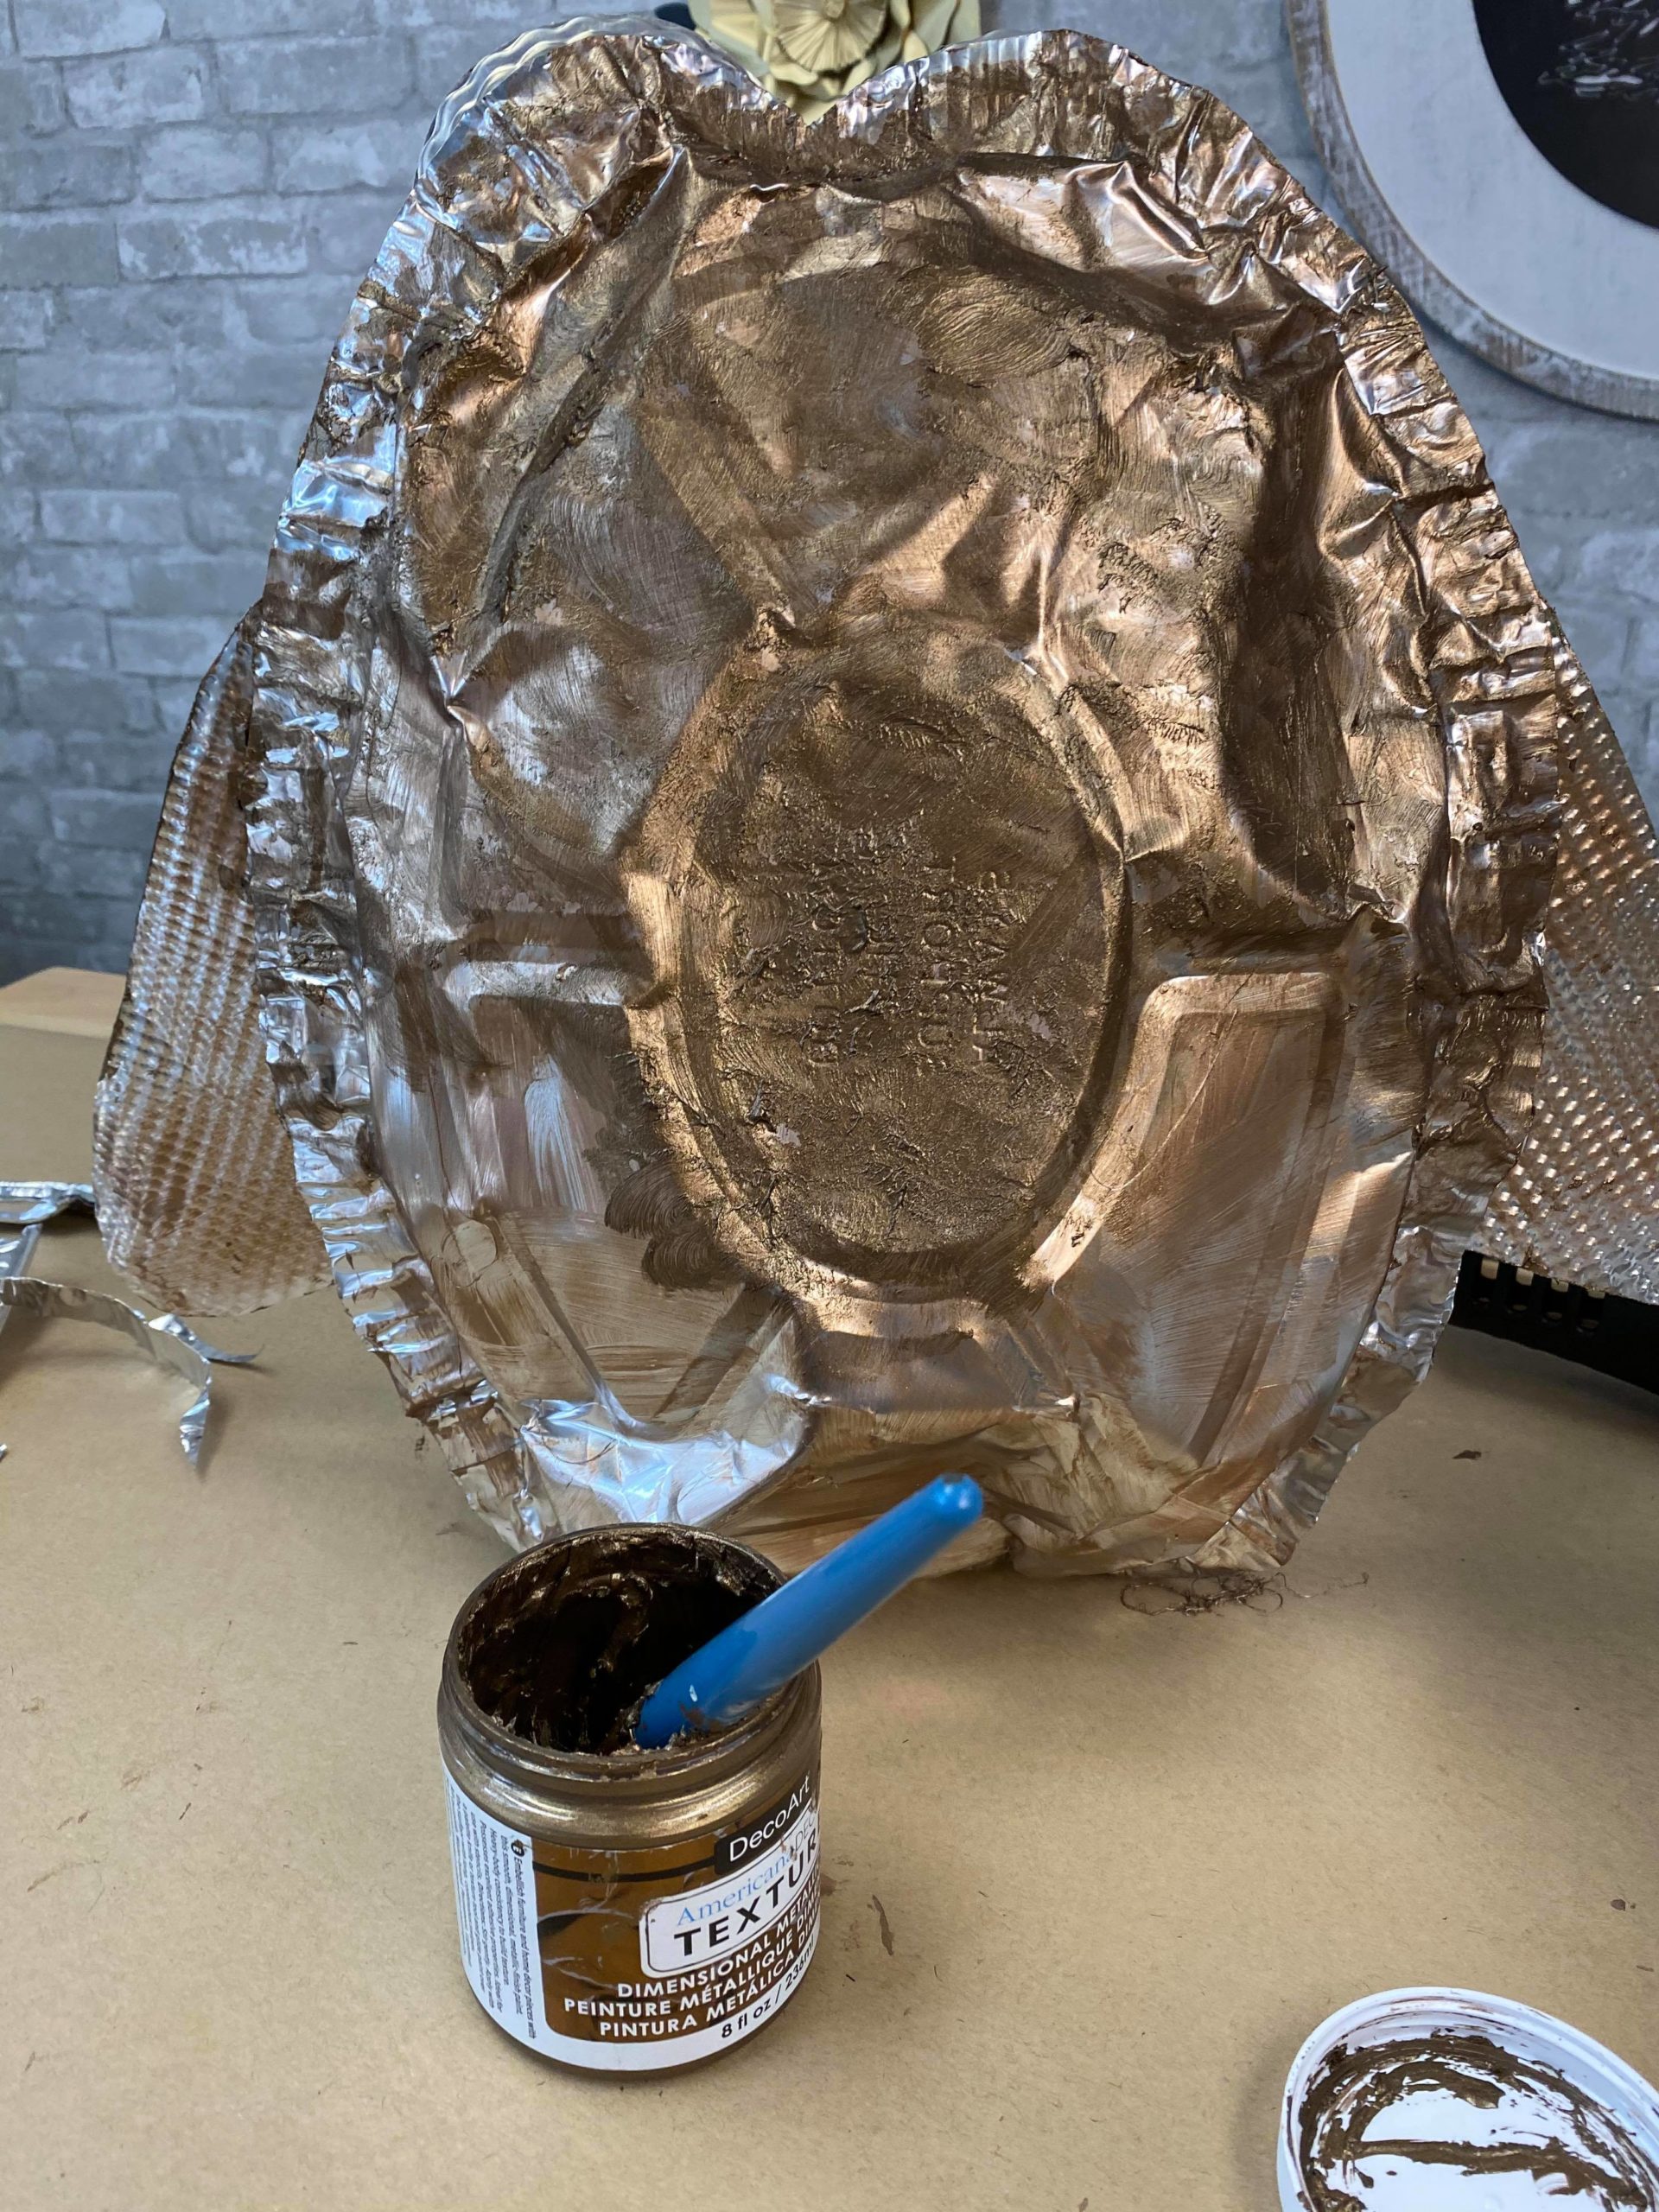
I did the front and back.
This owl is so easy to make and there are so many different ways you can create it. I just want to let you know that two oval roasting pans make it very easy to create the body to an owl. You can find aluminum roasting pans in a variety of stores. I hope you will take this idea and run with it and create a fun and unique owl your way.