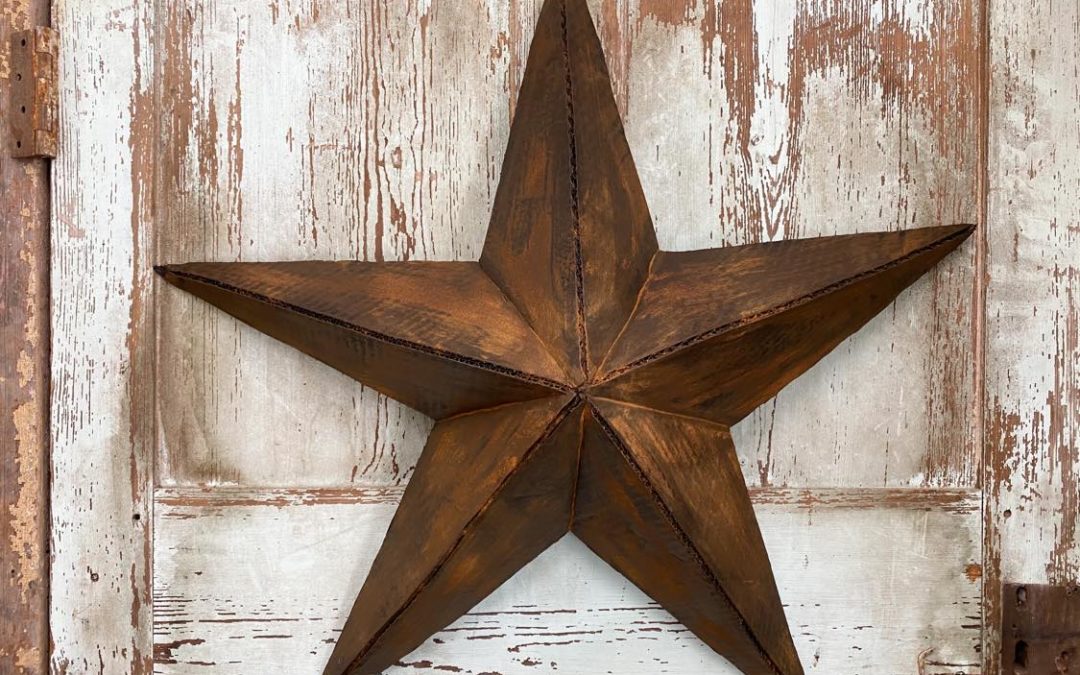
When you love to craft you are always looking for different items to use for crafting. If you are following The Shabby Tree then you already know that we do a lot of crafts using cardboard. One home decoration that a lot of people love to use in their home is a large barn star. A large barn star can sometimes be a bit pricey which is why I want to try and make one using cardboard.
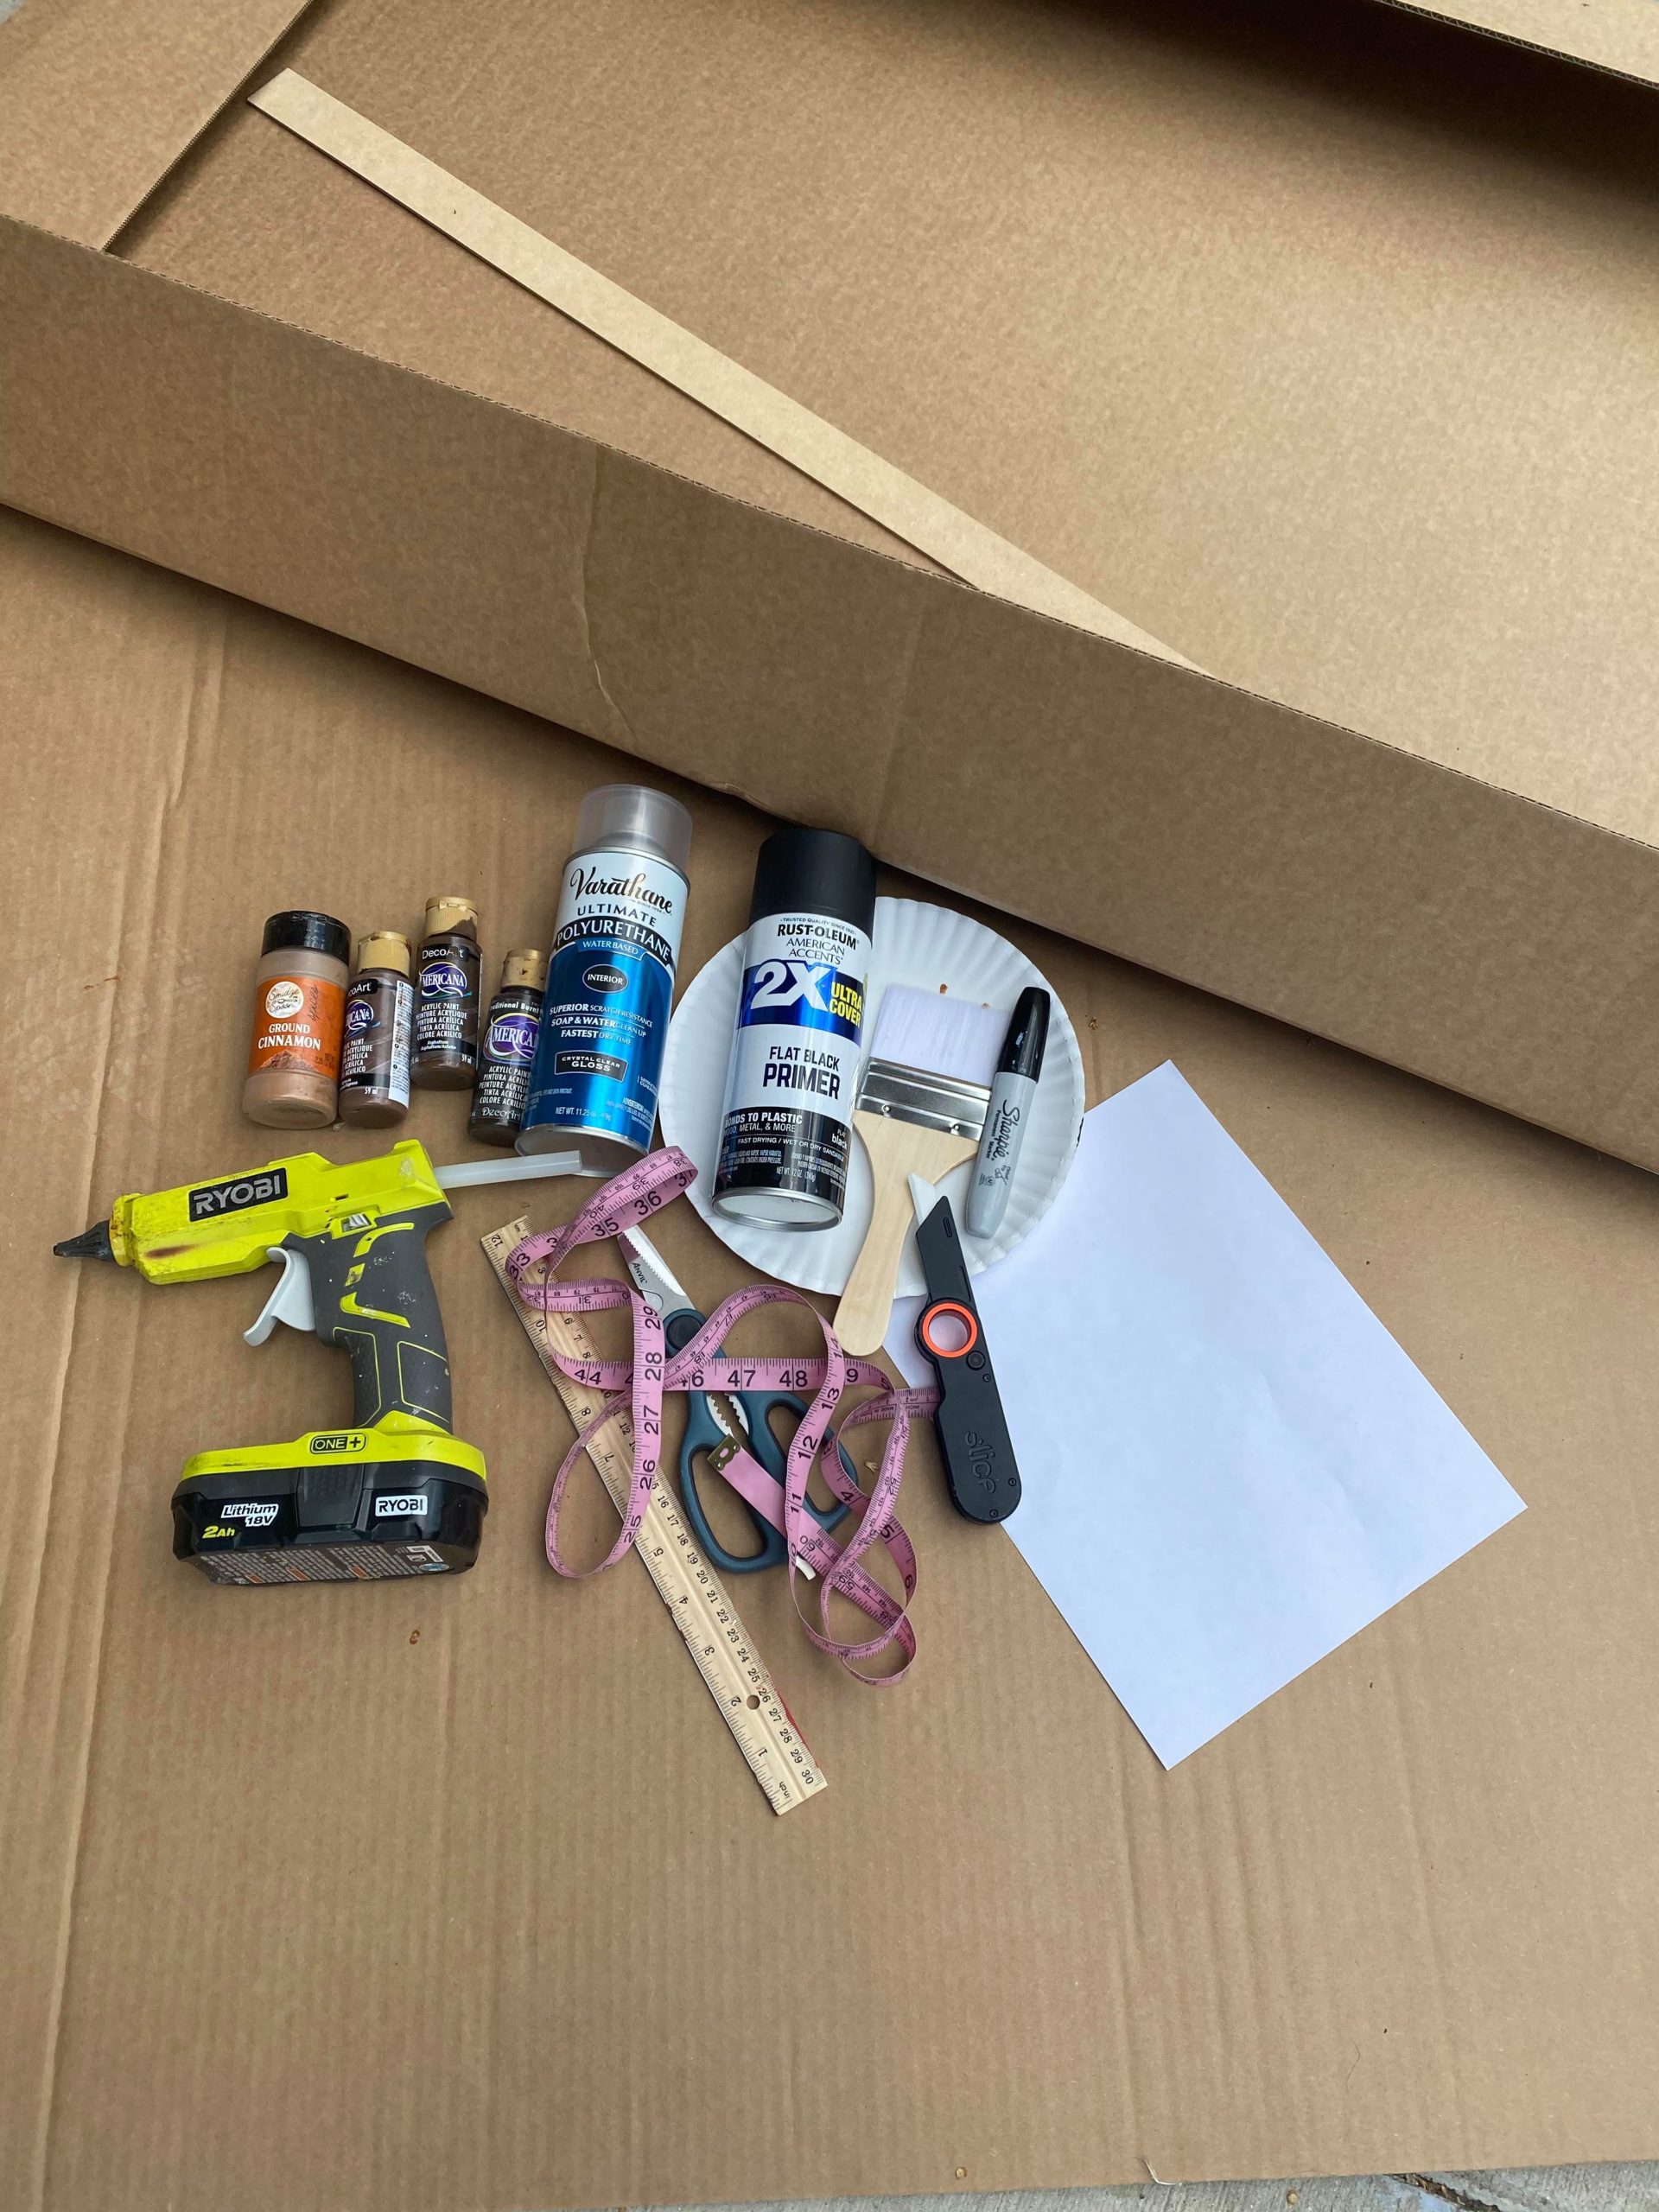
The supplies I will be using are:
1. One large piece of cardboard
2. One sheet of paper (my paper is 8×10)
3. Box cutter
4. Scissors
5. Hot Glue
6. Paint brush
7. Different shades of brown paint (I am using Burnt Umber, Expresso and Asphaltum)
8. Black spray paint
9. Polyurethane spray
10. Cinnamon
11. Ruler stick
12. Marker
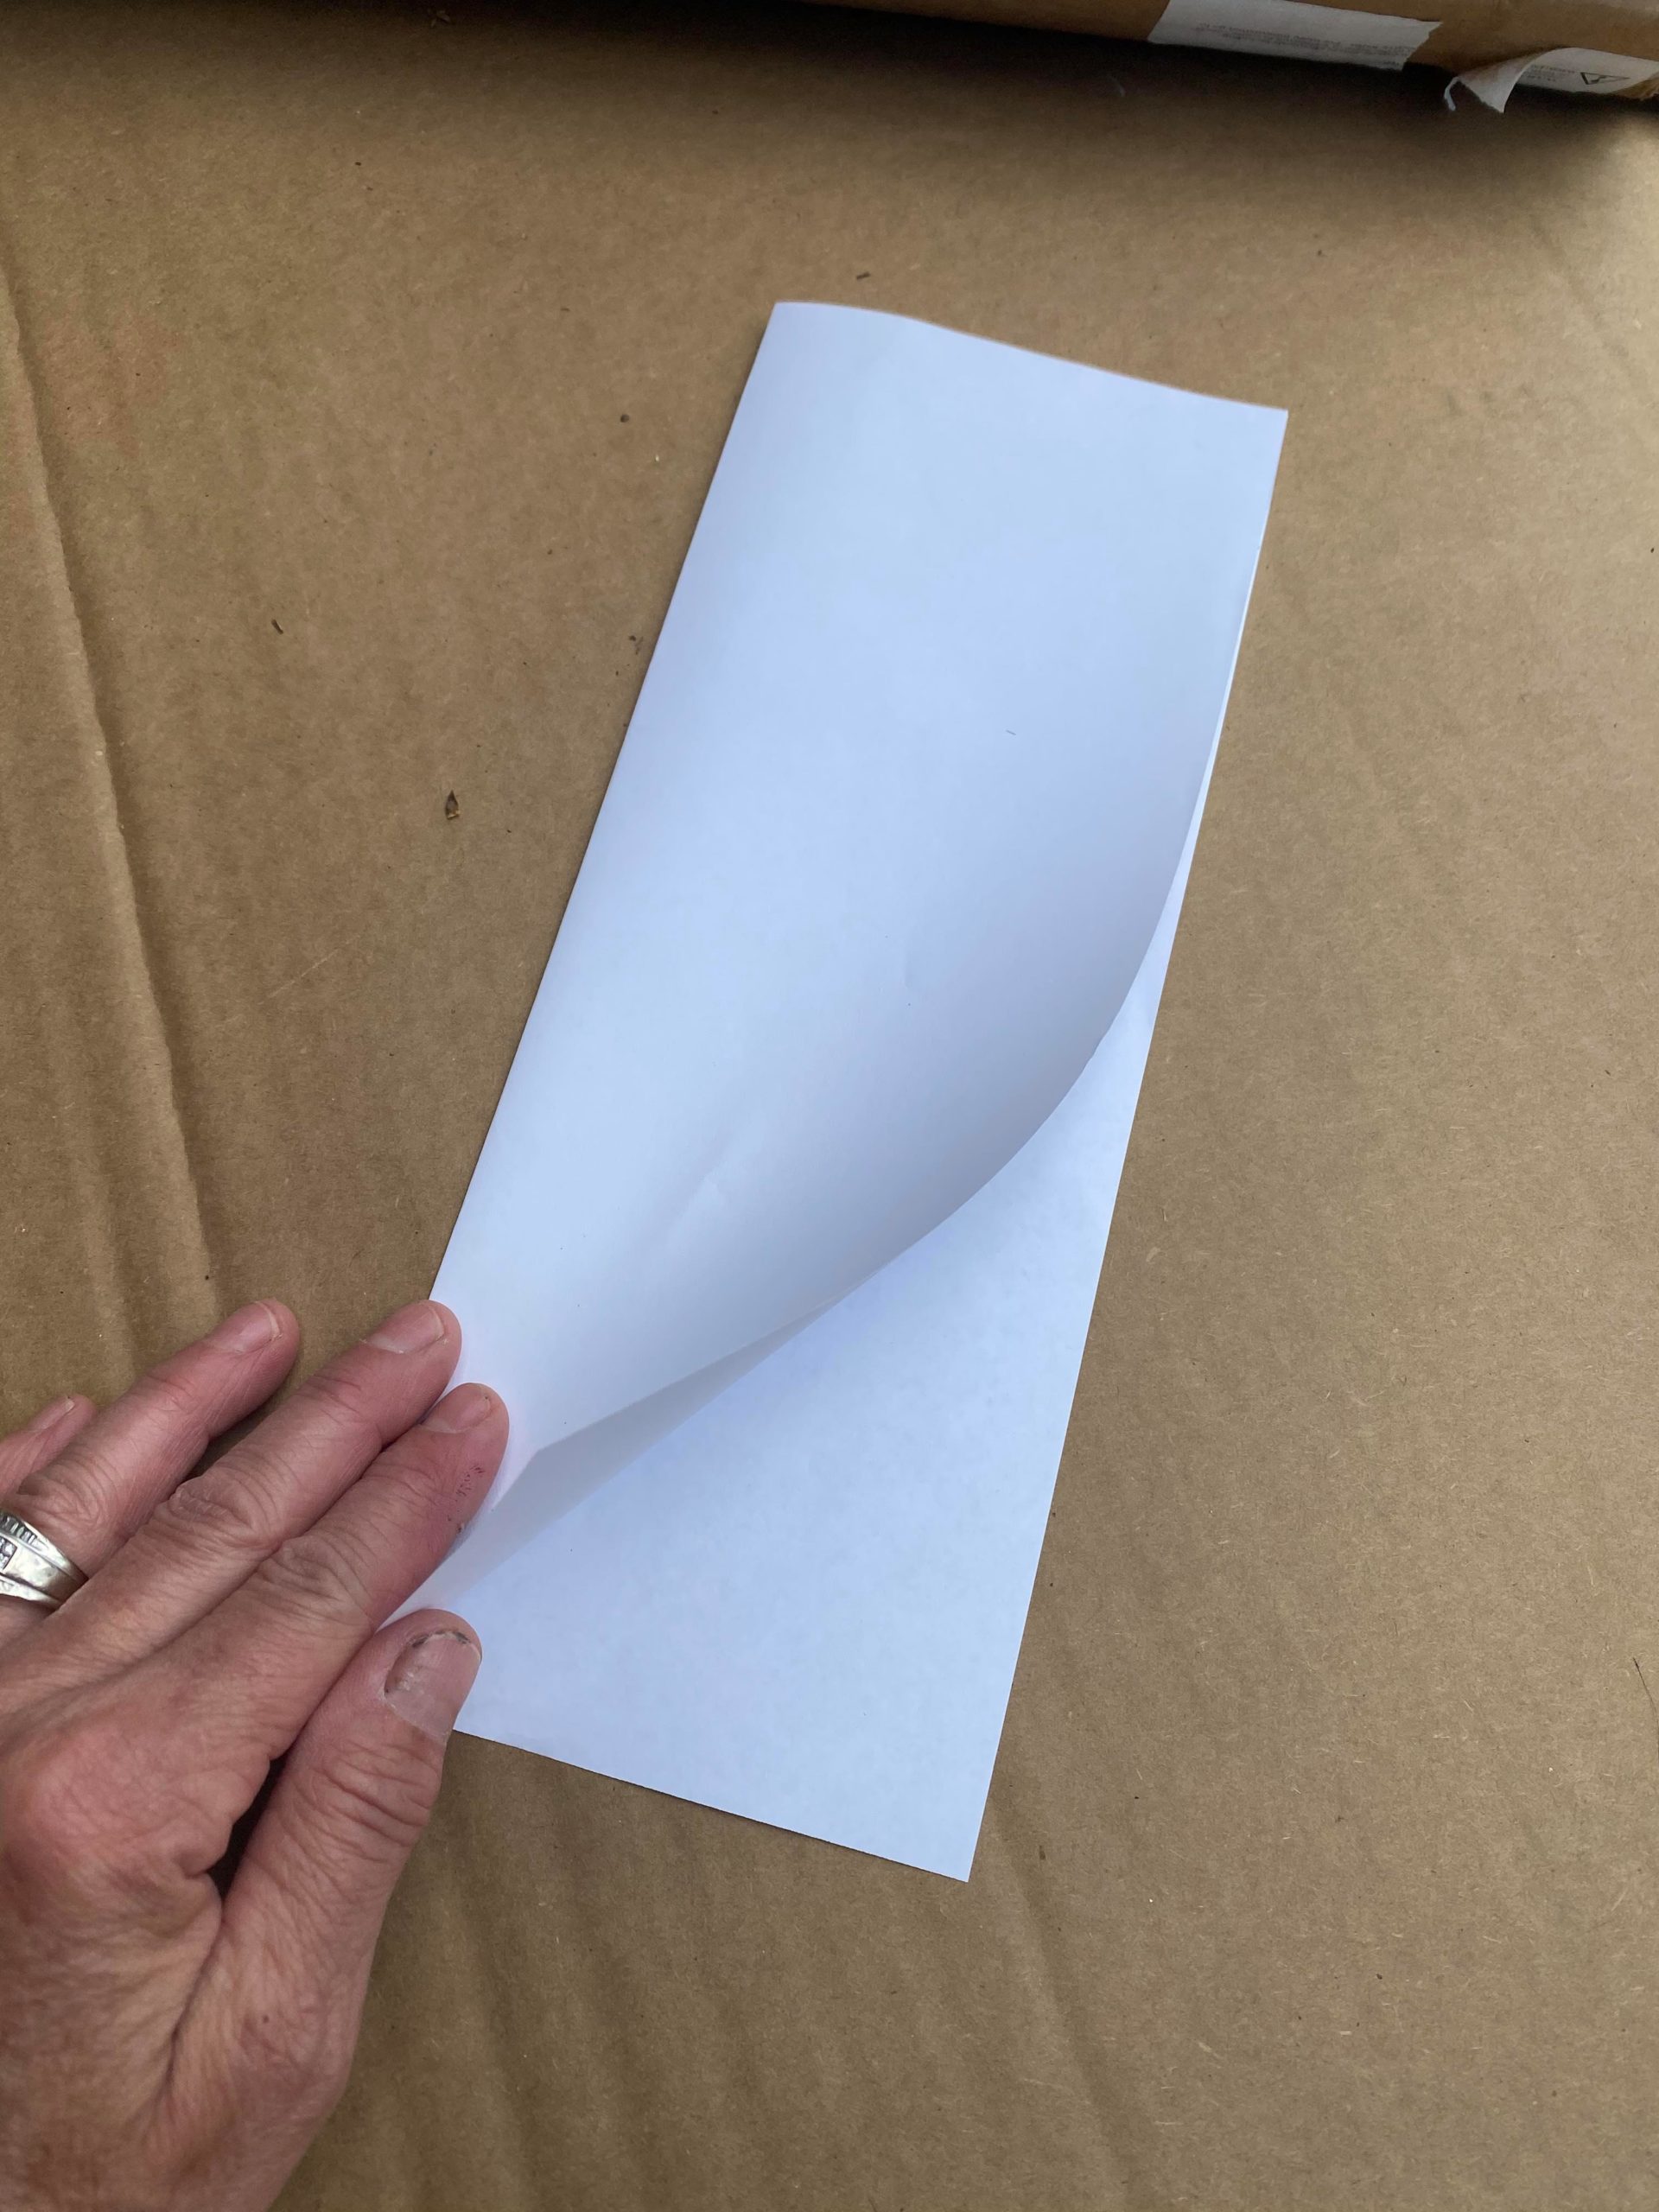
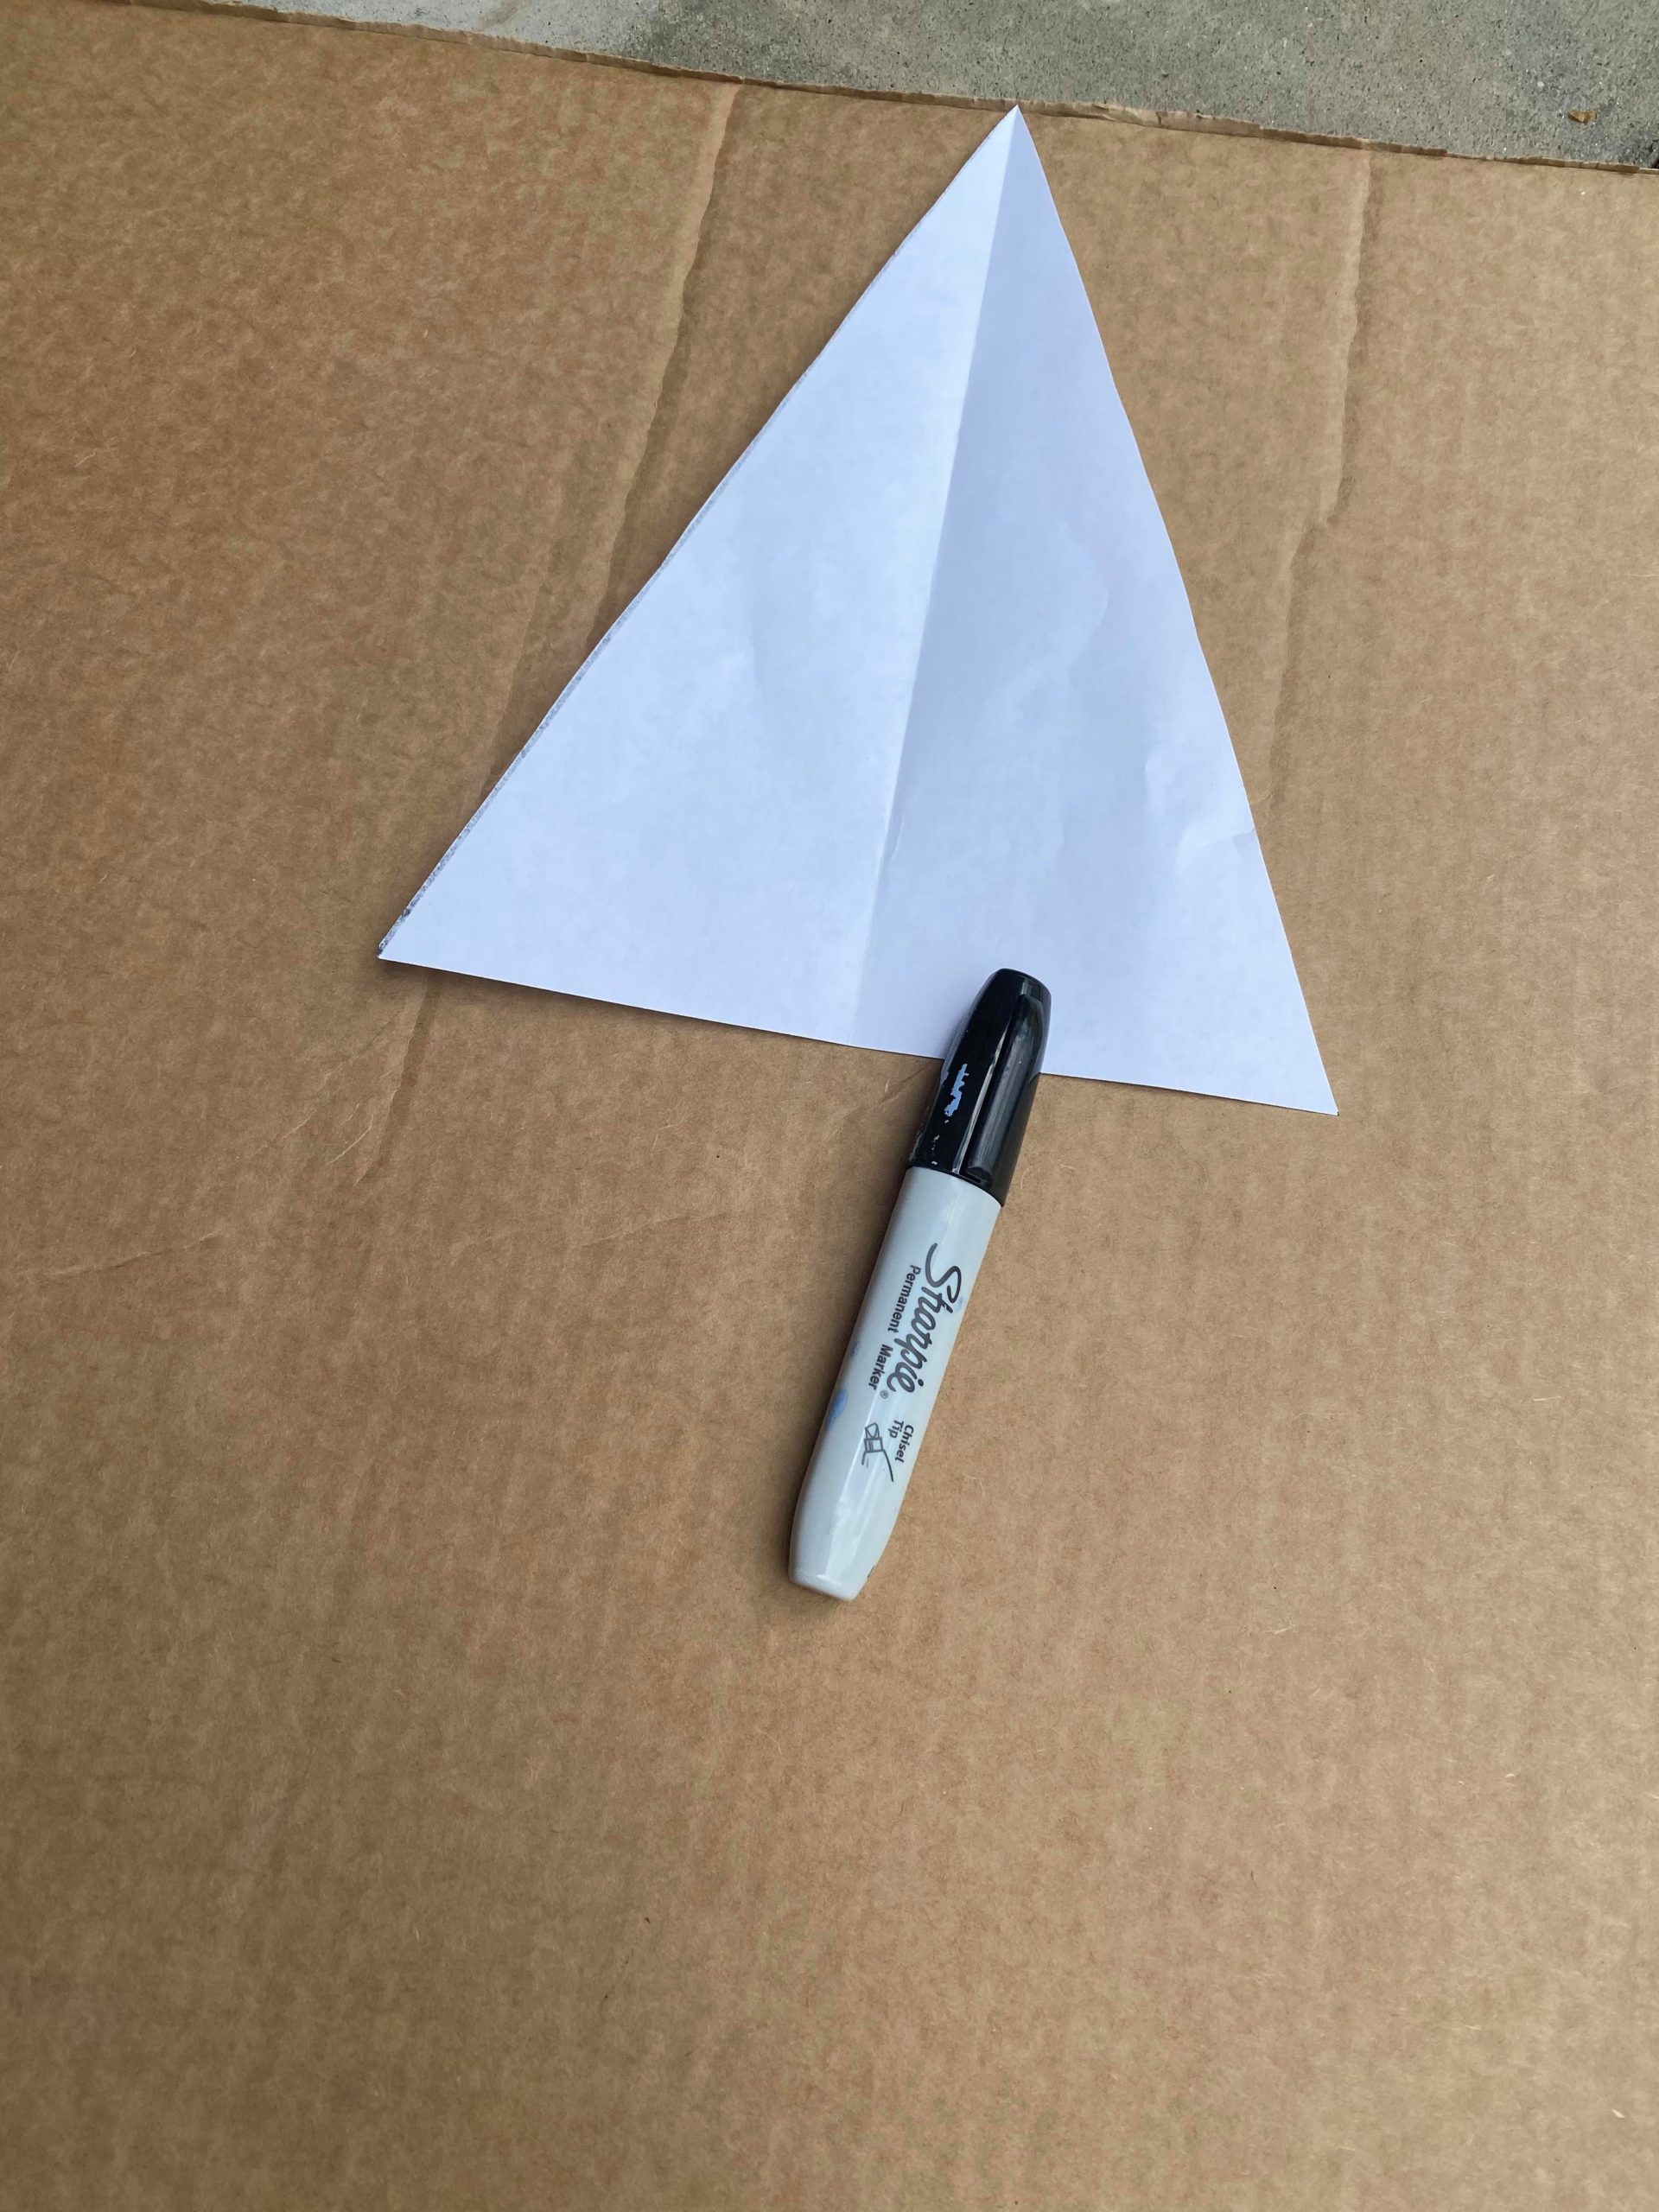
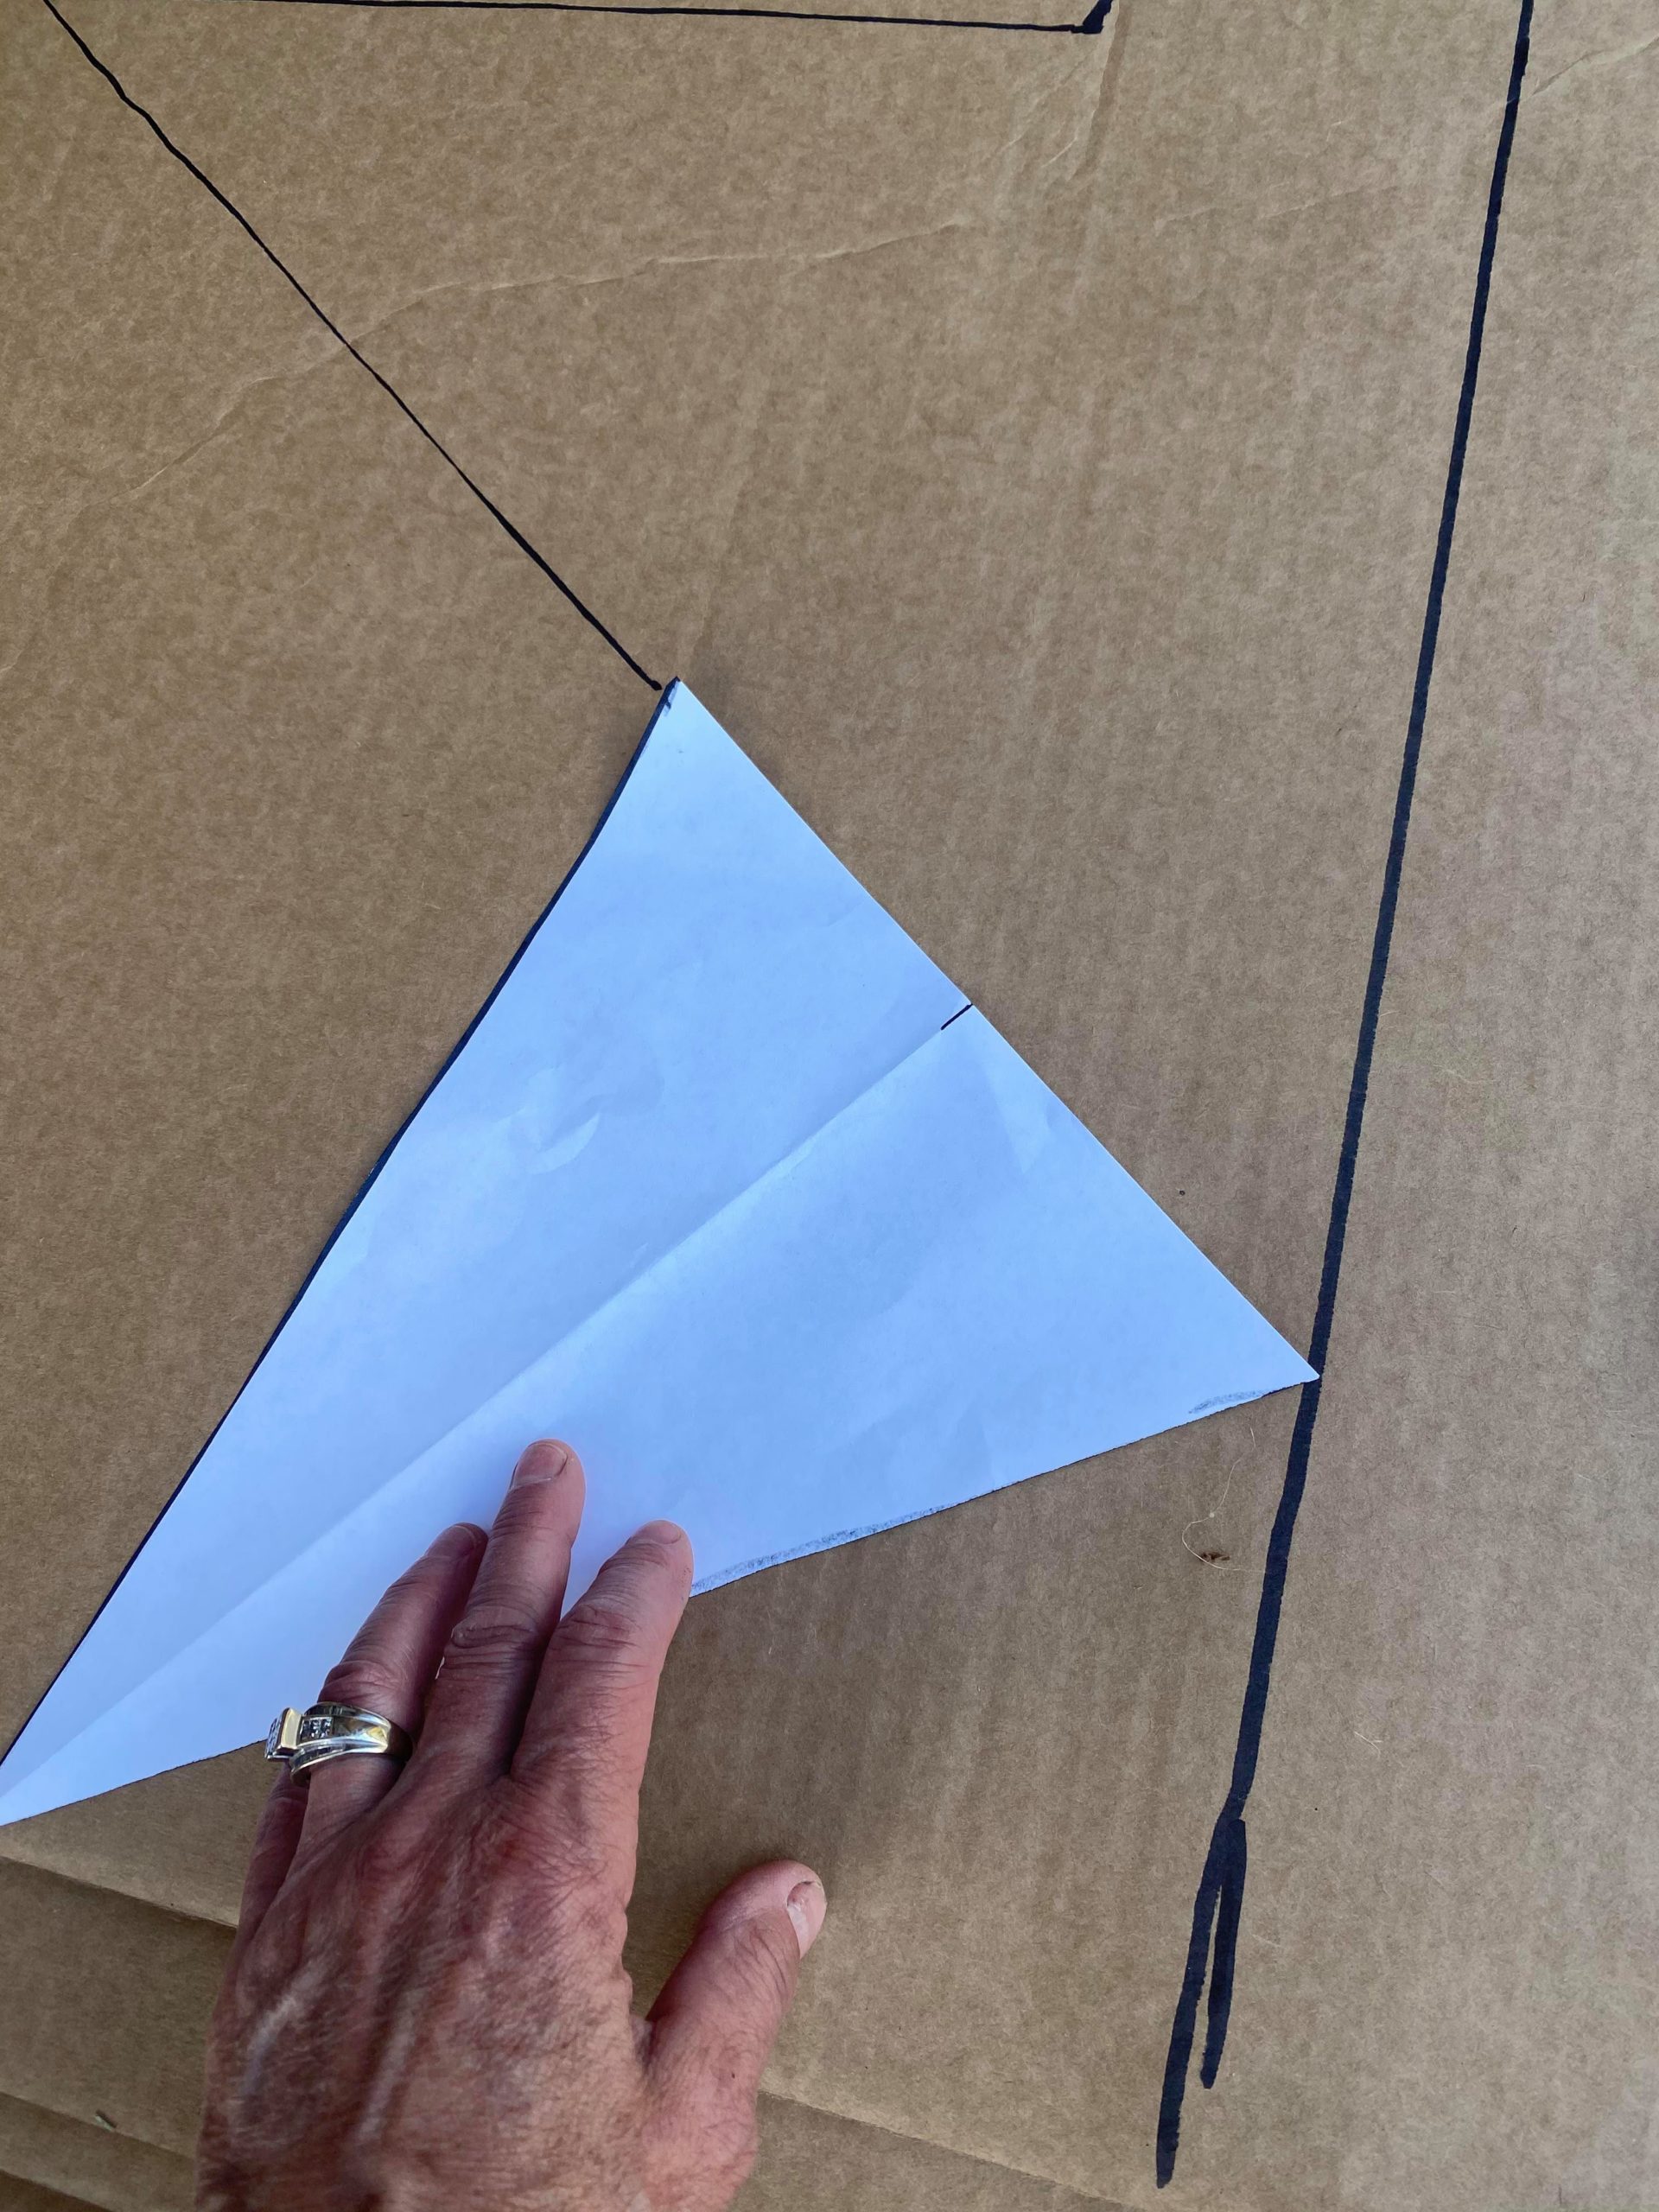
The first step is to fold your 8×10 sheet of paper evenly in half. You will then take the ruler stick and draw a line corner to corner as shown in photo below.
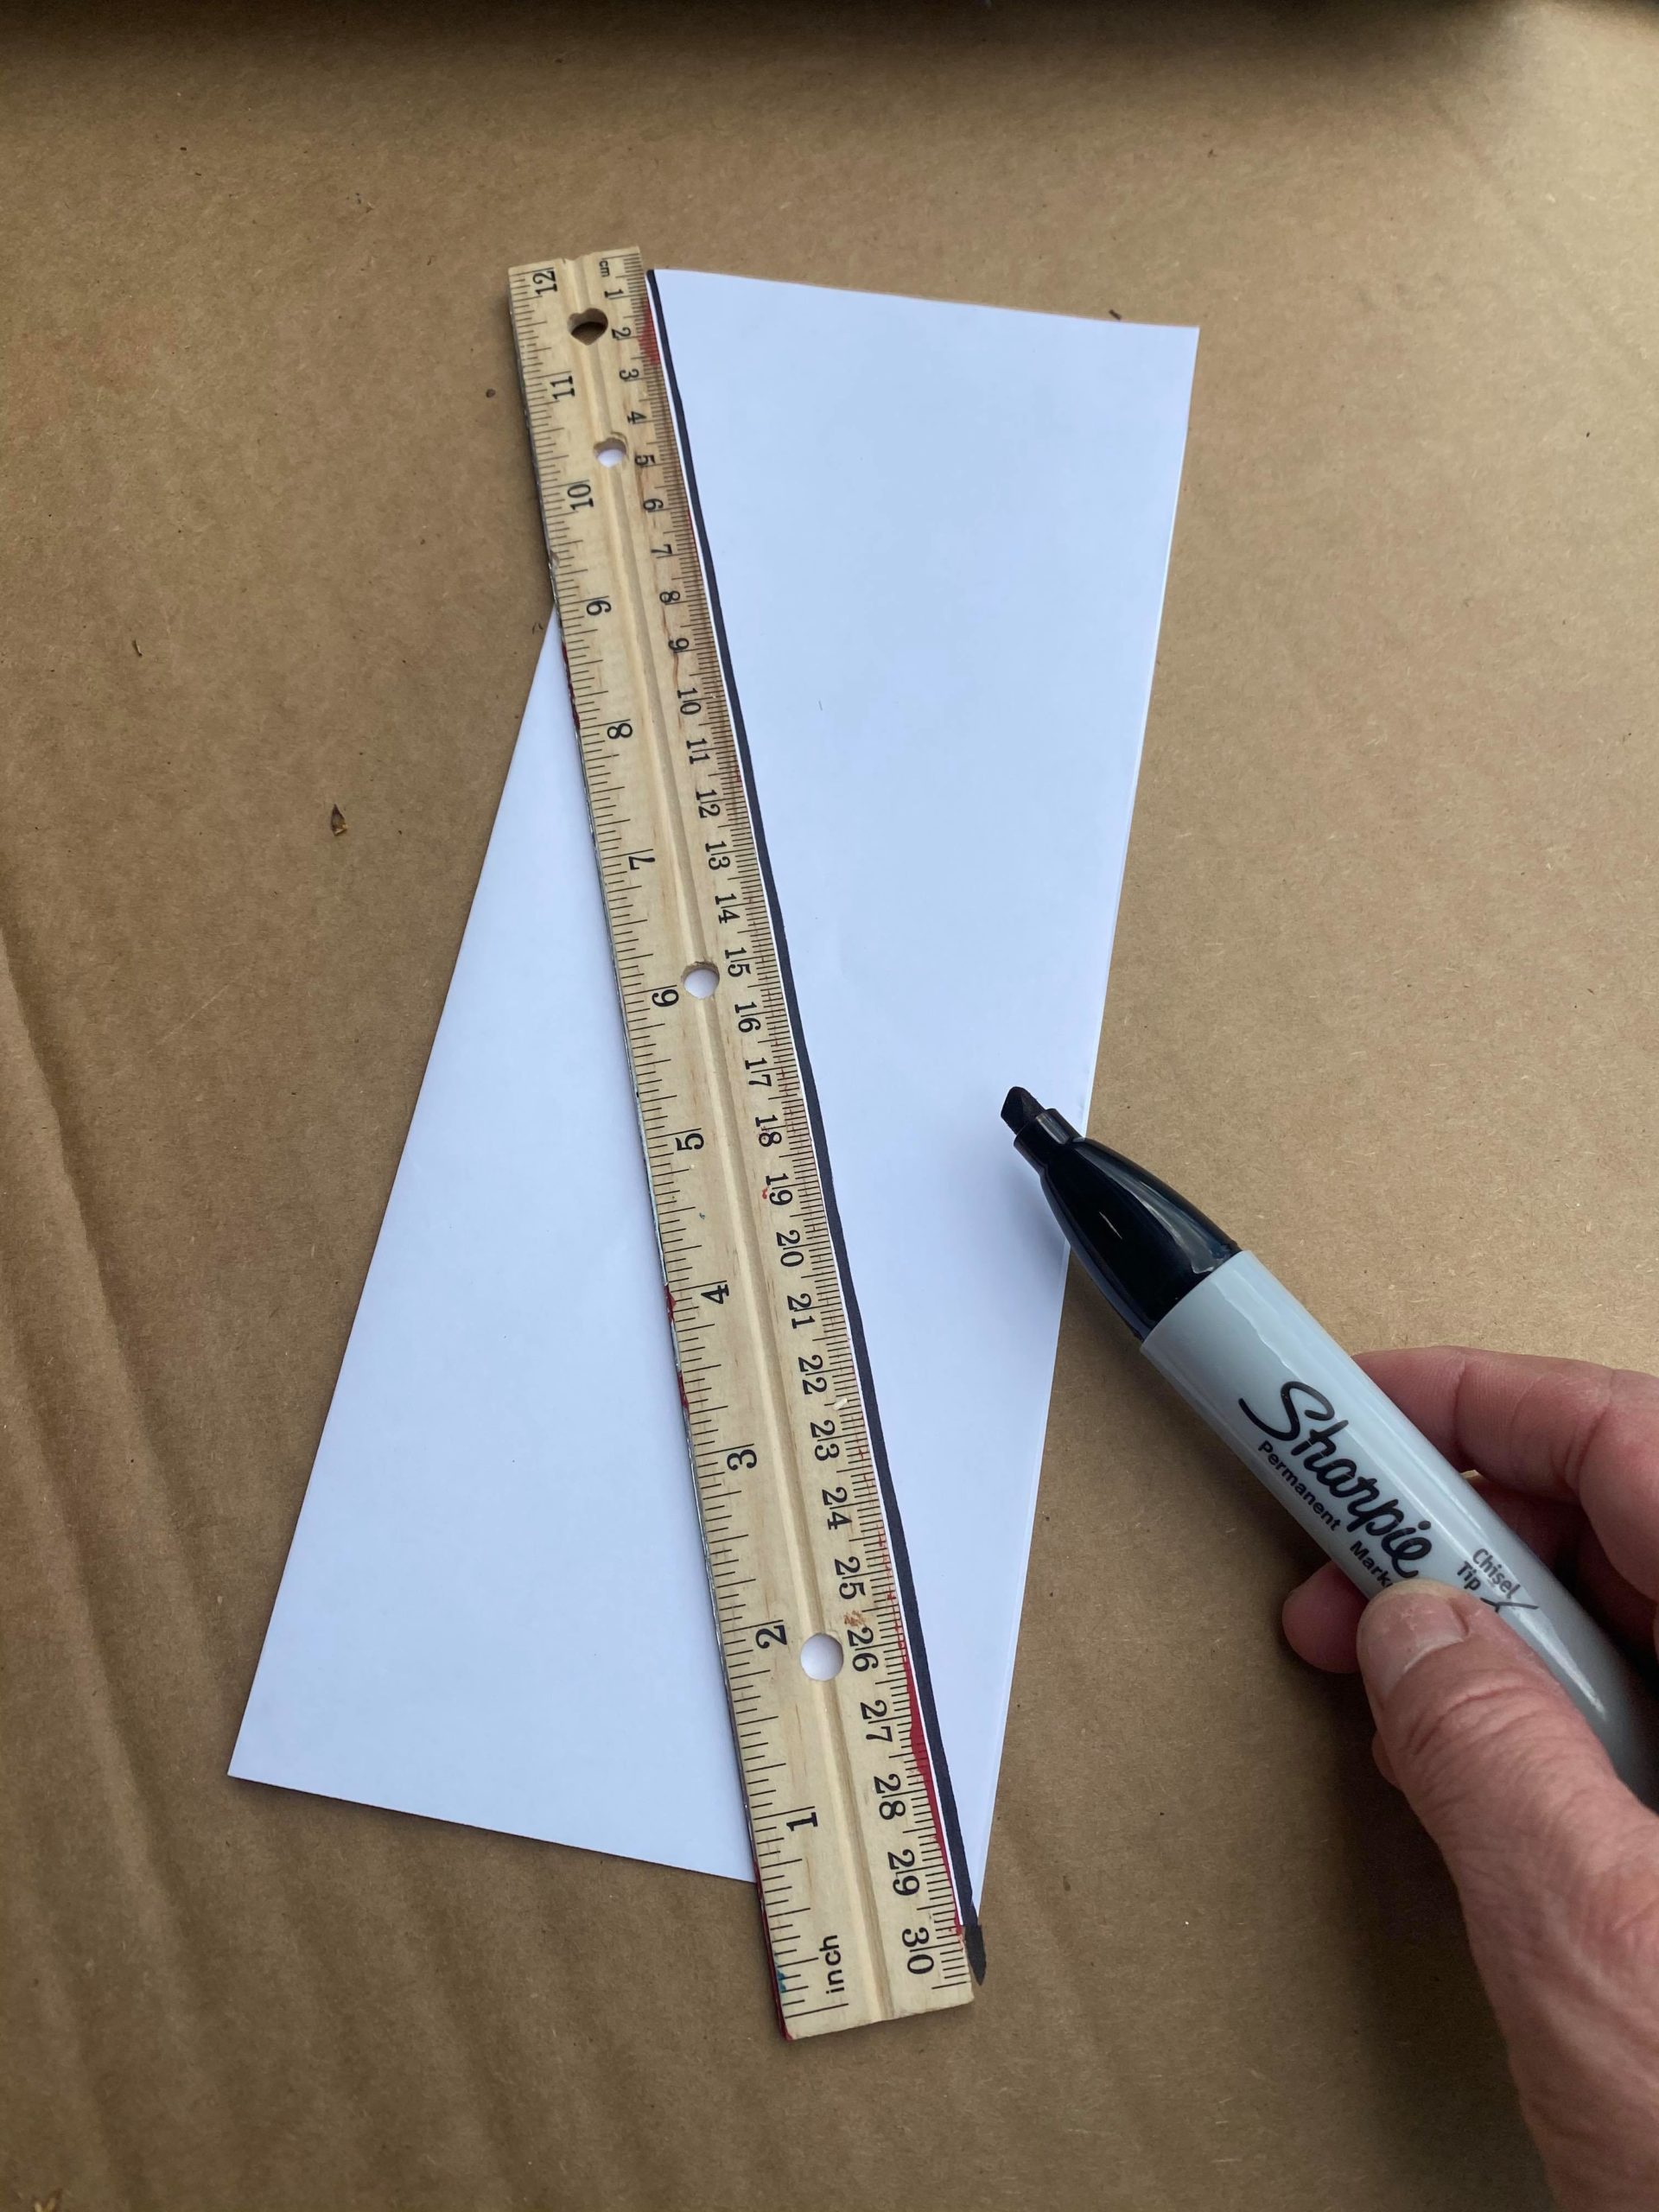
You will then cut out your triangle.
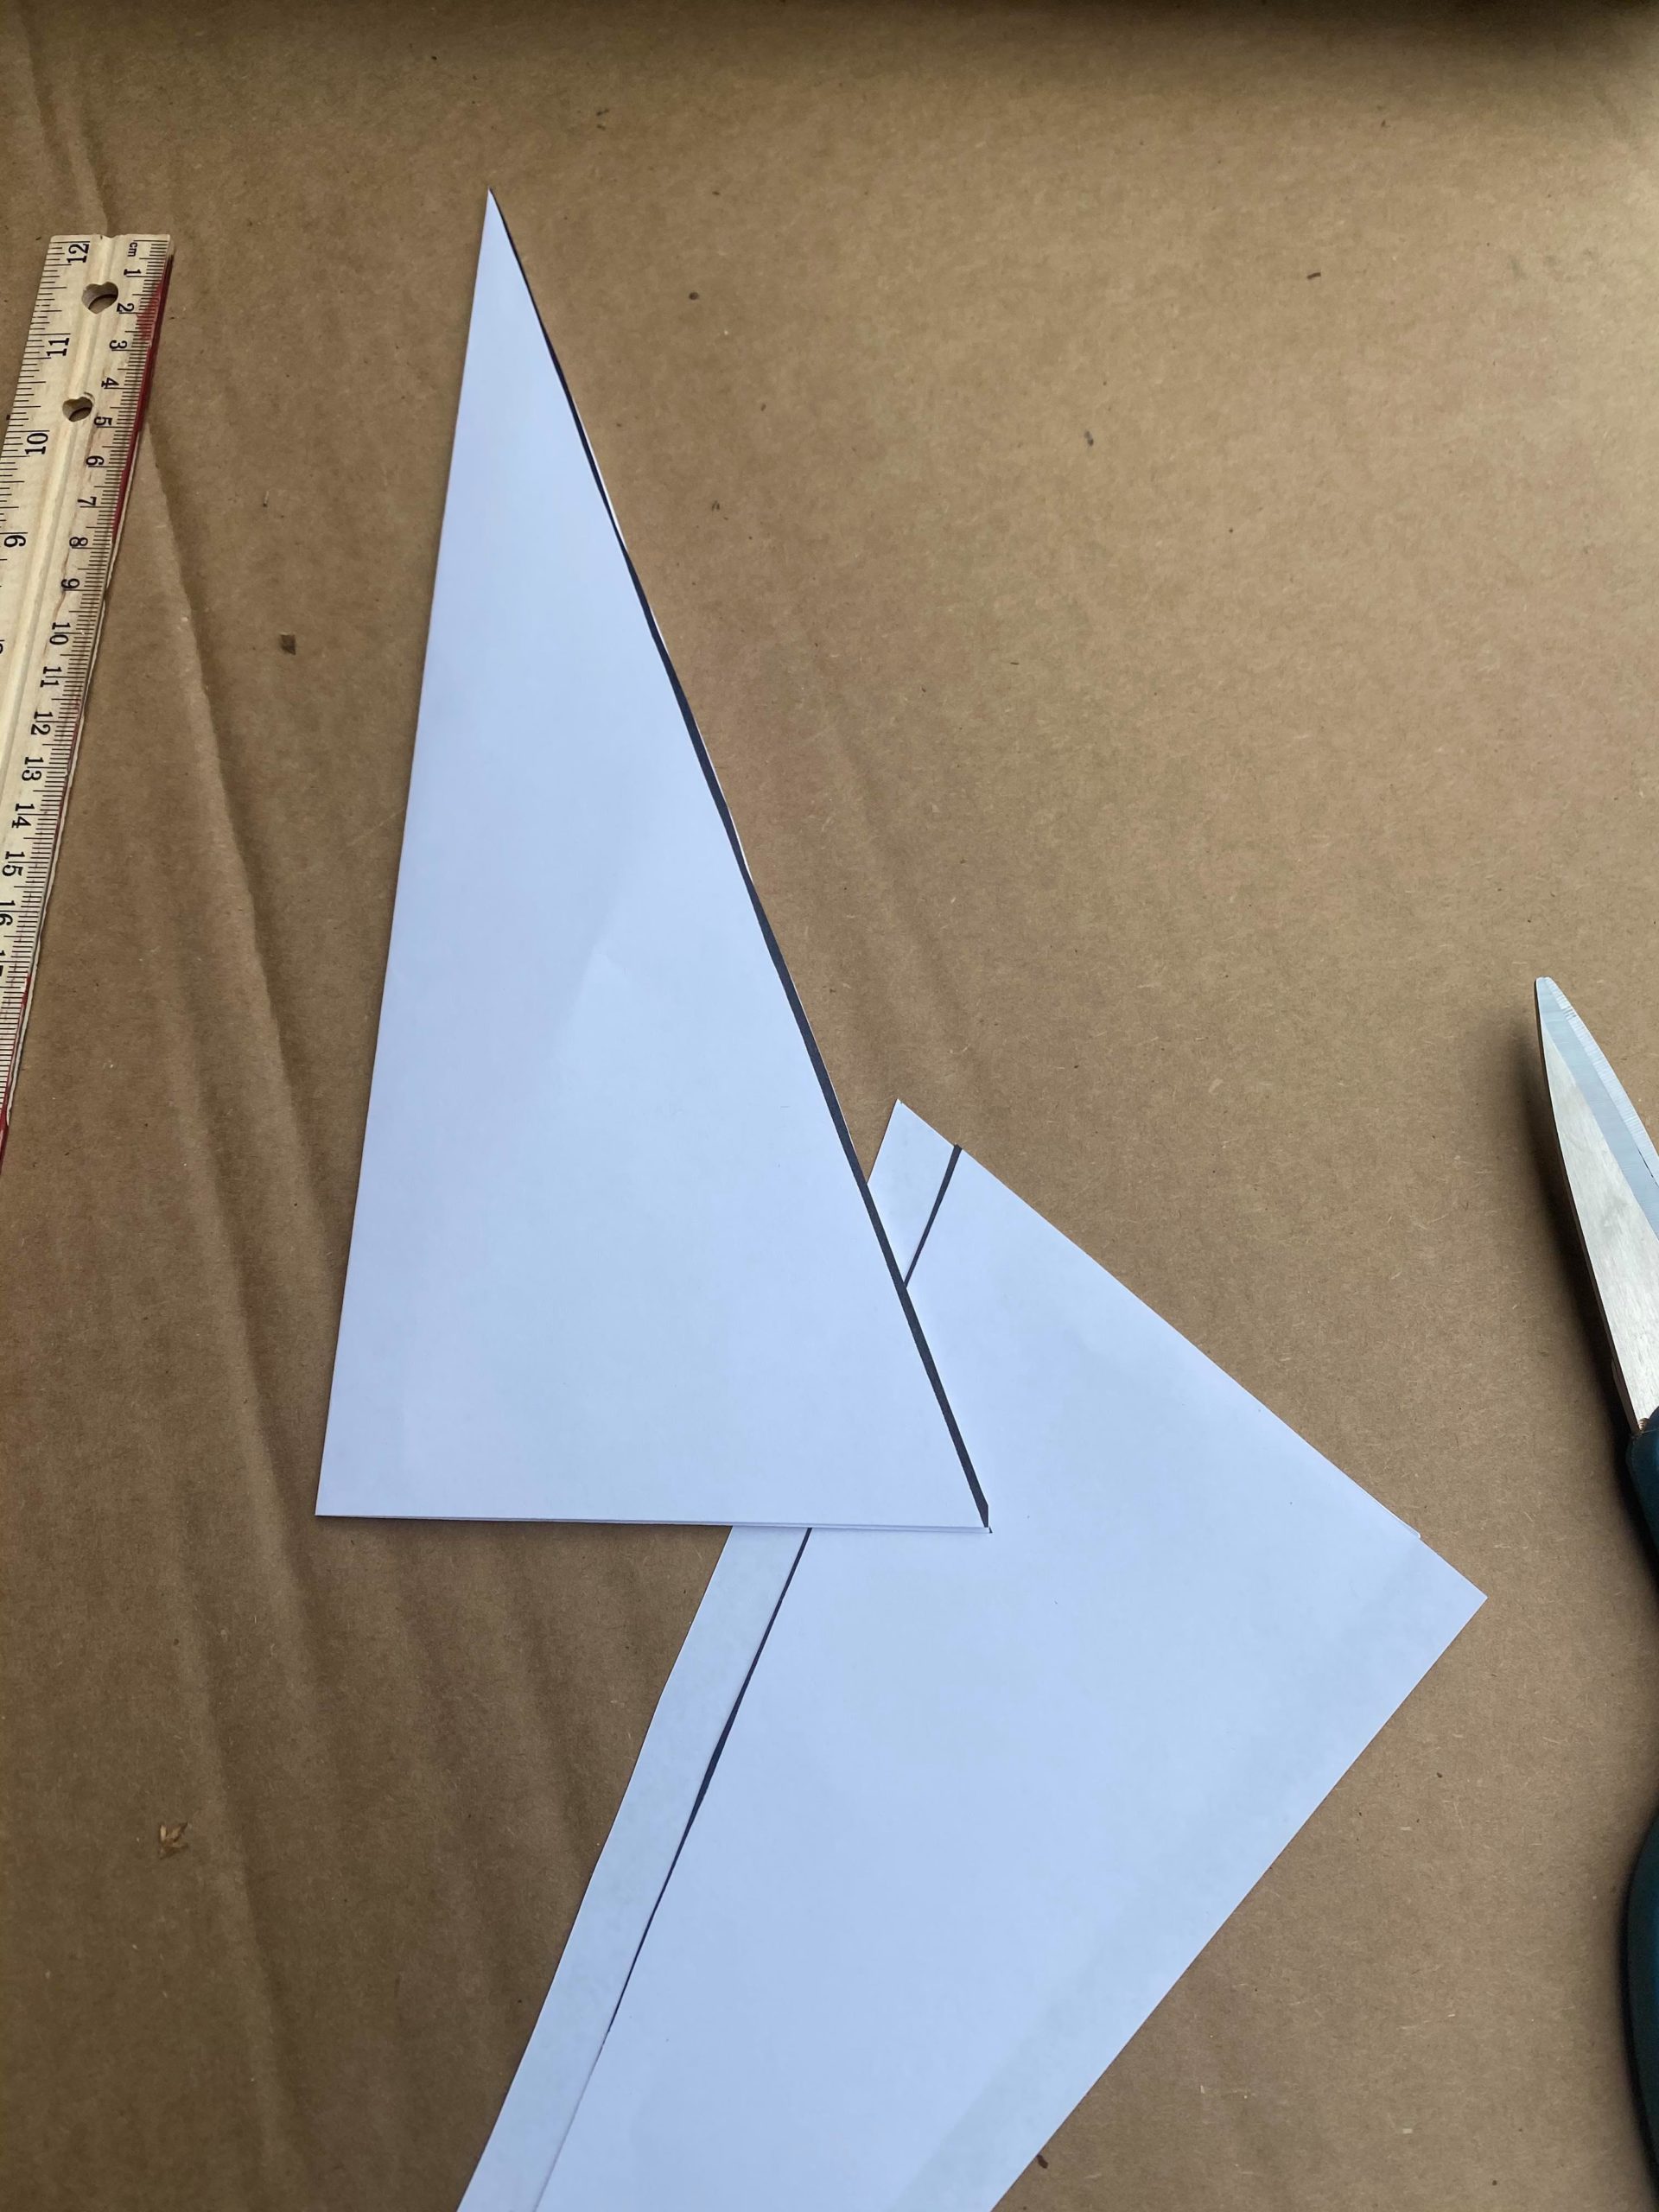
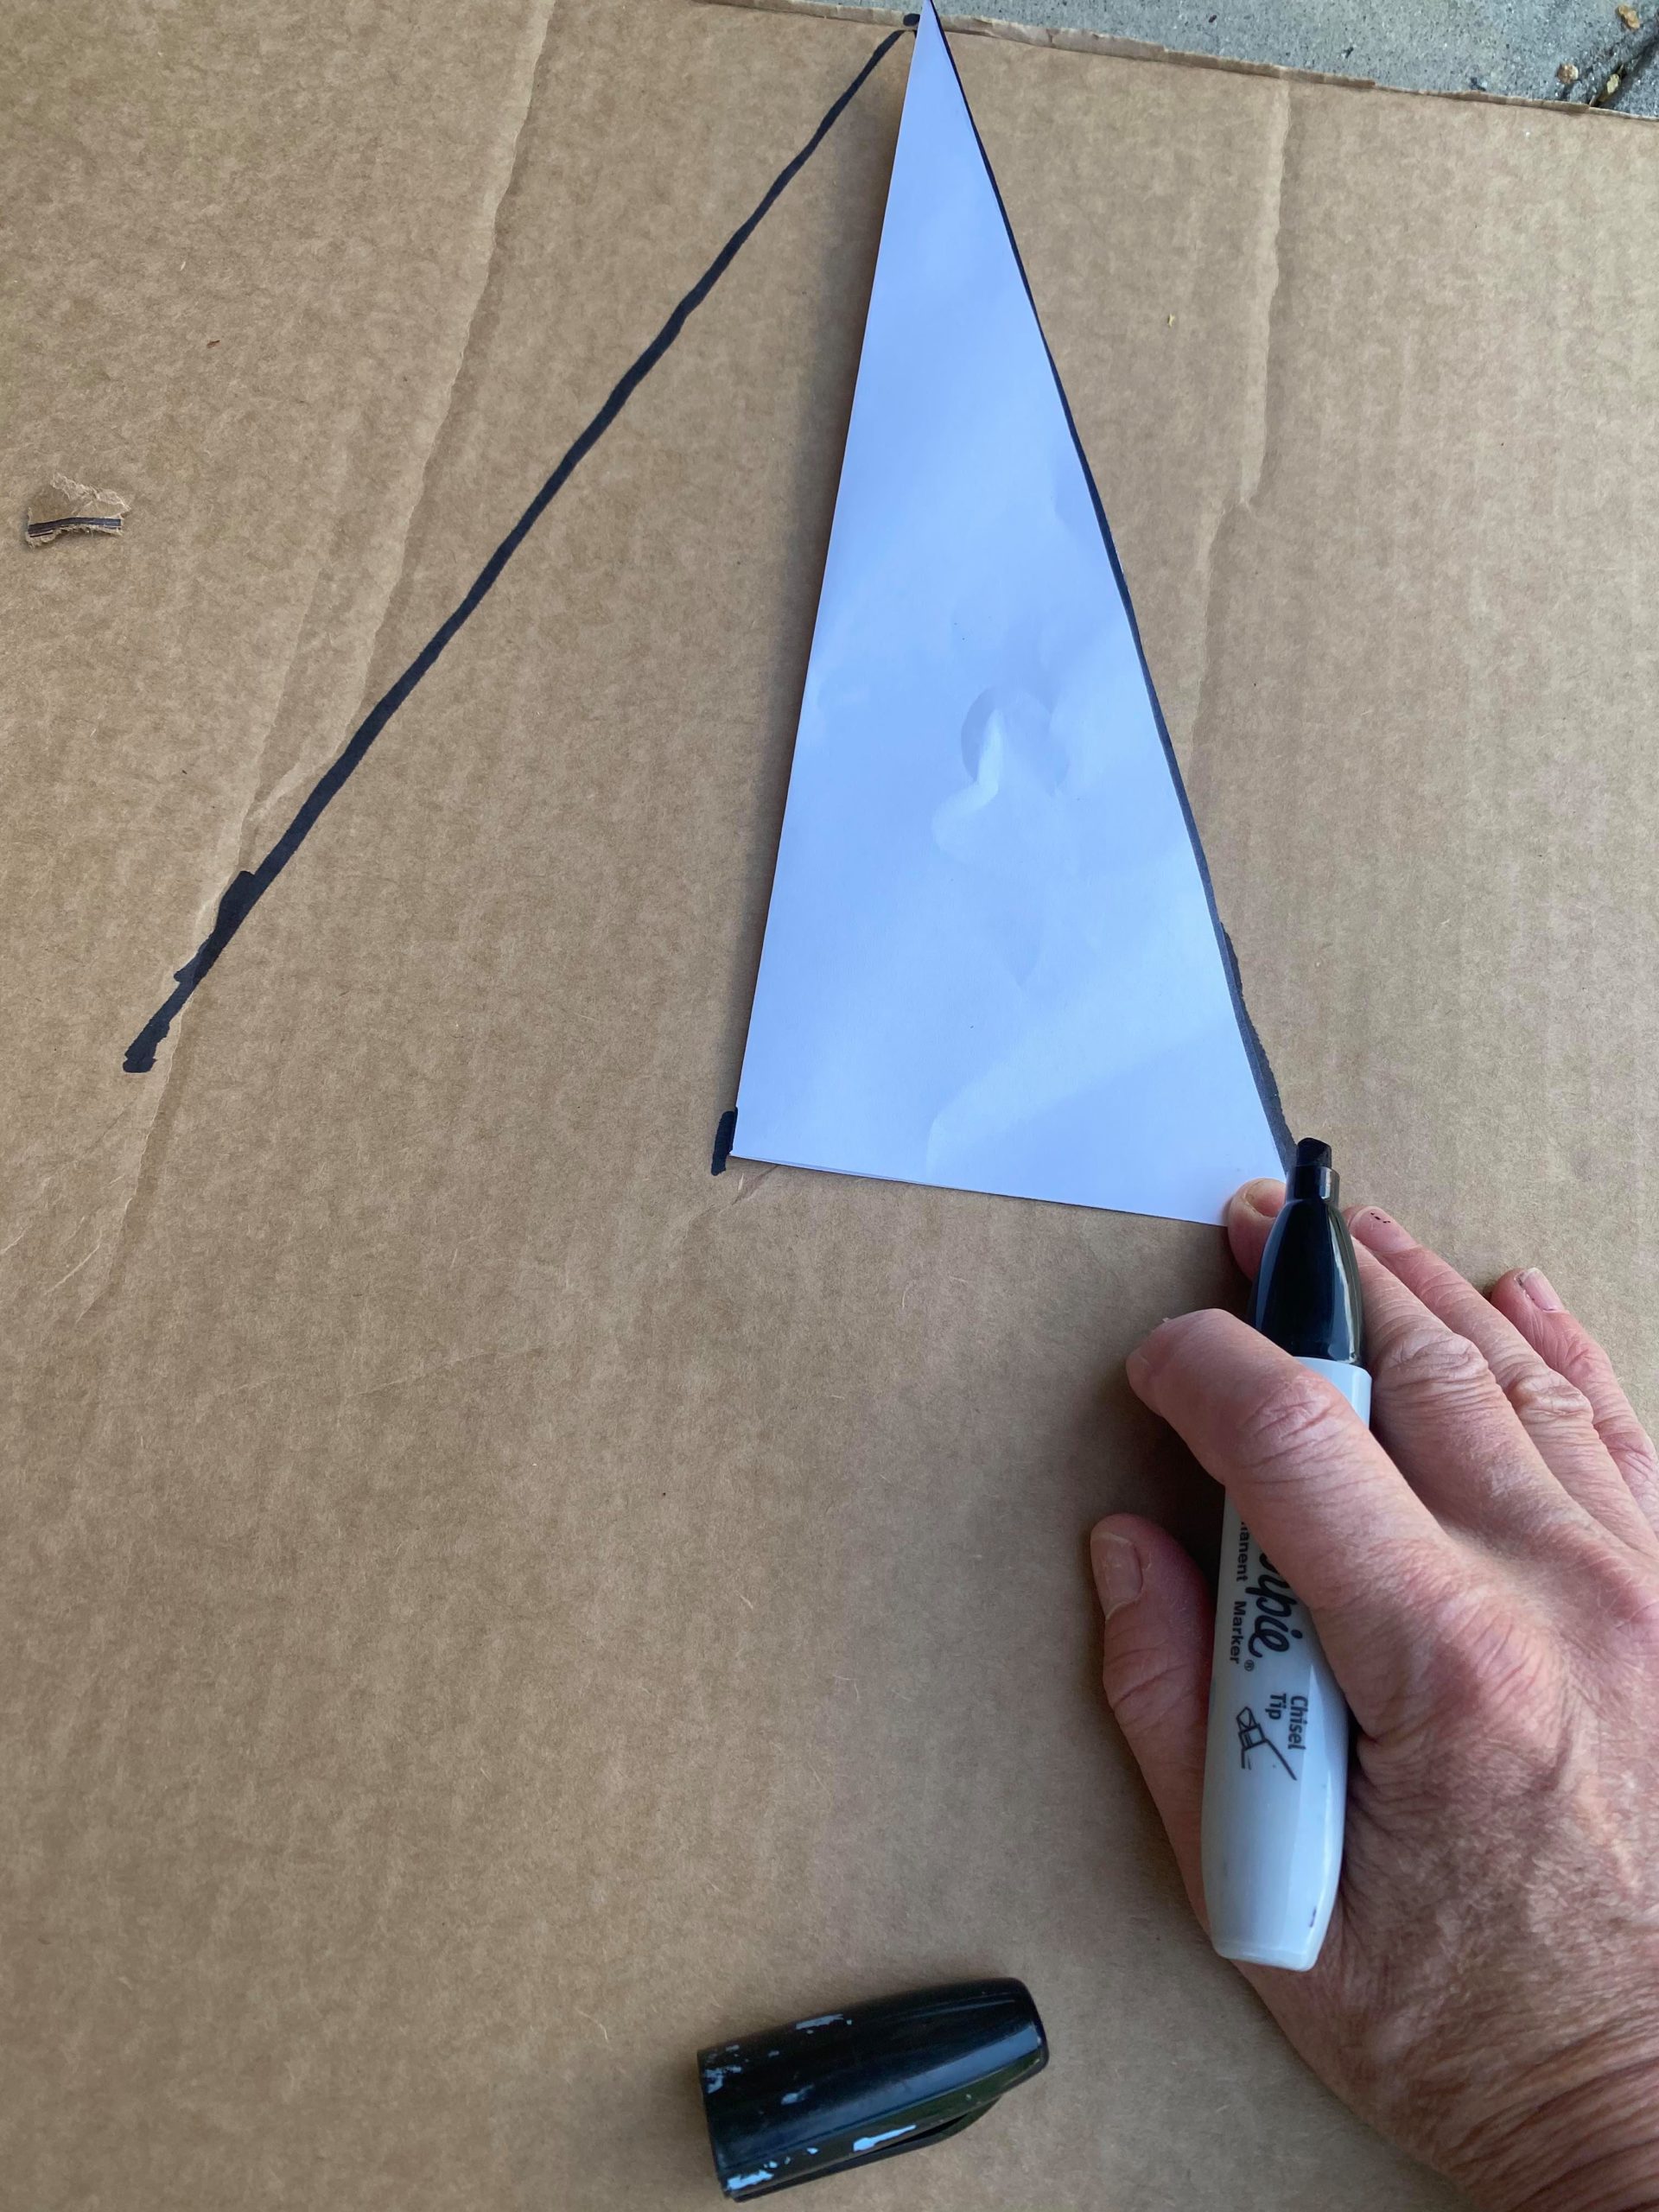
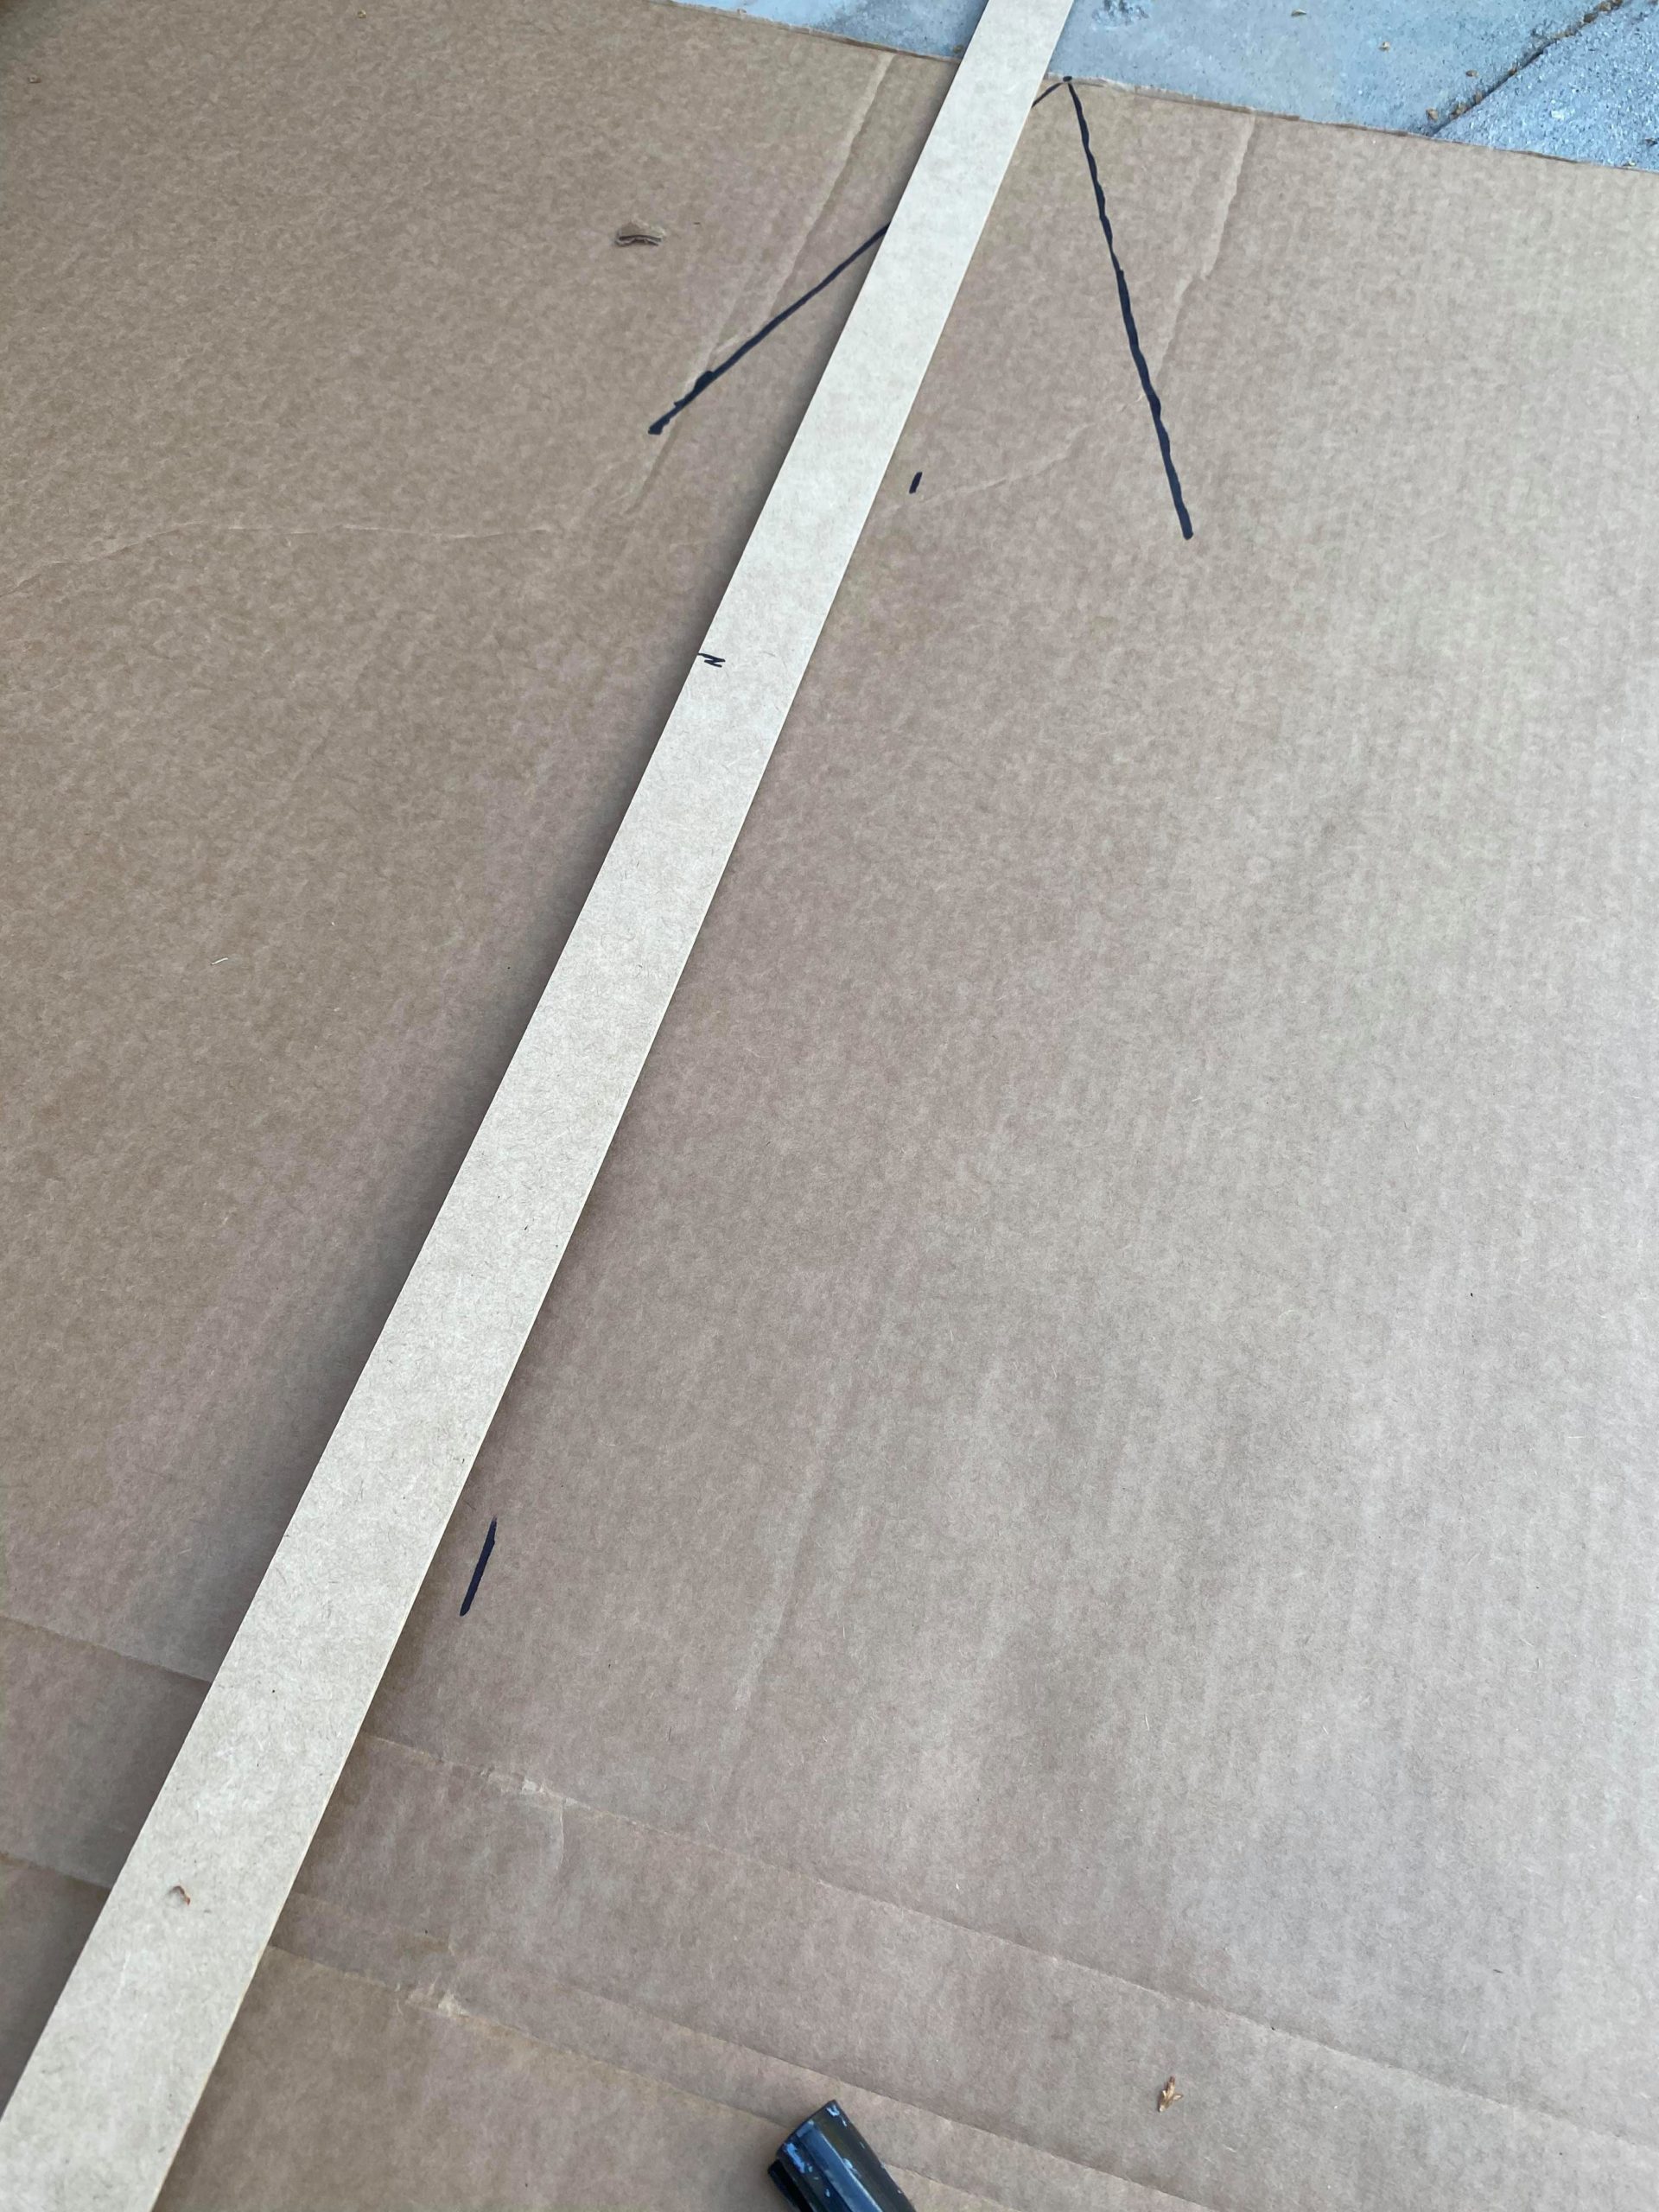
Place your triangle onto the cardboard. Be sure to place your triangle in the top center of the cardboard.

You will trace the triangle onto the cardboard.
Mark the center of the triangle. I found it easier to fold the triangle in half and then lay it back onto the cardboard. Place a mark at the fold line as shown in photo above.
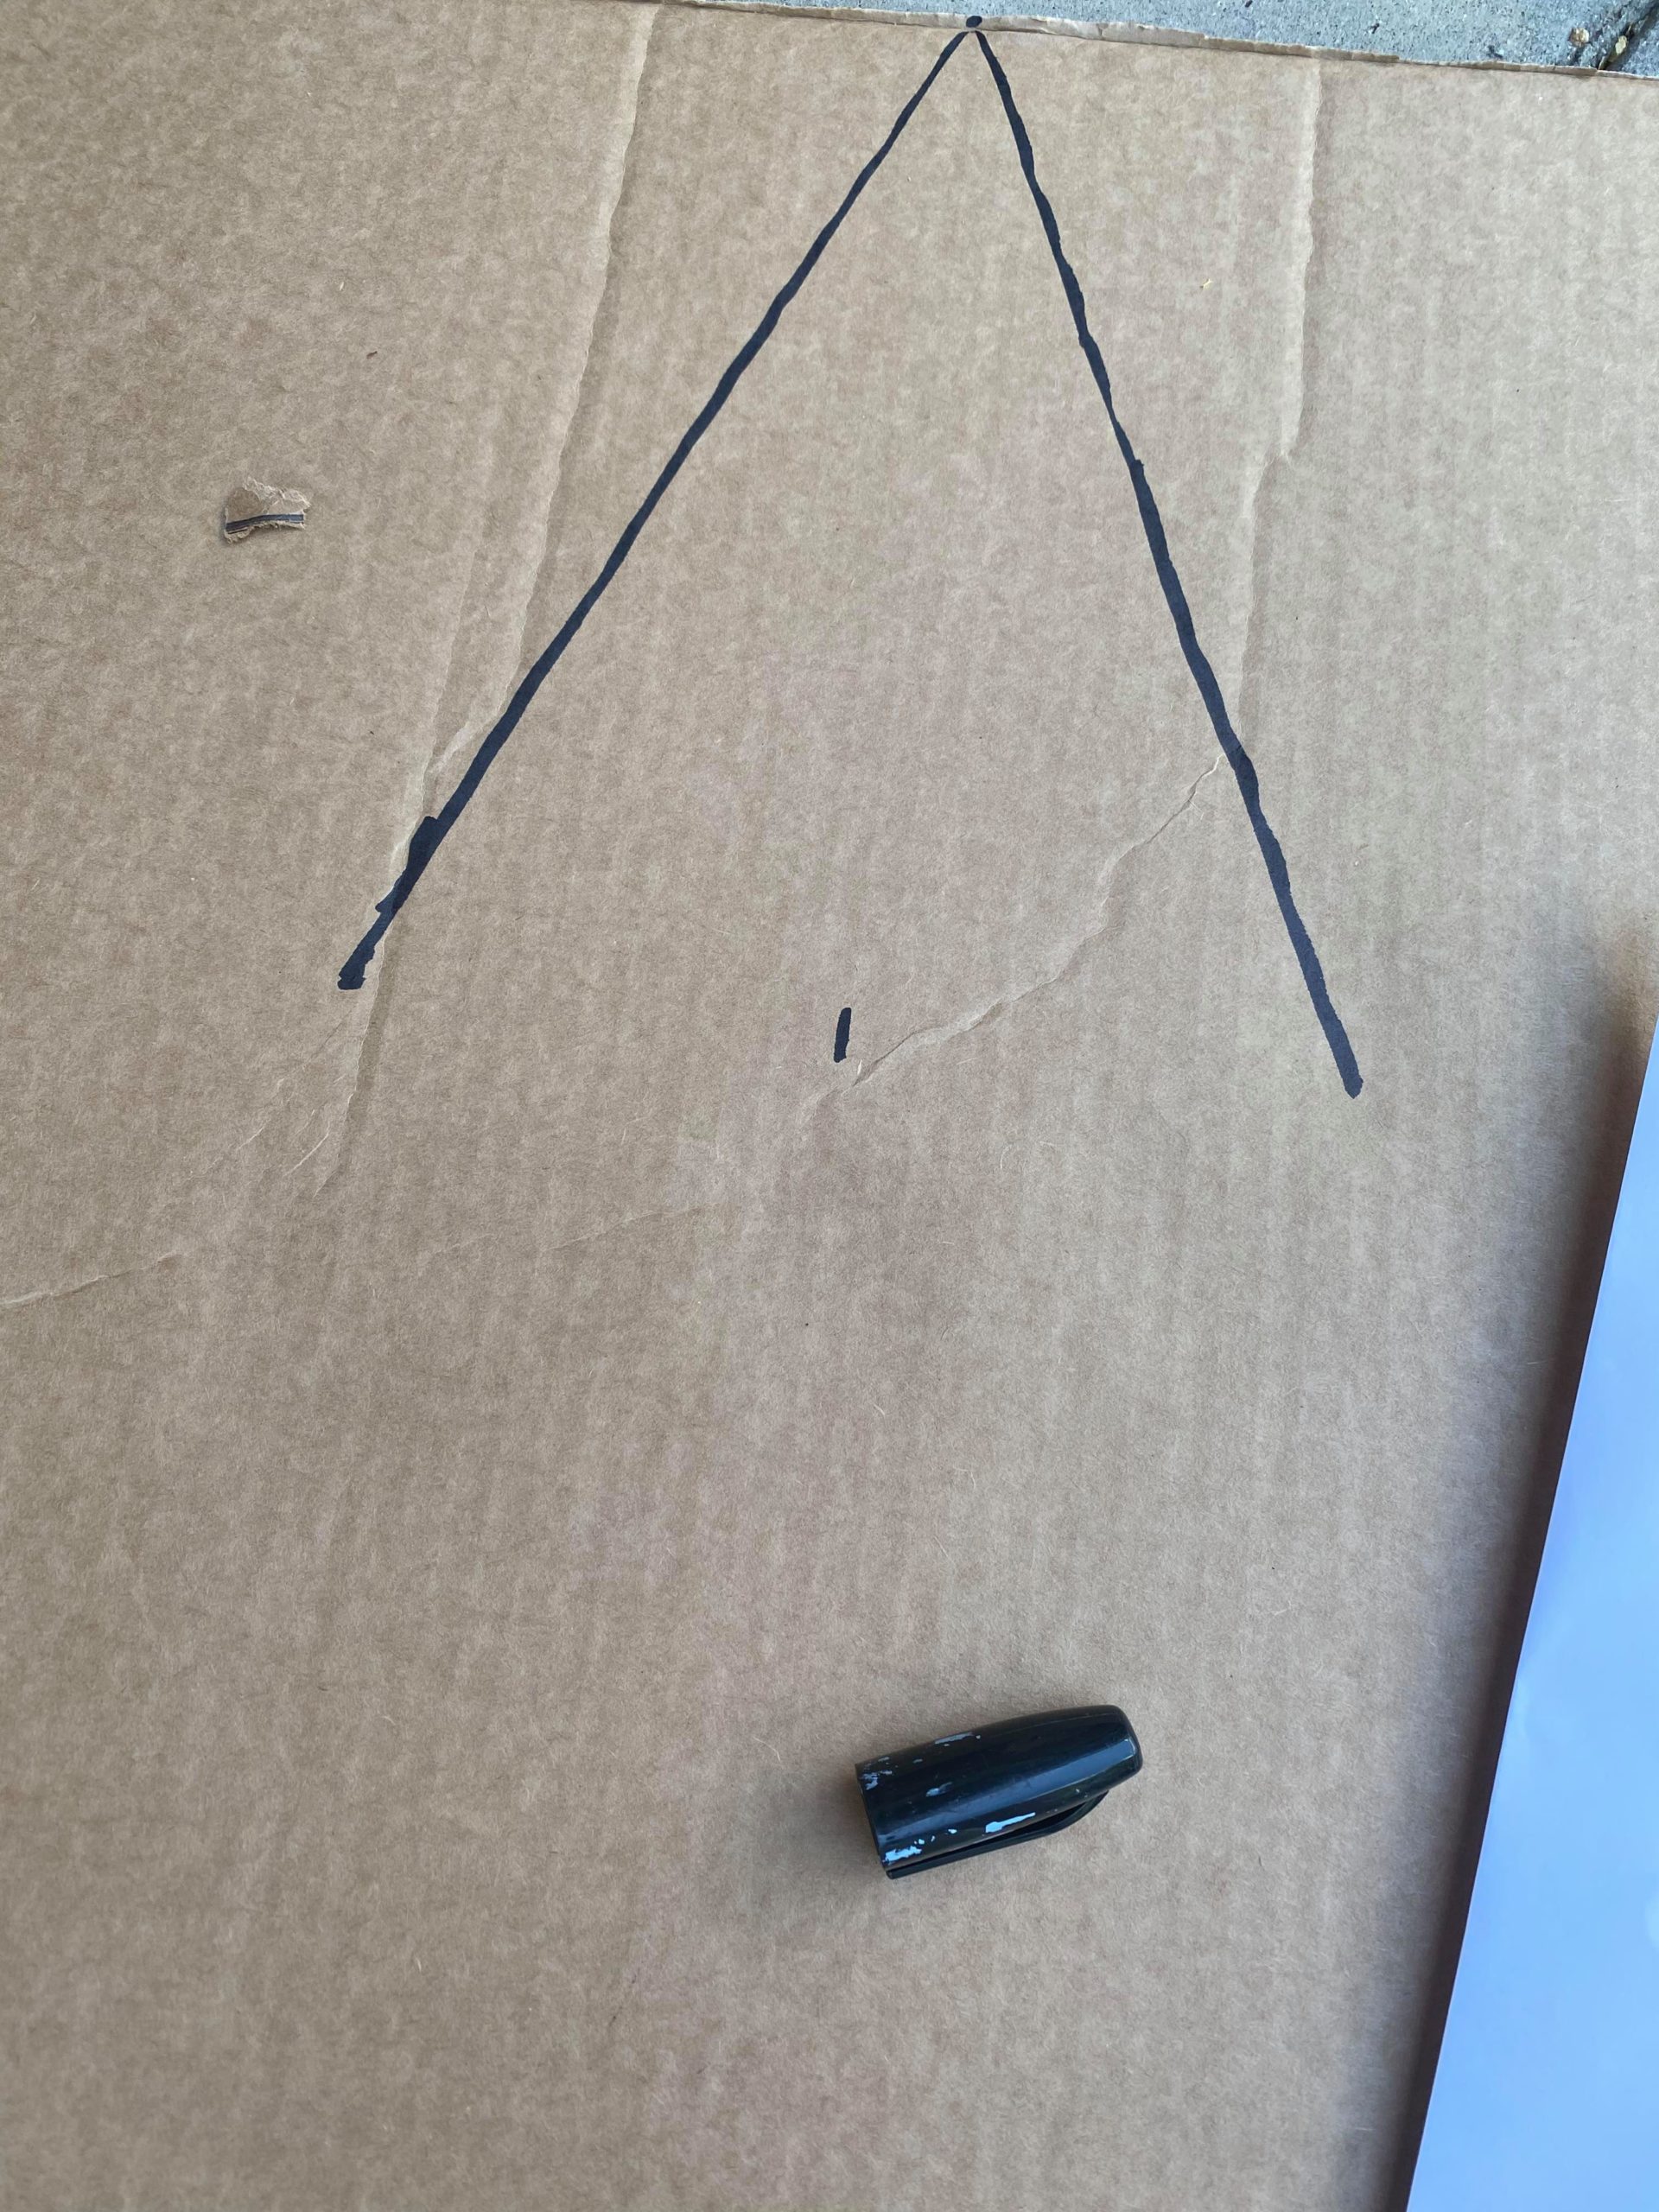
You will now need to draw a line down the center of the triangle. Be sure to draw one long line. This line will help you to place the triangle for the bottom points to your star.
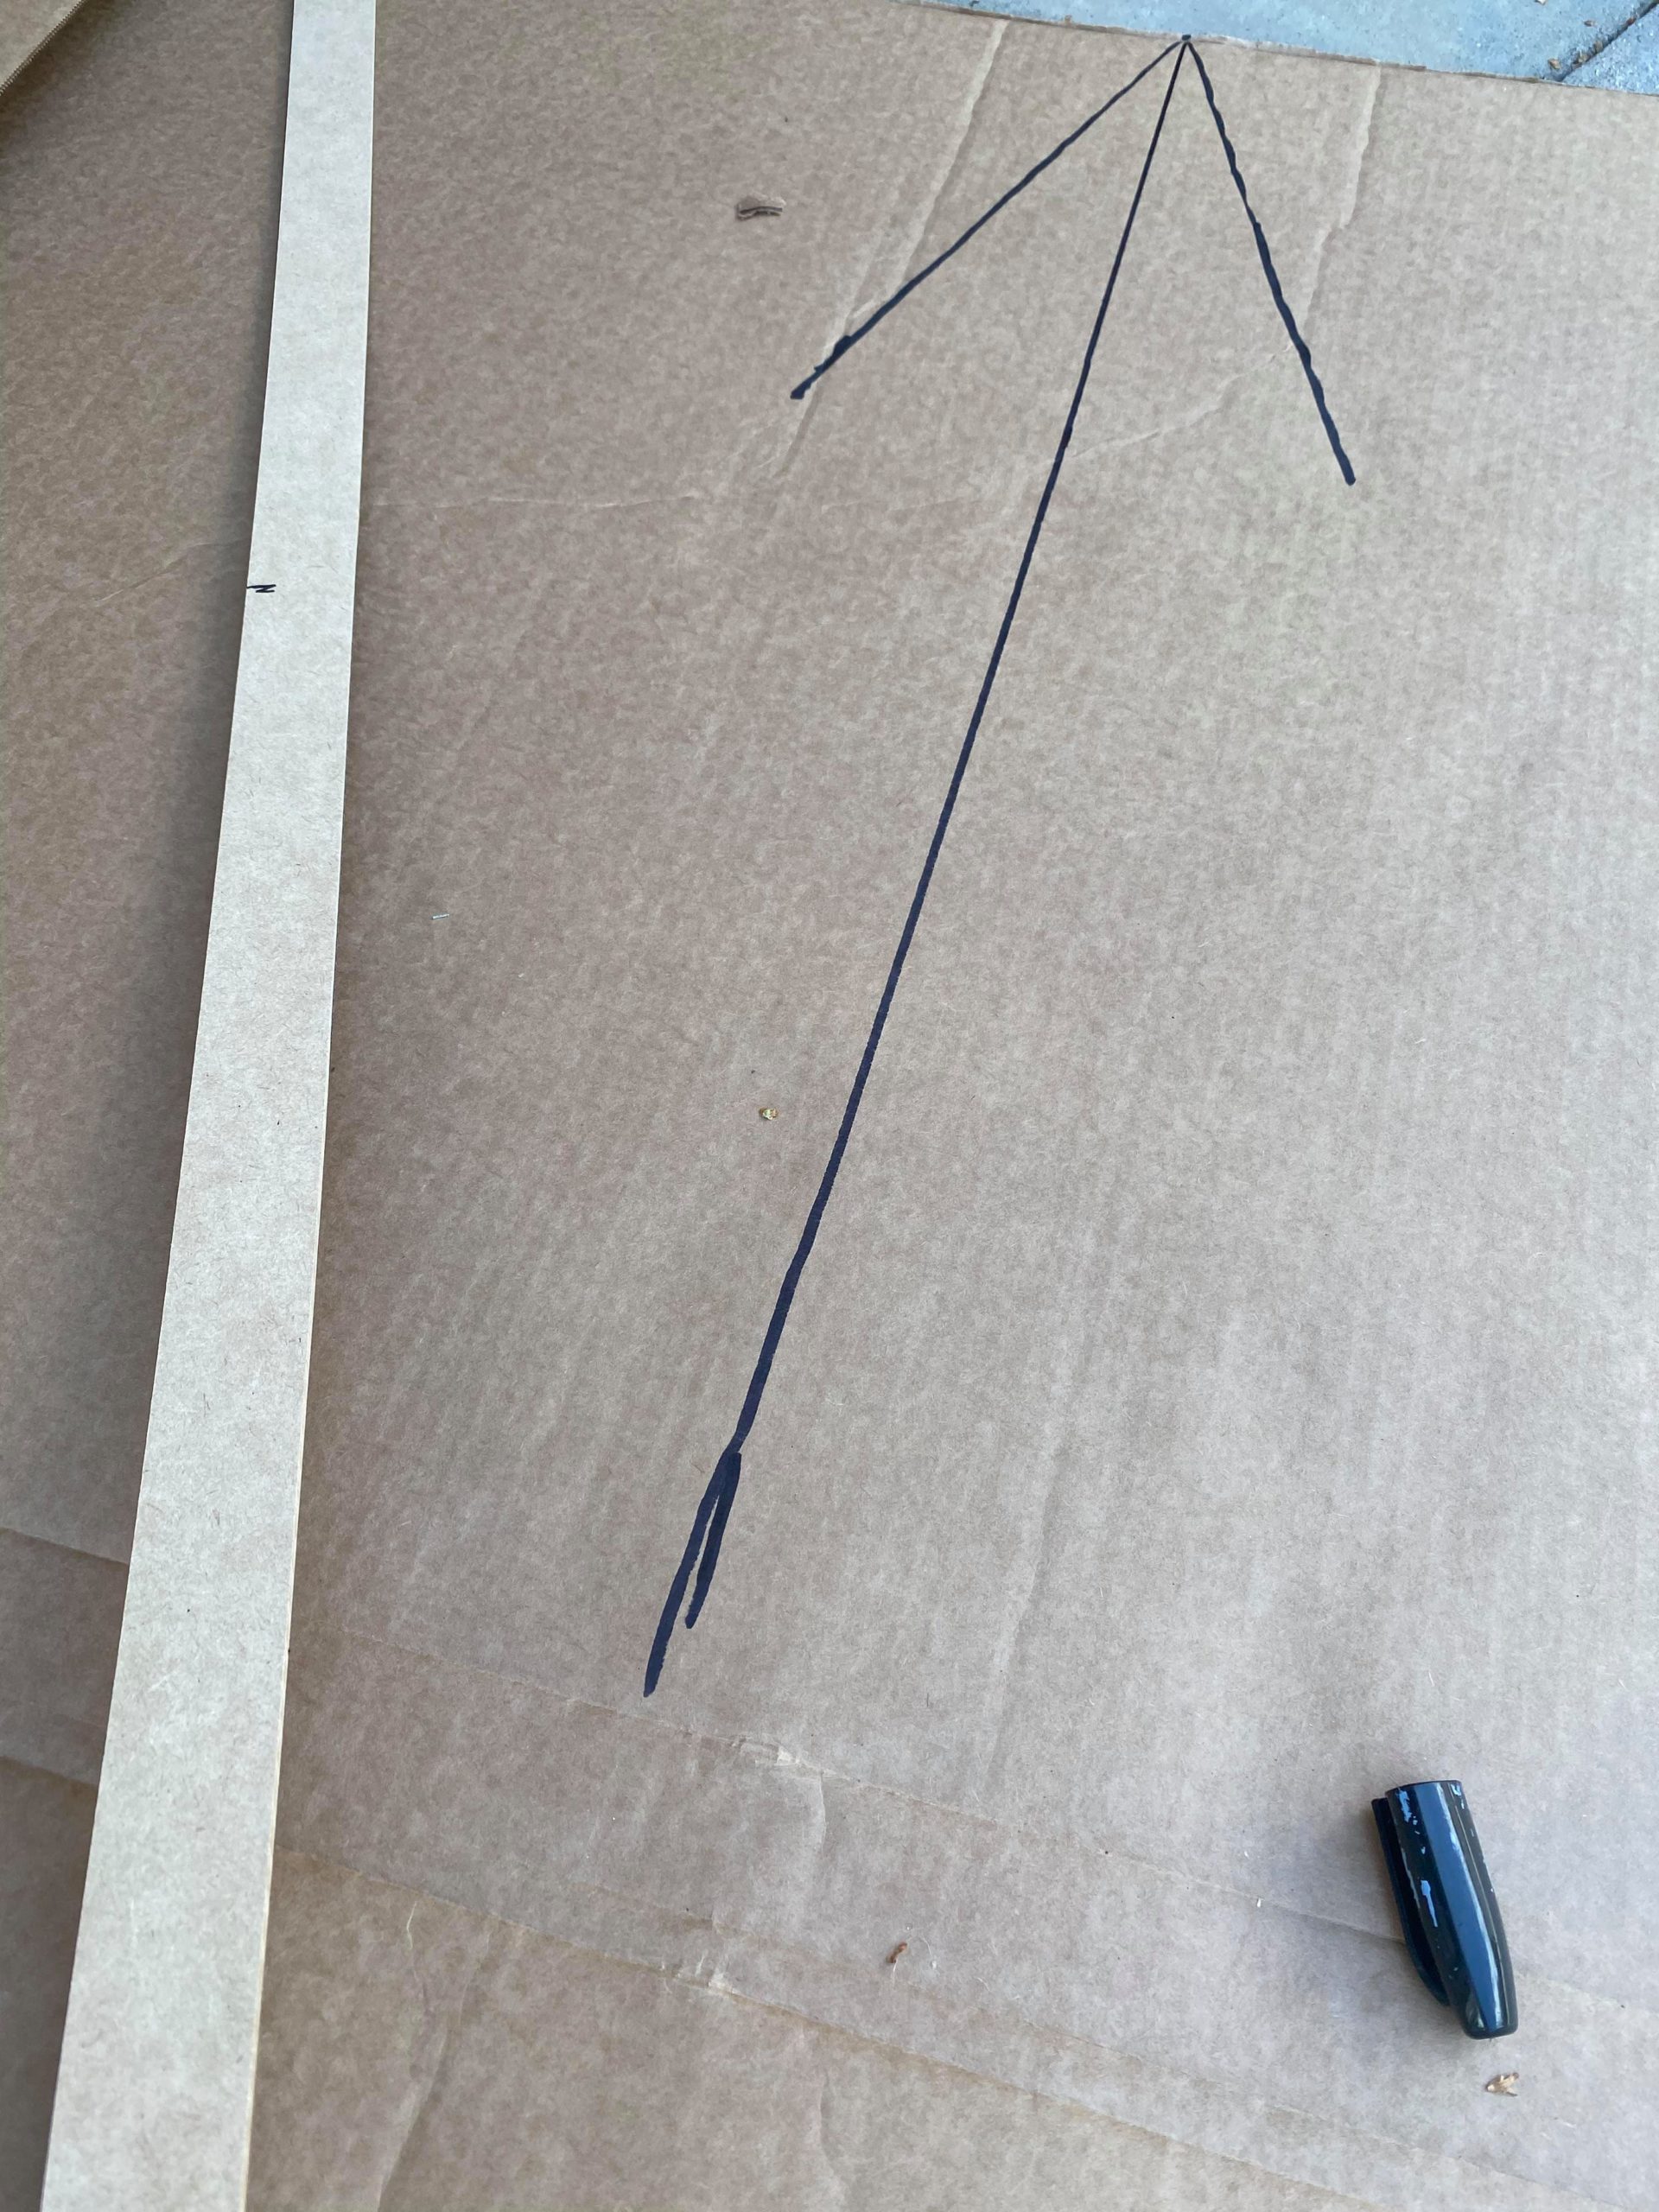
Once you have the line drawn you will want to start tracing the next triangle.
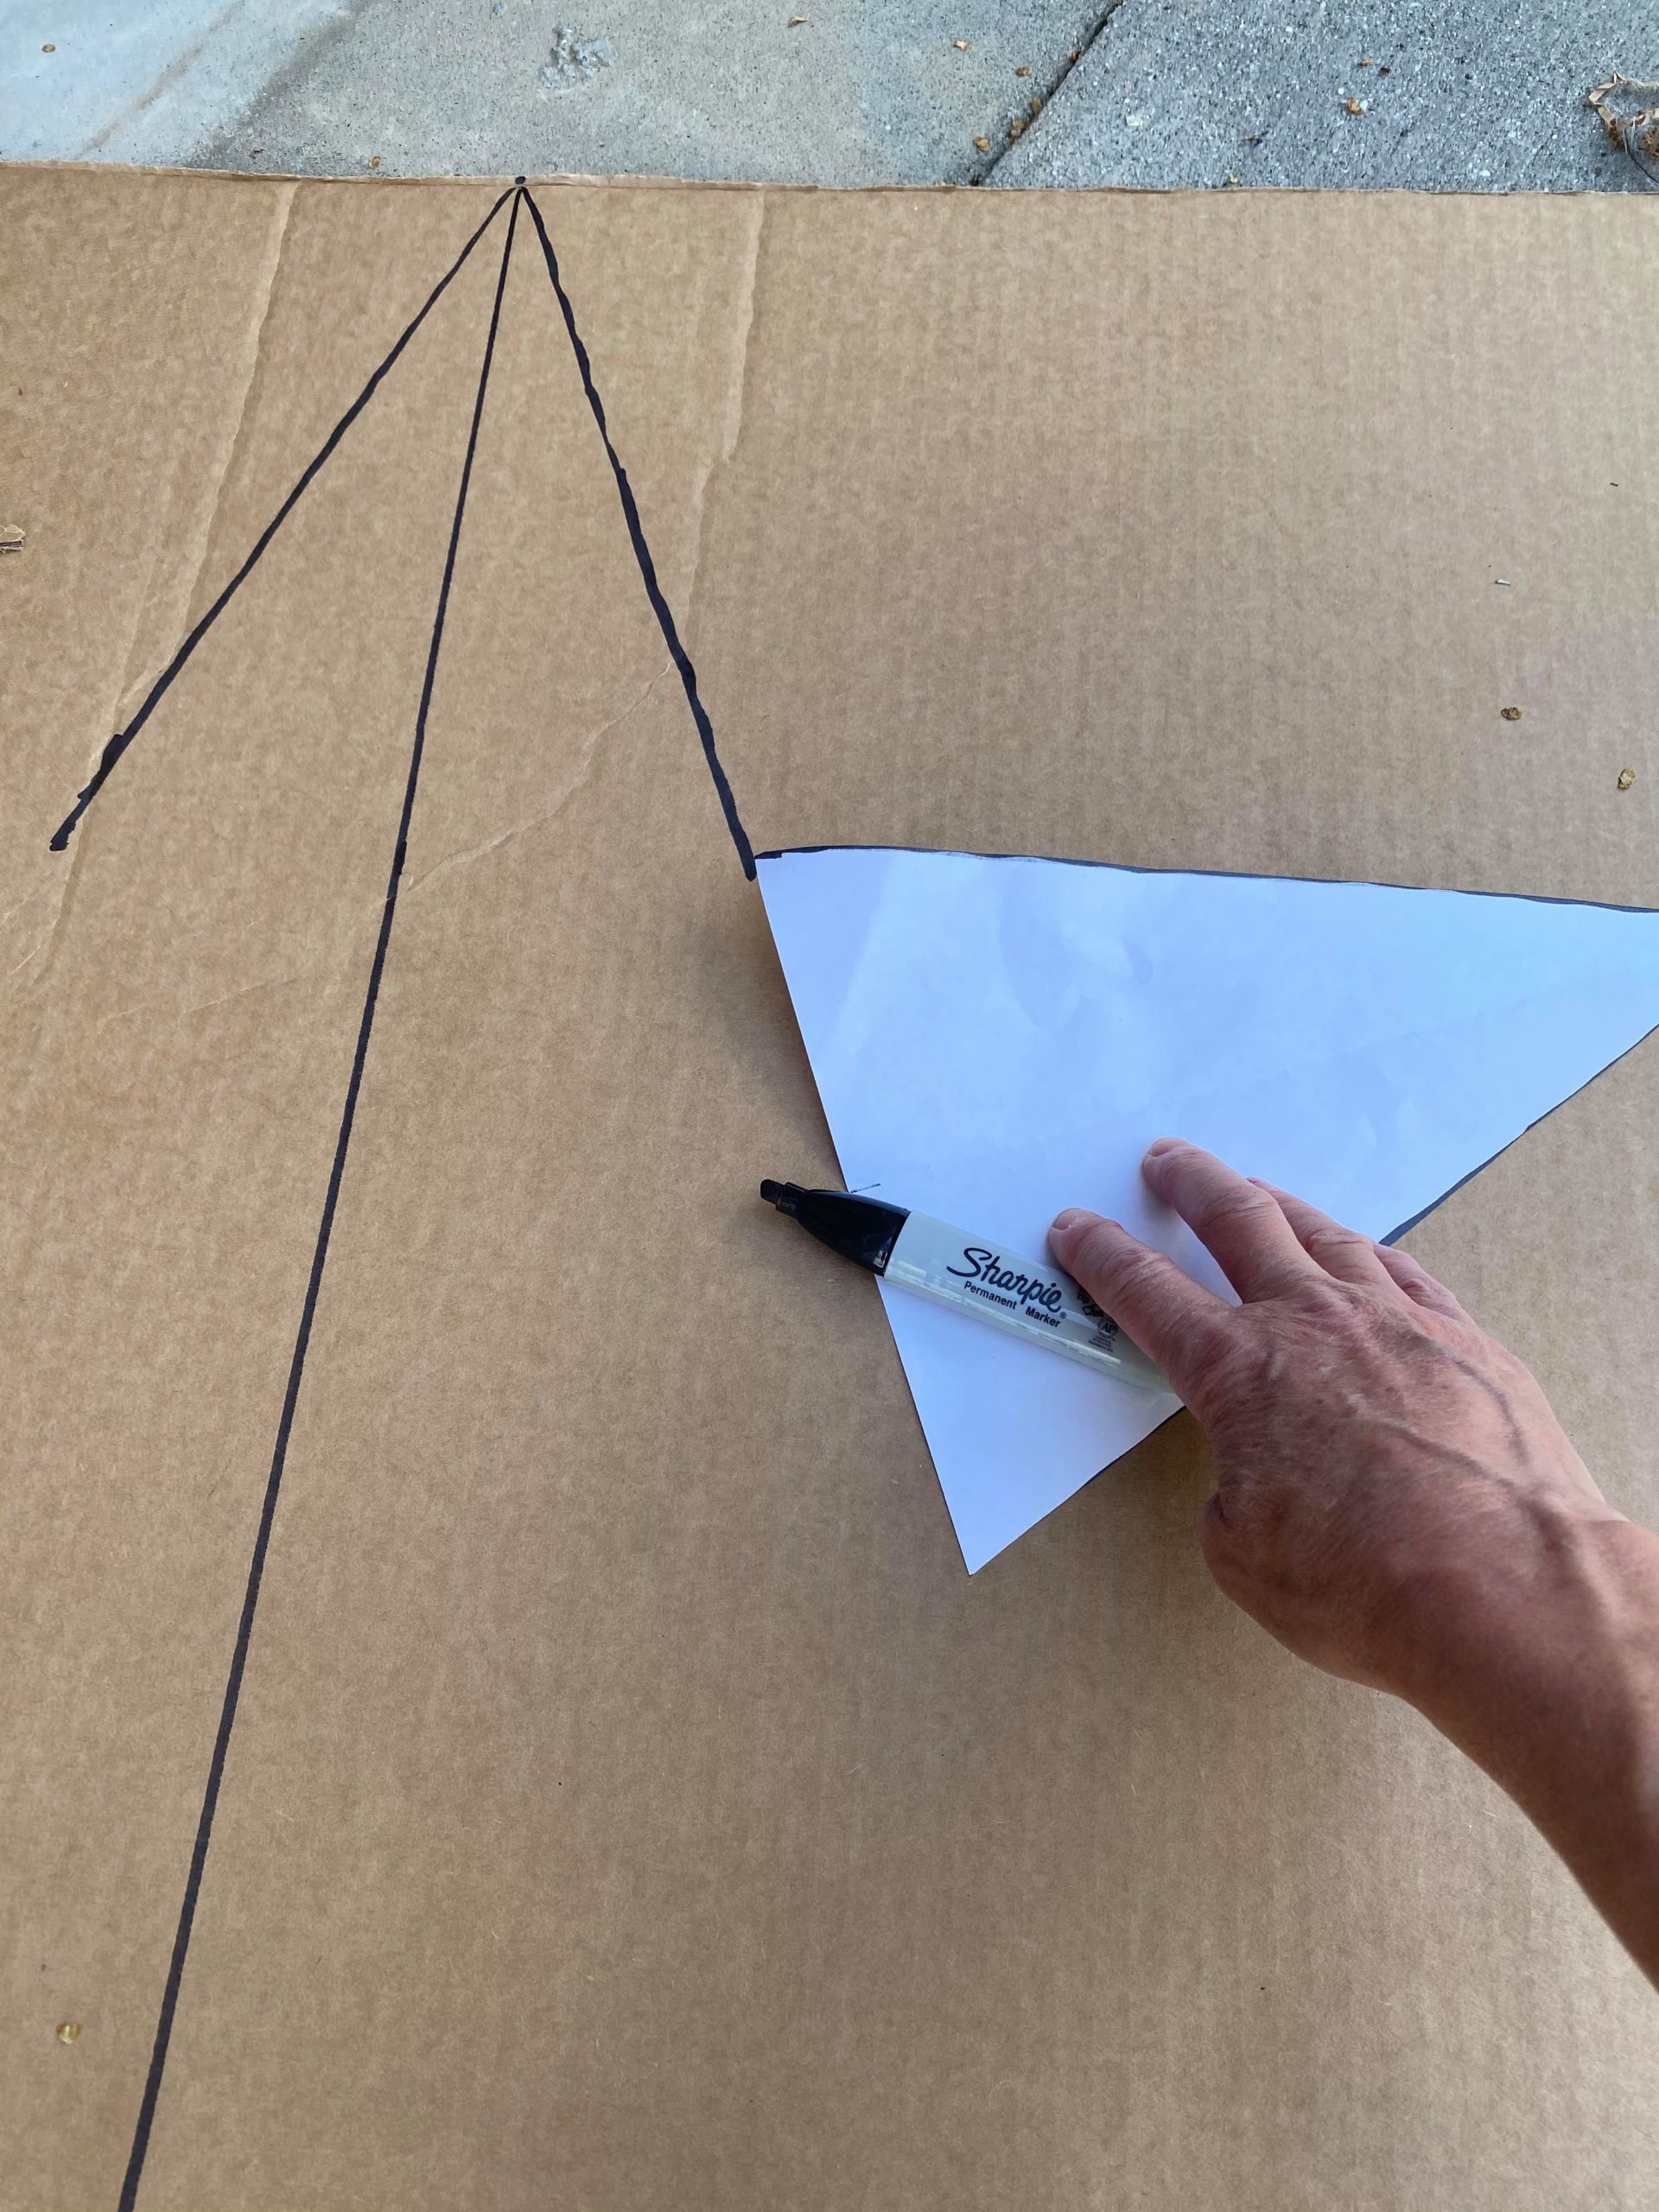
You want to place the triangle so that the side of the triangle makes a horizontal line as shown in photo above.
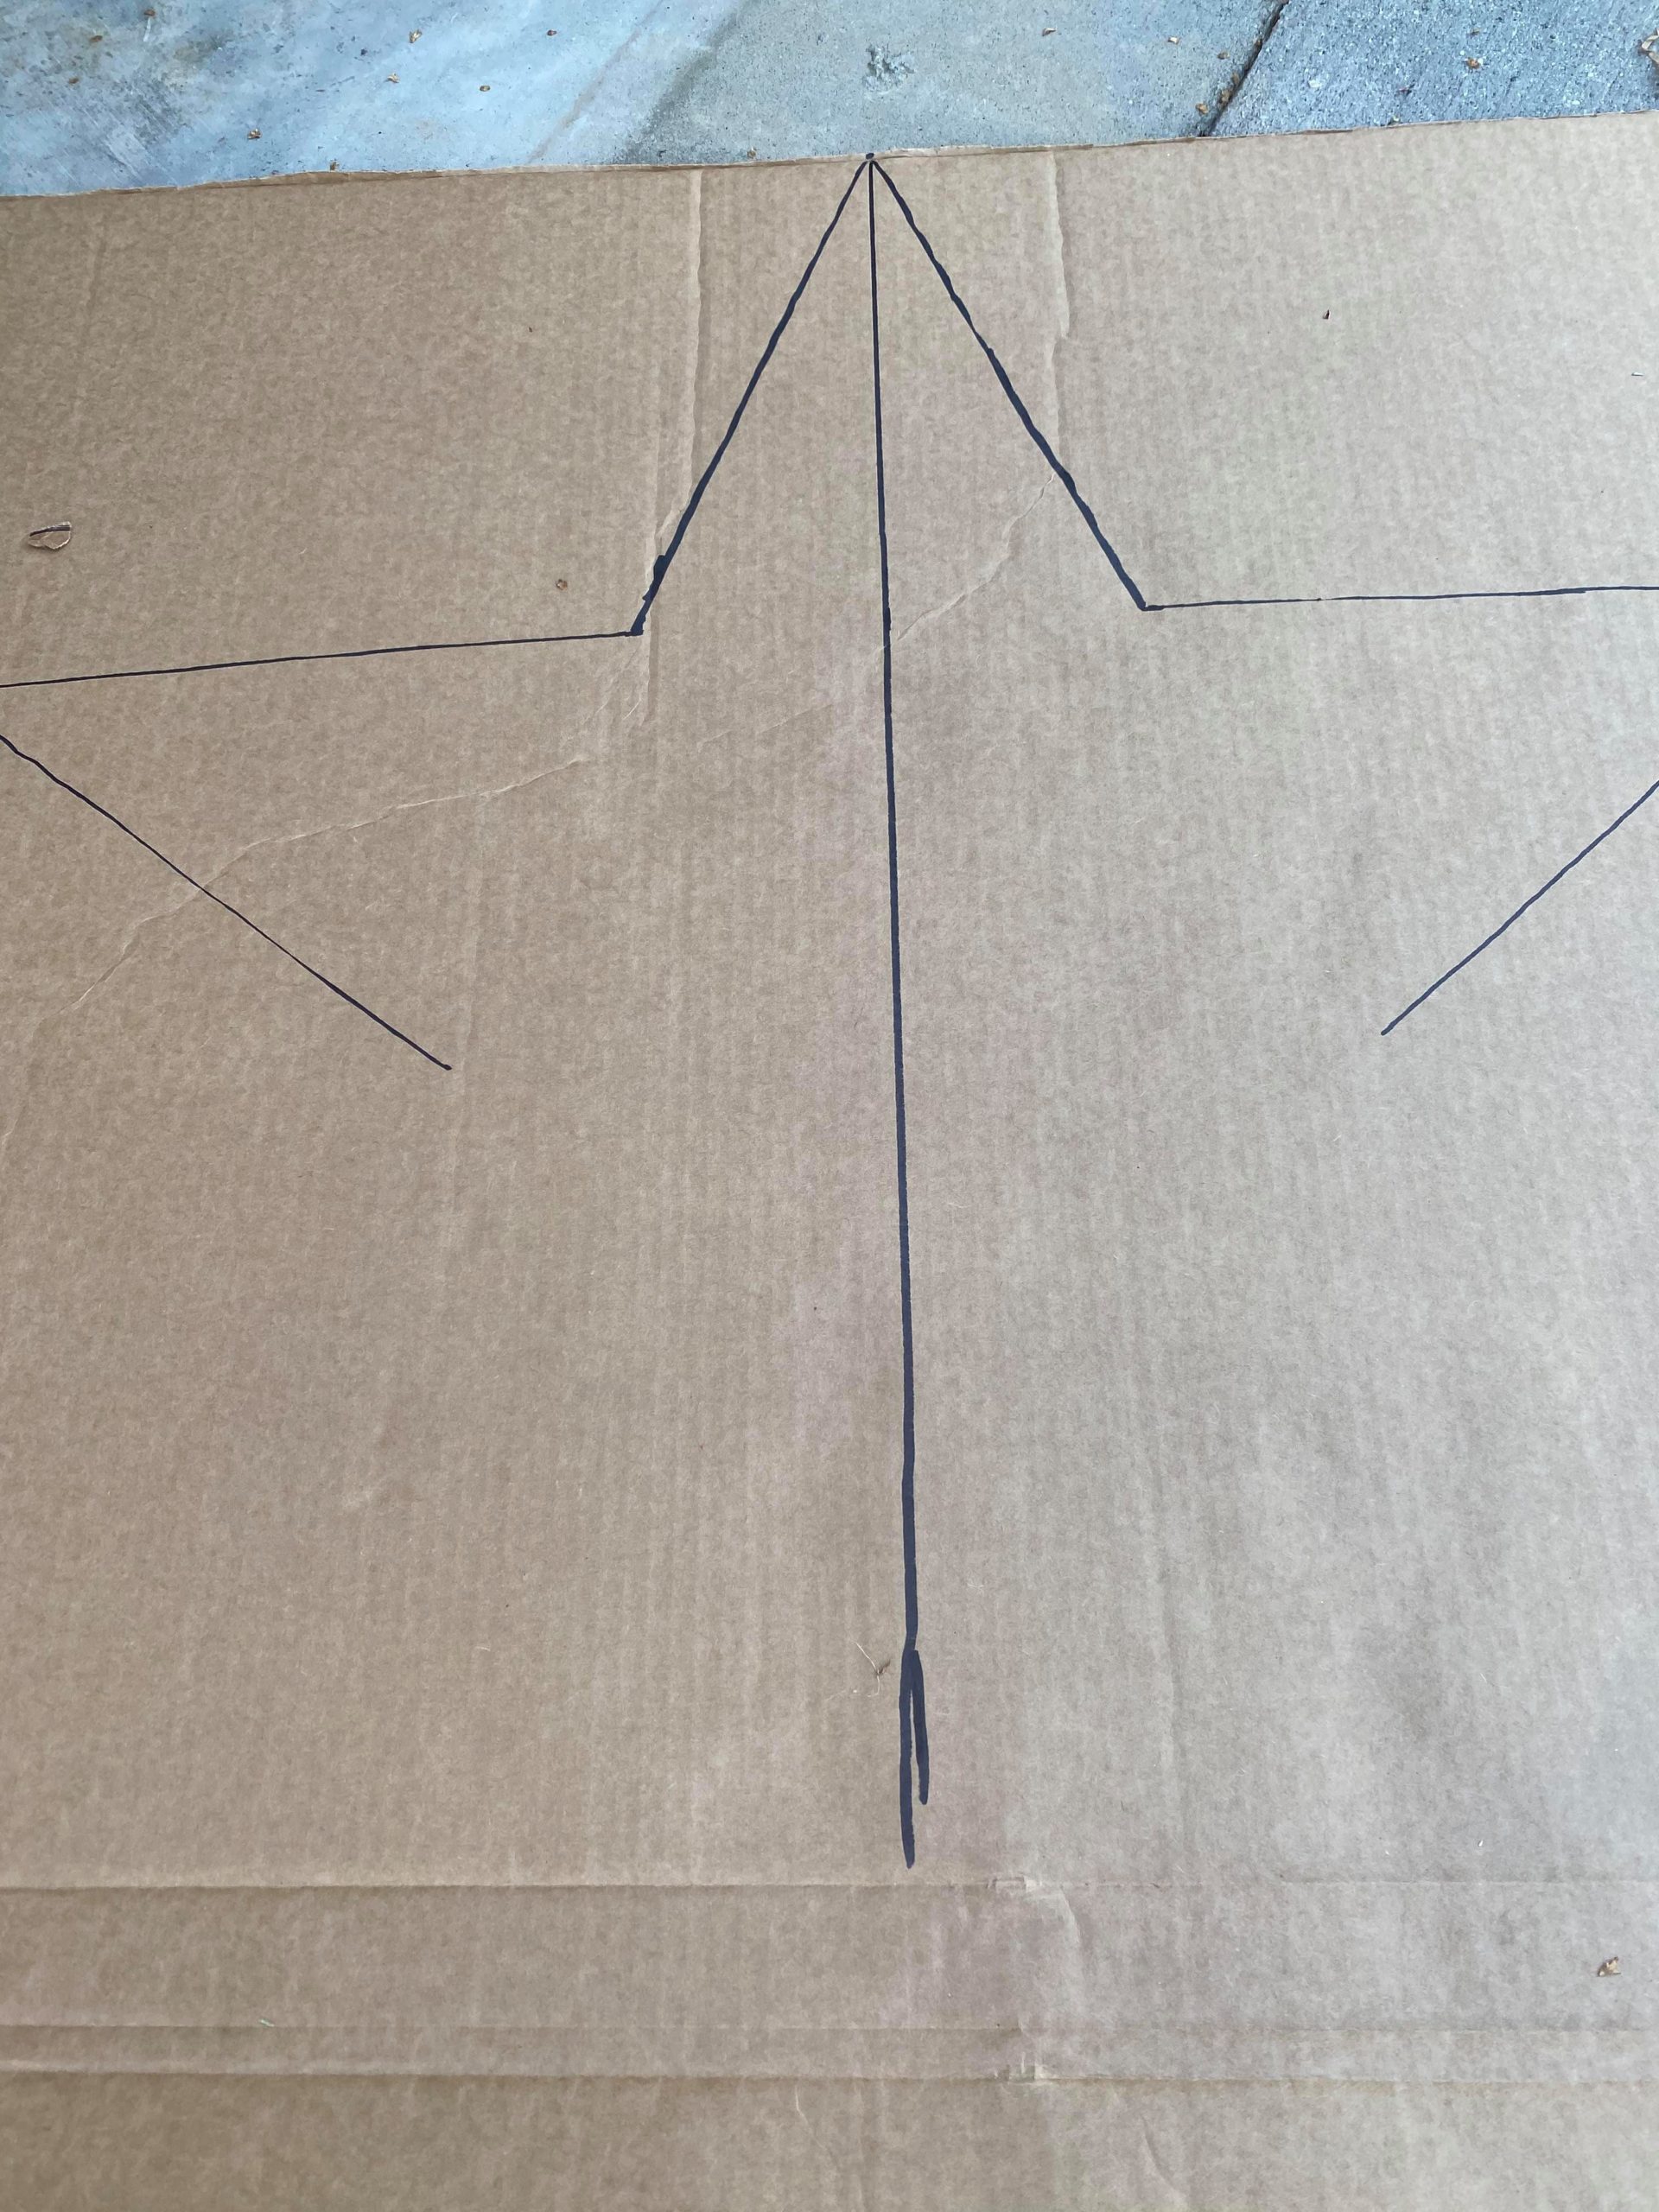
You will do the same thing to the other side.
You will then take the triangle and connect one corner to the center line and the other corner to the line from your previous triangle.
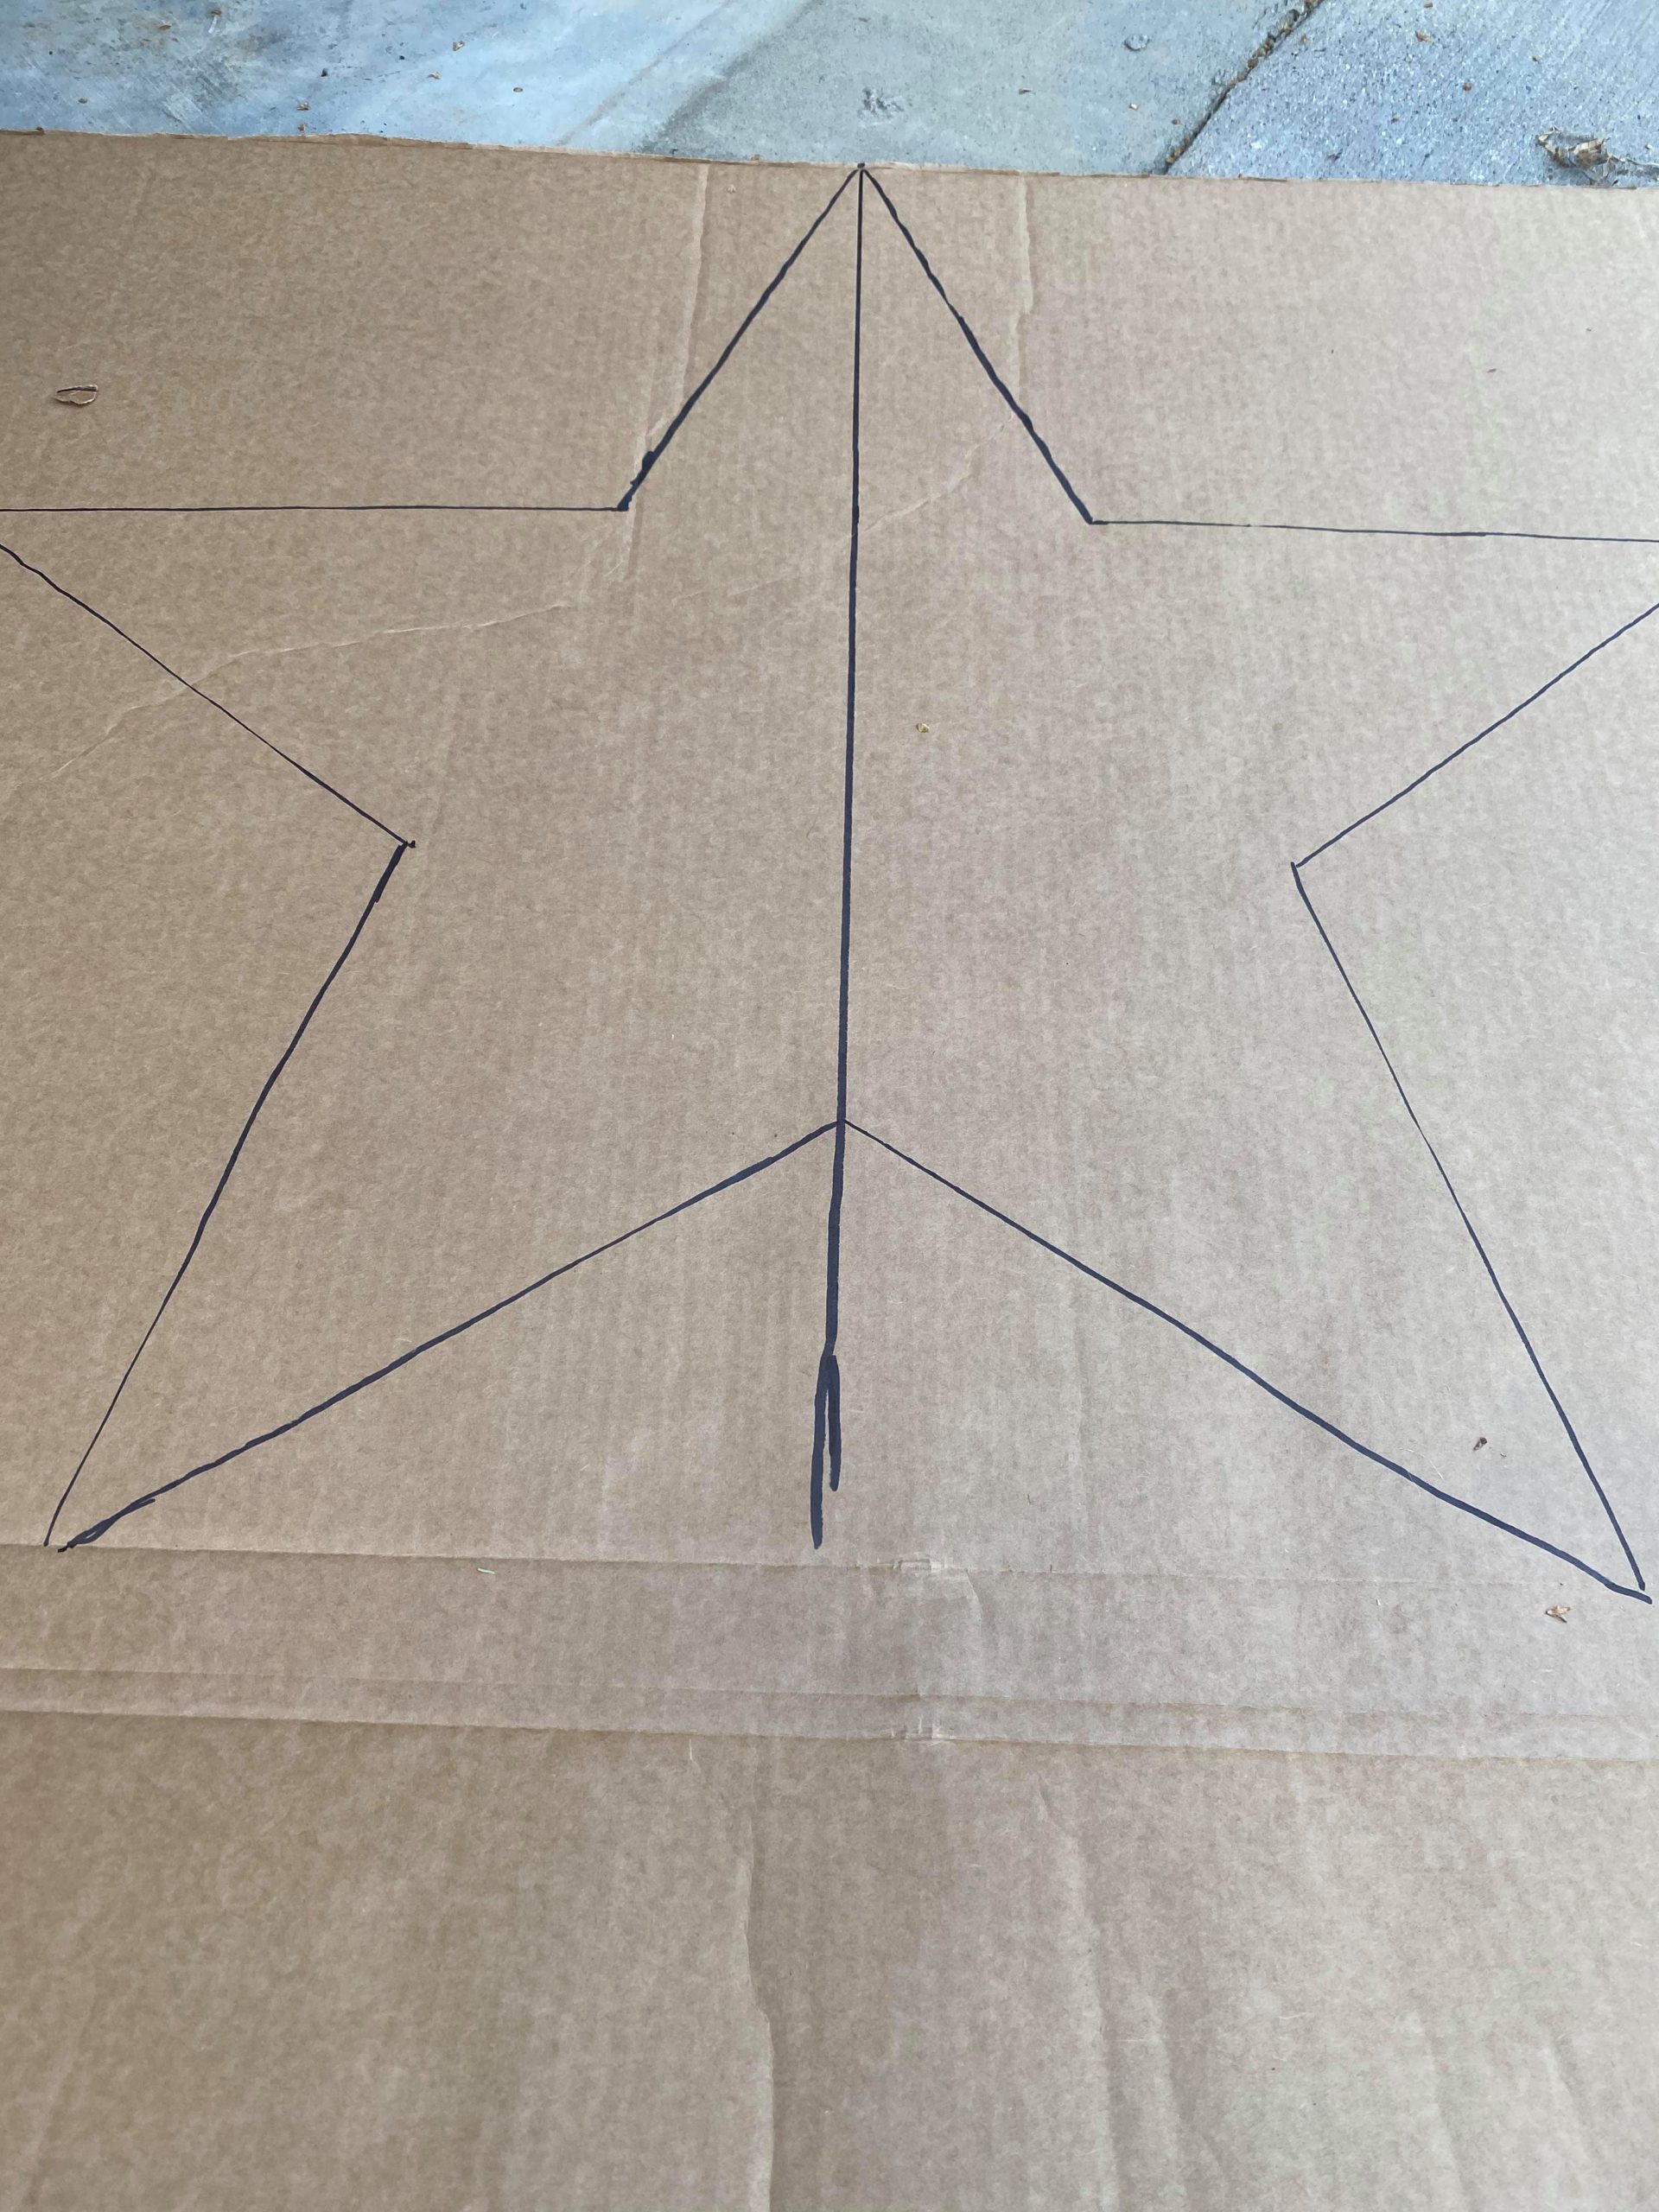
Do the same thing to the last triangle to your star. Once you have your star drawn it is now time to draw your fold lines.
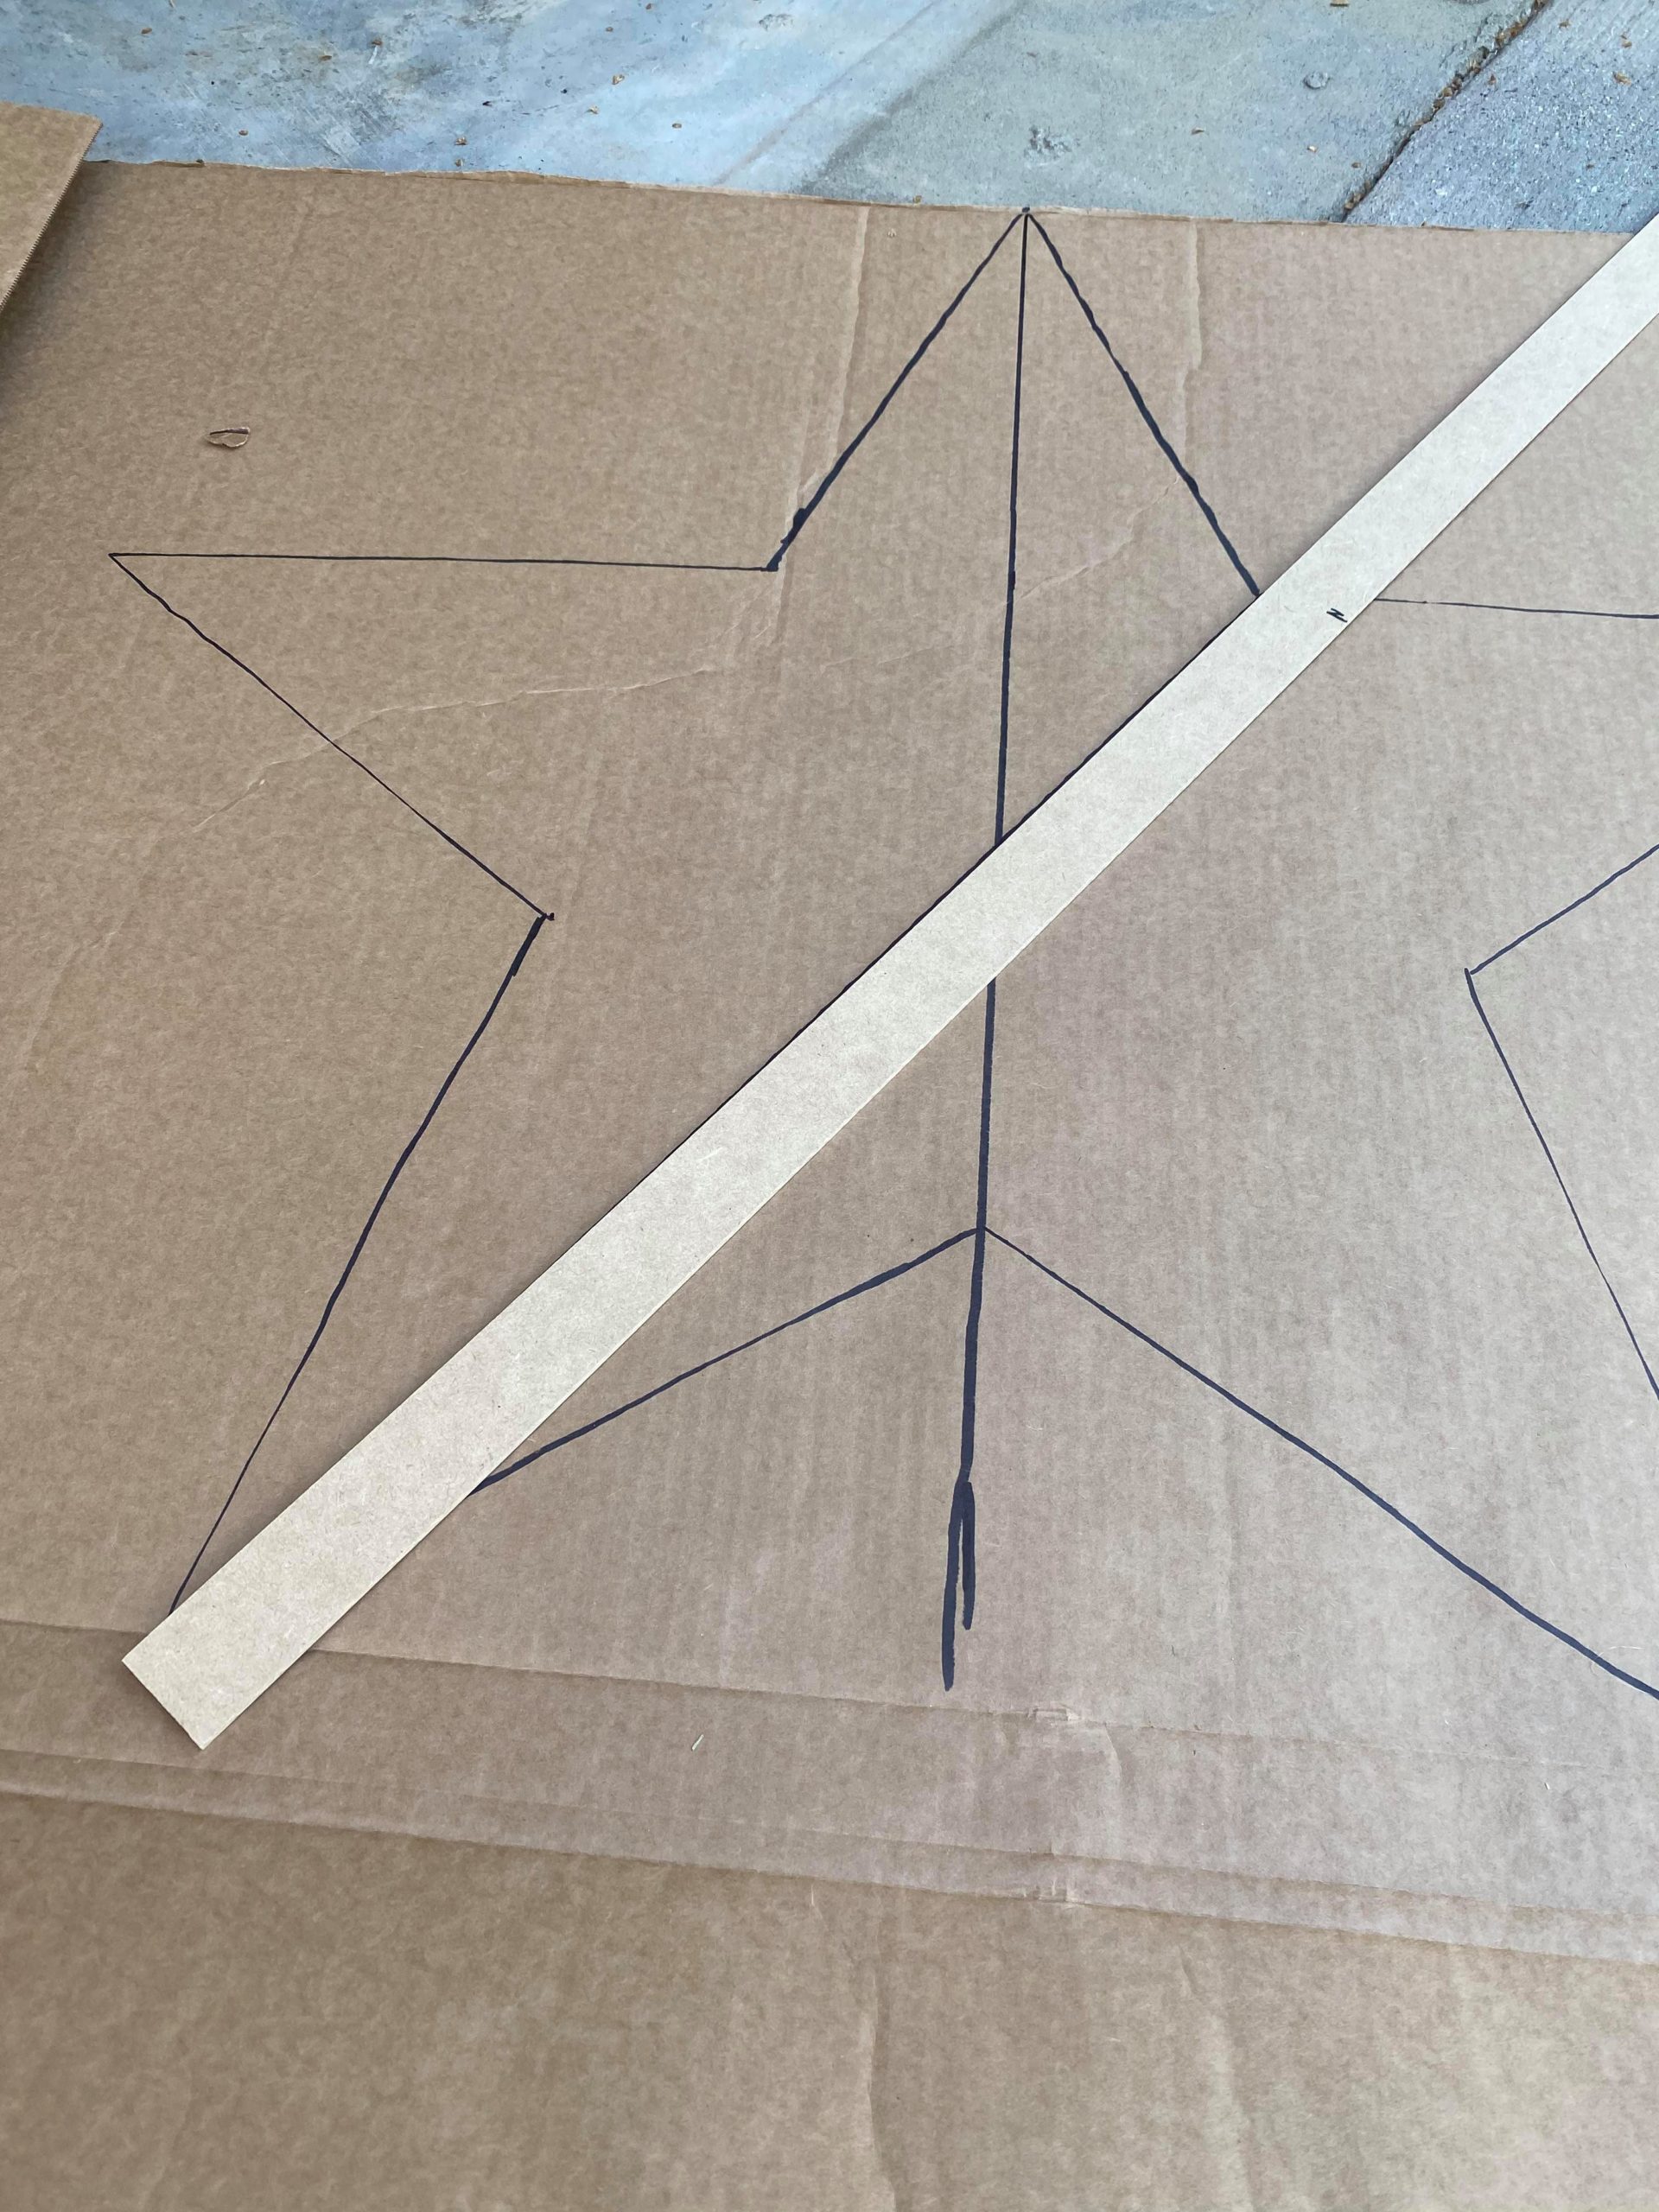
You will use a ruler or straight stick to connect your points and draw your lines.
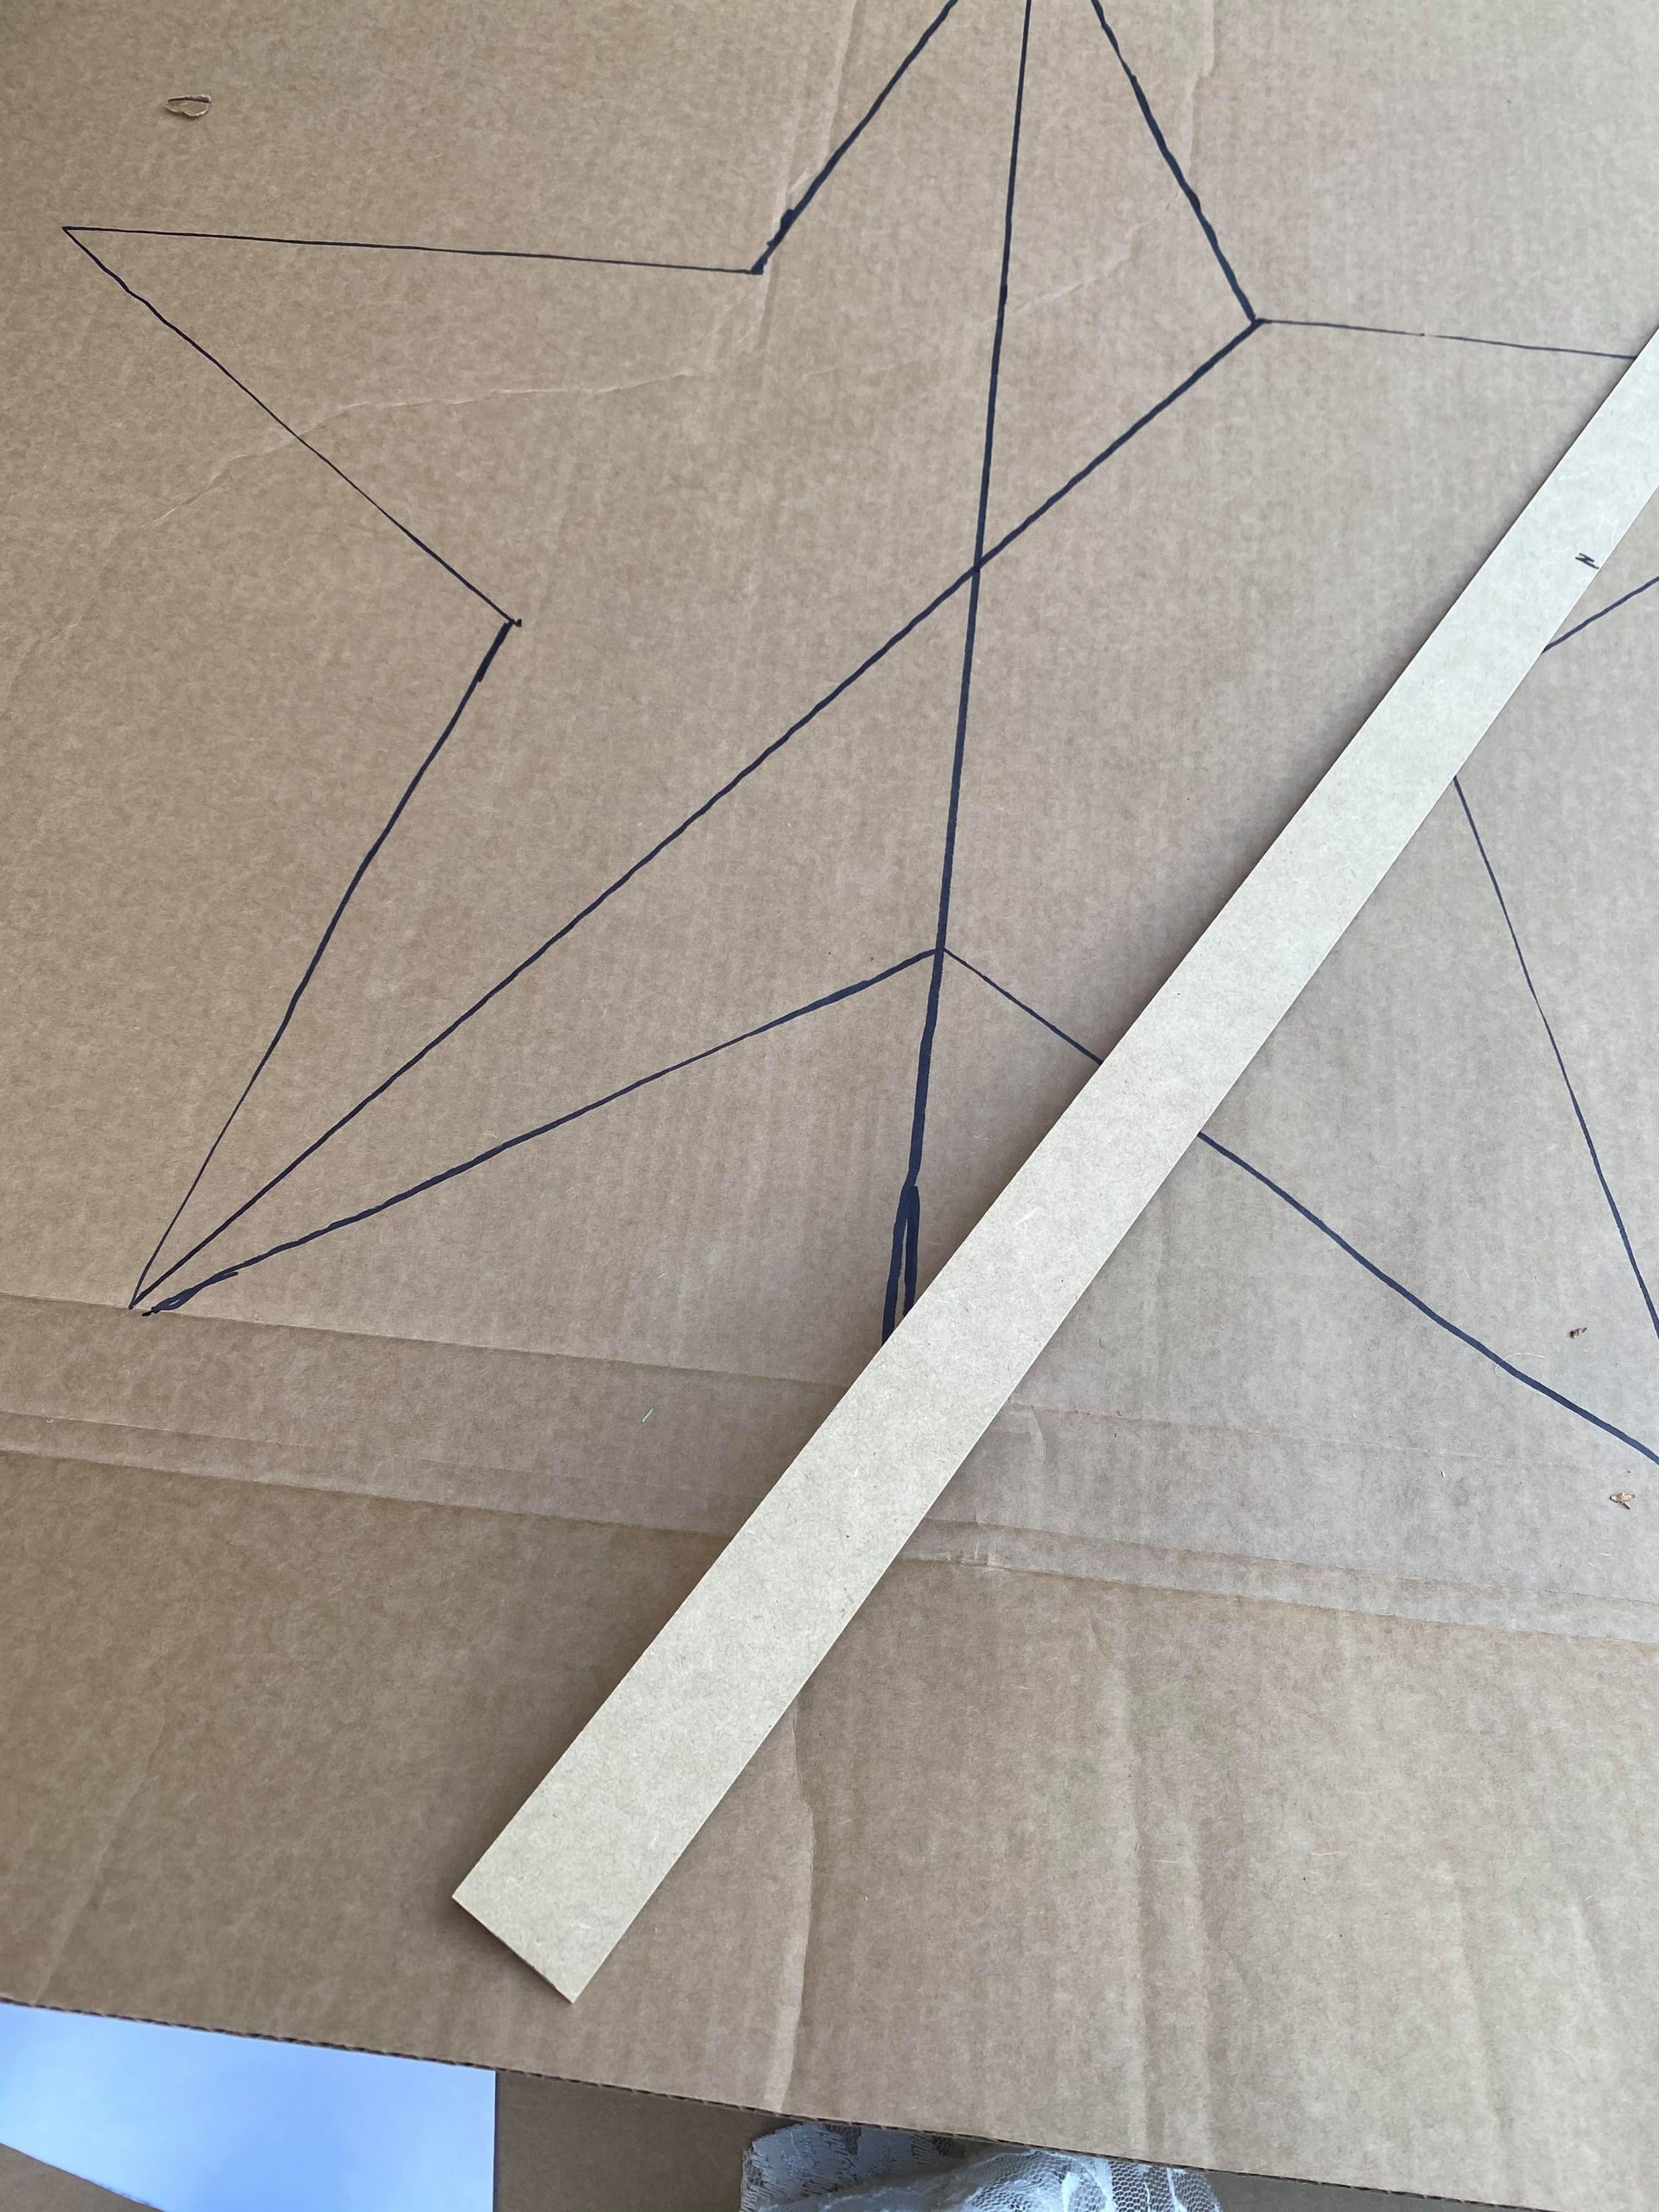
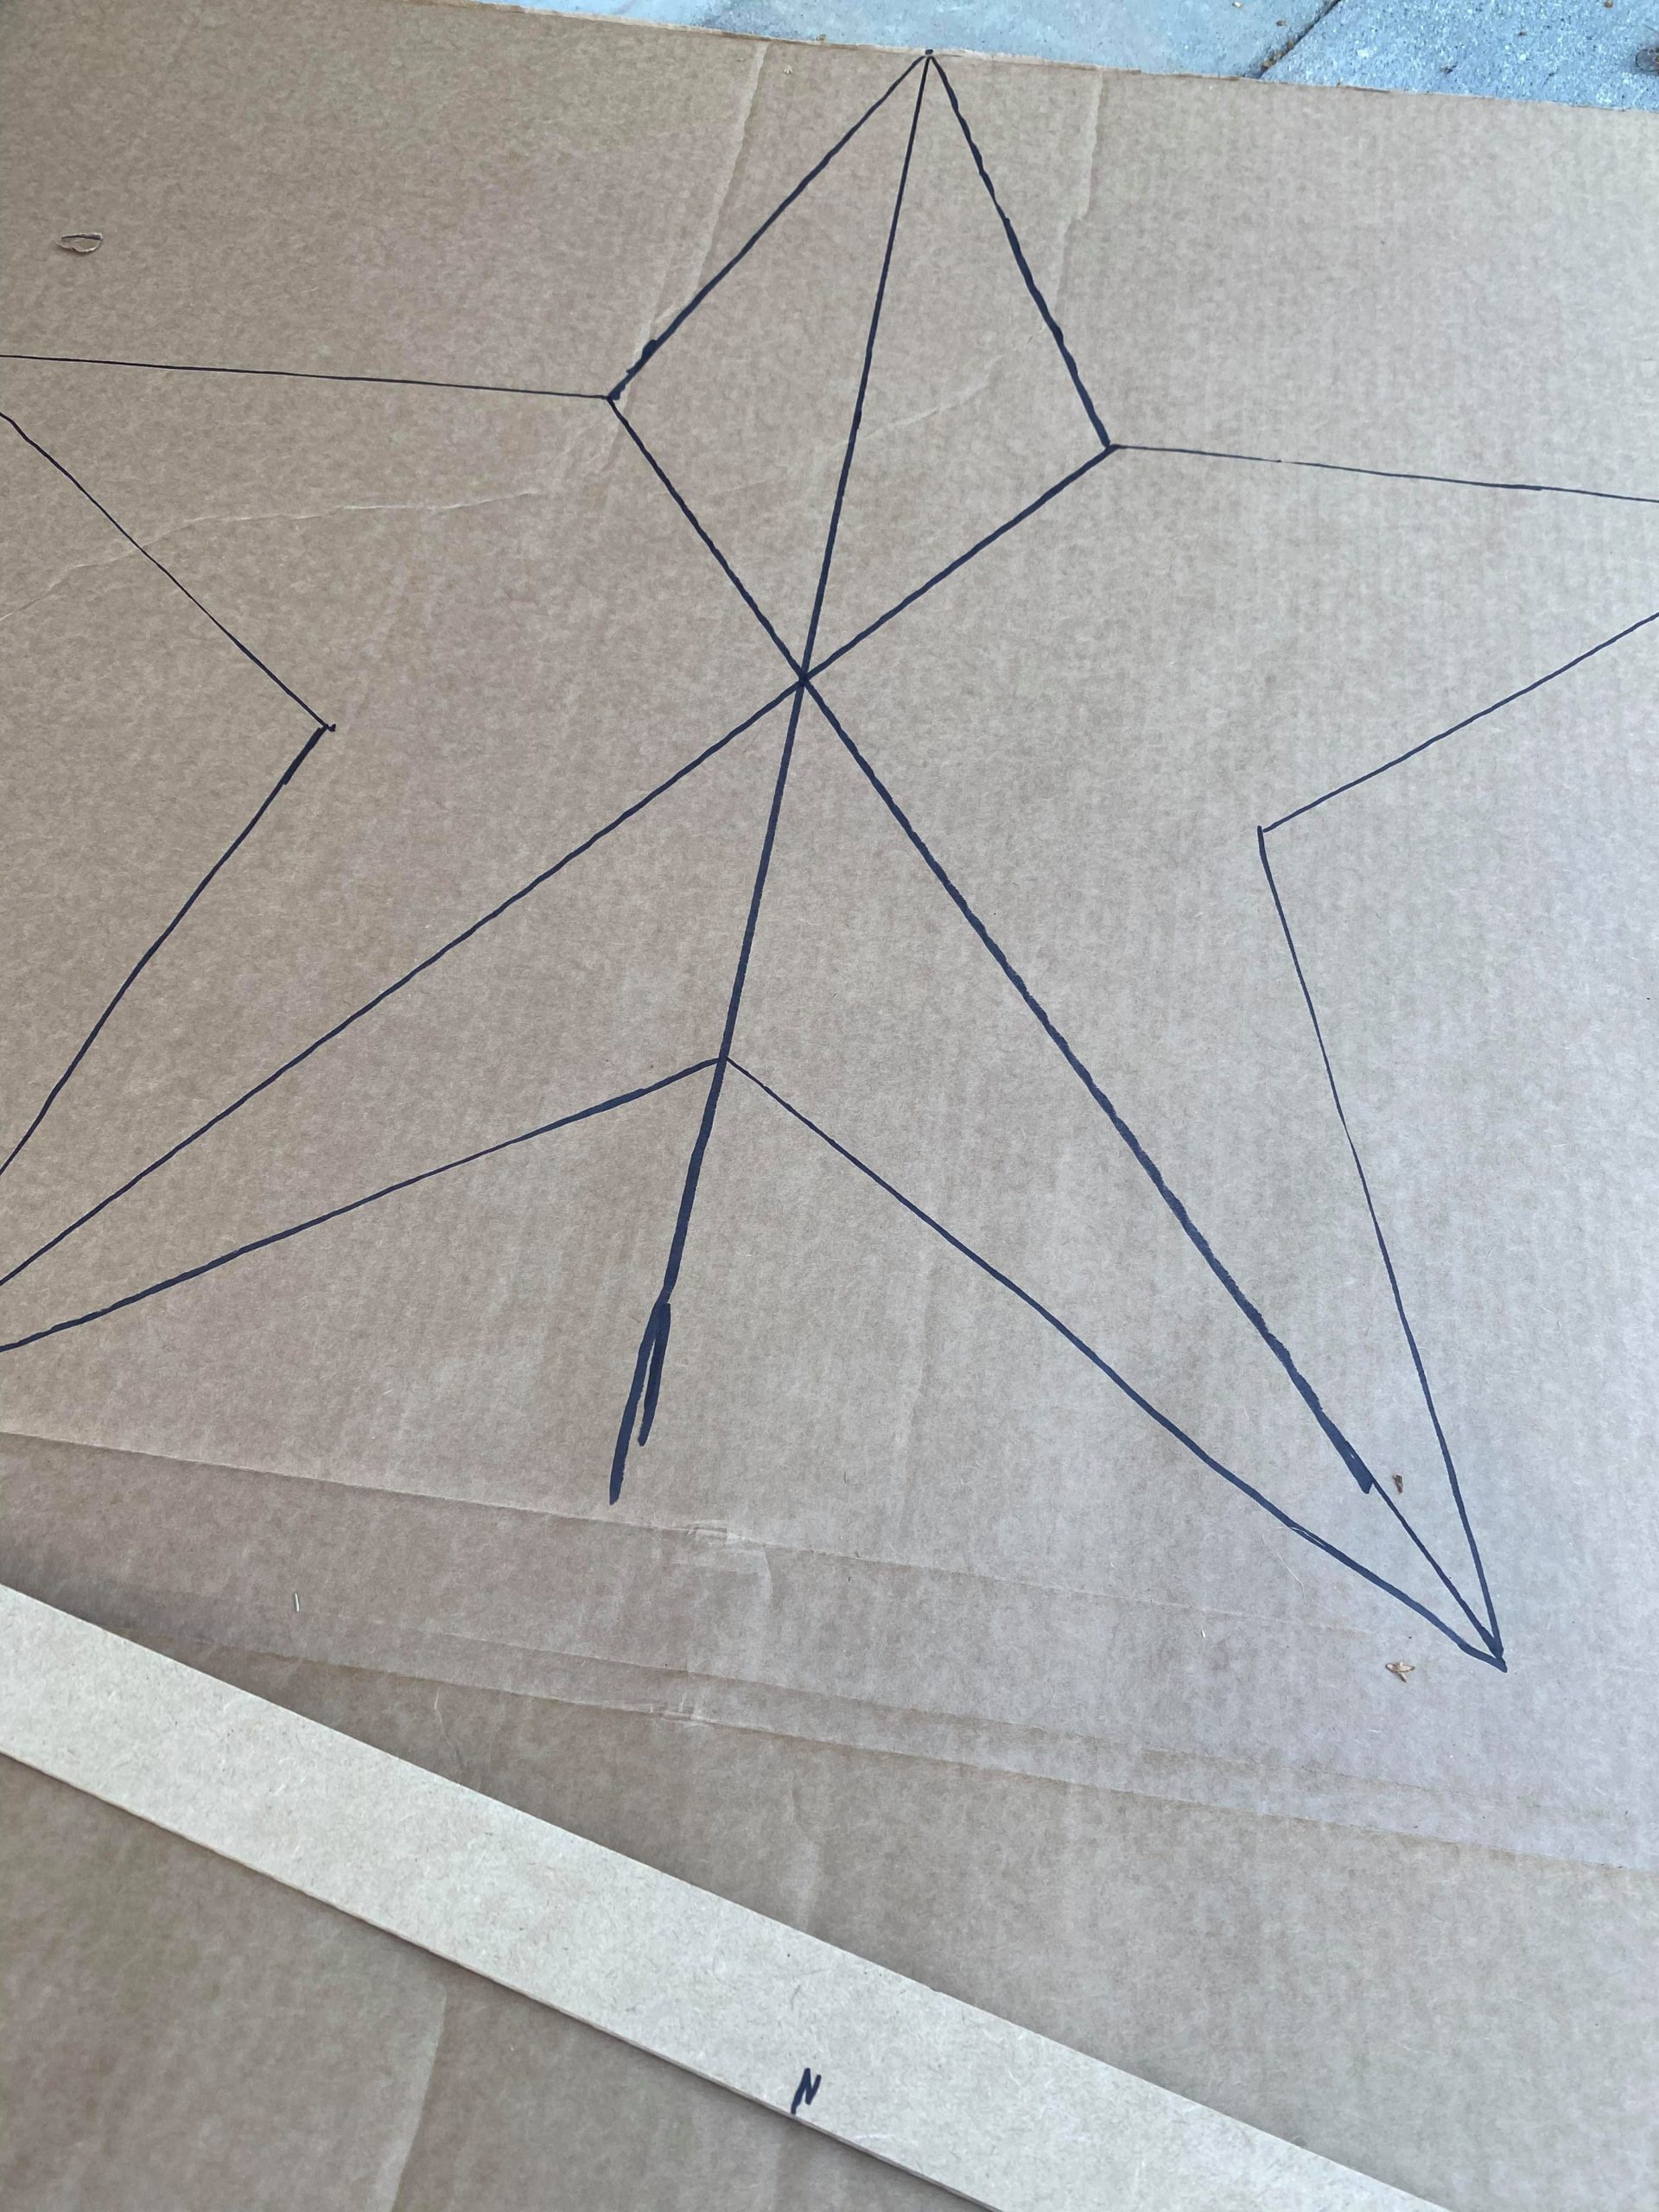
Your lines should all intersect in the center of your star.
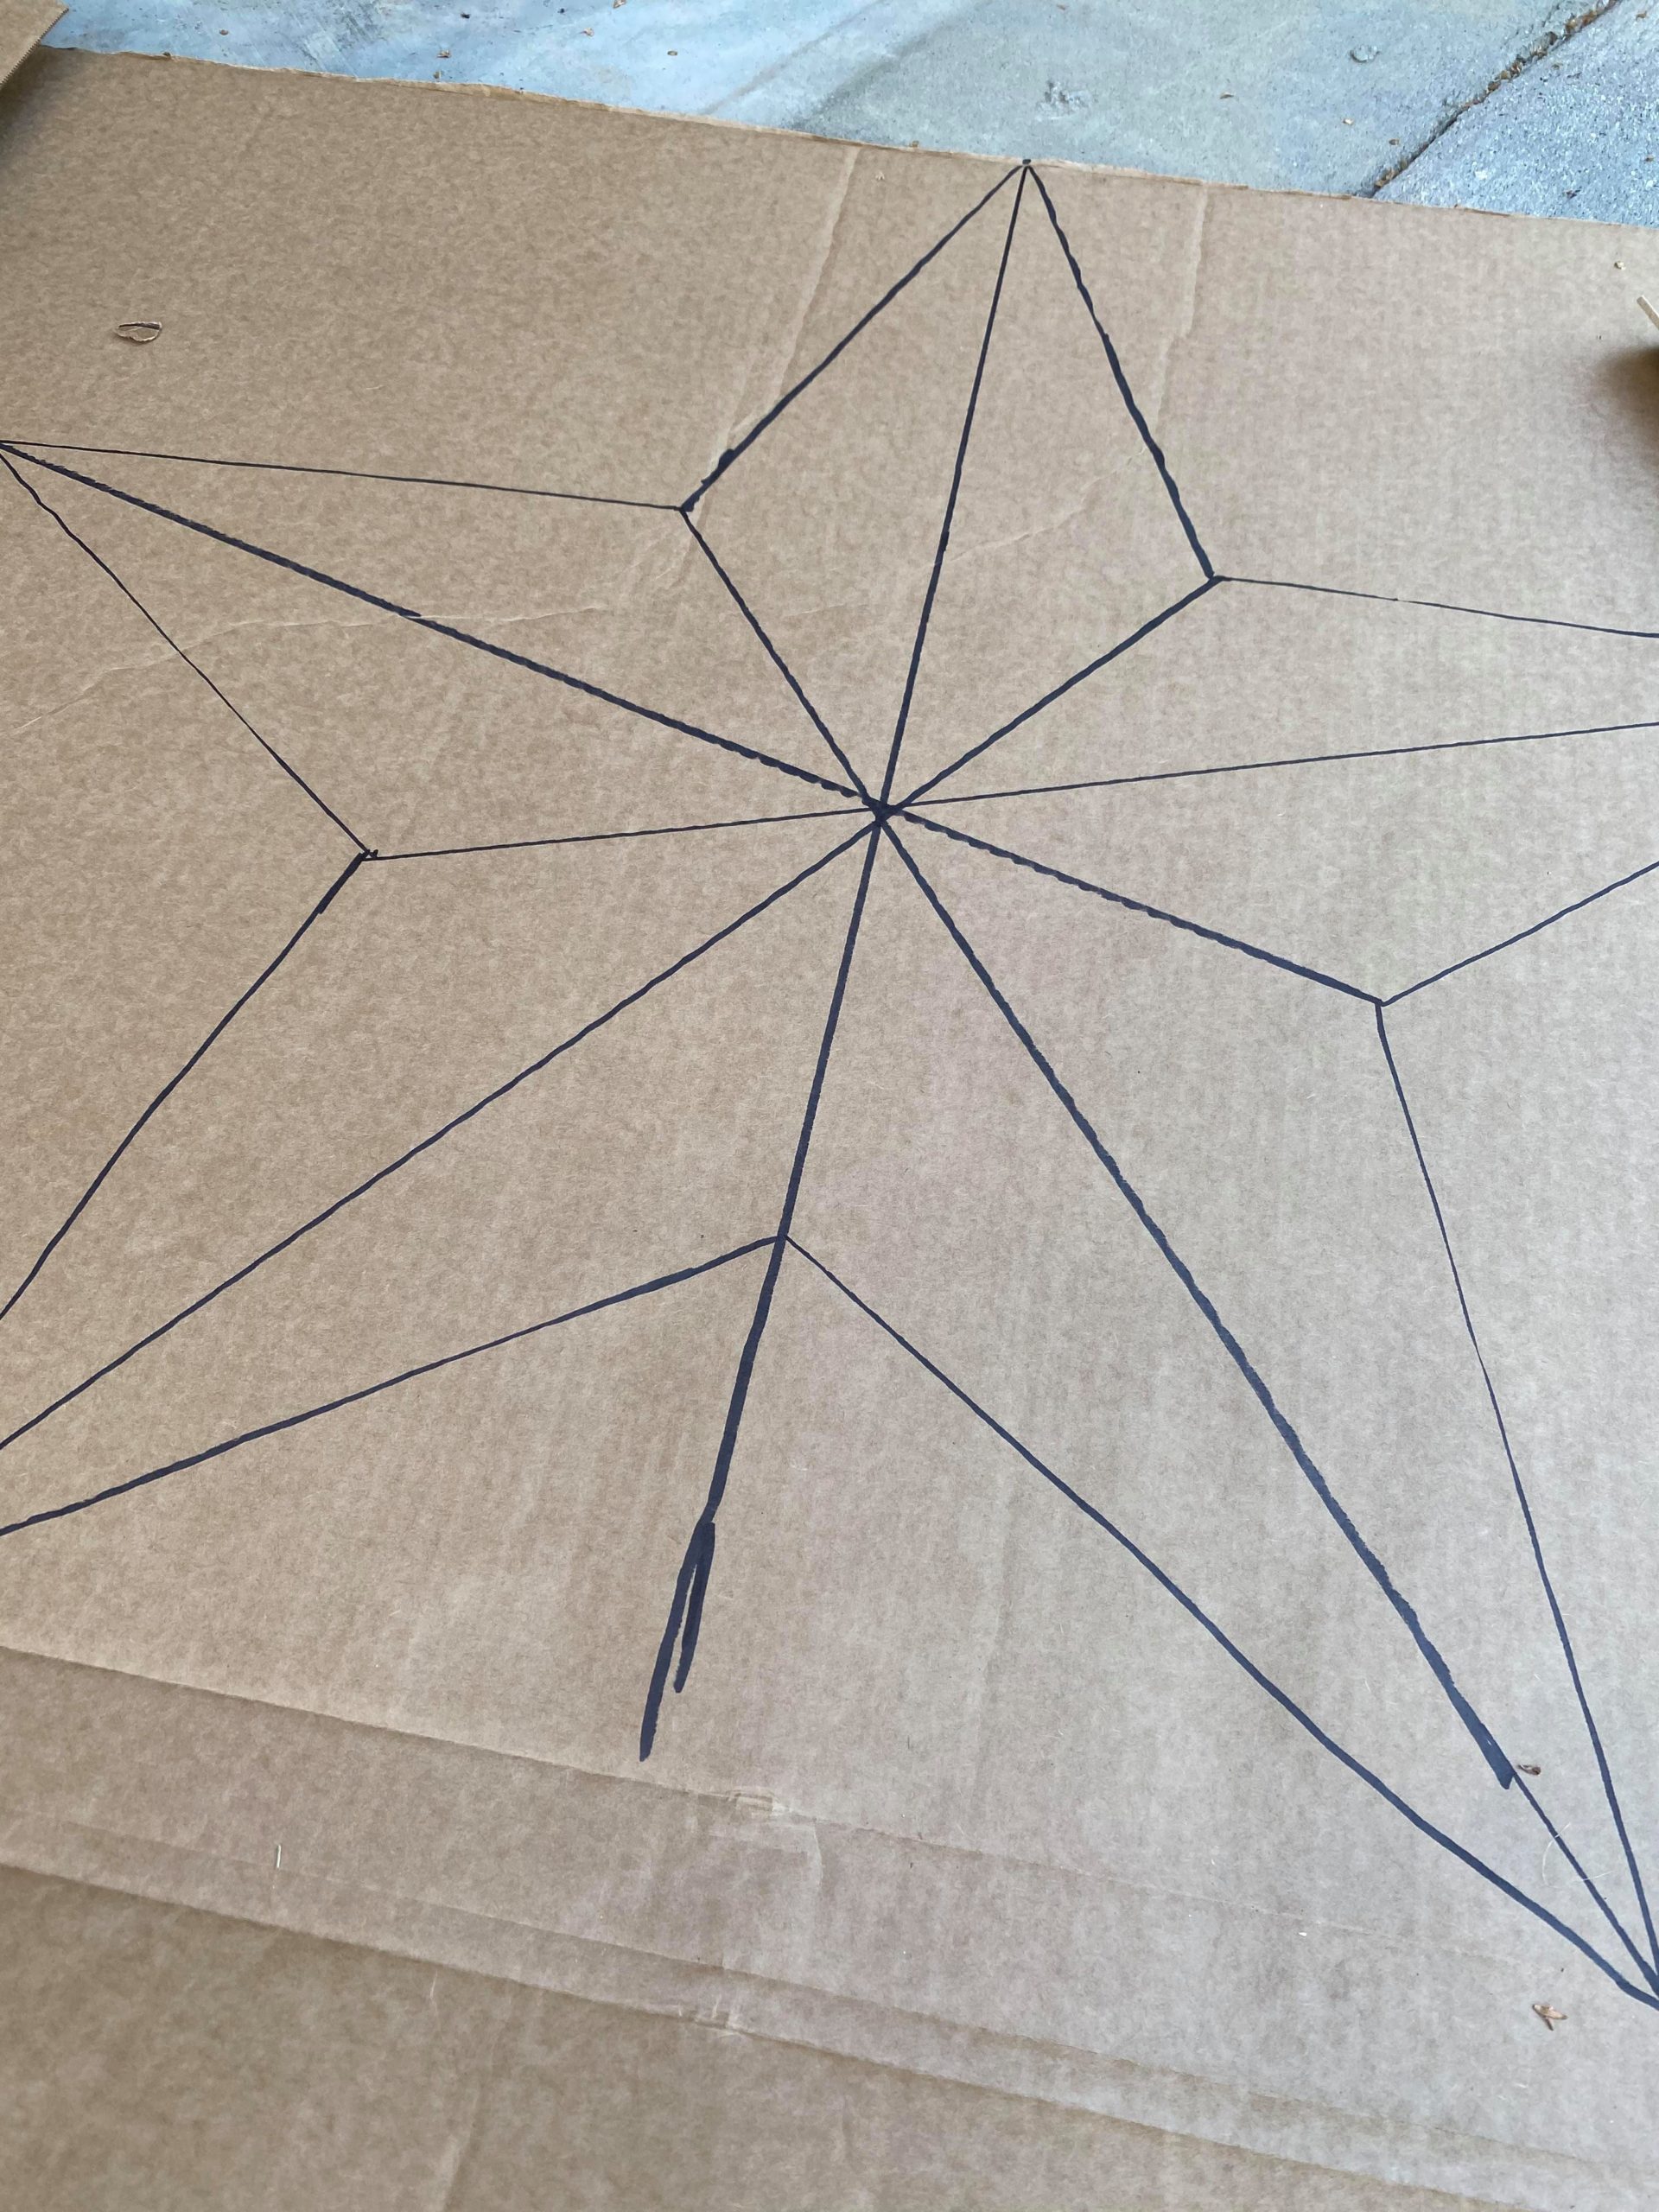
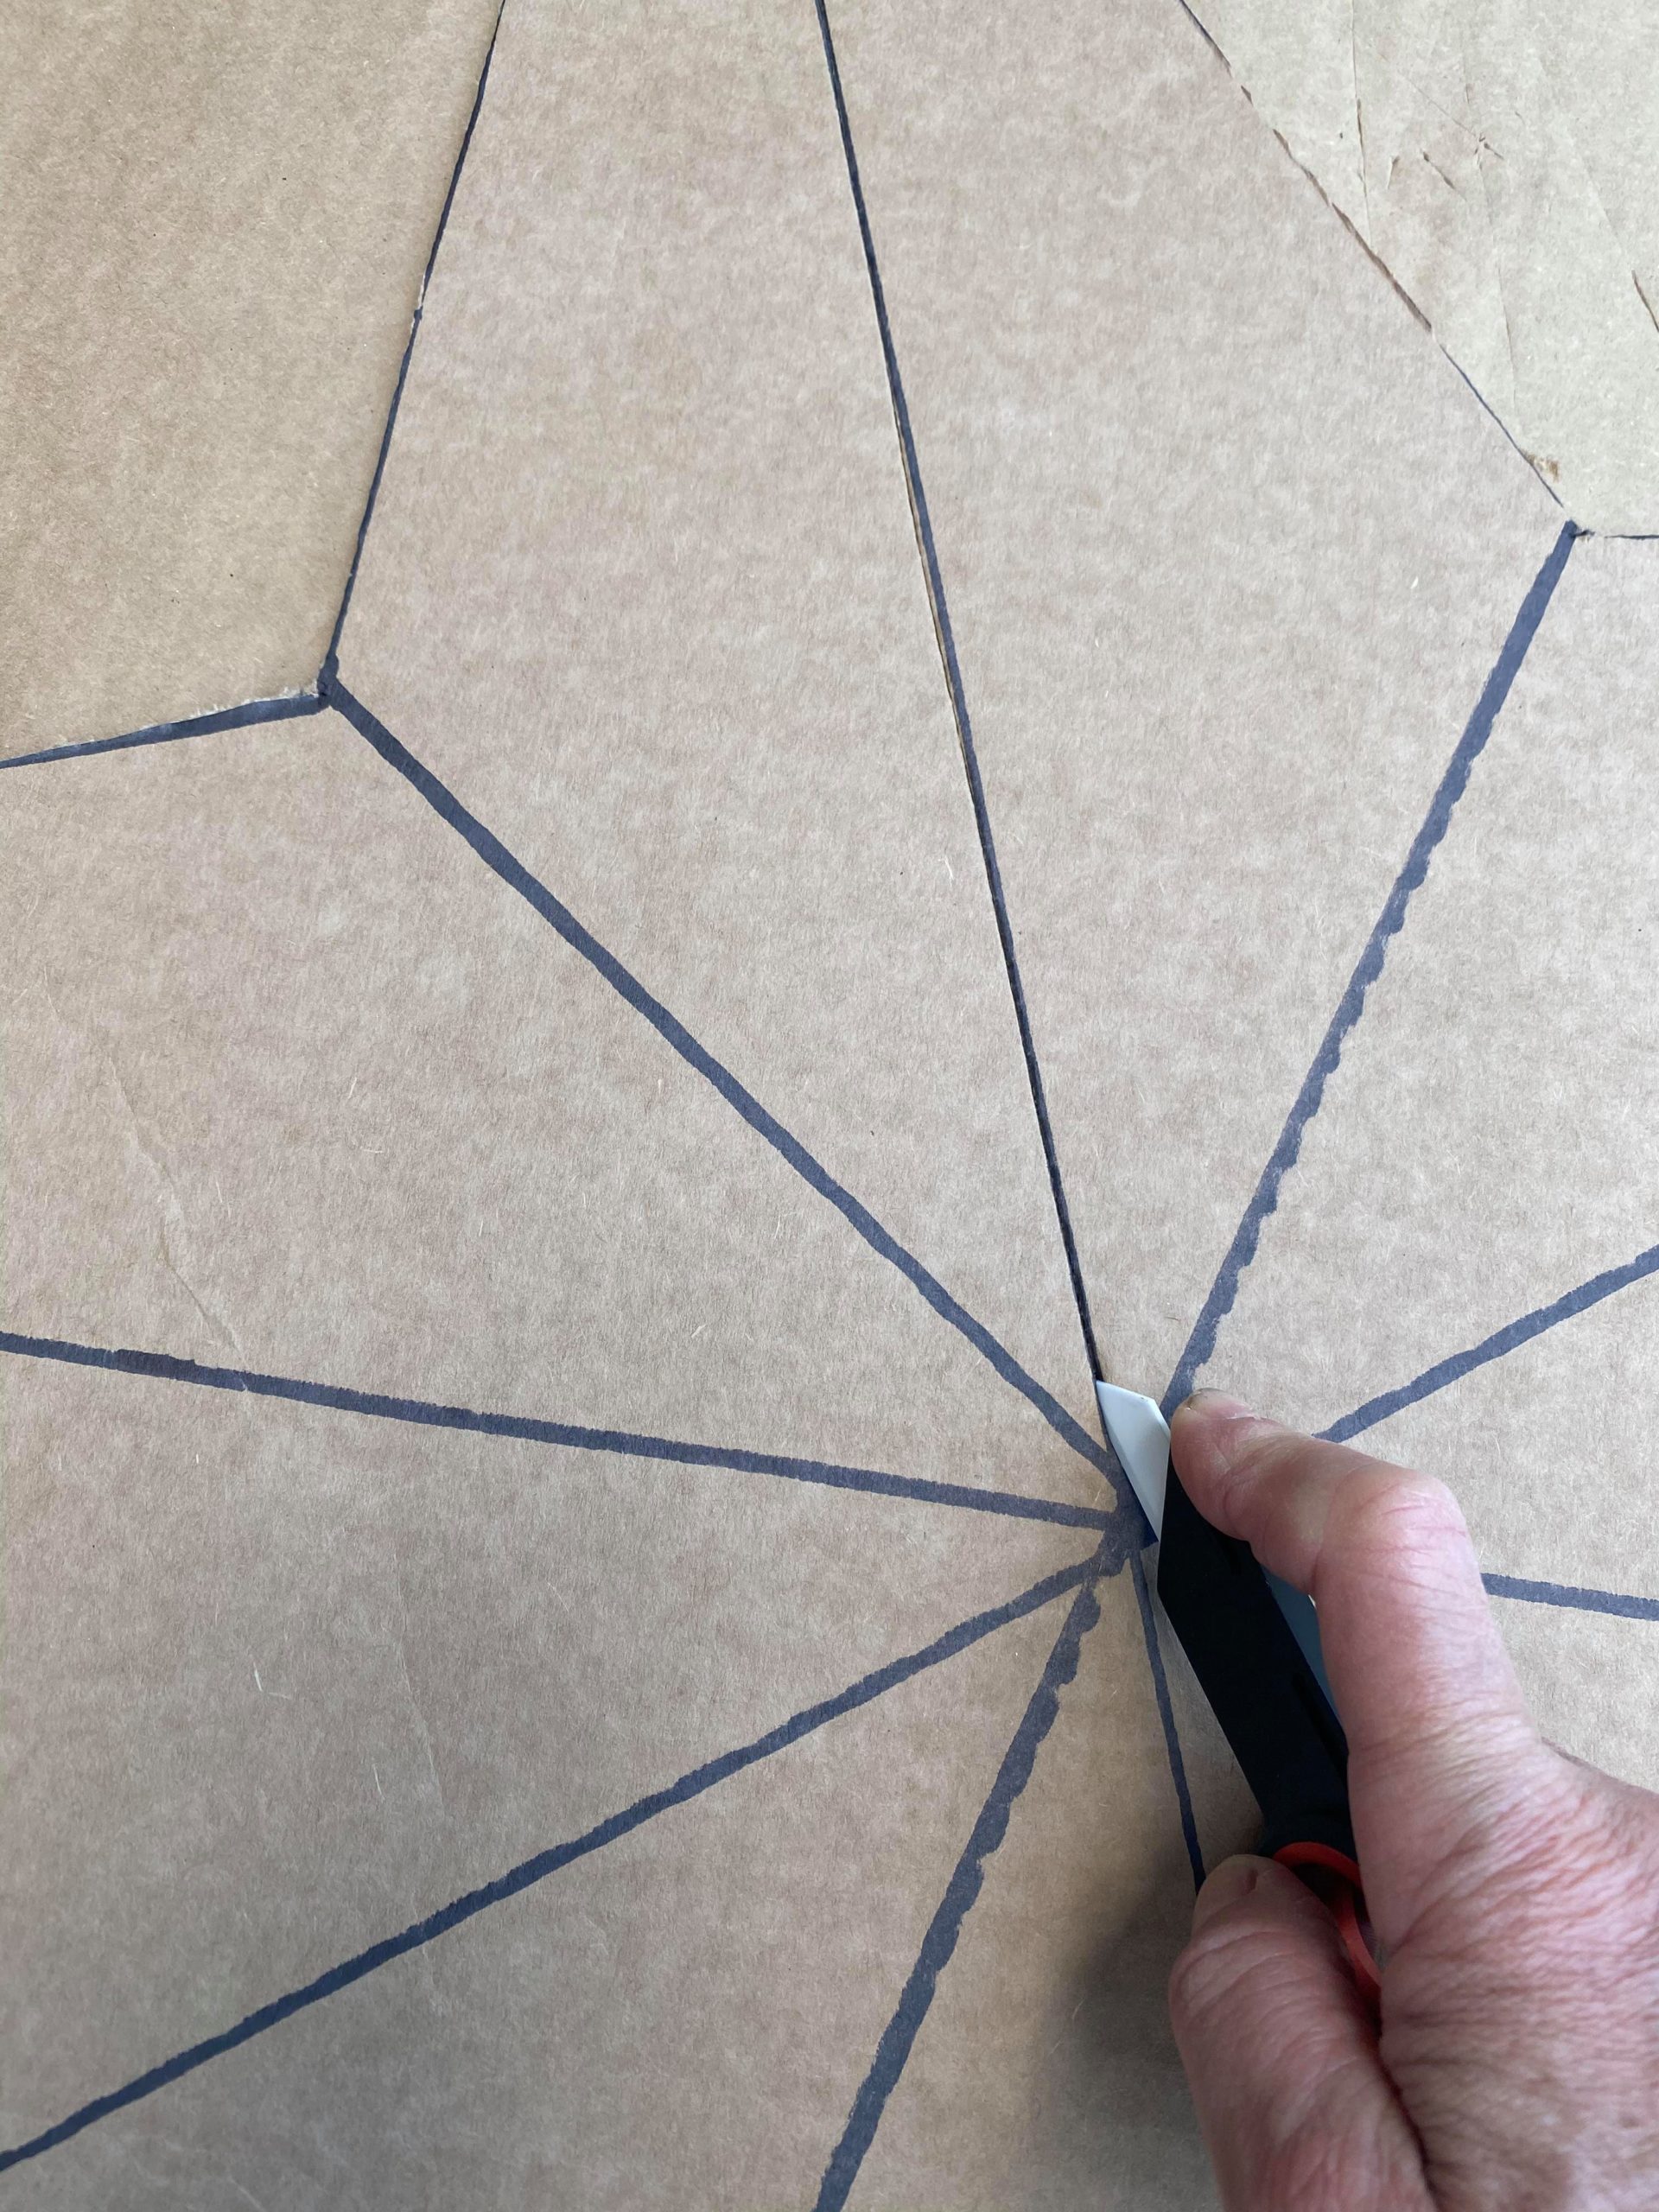
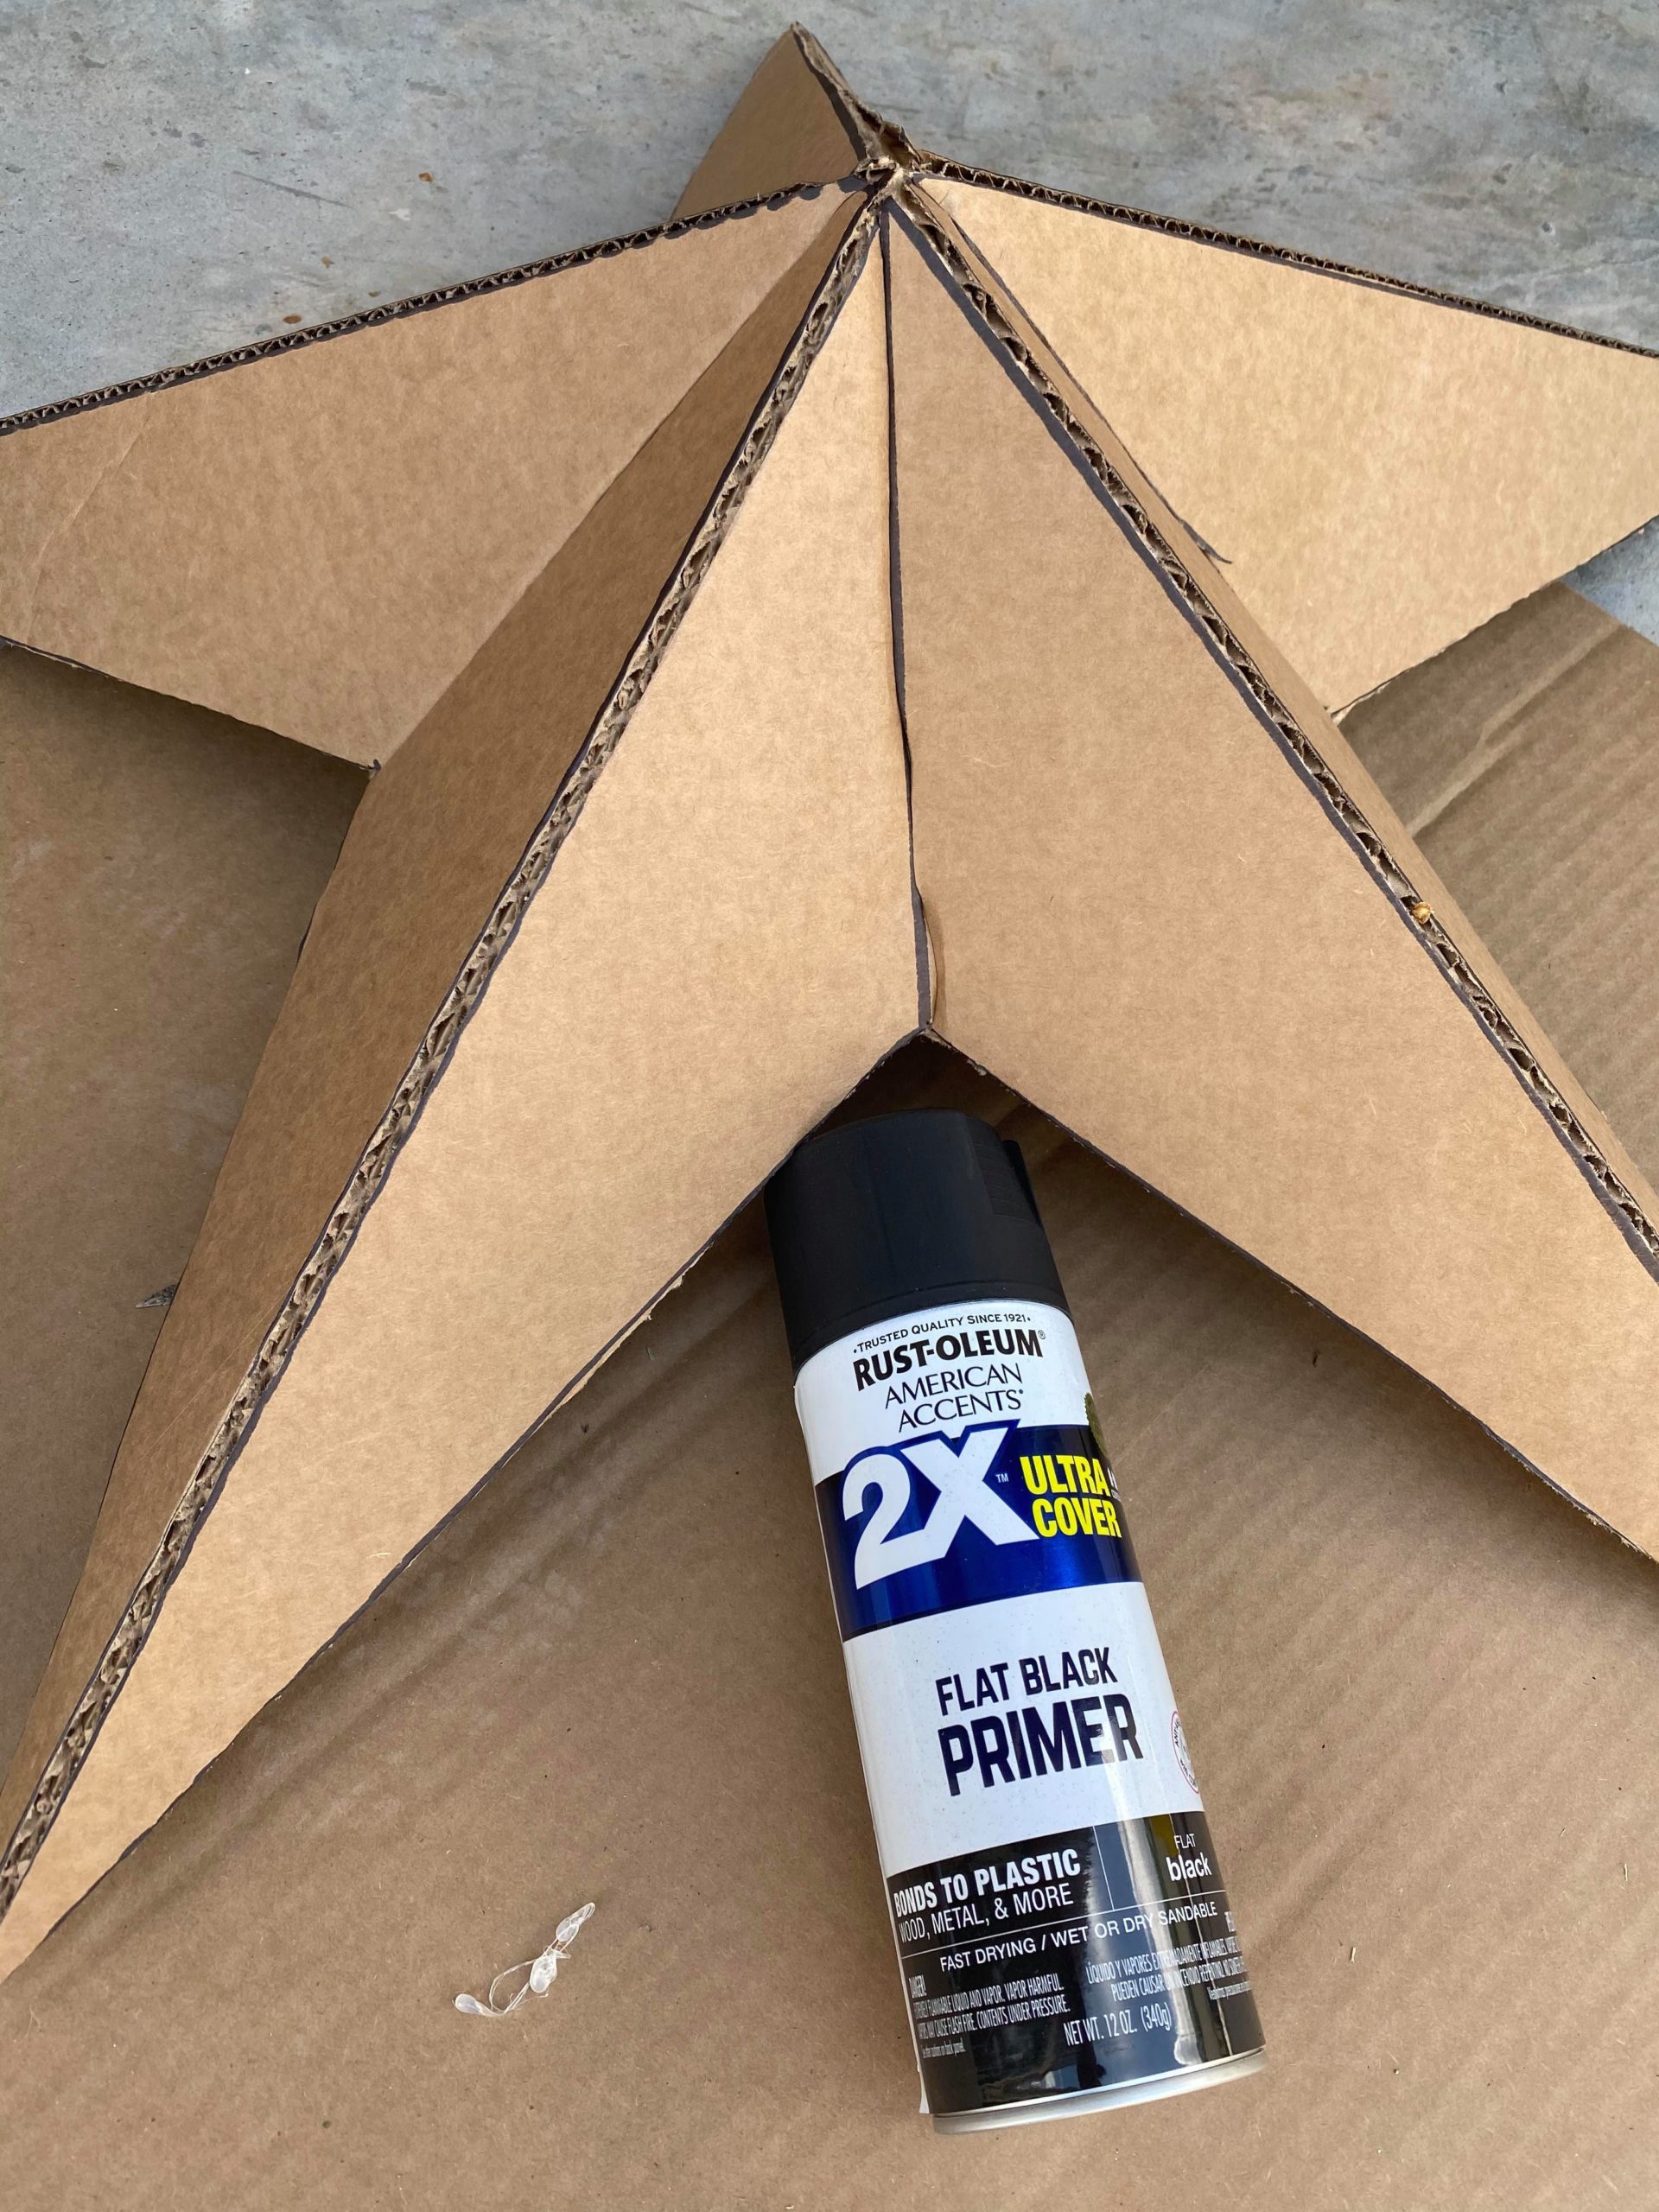
Once you have all of your fold lines drawn you will then use the box cutter to cut out the star.
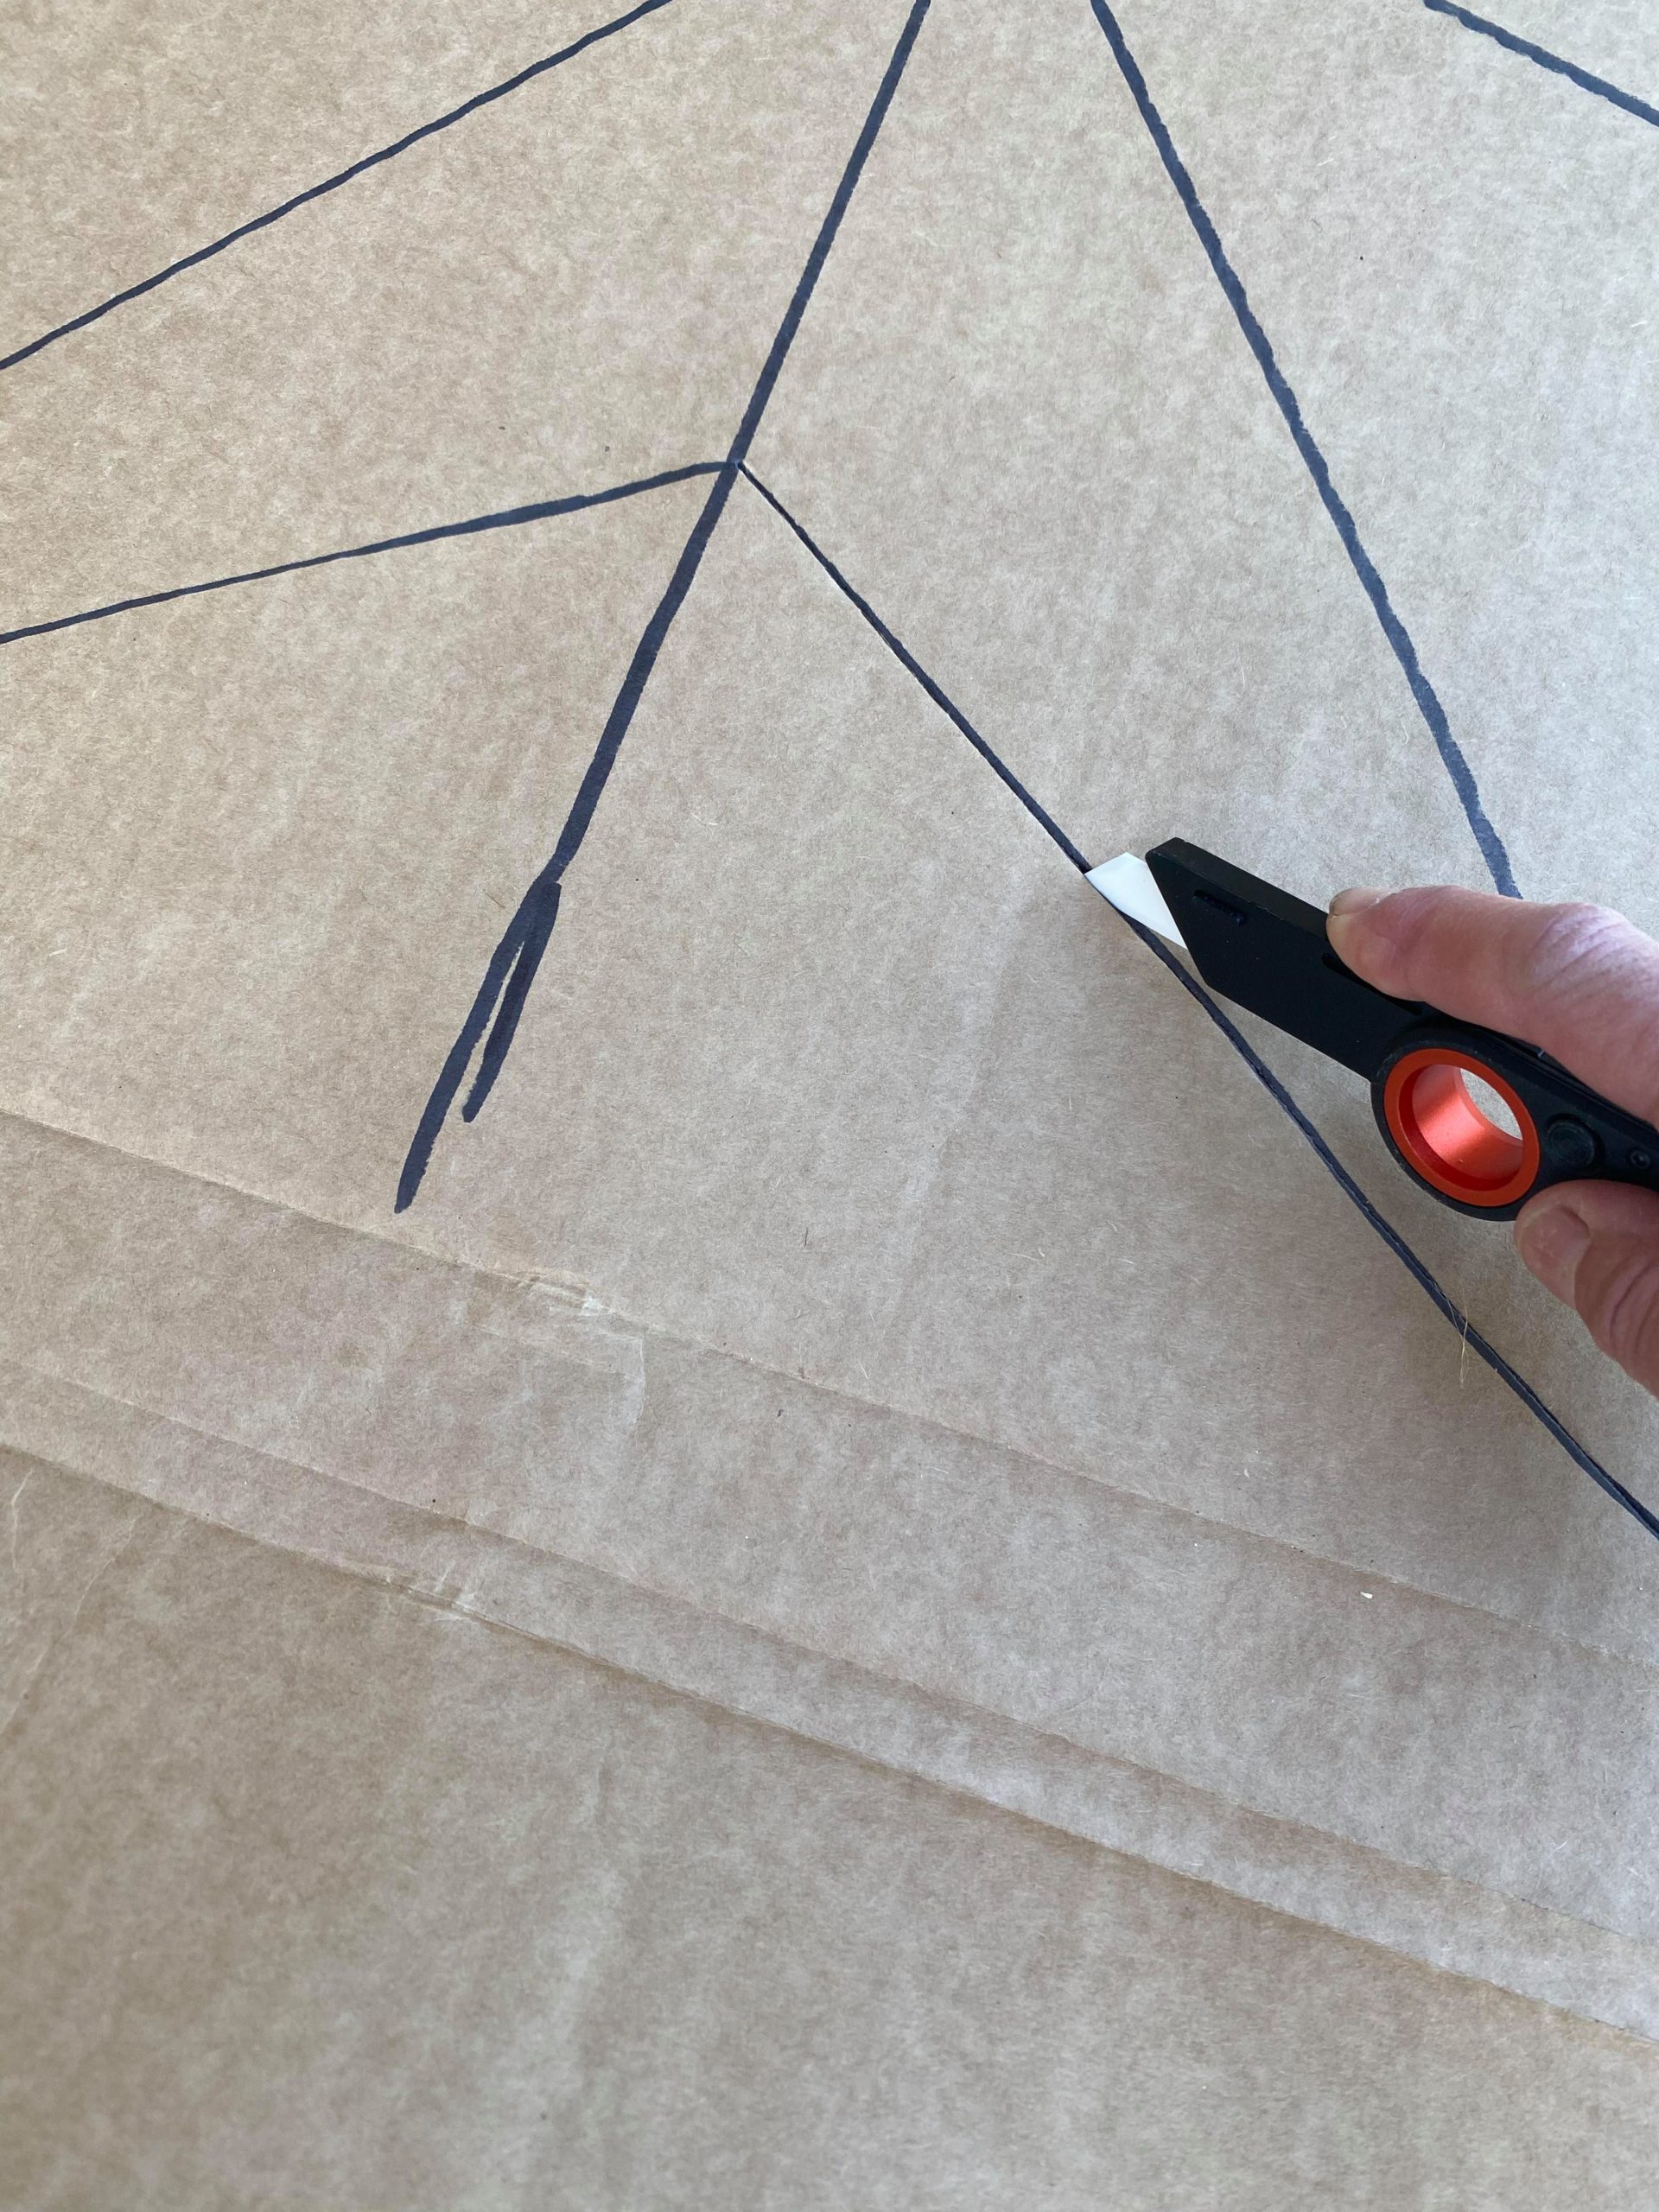
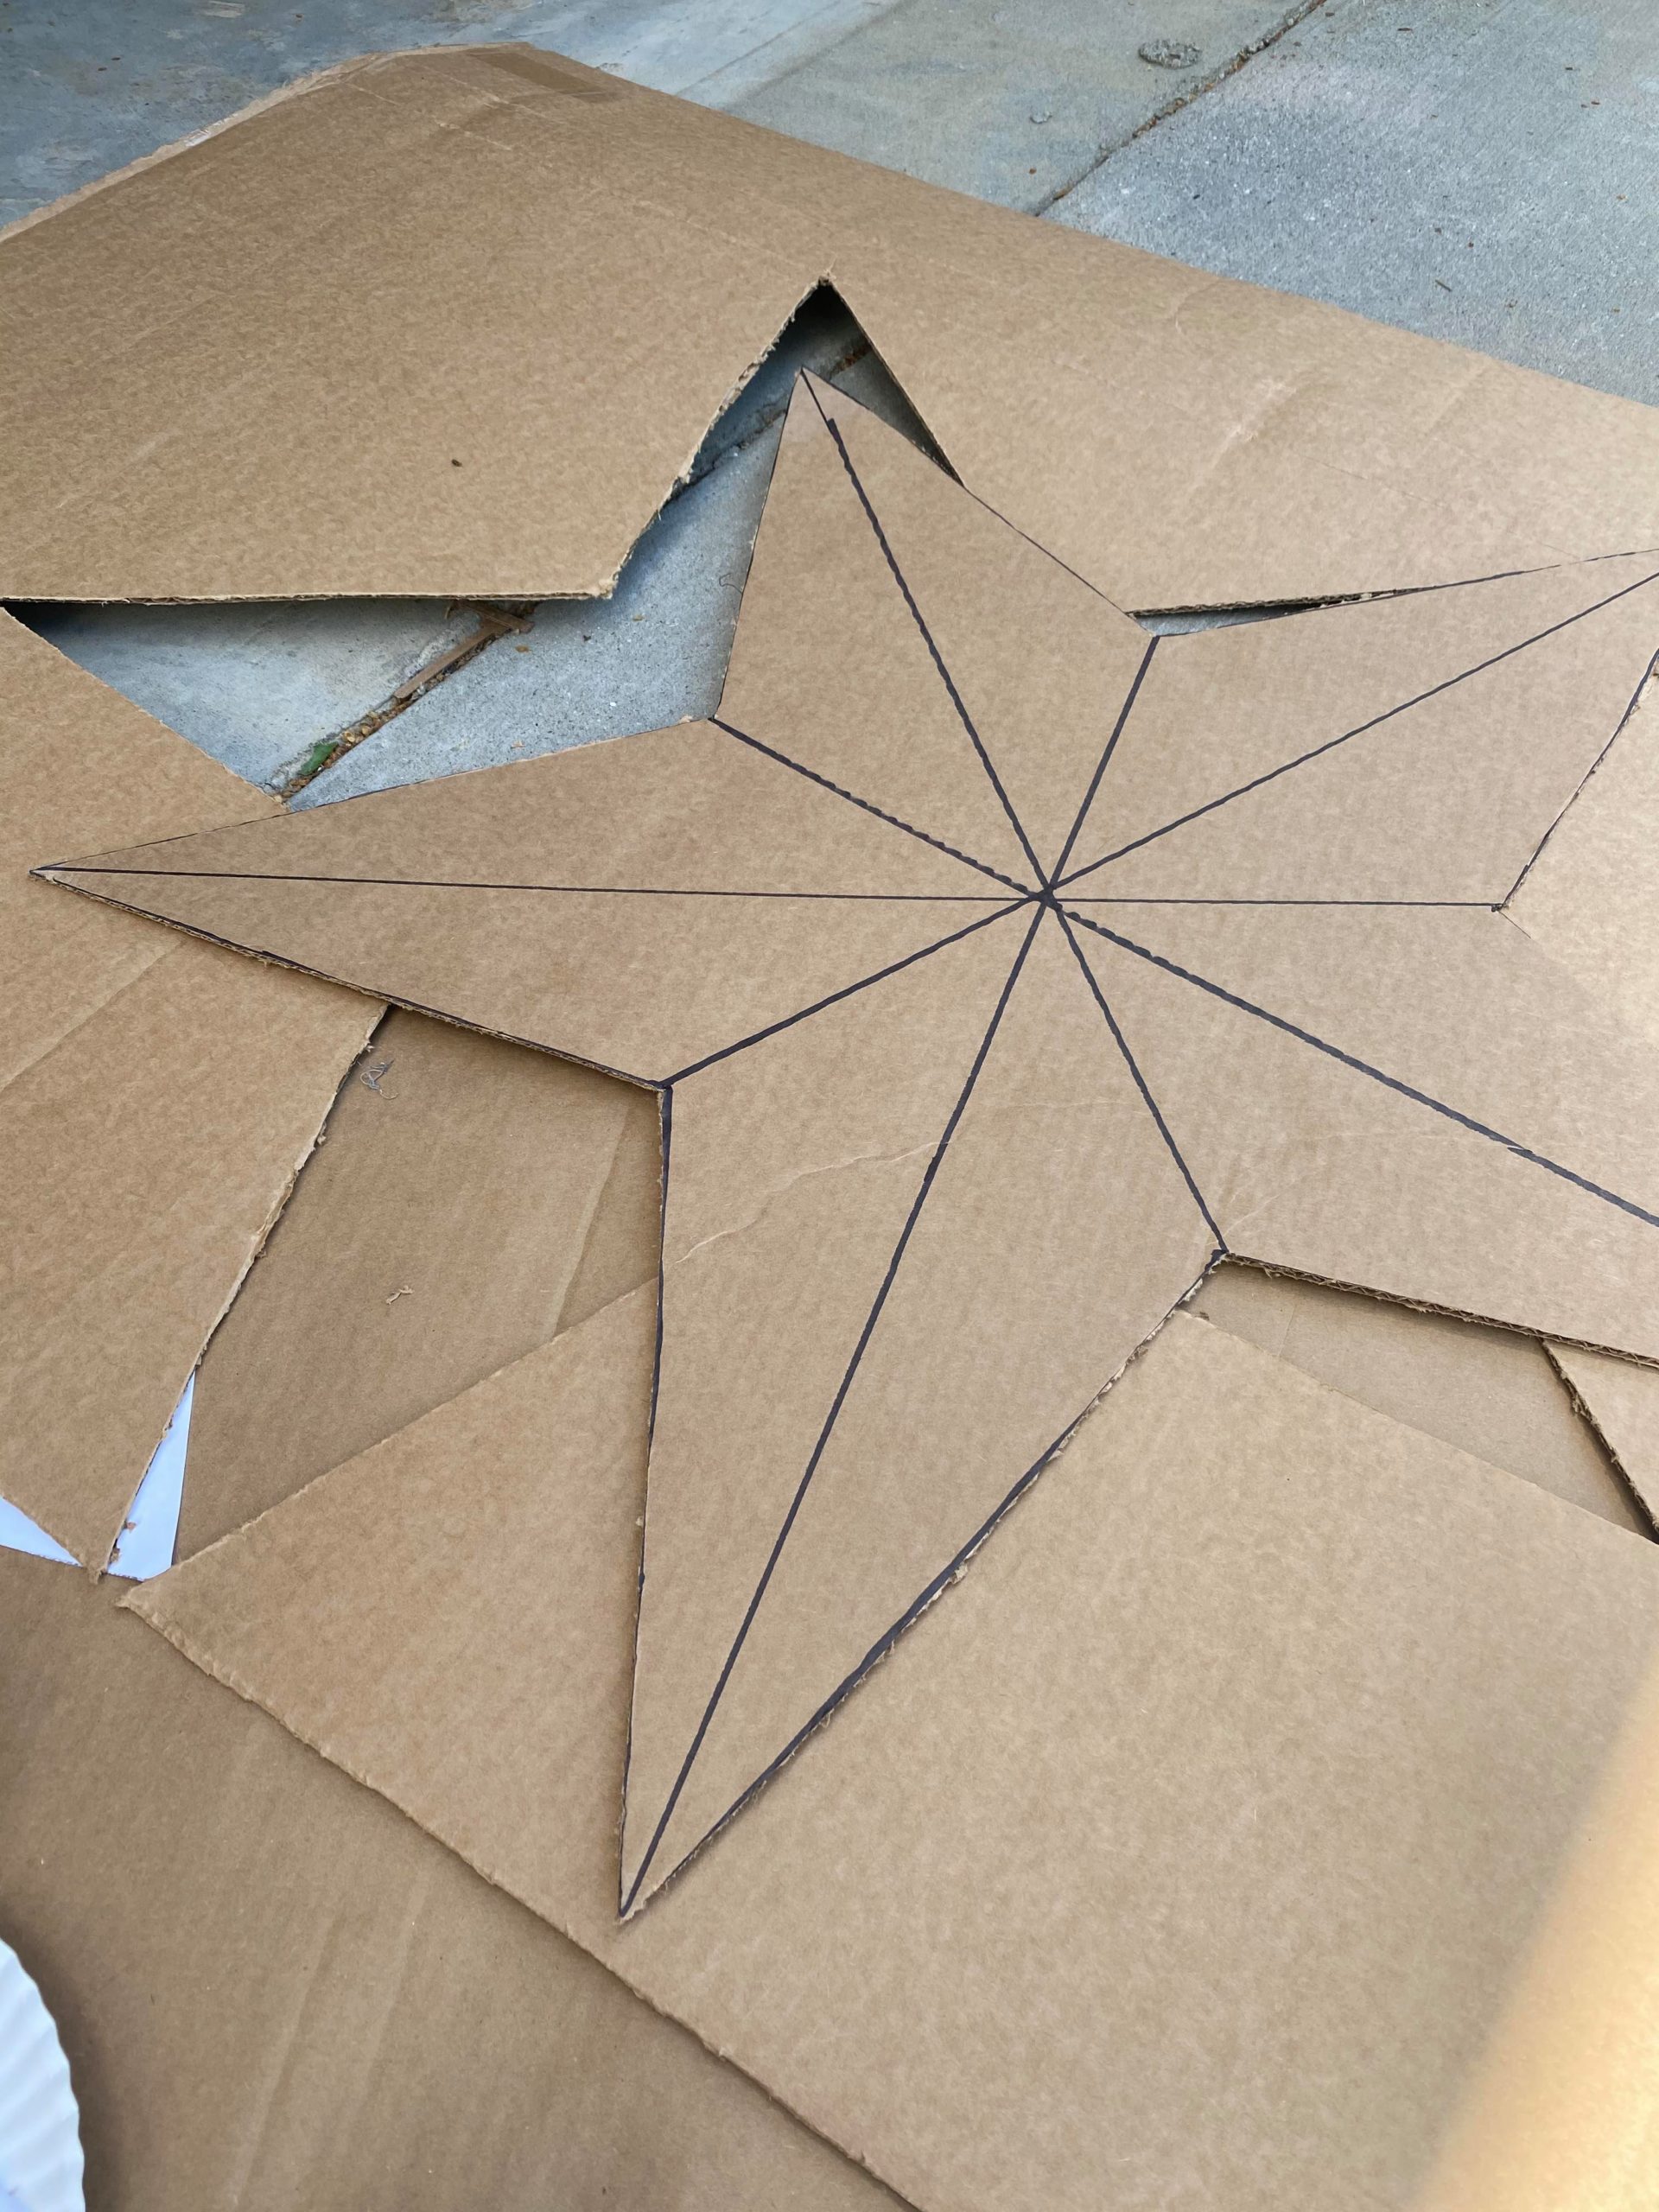
Once your star is cut out you will then use the box cutter to score your fold lines. Just lightly press on the box cutter and it will cut through just the top part of the cardboard.
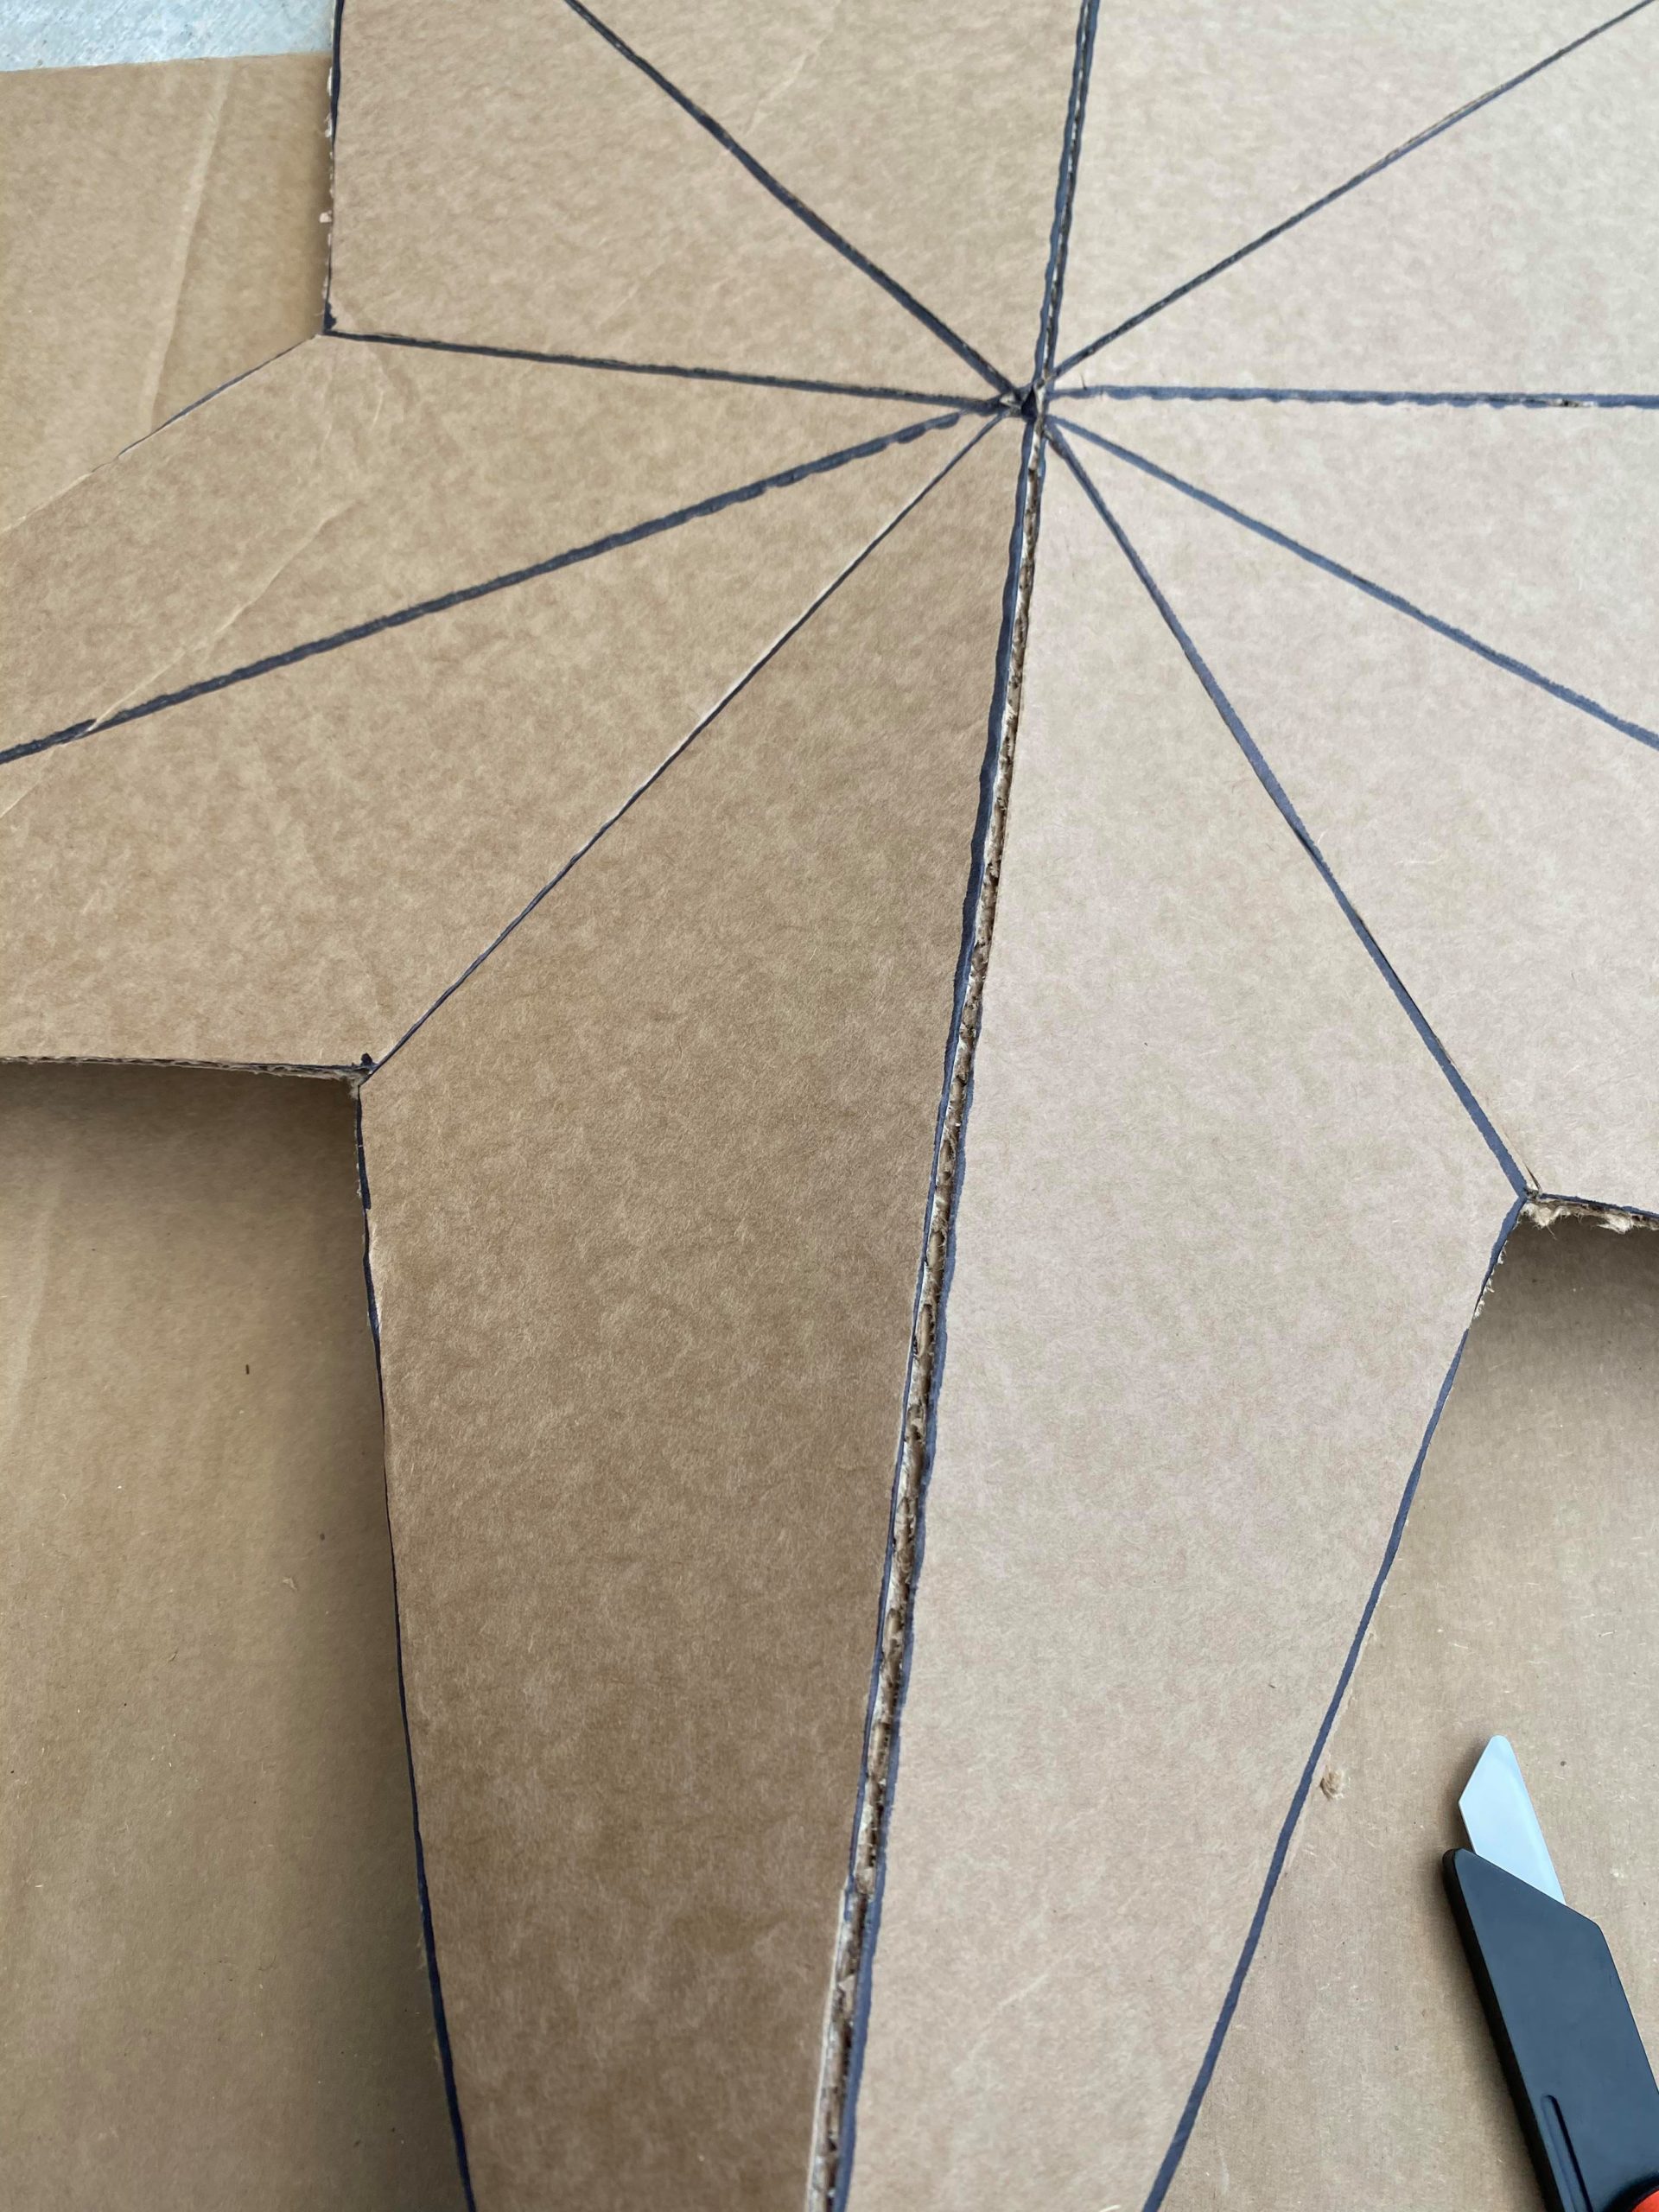
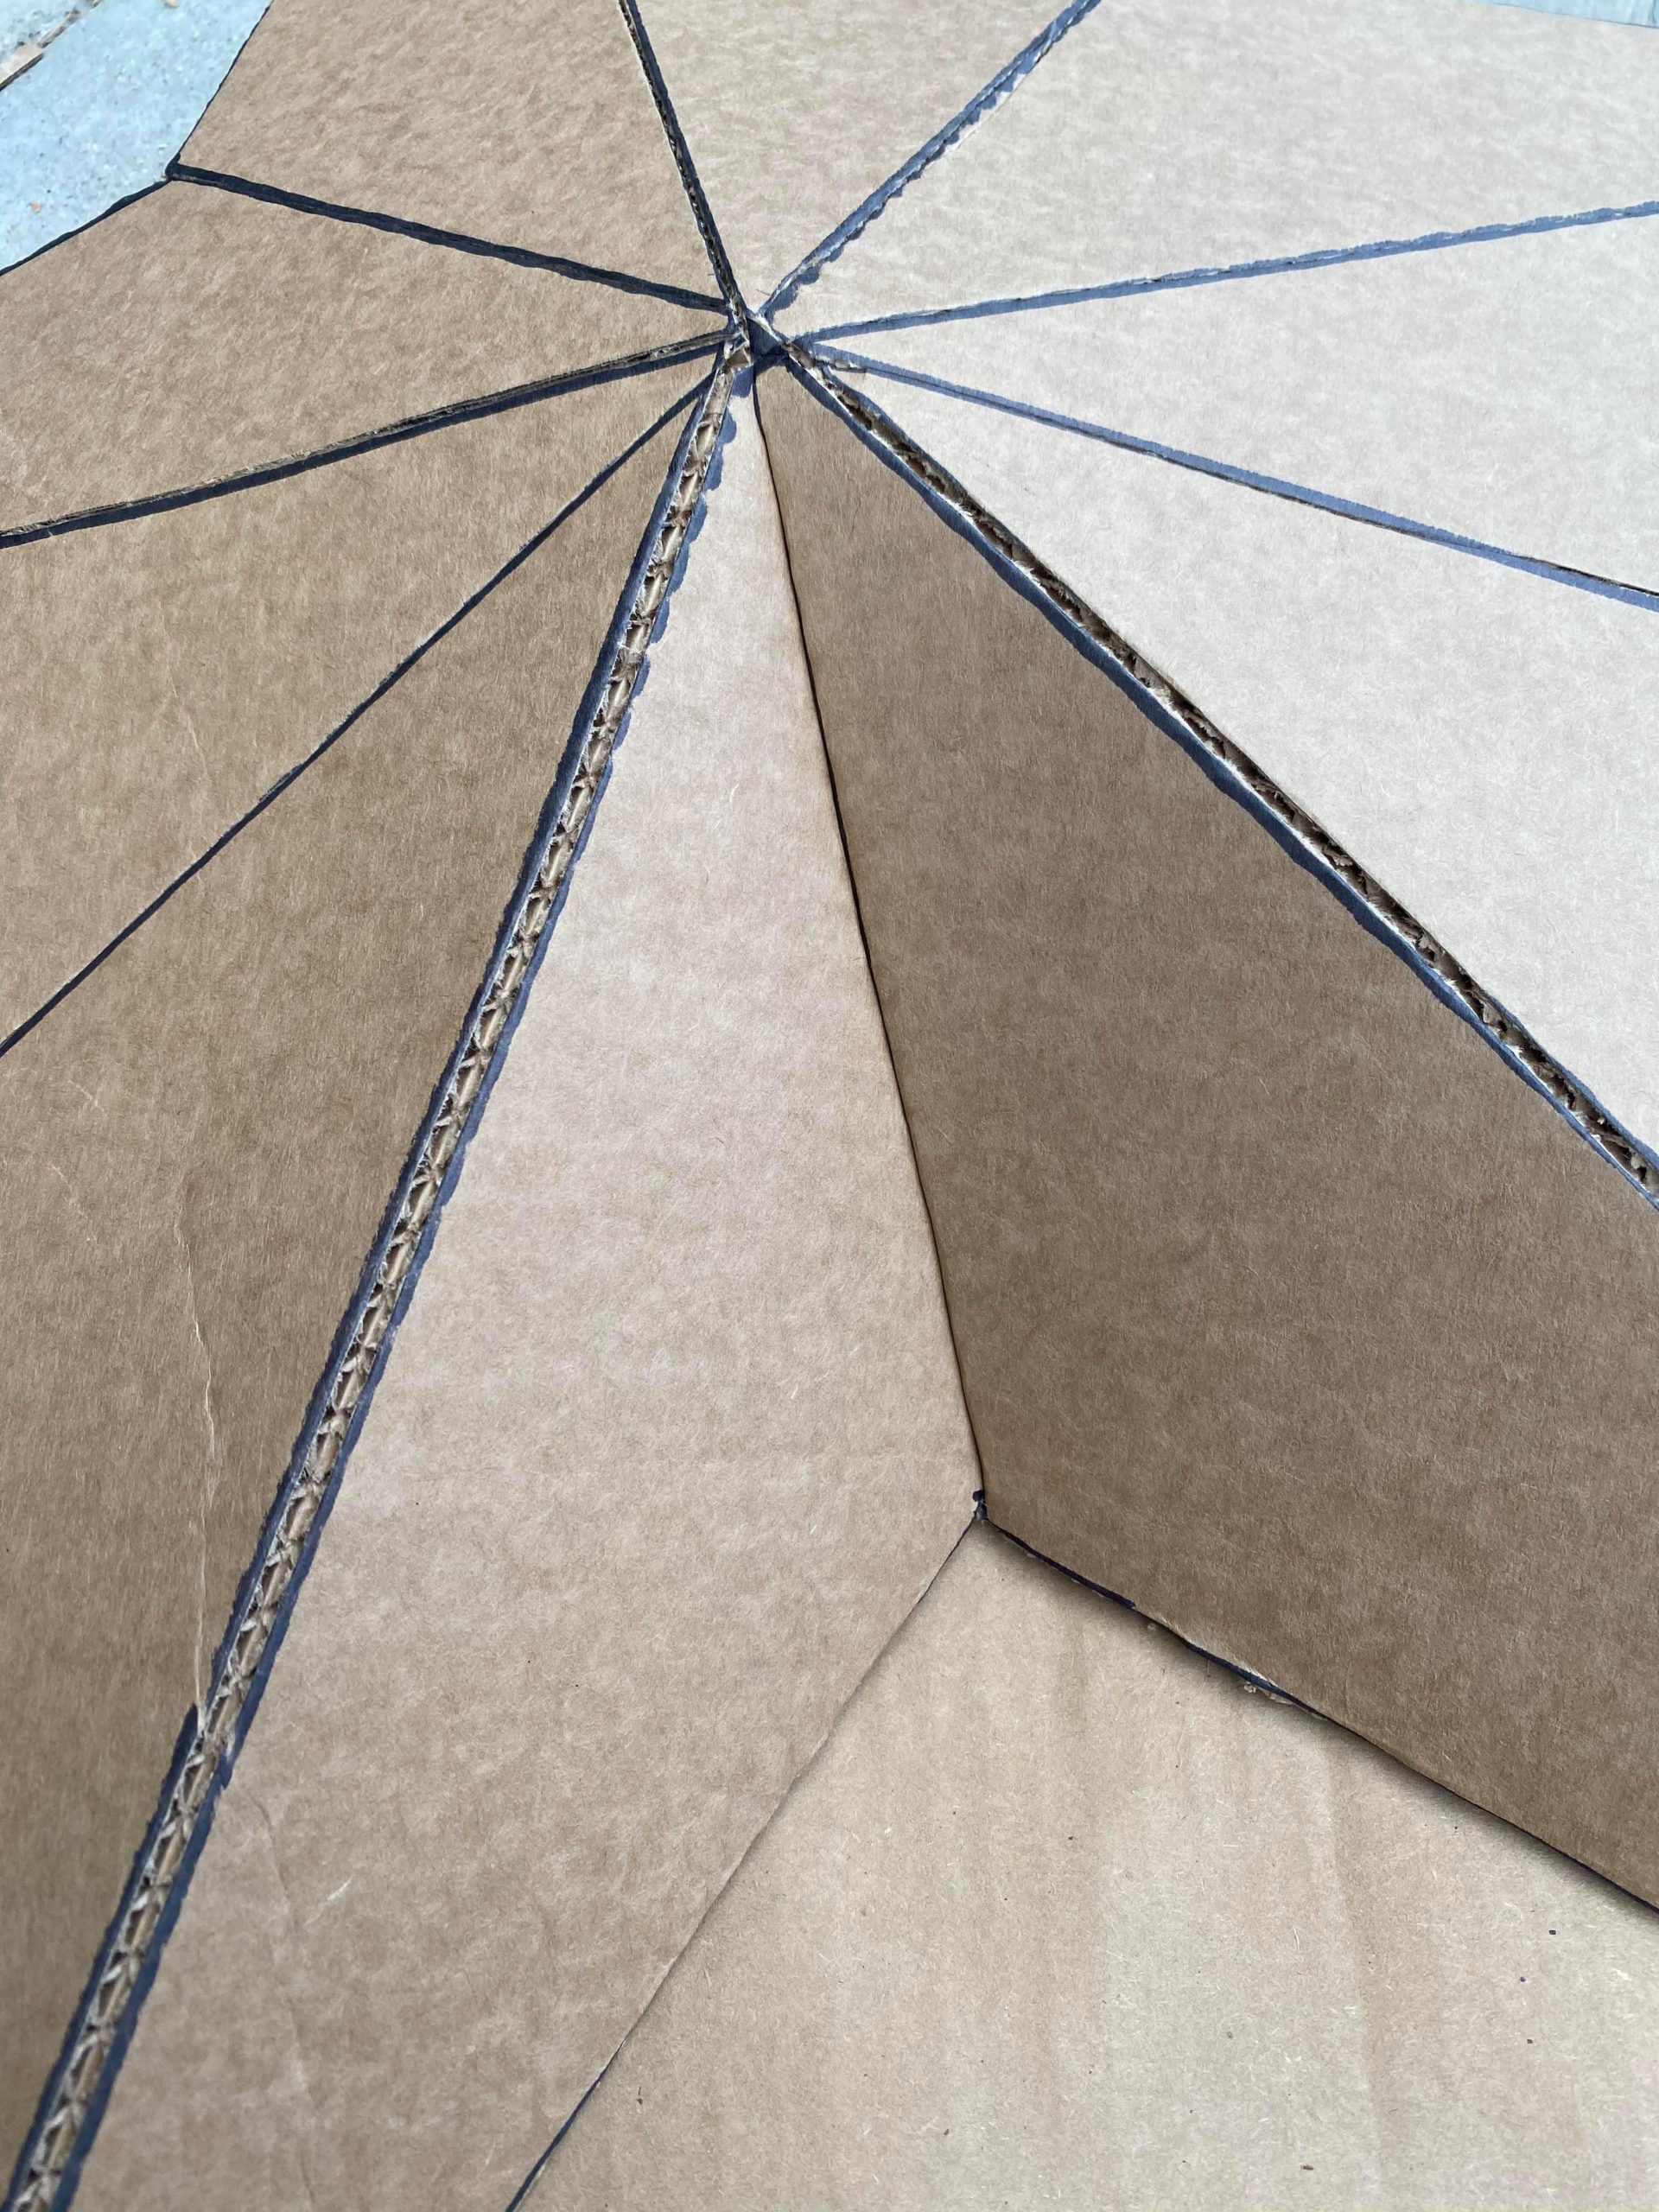
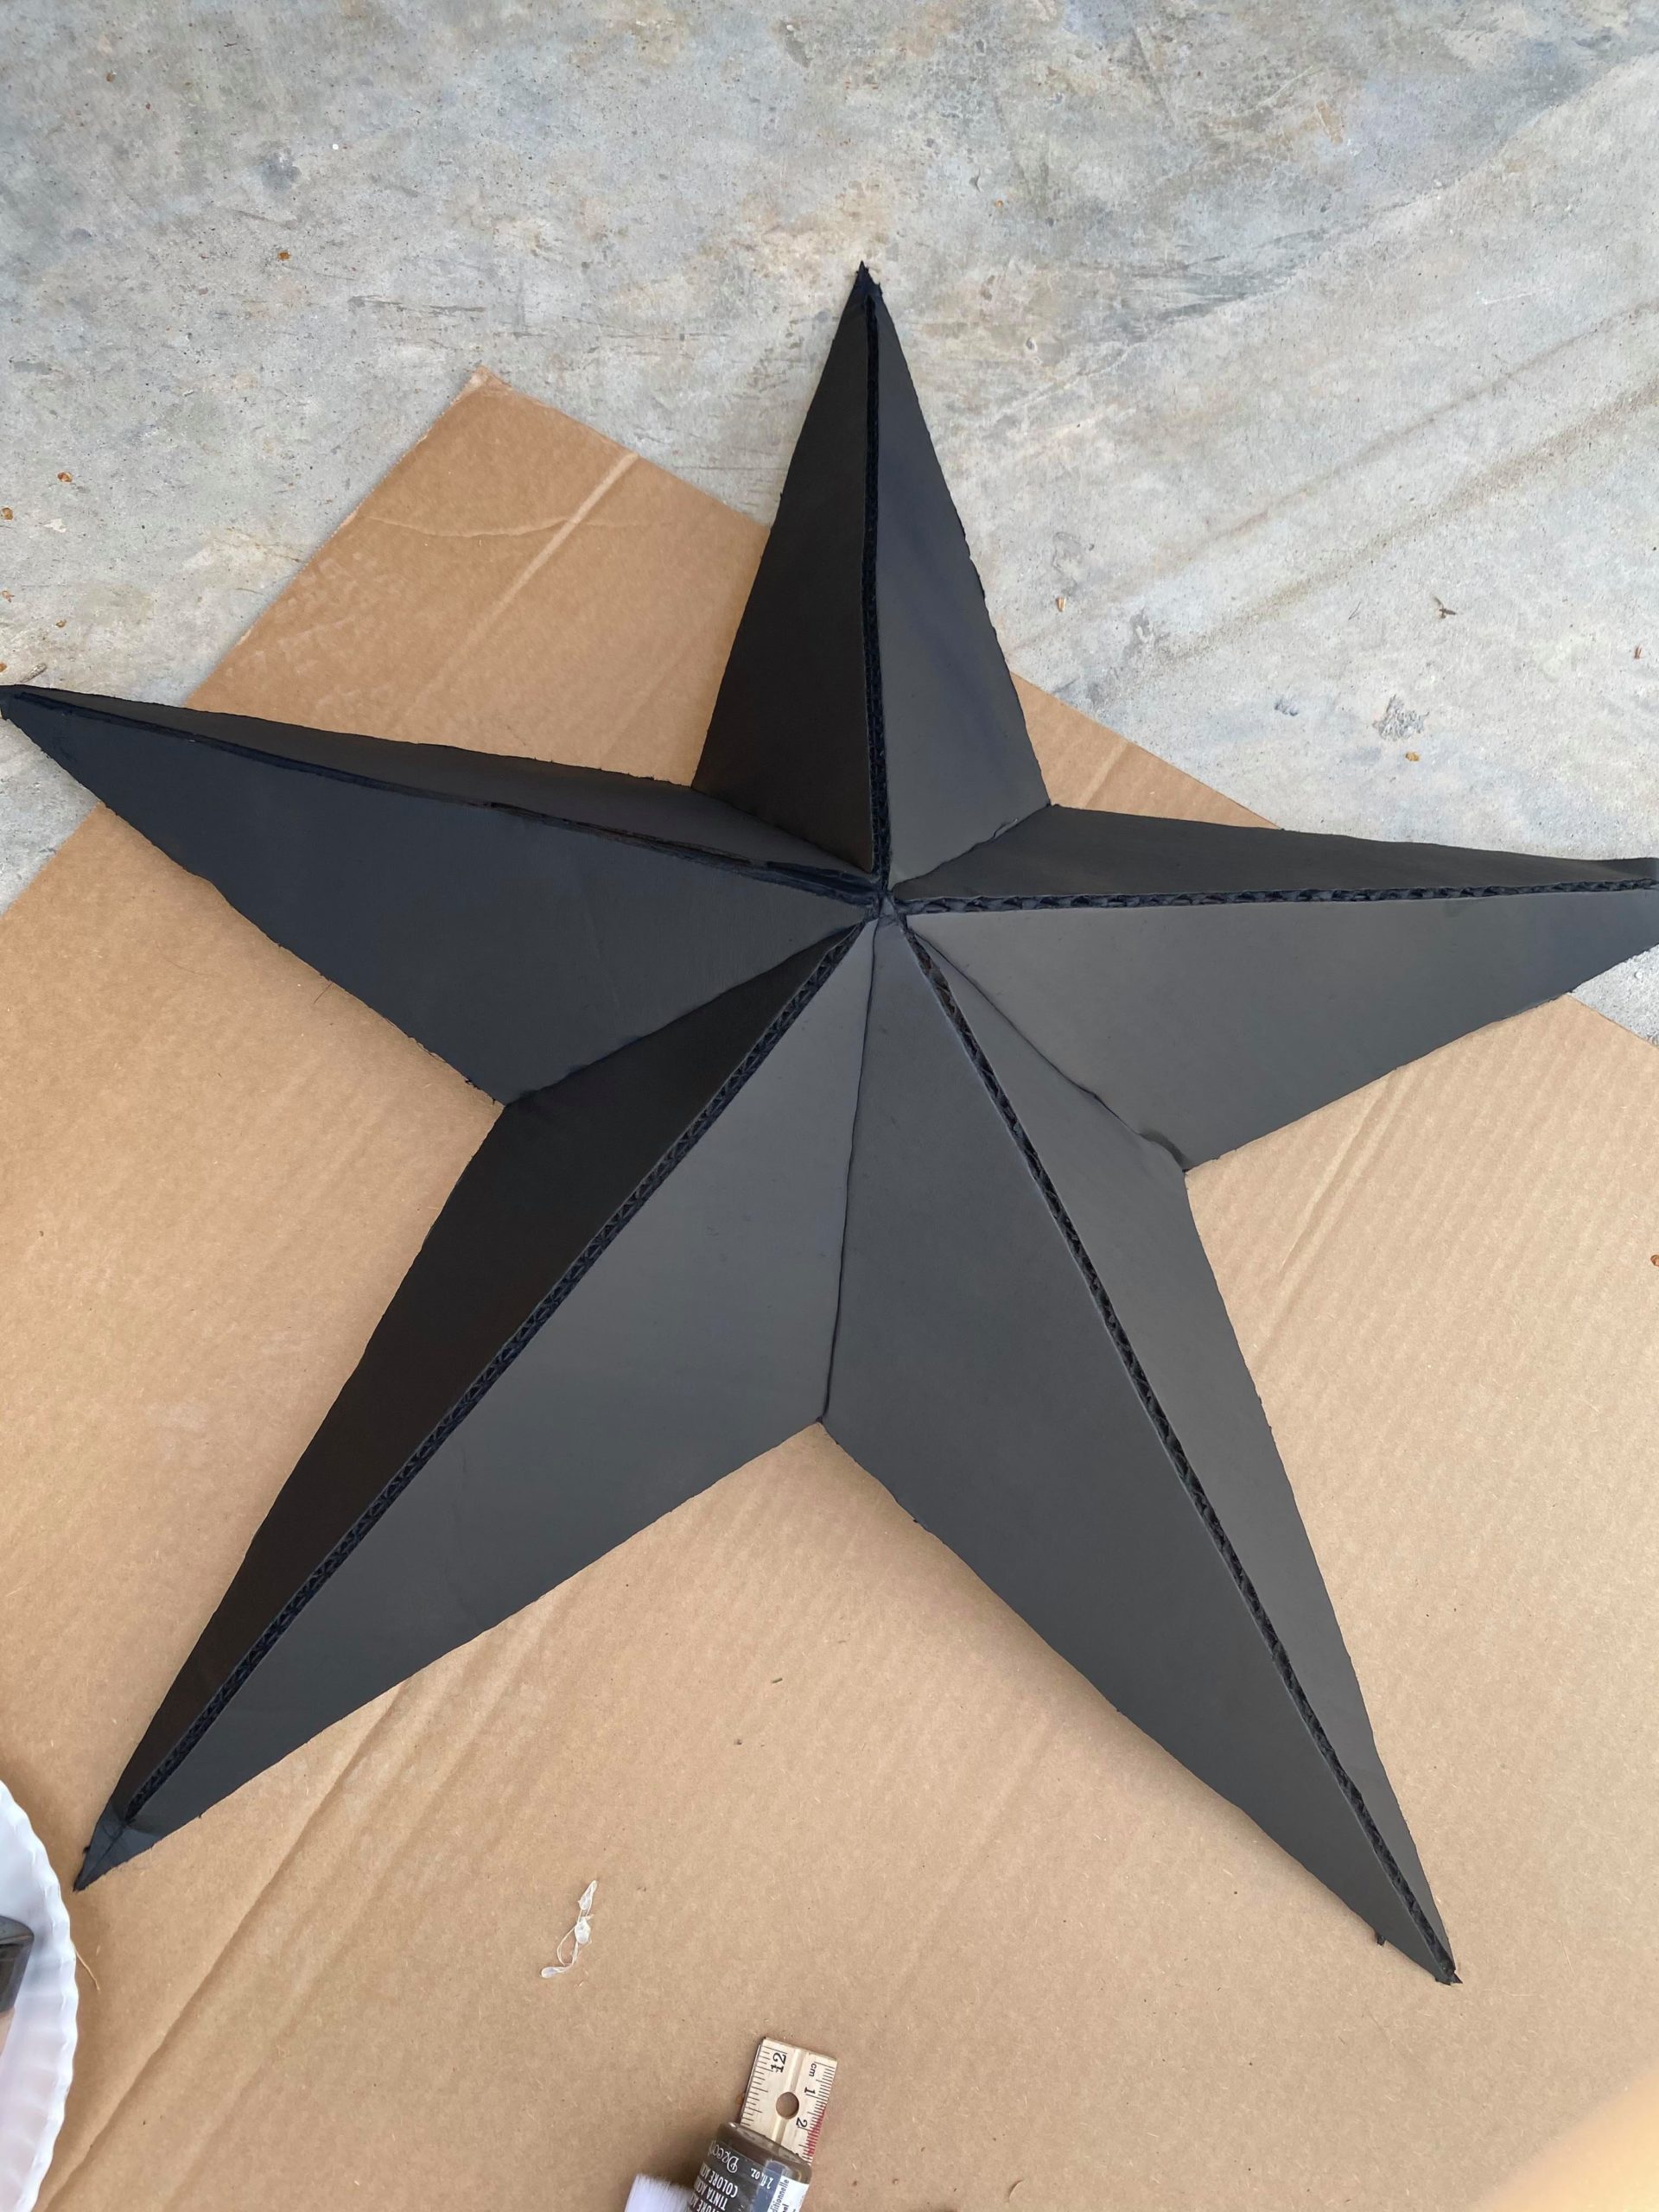
This will allow you to fold the cardboard to form a 3D barn star.
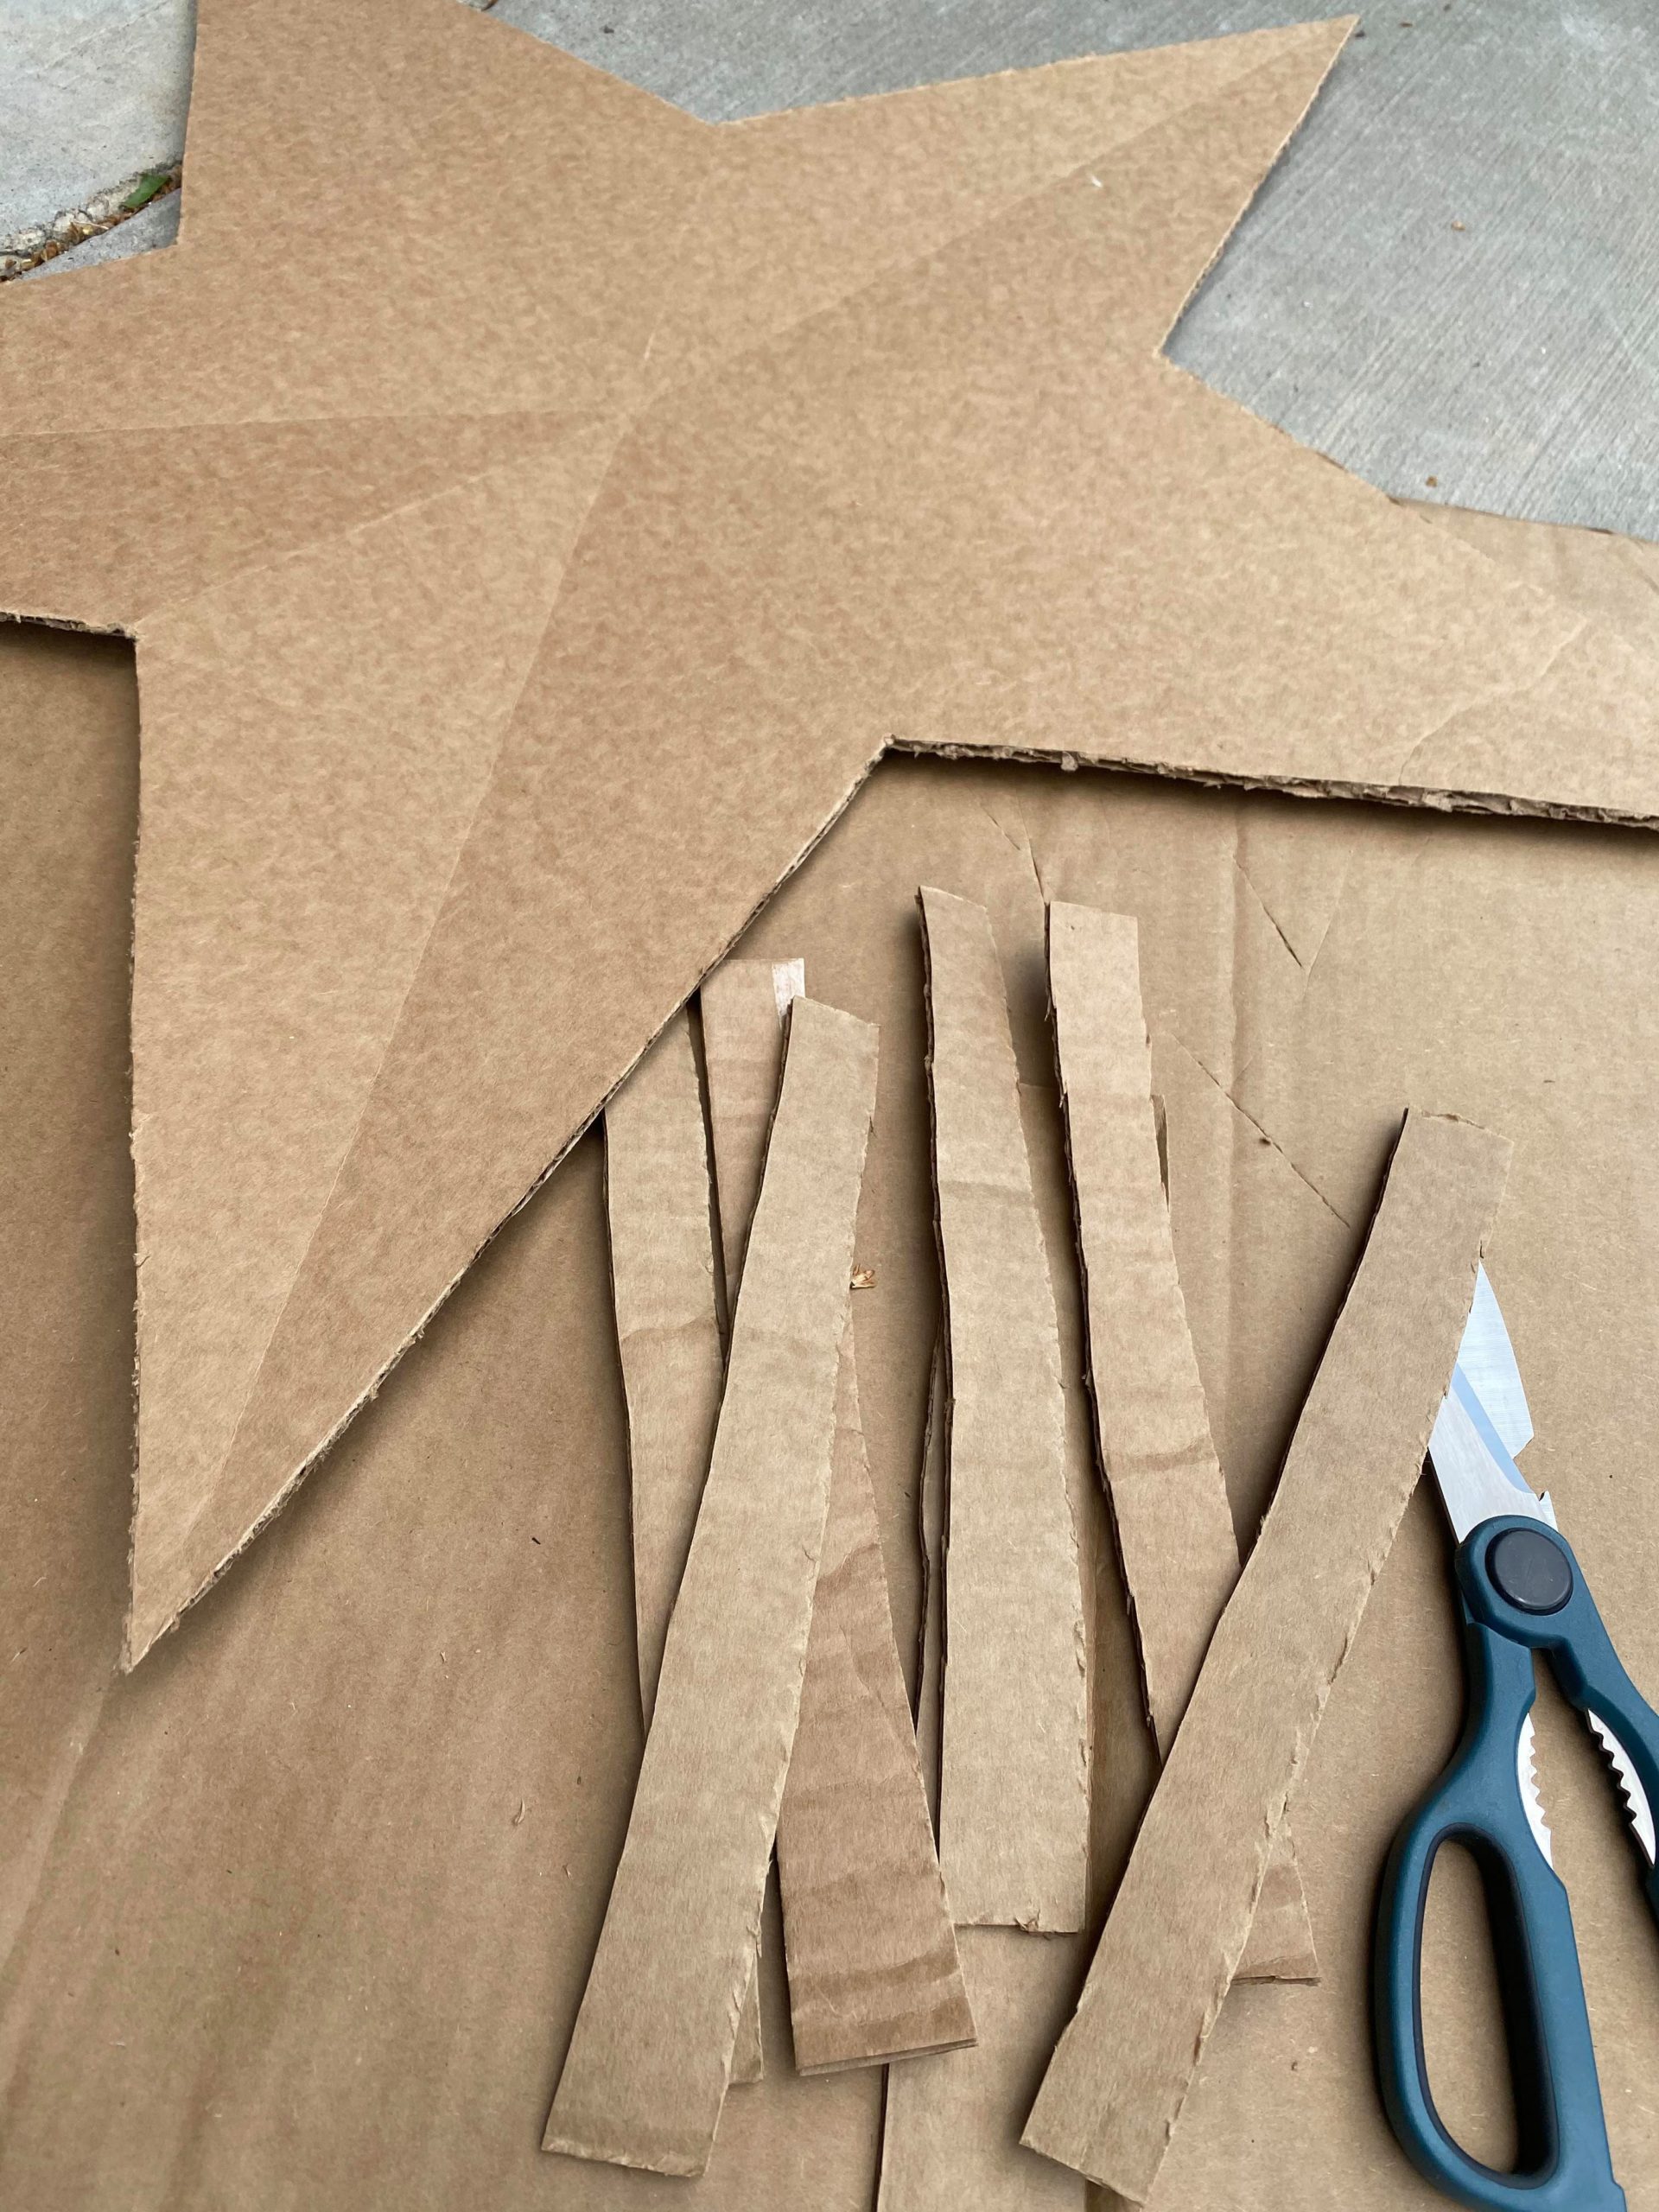
You will want to cut at least 5 strips of cardboard. These will help hold your folds in place.
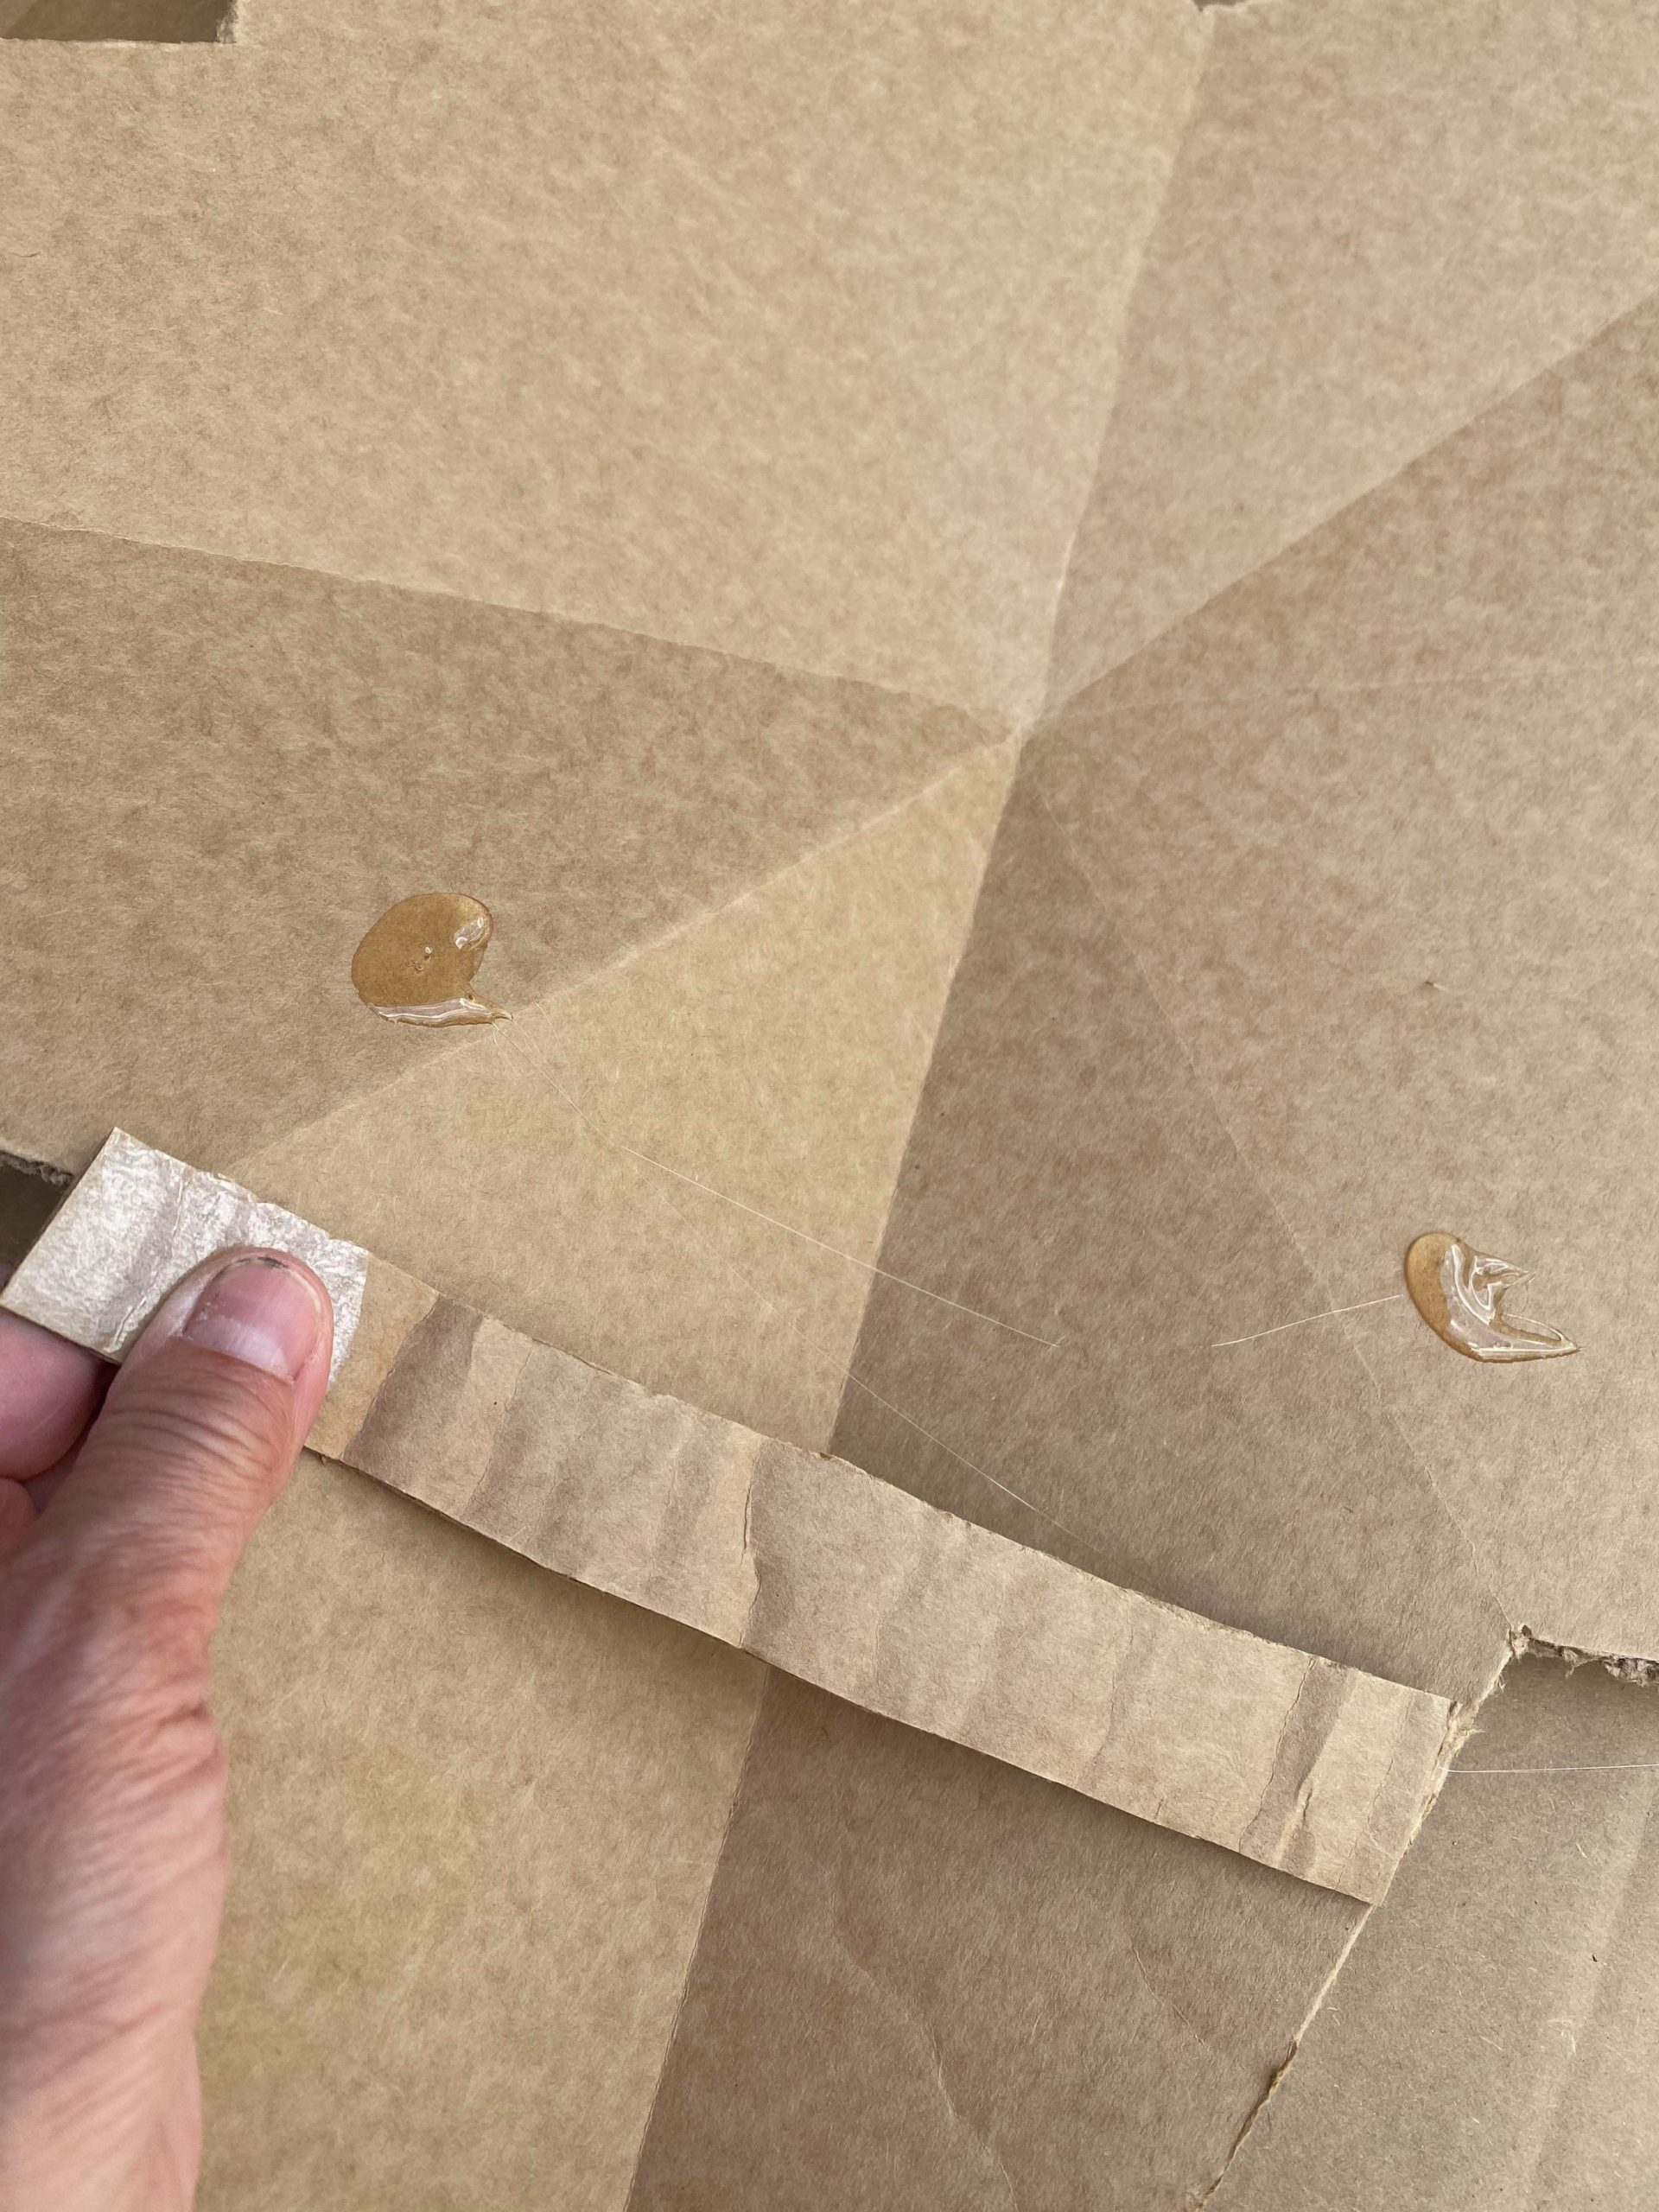
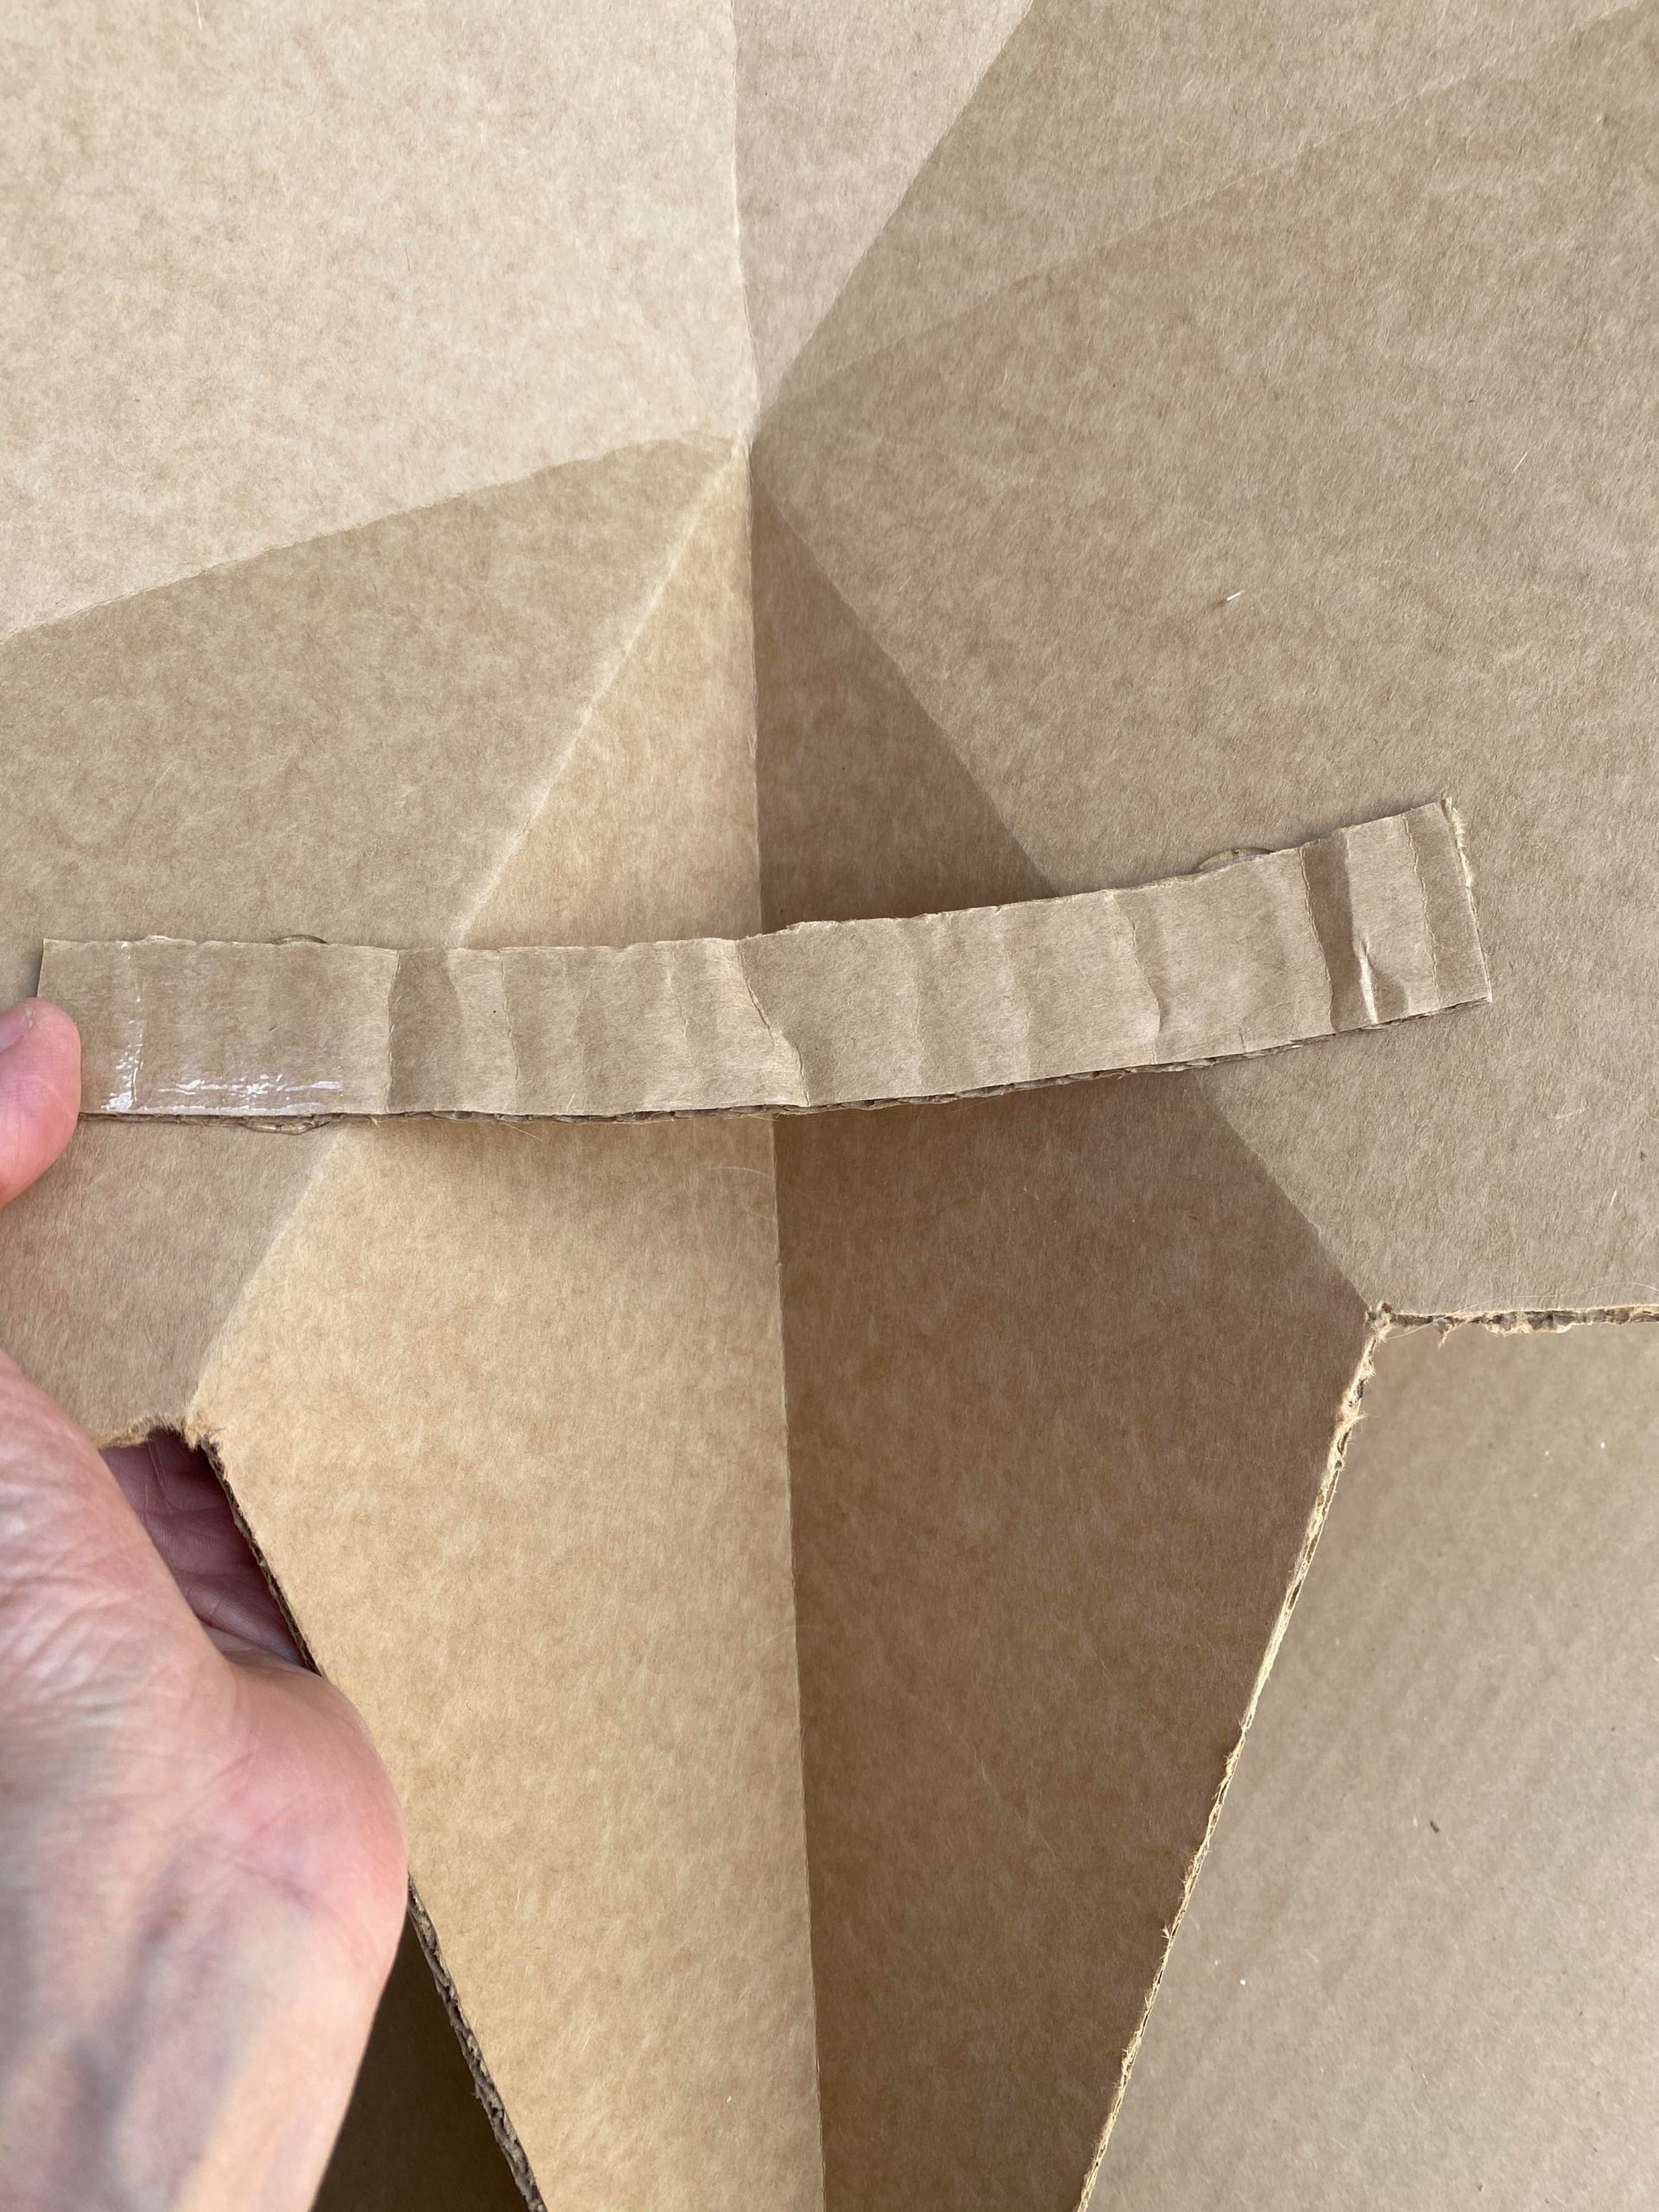
You will add hot glue to the ends of your cardboard strips. You will need to hold them in place until they securely stay in place.
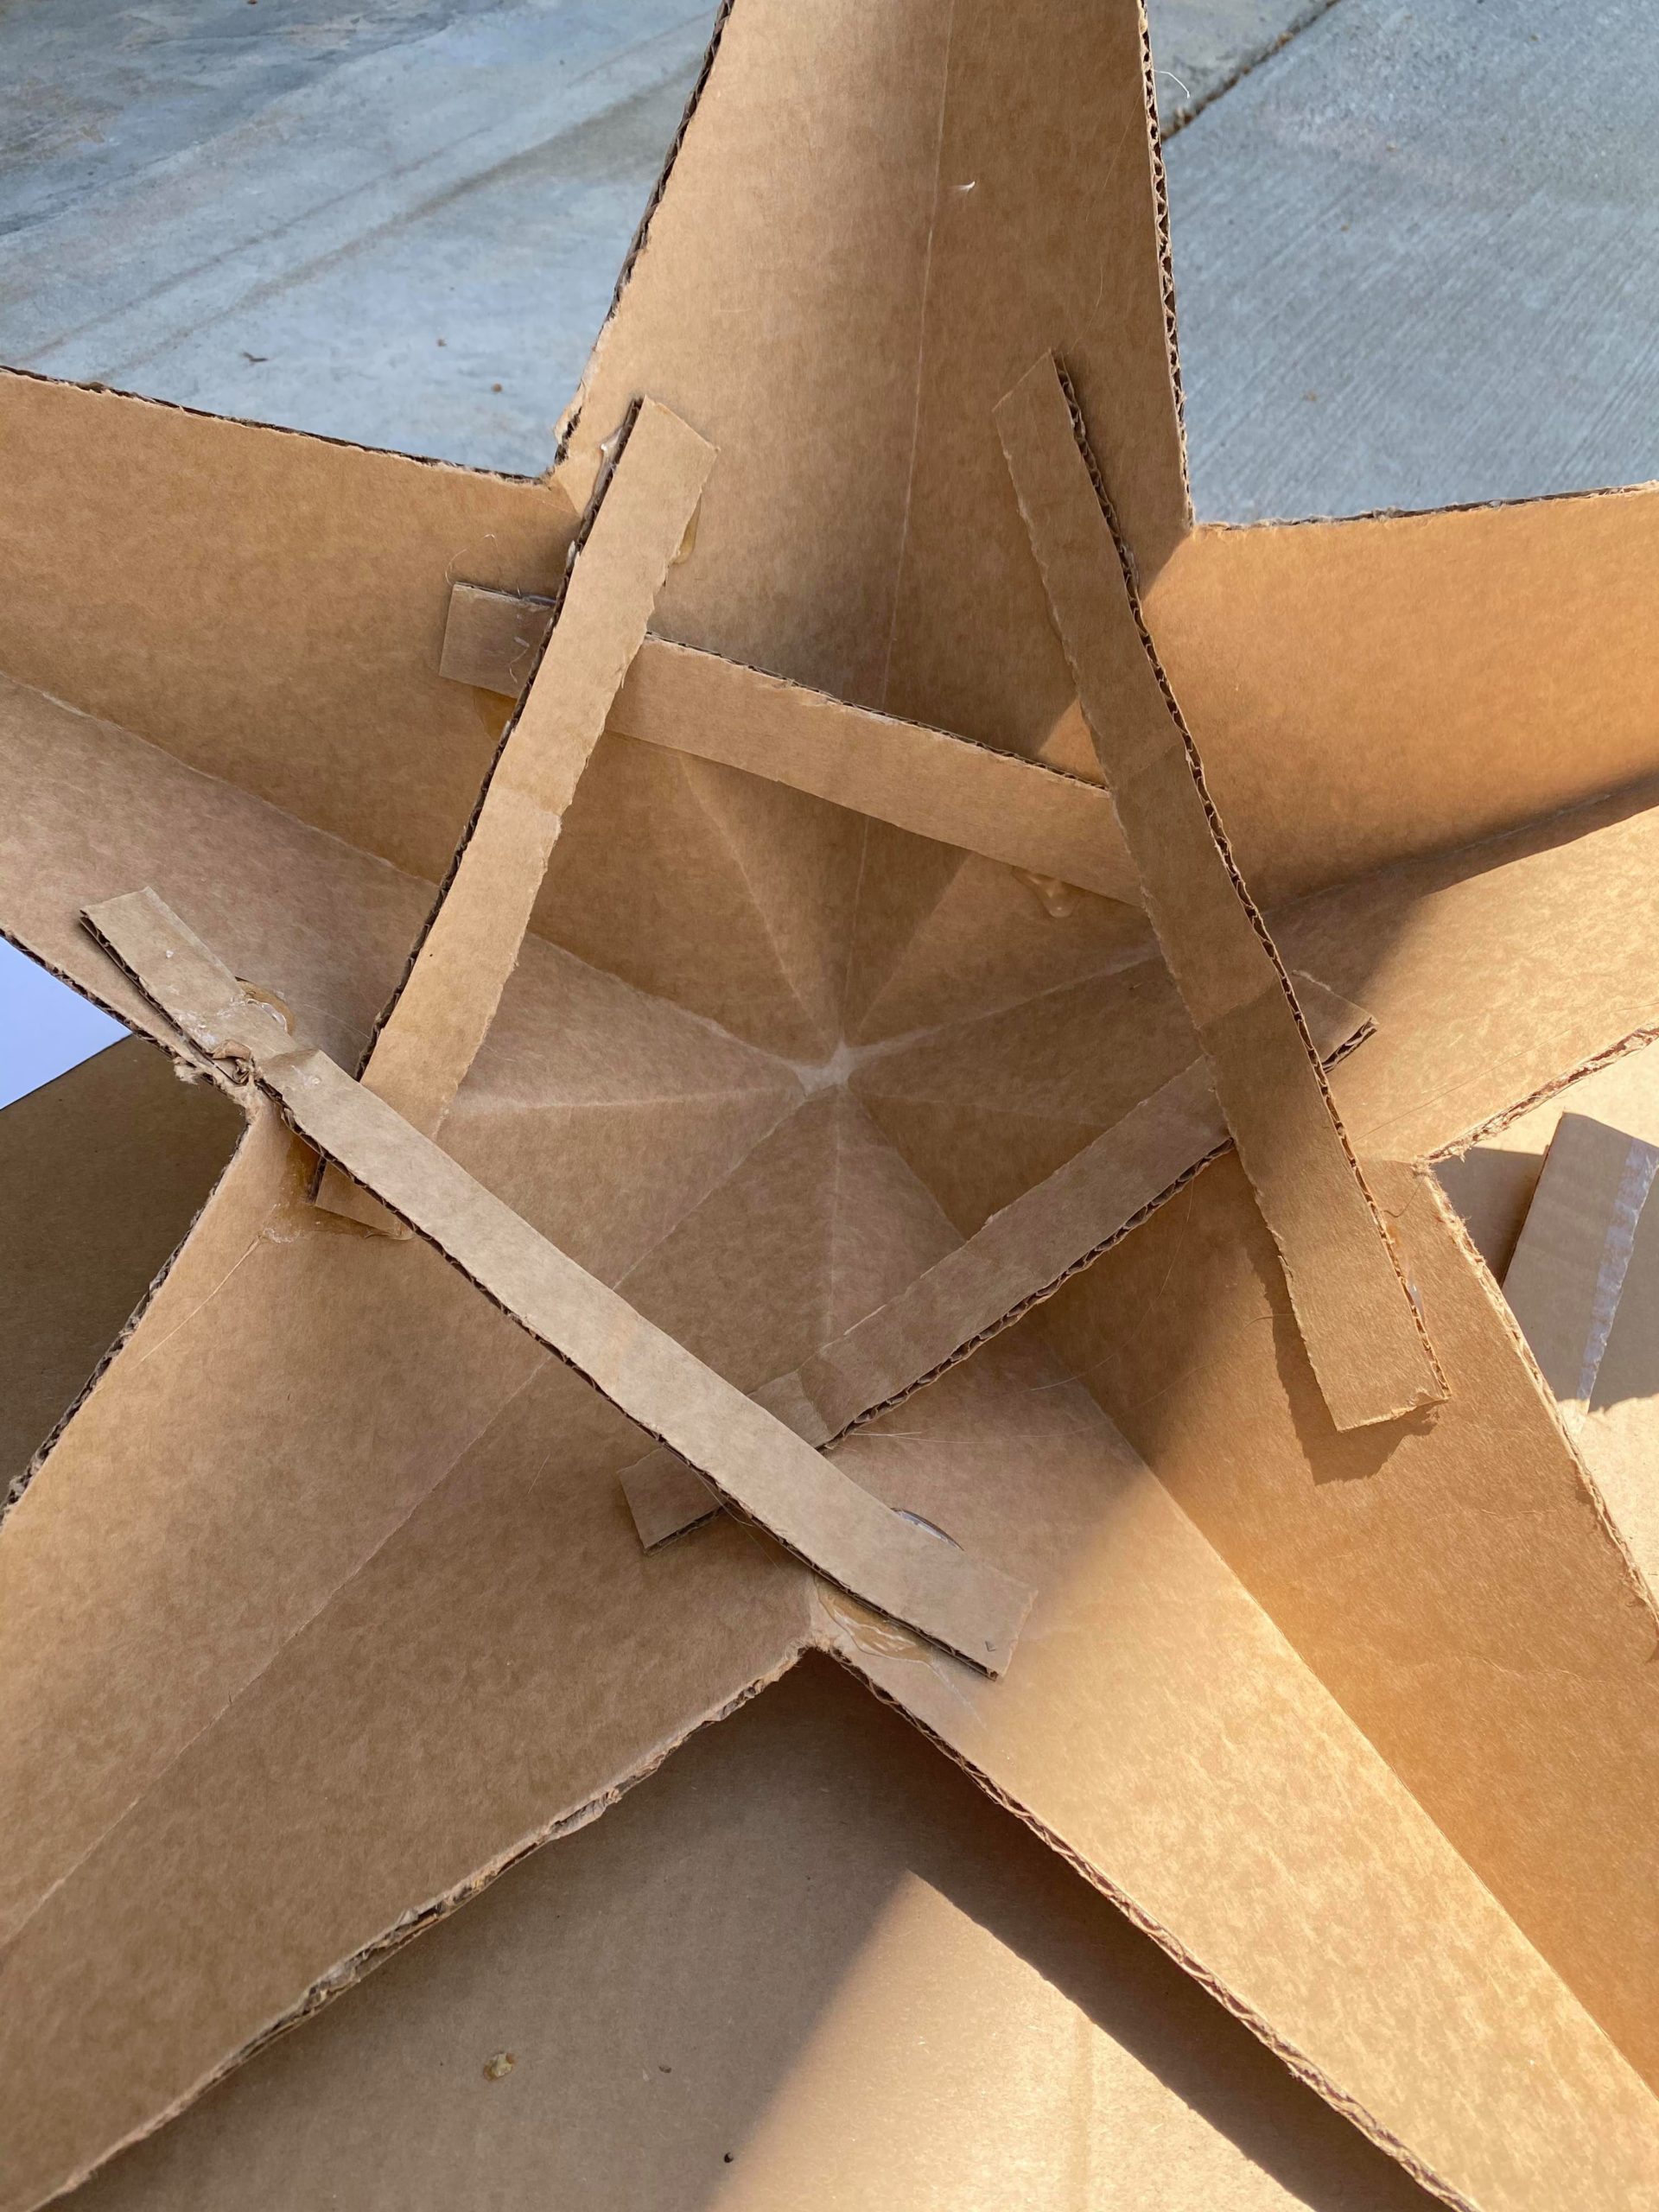
You will do this around the back side of the star to hold your folds in place.
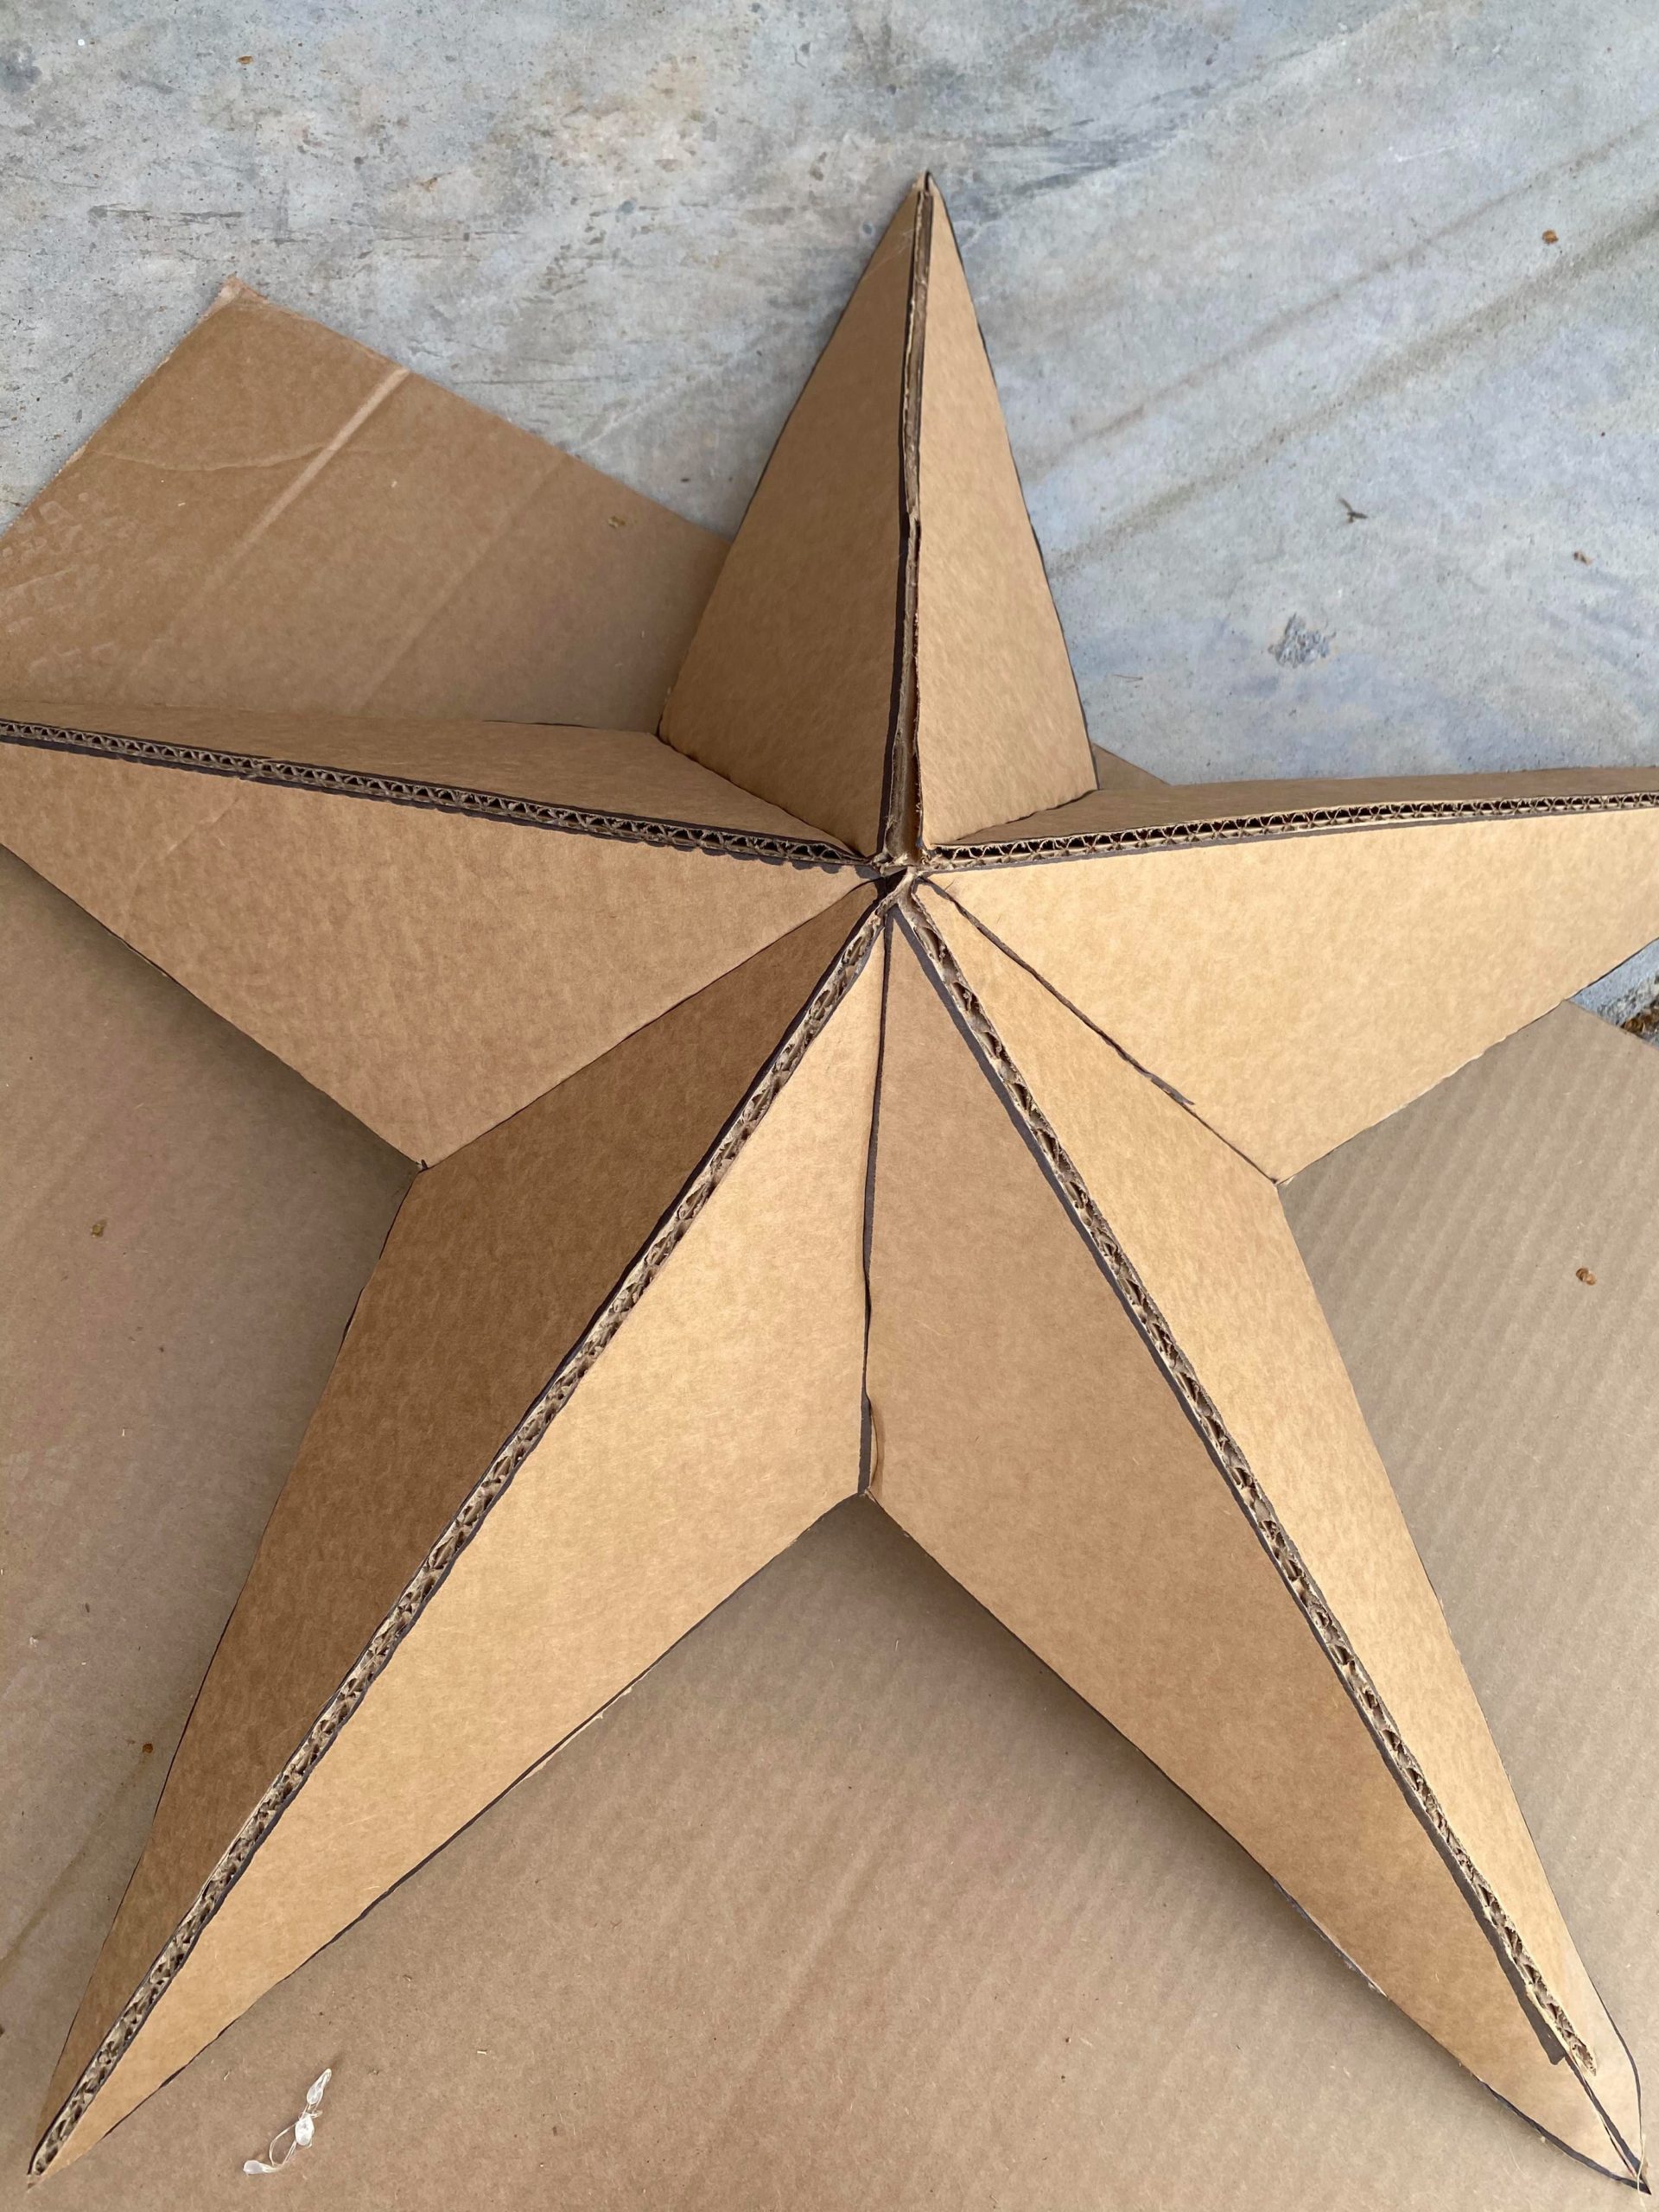
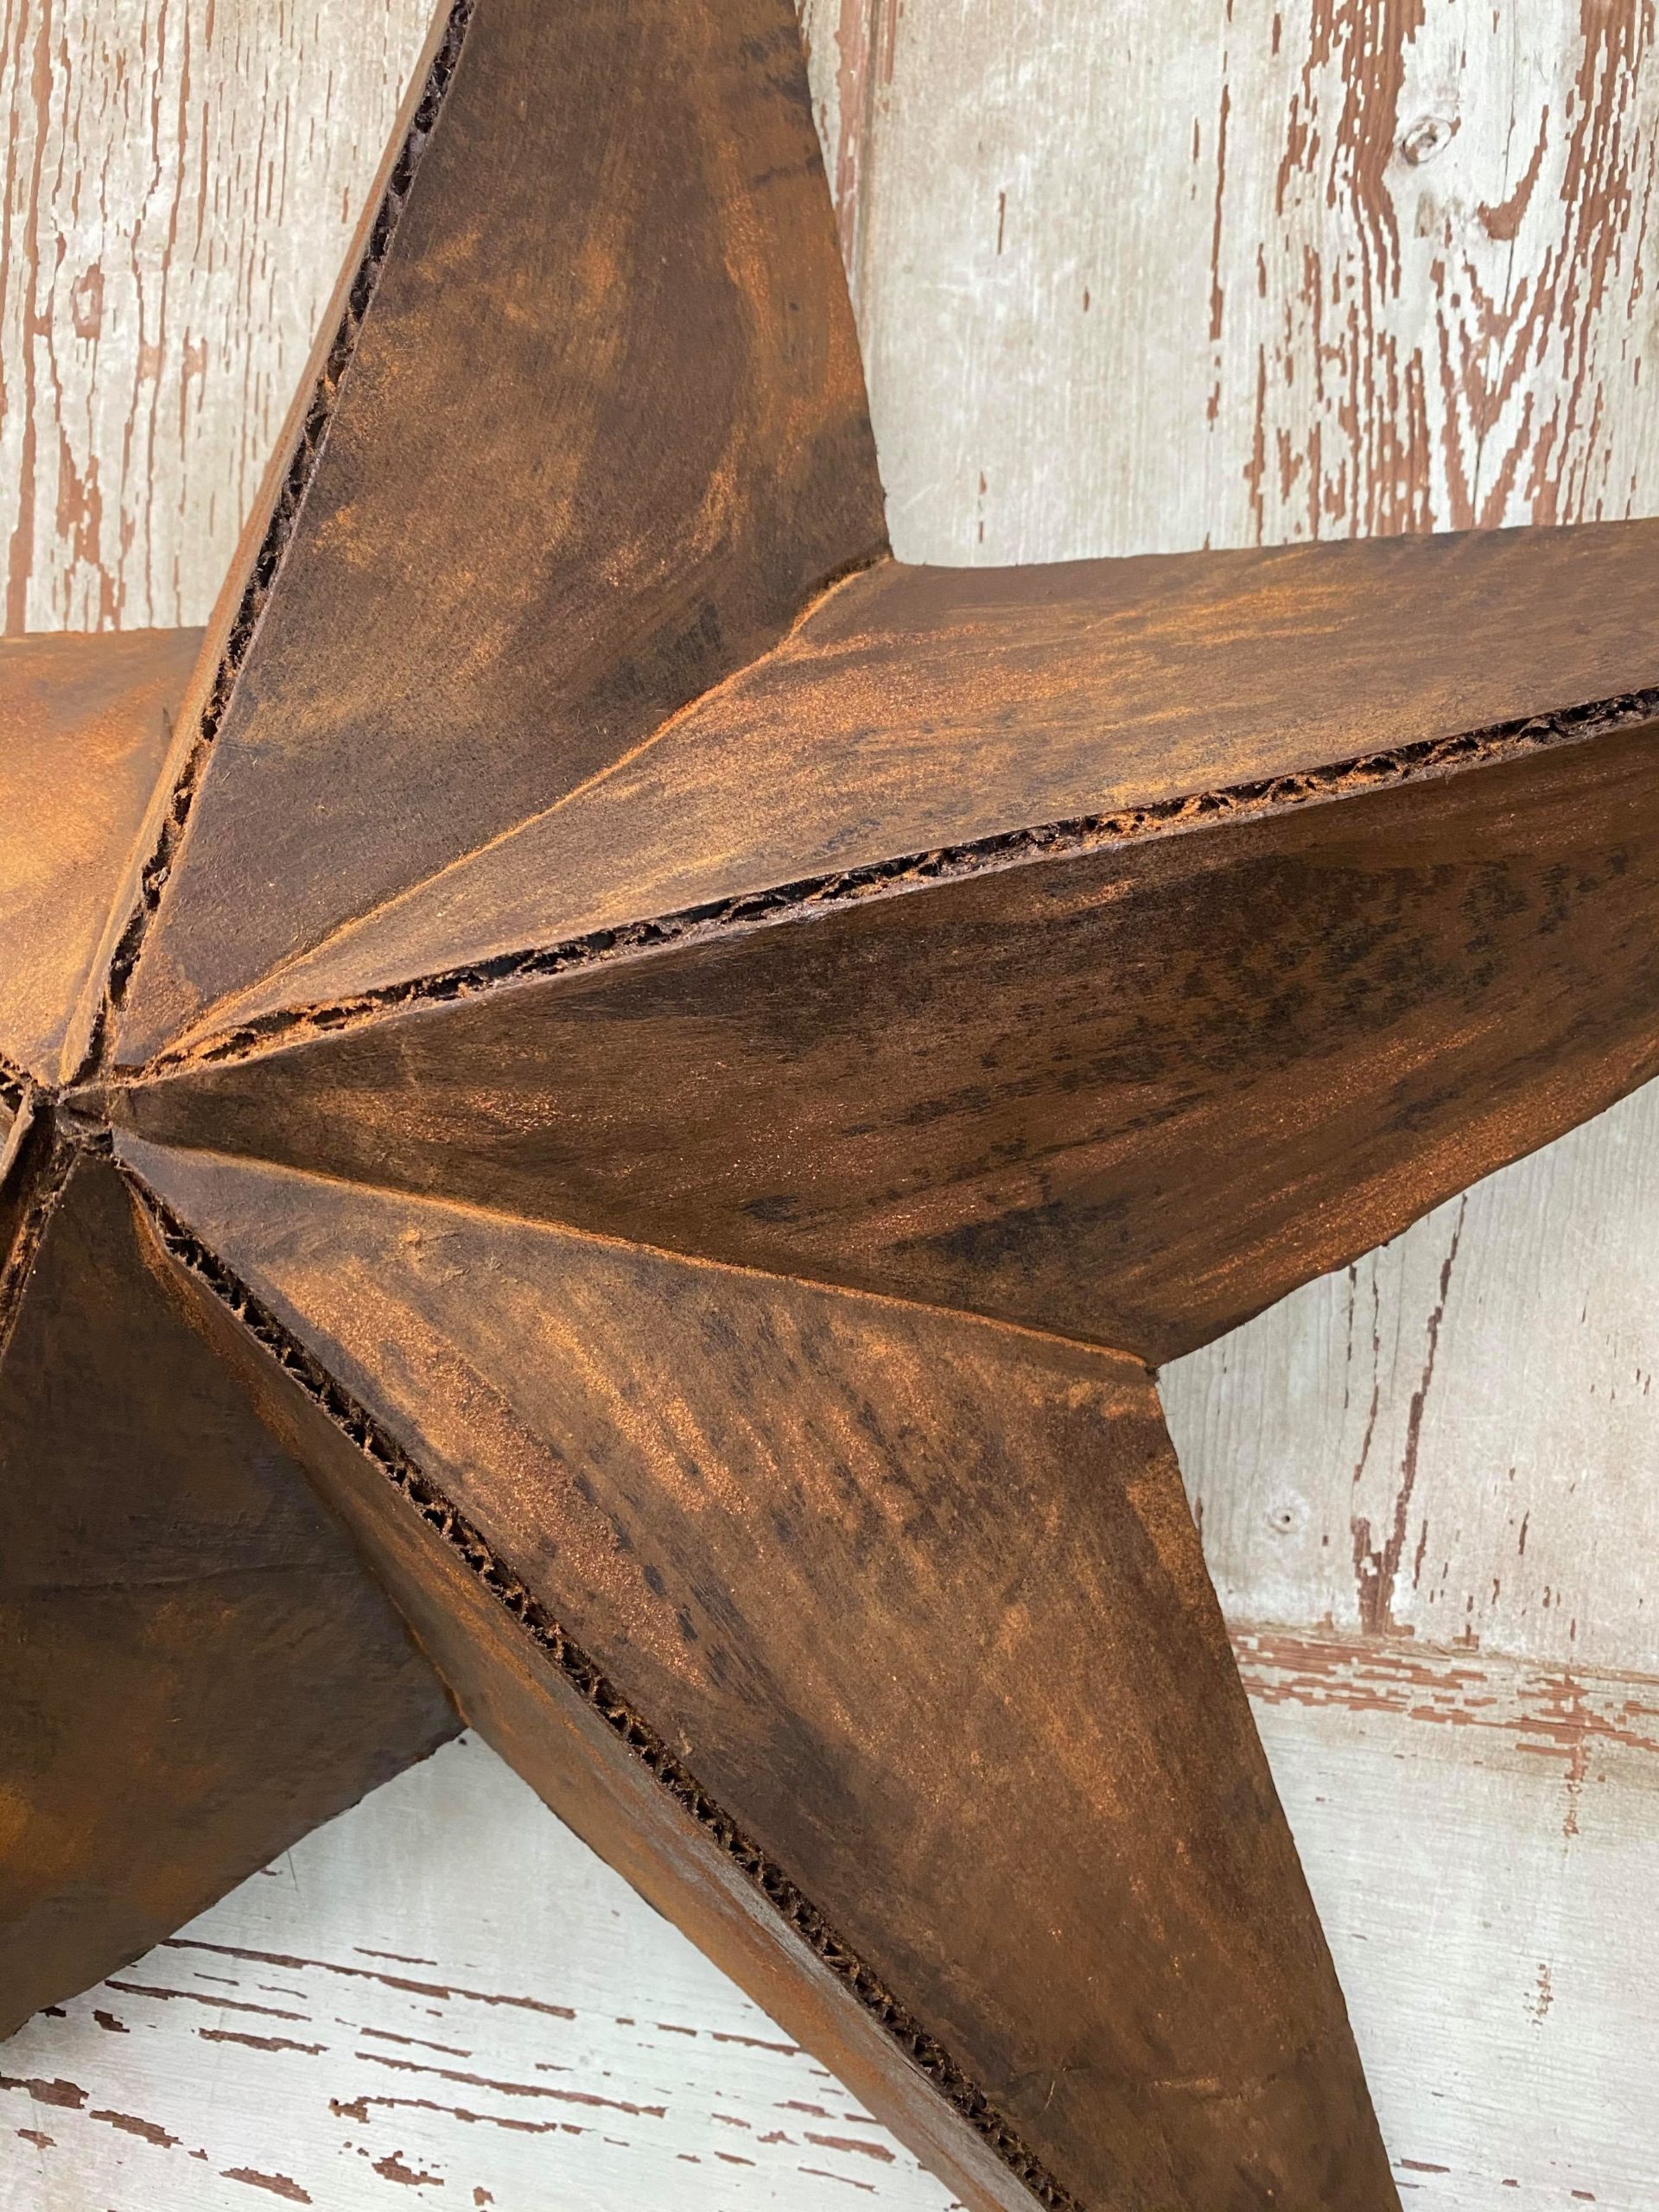
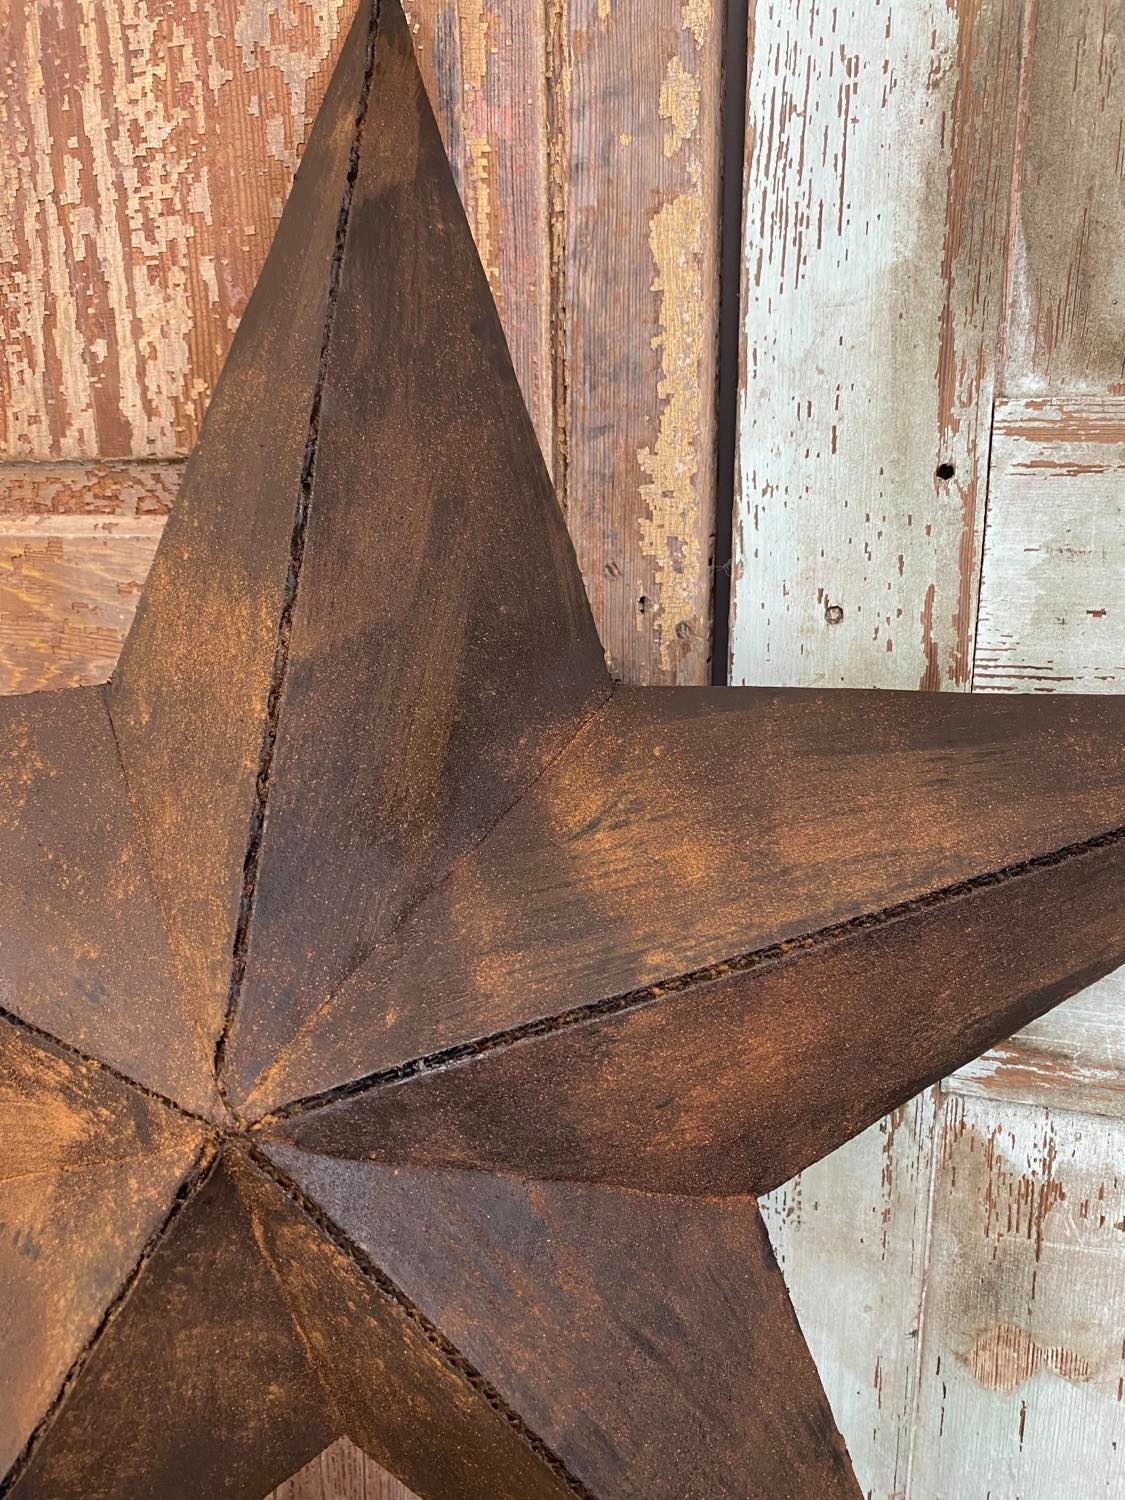
Be sure to fold it so that your long lines come outward and your shirt lines go inward. Once my star was formed I then gave it one coat of black spray paint.
I want my star to look like an old rusty star.
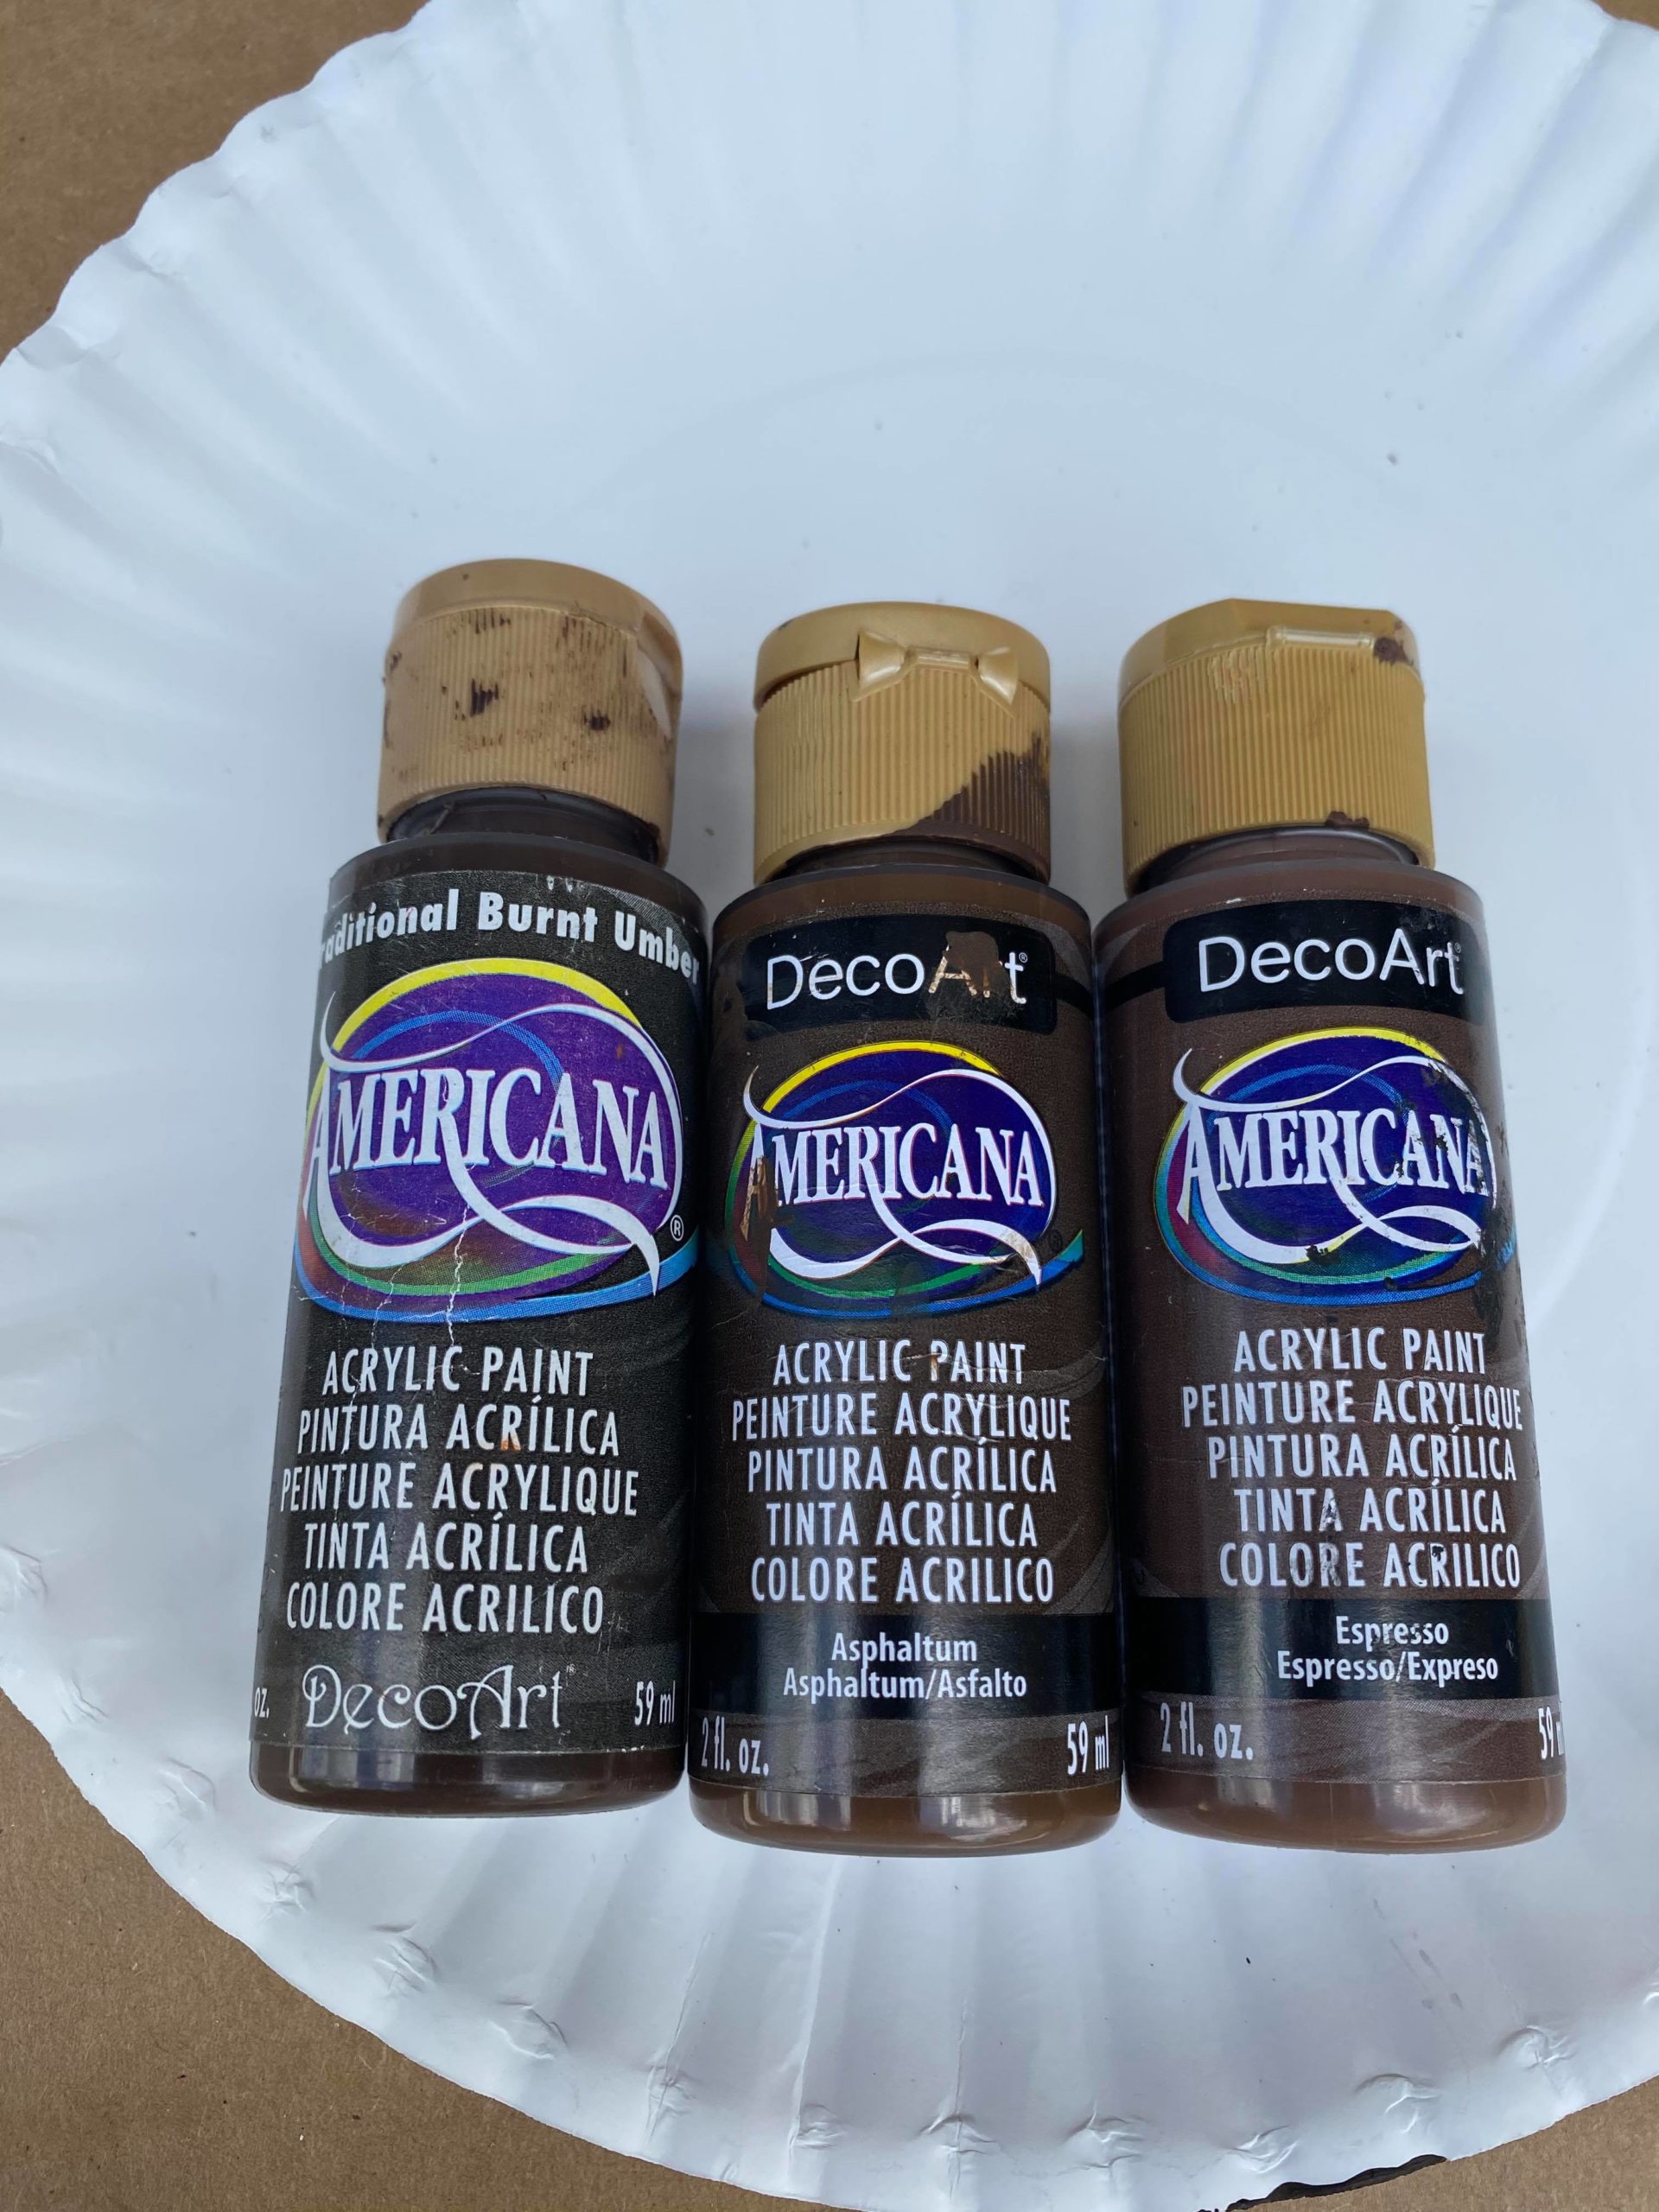
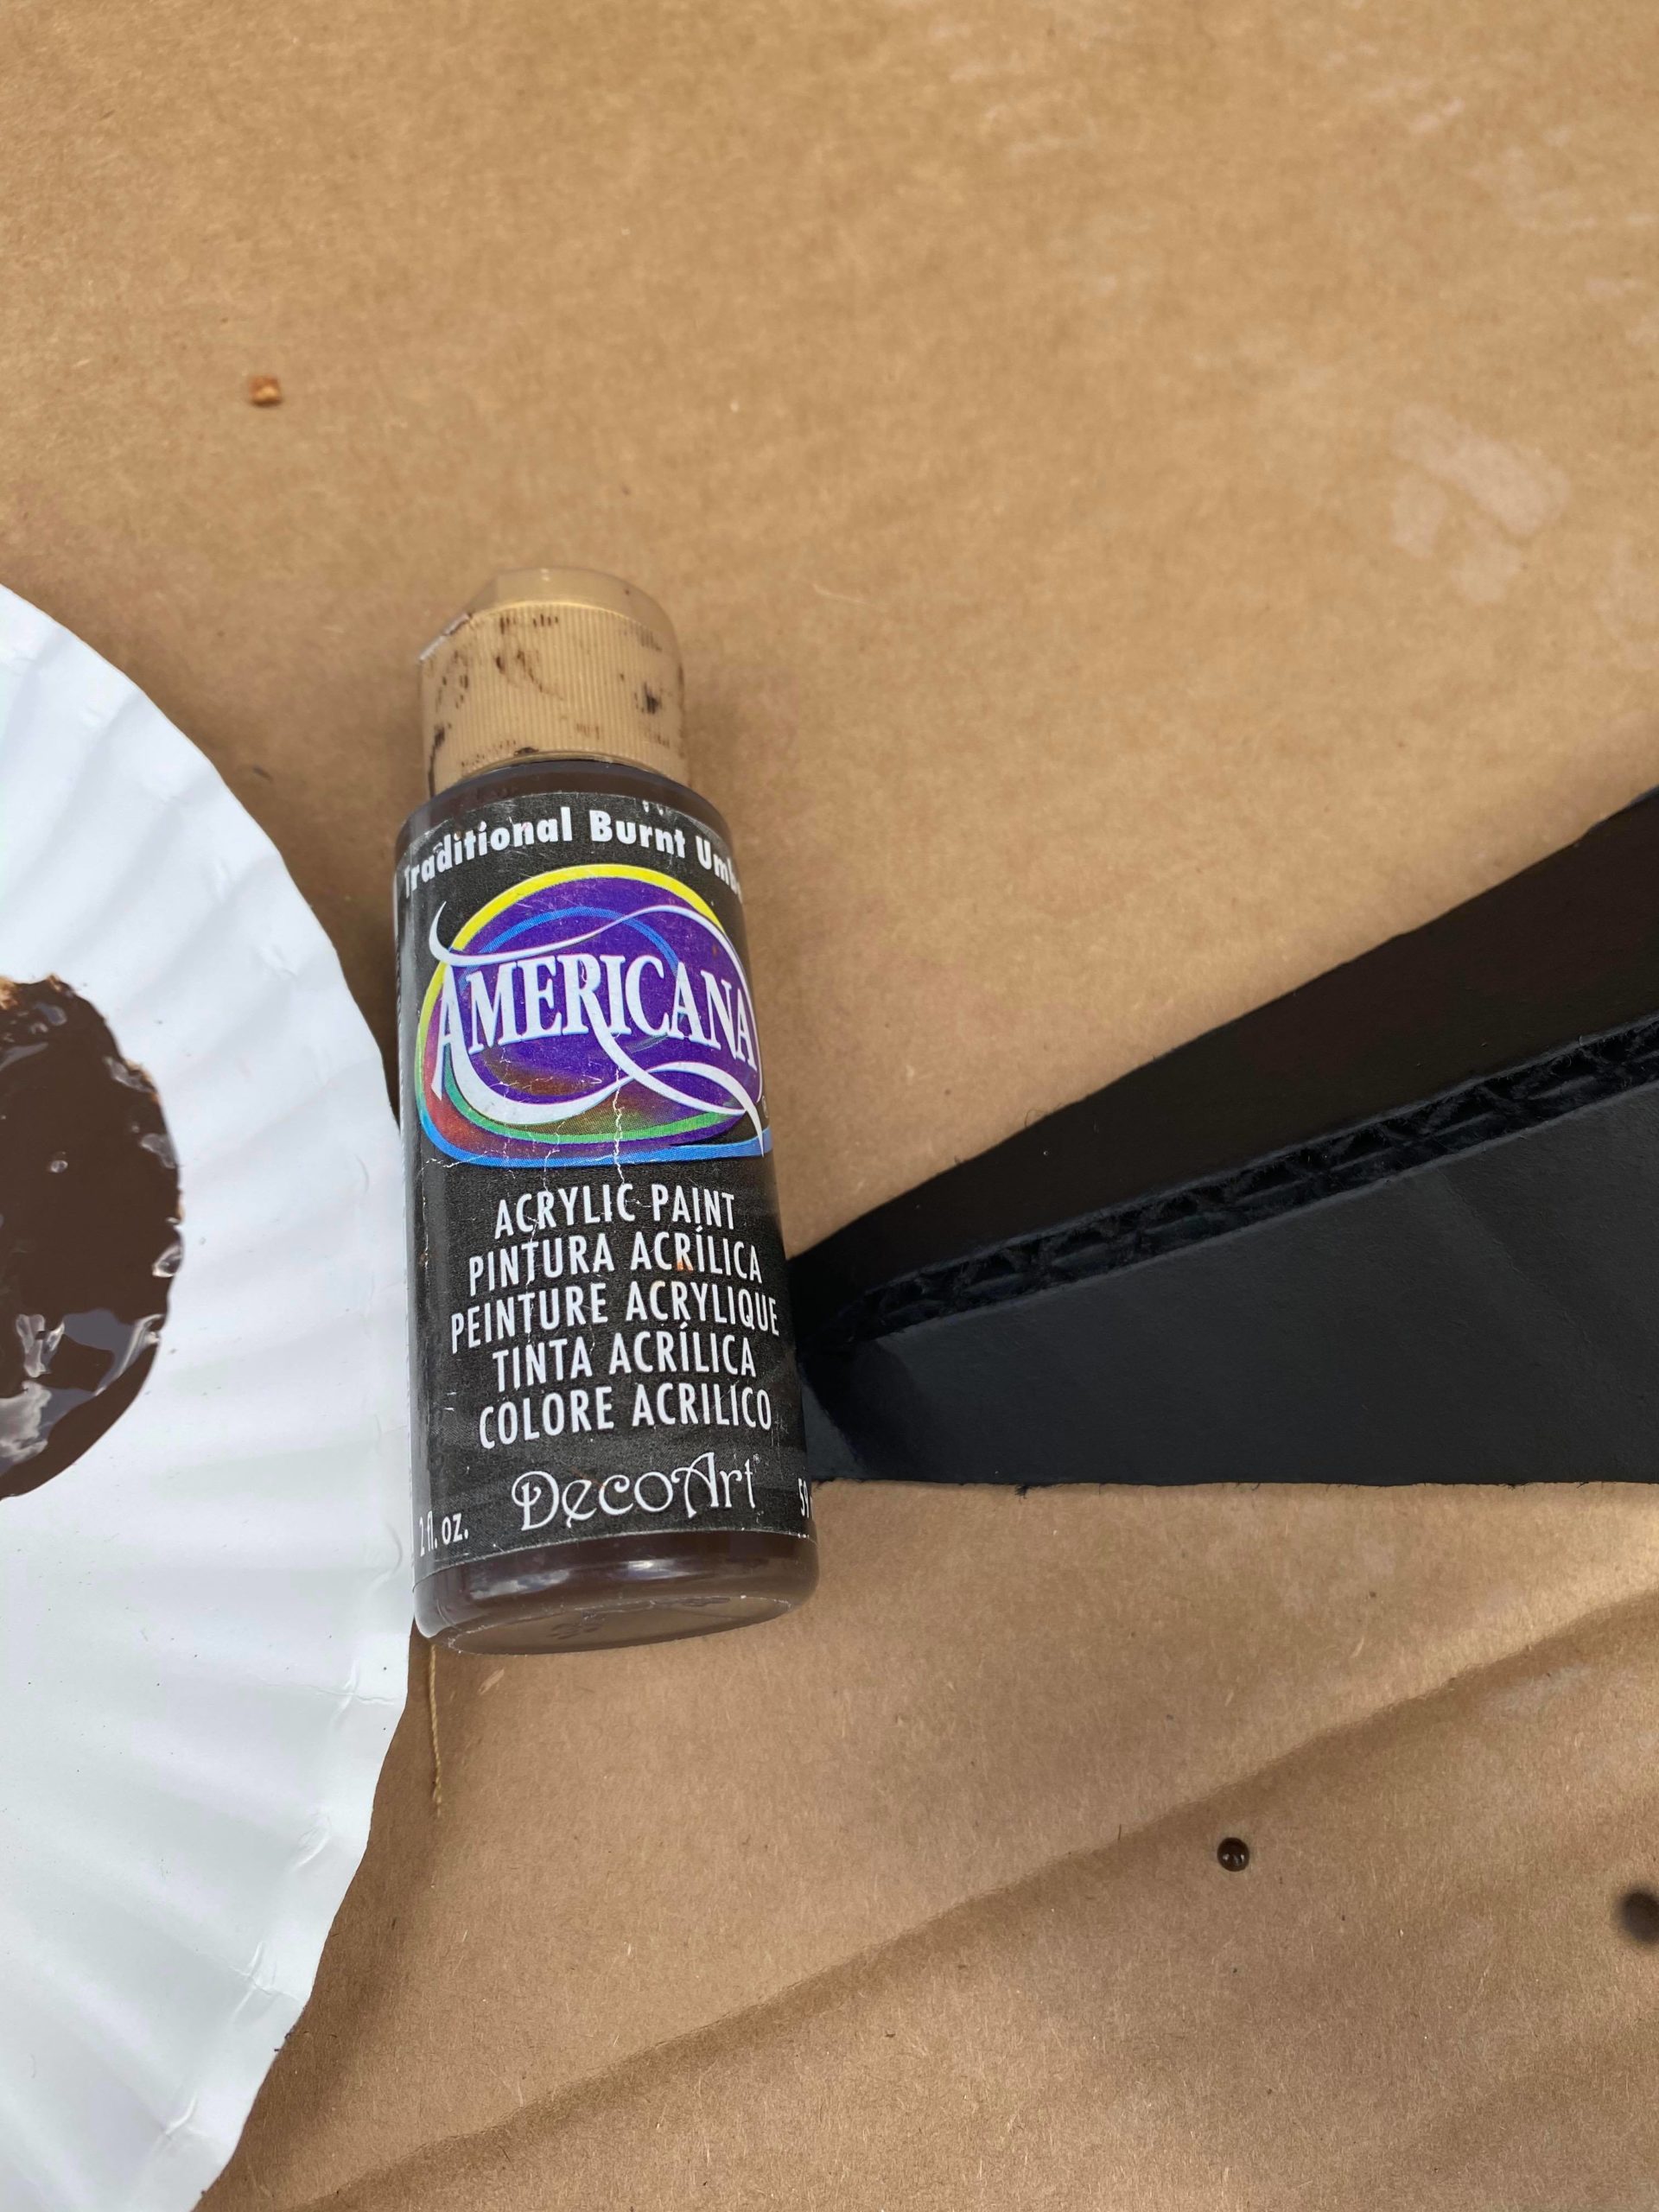
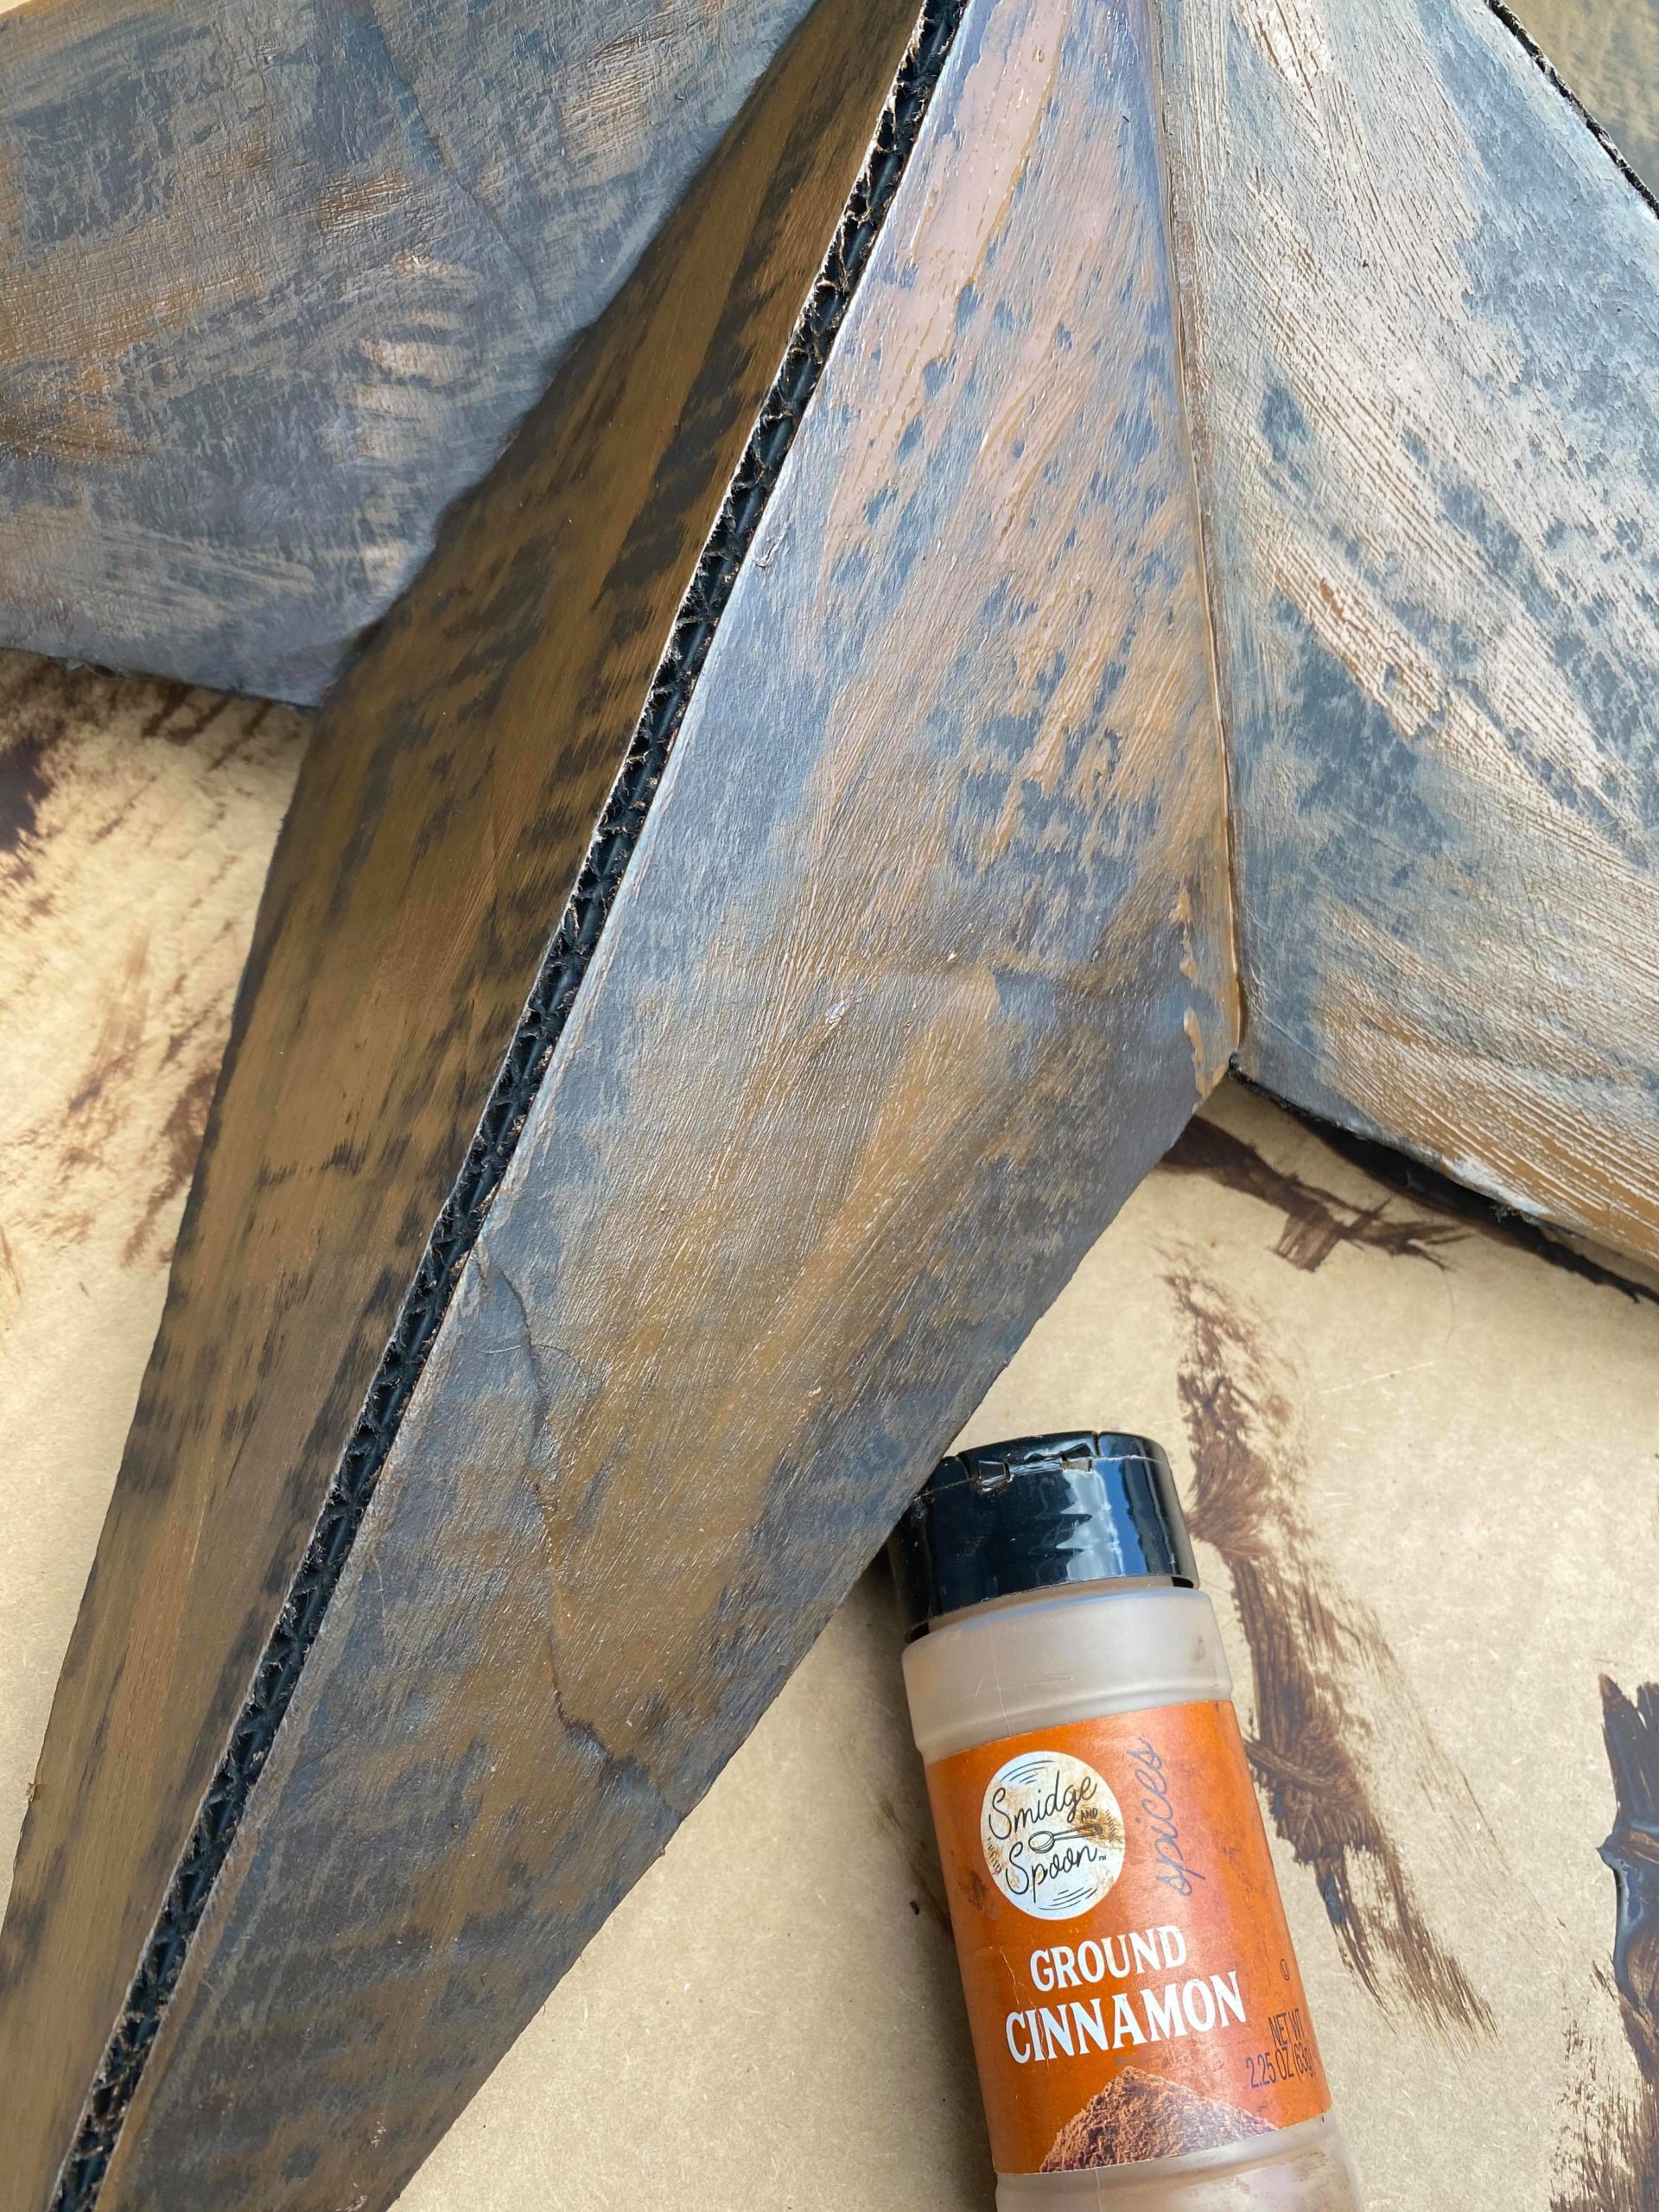
I will be adding a few different shades of brown over the black. The first brown i added was the Burnt Umber.
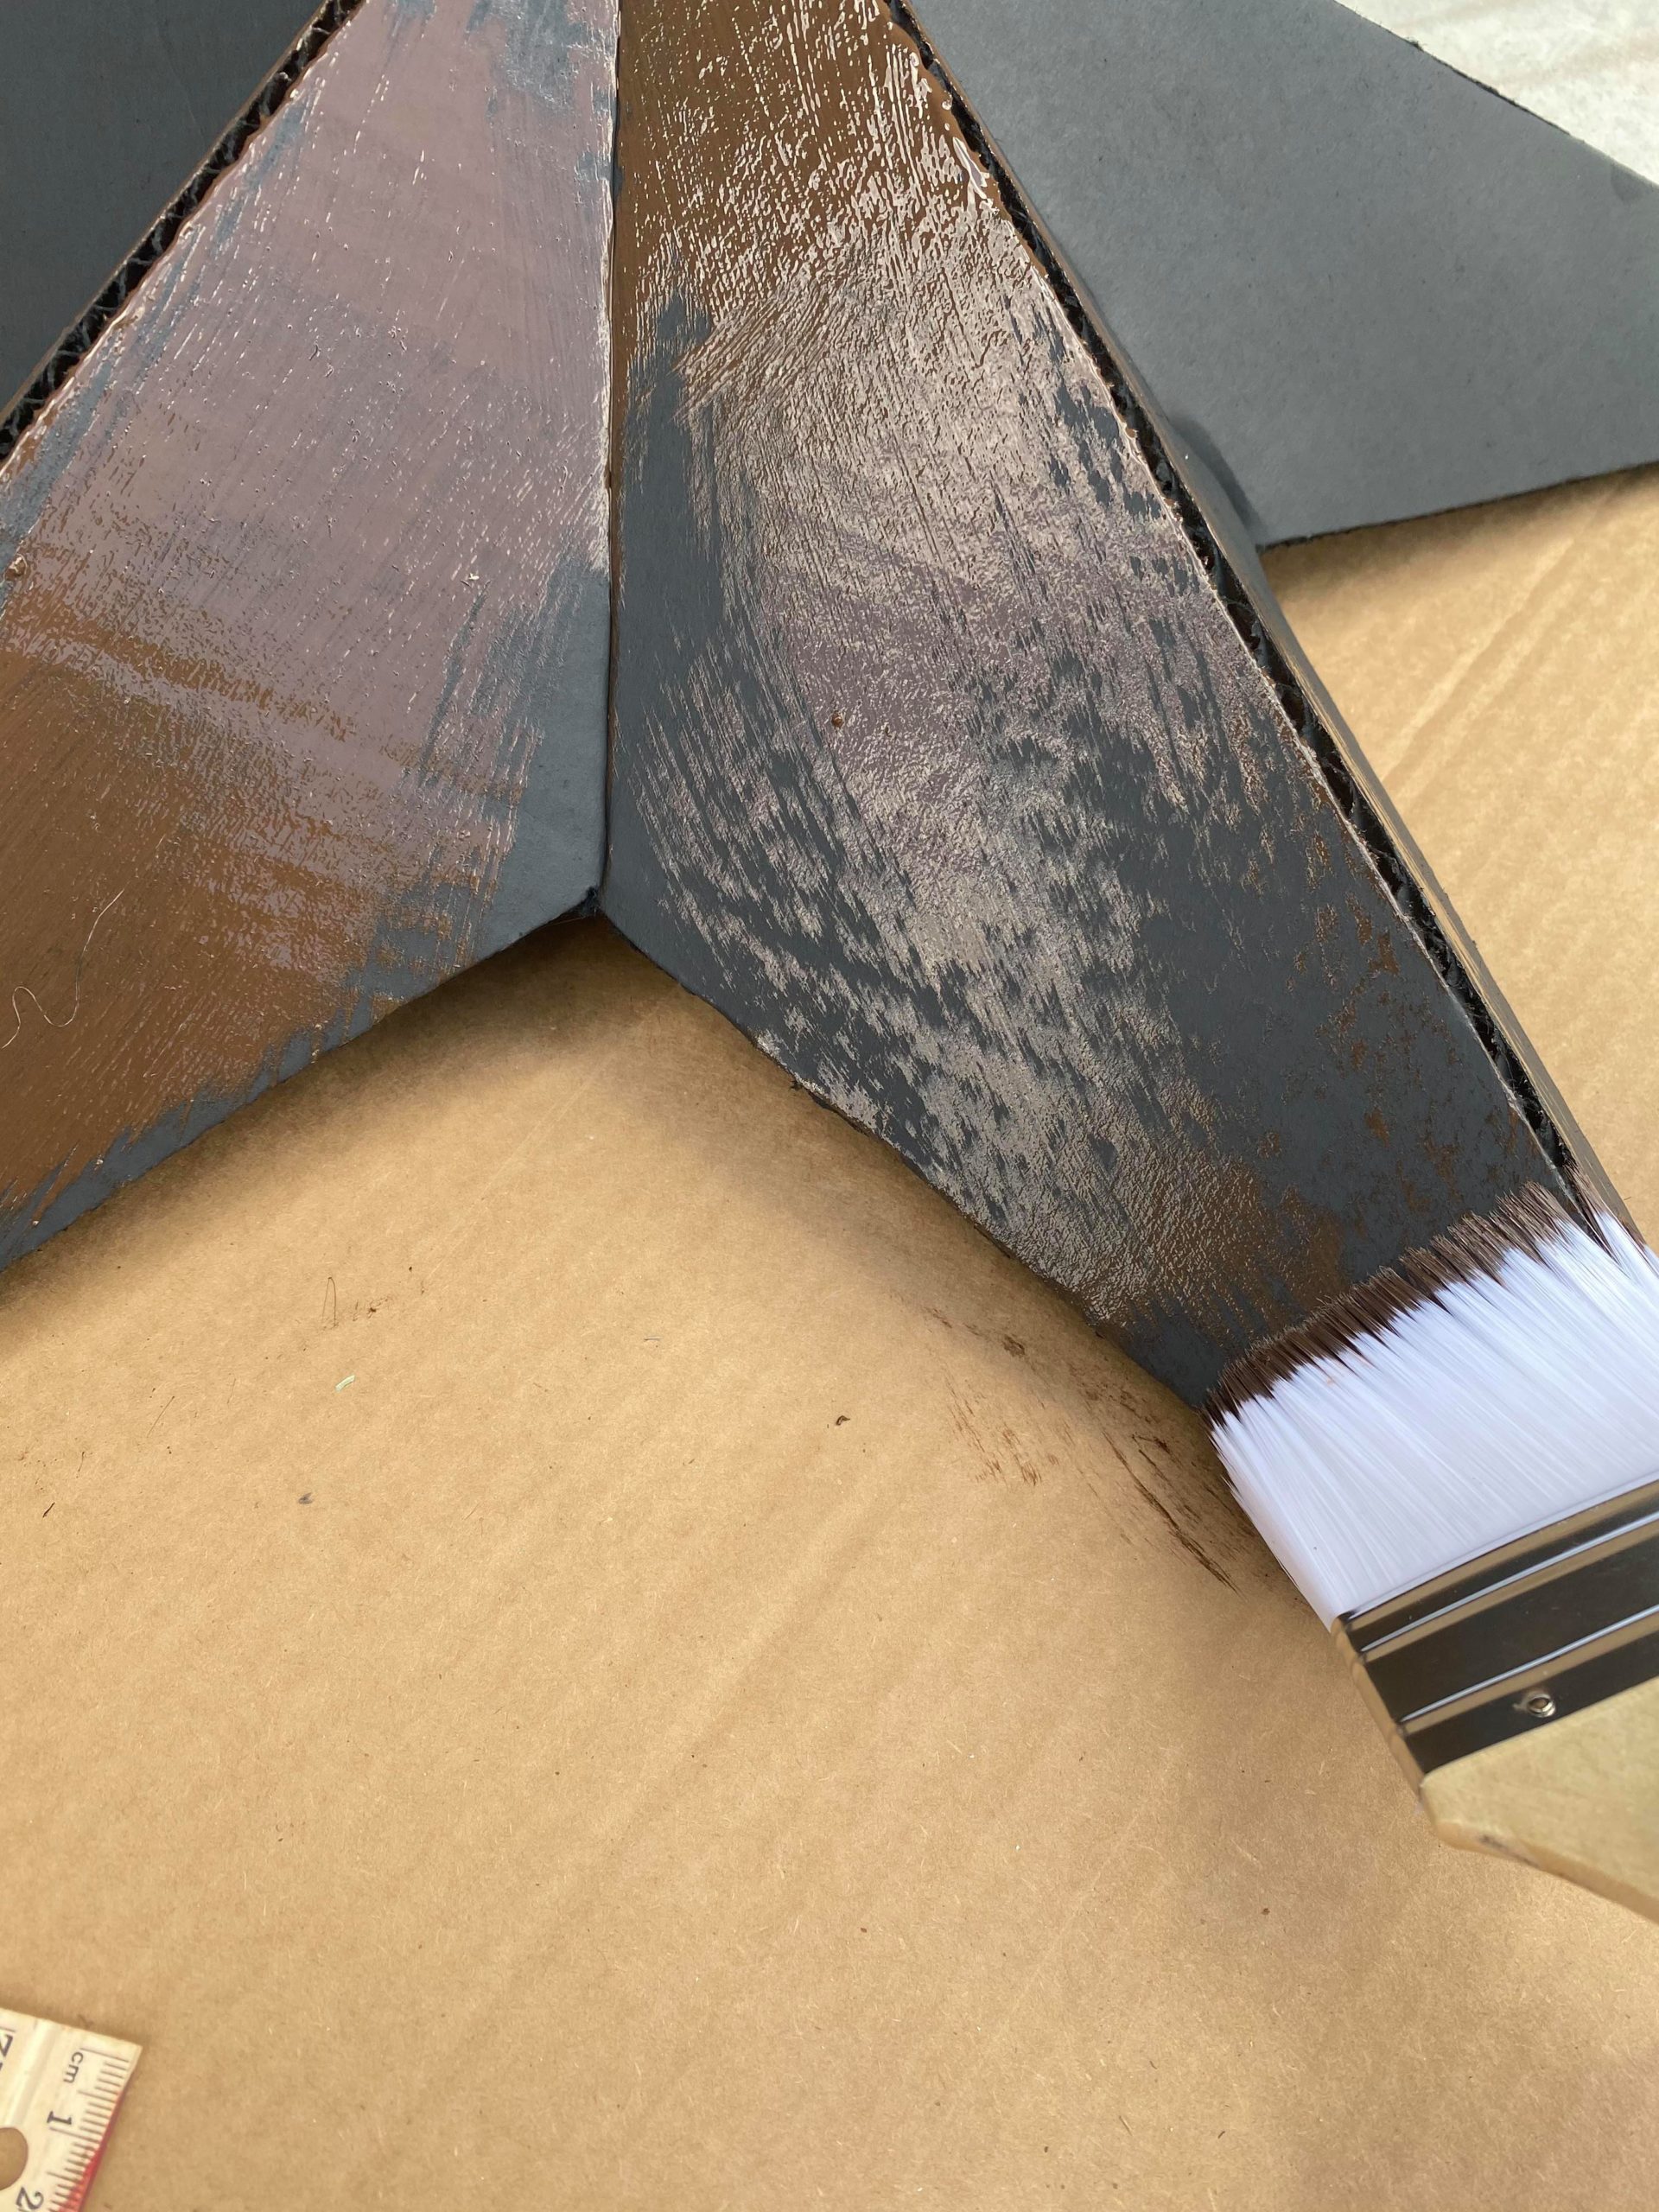
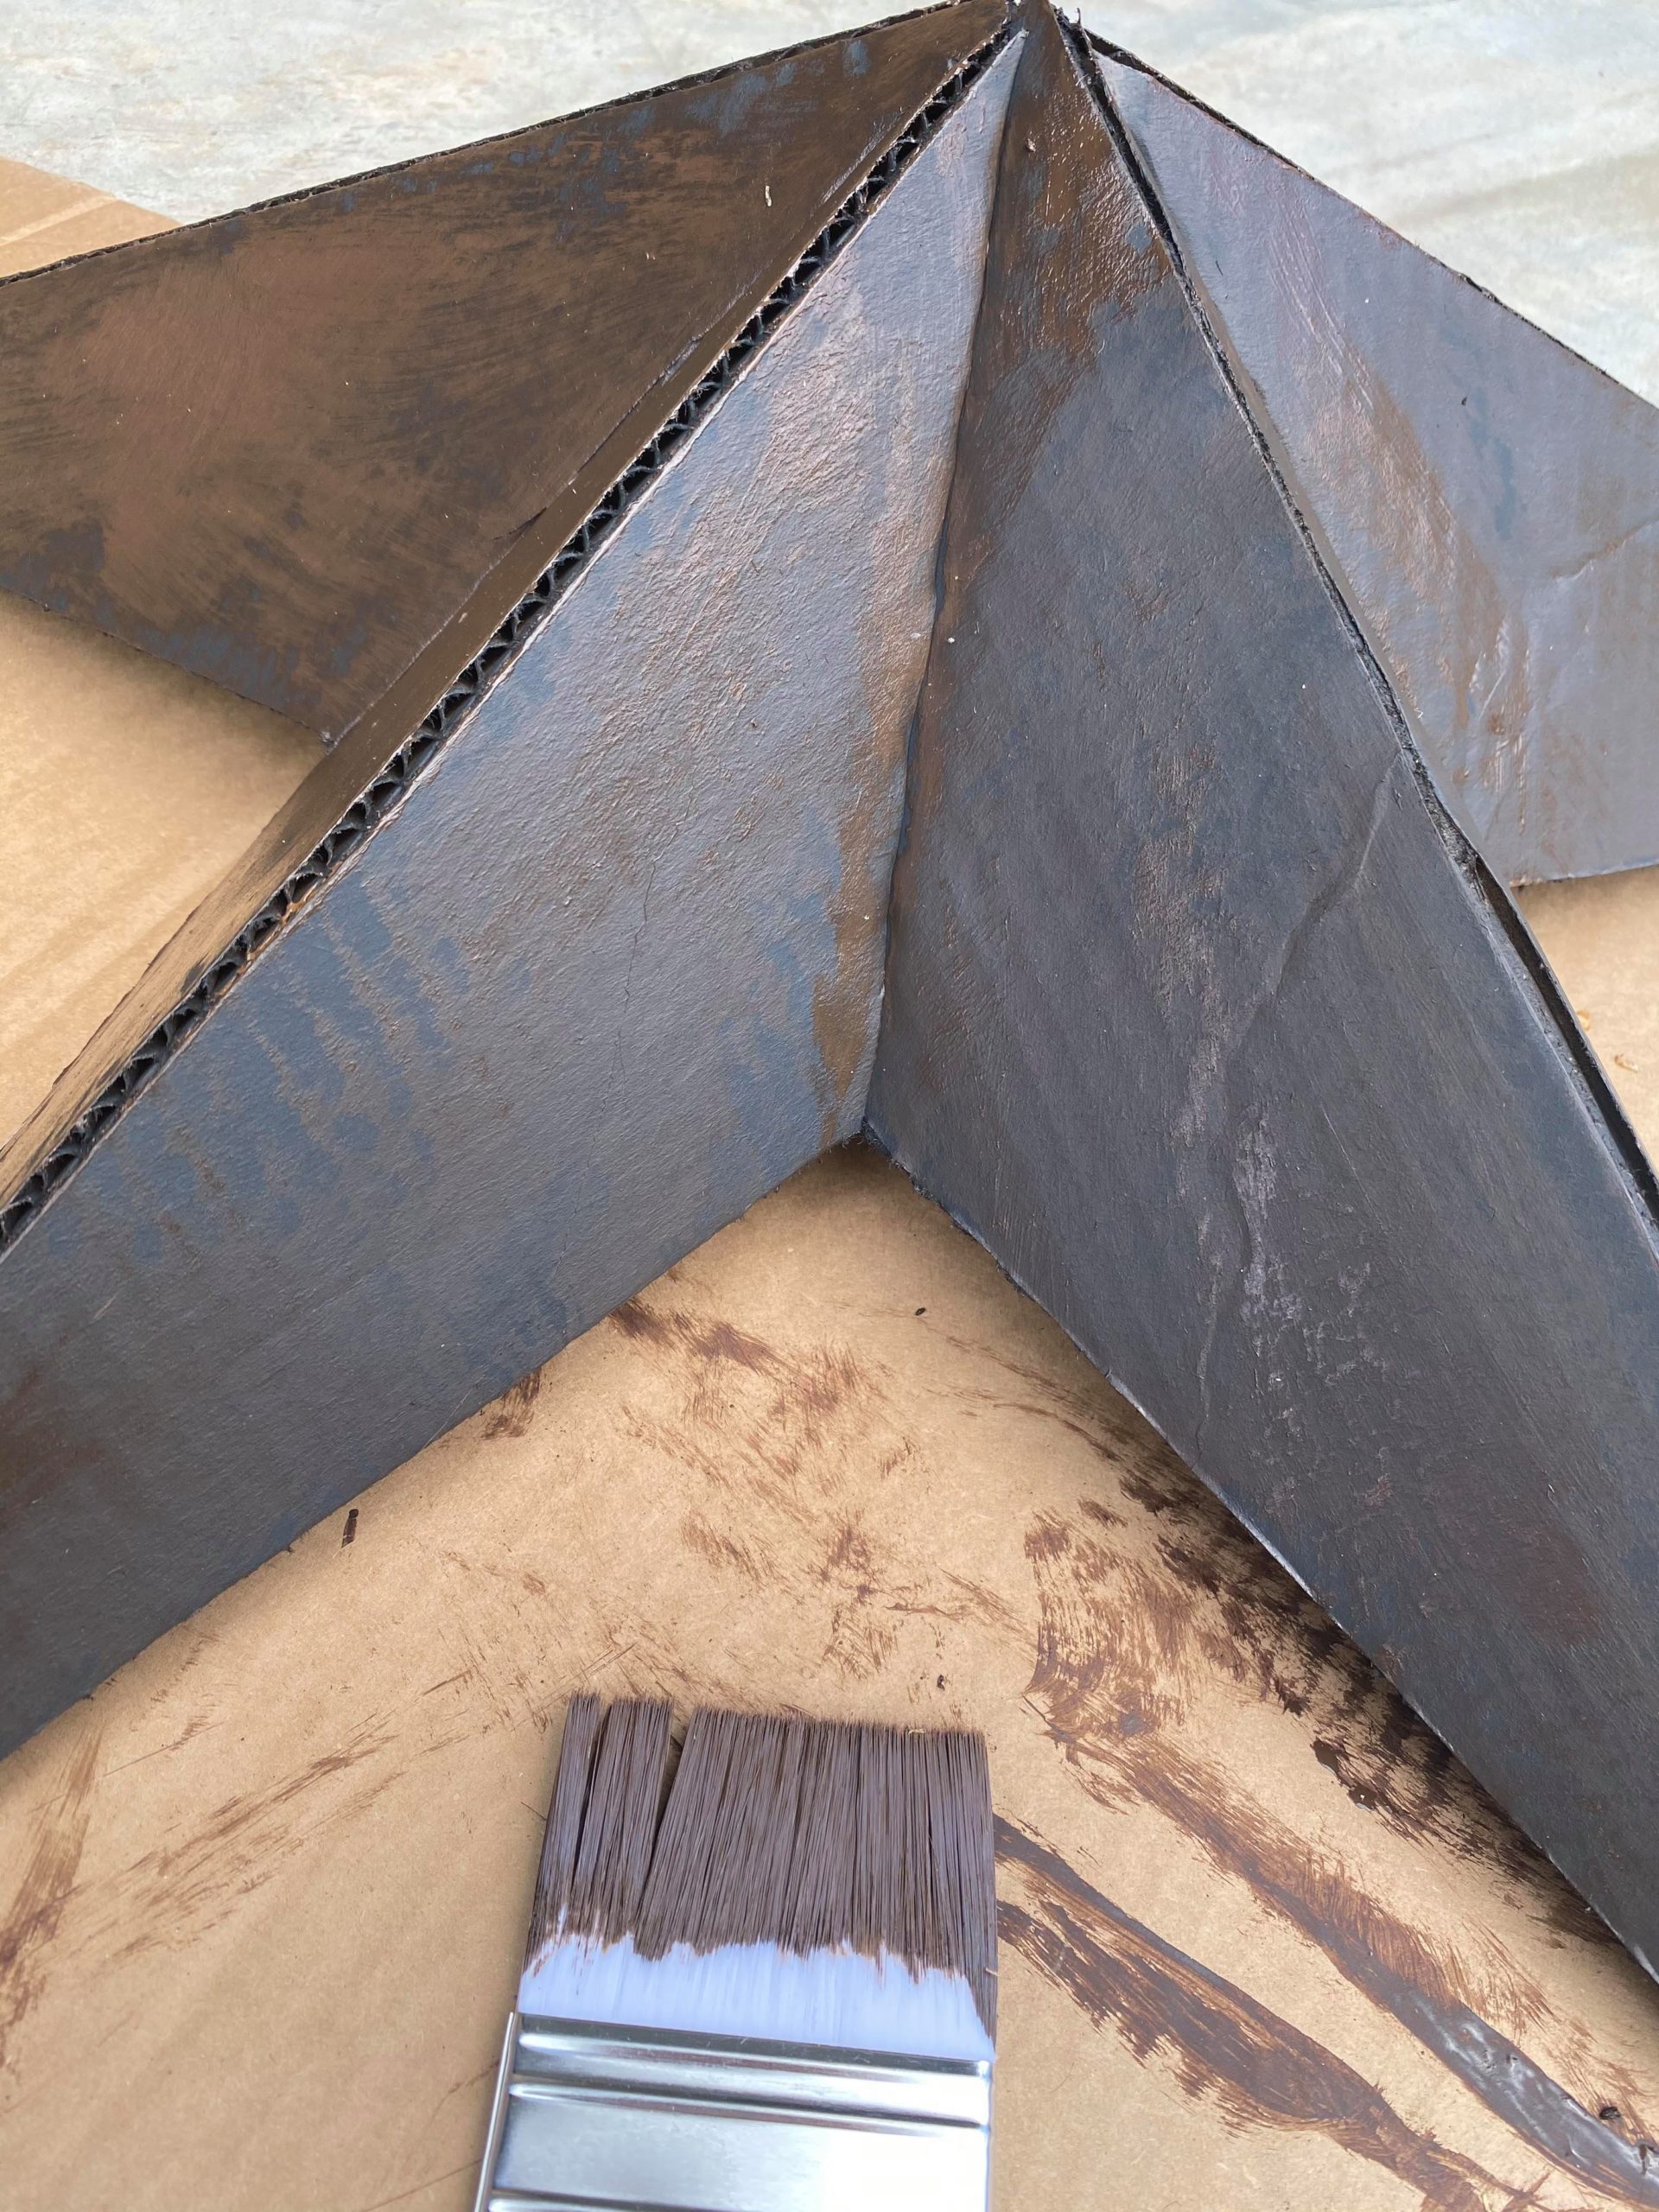
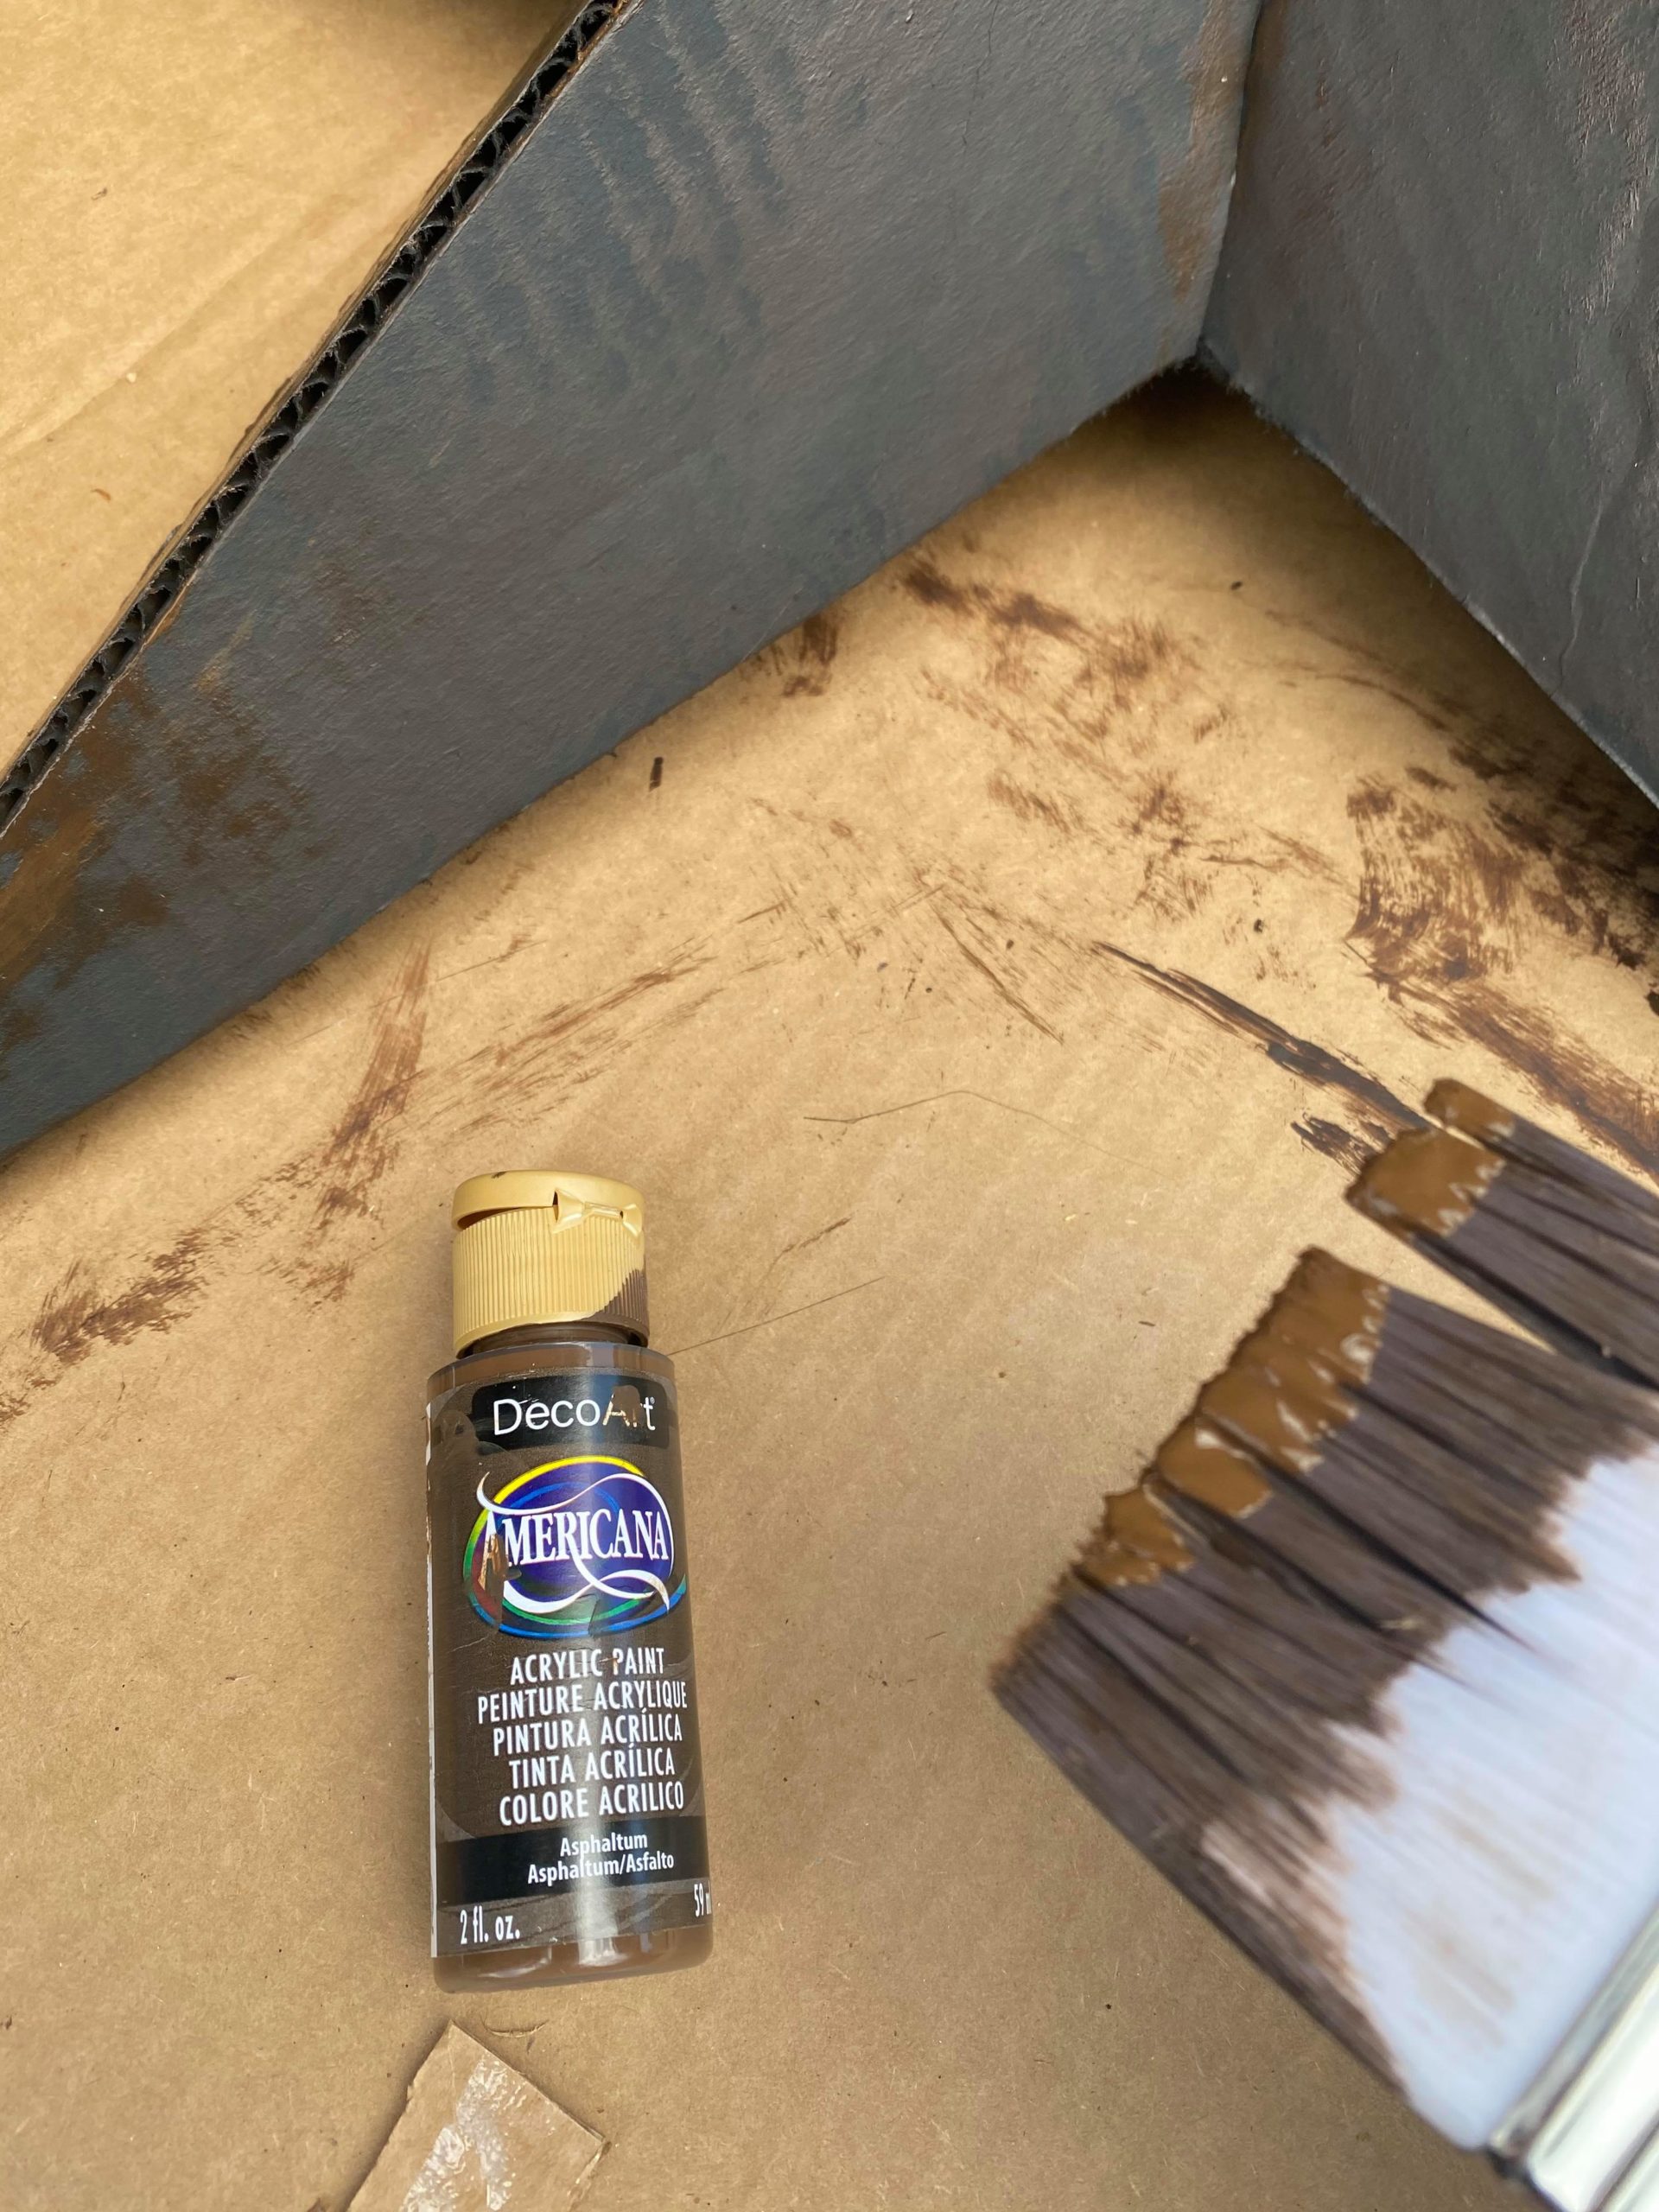
I then added on the other browns here and there.
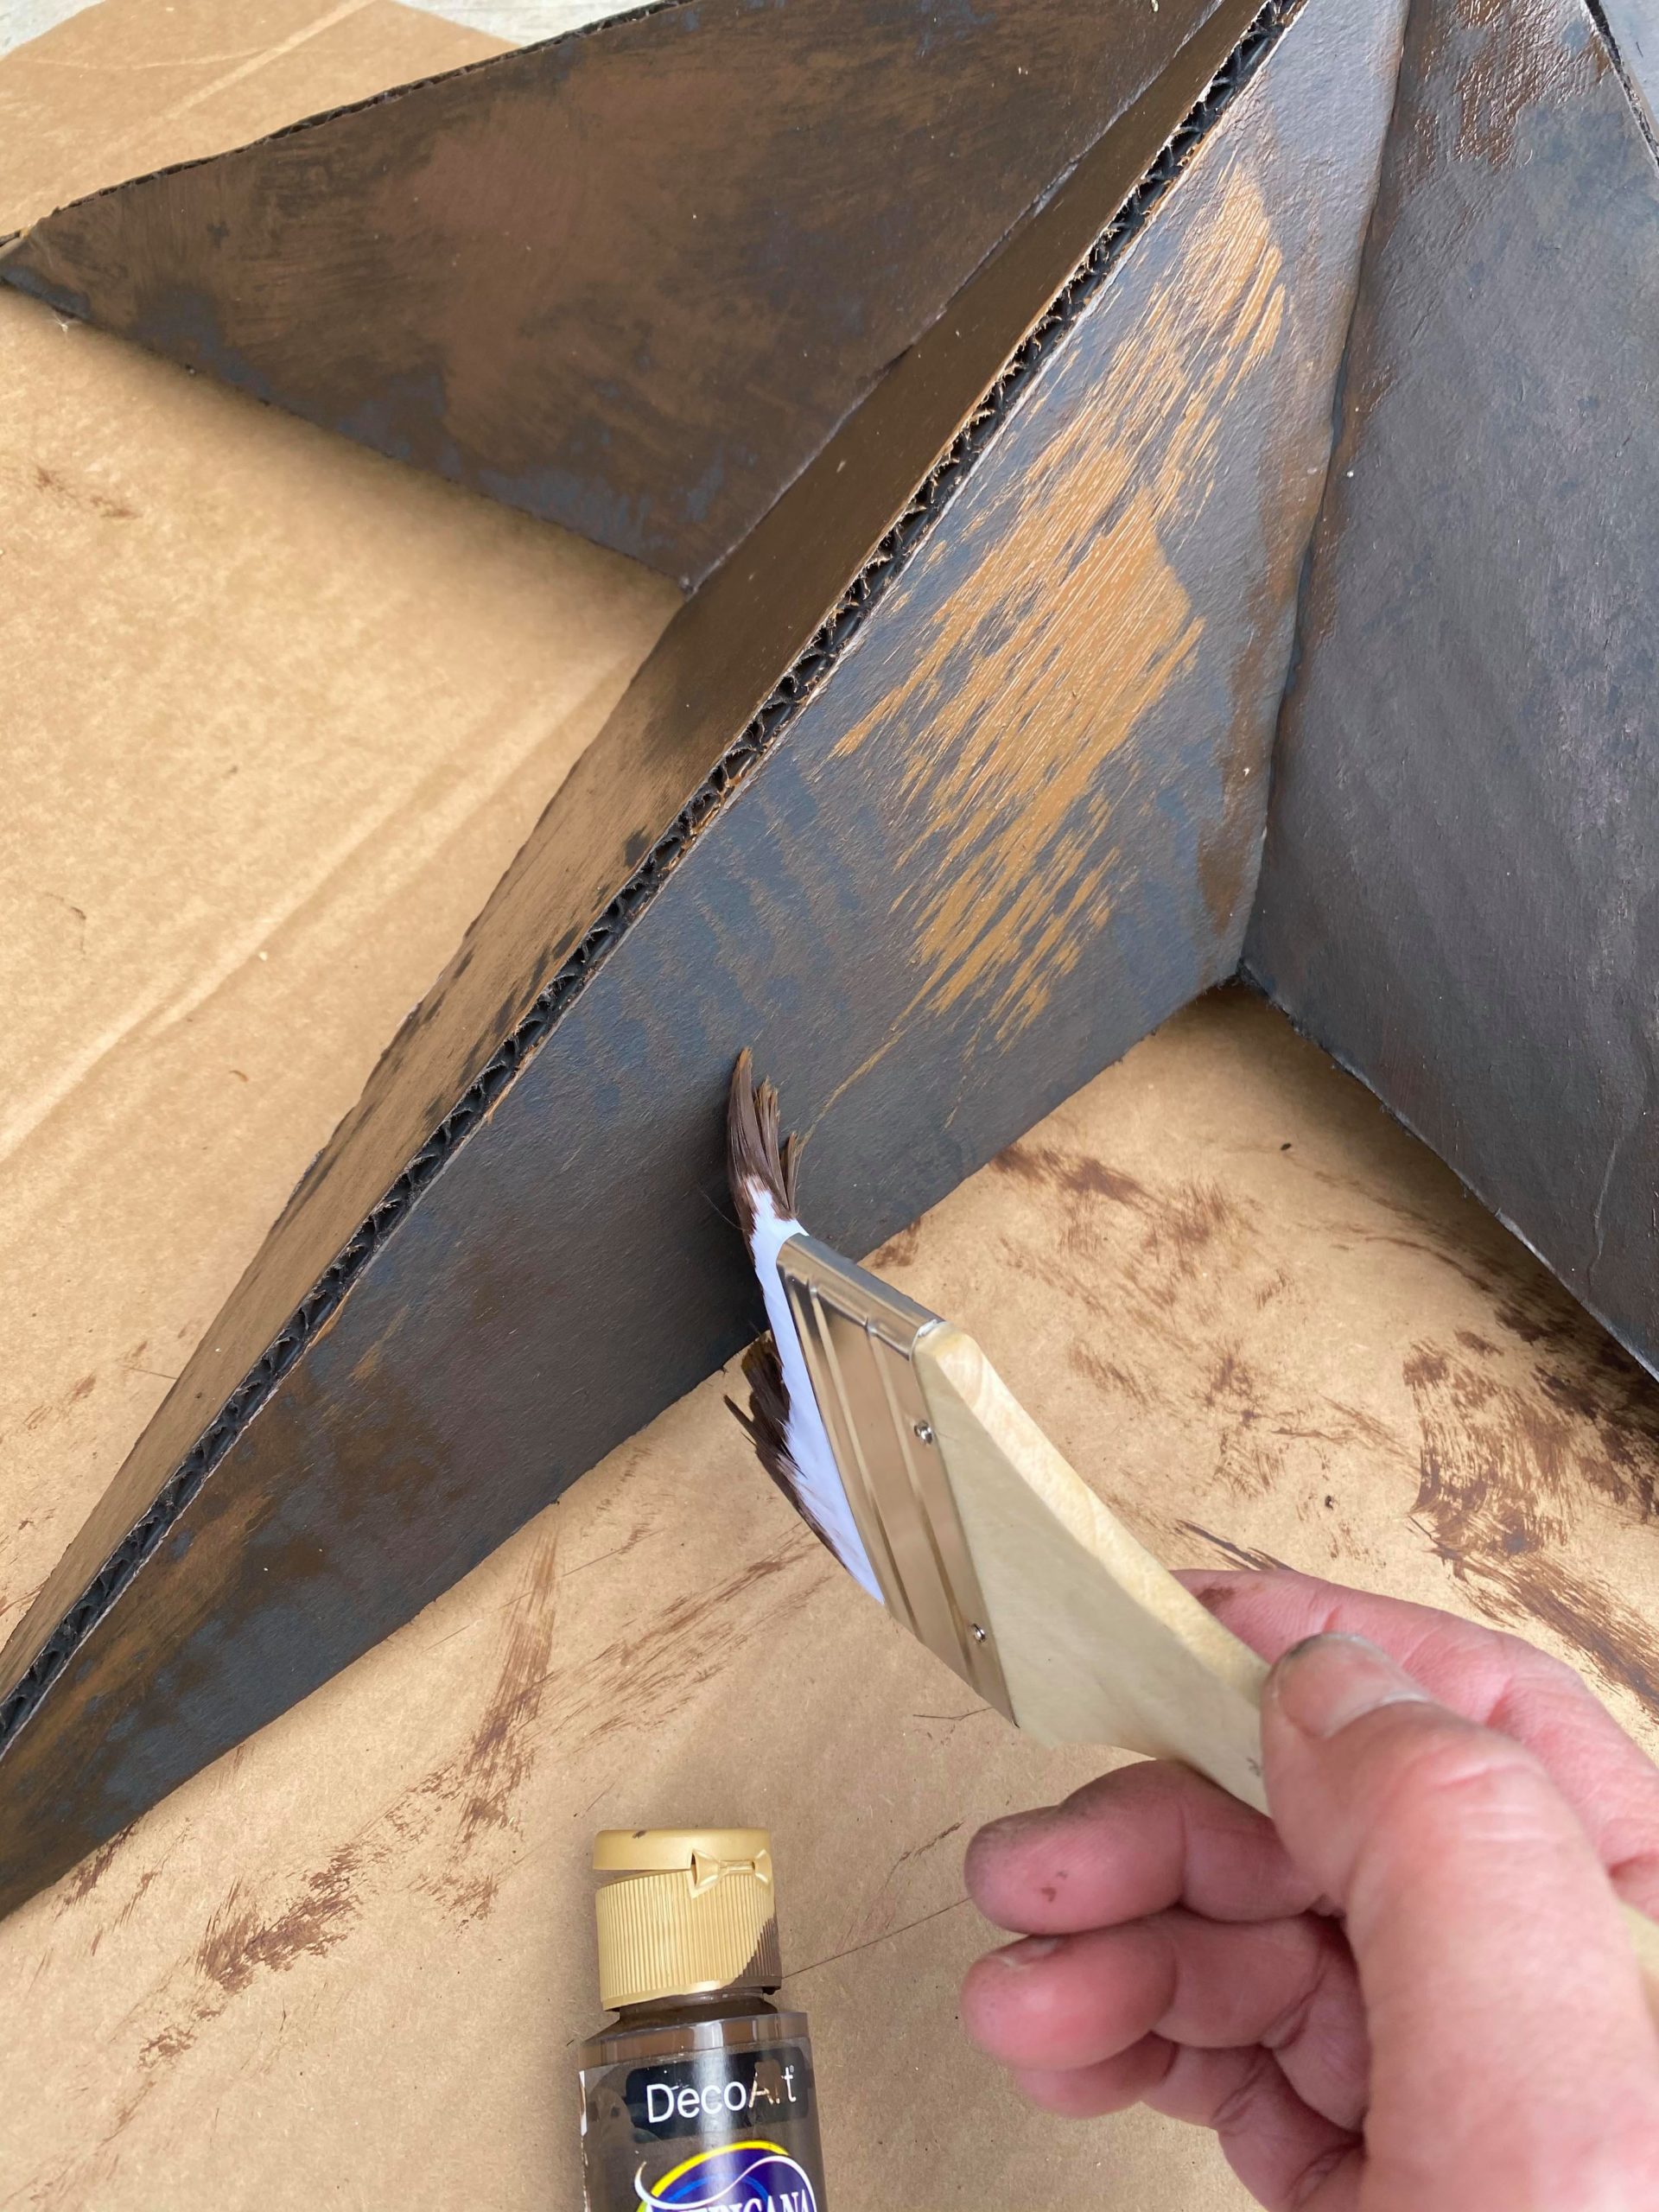
I then sprinkled on a lot of cinnamon to give it a rusty look.

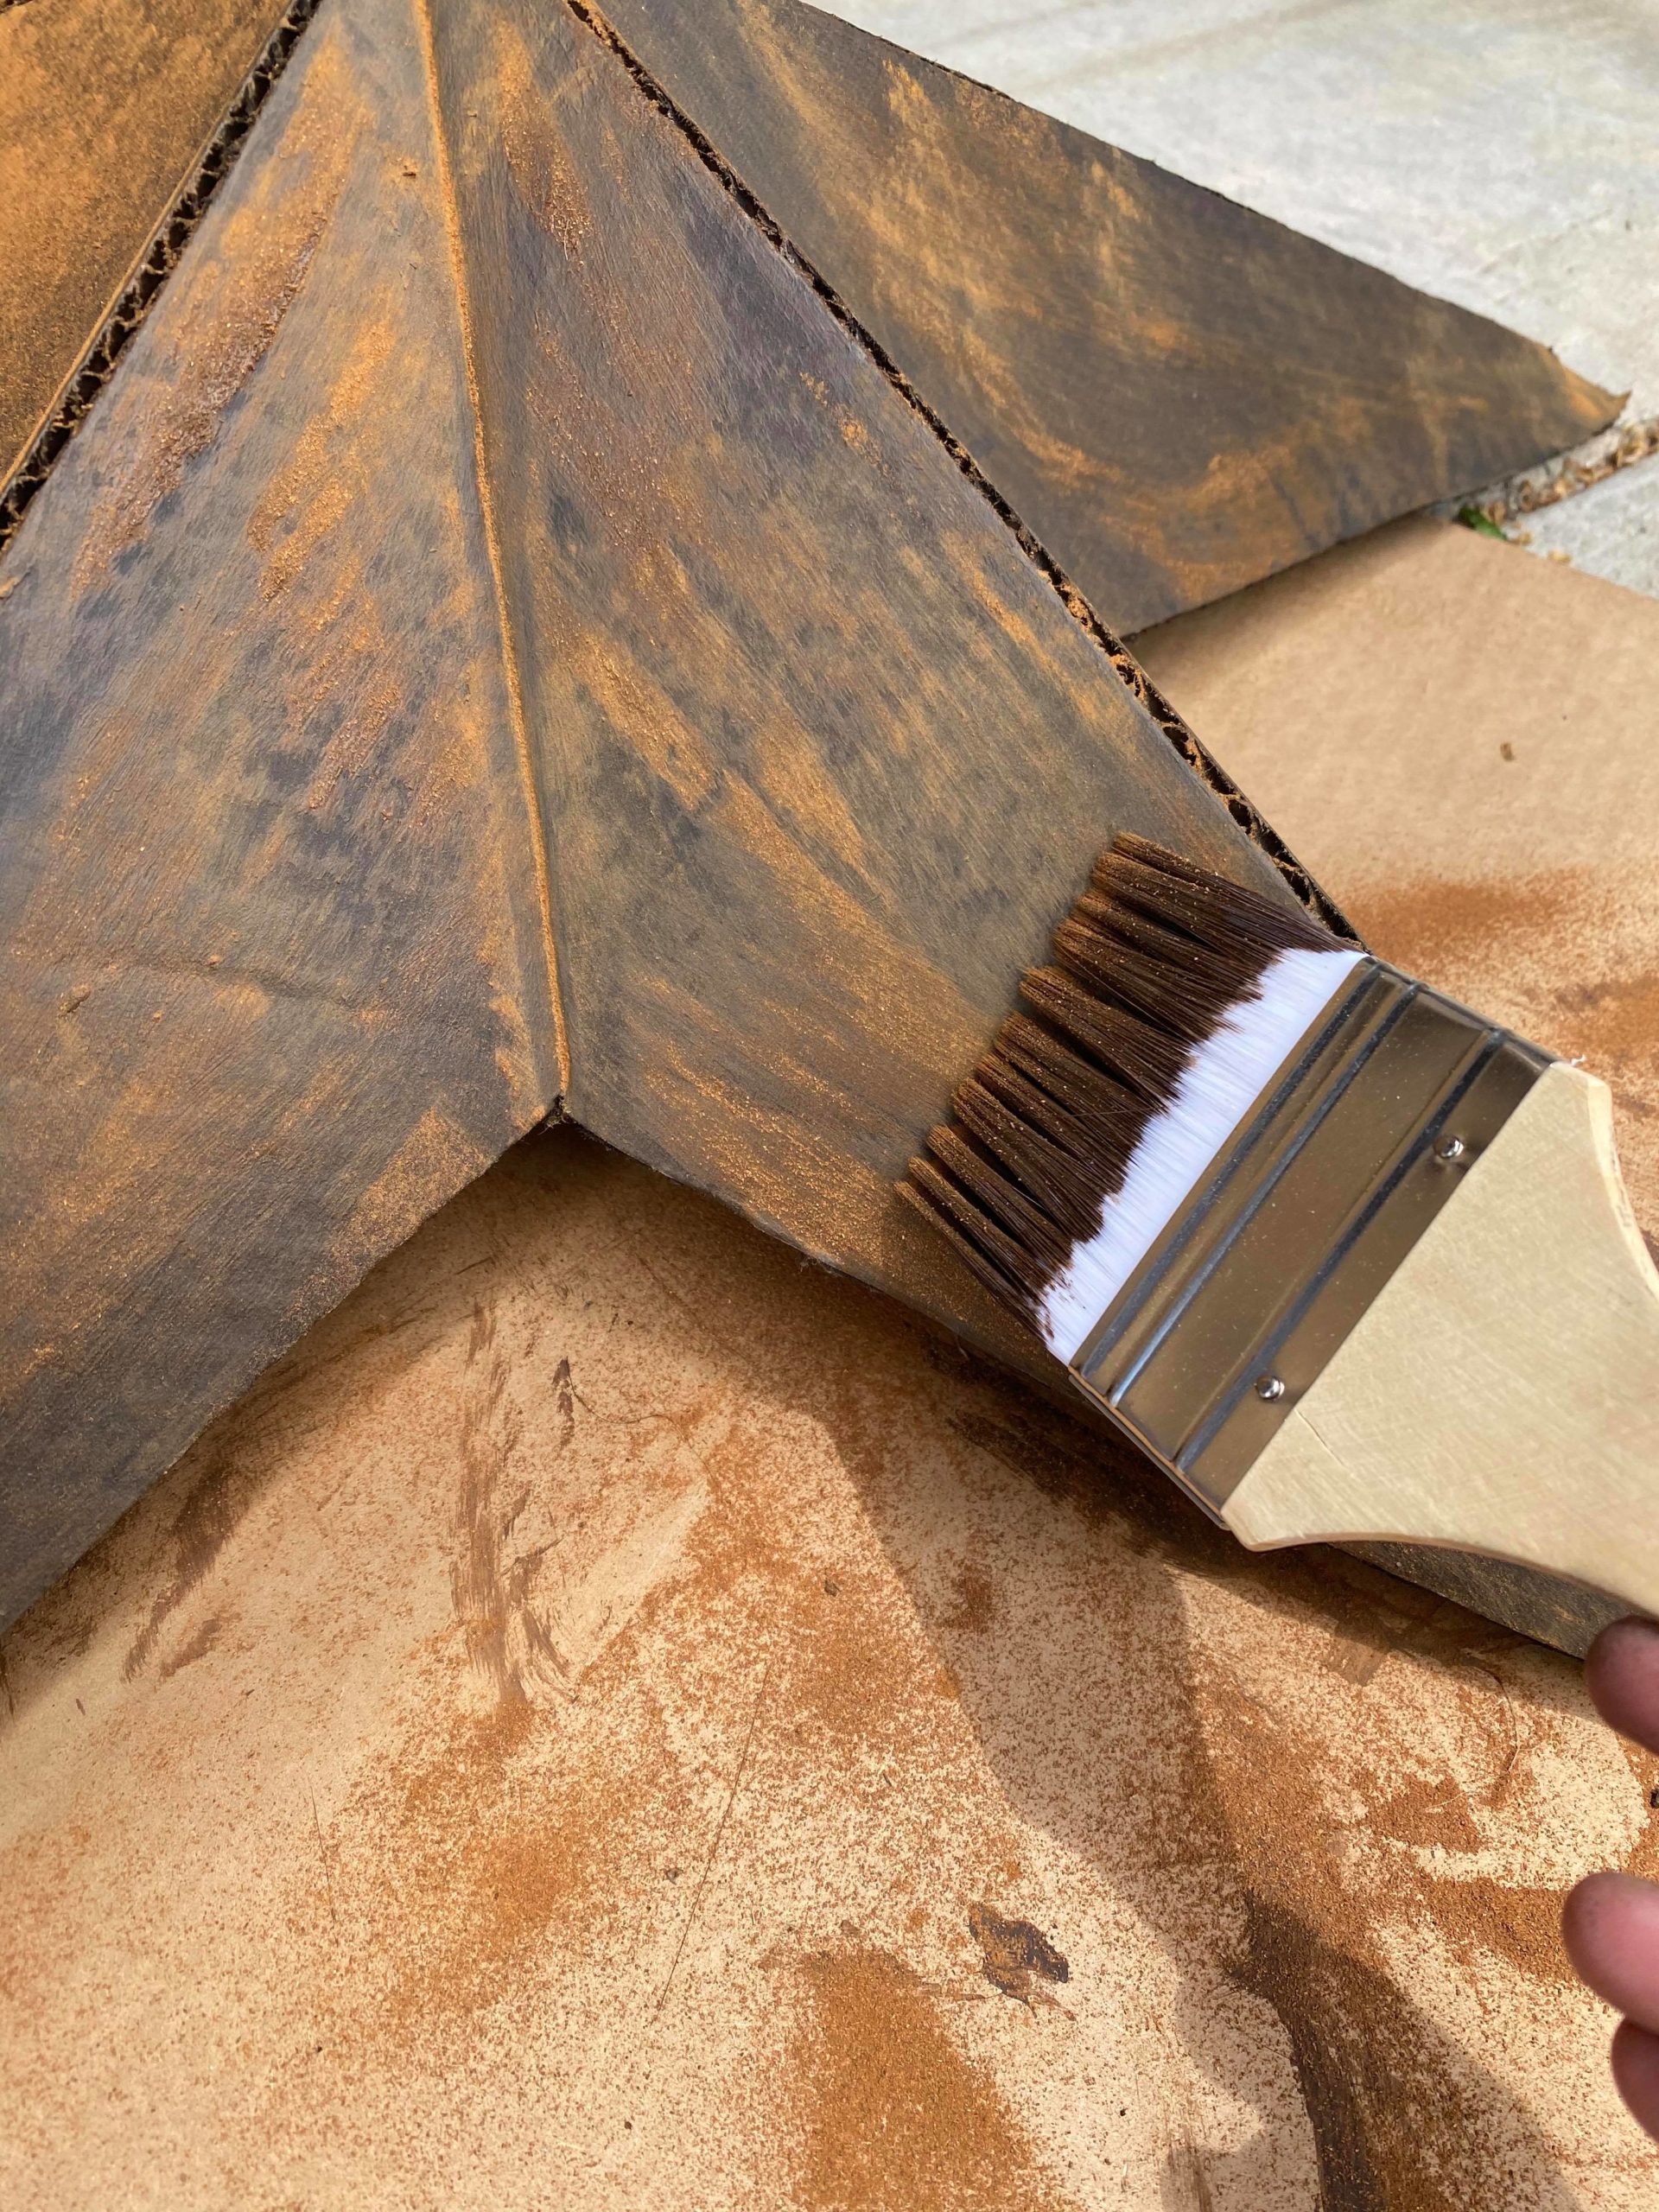
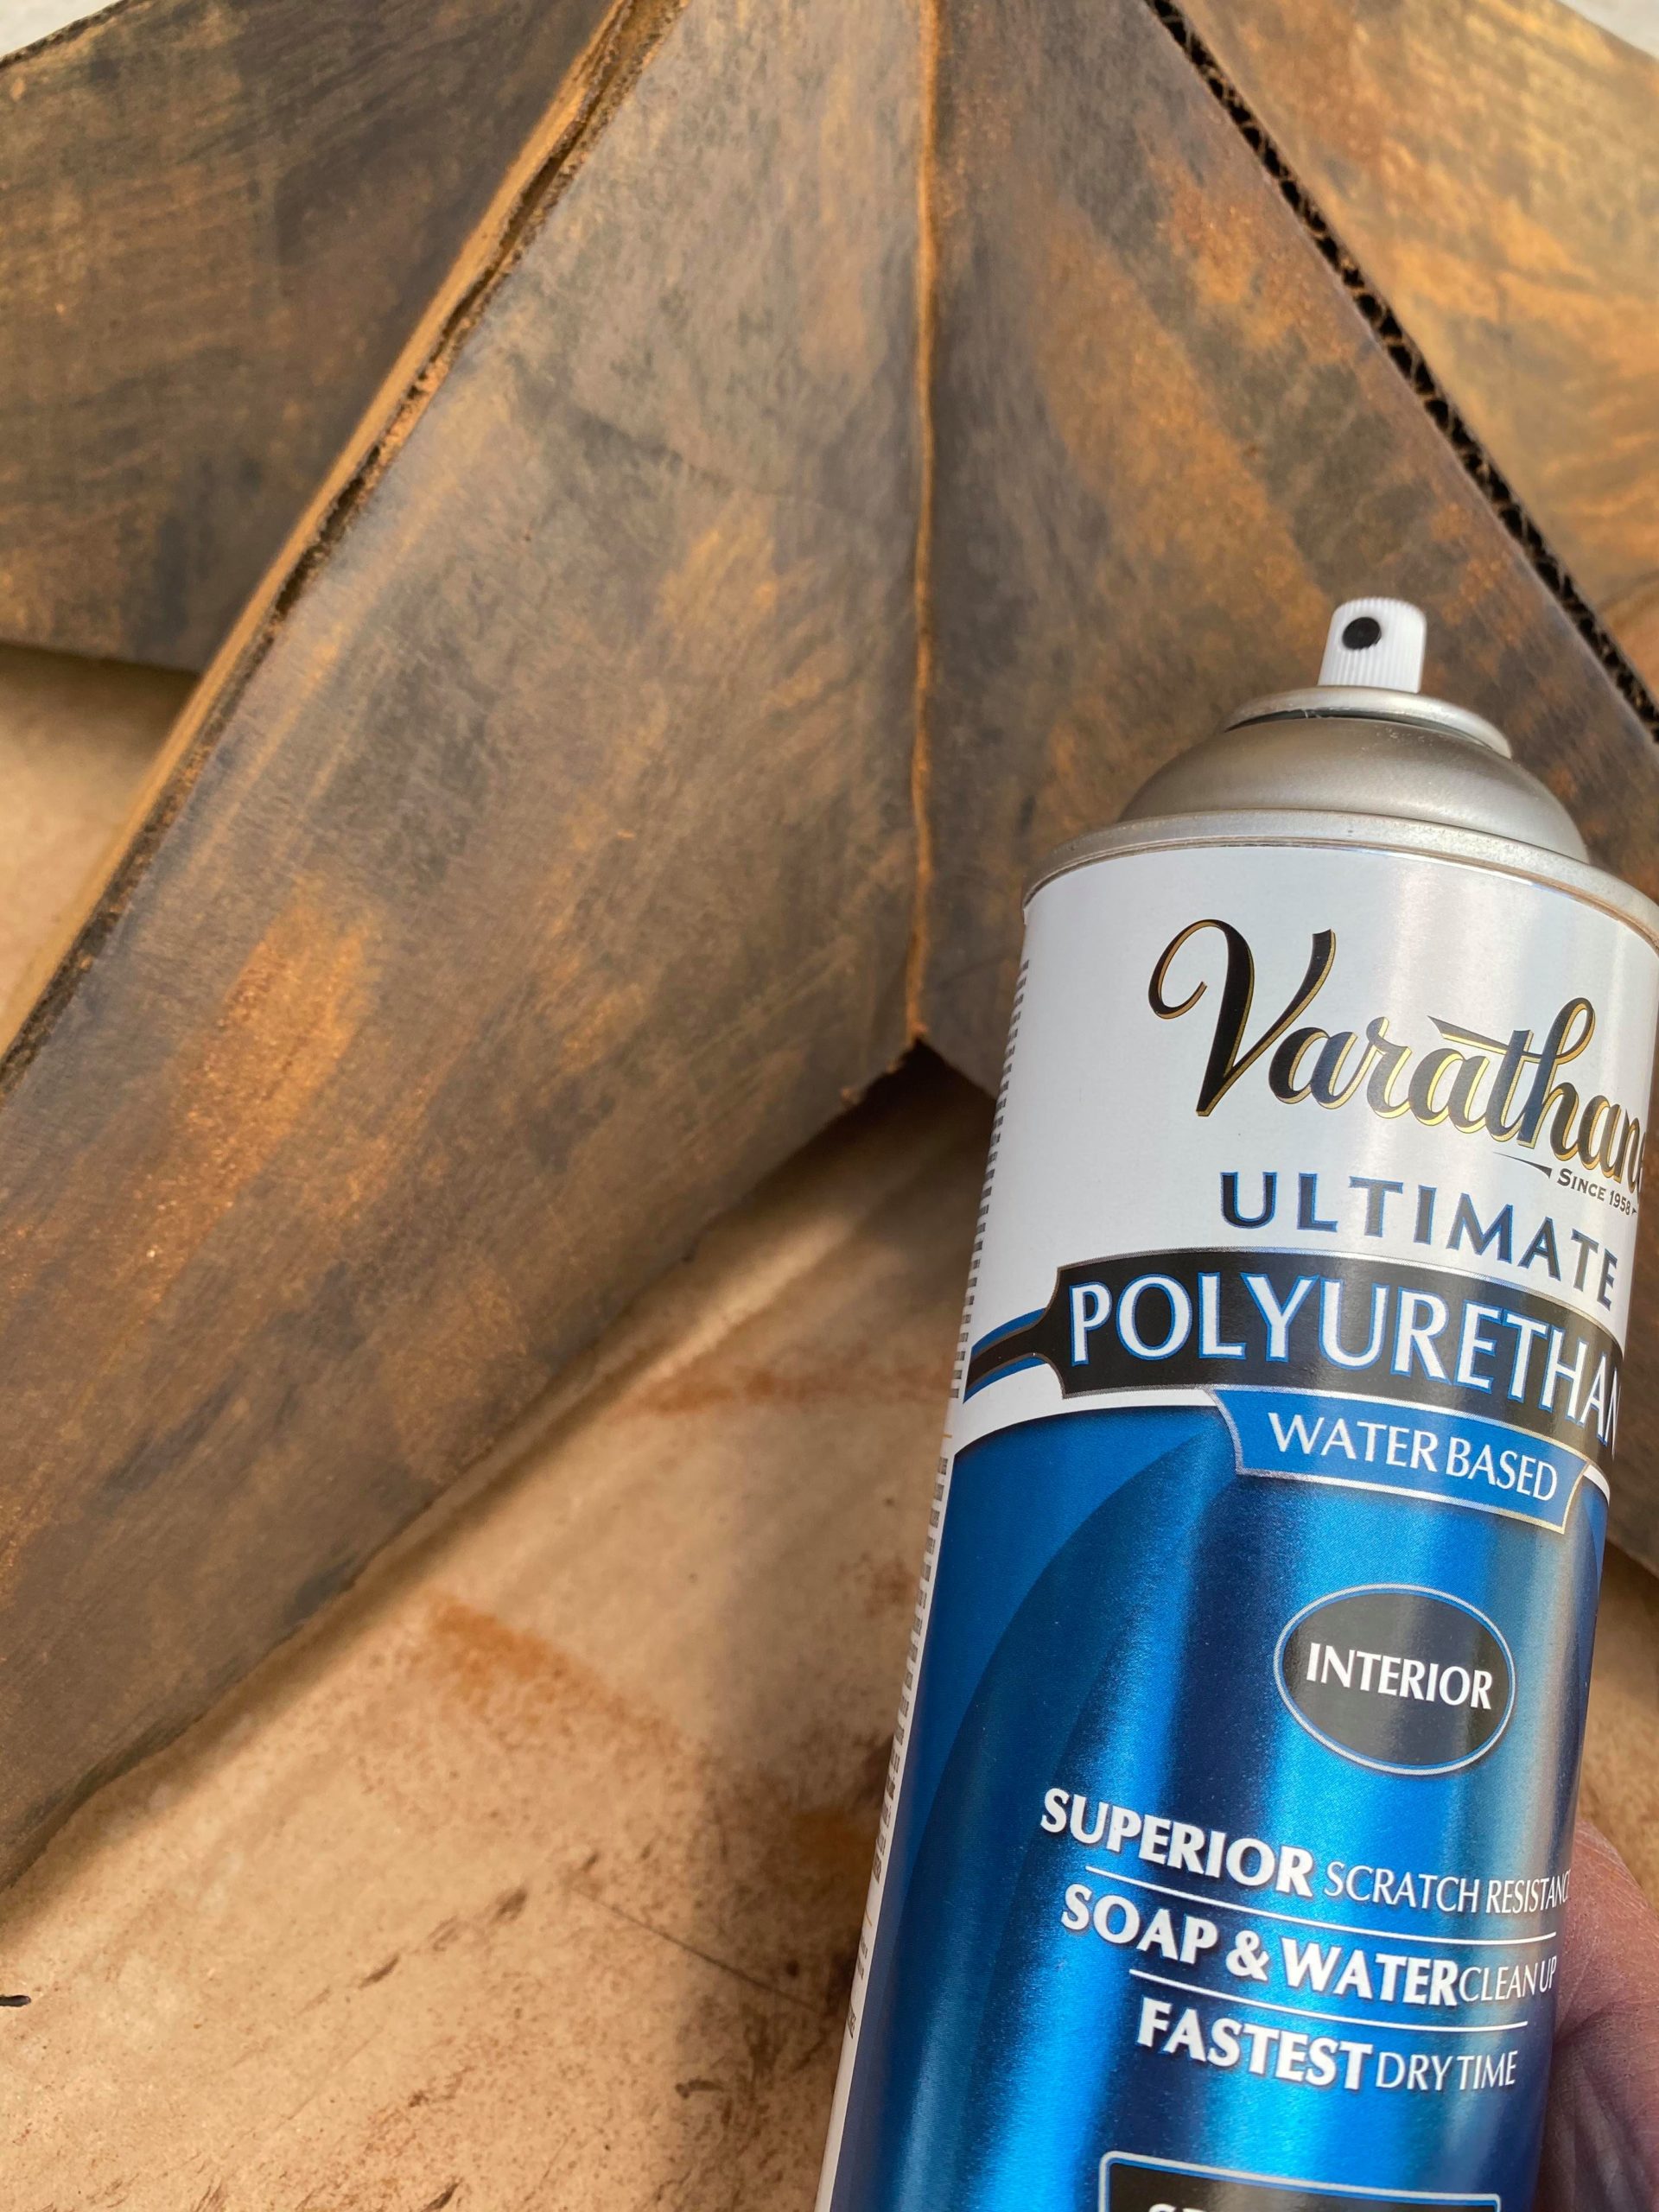
You can use the paint brush to rub in the cinnamon. The last step is to give it a light coat of polyurethane spray.
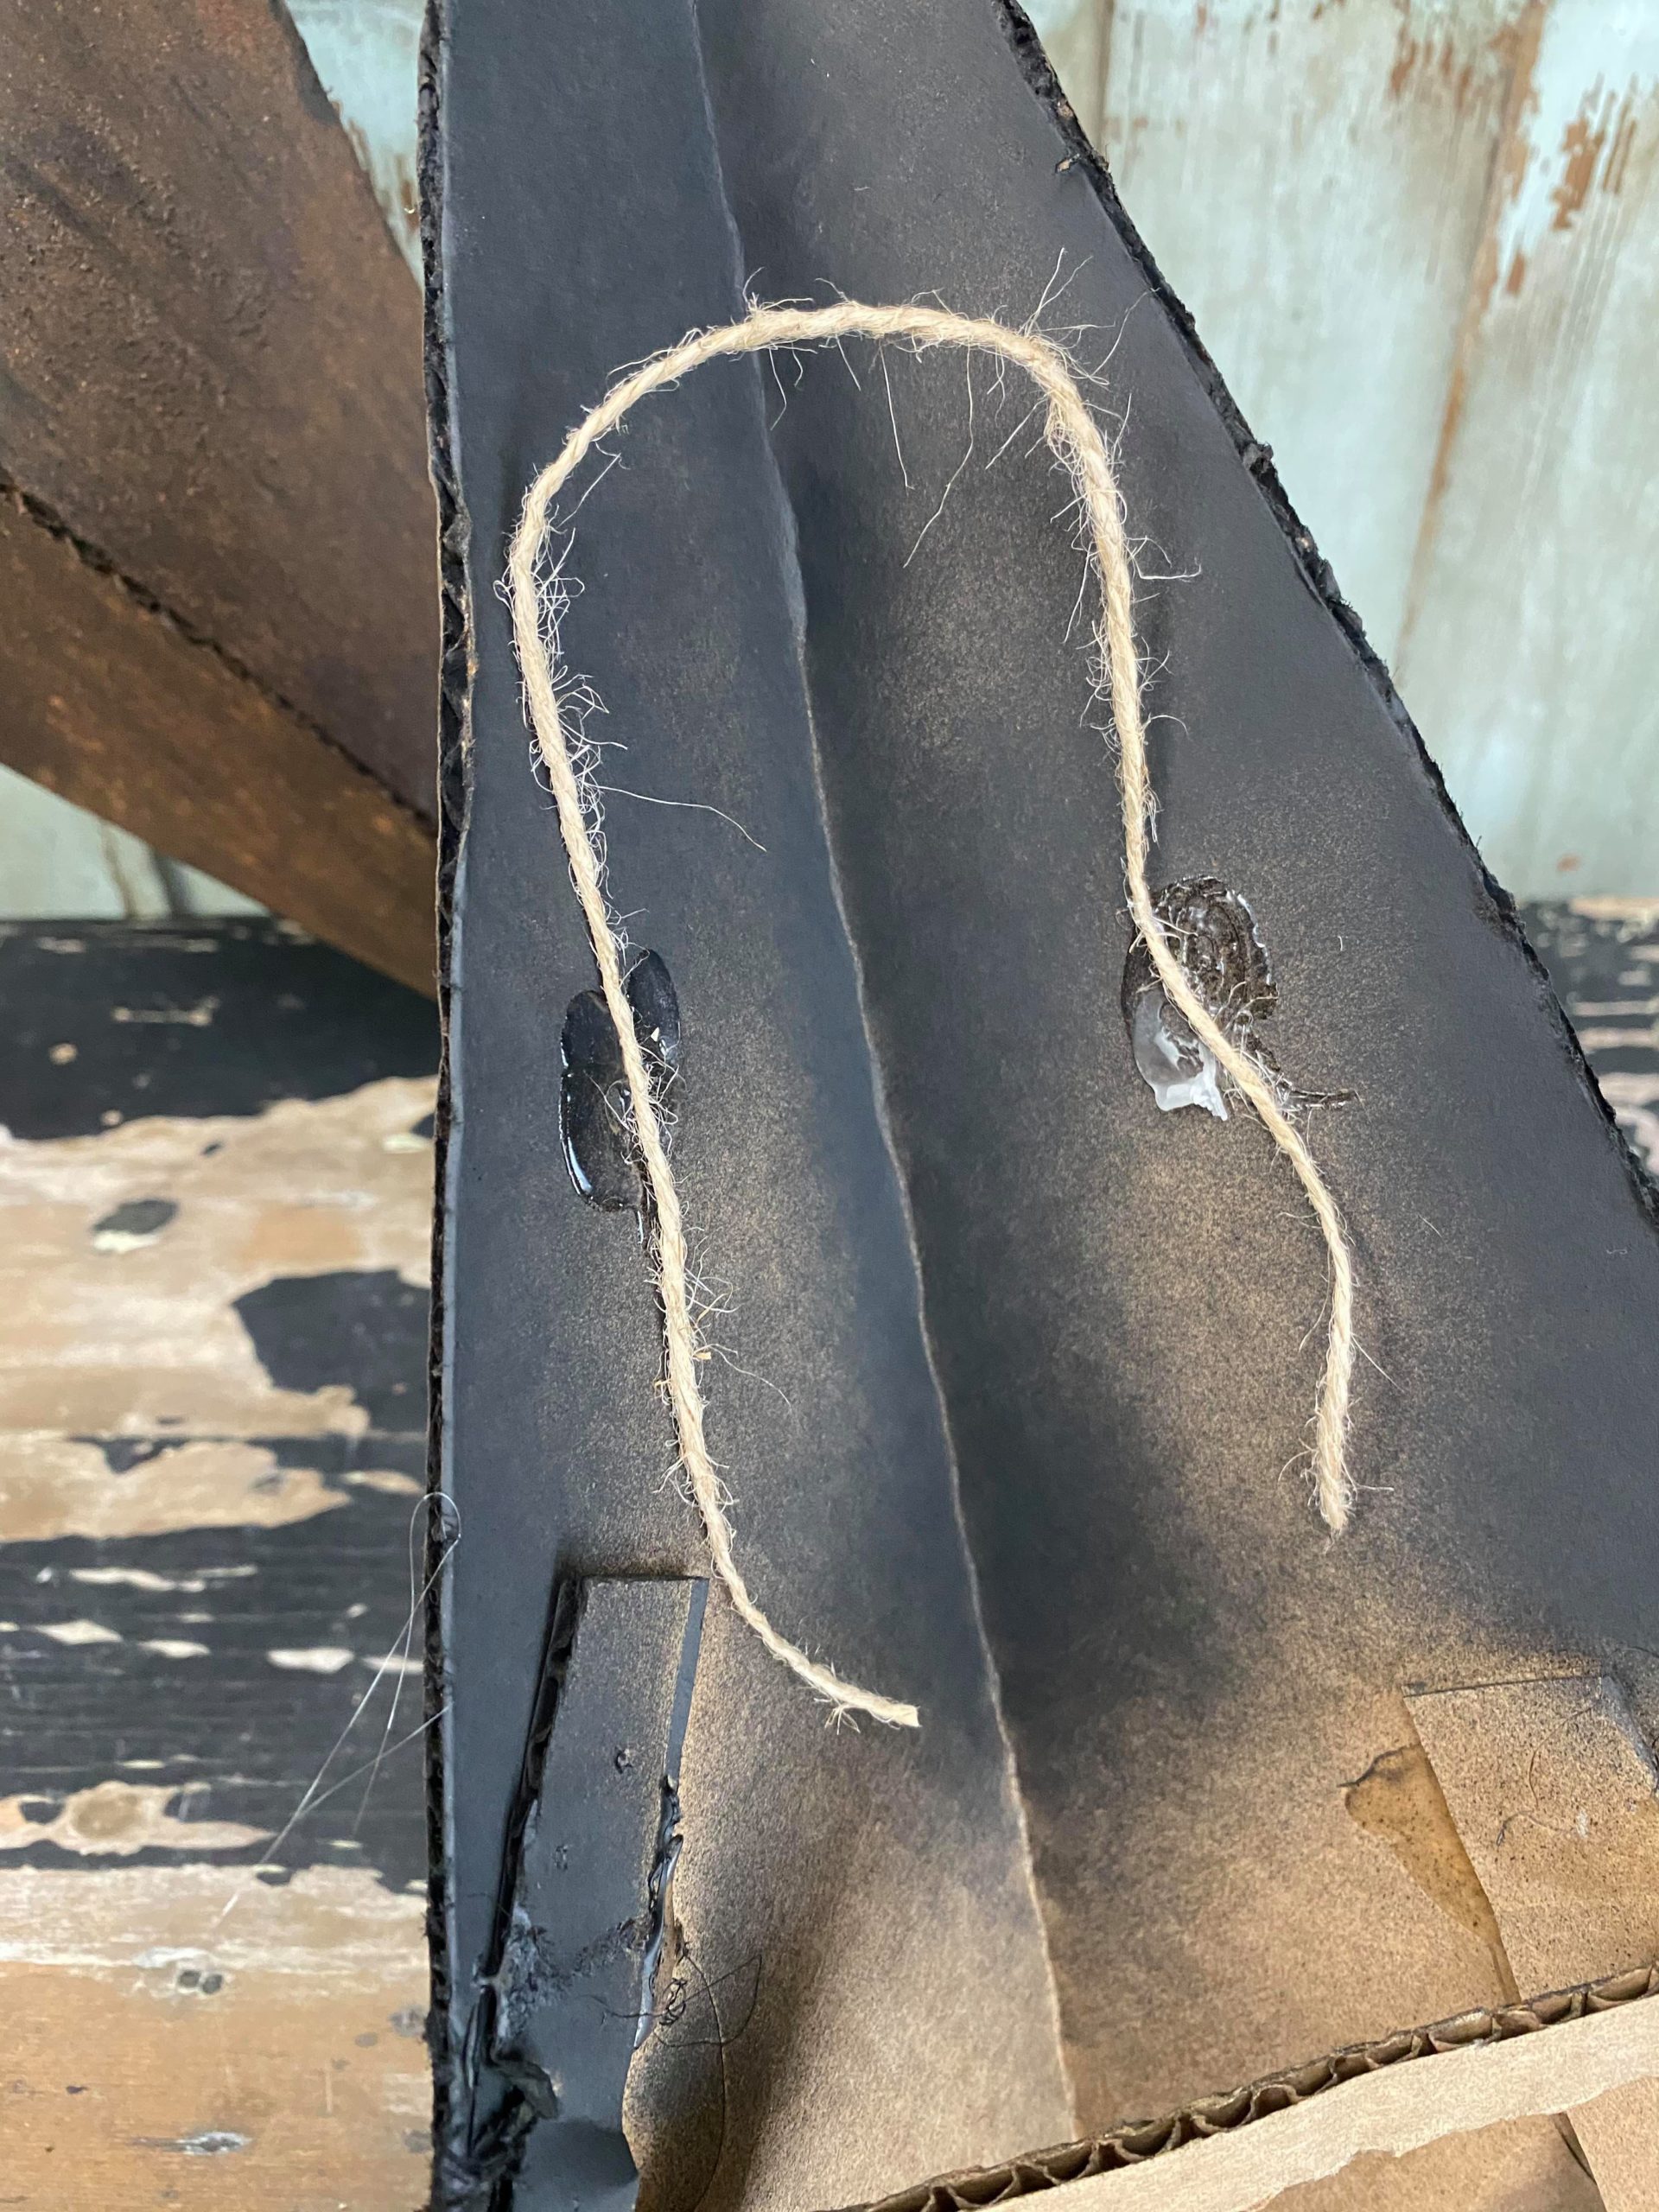
You can got glue a piece of twine onto the back for a hanger.
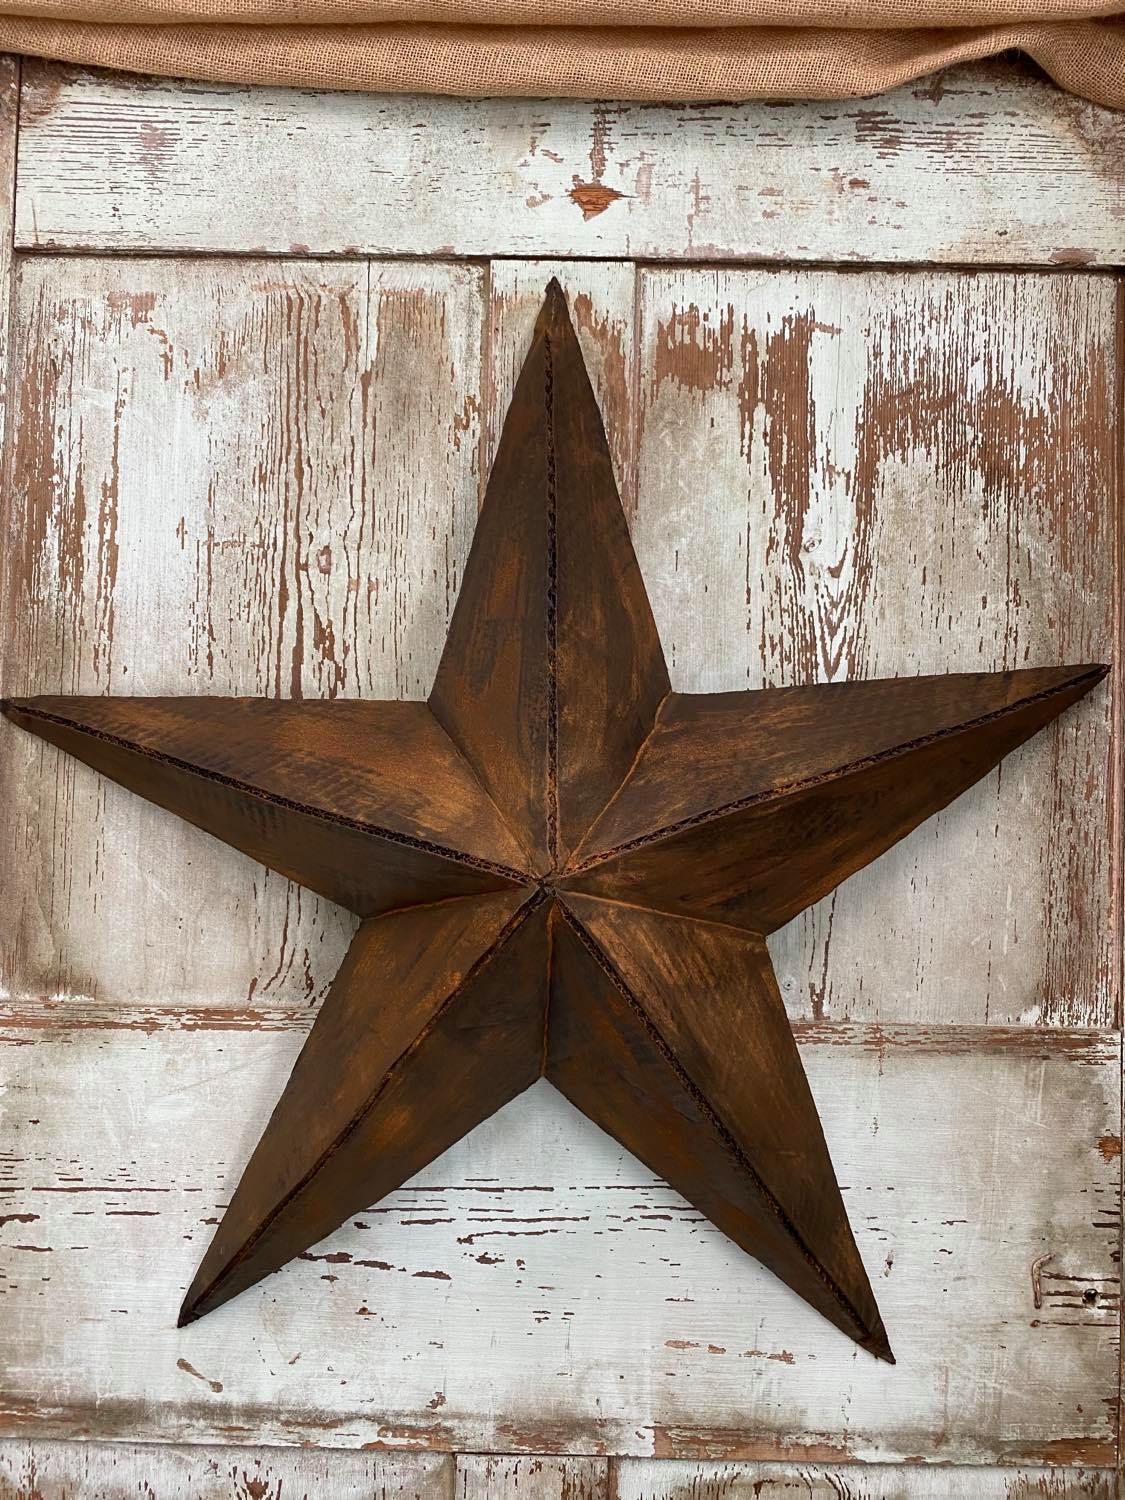
This is so easy to make and you can create it any size or color that you want. I hope you will all get creative and give this a try.
