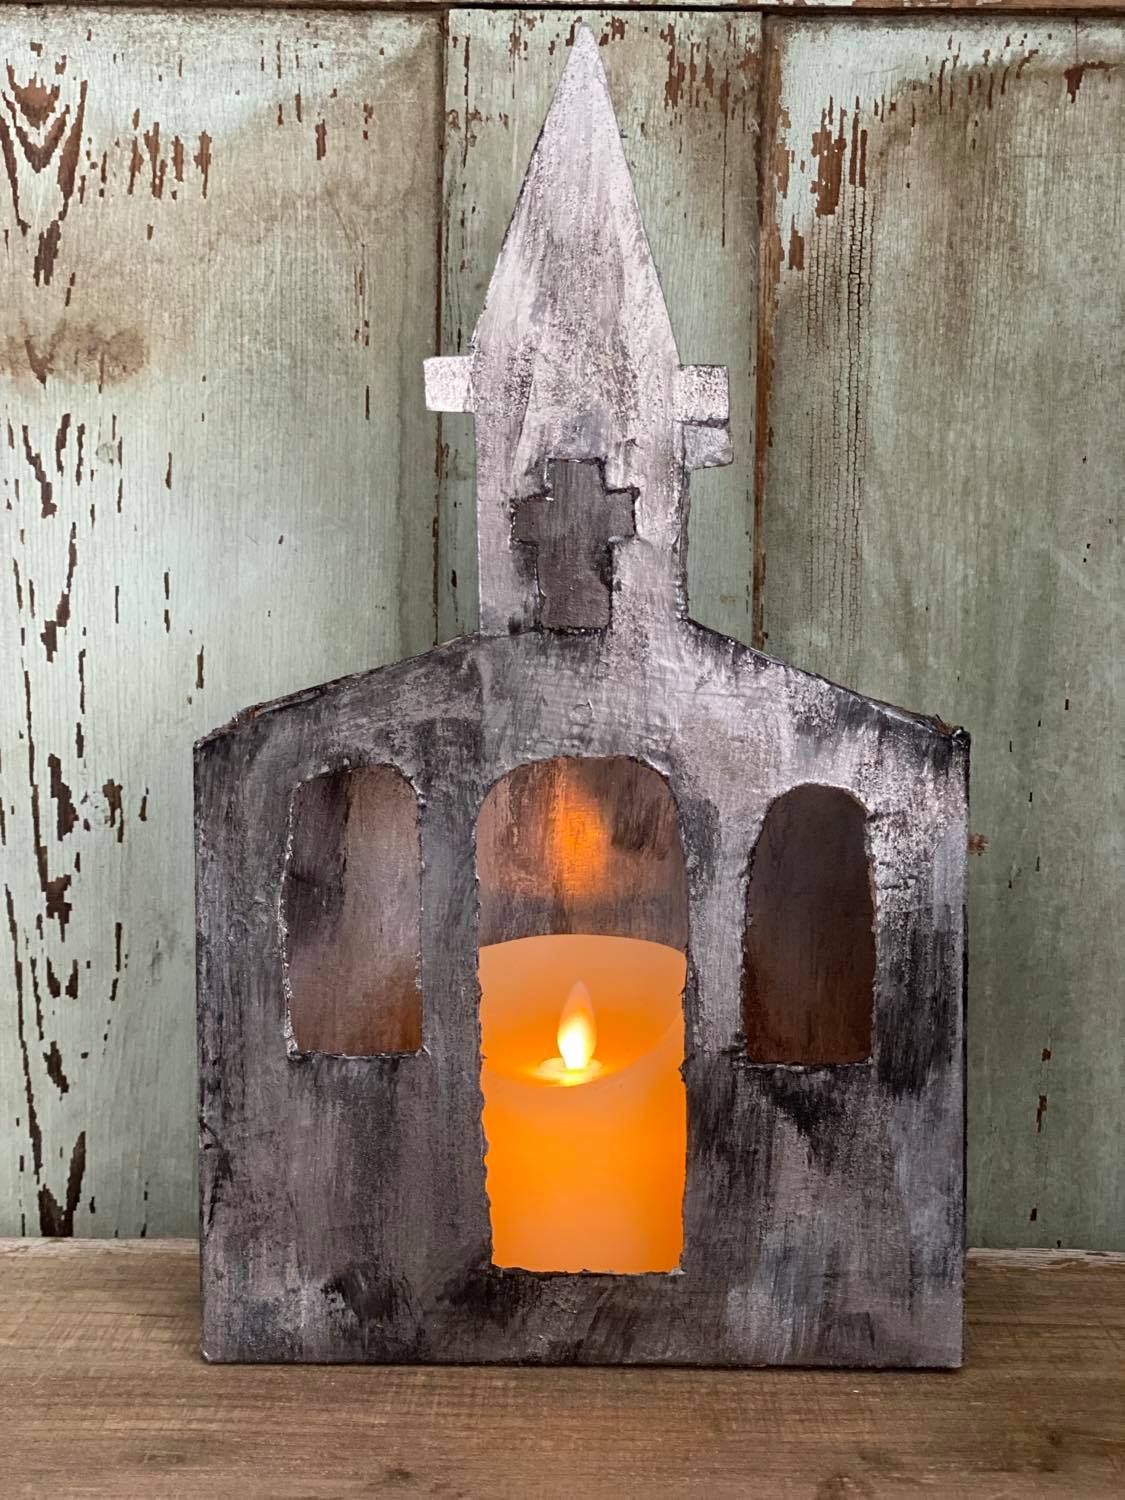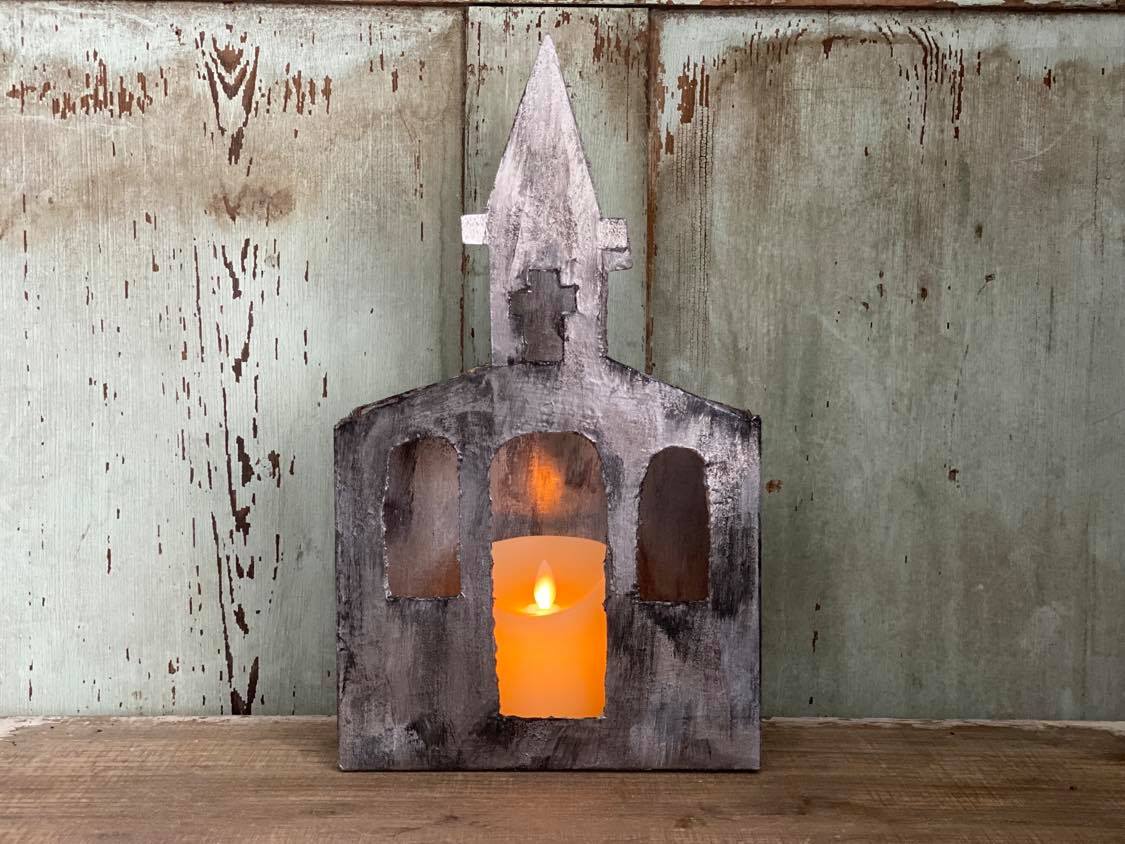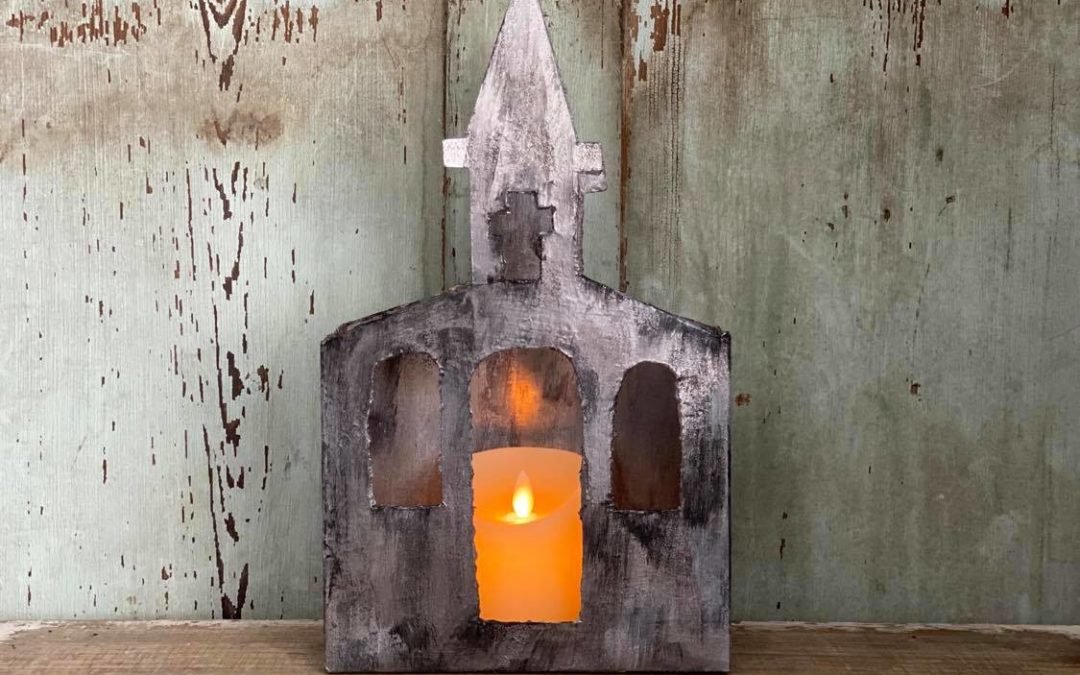
I recently got the Oxidized Tin Designer Finishes by DecoArt and I thought it would work amazing for creating a lantern. We are always using everyday items for crafting here at The Shabby Tree and I just knew we could use a cereal box to create a lantern. I want this lantern to be fun and unique so we will transform the cereal box into a church lantern.

The supplies I will be using are:
1. Large cereal box
2. Box cutter
3. Scissors
4. Marker
5. Ruler stick
6. Paint brush
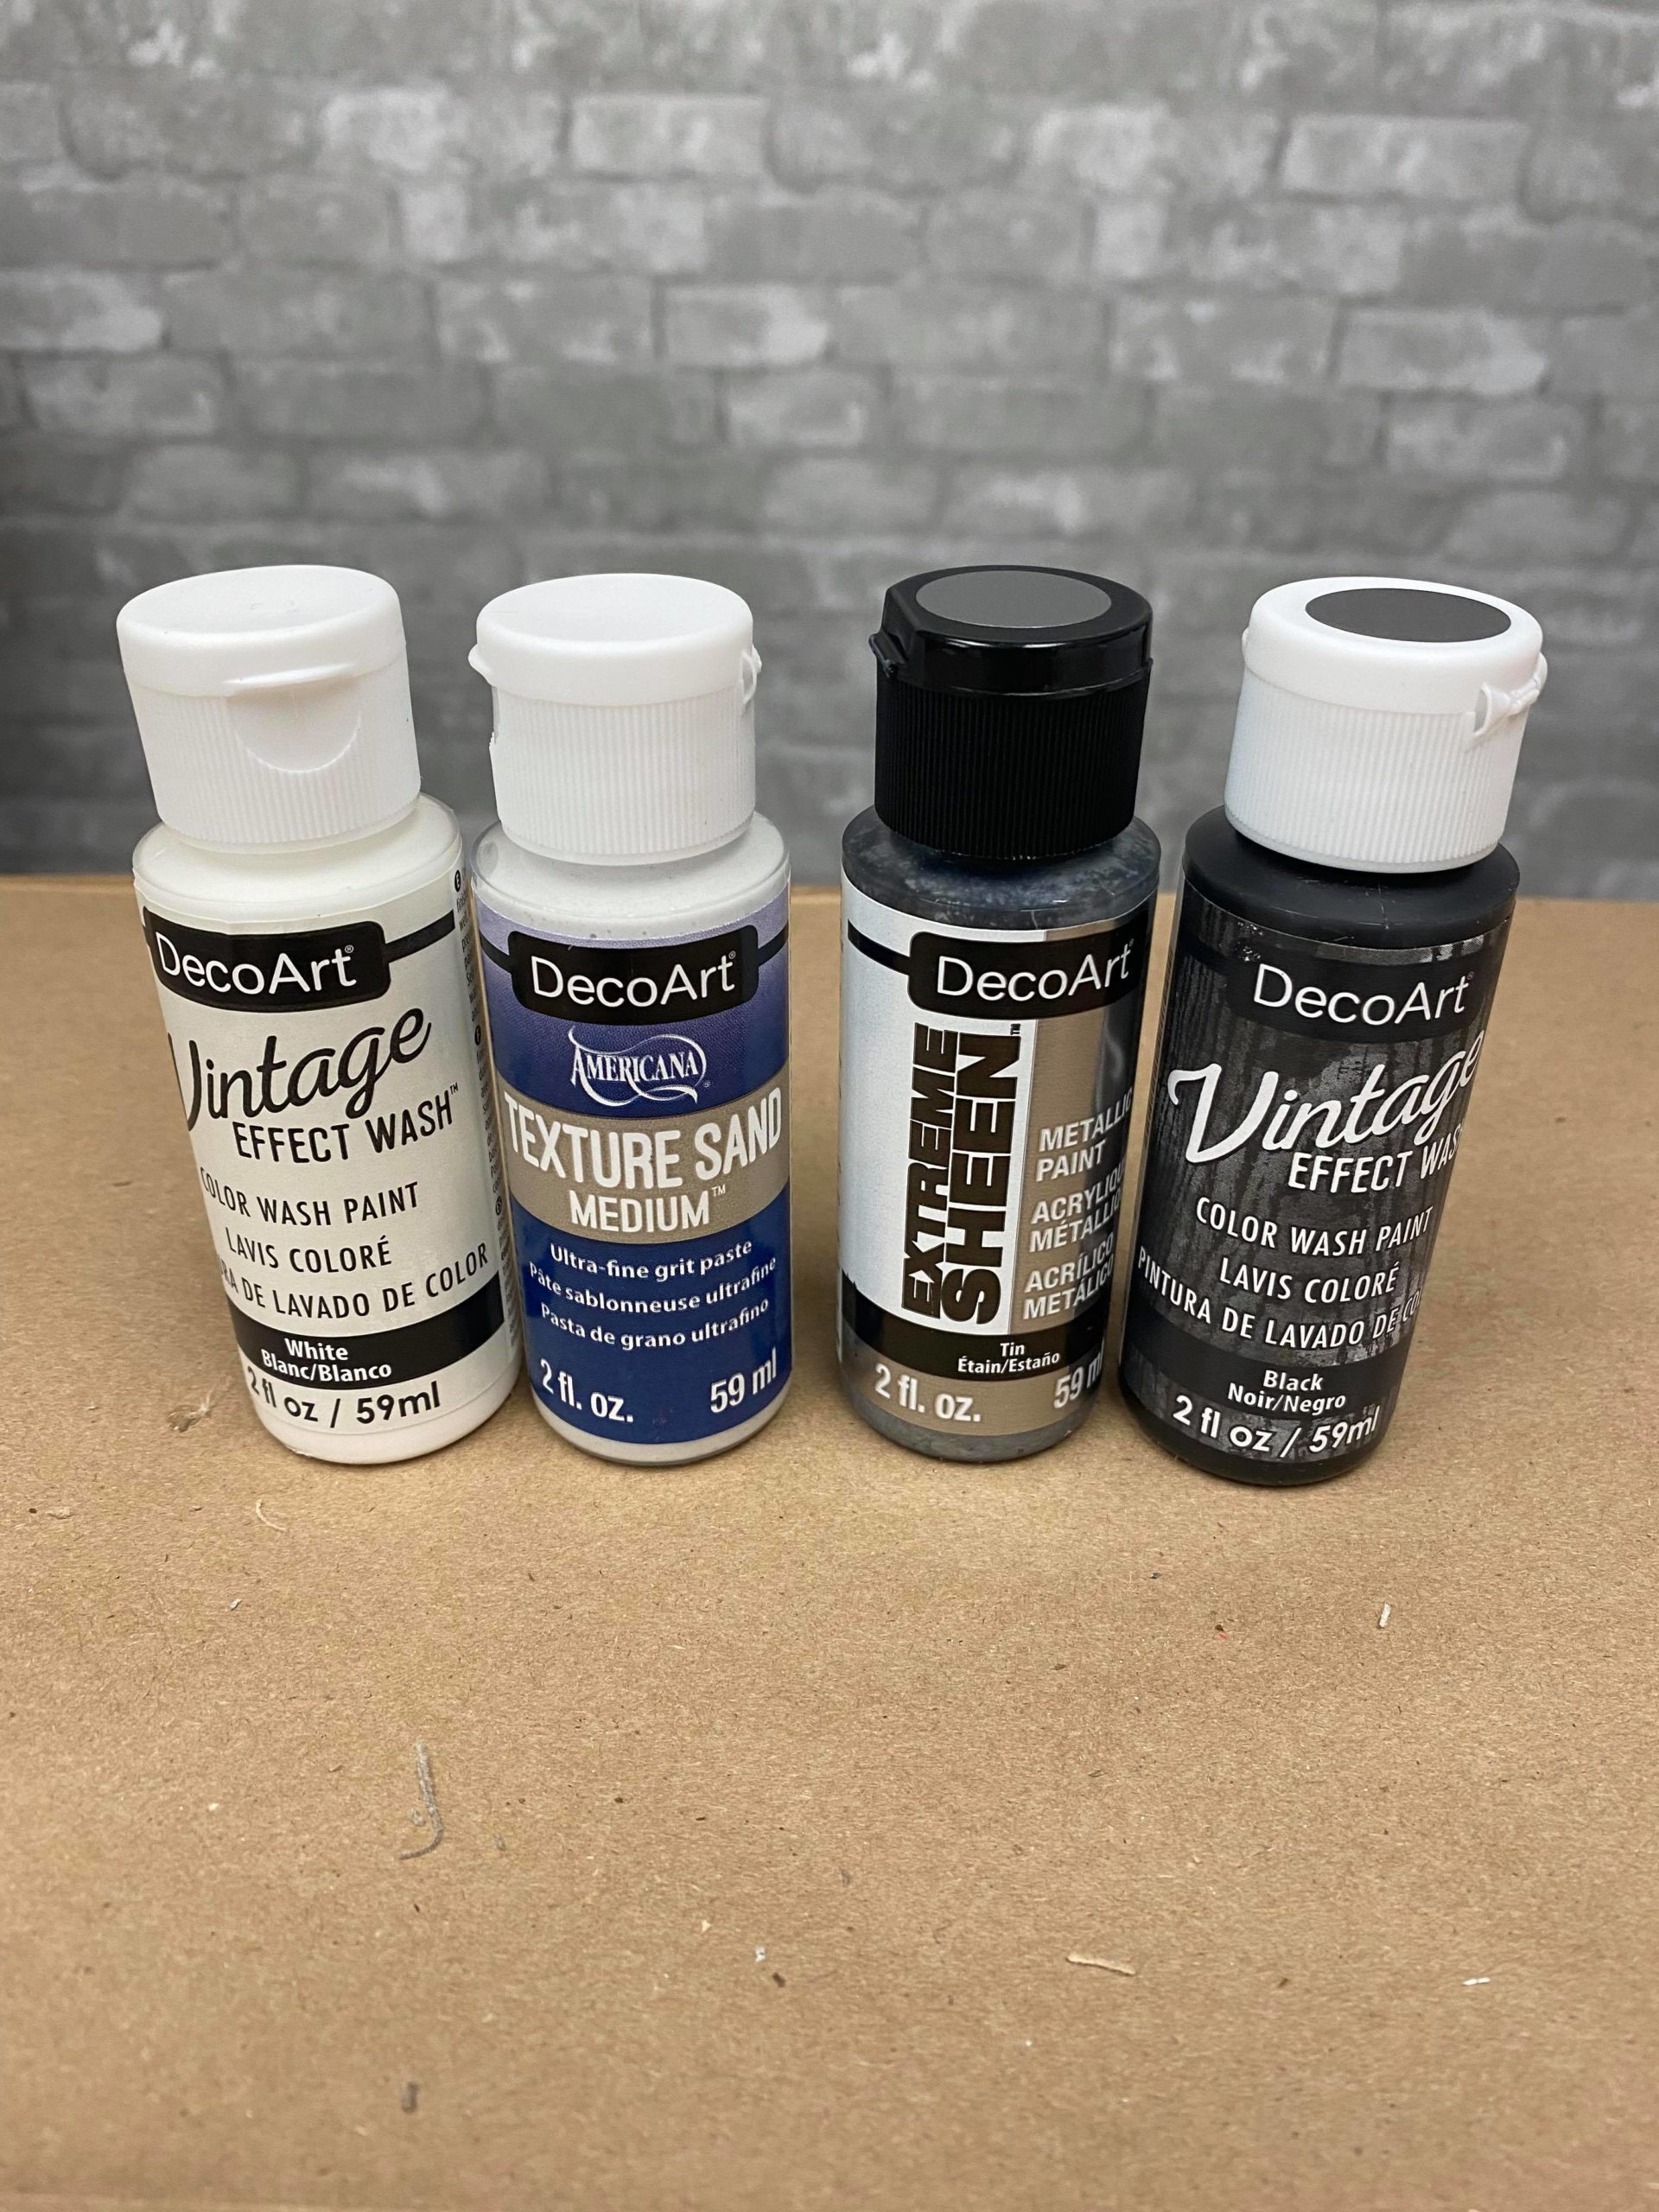
7. Oxidized Tin Designer Finishes by DecoArt

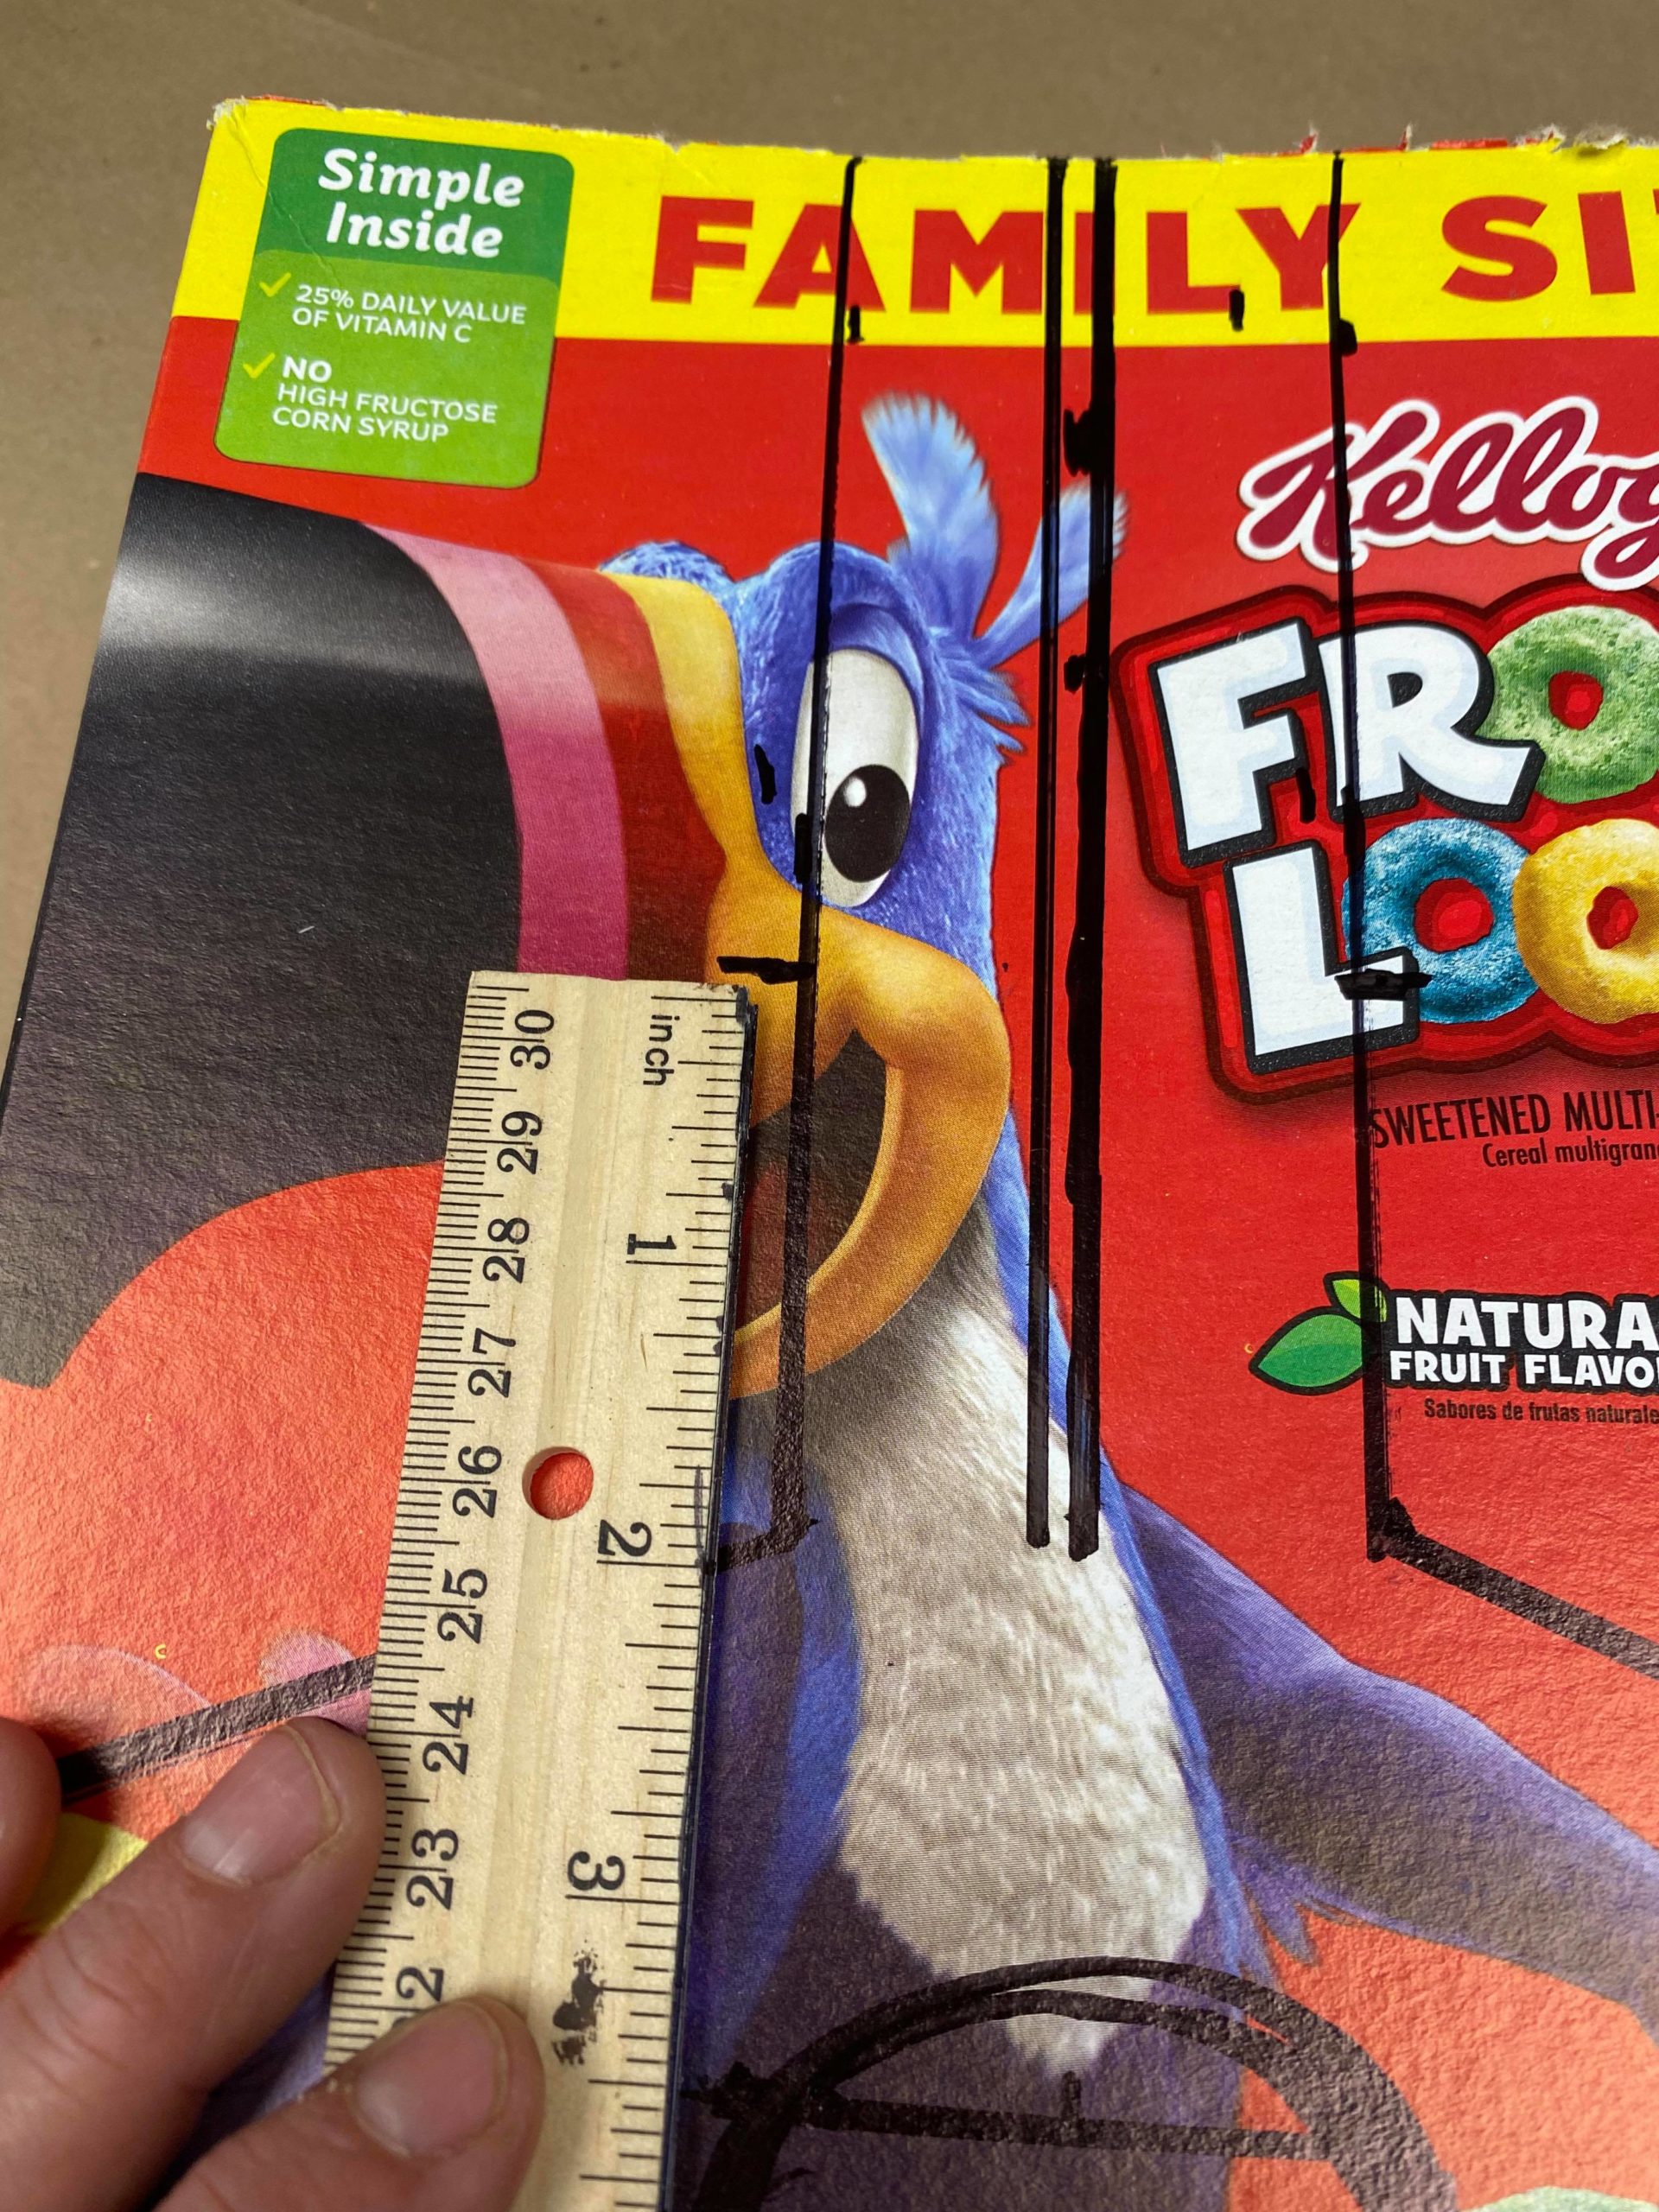
The first step is to cut out your church. You will want to cut off the top flaps on the box. The next step is to draw a line down the center of your box.
I drew a line down the center of the box on both sides of the box. You will then draw two more lines one inch over from each side of the center line.
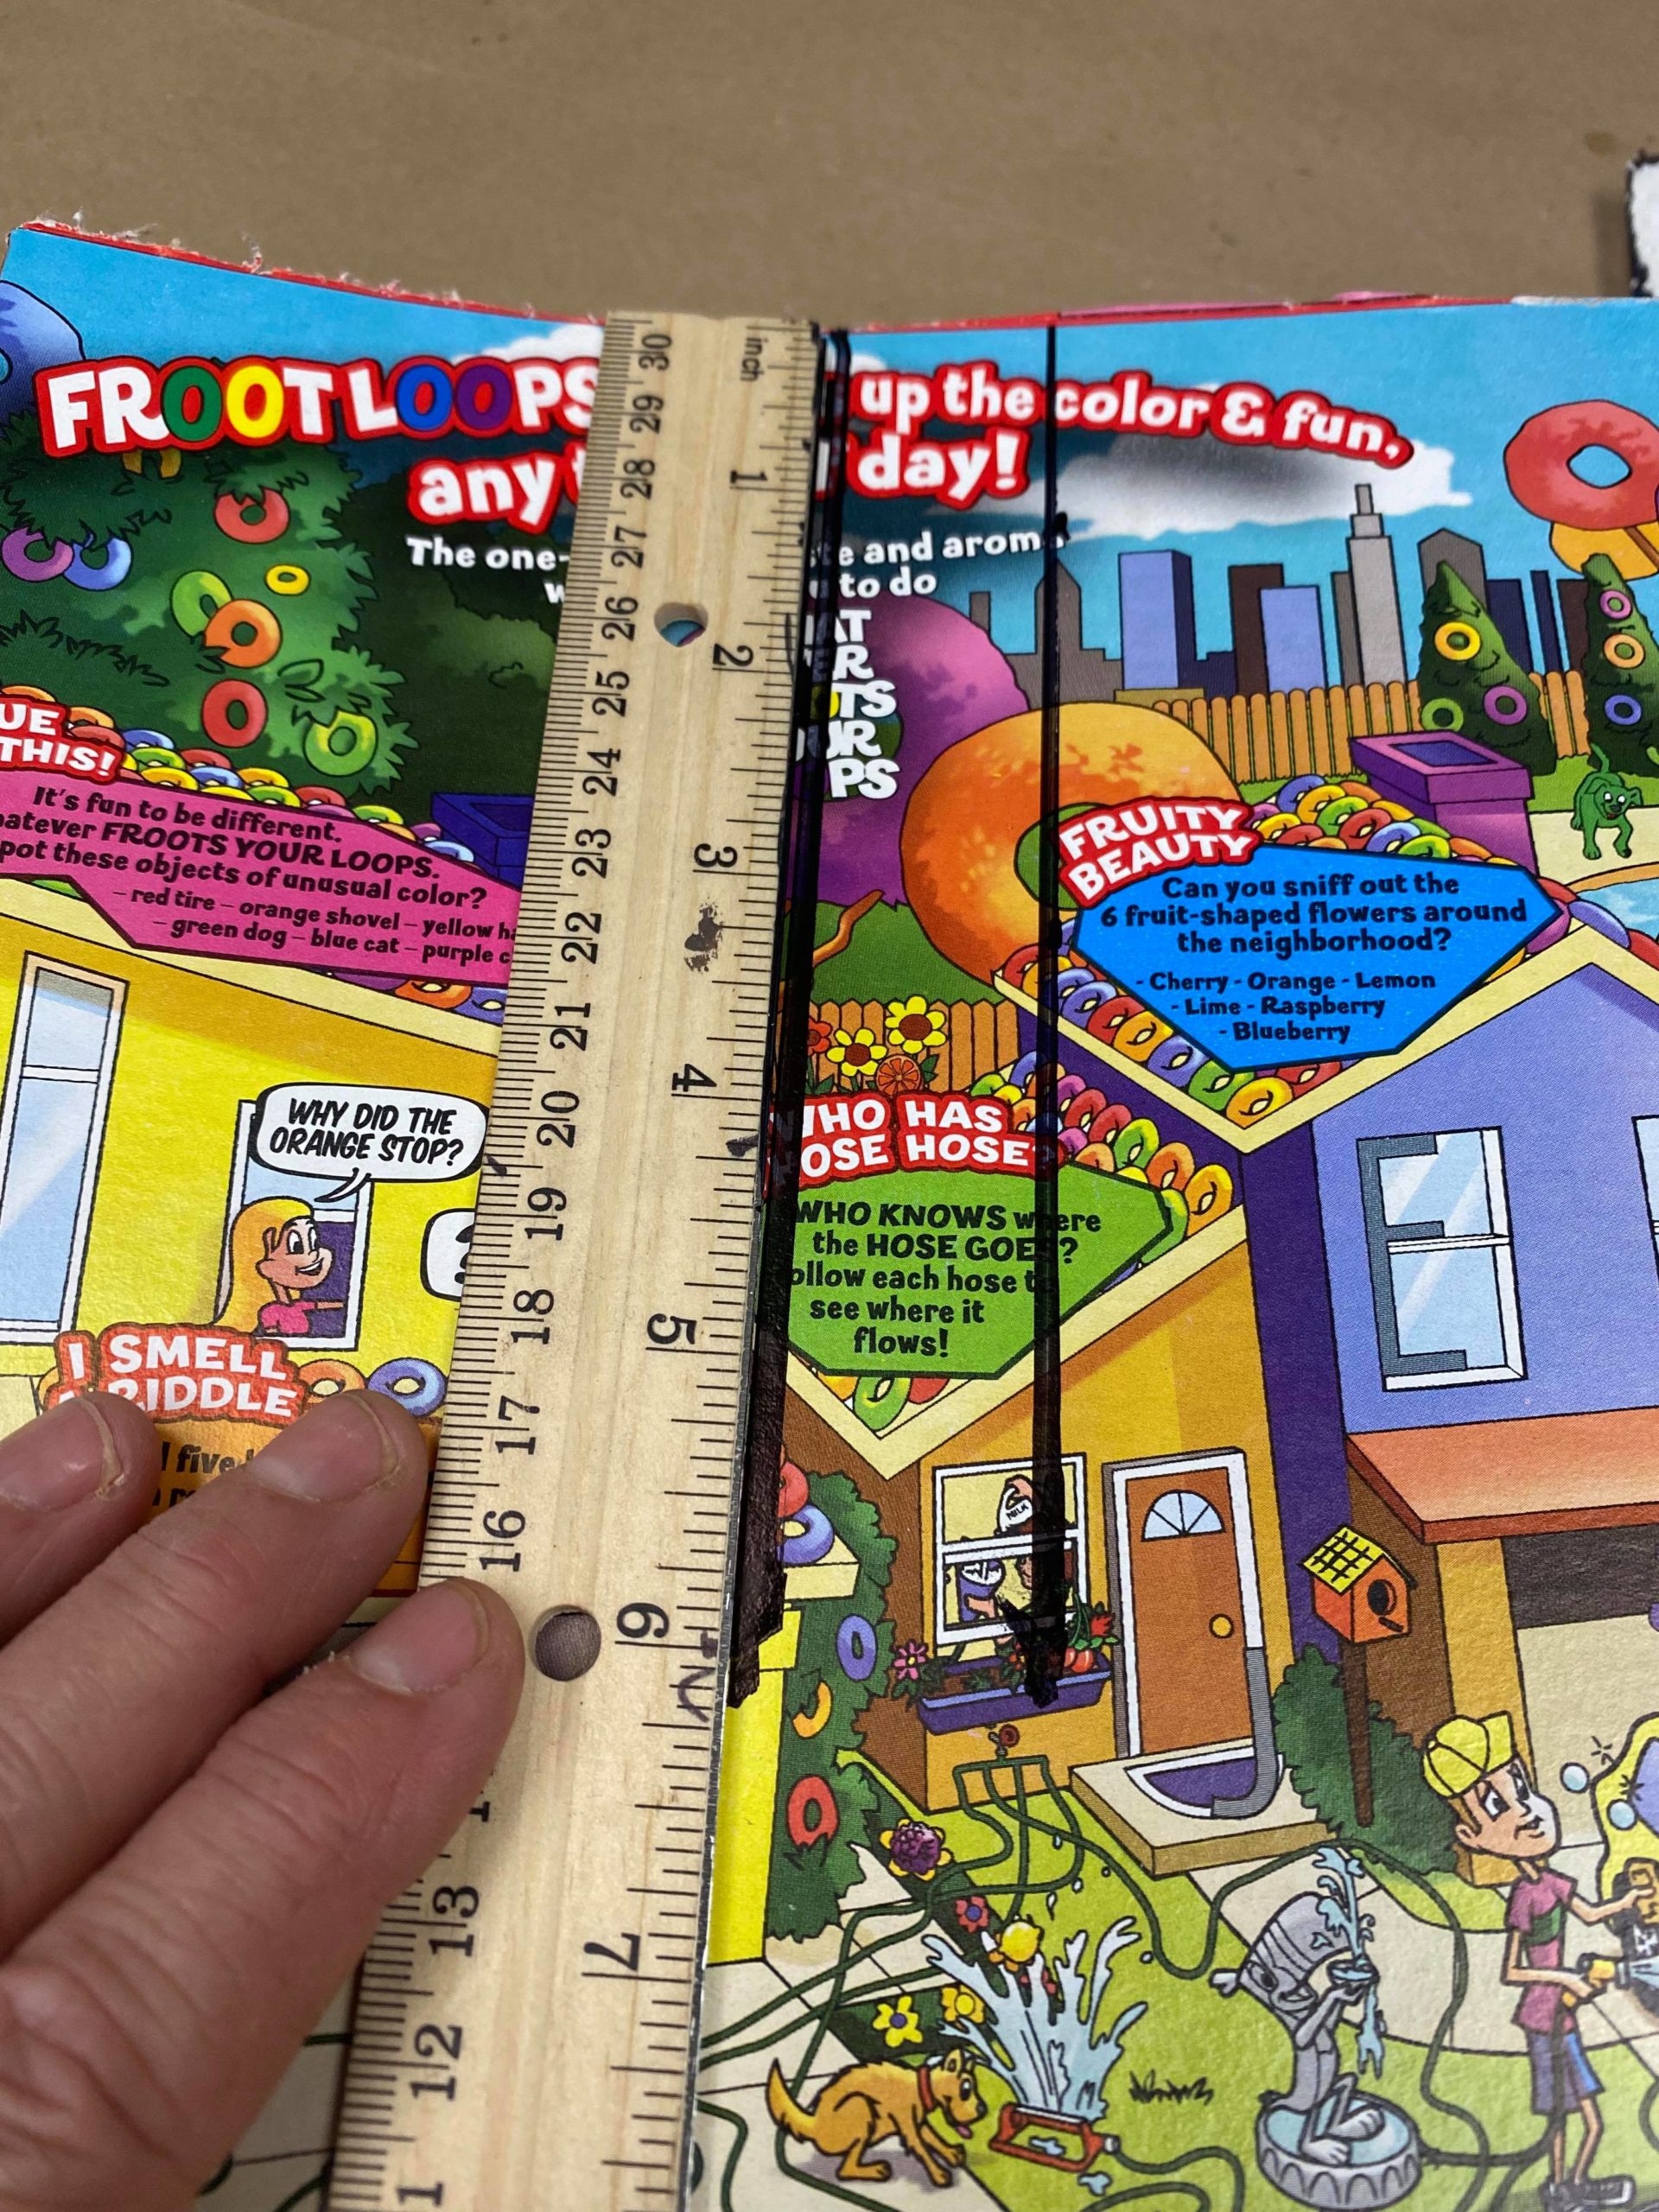
You will want to do the two other lines 6 inches down from the top.

Once you have the lines drawn on top then place a mark 6 1/2 inches up from the bottom of the box. You will want to place the mark up on each side of the box and also on front and back sides of the box.

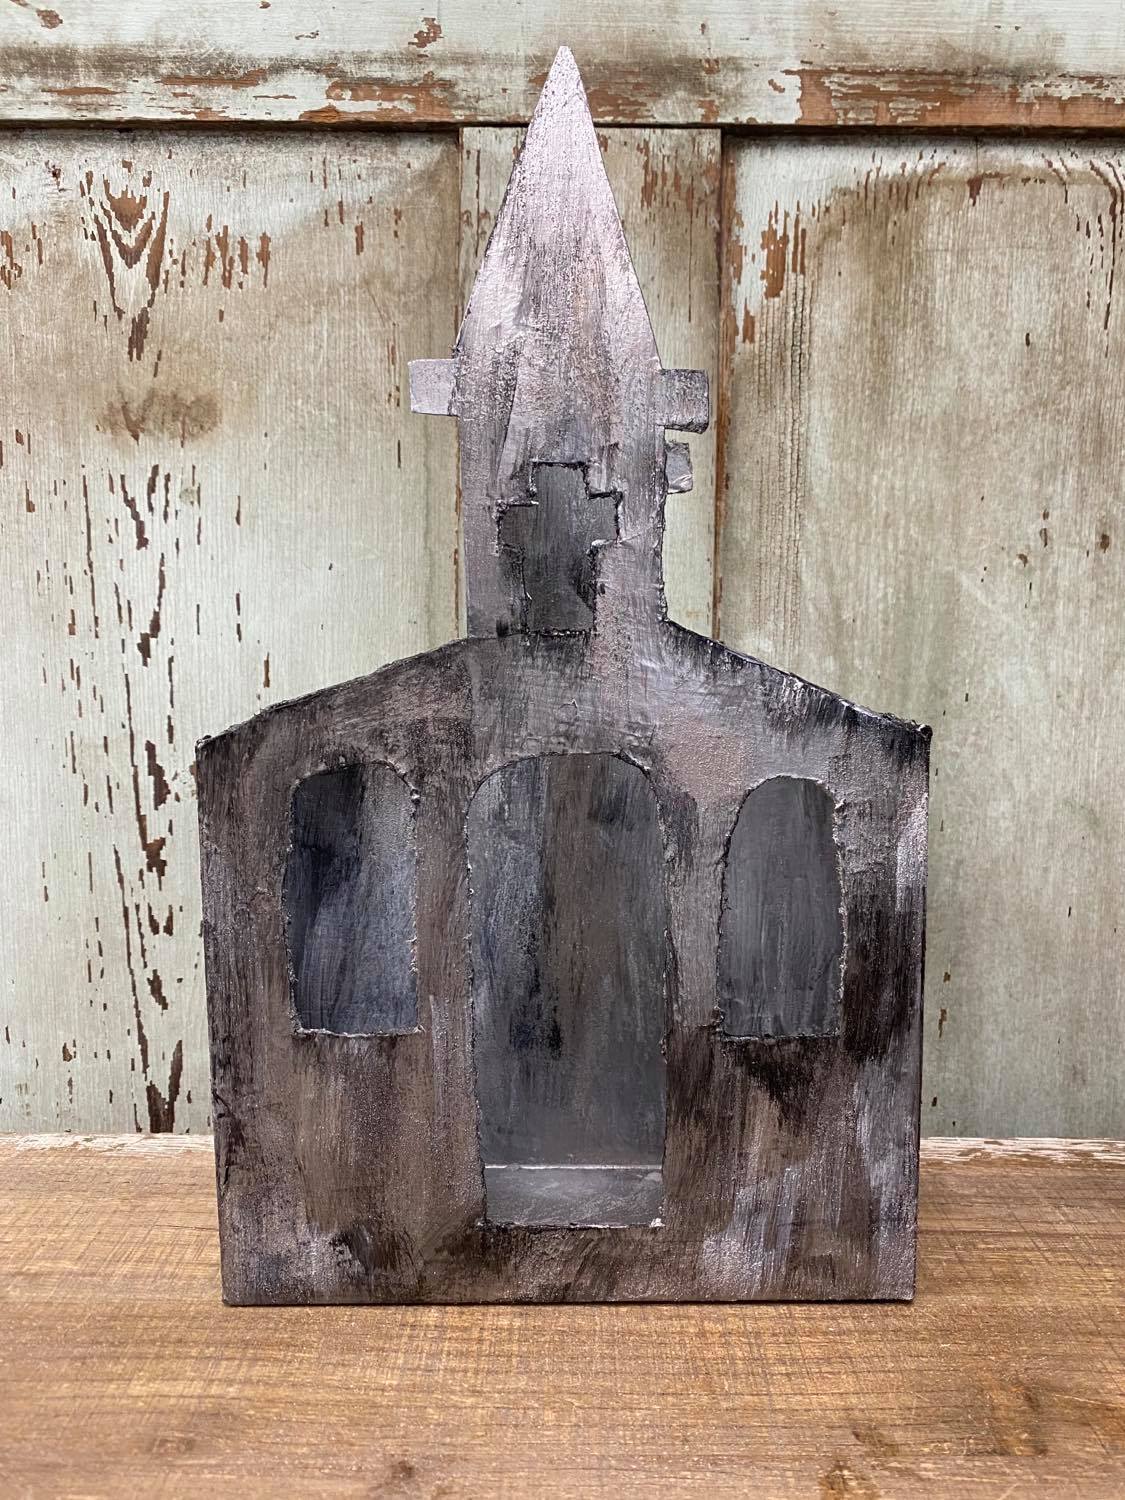
You will draw a line connecting the marks in the side of box to the outside center lines as shown in photo above. I then drew a doorway on the front side if the box only. I came up from the bottom center of the box about one inch and then drew a door 2 inches wide and 5 inches high.


I drew two windows which are about 3 inches up from the bottom.
To form the top of the church I came up about 2 inches from the top connection point. I placed a mark and then drew a small line about 1/2 inch out.

I drew a line 1/2 inch out then 1/2 inch line up and then another line back in towards the main line. Once you have that drawn then use the ruler stick to connect that corner to the top of the center line. You will do this to both sides of the outer lines and both sides of the box.
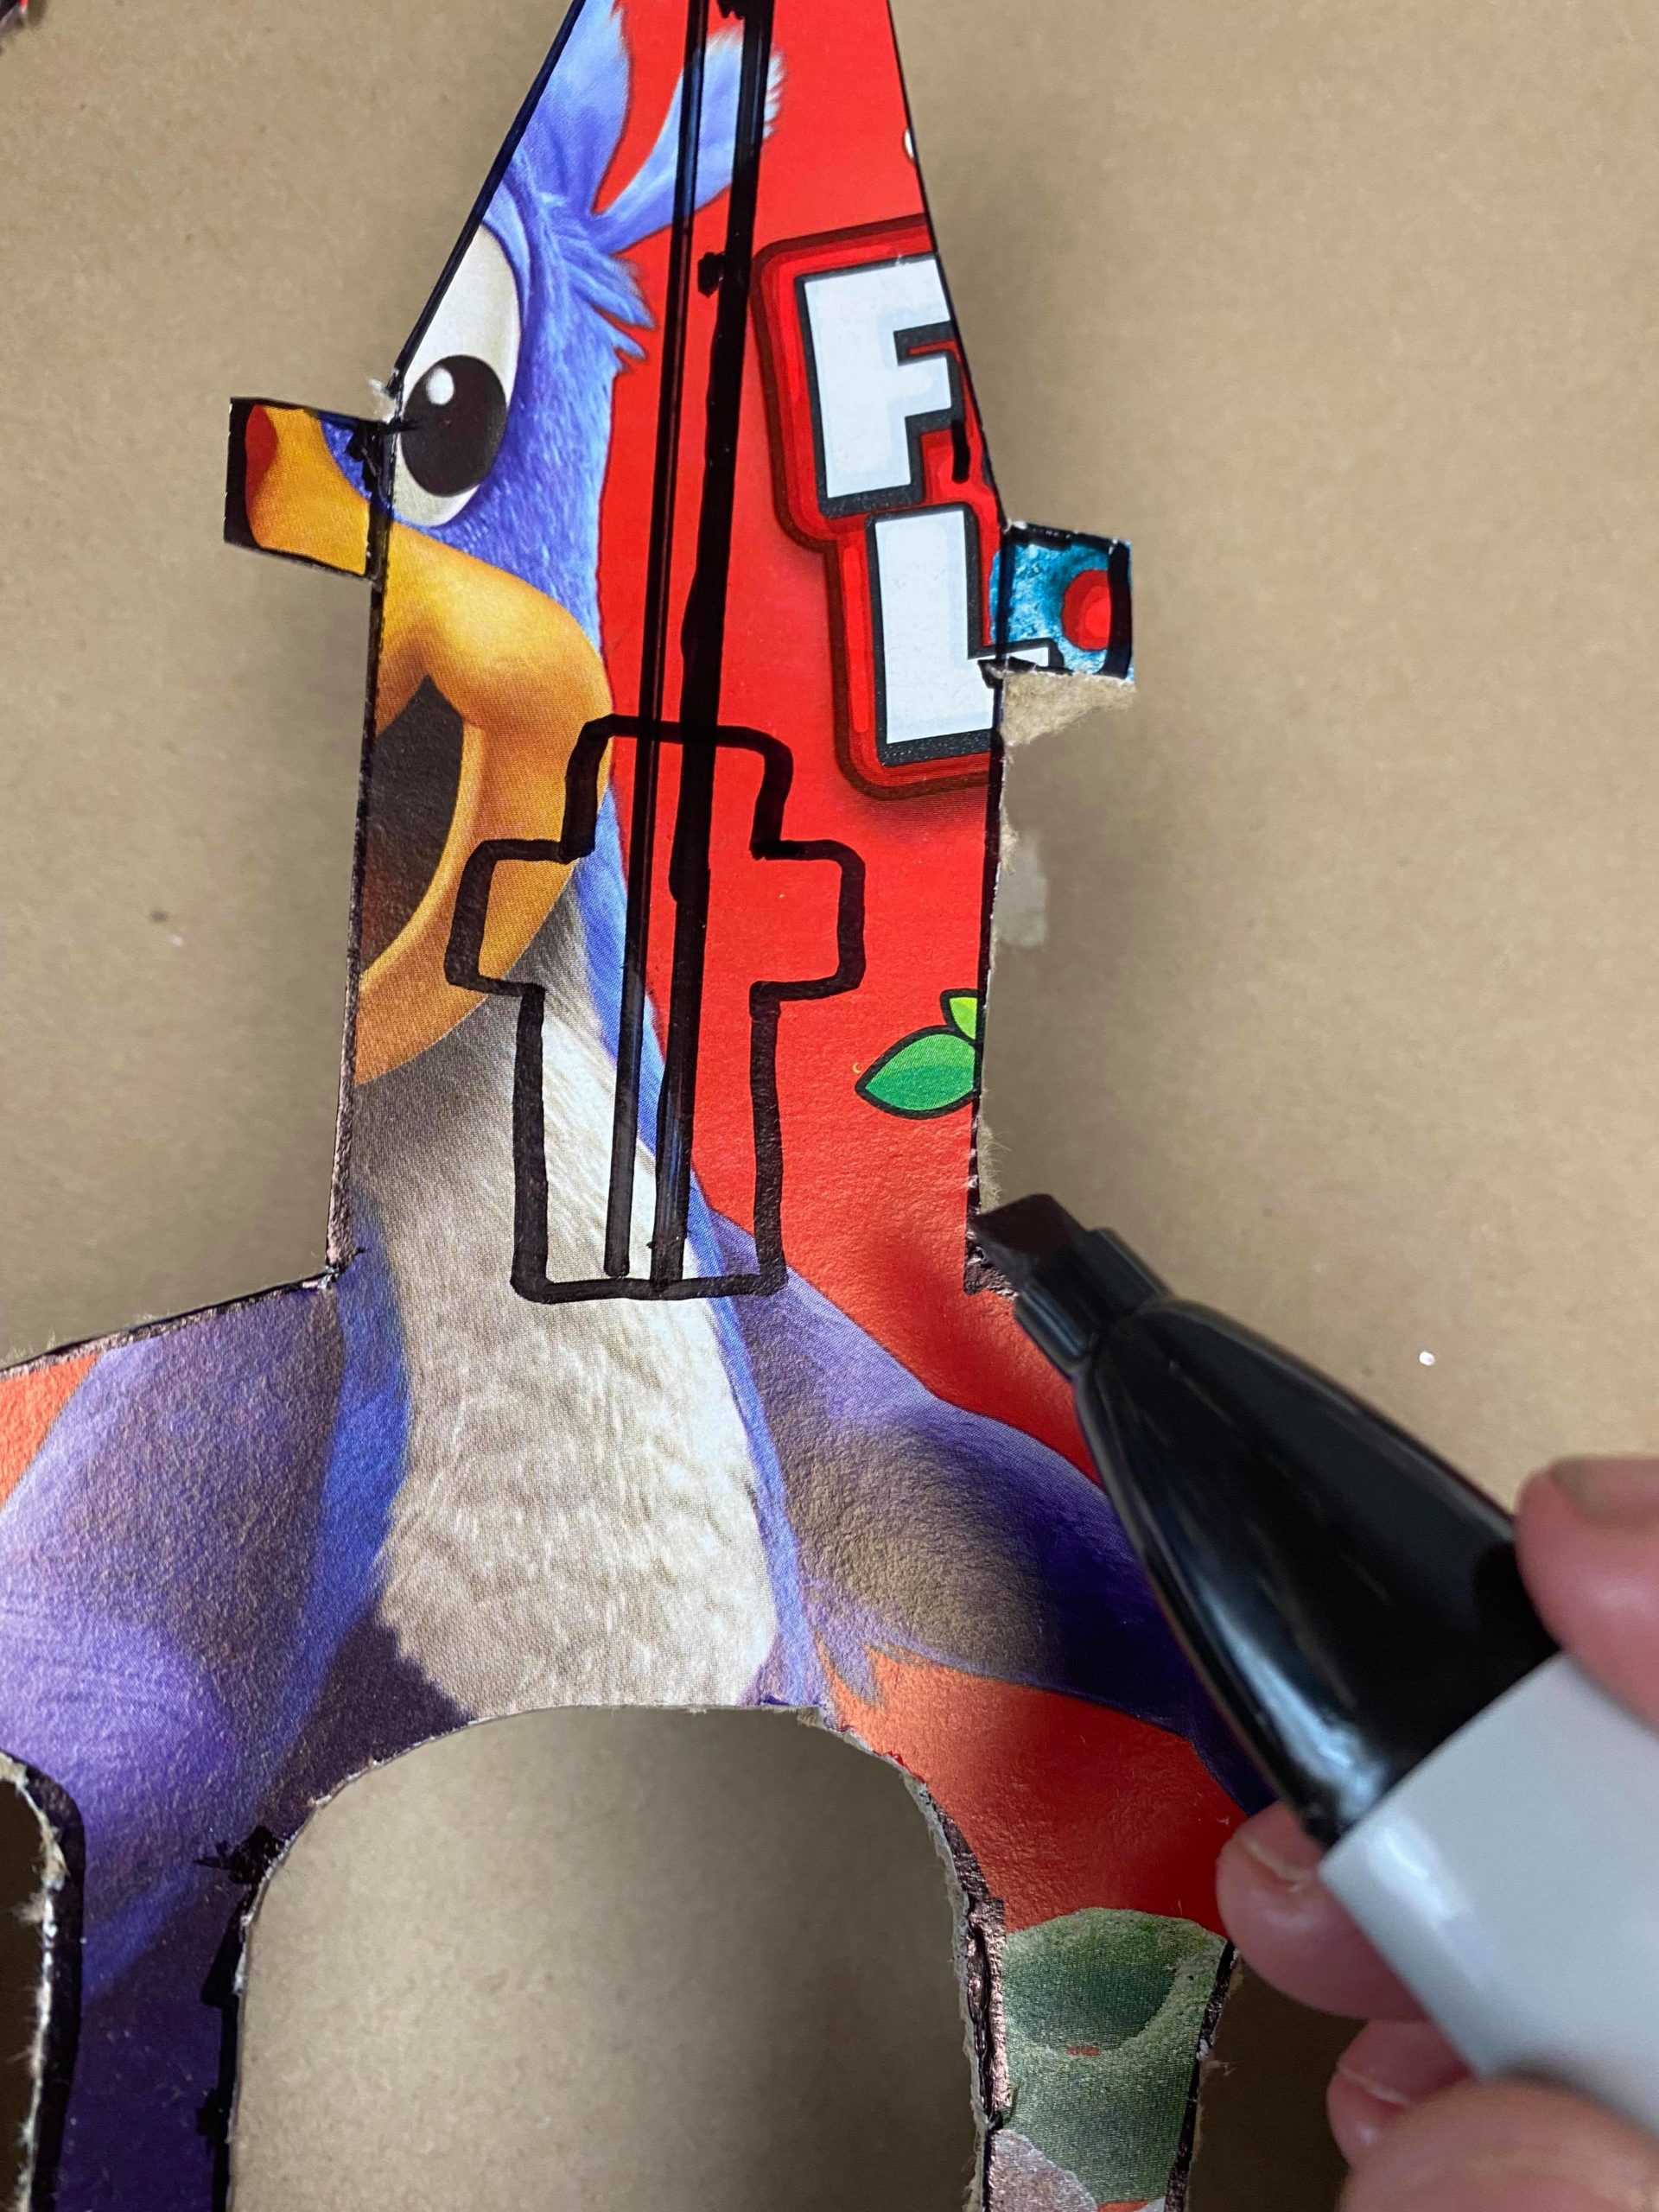
I also drew a small cross on the front side of the church.
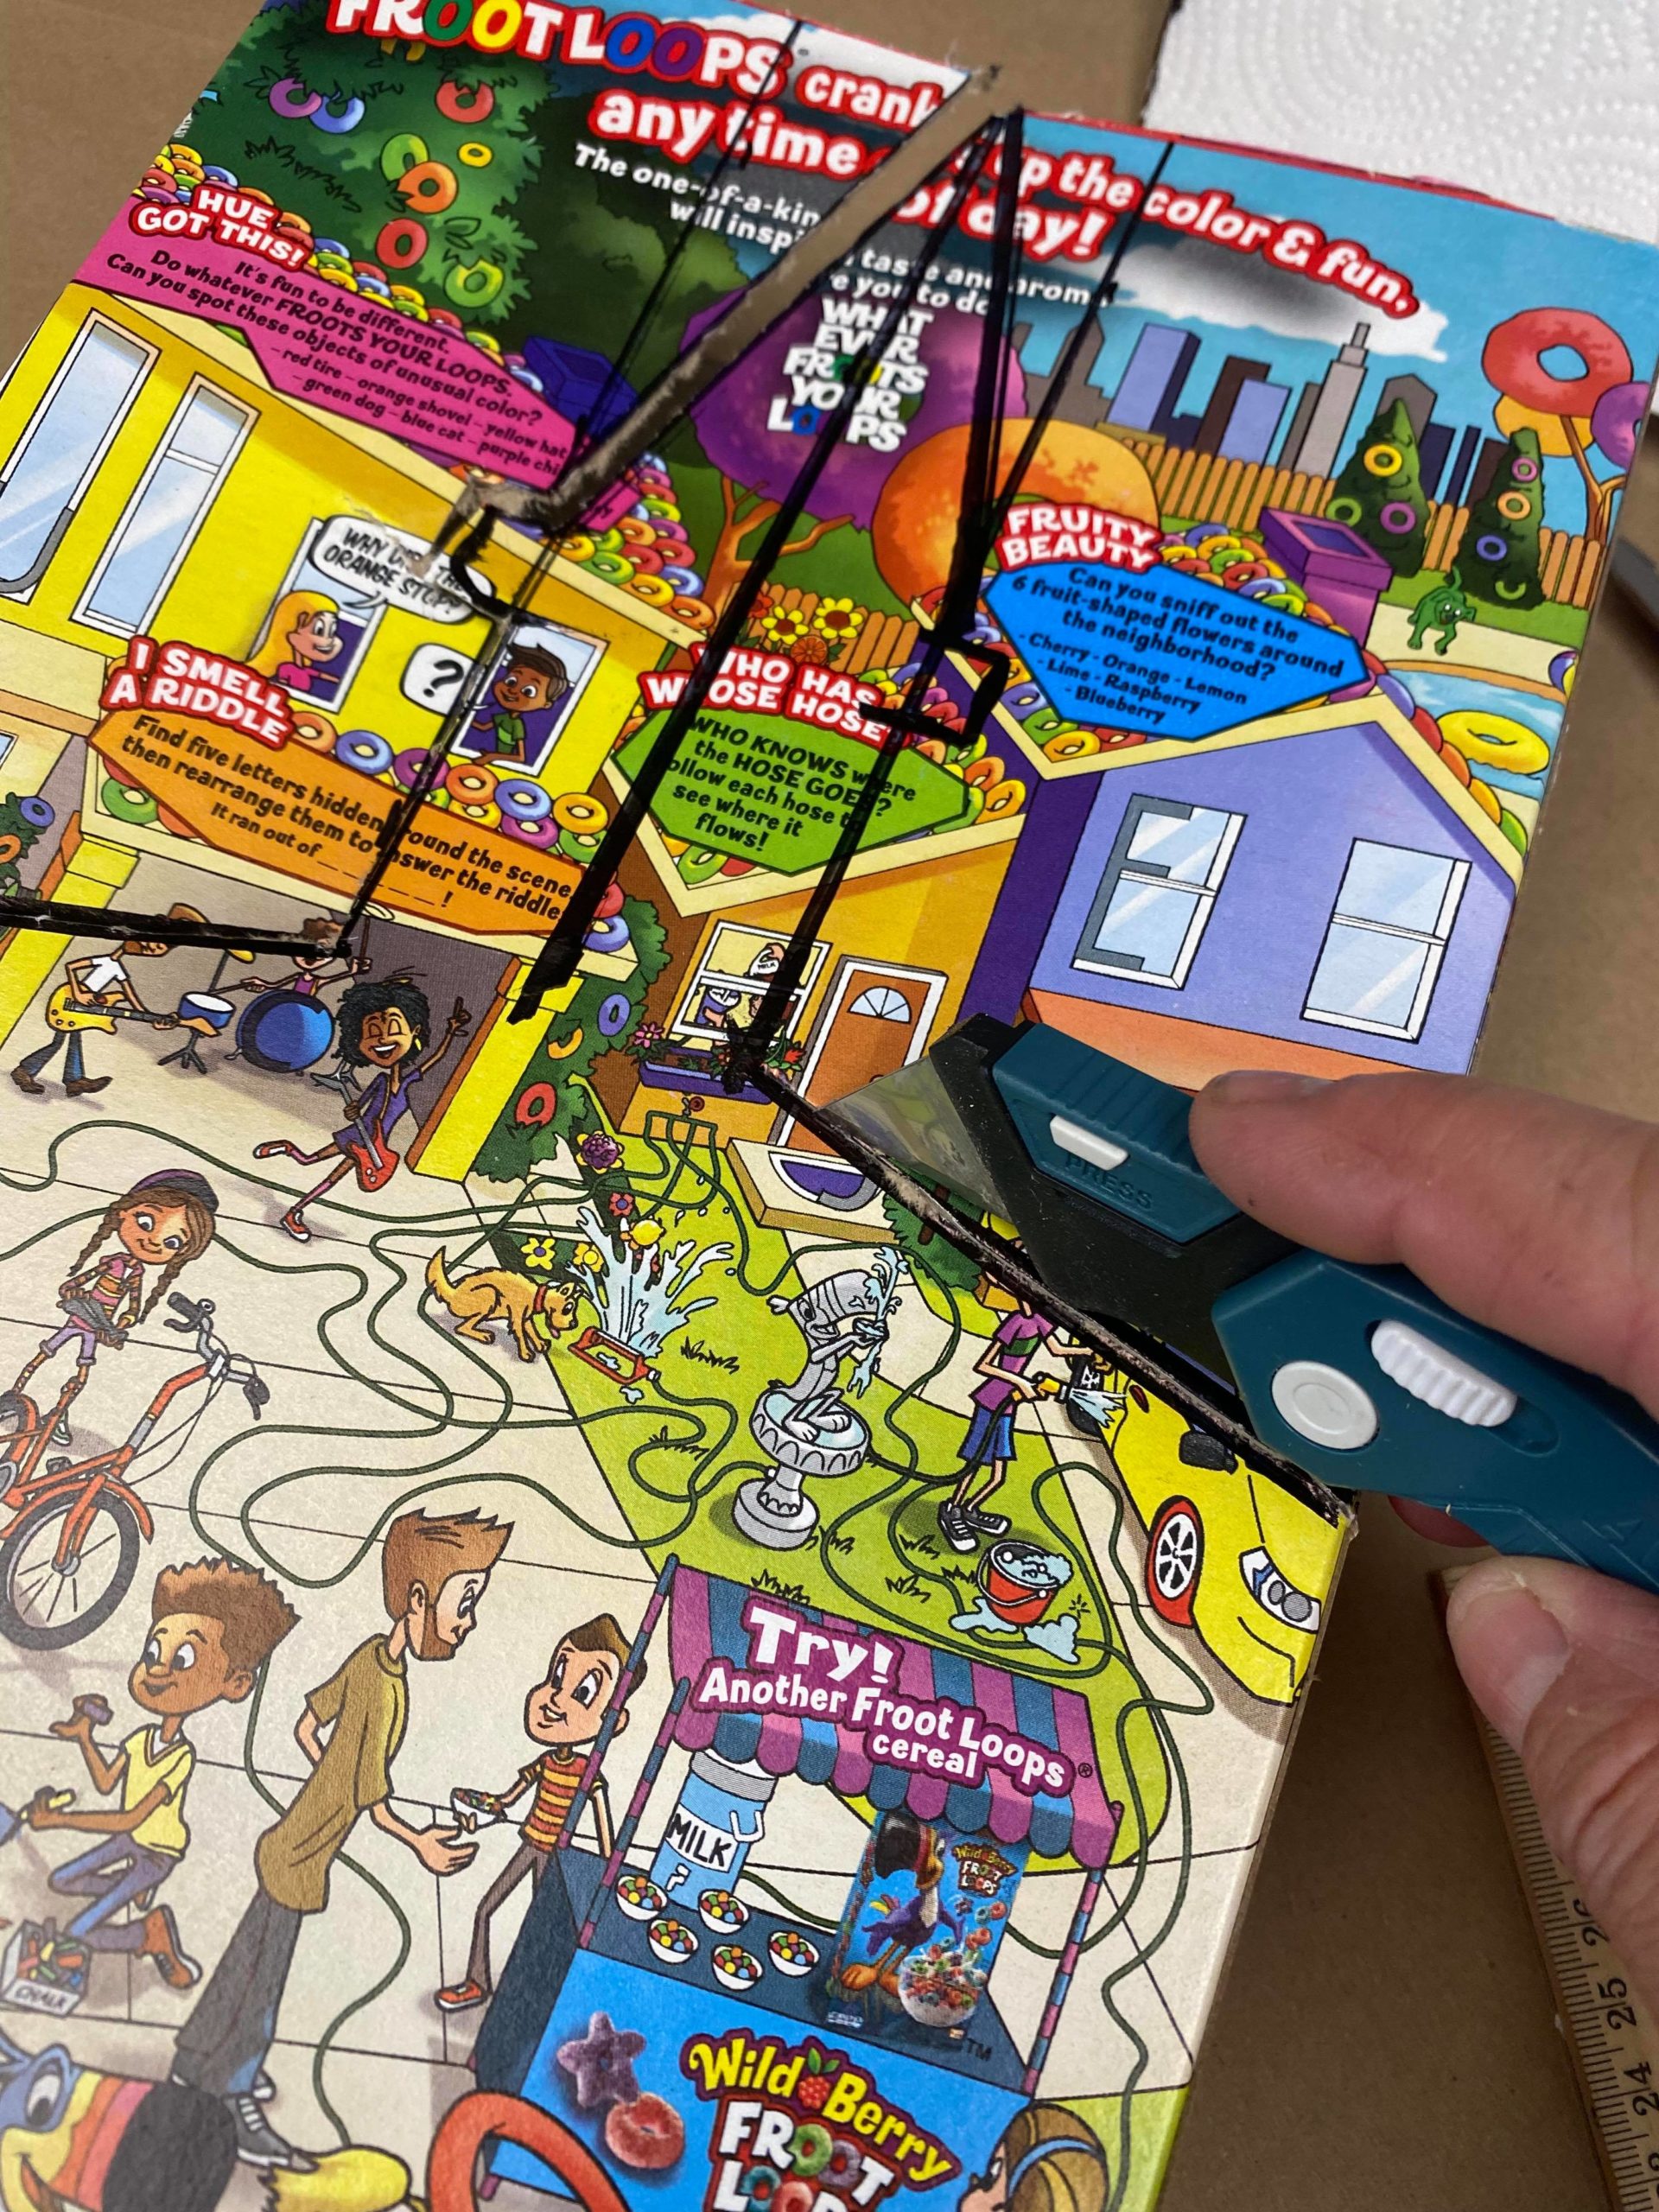
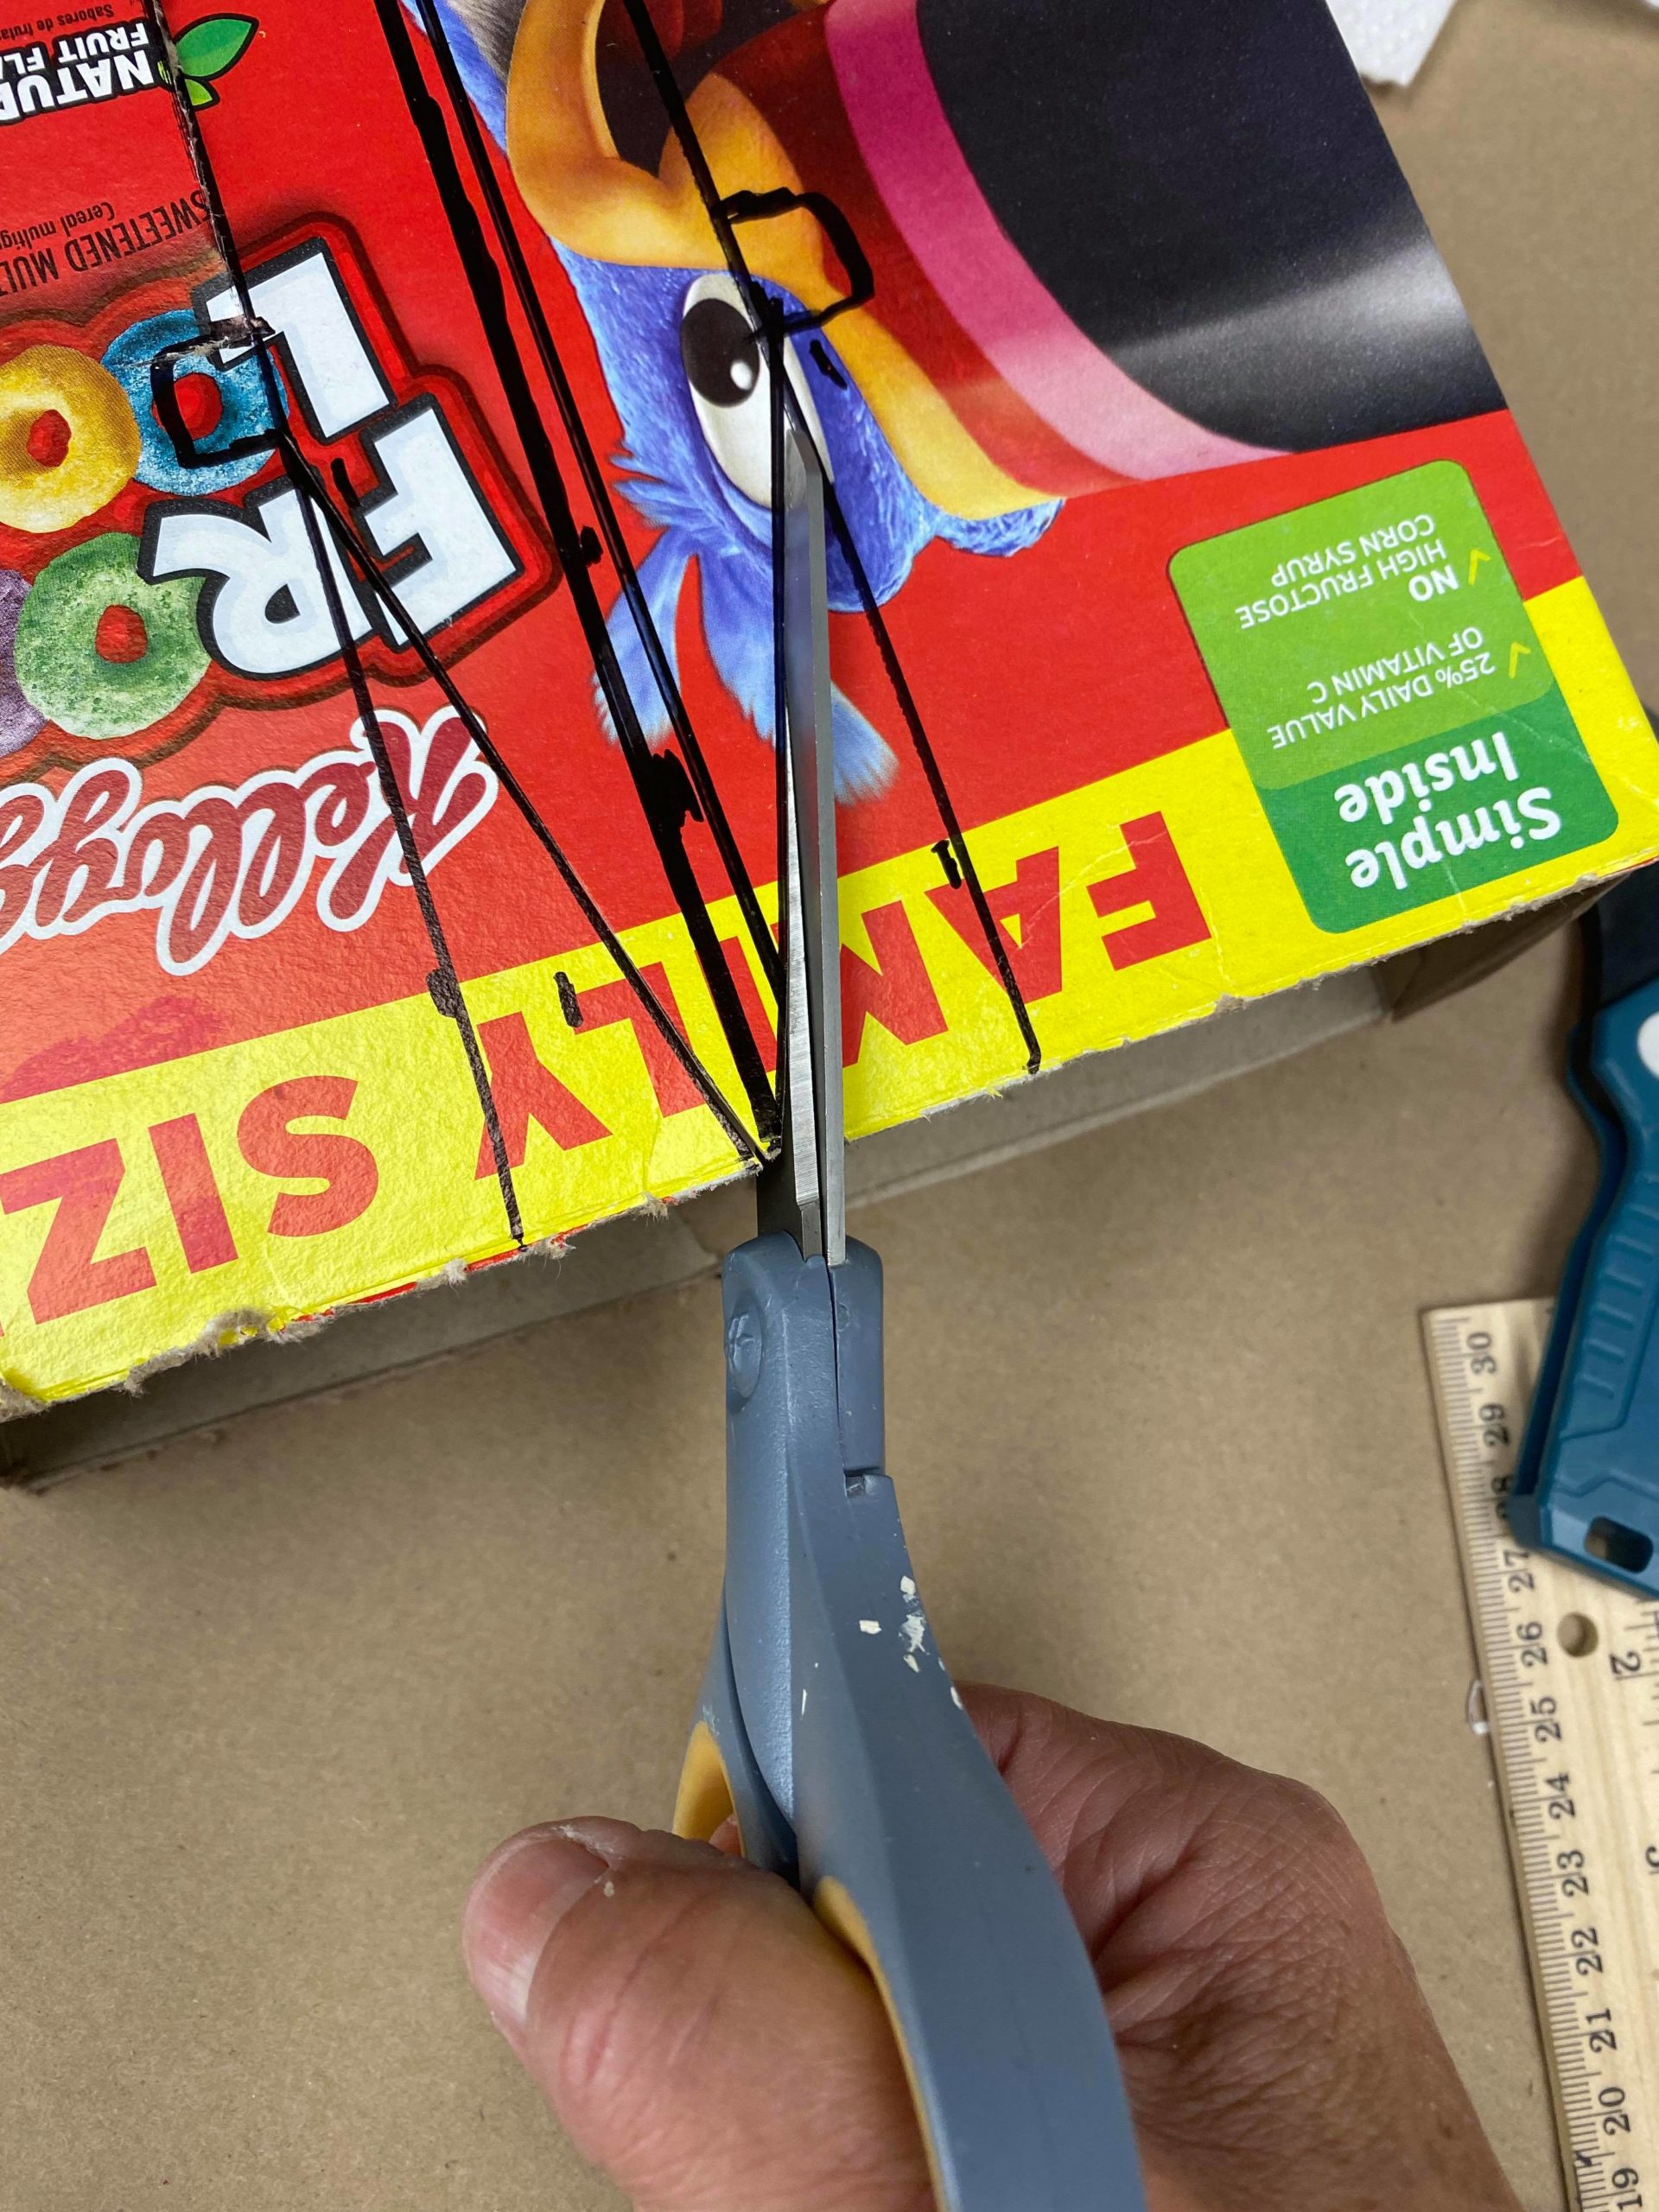
You will use the box cutter and scissors to cut out the church.
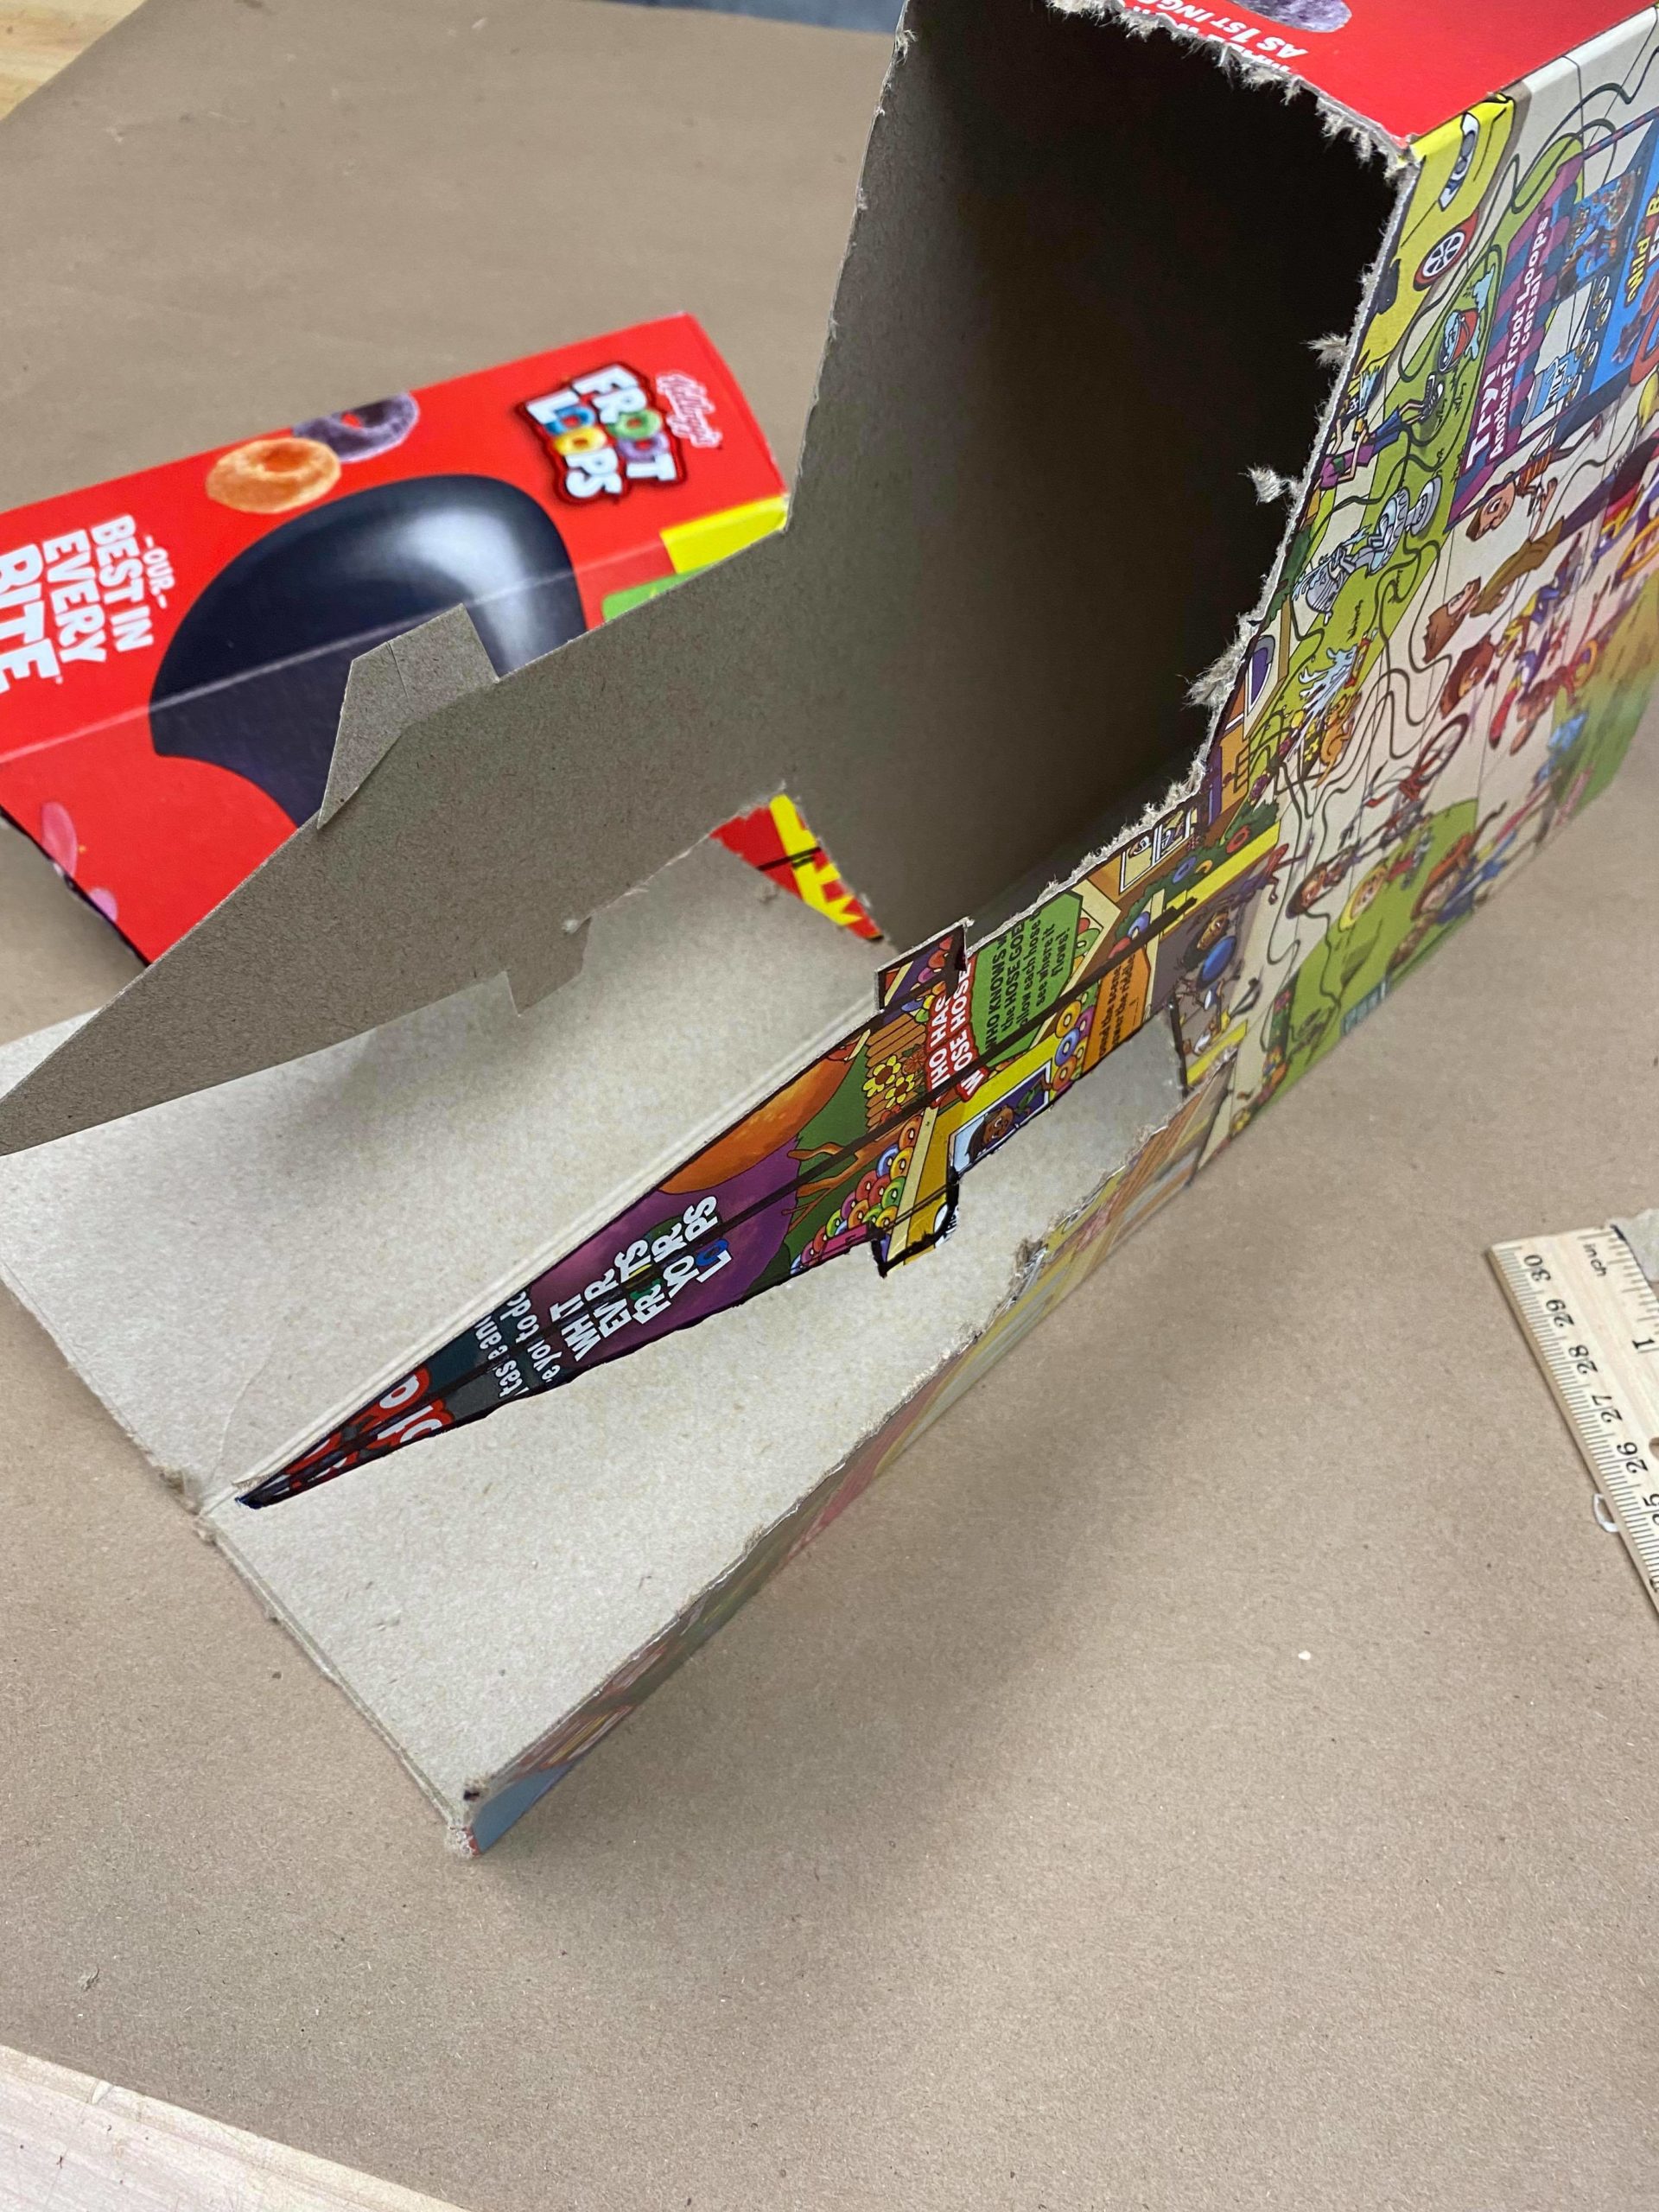
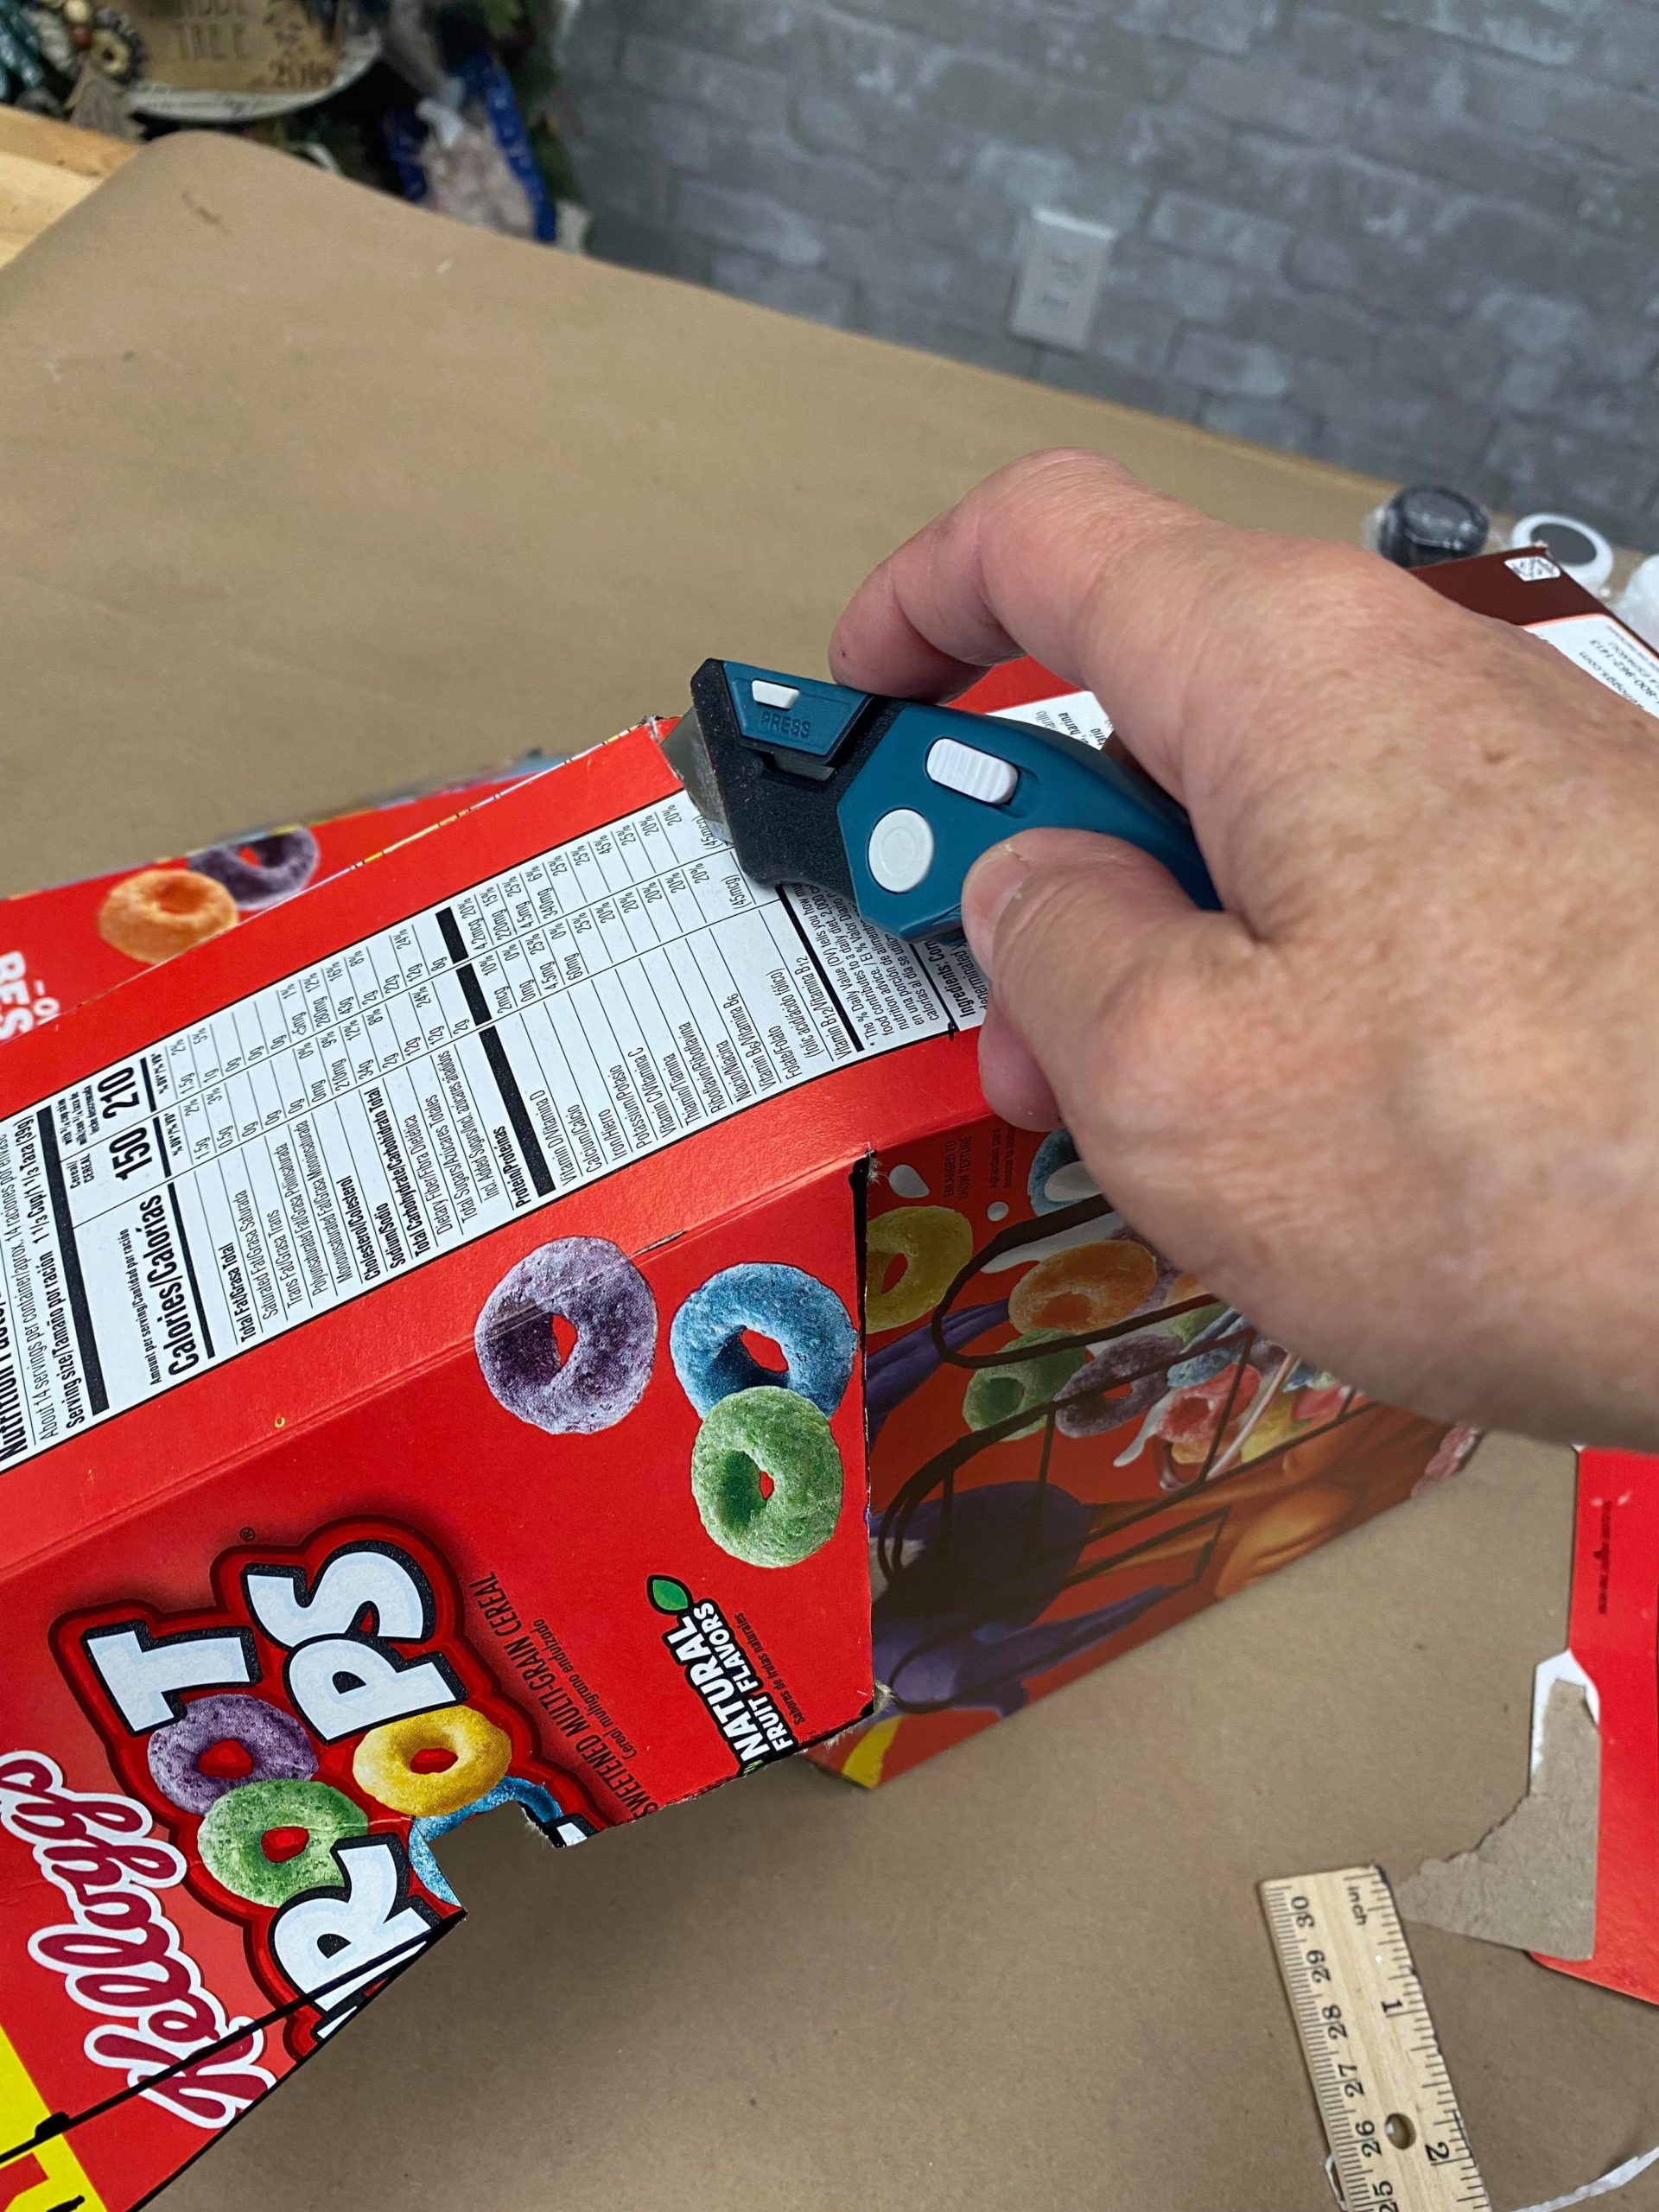

Once you have your church cut out you will then follow the directions on the back of the Designers Finishes kit.
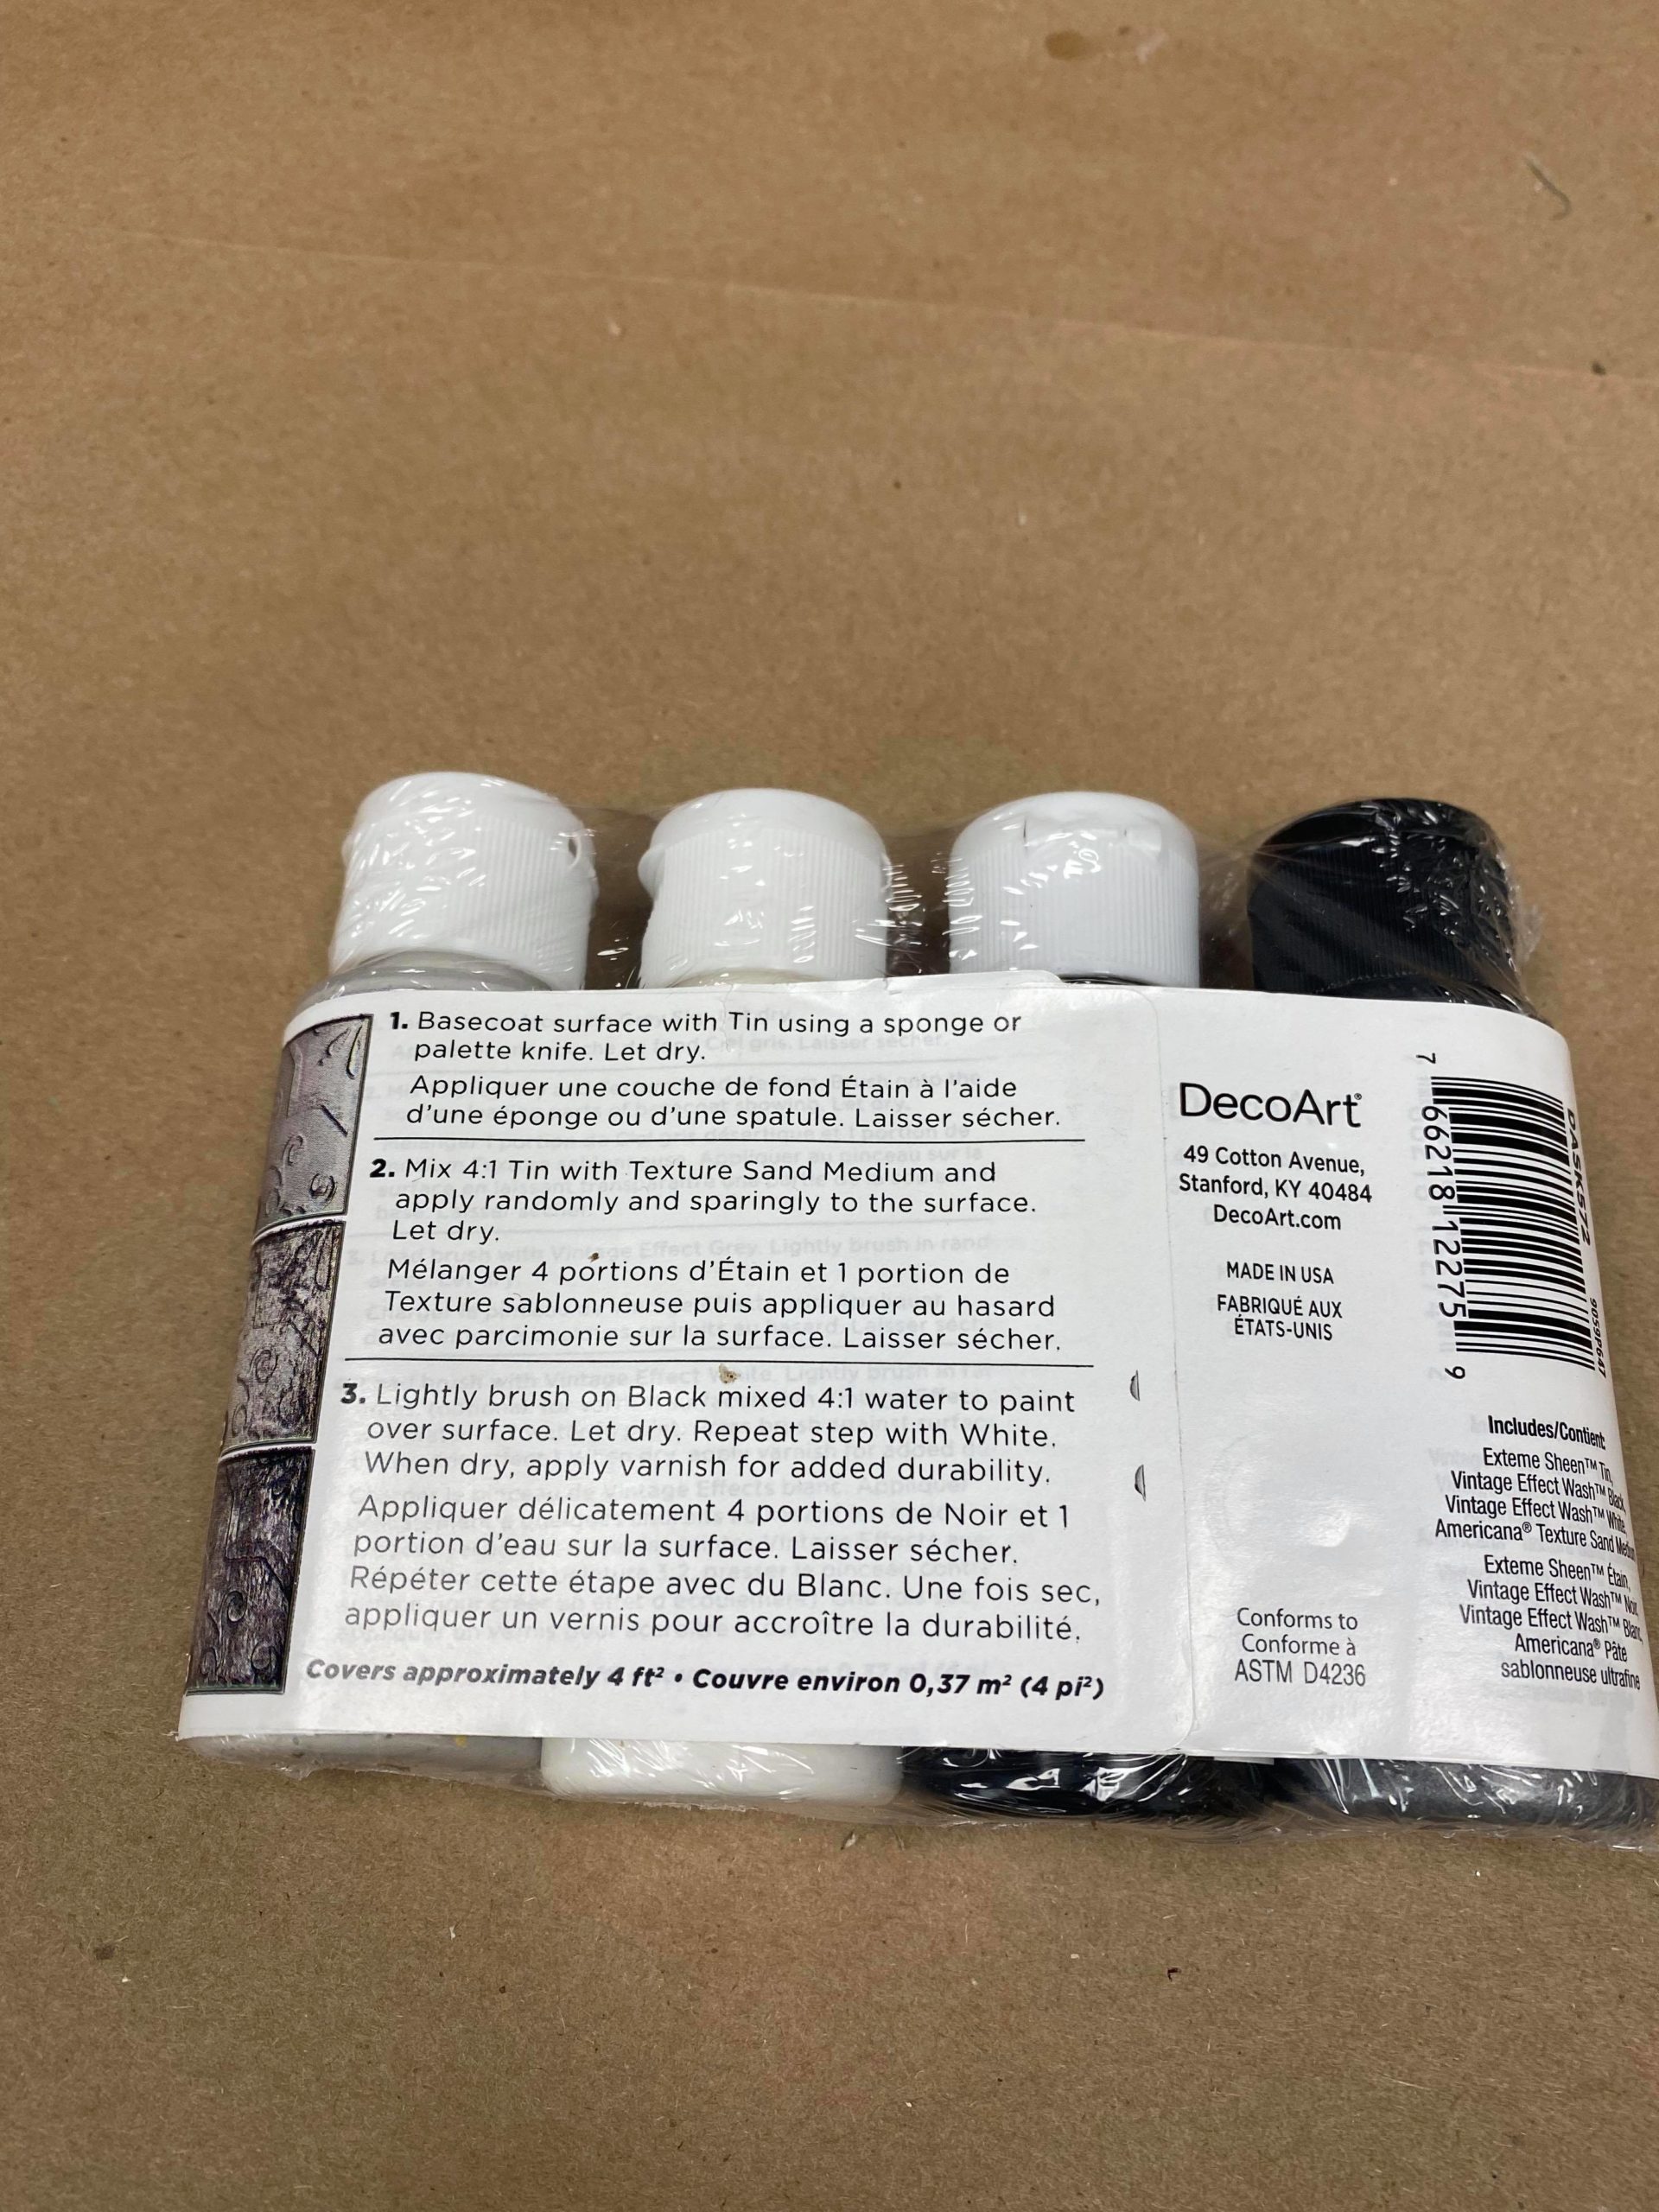
The first step will be to cover the outside and inside of the church with the tin.
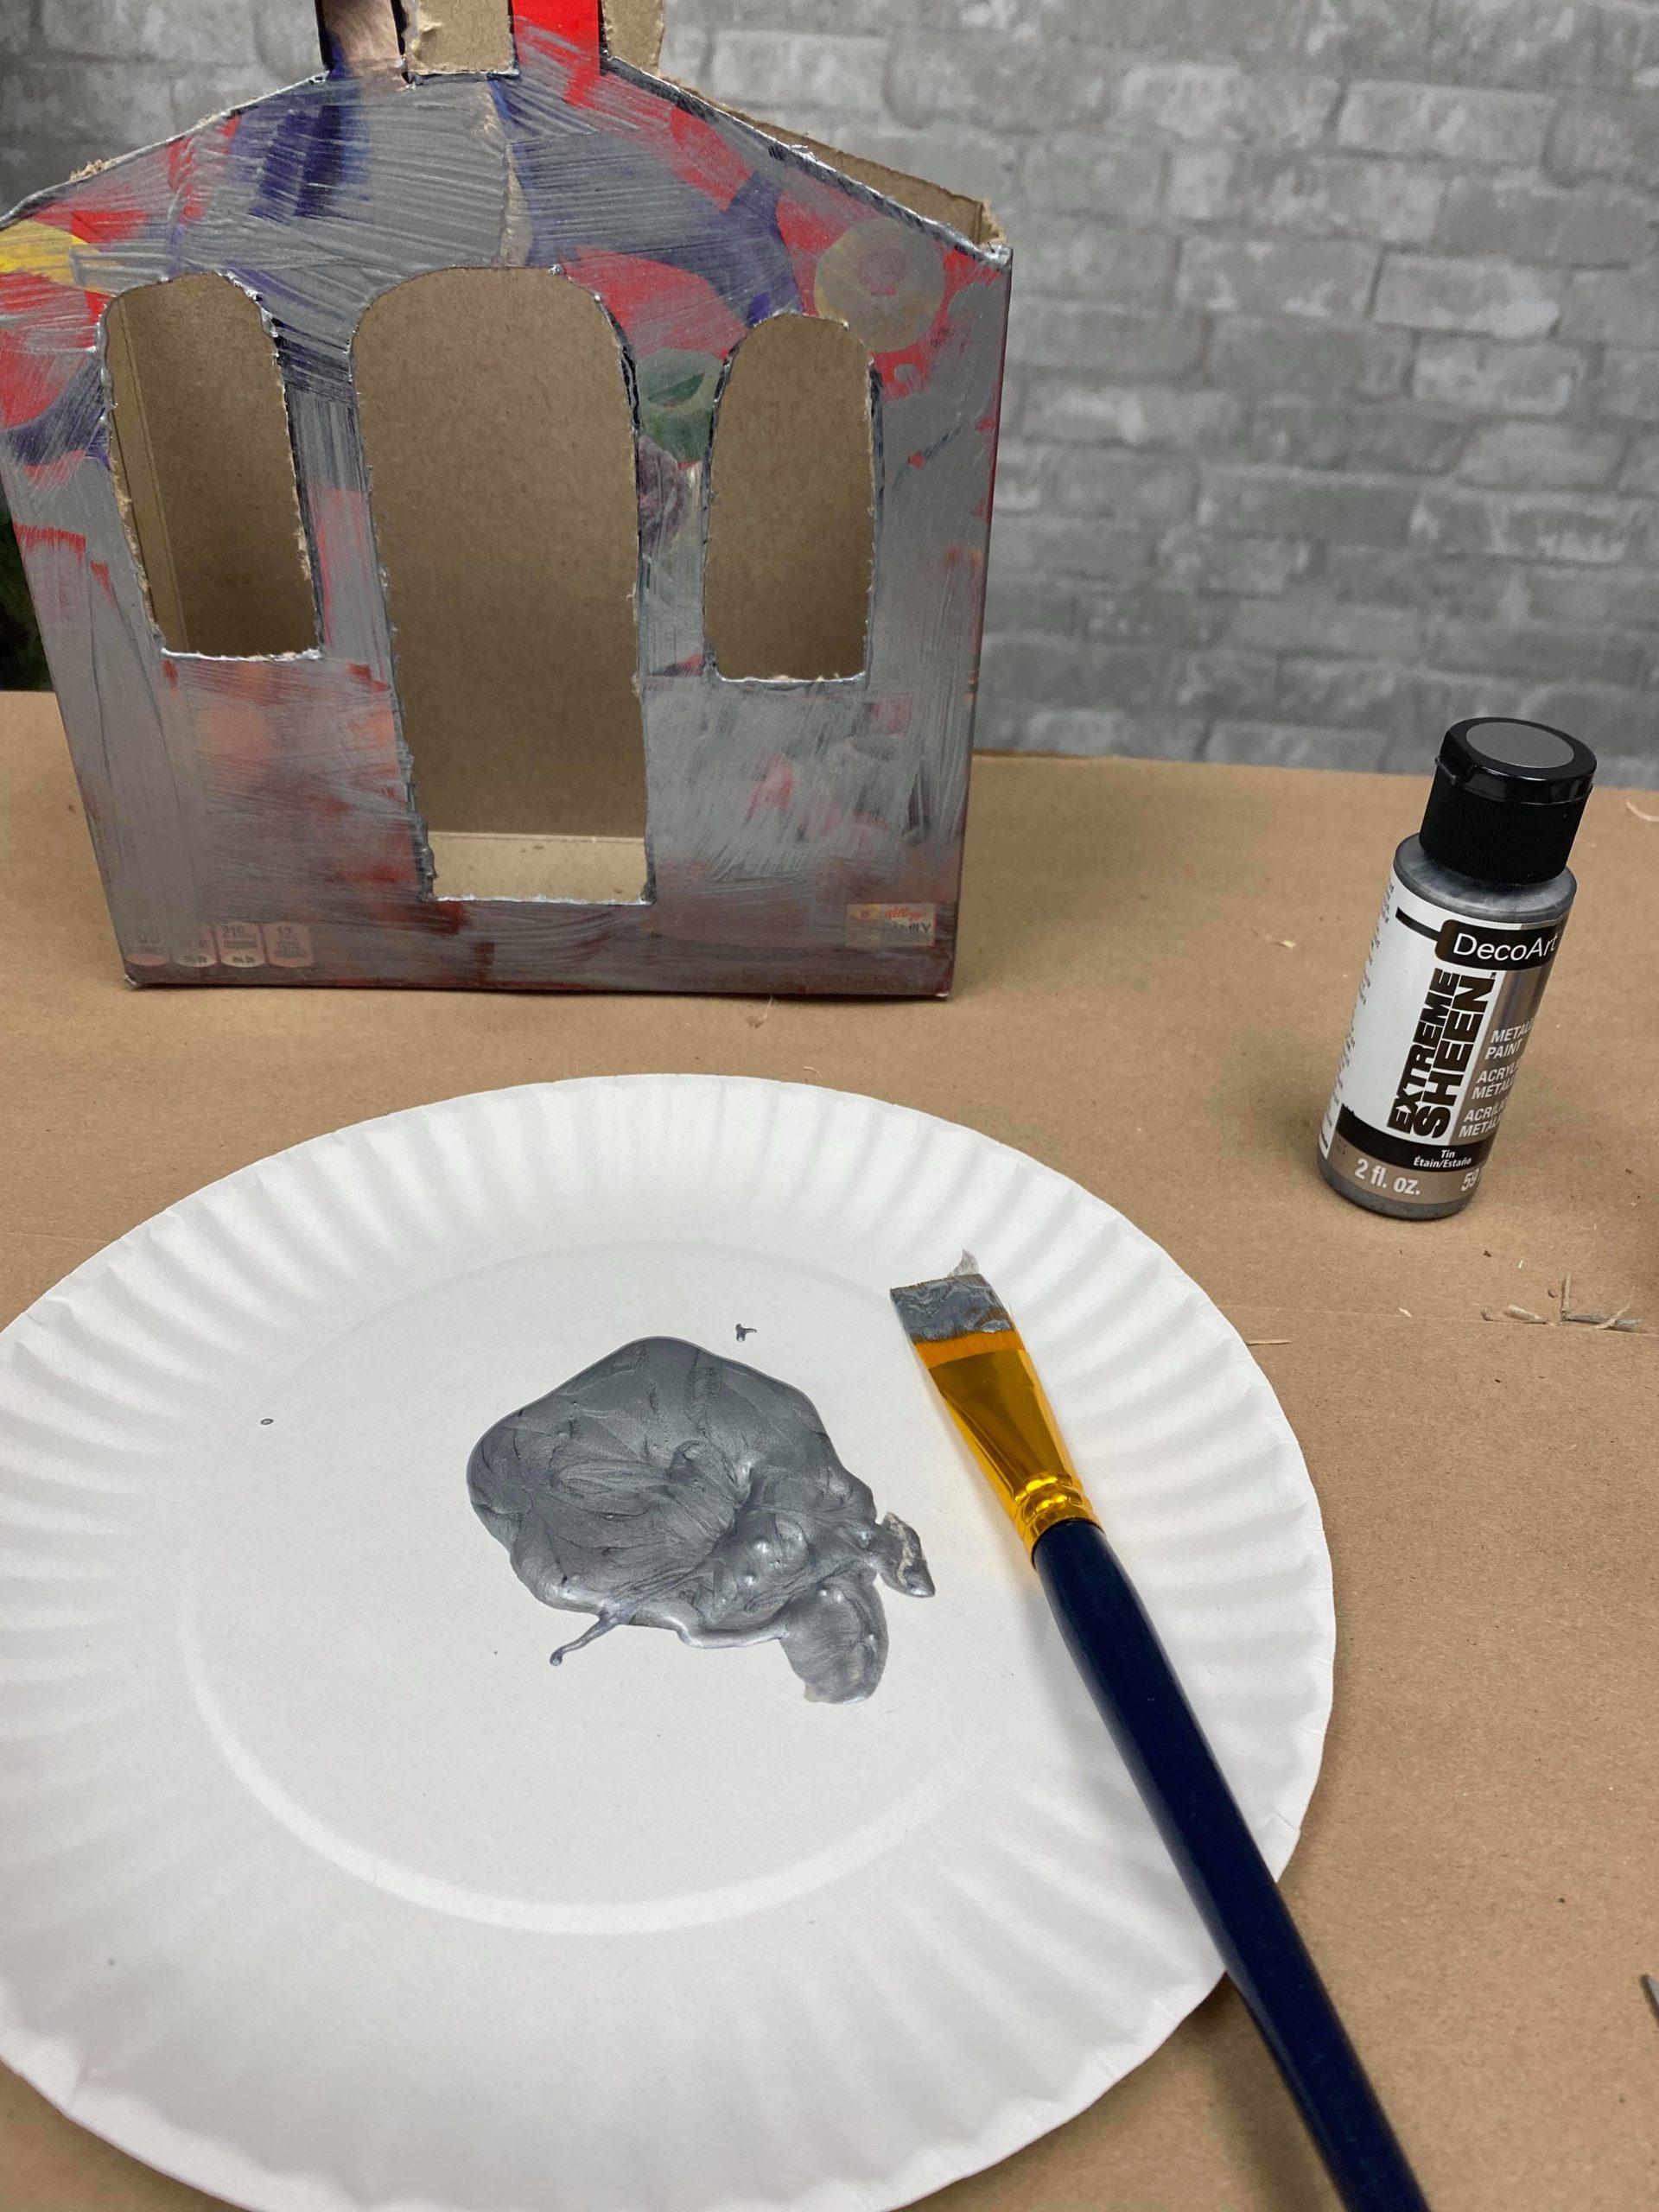
This took me about 3 coats to completely cover the church.

The next step is to mix the tin and texture together.
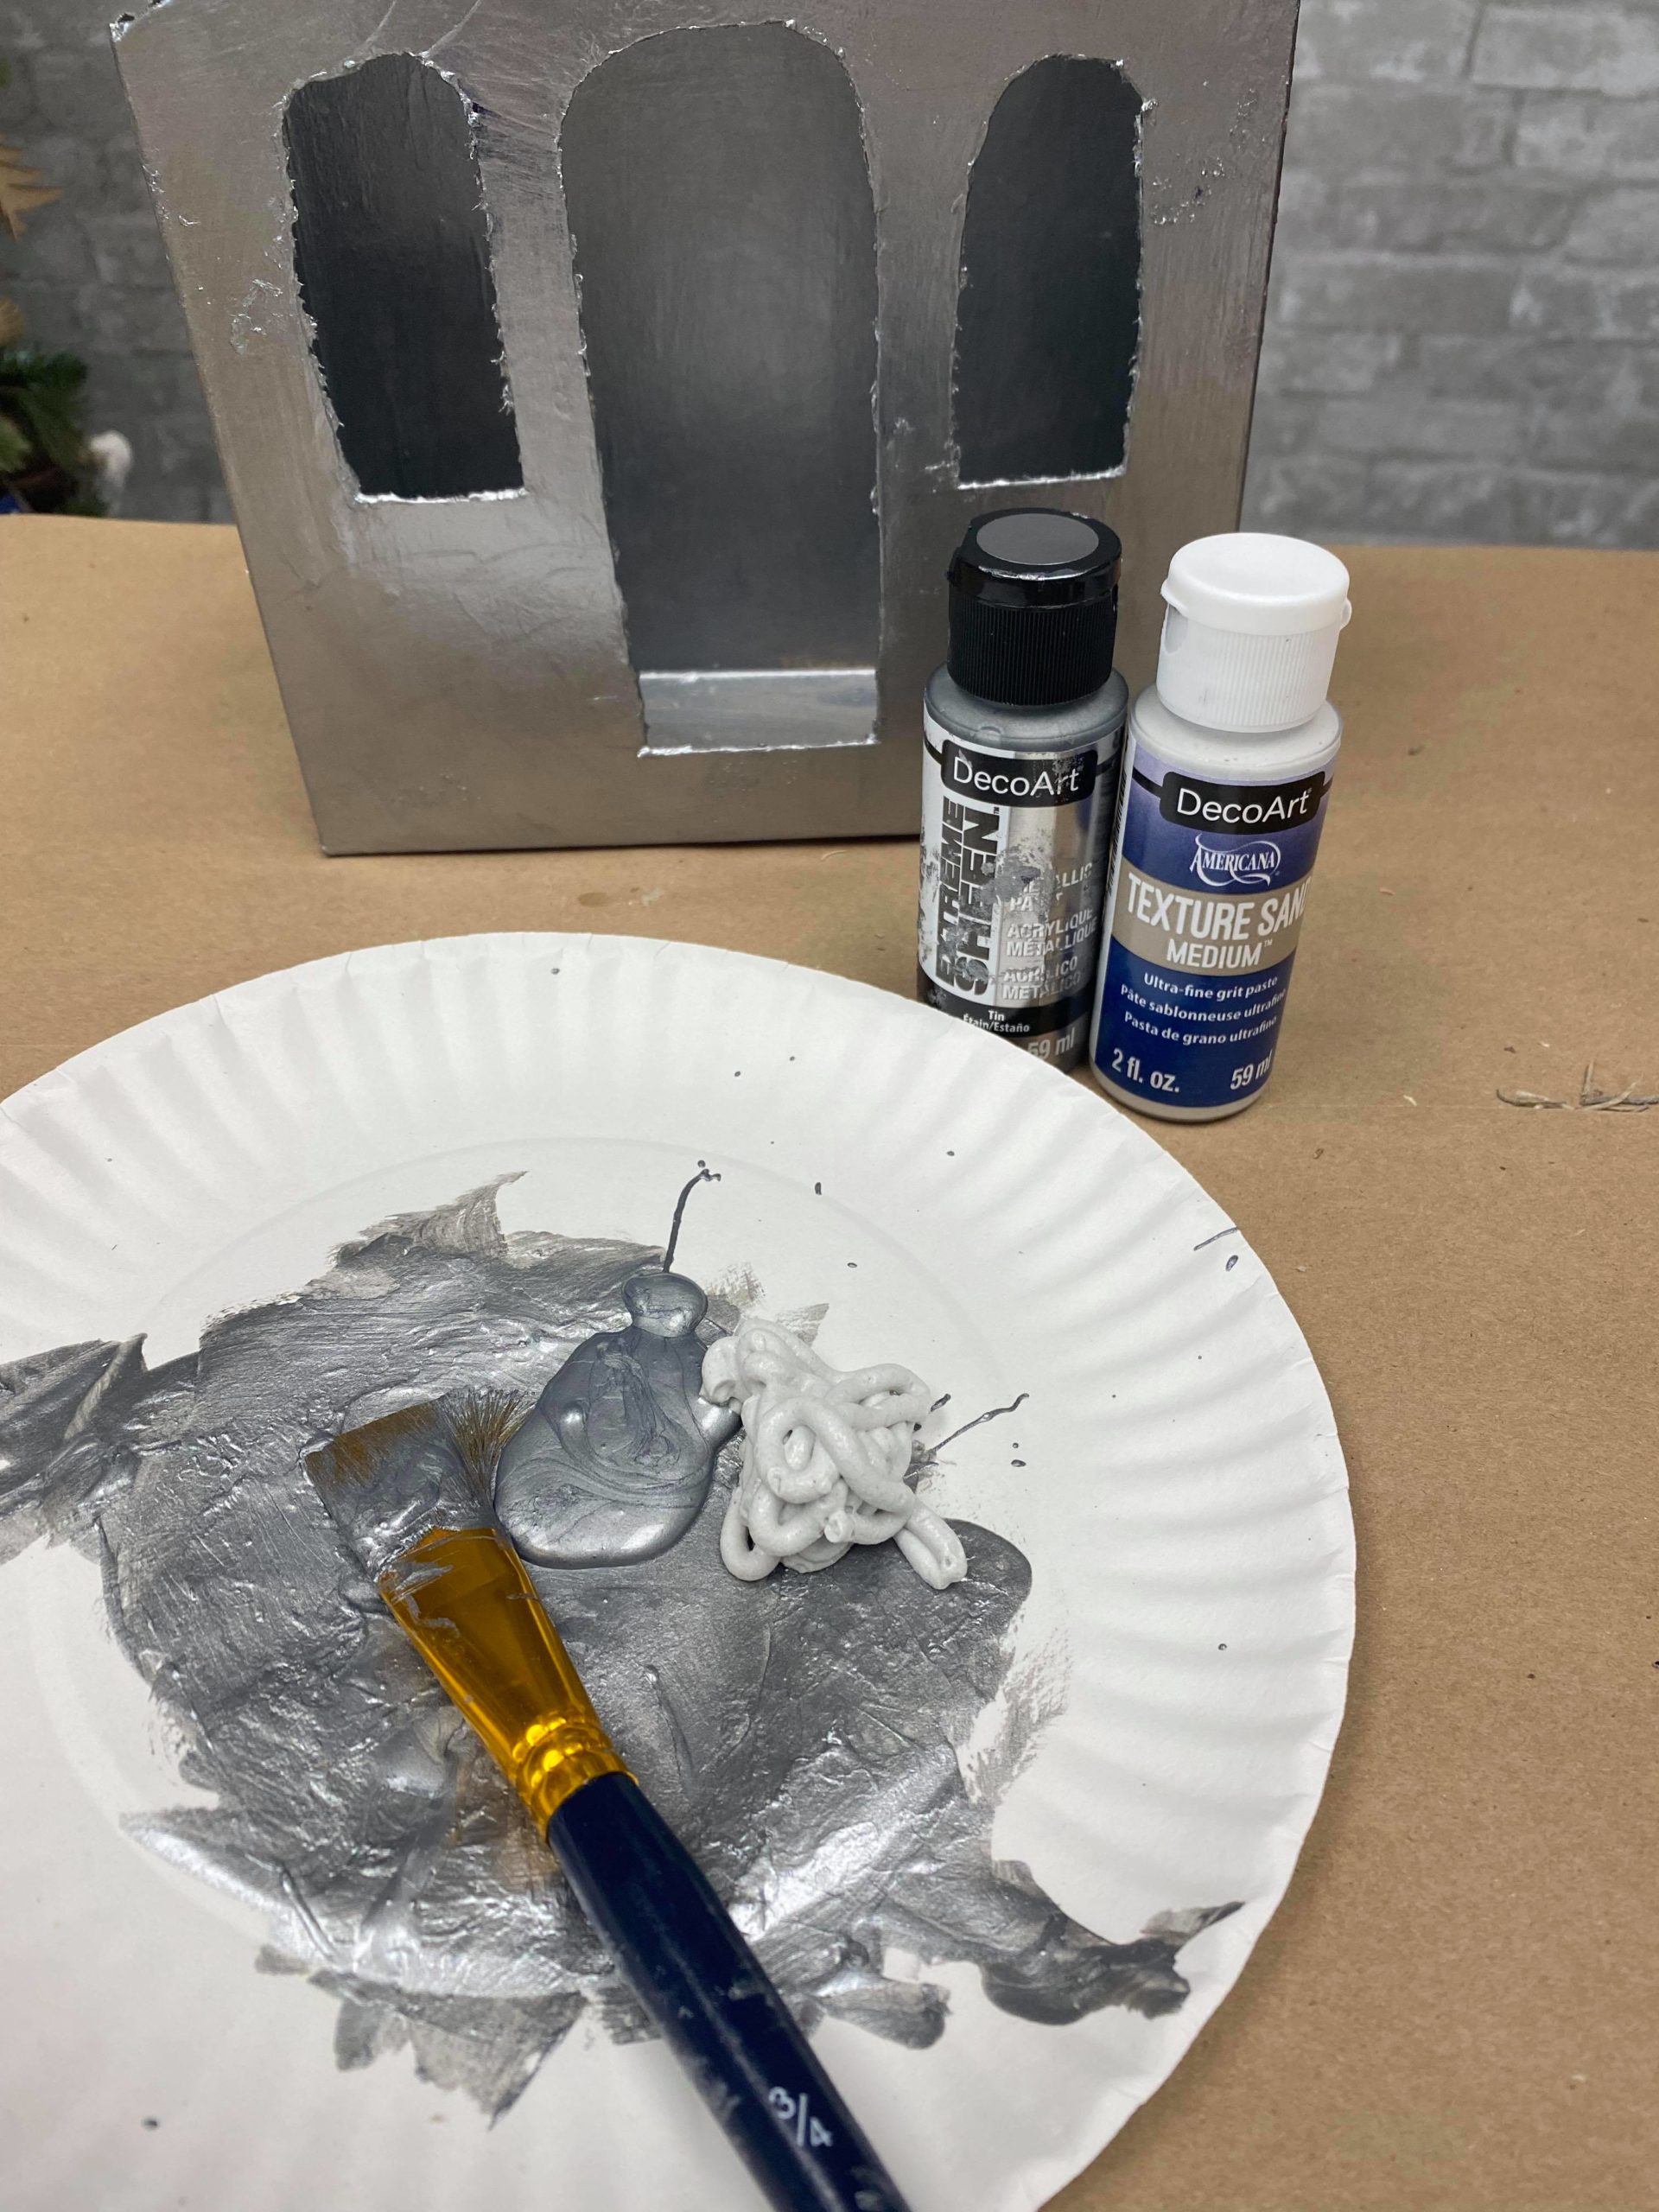

You will only add this here and there.
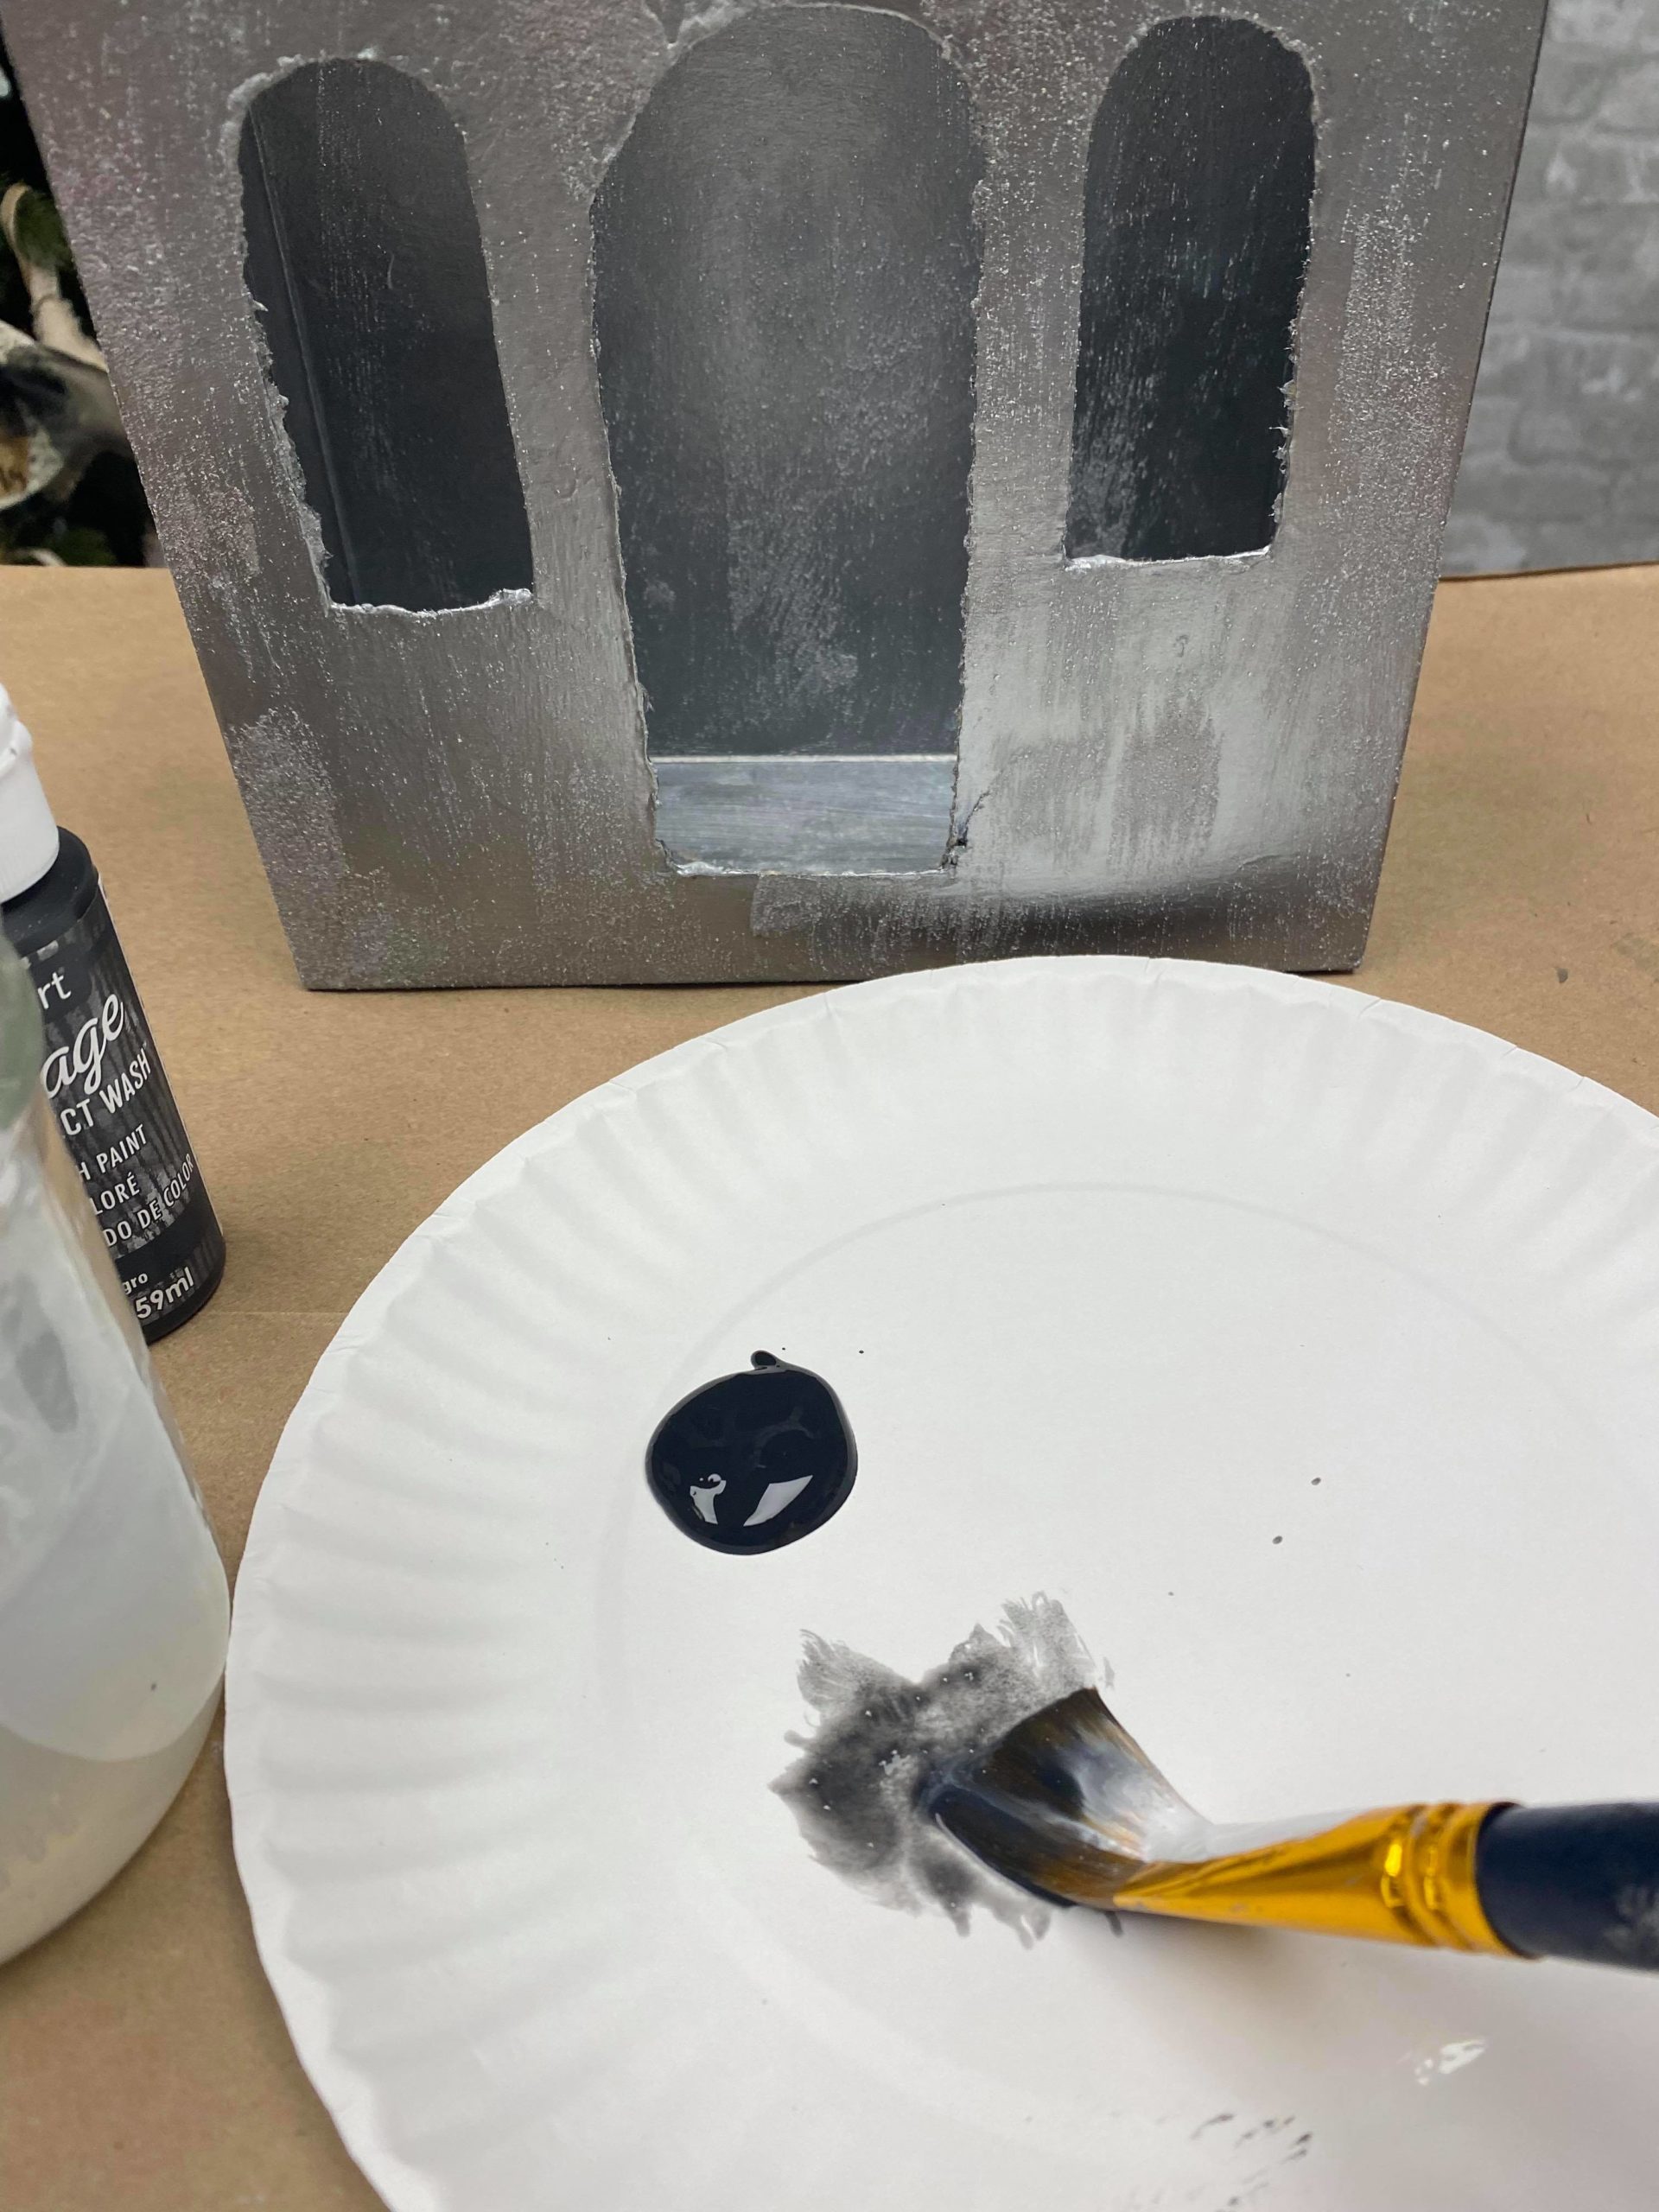
The third step will be to add the black and white Vintage effects.
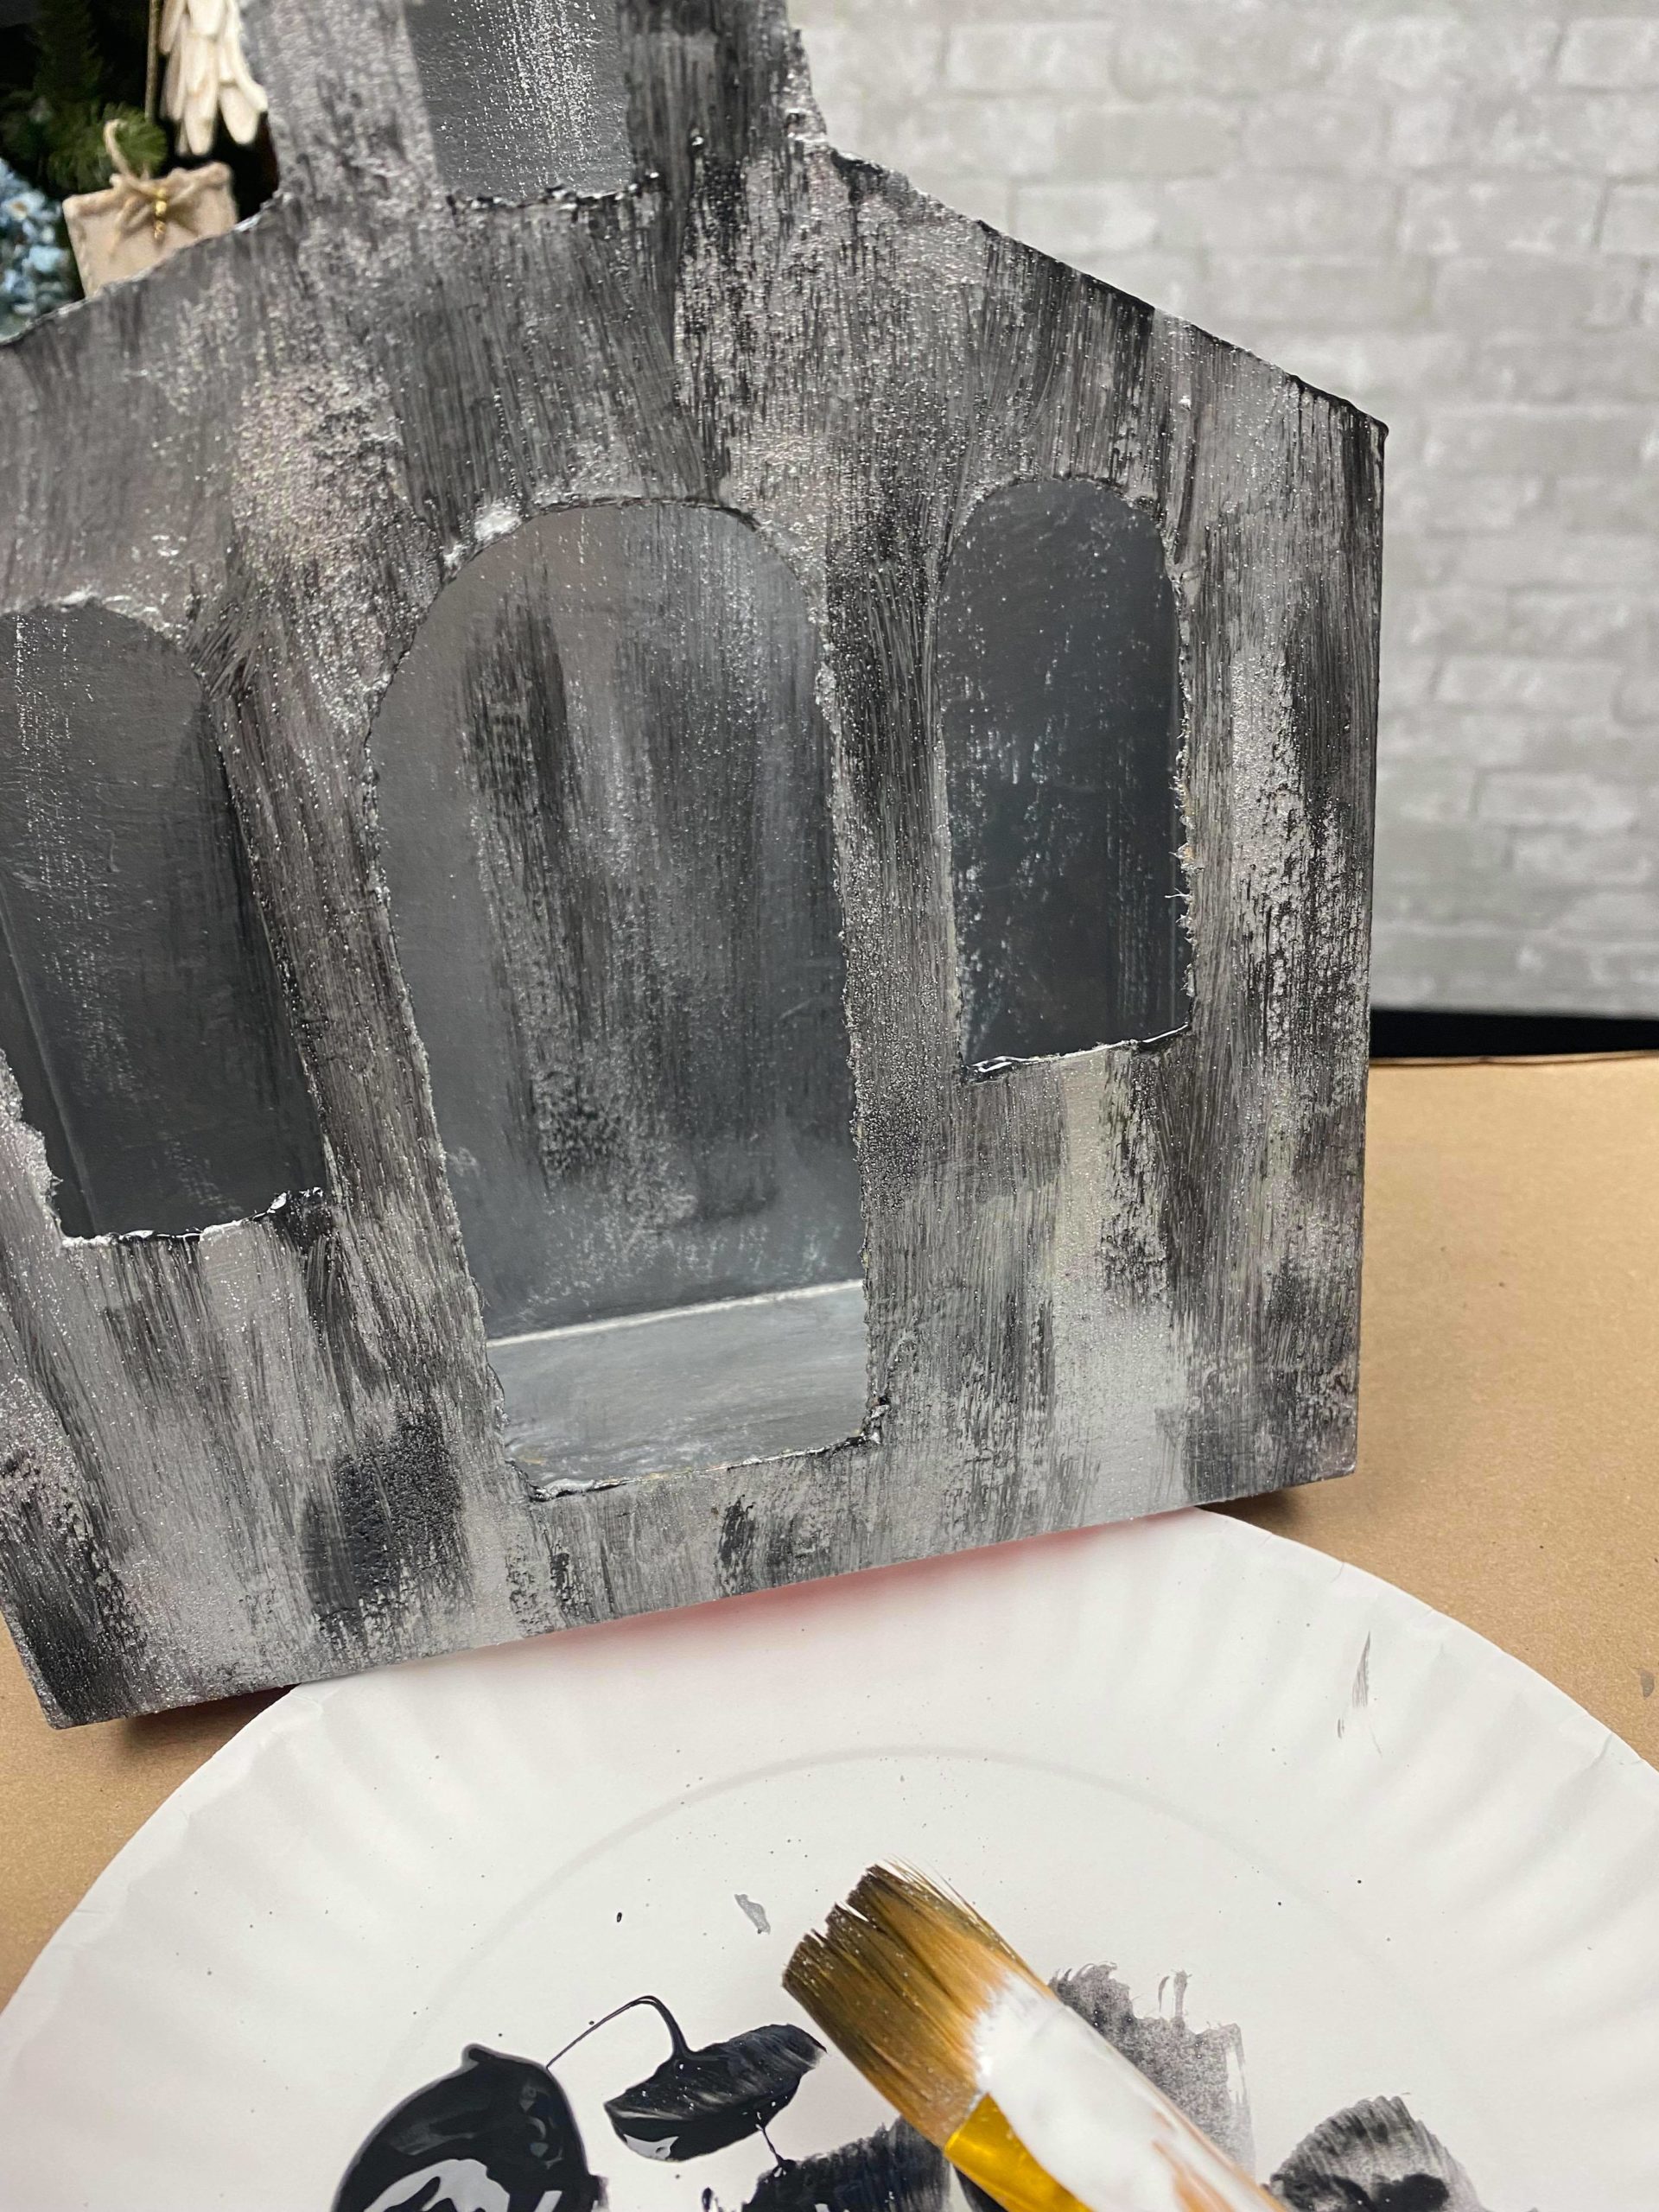
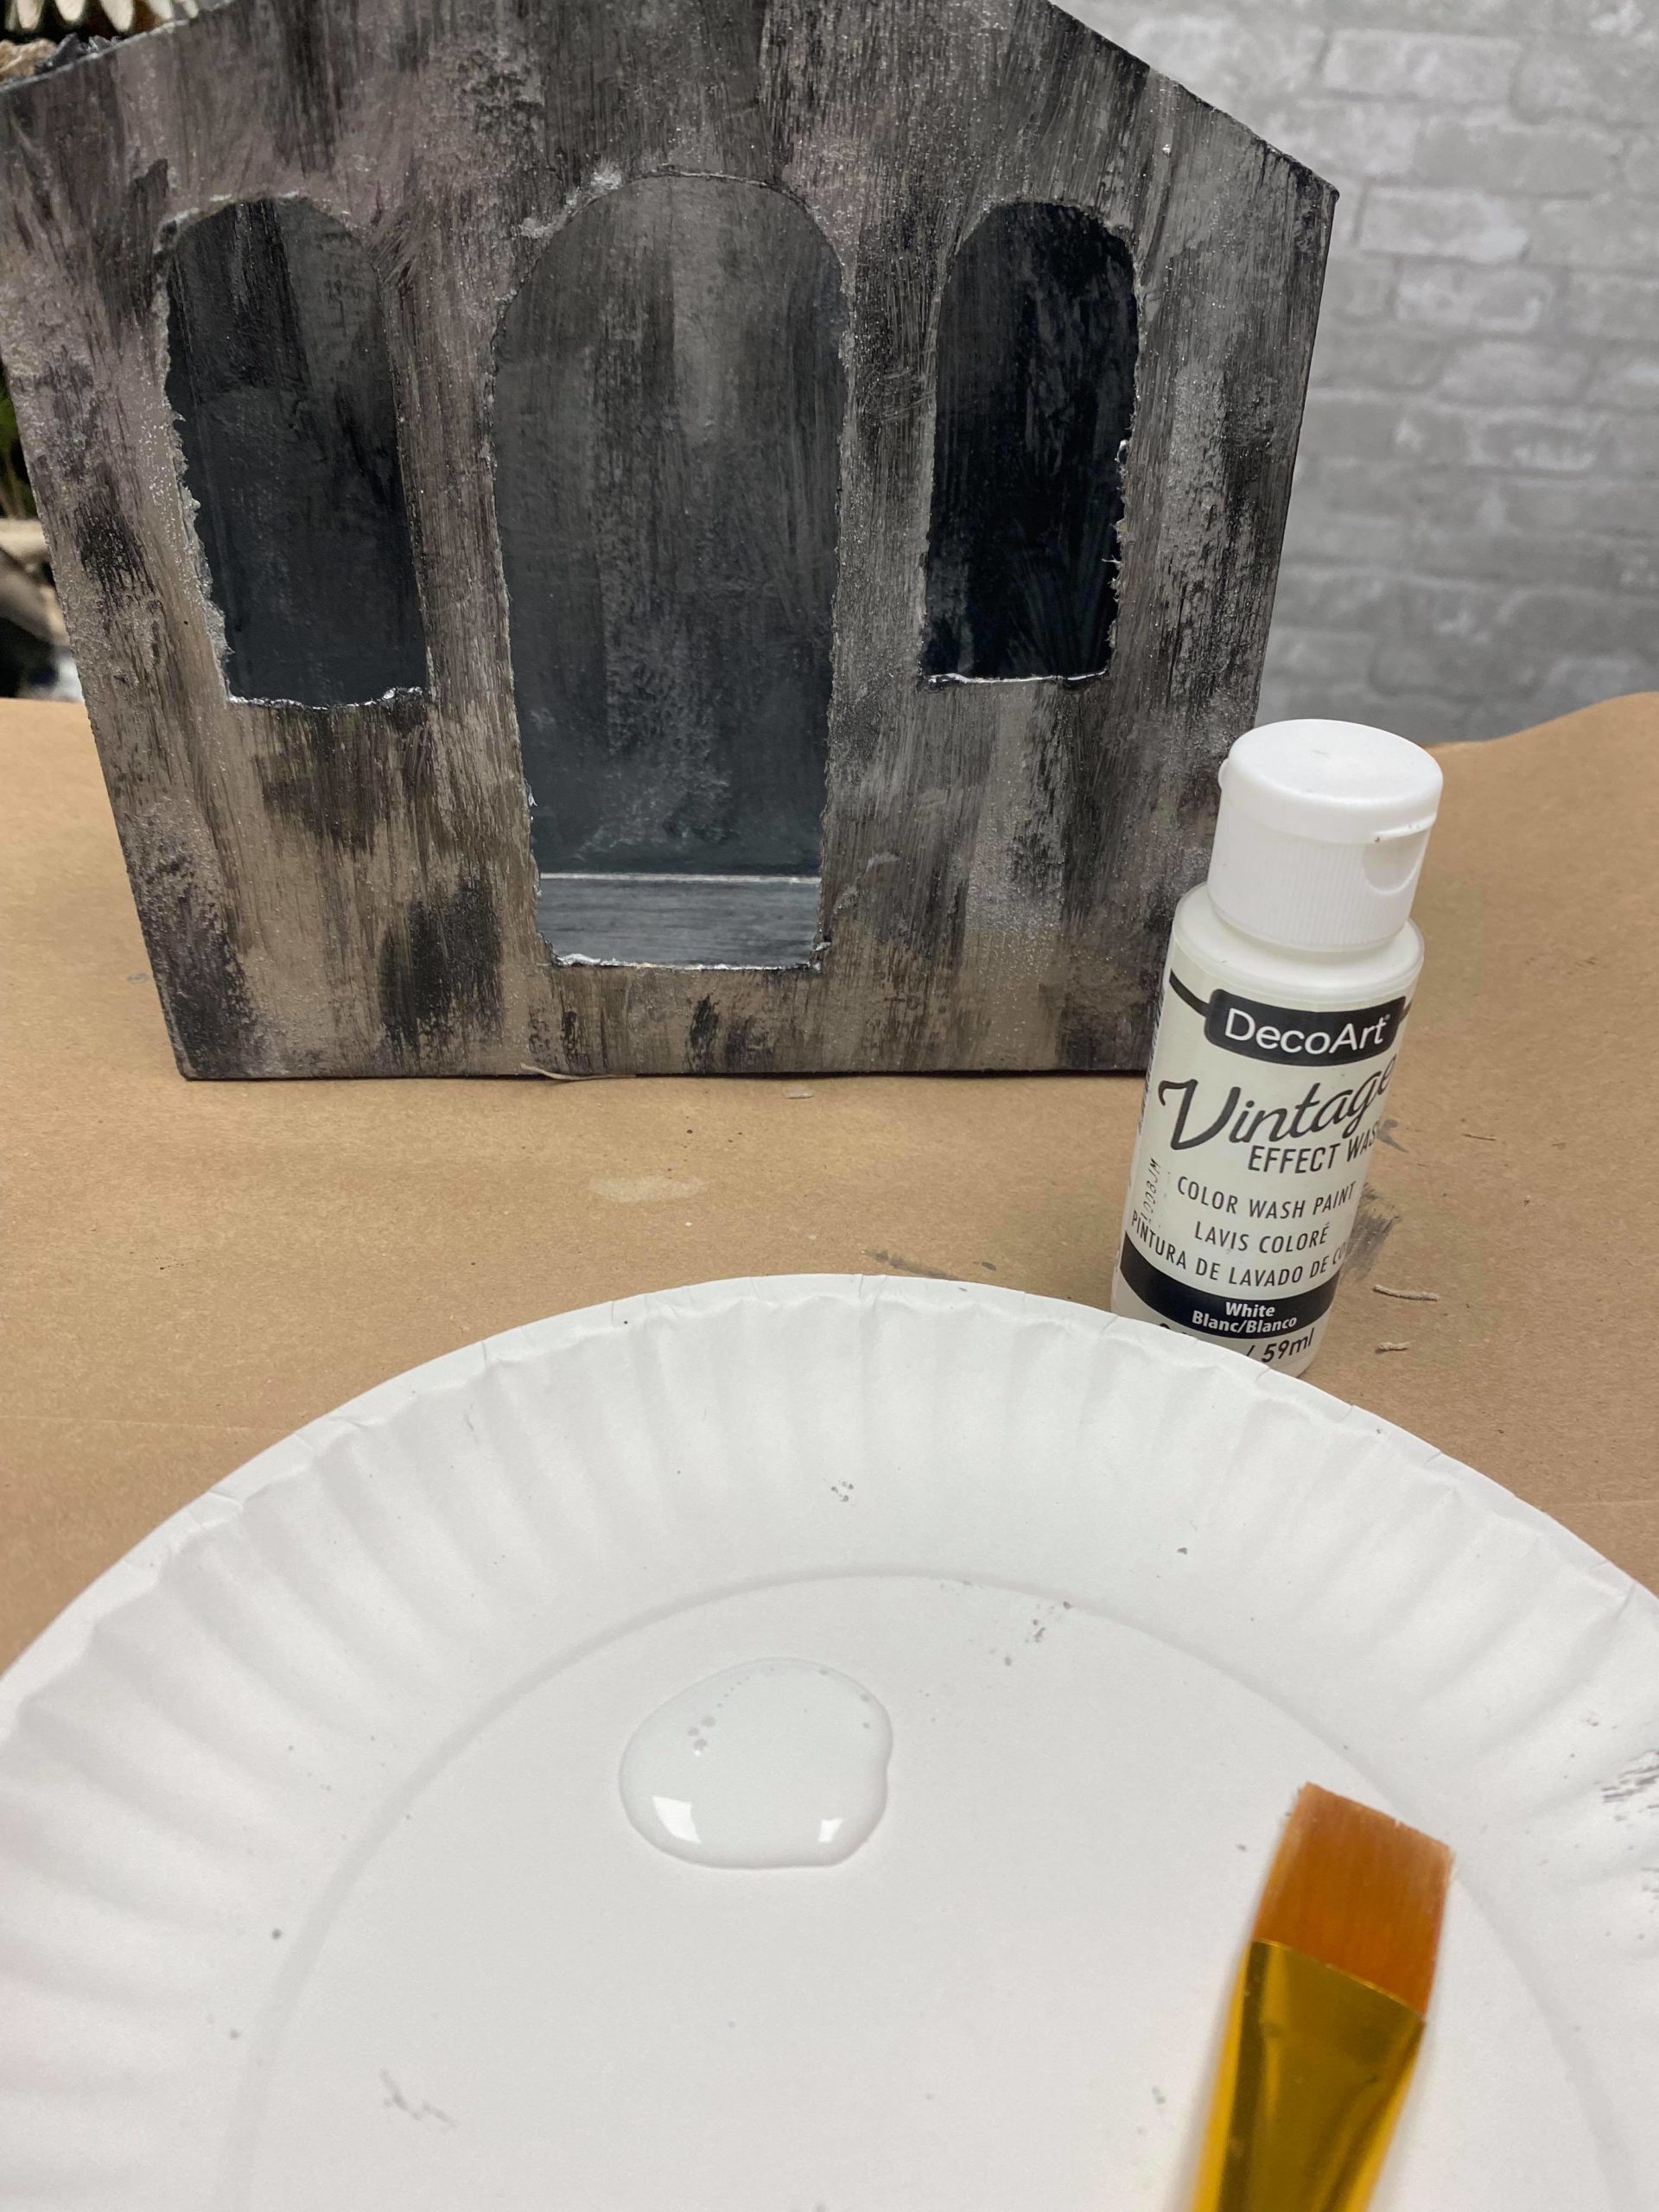
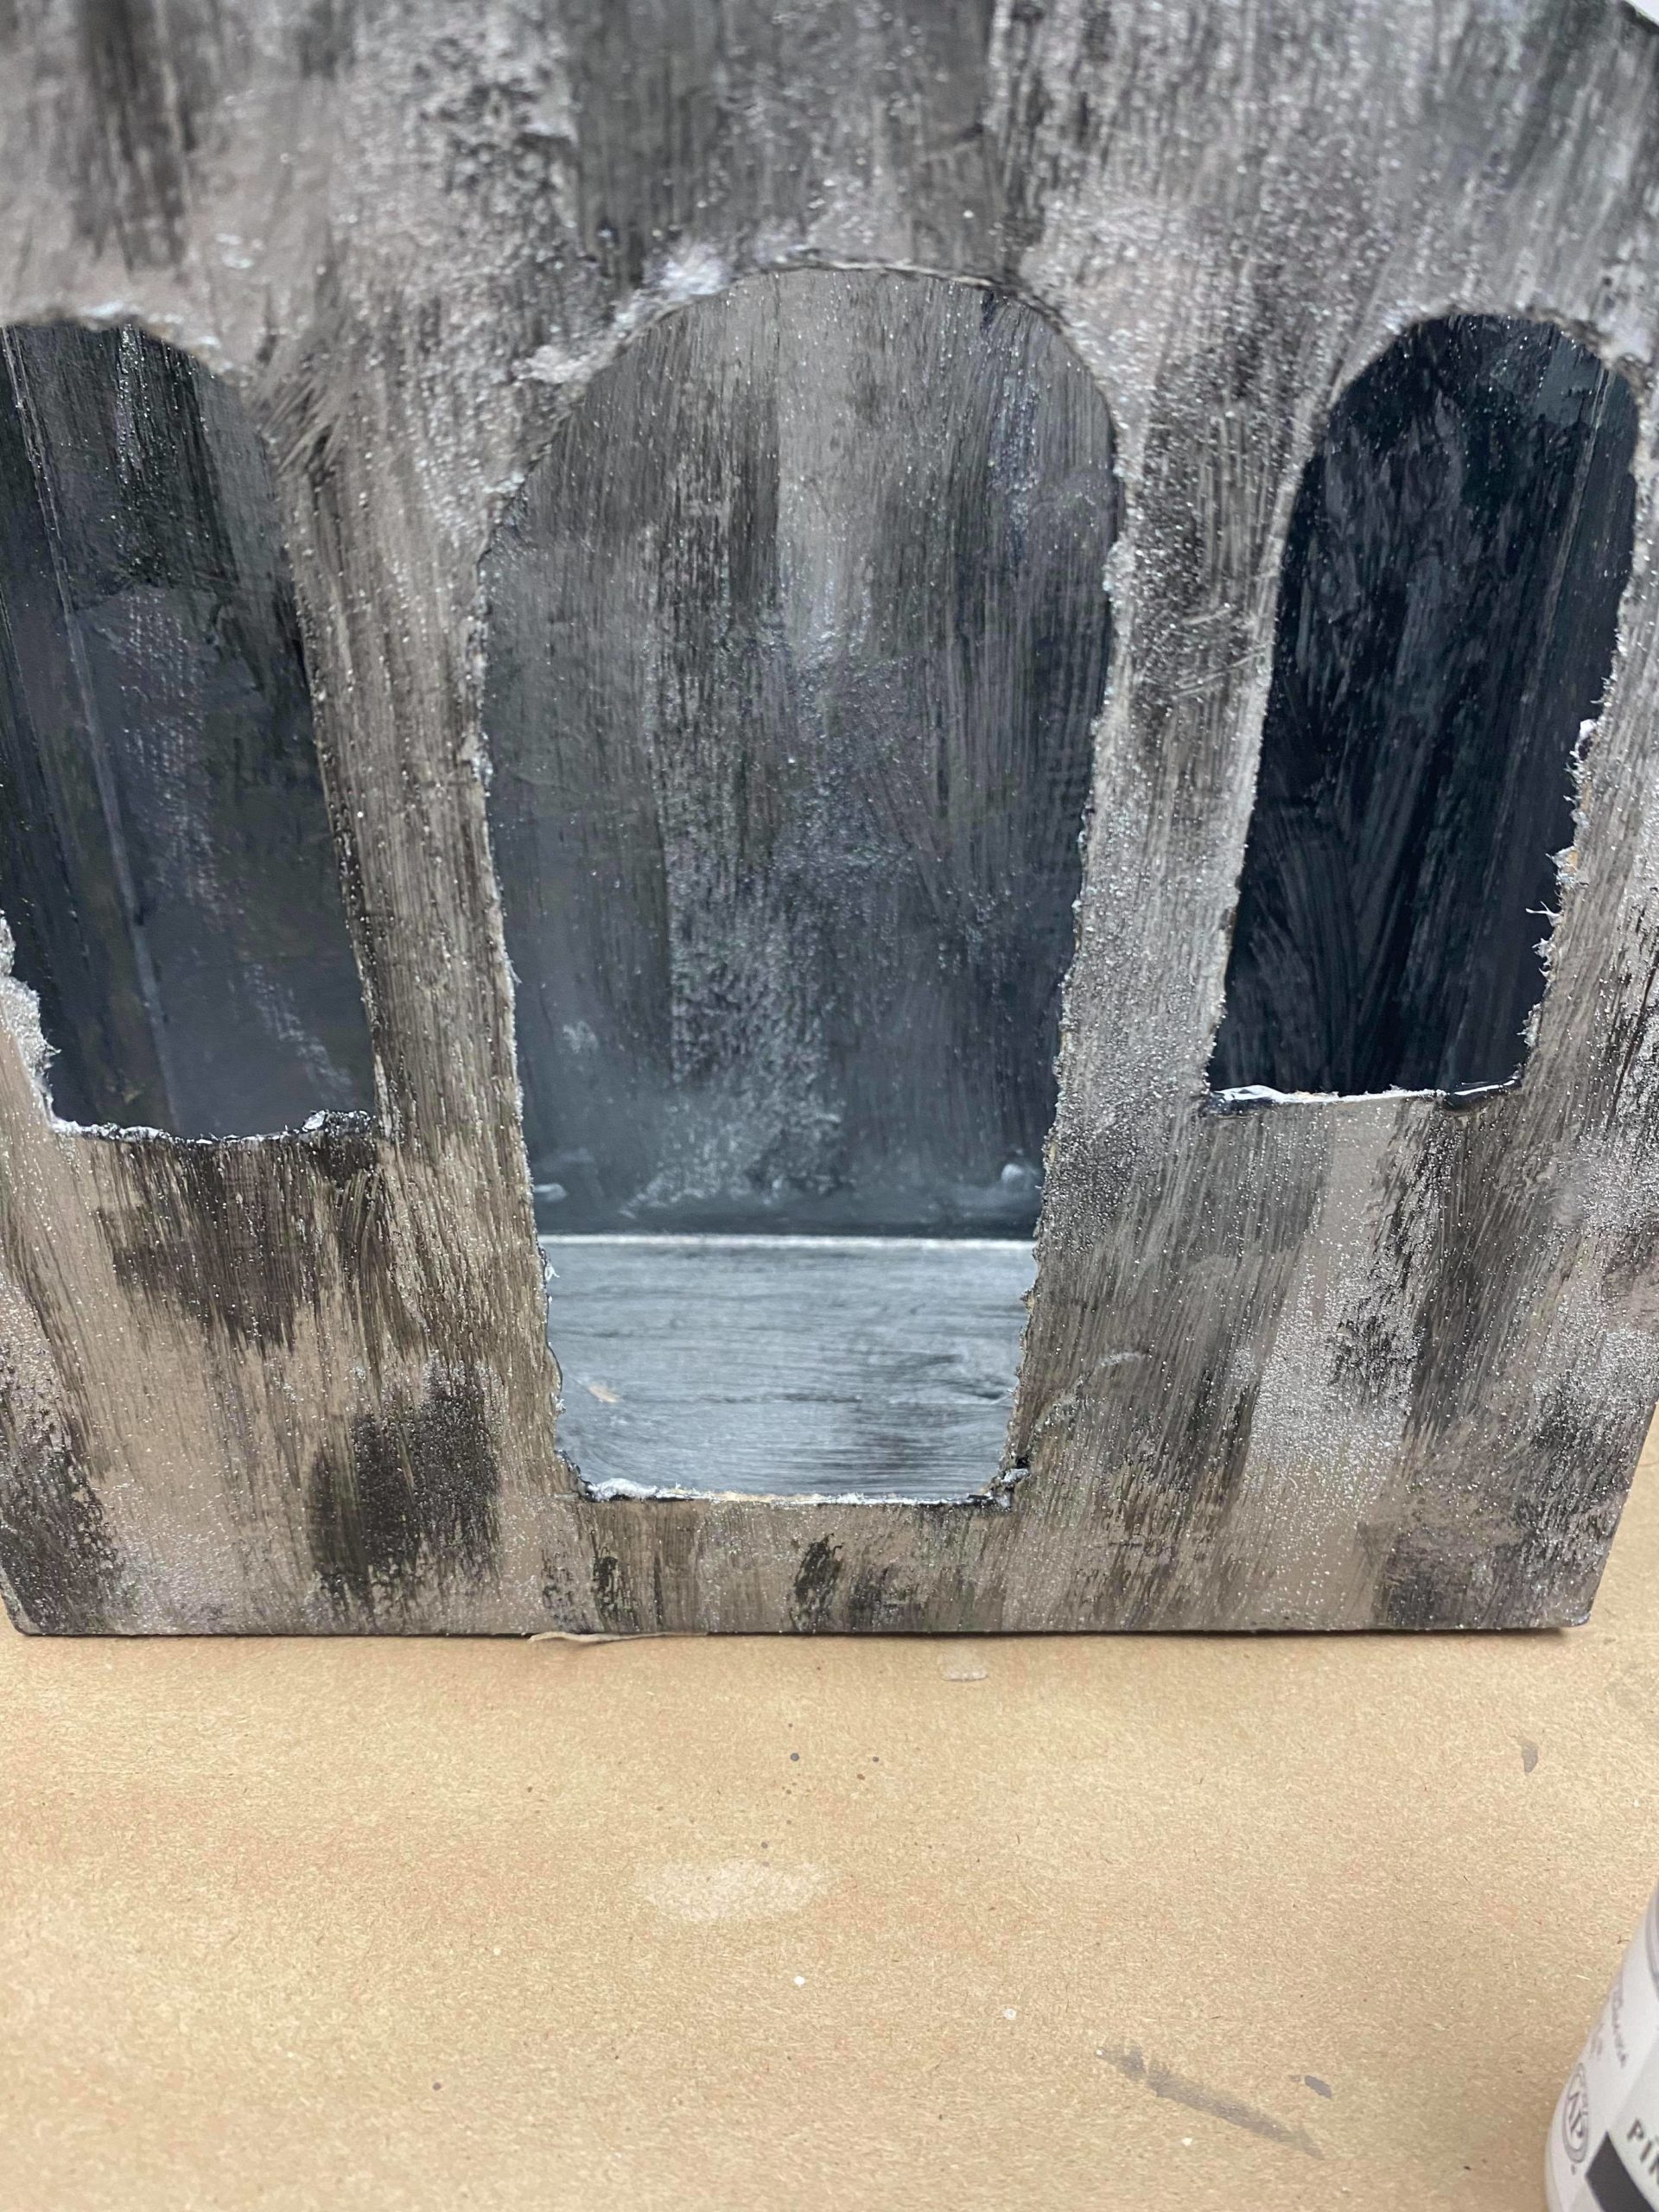
You will add the black and white Vintage Effects here and there until you achieve the look you want.
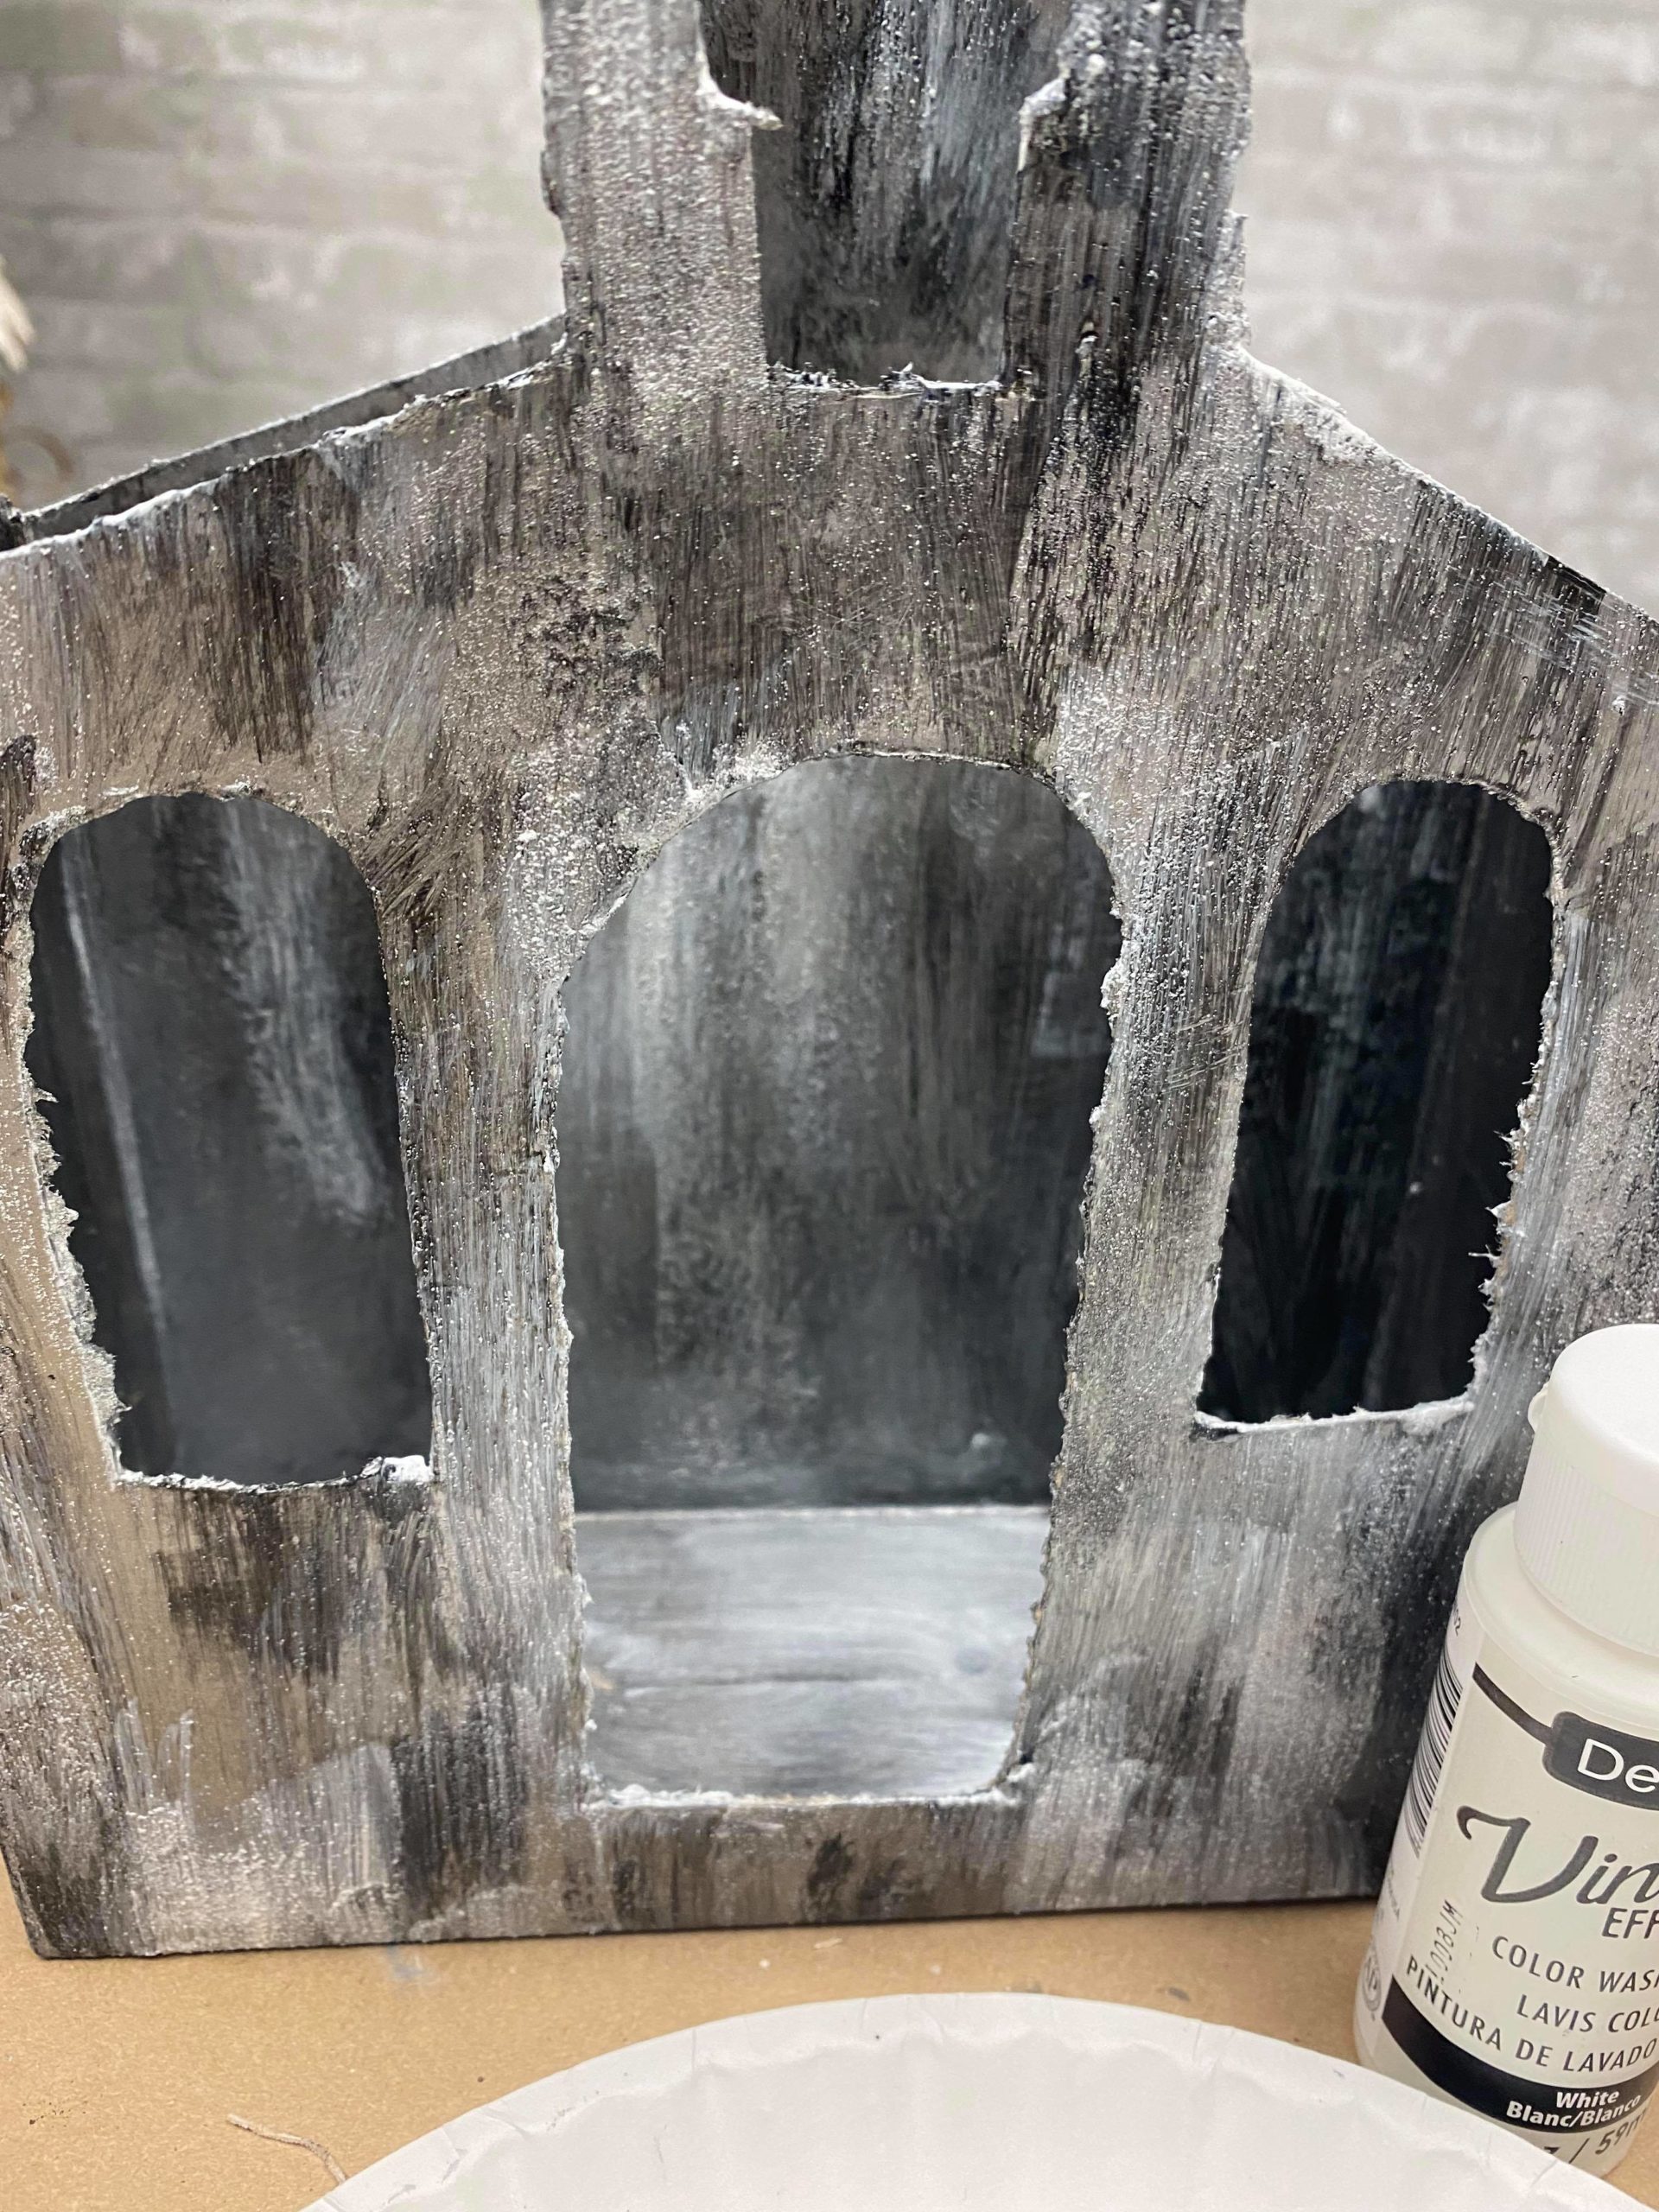
This is so easy to use and creates an amazing look.
You can find the Designer Finishes right here with my affiliate link https://www.dpbolvw.net/click-100329937-13492653?url=https%3A%2F%2Fwww.michaels.com%2Fdecoart-designer-finishes-oxidized-tin-kit%2F10656951.html%3Fr%3Dg&cjsku=10656951
This church lantern turned out amazing and will look great any where in your home. I hope you will get creative and give this a try.