If you love angels and gold as much as I do, then you’re going to adore this festive DIY! This beautiful centerpiece started out as two simple angel tree toppers from Dollar General — and with just a little creativity, they were completely transformed into a stunning holiday display.
I wanted something special for my dining room this Christmas season, and this project turned out even better than I imagined. It’s a great reminder that you don’t have to spend a lot to make your home feel elegant and cozy for the holidays. A few affordable Dollar General finds and a bit of imagination can go a long way!
To bring everything together, I used the Evergreen Tapestry Candle Ring from our website, which added the perfect touch of greenery and sparkle around the base. The combination of shimmering gold tones, warm lights, and angelic charm makes this the perfect Dollar General Christmas DIY for anyone who wants something meaningful and affordable this season. Check out the rest of the blog to see how we made it!
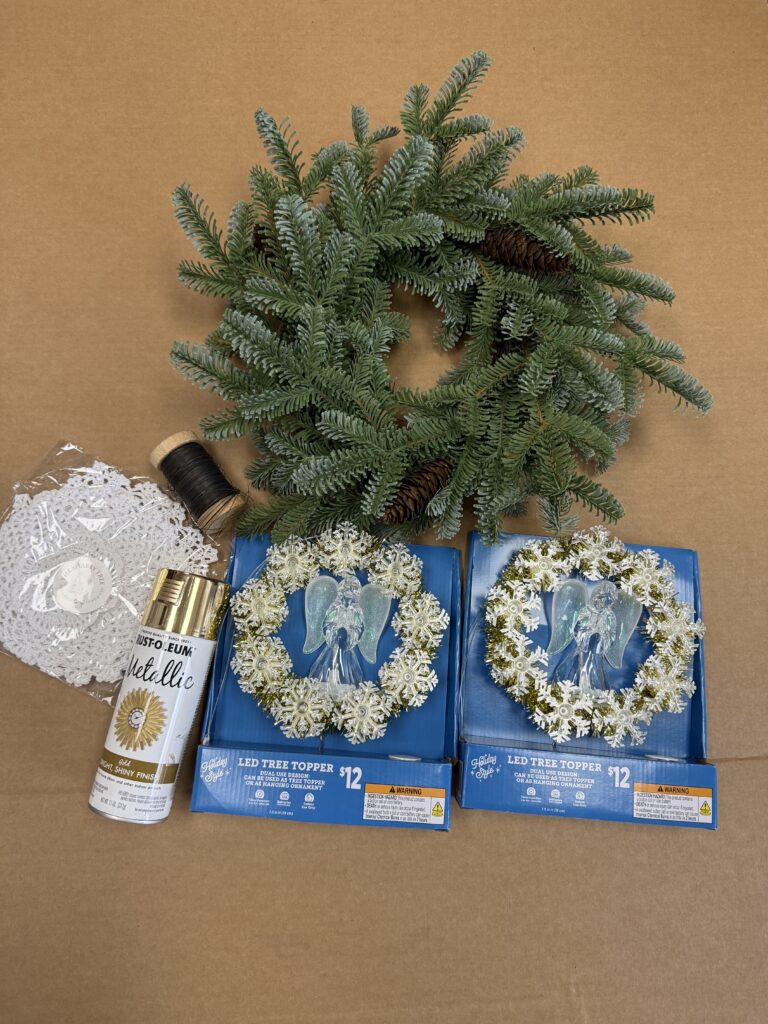
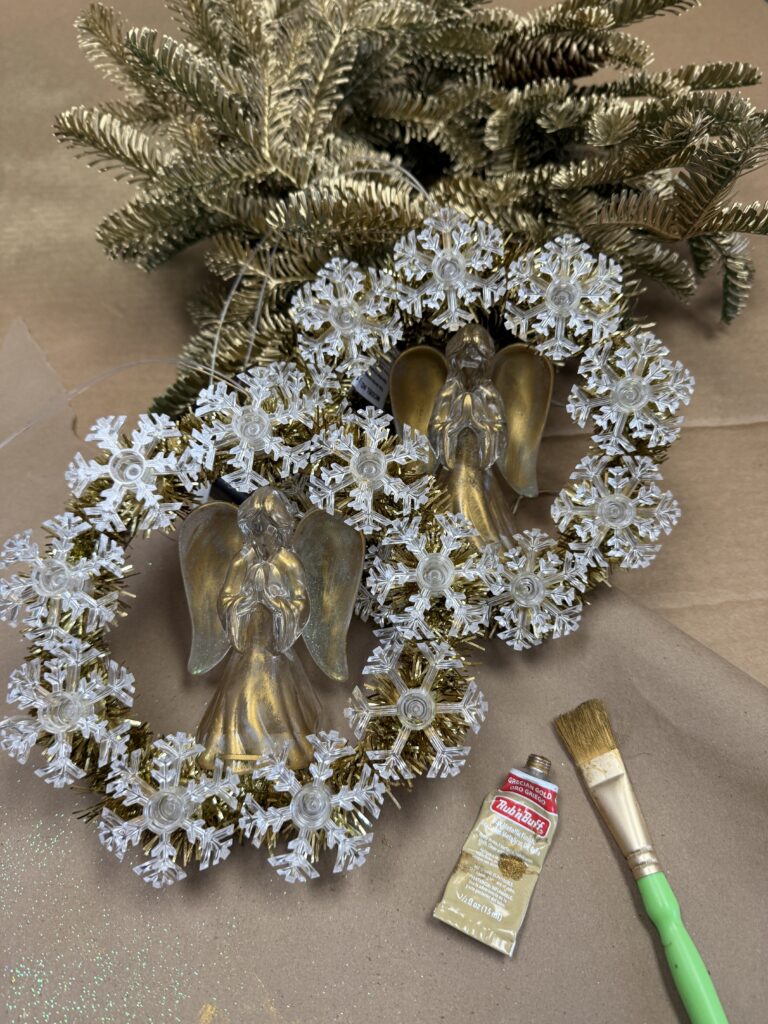
Here is what you will need for this DIY:
1. Two Angel Tree Toppers from Dollar General
2. A big candle ring, I am using the Evergreen Tapestry Candle Ring from our website
3. Gold Spray Paint
4. A pack of the small doilies from our website
5. Wire and scissors
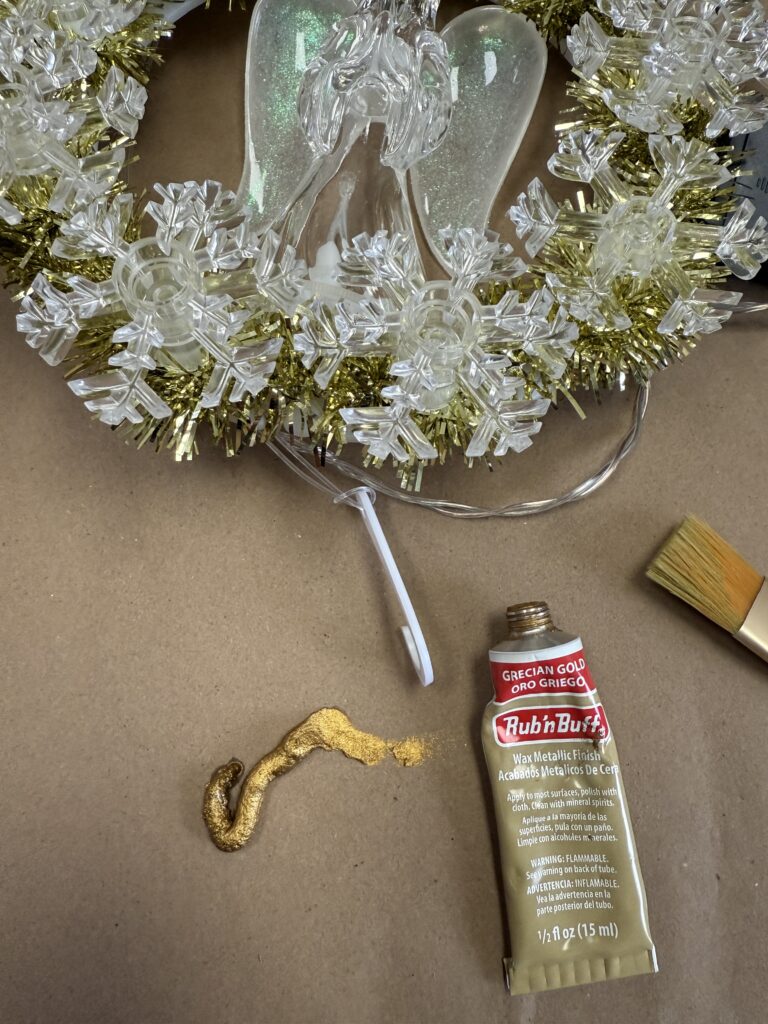
6. Grecian Gold Rub N’ Buff (Not pictured)
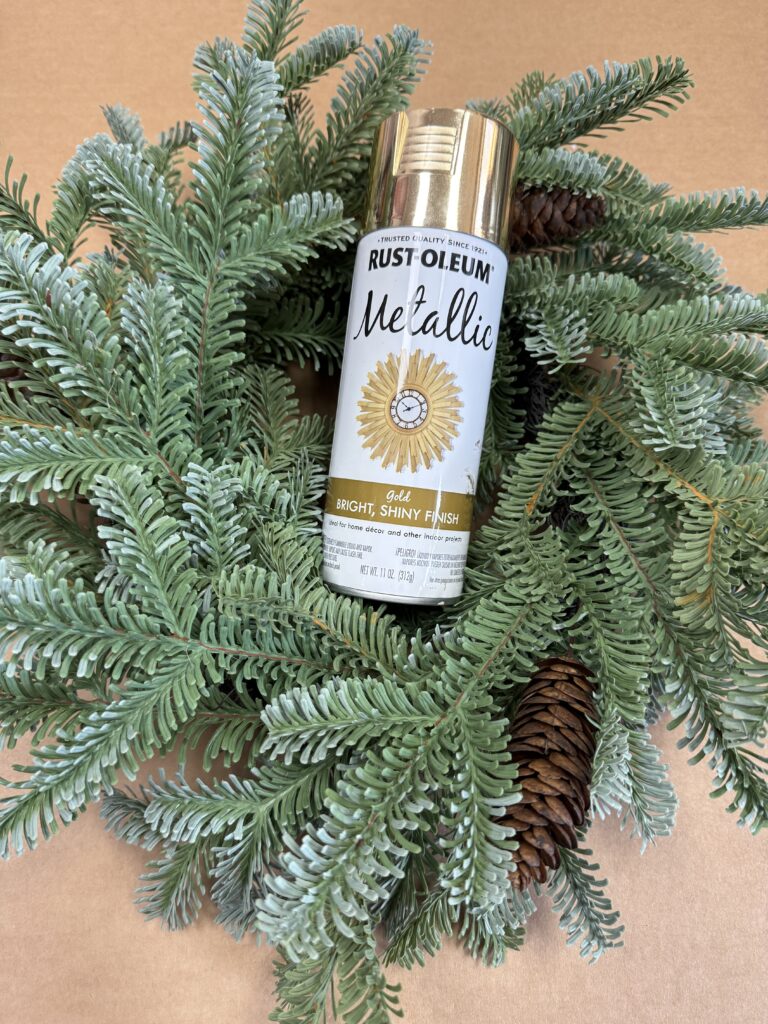

To start this Dollar General tree topper makeover, I grabbed our Evergreen Tapestry Candle Ring from The Shabby Tree website and gave it a little upgrade. I wanted my centerpiece to tie in beautifully with the gold tones of my dining room, so I decided to spray paint the entire candle ring a rich, metallic gold.
I applied several light coats, letting each layer dry before adding more until I reached the perfect shade of gold I envisioned. The transformation was instant — the greenery took on a shimmery, elegant look that made it feel more like a boutique piece than a simple candle ring.
If you’d like to use the same base for your project, you can find the Evergreen Tapestry Candle Ring right on our website here: https://theshabbytreeboutique.com/evergreen-tapestry-candle-ring/?searchid=593473&search_query=evergreen
This step really set the tone for the rest of my DIY Dollar General Christmas centerpiece, adding a warm glow and a touch of luxury before I even brought in the angel toppers.
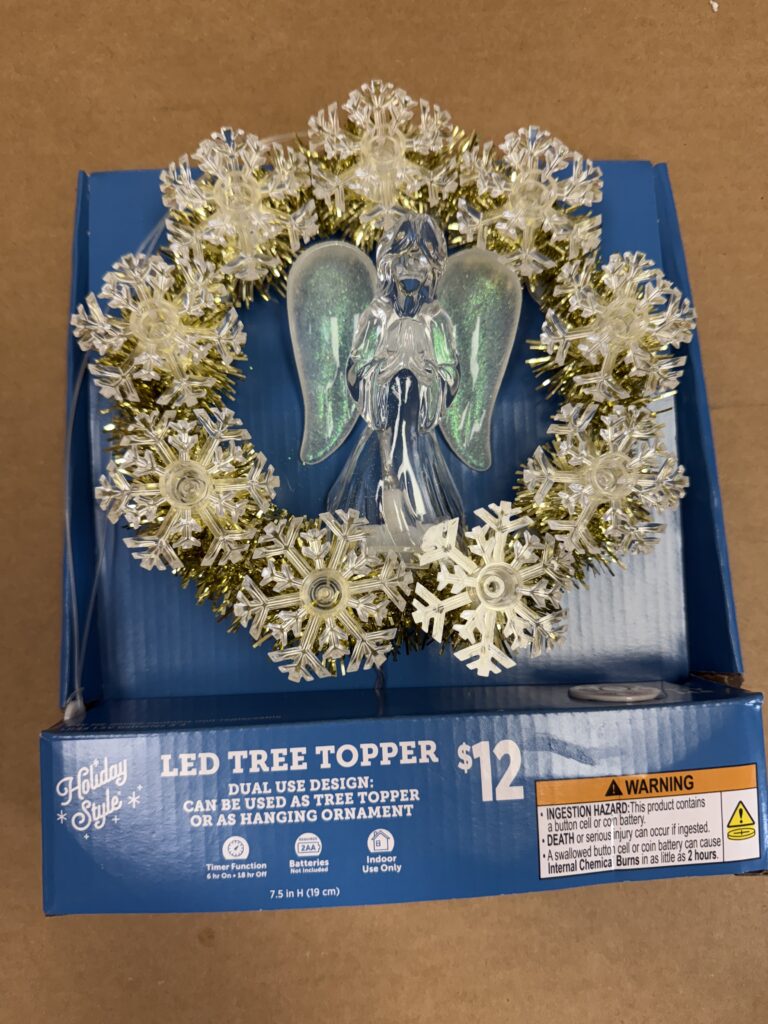
Next, I took the angel tree toppers from Dollar General out of their packaging and got ready to give them a quick makeover. They were already adorable, but I wanted to give them a more vintage and elegant look to match the gold theme of my dining room centerpiece.
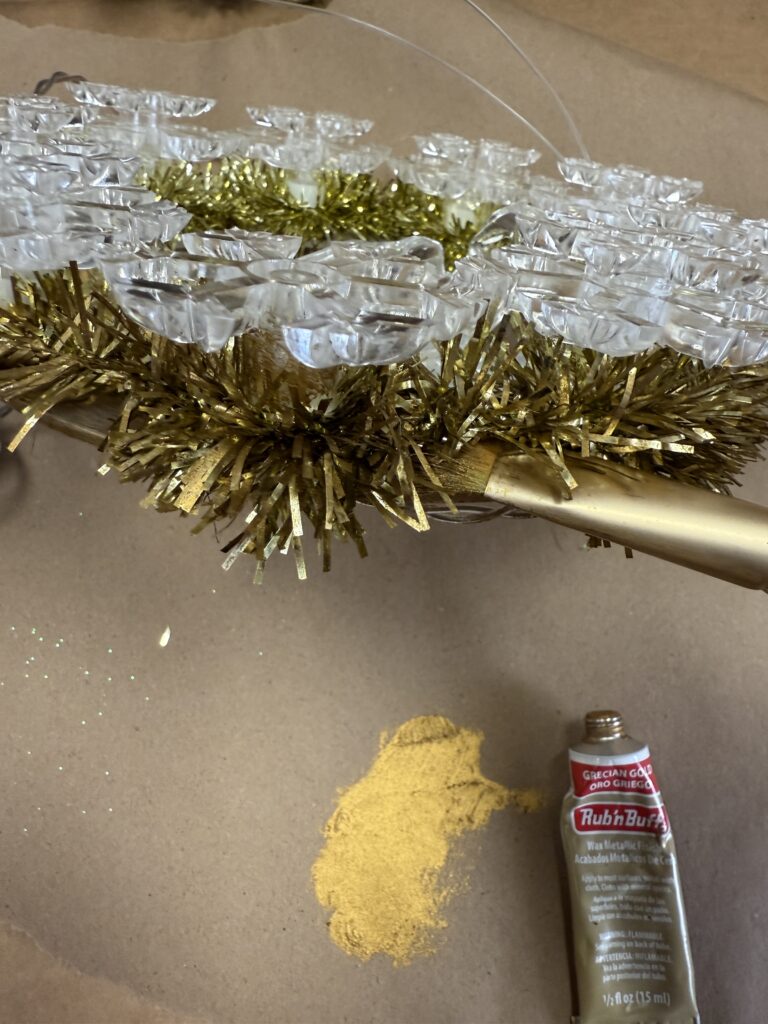
I grabbed my Grecian Gold Rub ’n Buff and a small paintbrush to apply it. Instead of using my fingers, I used the brush to lightly go over the tinsel around each angel. This gave me a little more control and helped blend the gold tones evenly without overdoing it.
It’s amazing how just a little Rub ’n Buff can change the look of something so simple! The tinsel took on a soft, antique gold finish that made the toppers feel more high-end and timeless. It’s an easy way to create that vintage Christmas decor feel while keeping the project affordable and fun.
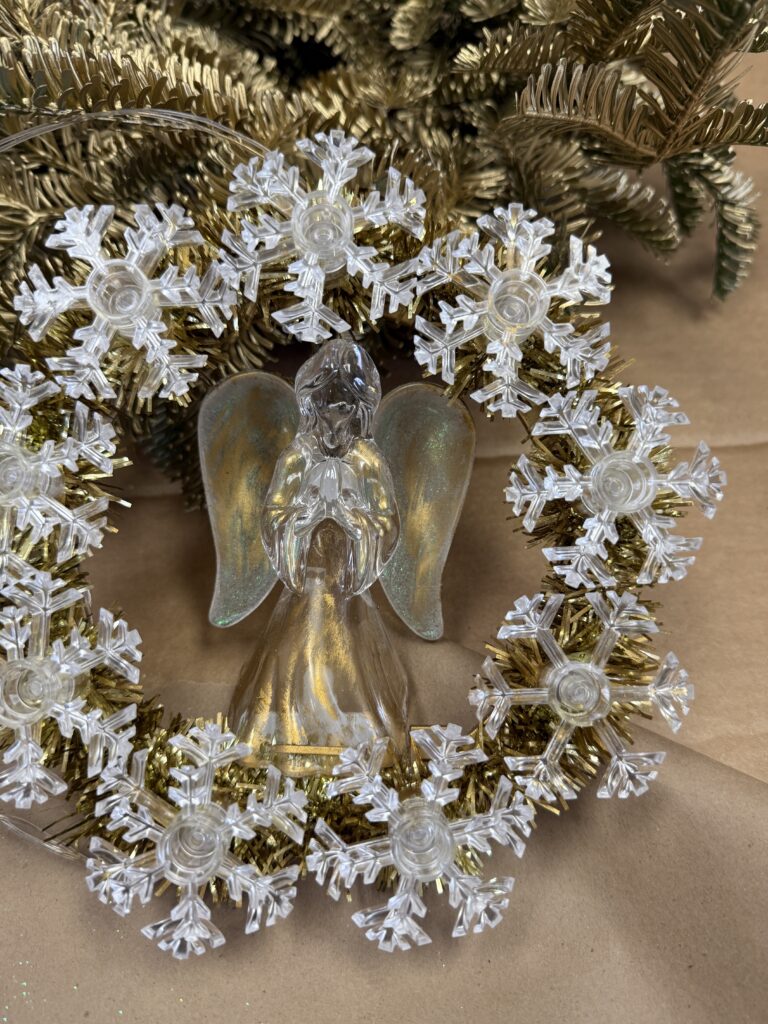
Once the tinsel had that pretty vintage finish, I decided to take things a step further and give the angels themselves a soft golden glow. Using the same Grecian Gold Rub ’n Buff and my small paintbrush, I gently brushed a bit onto the angel’s wings and dress.
This step really brought the whole piece to life. The subtle shimmer made the Dollar General angel tree toppers look like something you’d find in a boutique rather than a budget store. I didn’t want them to look overly shiny — just enough gold to highlight the details and give that warm, candlelit effect when the lights hit them.
It’s such a simple touch, but it completely transformed the look. The angels went from clear and plastic to elegant and glowing — the perfect accent for a DIY gold Christmas centerpiece that feels both timeless and meaningful.
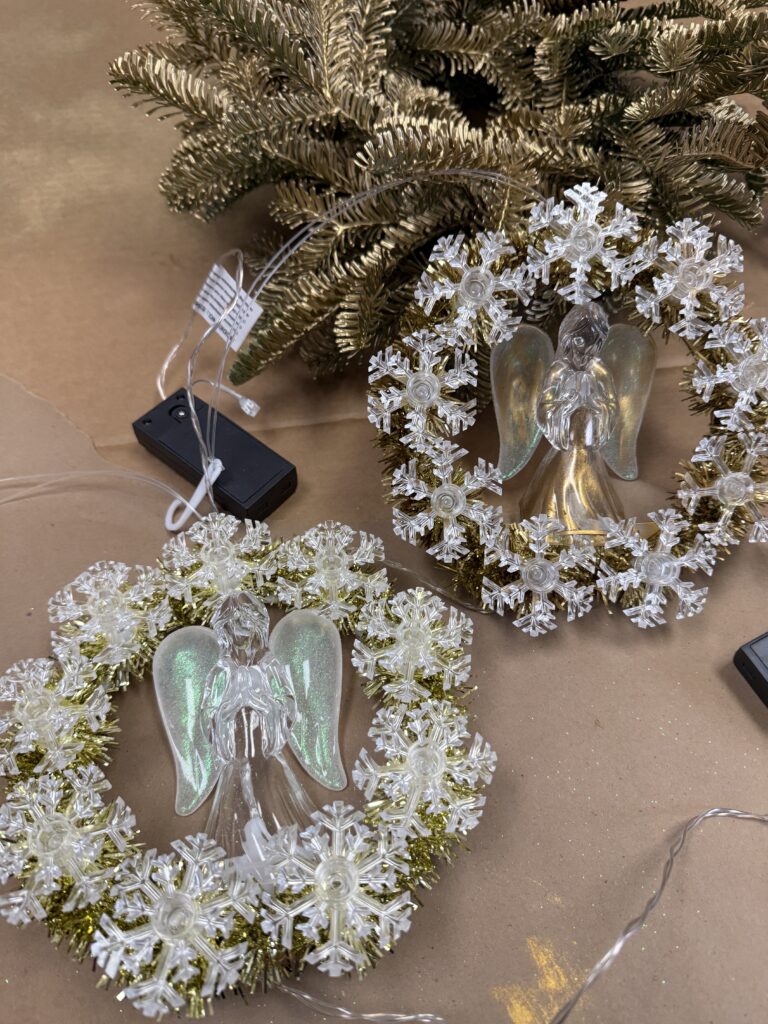
You can really see the difference in this before-and-after! The Dollar General angel tree topper on the left is how it looked originally, and the one on the right has that soft golden glow I added with the Grecian Gold Rub ’n Buff.
Even though I only brushed on a small amount, it completely changed the look. The tinsel went from bright yellow-gold to a softer, vintage tone, and the angel’s wings and dress now have a warm shimmer that feels so much more high-end.
I love how this step gives the angels that antique charm without taking away from their sweet, classic look. It’s such an easy way to elevate a simple Dollar General Christmas find into something that looks custom-made for your home.
Once I finished the first angel, I went ahead and repeated all of the same steps on my second one. I wanted both Dollar General angel tree toppers to match perfectly since they were going to be the focal point of my DIY Christmas centerpiece.
I added the same touches of Grecian Gold Rub ’n Buff to the wings, dress, and tinsel using my small paintbrush, making sure the gold tones were even on both. Keeping them consistent really helped the final piece feel cohesive and balanced once everything was assembled.
It’s amazing how just a few simple steps can make two budget-friendly finds look like a coordinated pair of elegant holiday decorations!
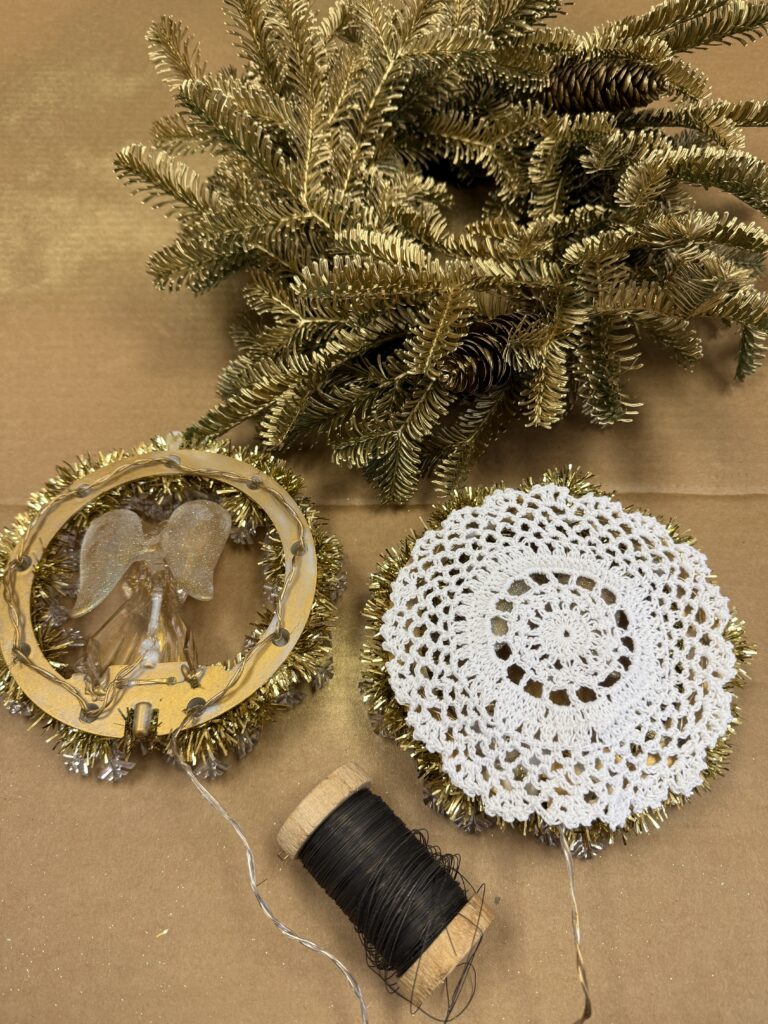
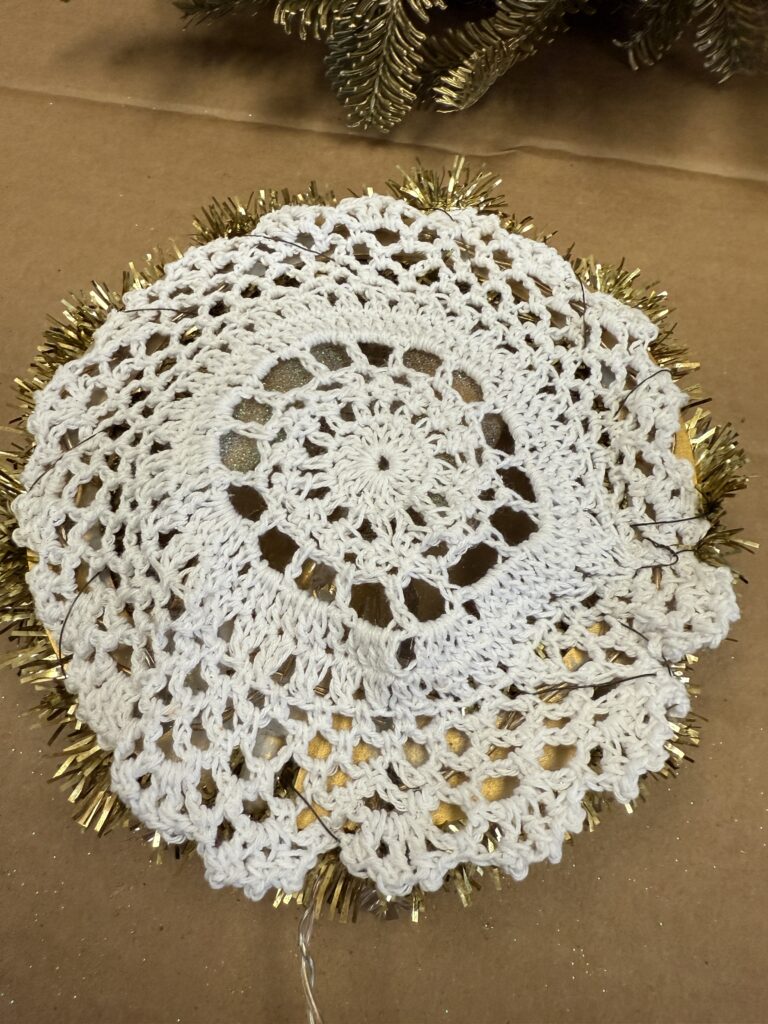
Next, I grabbed one of the doilies from our website along with a little bit of wire. To add a touch of texture and softness behind the angel, I turned one of the Dollar General tree toppers over and carefully wired the doily to the back.
This step might seem small, but it made a big difference! The delicate crochet pattern of the doily created a beautiful backdrop for the angel, helping it stand out even more against the gold tones. It added that perfect mix of vintage charm and handmade detail that I love including in my DIY Christmas decor.
If you’d like to use the same ones I did, you can find the doilies on our website here: https://theshabbytreeboutique.com/pack-of-5-crochet-doilies/
The doily helps the light reflect beautifully and really makes the angel pop when the centerpiece is lit up!
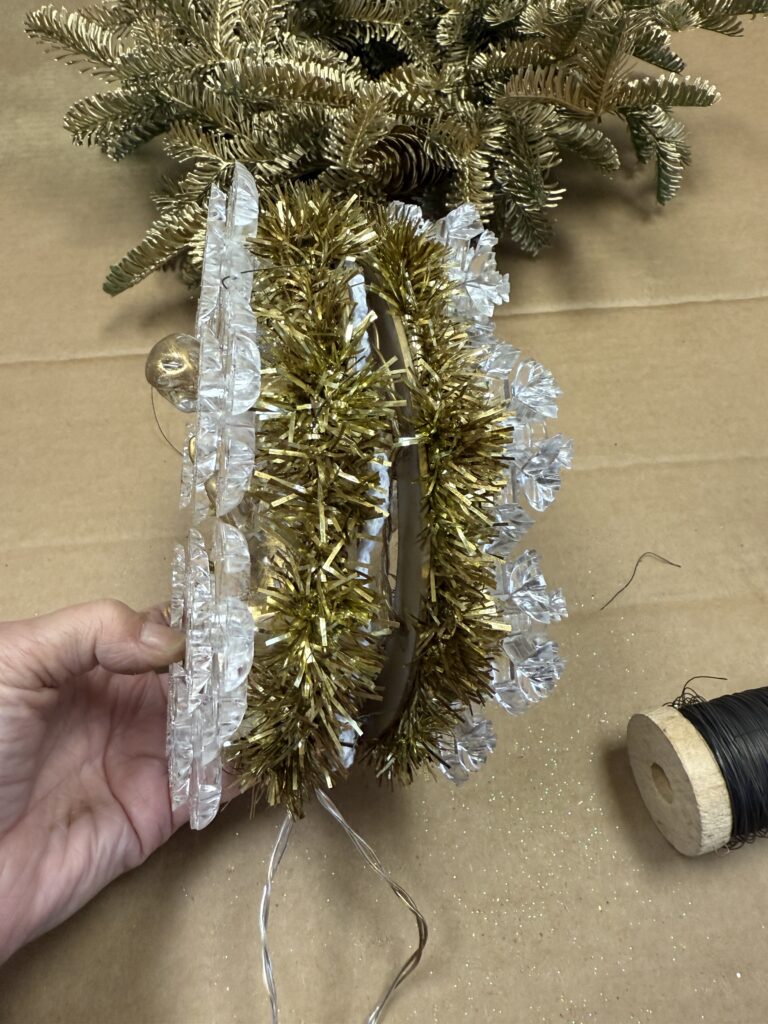
Once that was done, I took the second Dollar General angel tree topper and wired it to the back of the first one — with the doily sandwiched perfectly in between. I just used a few pieces of thin craft wire to secure them together tightly.
This simple step brought the two angels together to create one beautiful, double-sided piece. I love how it added more depth and dimension, making the angels stand out from every angle. The doily in the middle softens the look and gives that vintage, handmade touch that ties the whole design together.
It’s such an easy way to turn two inexpensive Dollar General Christmas decorations into a stunning DIY Christmas centerpiece that looks completely custom-made.
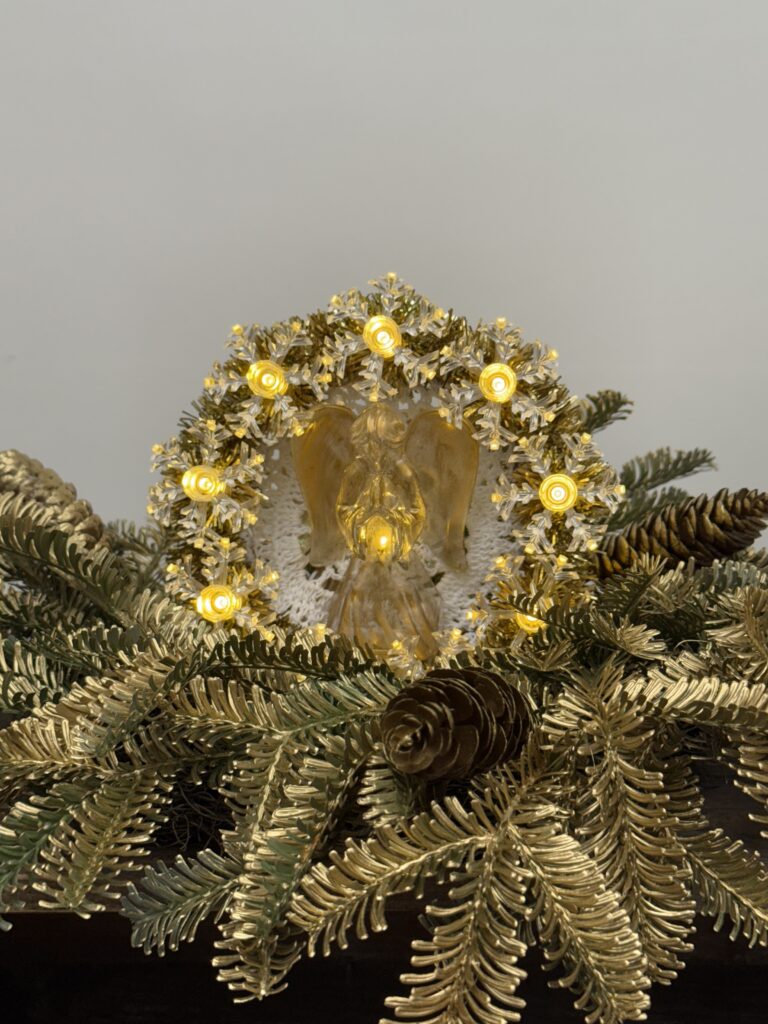
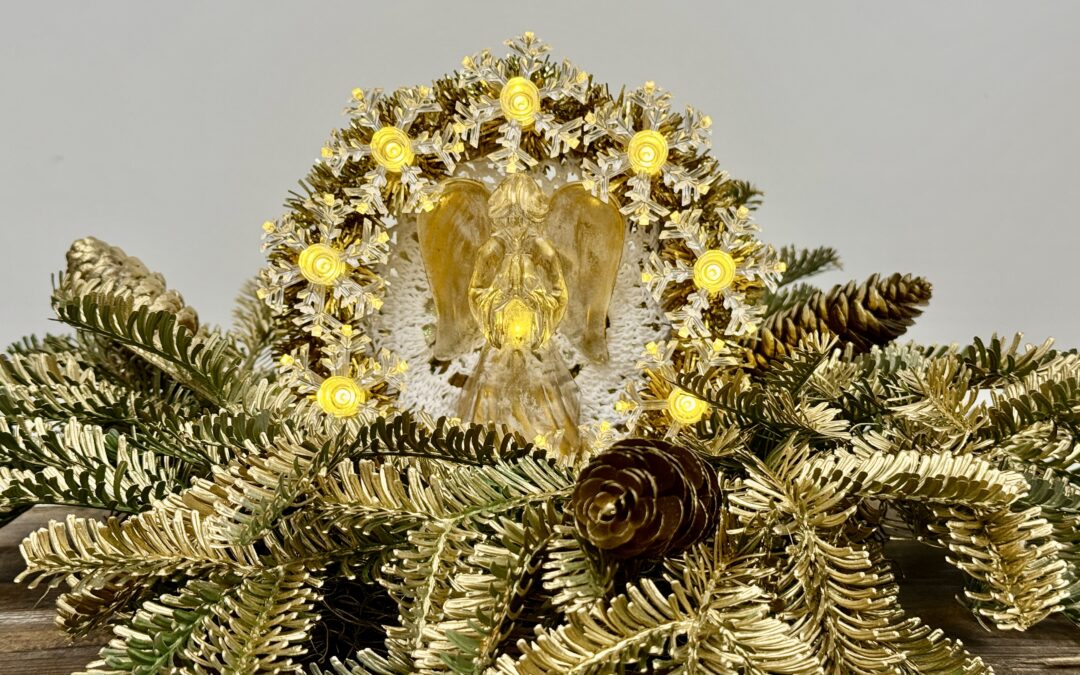
After everything was wired together, it was time for the final step! I added batteries to both of the Dollar General tree toppers and tucked the battery packs neatly into the center of my gold Evergreen Tapestry Candle Ring. Once everything was in place, I positioned the angel toppers right in the middle — and that’s when the magic happened!
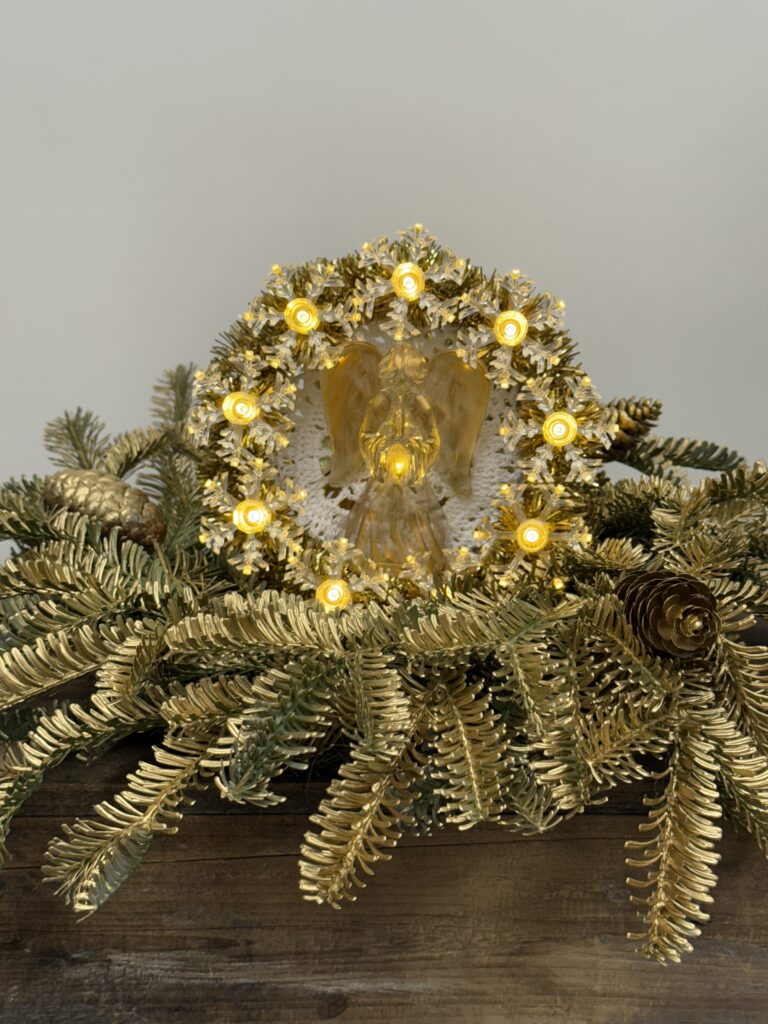
When I turned on the lights, the angels gave off the most beautiful, warm glow. The gold tones, the soft shimmer from the Rub ’n Buff, and the vintage doily all came together perfectly. This project turned out even better than I imagined, and it makes the sweetest statement piece for my dining room table this season.
It’s proof that with a few Dollar General Christmas finds and a little creativity, you can make something that looks high-end, meaningful, and totally unique to your style.
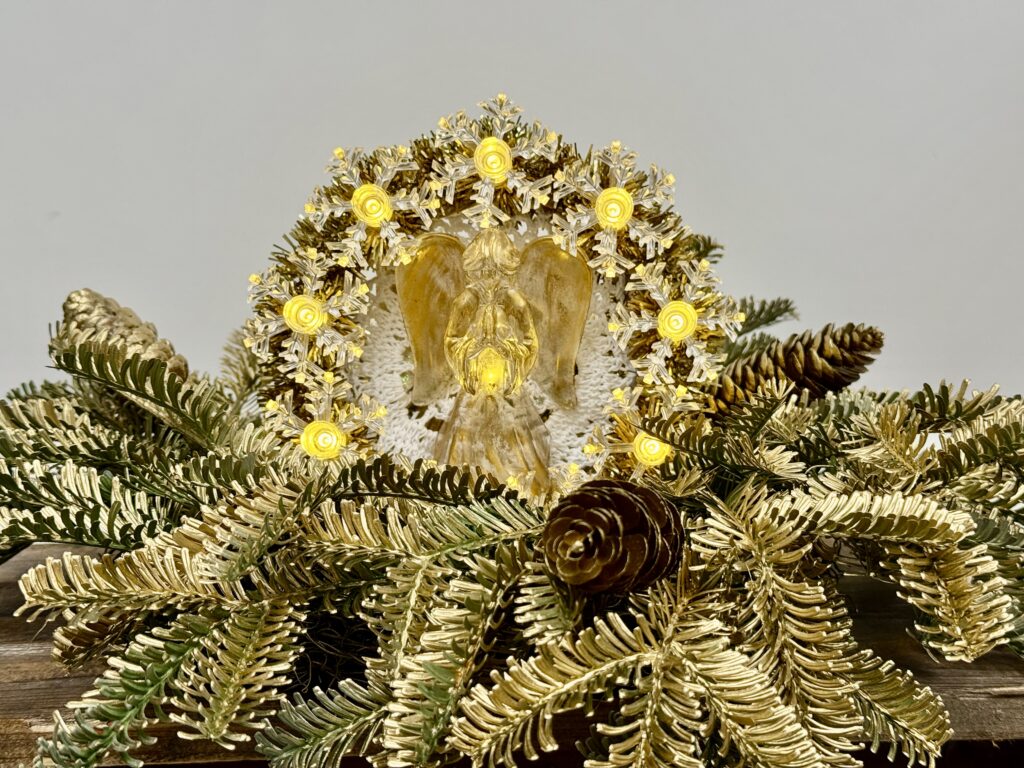
I absolutely love how this DIY Dollar General Tree Topper Makeover turned out! It’s such a fun and affordable way to create a high-end look using simple items you can find right at Dollar General. The soft golden tones, glowing lights, and vintage touches make it feel so cozy and special — perfect for the holiday season.
If you love angels and gold decor like I do, I hope this project inspires you to get creative and make one of your own. Whether you display it as a Christmas centerpiece, on a mantel, or even as part of a tabletop display, it’s sure to add a beautiful glow to your home this year.
Remember, it doesn’t take much to make something amazing — just a little imagination and a few budget-friendly finds! If you try this craft, I’d love to see how yours turns out. Share your version on Facebook or tag us on social media — I can’t wait to see your take on this festive Dollar General Christmas DIY!
This blog may contain affiliate links, which means I could earn a small commission if you make a purchase through them—at no extra cost to you. Thanks for supporting what I do!
We’re the angles different on each of weaths?
I love this project! It looks very elegant! Looks like a trip to DG is going to happen. ❤️❤️❤️❤️❤️
You’re so creative! Can’t wait to hang out tonight!
Happy Halloween!!🎃👻
Totally love this piece have to see if I find the toppers in our store ❤️
Barb this is so cute ♥️
Very elegant and at the right price. Thanks Barb
Pretty makeover 😍
It’s very elegant and I simply loved how it turned out.❤️❤️❤️💦💦💦💦💦💦💦💦 Watering another wonderful Shabby Tree diy!!!
Love, love, love it! So festive! So creatuve! ❤️
Love your vision for this item. This makes me look forward to Christmas!
You always come up with the best ideas
It’s very pretty. ❤️ it !
Absolutely beautiful!! ❤️❤️❤️
This will look just beautiful in your newly refinished dining room!! Can’t wait to see it!
Absolutely beautiful! What a creative idea! You’re the bomb, Barb!
Barb, you completely outdid yourself!! Love this !
This is absolutely gorgeous, love it ❤❤❤ excited for Friday night
This is so creative. I loved how you took inexpensive items and turned them in to beautiful decor item for Christmas.