
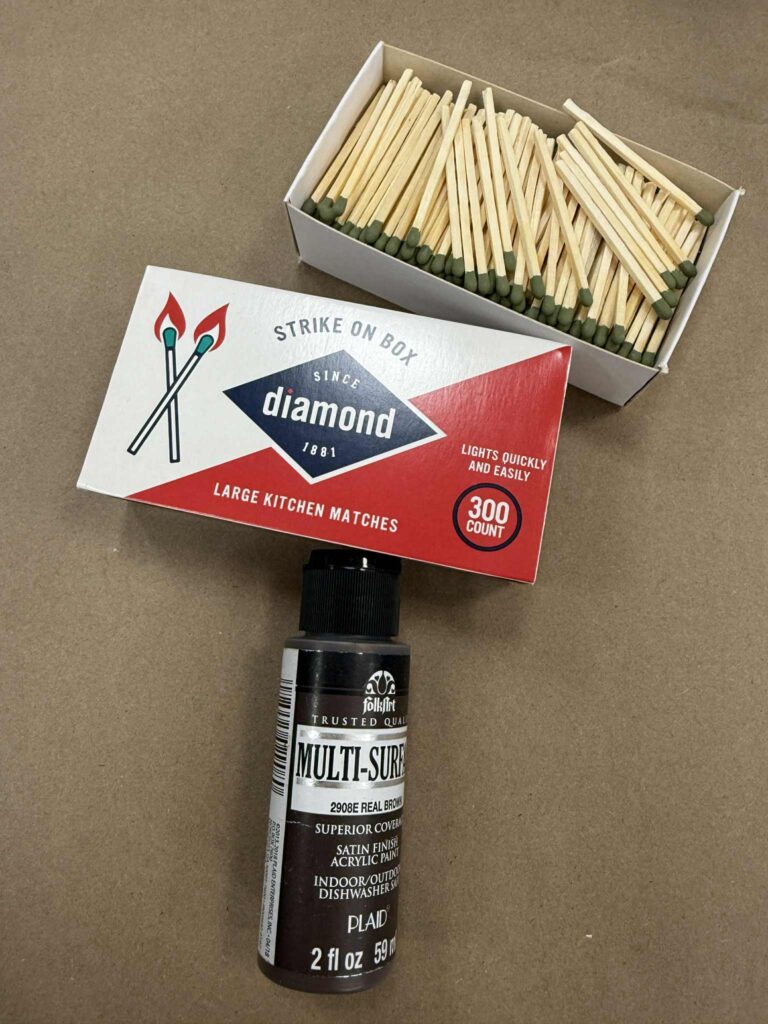
While I was walking through Dollar Tree, I came across the cutest little matchboxes and immediately my creative wheels started turning. You know how we love to get creative here at The Shabby Tree, so I knew these tiny finds had the potential to turn into something really special. With just a little imagination and a few simple supplies, these matchboxes can be transformed into charming decorative pieces.
This makeover is such a fun and easy project, making it perfect for crafters of all skill levels. Not only are they adorable to create, but they also make the sweetest little gifts. Whether you’re putting one together for a friend, adding it to a gift basket, or using it as a small seasonal accent, these matchbox makeovers are sure to bring a smile to anyone who receives one.

The supplies that I’ll be using are listed down below.
1. Matchboxes from the Dollar Tree
2. Mod Podge
3. Acrylic paint ( I’m using linen and real brown from FolkArt)
4. Paper or stickers of your choice
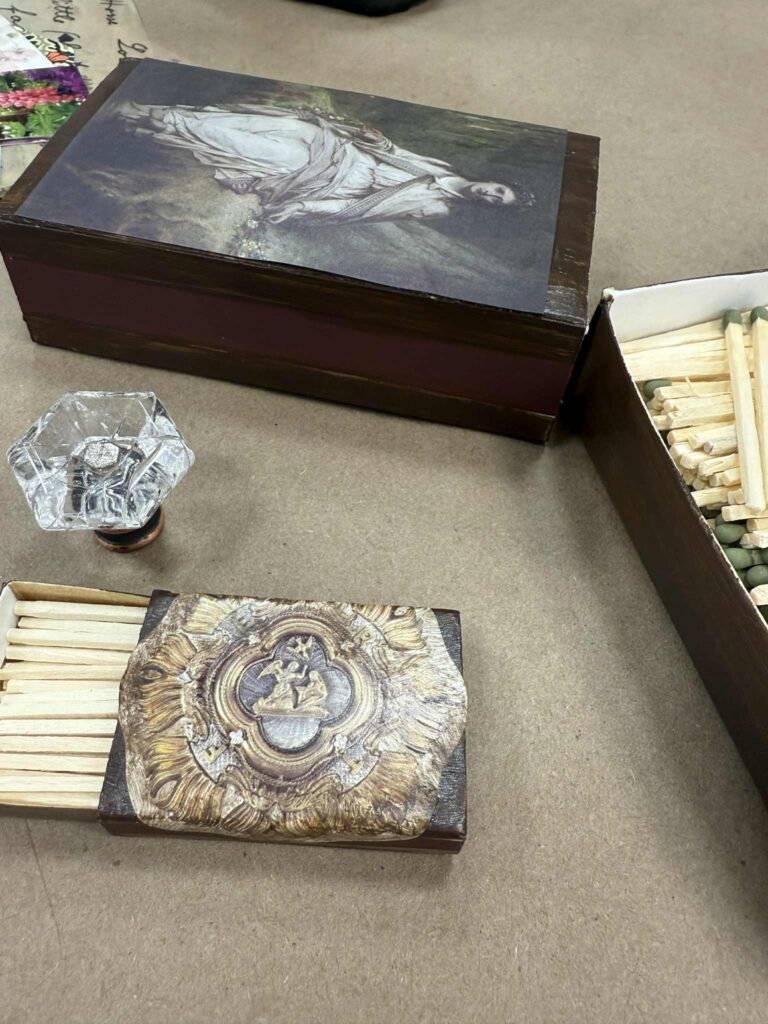
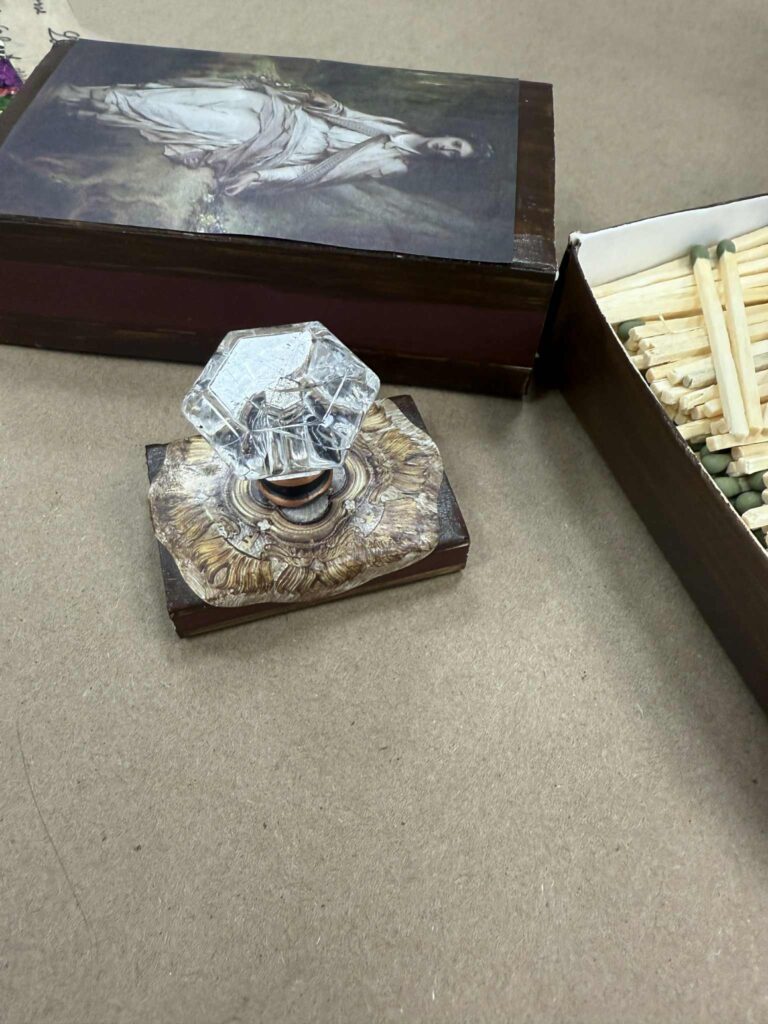
5. Small crystal knob
6. Paint brush
7. Hot glue
The first step is to decide what color you would like to paint your matchbox. This is where you can really start getting creative and have fun with the project. You can choose a color that matches your home décor, fits a specific season, or coordinates with the theme you’re going for. Whether you prefer something neutral, bright, or vintage-inspired, the paint color you choose will help set the tone for the entire makeover.
Once you’ve picked your color, you’ll be ready to give your matchbox its first transformation and bring your design to life.
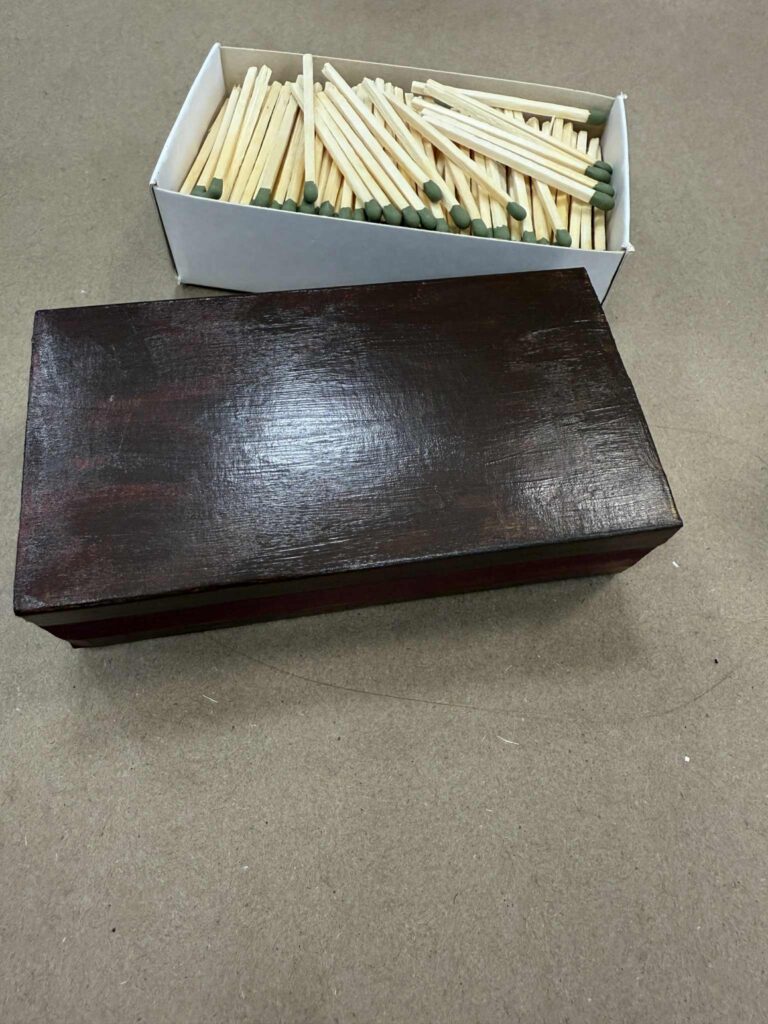
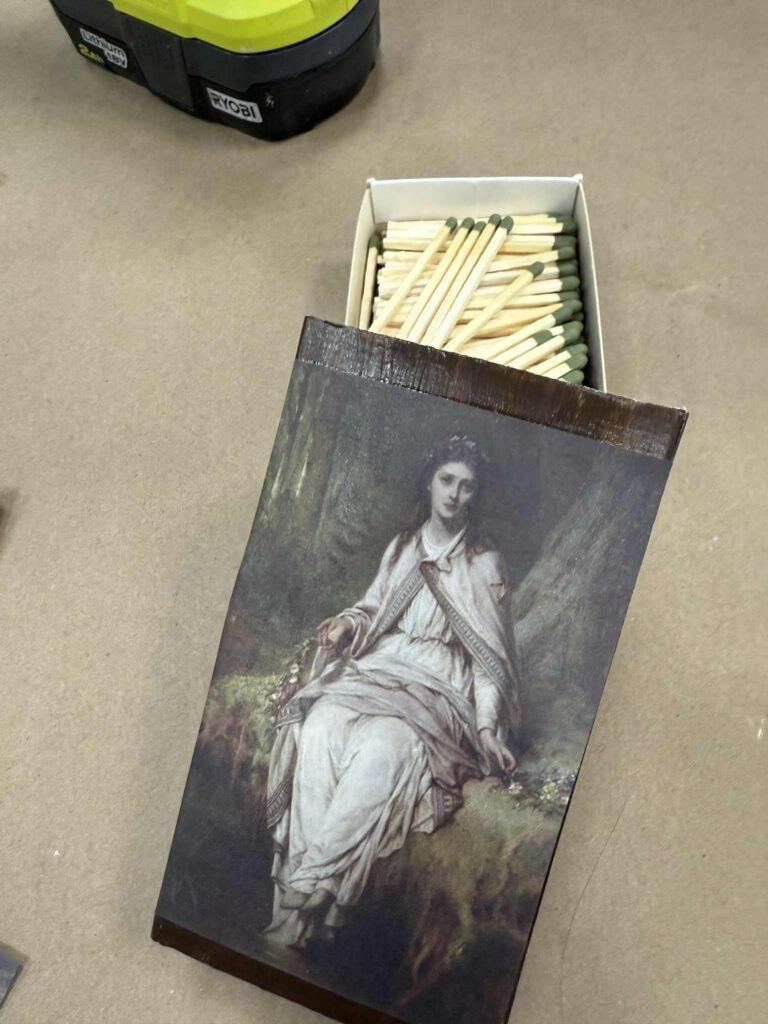
You’ll want to paint the lid of the box along with the outer edge of the bottom portion of the matchbox. Be sure to leave the inside of the box unpainted so it can still slide open and closed smoothly. Applying paint only to the outside will give your matchbox a clean, finished look while keeping it fully functional.
Depending on the color you choose, you may want to apply one or two coats of paint, allowing each layer to dry completely before moving on. Once the paint is dry, your matchbox will already start looking like a brand-new piece and be ready for the next step of the makeover.
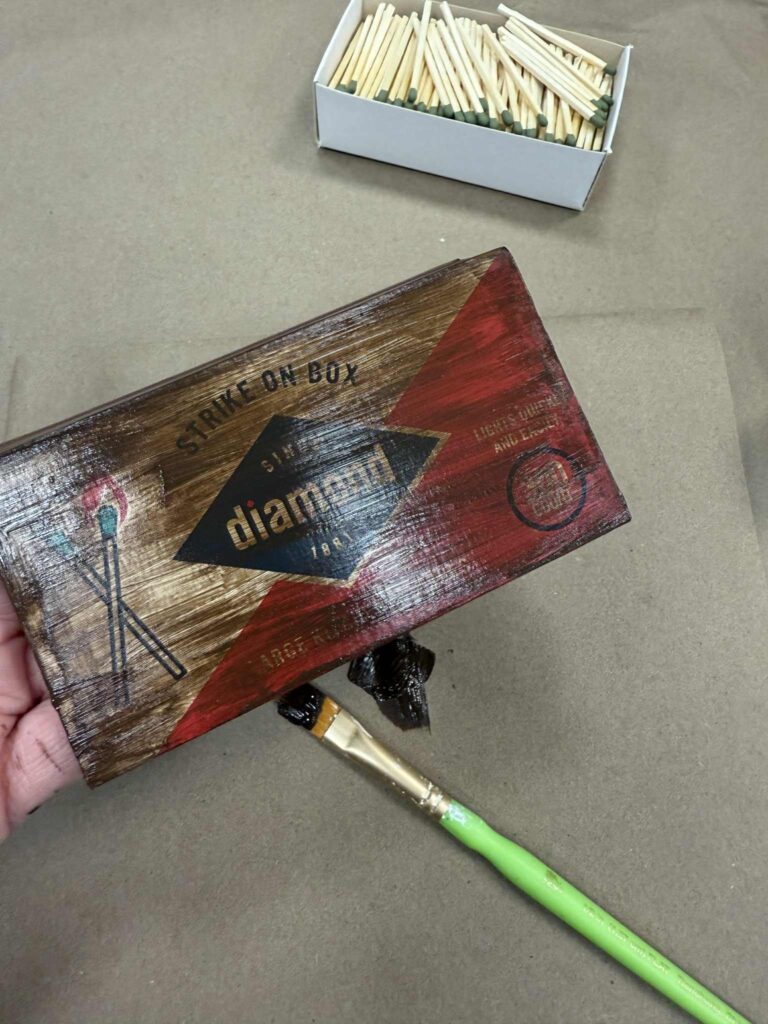
This will take a few coats of paint, with drying time needed in between each layer. Allowing the paint to dry completely before adding the next coat will help create an even, smooth finish and prevent streaks or peeling. Taking your time with this step will make a big difference in how polished your matchbox looks once it’s finished.
Once all of the coats are dry, you’ll be ready to move on to the next step of the makeover.
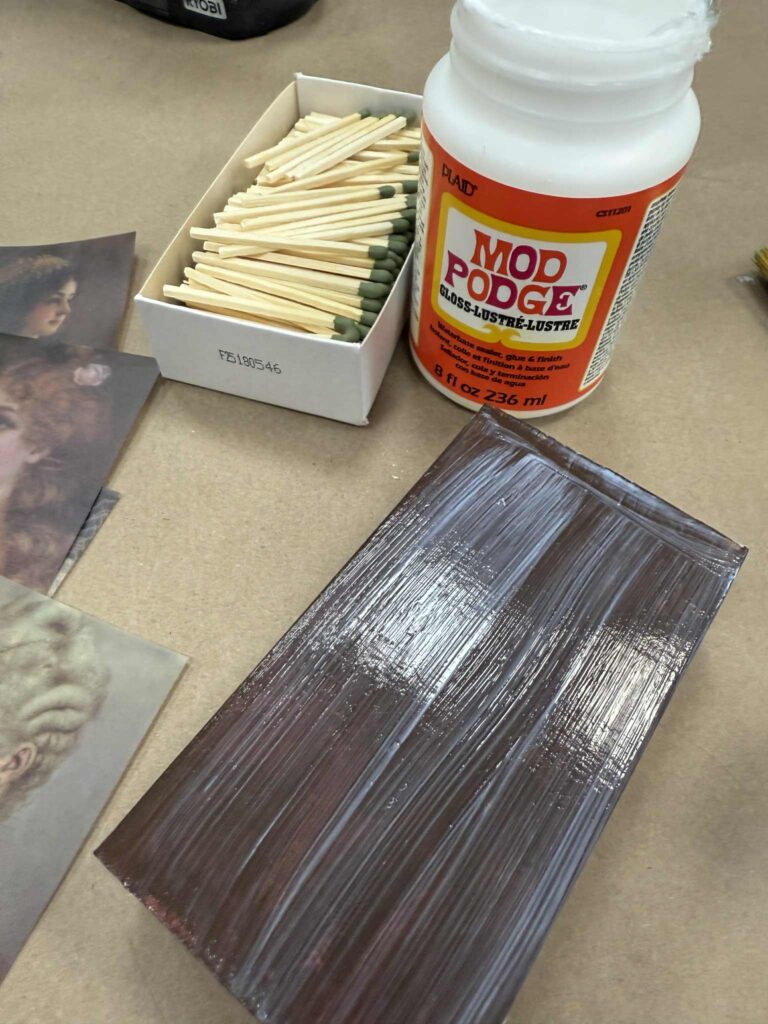
Once the paint is completely dry, you’ll move on to adding Mod Podge and your decorative paper. This is where the matchbox really starts to come to life. Choose a paper design that fits your style—whether it’s floral, vintage, seasonal, or something fun and whimsical.
Apply a thin, even layer of Mod Podge to the surface of the box, then carefully place the decorative paper on top. Smooth it out gently to remove any air bubbles or wrinkles. After the paper is in place, add another light coat of Mod Podge over the top to seal everything and give it a finished look.
Allow this layer to dry fully before continuing on to the next step of your makeover.
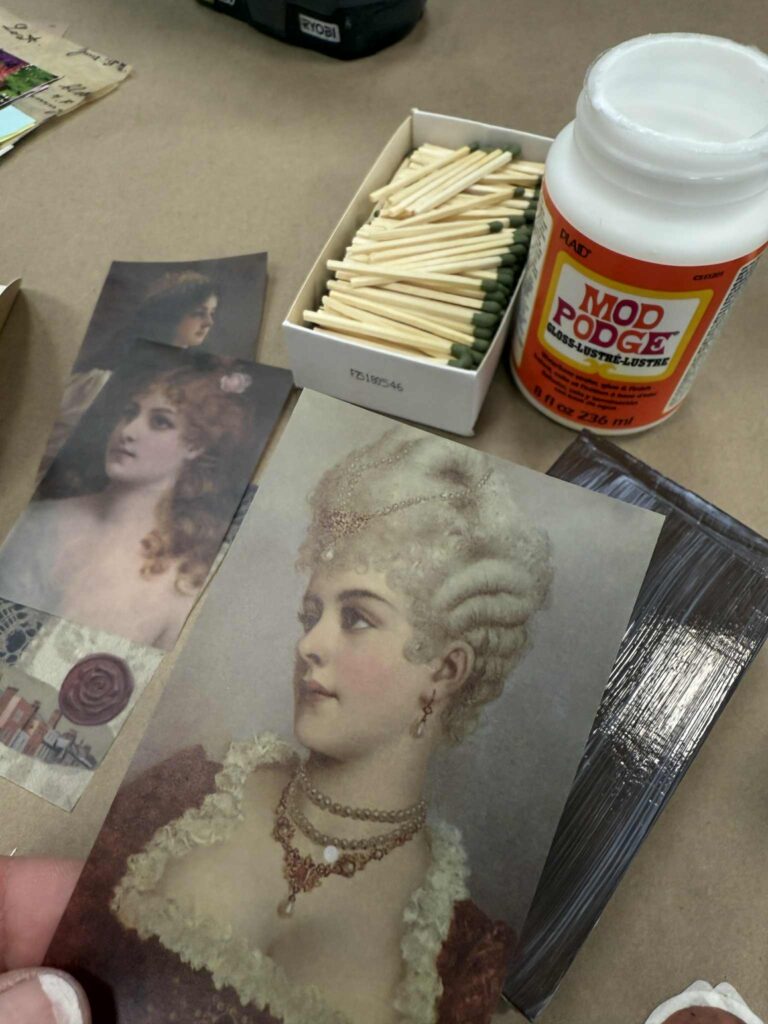
I’m using some decorative paper from the bundles that we have available on our website. These paper bundles are perfect for projects like this because they include a variety of patterns that work beautifully for small crafts. The designs make it easy to mix and match styles, and they’re already sized just right for adding fun details to pieces like these matchboxes.
Using paper from the bundles is a great way to add personality to your project while keeping everything coordinated and simple.
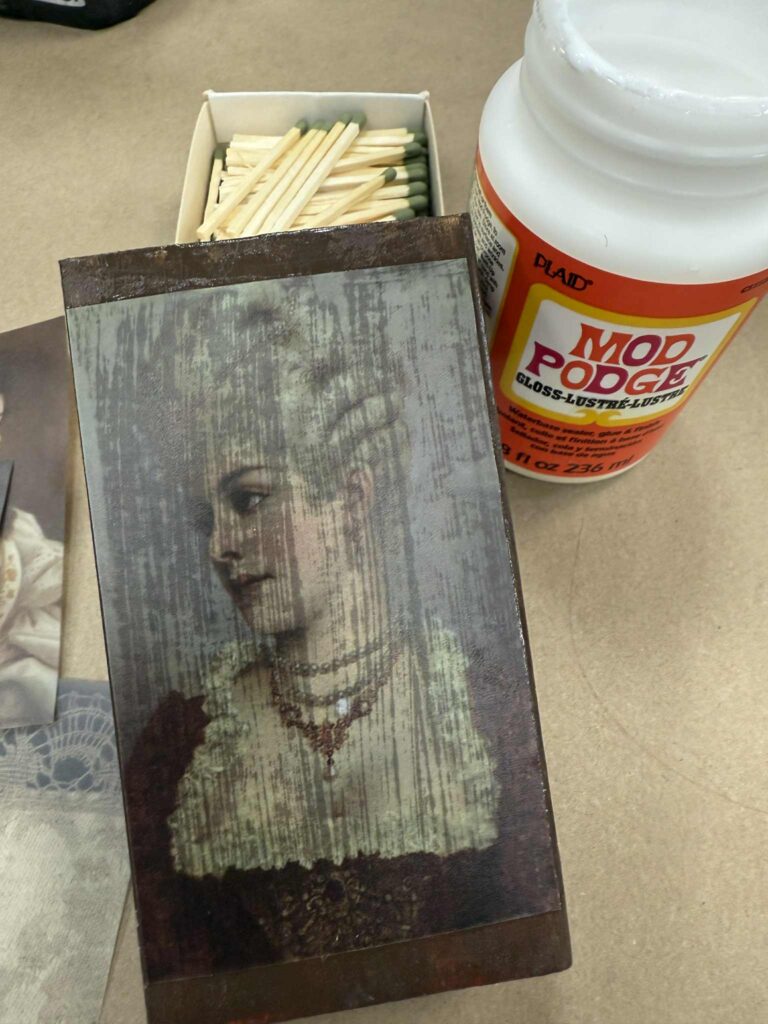
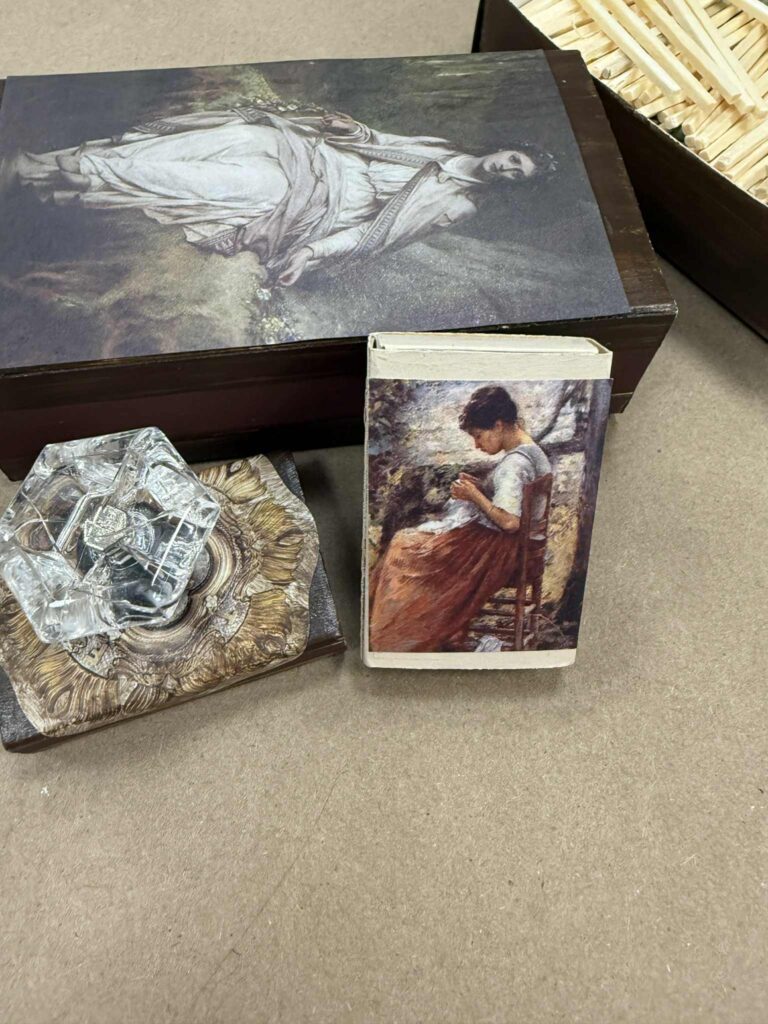
You can add decorative paper to both the front and the back of the matchbox. Covering both sides helps give the piece a more finished and polished look, no matter how it’s displayed. This also gives you the opportunity to mix and match patterns or keep the same design on each side for a more cohesive feel.
Once both the front and back are covered, allow everything to dry completely before moving on to the next step.
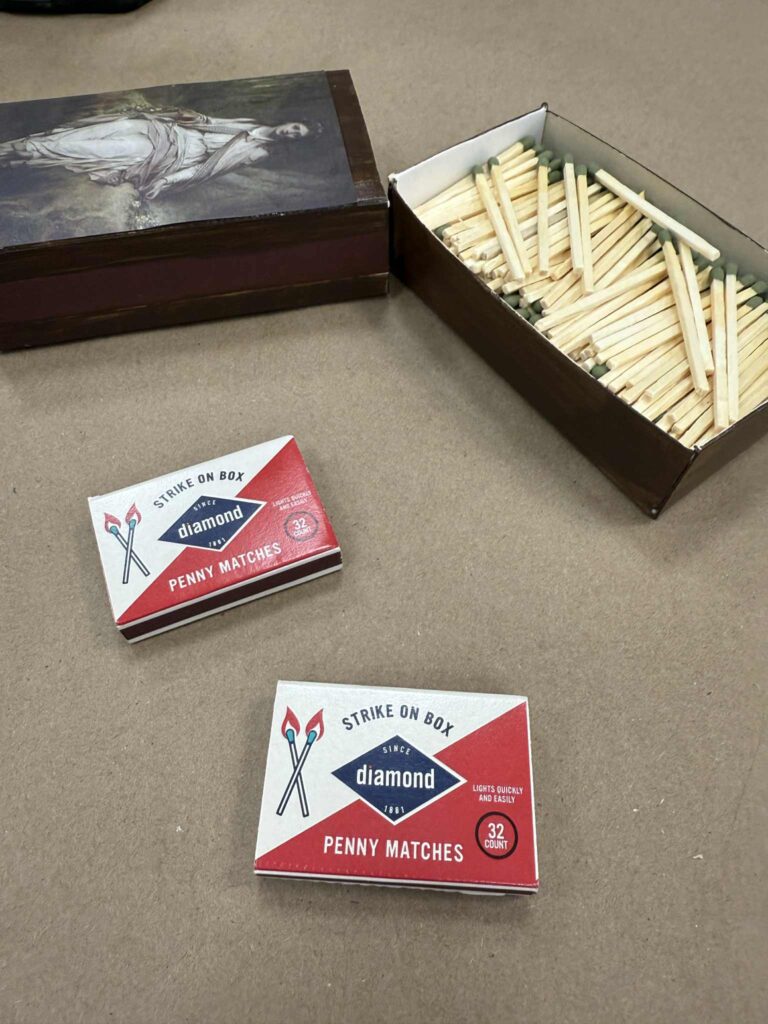
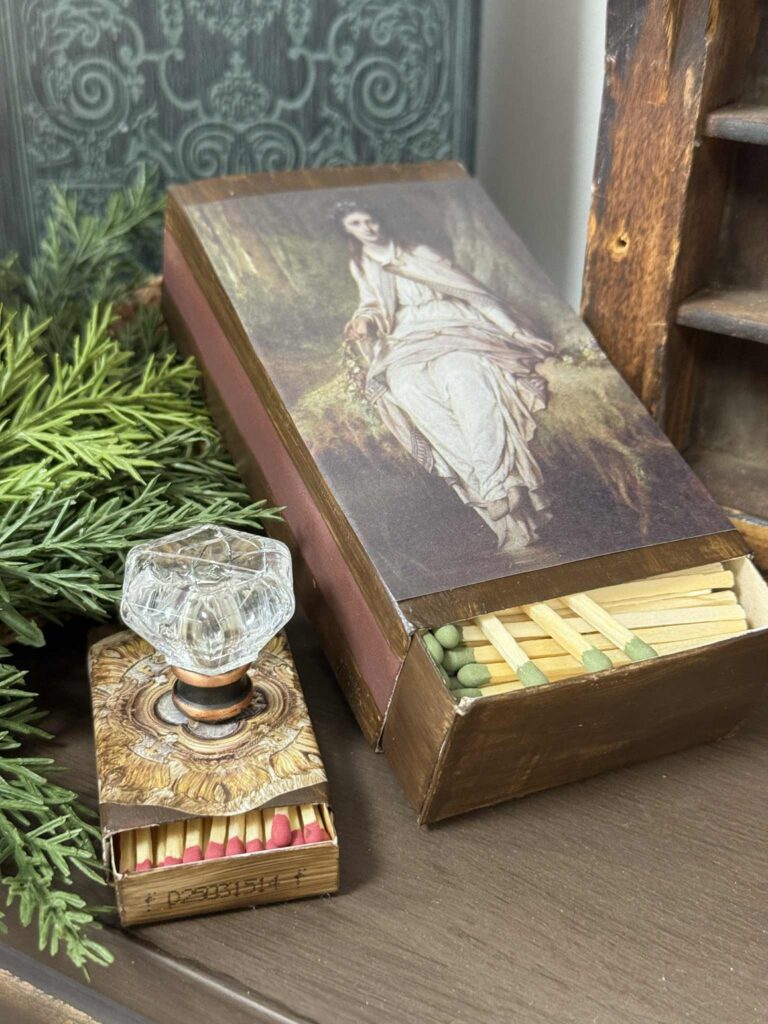
The Dollar Tree carries both large and small matchboxes, which makes this project even more fun. You can choose whichever size you prefer, or even mix the two together for a little variety. The different sizes are perfect for creating unique looks and can be styled in so many ways.
Whether you use the larger matchboxes for a statement piece or the smaller ones for quick and simple gifts, both sizes work great for this makeover and allow you to customize each one to fit your style.
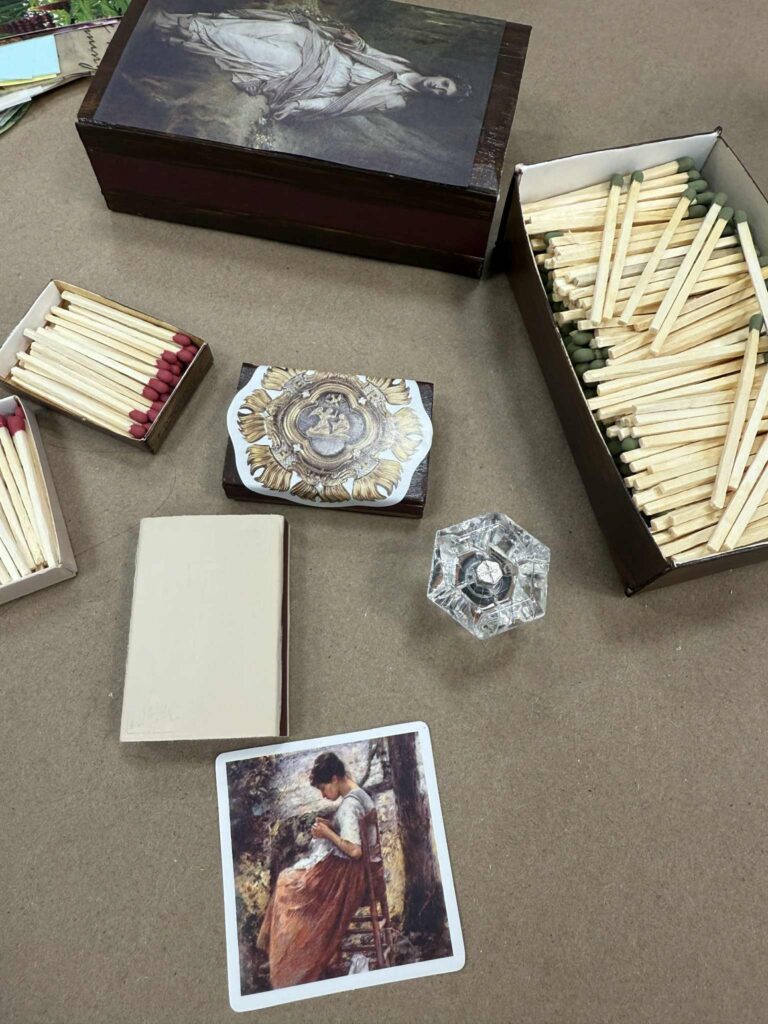
These matchboxes are so easy to get creative with, which is one of my favorite parts of this project. There are so many fun ways you can personalize them and make each one look a little different. I decided to add a small crystal knob to the small matchbox to give it a touch of sparkle and extra charm.
The crystal knob not only adds a decorative detail but also makes the matchbox easier to open. It’s a simple addition that instantly elevates the look and turns the matchbox into a truly unique piece.
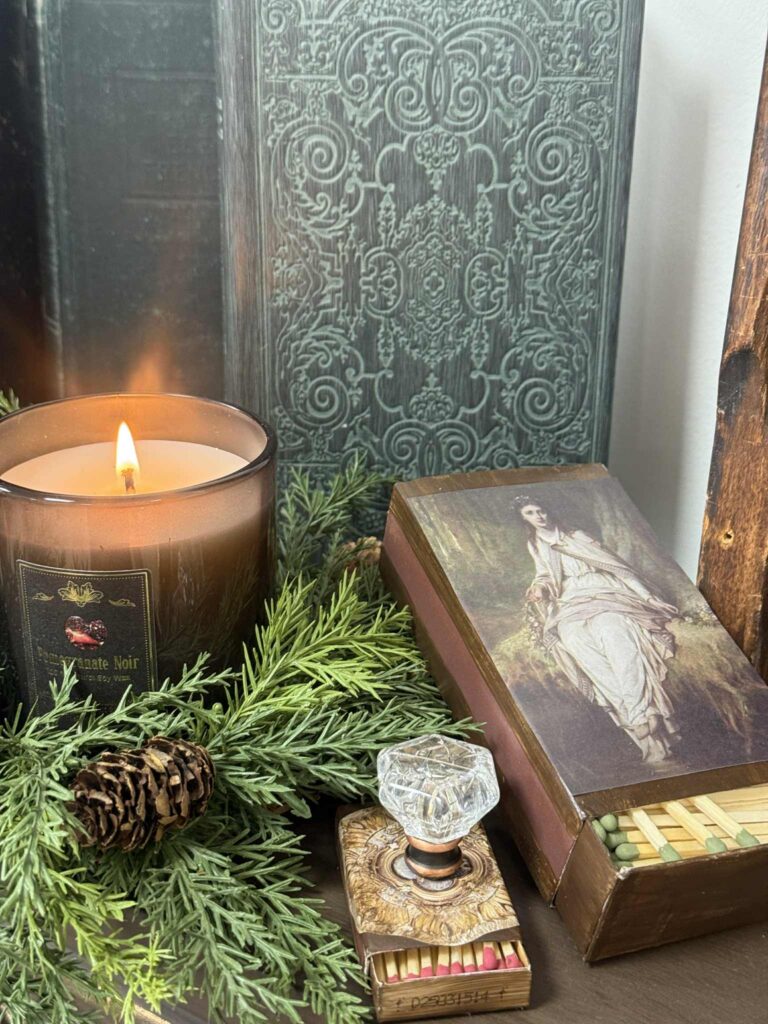
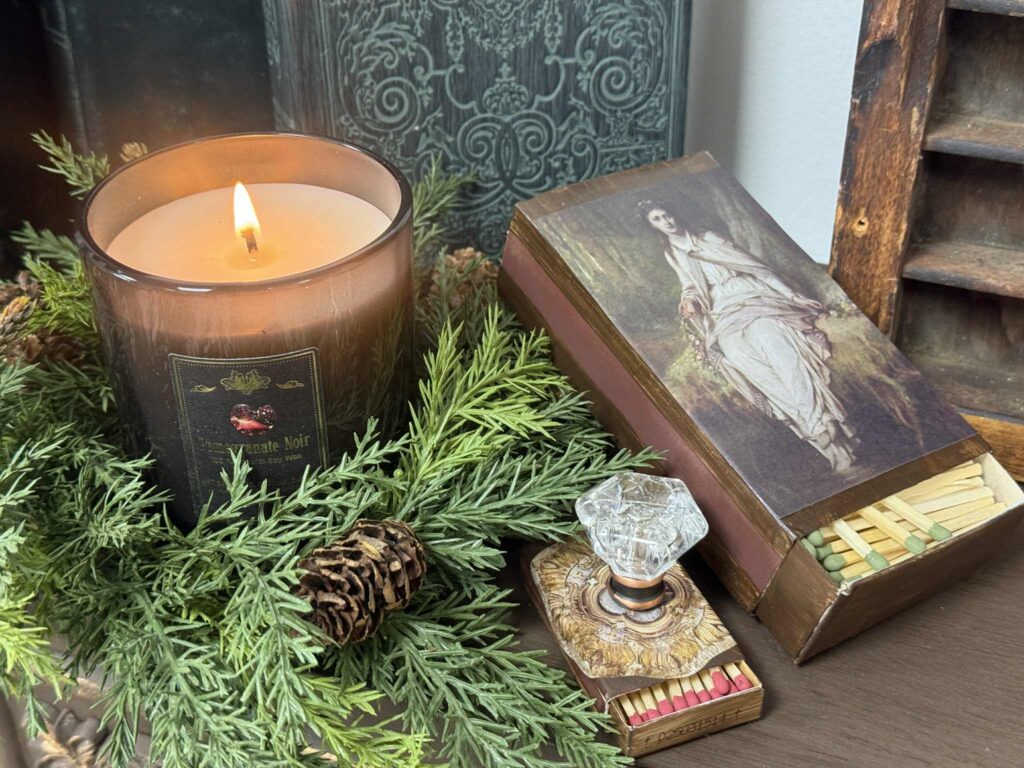
These matchboxes will make such a fun little gift to pair with a candle. They’re small, thoughtful, and add a handmade touch that makes any gift feel extra special. Whether you’re putting together a hostess gift, a holiday surprise, or a simple “thinking of you” present, this matchbox and candle combo is both practical and adorable.
It’s an easy way to turn an everyday item into something meaningful and creative, and it’s sure to be a gift that anyone would love to receive.
These matchboxes turned out great, and I absolutely love how each one can look a little different. This is such a simple project, but it’s amazing how a few small details can completely transform something so ordinary. I hope this DIY inspires you to get creative and give it a try yourself.
Whether you make one or several, this is a fun way to use inexpensive supplies and turn them into something unique and handmade. I can’t wait to see how yours turn out!
Barb, I love this craft for gifts. A candle and matchbox. What a wonderful gift 🎁 will be making for sure! ❤️❤️❤️
such a great craft idea Barb, I want to make these for different holidays to have sitting out near candles. LOVE IT!!
This really is a cute idea to give with a candle as a gift. Planning to be at the Friday night hangout. We all need a crafting idea while we settle in for the snowmageddon that is heading our way.
This is a beautiful decoration and makes it easy to find the matches. I can never find the matches when I need them. Thanks for the idea Barb!
I wish I had read this before I left work. Don’t have the supplies but maybe tomorrow morning if I brave the cold??? Where do you find the glass knobs???
Great one of a kind idea, love it! I will be joining you tonight!
What a great idea! No need to find a place to hide the matchbox when a drawer is not close.
Love it!
Barb, a very unique idea. They are so pretty and inexpensive.
Such a cute idea!
I think this is a great idea love it!!!💓
Love this idea!!!
Such a great idea ♥️
Great idea. Hope to be there friday night. So cute.
This is a neat idea
Hope to see you tomorrow
Stay warm and safe
Great ideal Barb
I will be there for Friday night hang out !
Terrific idea Barb! So pretty! Love these.
Super cute idea !. I was wondering when I watched the replay what you was going to make with the box of matches. Im going to try to join depending on how I feel.
Love this idea, definitely putting on my list ❤❤❤❤
This is a great idea! Simple but classy. Definitely want to try.
This is so cute! Would never have thought to do this! Love it and I plan on doing this myself ❤️
I love it, unique and beautiful ❤️
wow loving this!! what a great way to have them handy and blend in with your decore! see you friday night!
Love it , very unique
Barb, this is so different and so creative. Love it
This is a great idea Miss Barb!!! I love it !!!!
I want to try this. Cute ideal.
Love what you did with the match boxes!
Great idea! I definitely will be making some of these for gifts this year!
Great antique looking craft, such an imaginative idea ! ❤❤
Great idea! I will be there Friday Night to hang out 😁
Super idea! I use these matches for my candles all the time!