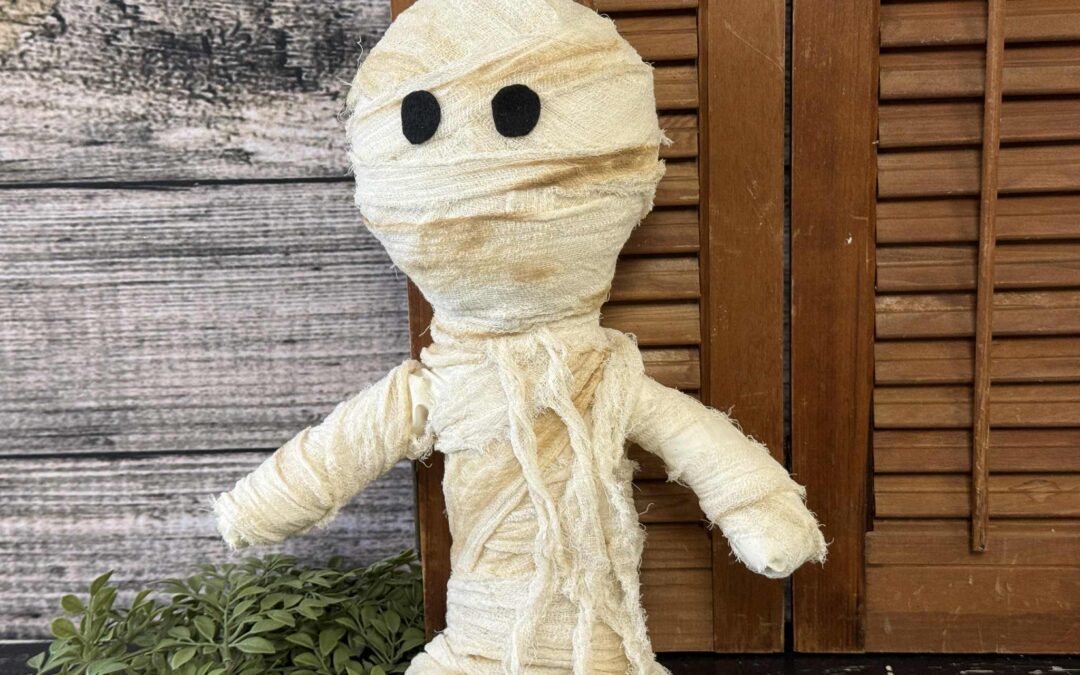
Halloween is just around the corner, and I can’t resist adding a little spooky fun to my décor. I decided to whip up a quick and easy mummy to bring some extra Halloween charm to my decorations.
You can find the list of supplies that I’ll be using down below.
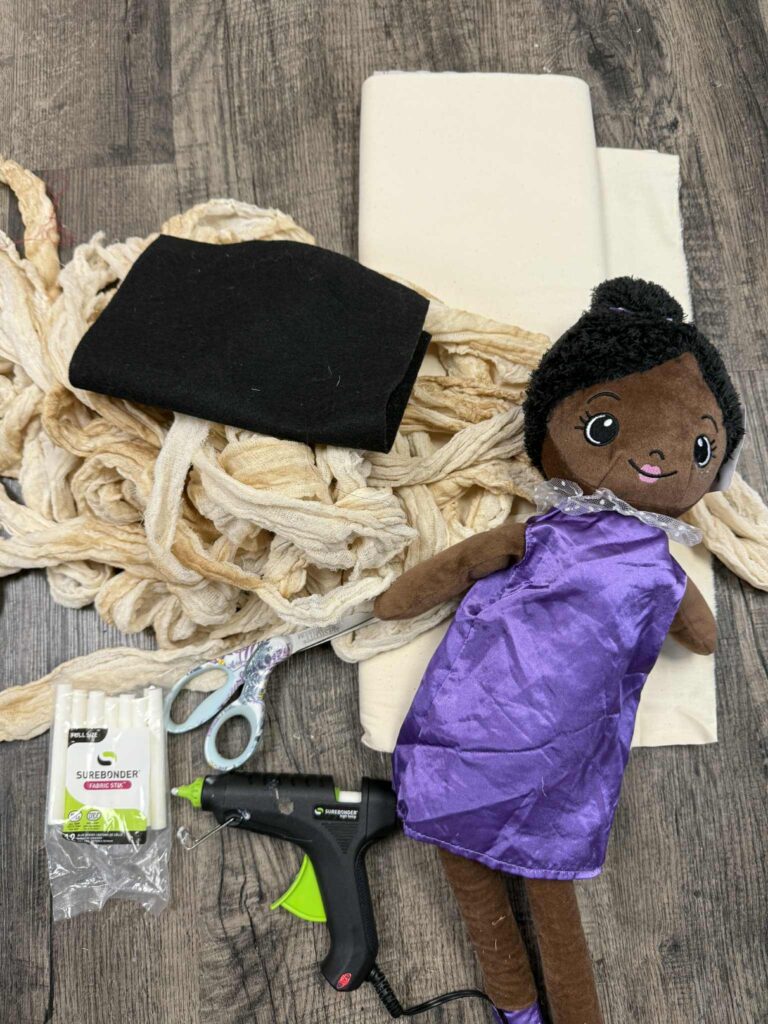
1. One rag doll from the Dollar Tree
2. Coffee stained cheese cloth
3. Muslin fabric
4. Surebonder fabric glue
5. Scissors
5. Black felt
Start by coffee-staining your cheesecloth. Mix instant coffee with warm water—use as much coffee as you’d like for the depth of color you prefer (I usually add about half a cup to a bowl of water). Dip the cheesecloth into the mixture, then gently squeeze out the excess liquid. Set it aside to dry completely before moving on to the next step.
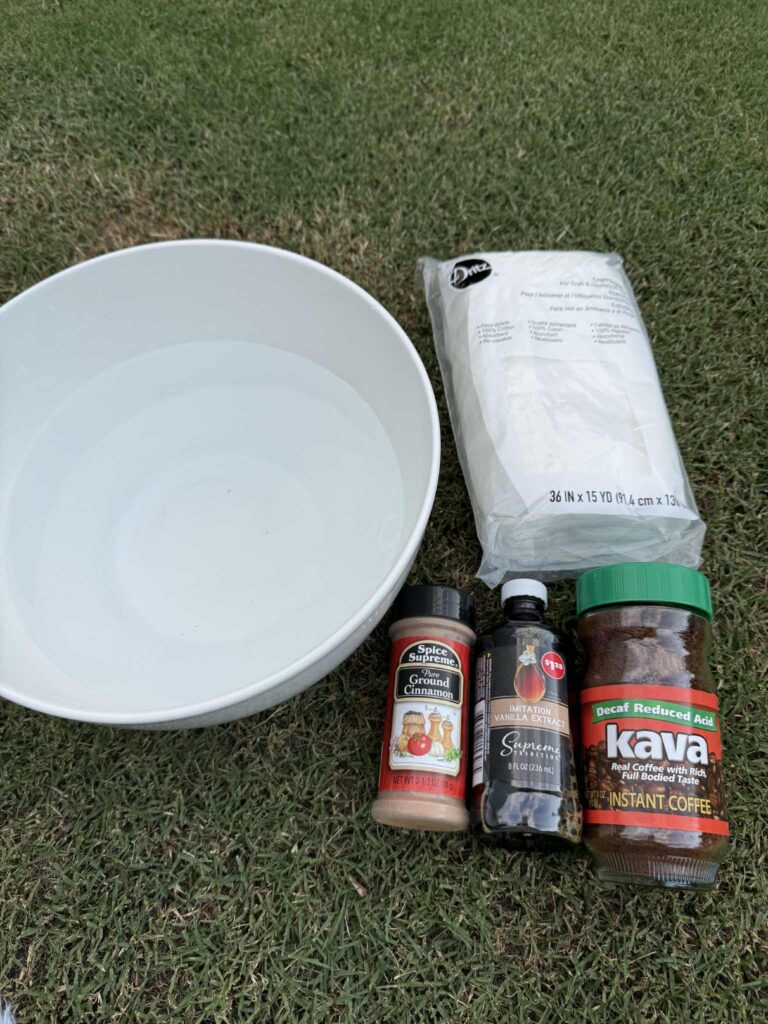
For an extra touch of cozy, you can stir a little cinnamon and a splash of vanilla into your coffee mixture. This gives the cheesecloth a subtle scent and a slightly warmer, aged look.
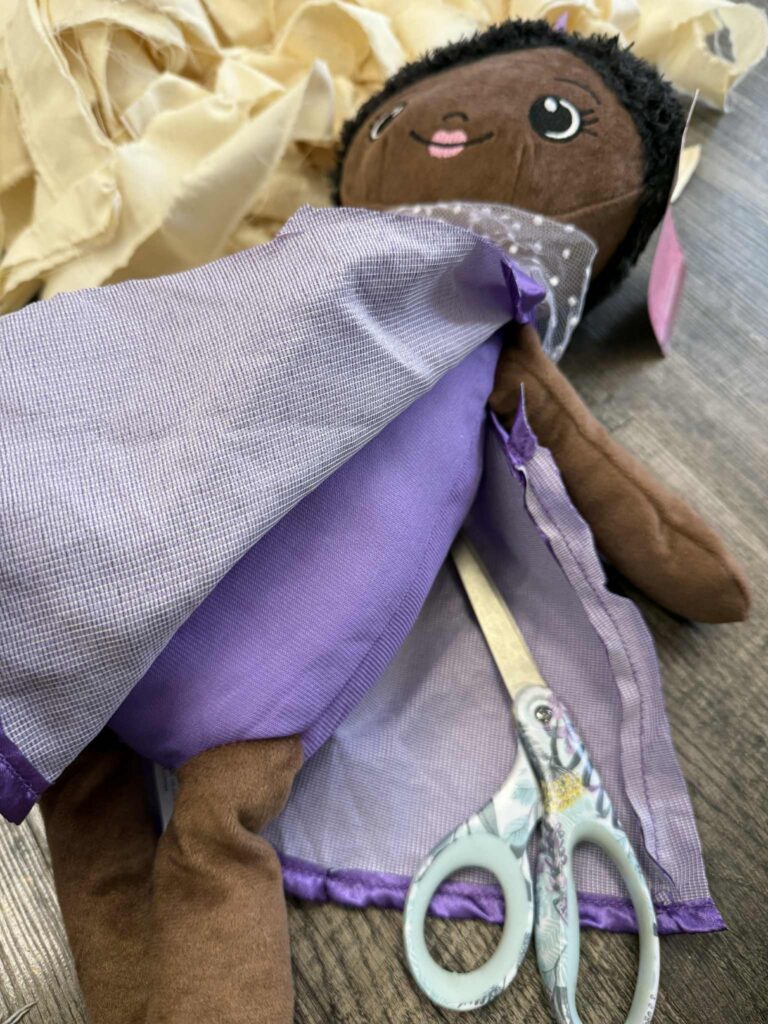
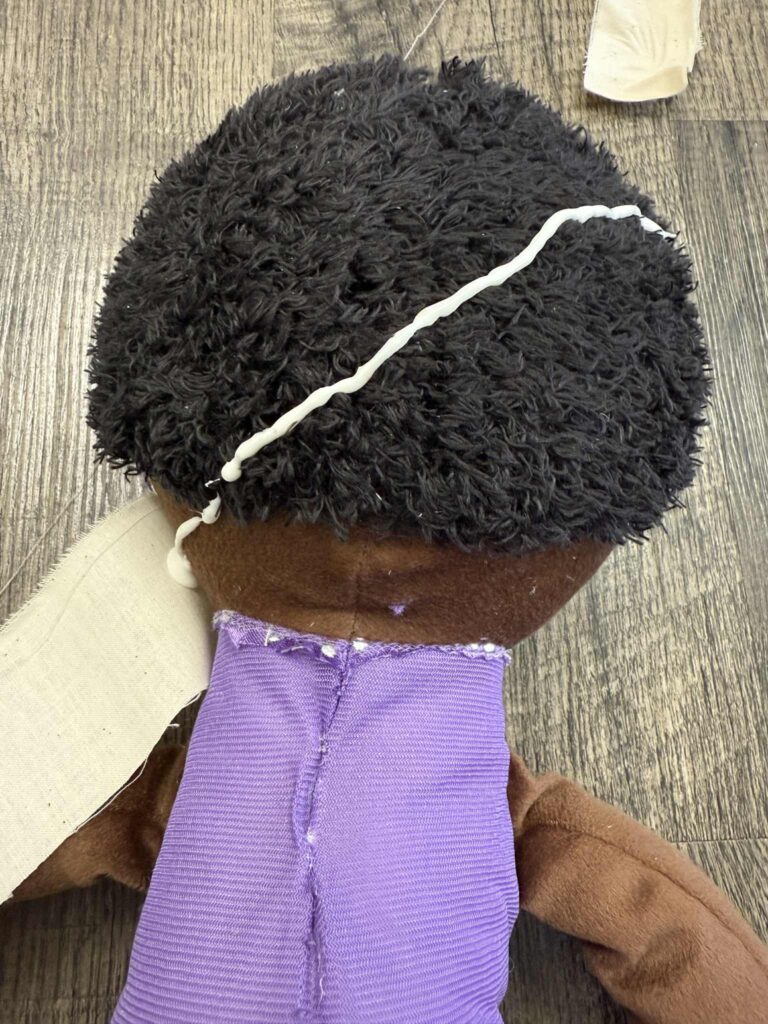
Next, carefully remove the doll’s dress by cutting it off. This will give you a clean base to start transforming the doll into your mummy.
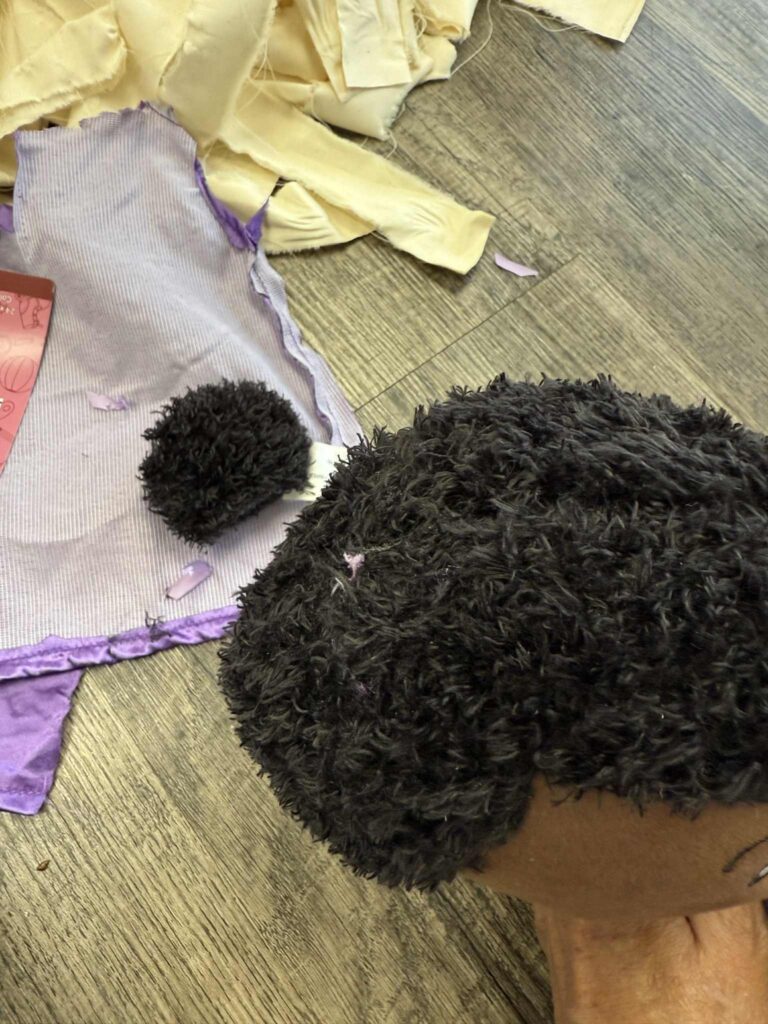
You’ll also need to snip off the small bun on top of the doll’s head so the surface is smooth and ready for your mummy makeover.
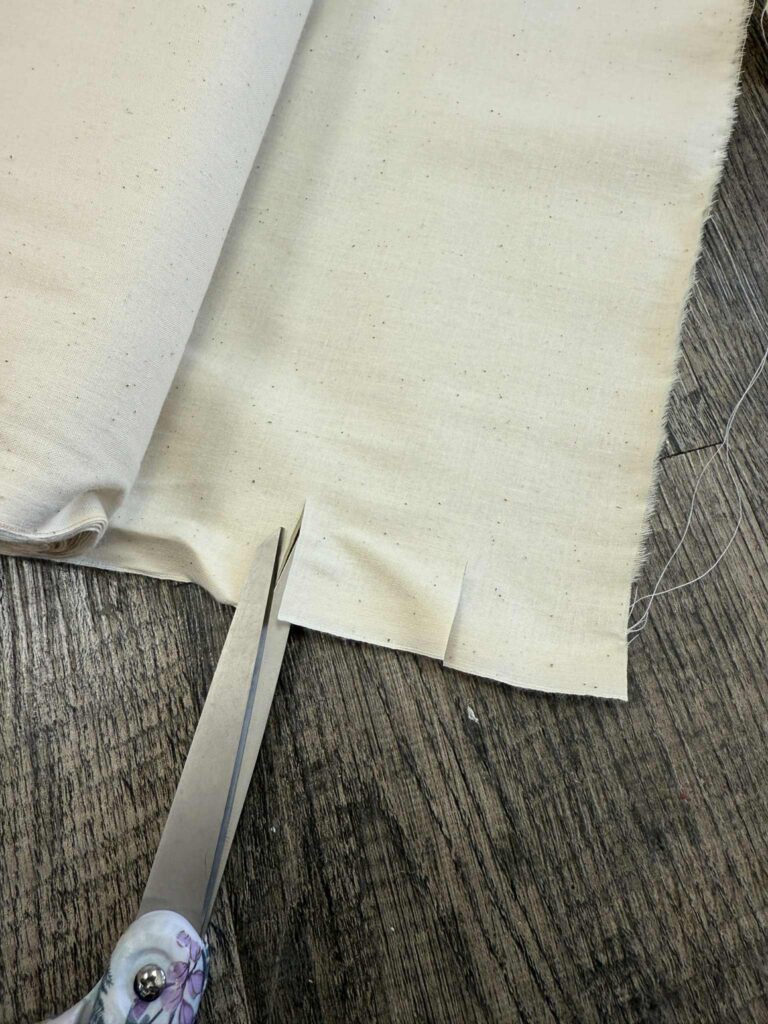
Now, begin cutting your muslin fabric into strips. Aim for each strip to be about one to two inches wide—this size works well for wrapping and creates the perfect mummy effect.
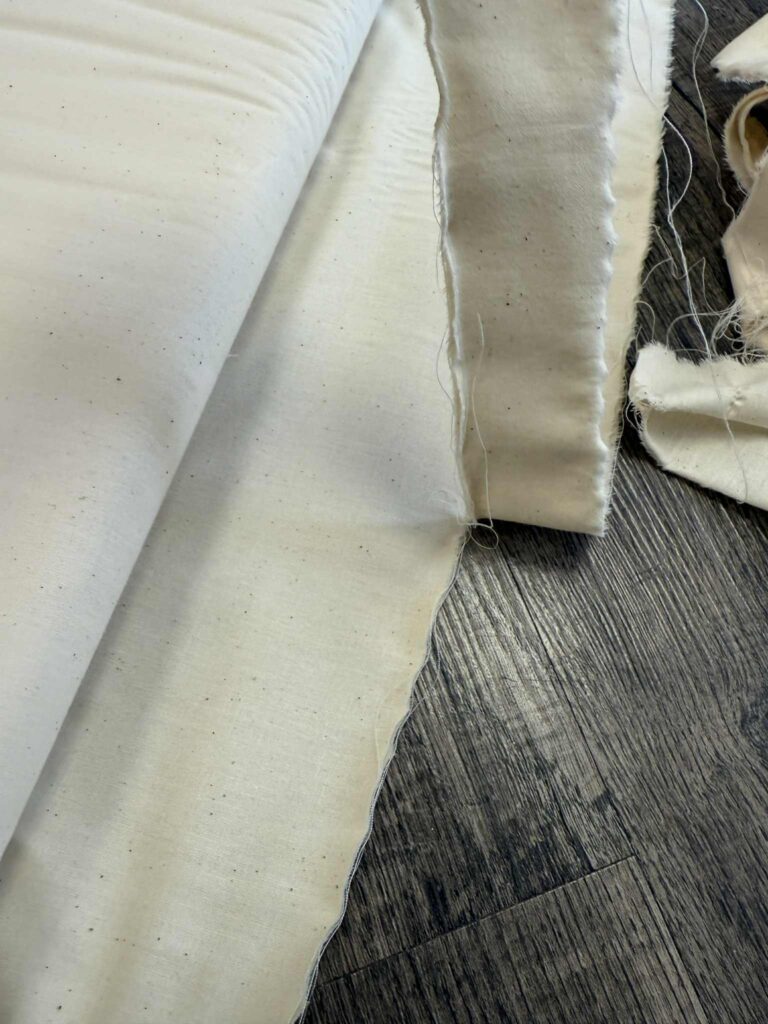
It’s actually much easier to tear the muslin into strips instead of cutting—it gives you natural, frayed edges that add great texture for your mummy.
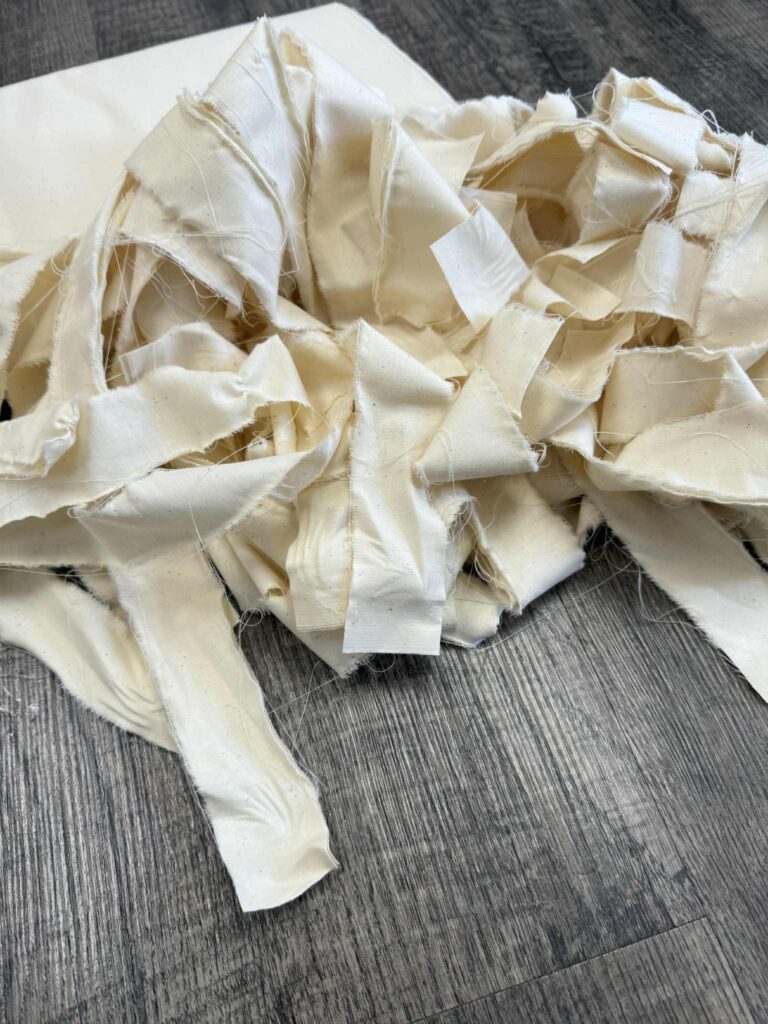
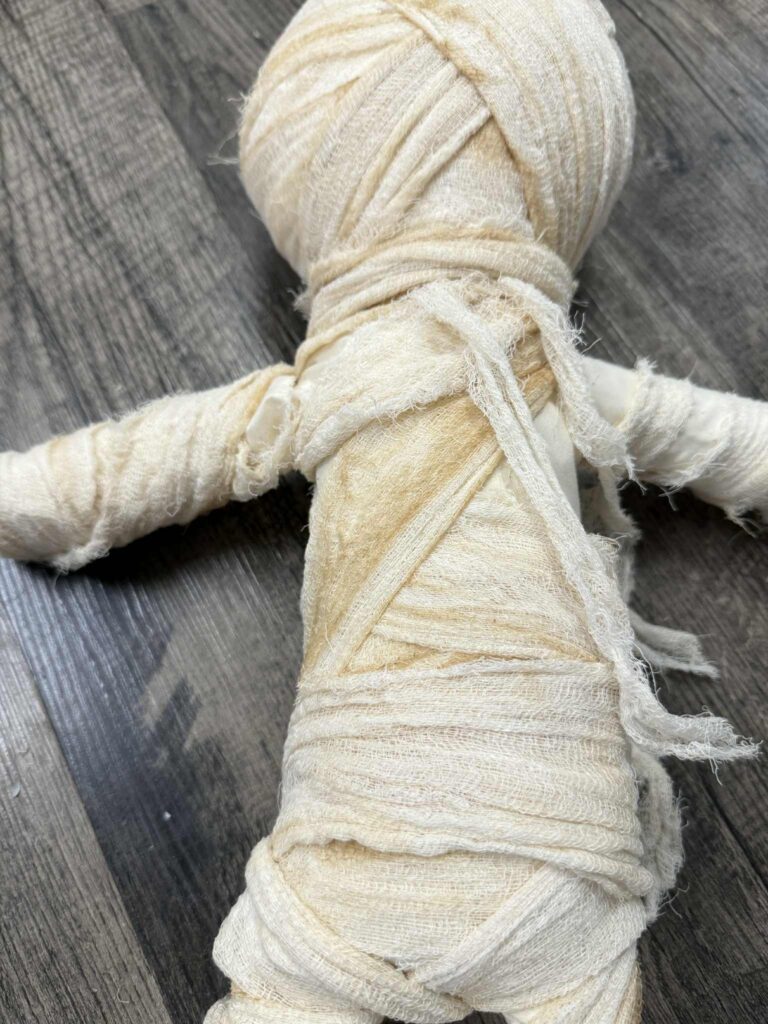
Once your strips are ready, begin wrapping them around the doll. Overlap the strips slightly as you go to give it that classic mummy look, making sure to cover all areas evenly.

As you wrap, apply Surebonder fabric glue along the strips to keep them securely in place. Adding small dabs of glue as you go will help your mummy stay wrapped and hold its shape.
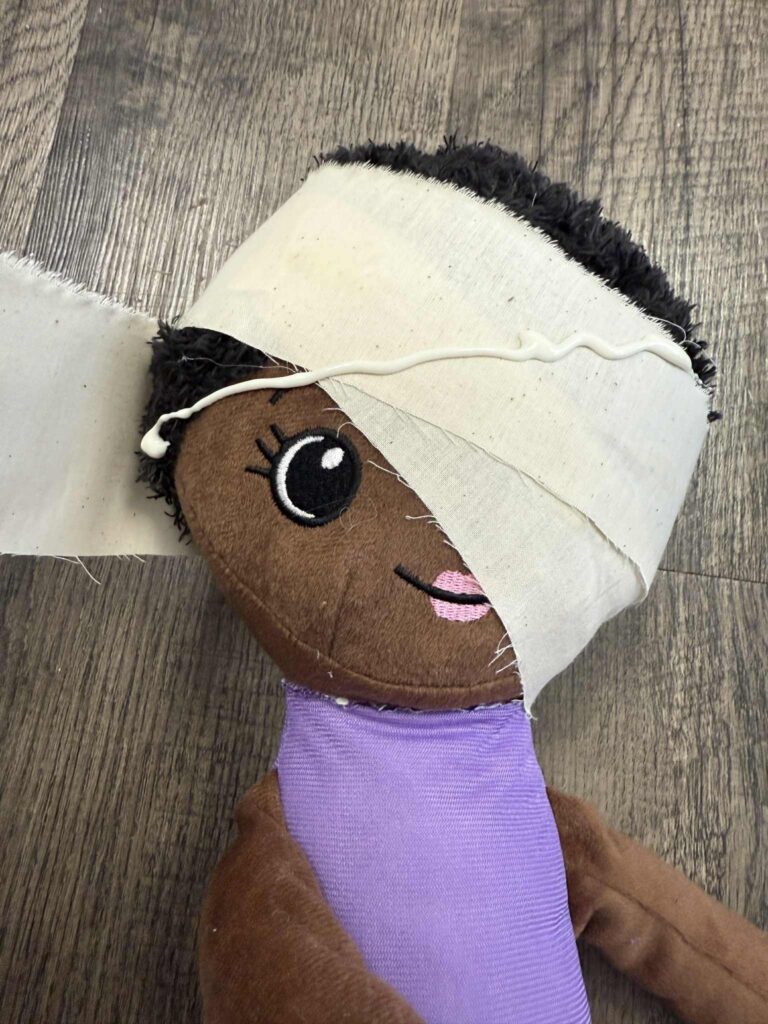
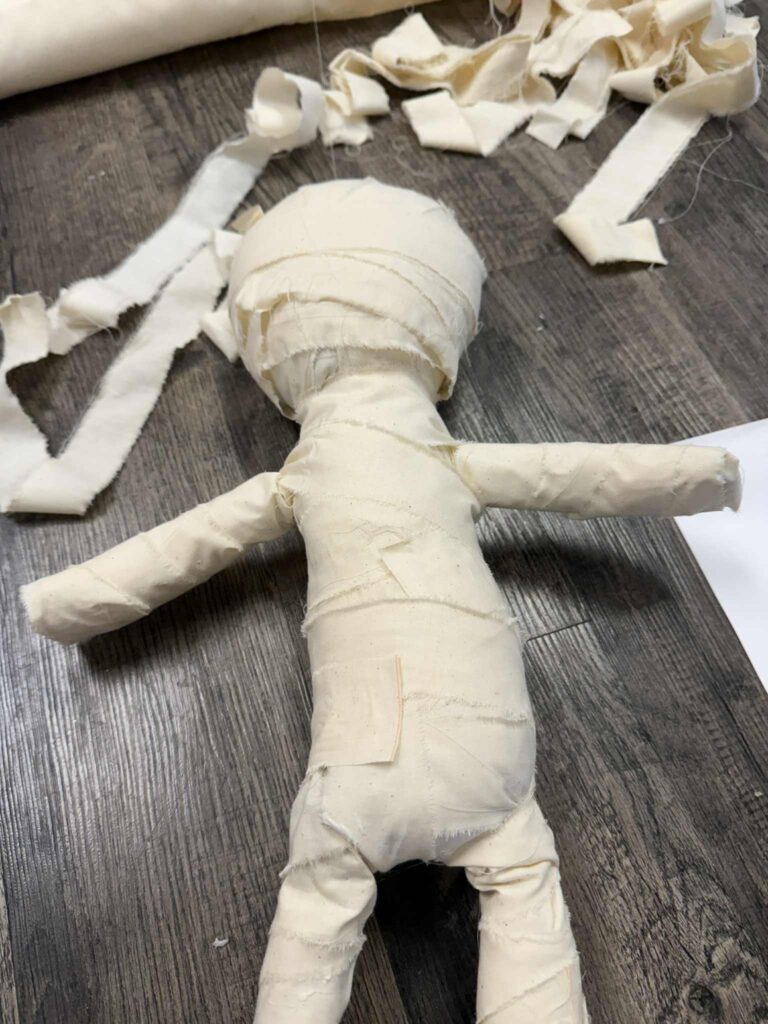
There’s really no right or wrong way to wrap the strips—just layer and crisscross them however you like until you get the spooky mummy look you’re going for.
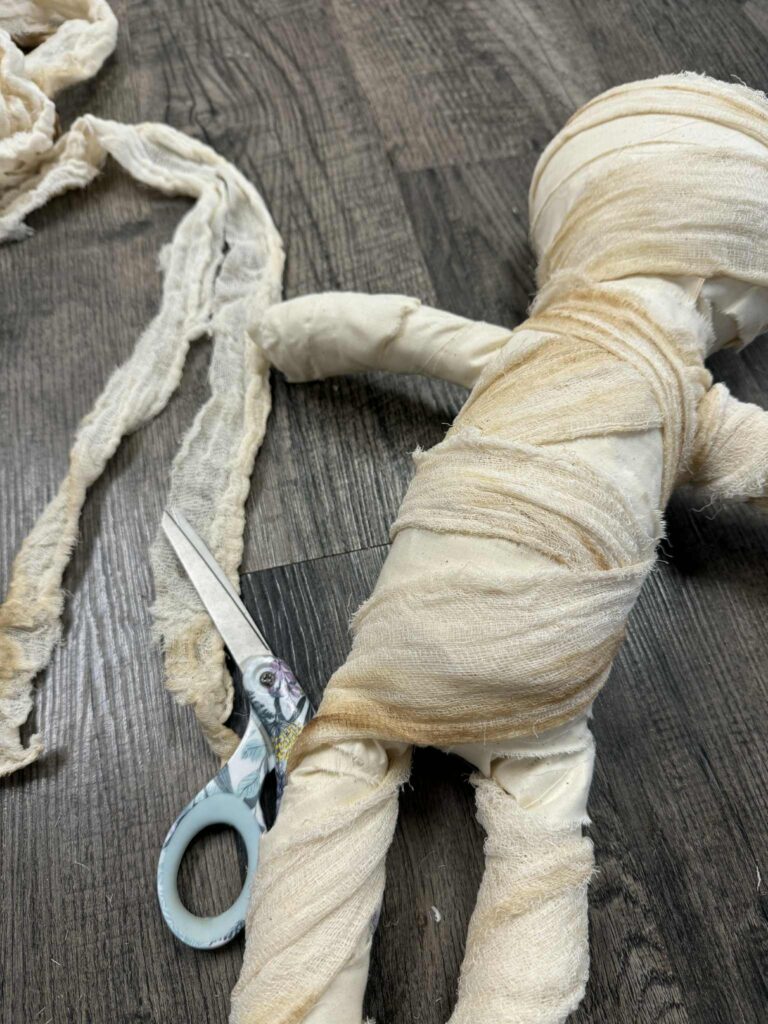
Once the doll is fully wrapped in muslin strips, start layering on pieces of the coffee-stained cheesecloth. Drape and wrap the cheesecloth over the muslin to give your mummy more texture and a perfectly aged, spooky finish.
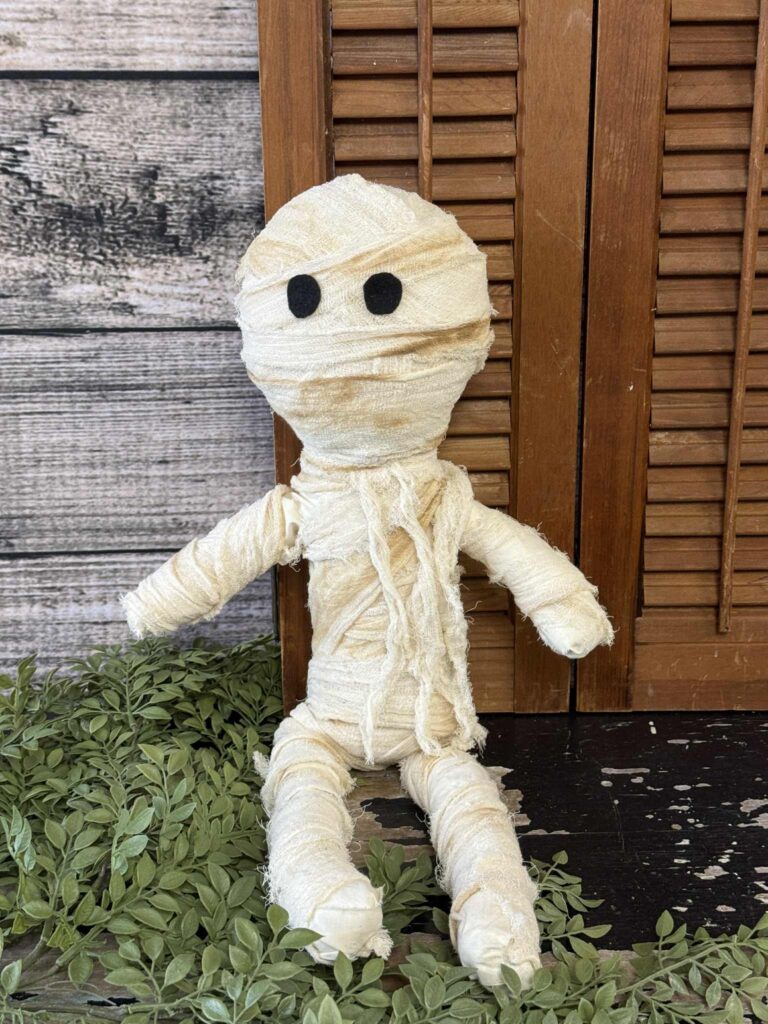
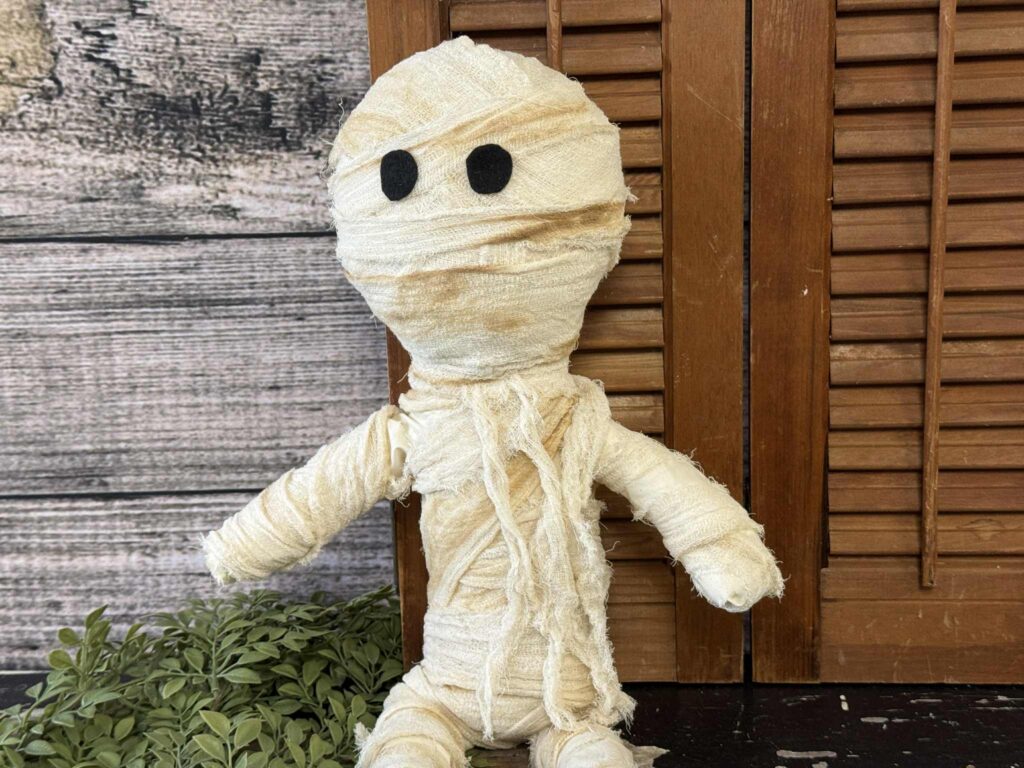
For the finishing touch, cut out two small pieces of black felt and attach them as the mummy’s eyes. This project is so simple to make and will look fantastic anywhere in your home. I hope you’ll get inspired, get creative, and give this spooky little mummy a try!
Cute 🥰
Going out to look for a rag doll! I absolutely love this!!
Oh my gosh that mummy doll is adorable!! I laughed when I saw the doll turned into a mummy!!! 🧡💜🤍
What an adorable mummy and it looks so easy to do. I am not a Halloween person, but I do think this is very cute and very doable. ❤️ Have fun on Friday night everybody!!
Barb, again you nailed it! What a unique and great mummy doll! 💦💦💦💦🌲
So cute! We made your mummy jar a few years ago and the kids enjoyed it.
This is one of my all time favorites! The little mummy is adorable. Reminds me of the children’s book “Are you my mummy?” So cute. I need to try this one
I’m going to go get my stuff so I can make it. Love it. See you at Friday Night Hangout
See you Friday night love this craft
This is adorable!! Can’t wait!
Love love love!!! I will be joining Friday Night hangout and hope to be able to get my supplies! Watered!!!