We are always crafting and creating here at The Shabby Tree. I am usually using a lot of lace and creams but I wanted to change things up and create something more rustic looking. It is time to start decorating for Spring and Easter so we are going to create a rustic wooden bunny.
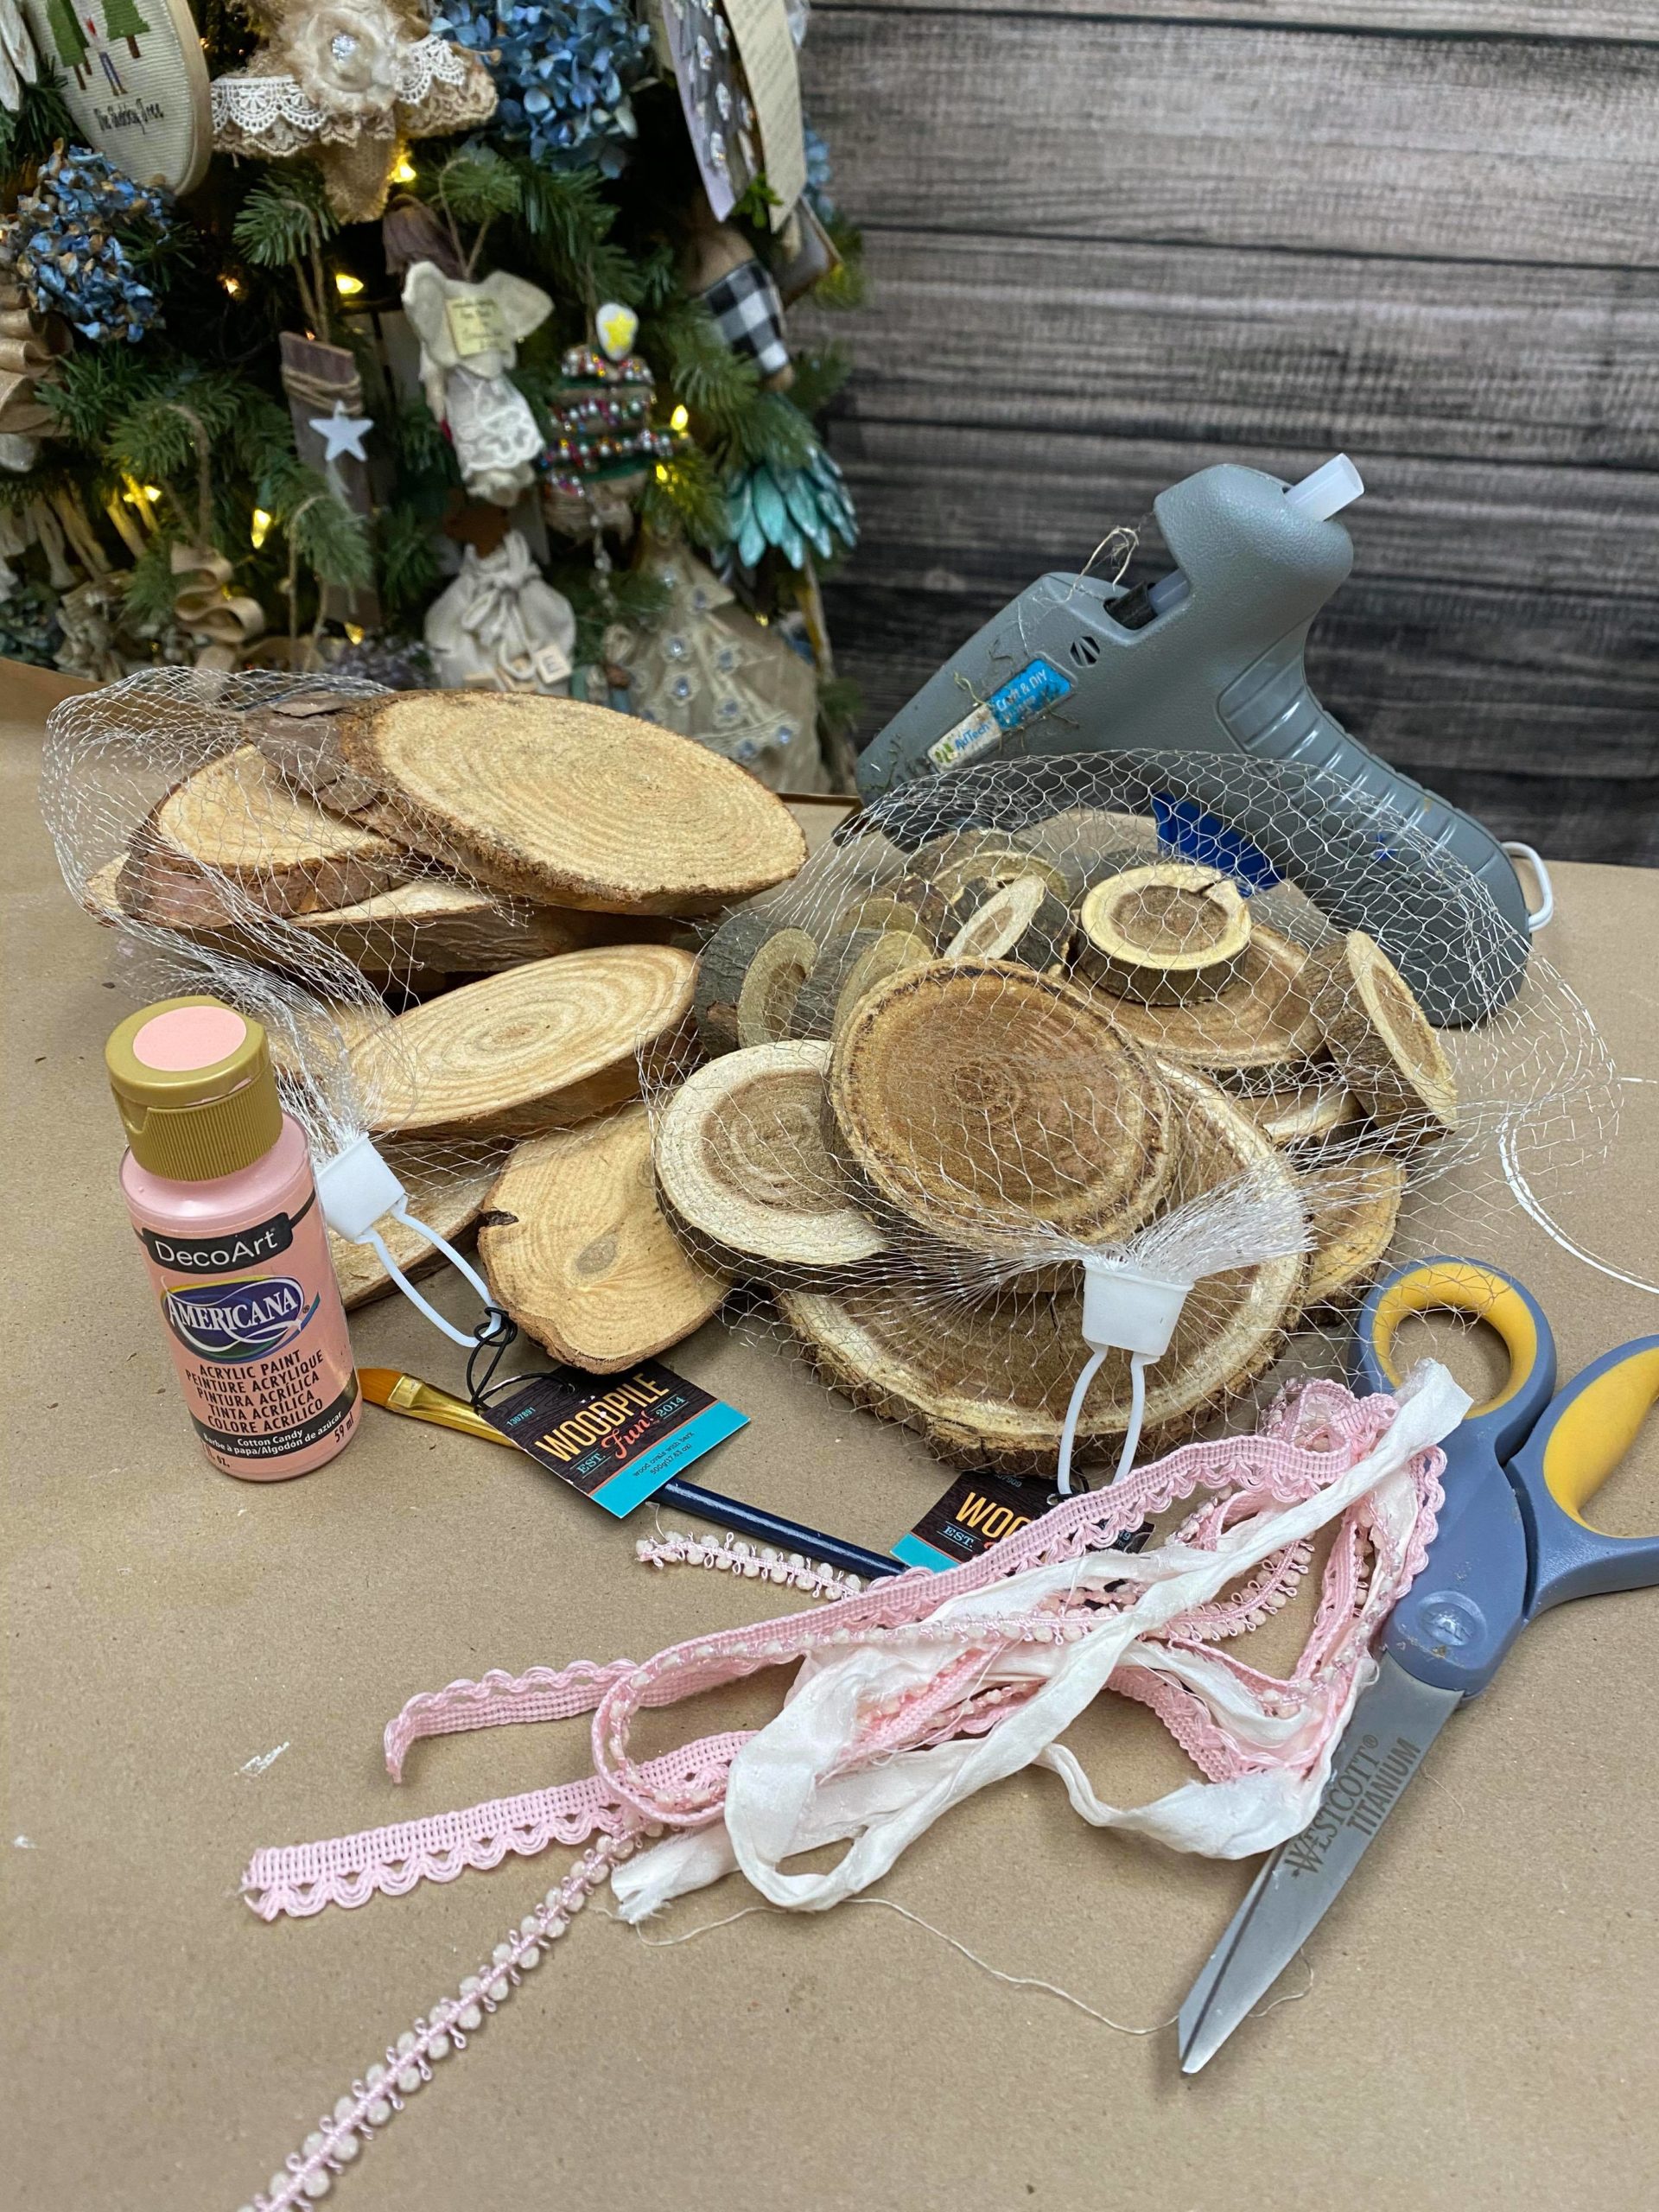
The supplies I will be using are:
1. Round wood pieces (you can find these in Hobby Lobby)
2. Oval wood pieces (you can find these in Hobby Lobby)
3. Hot Glue
4. Scissors
5. Ribbon
6. Pink paint
7. Paint brush
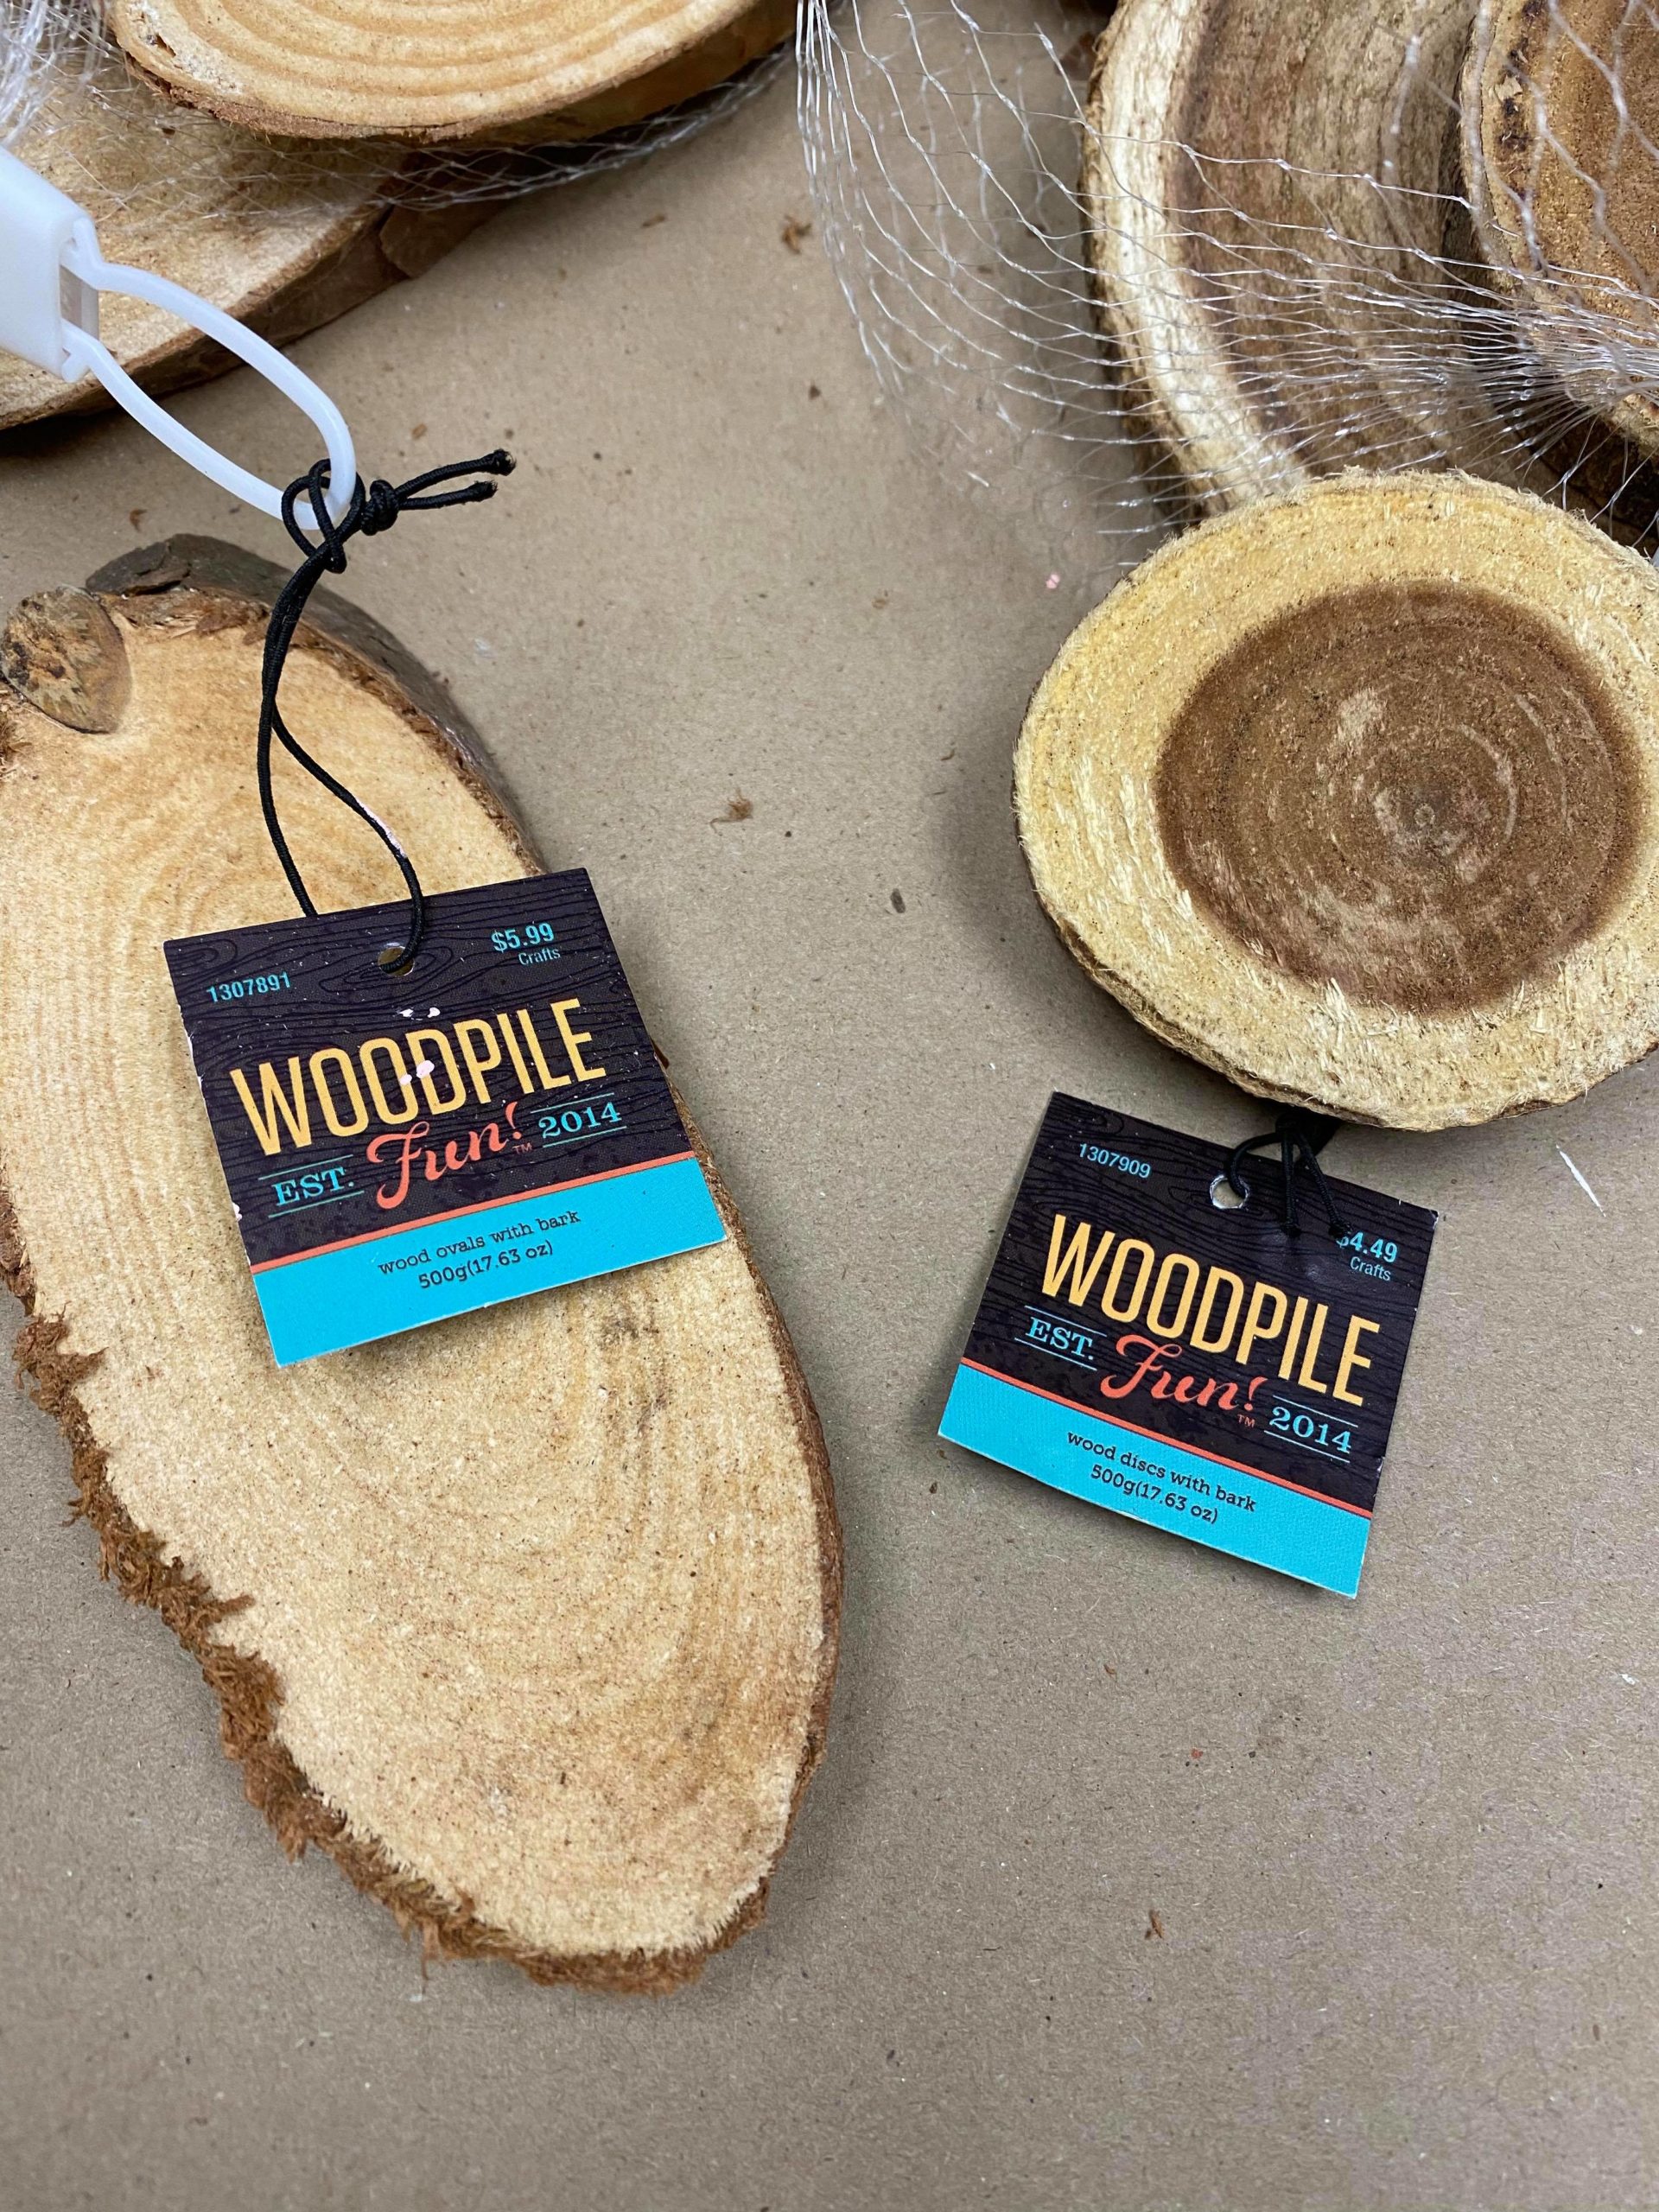
I bought one bag of oval wood pieces and one bag of round pieces. Both of these came from Hobby Lobby.
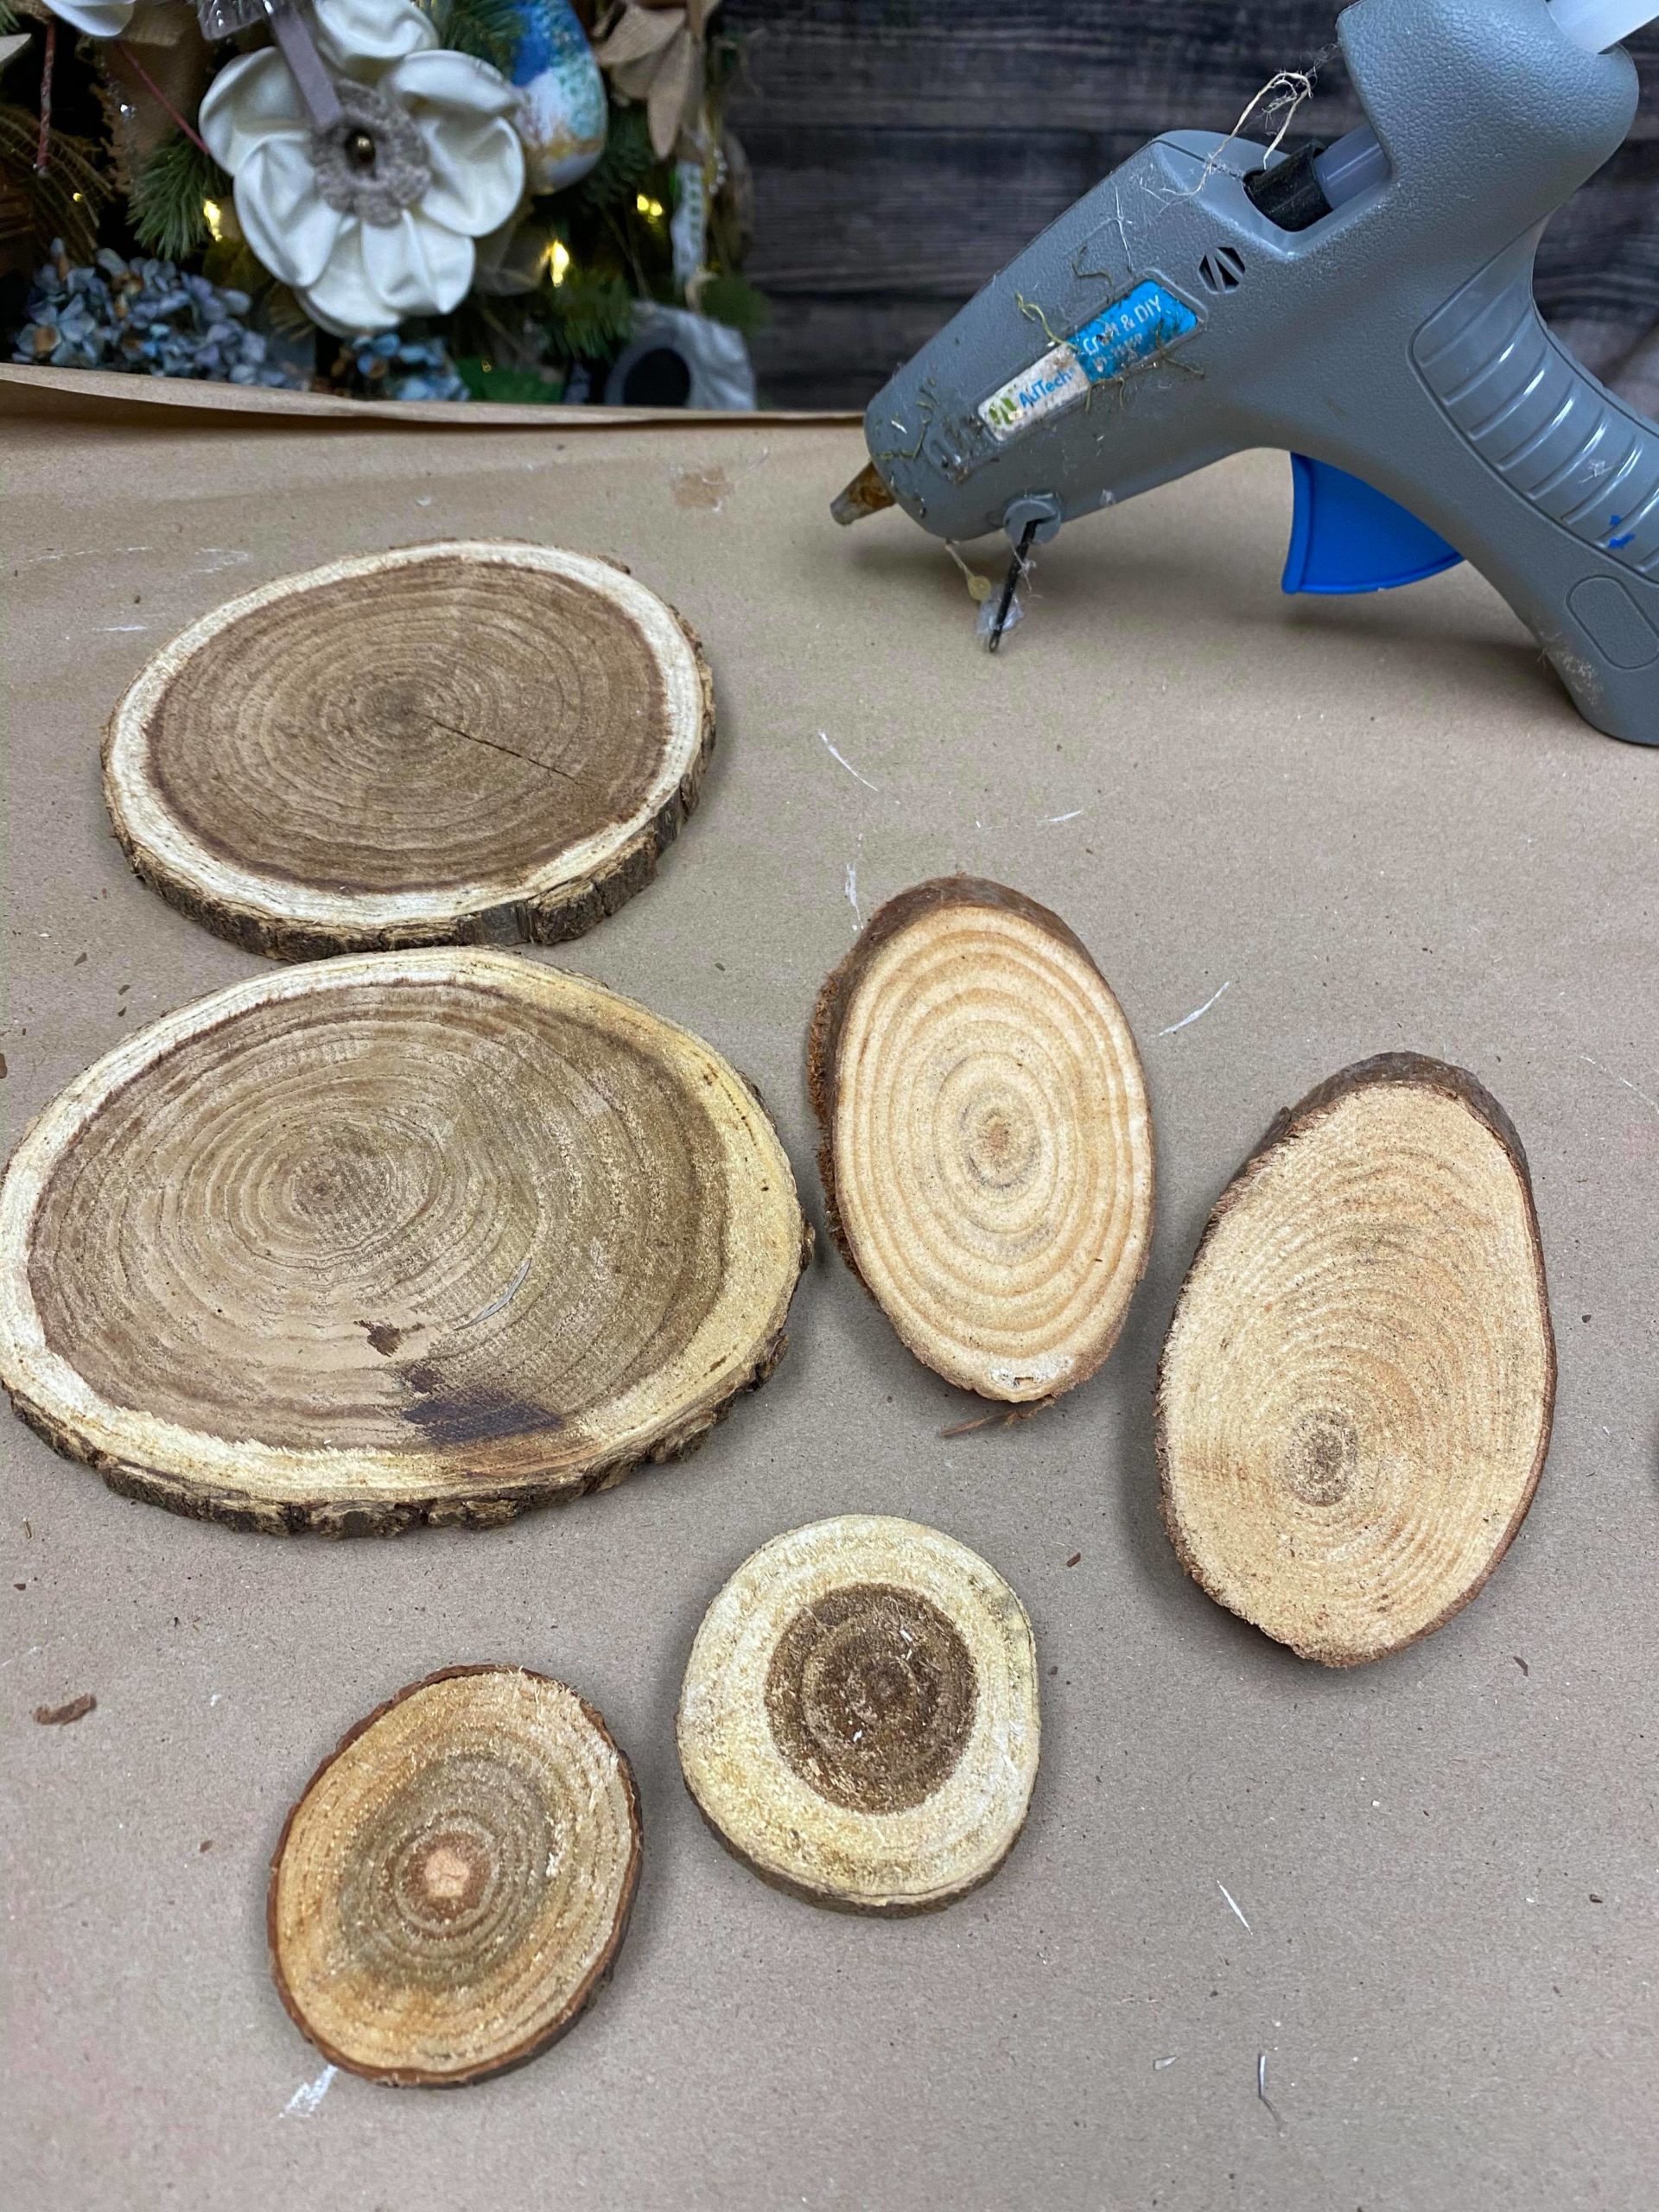
I will be using all the pieces shown in photo above.
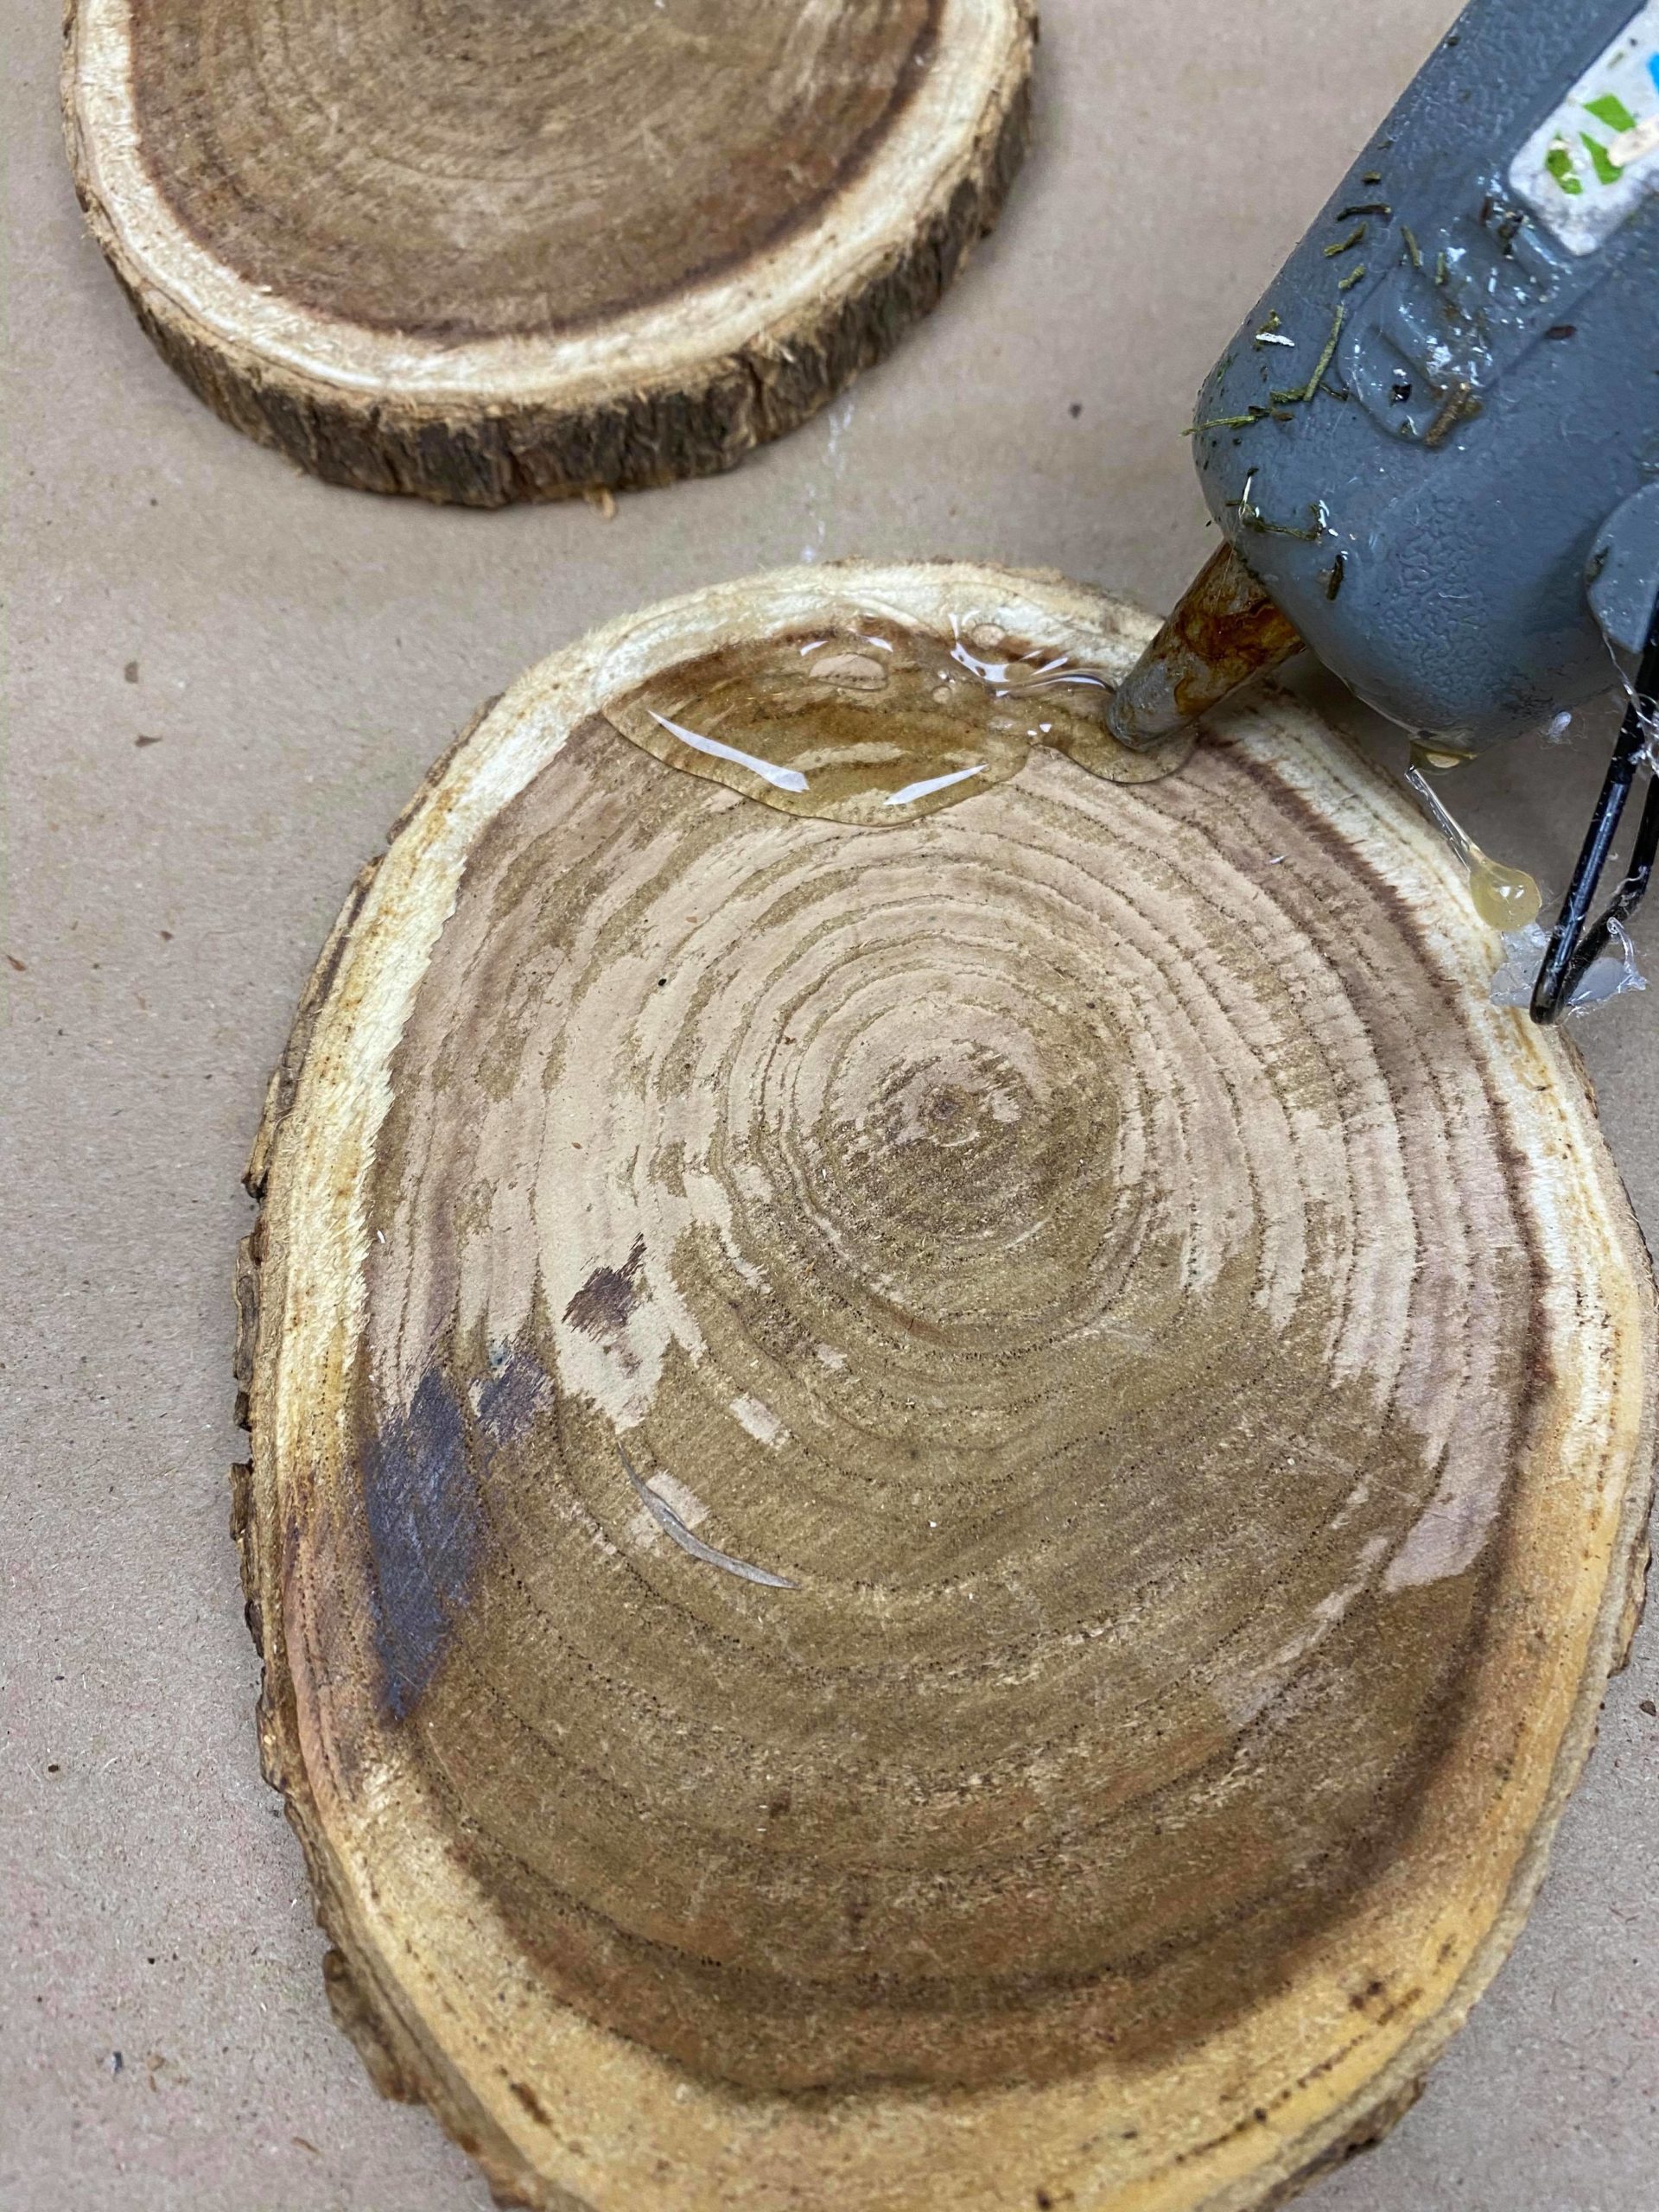
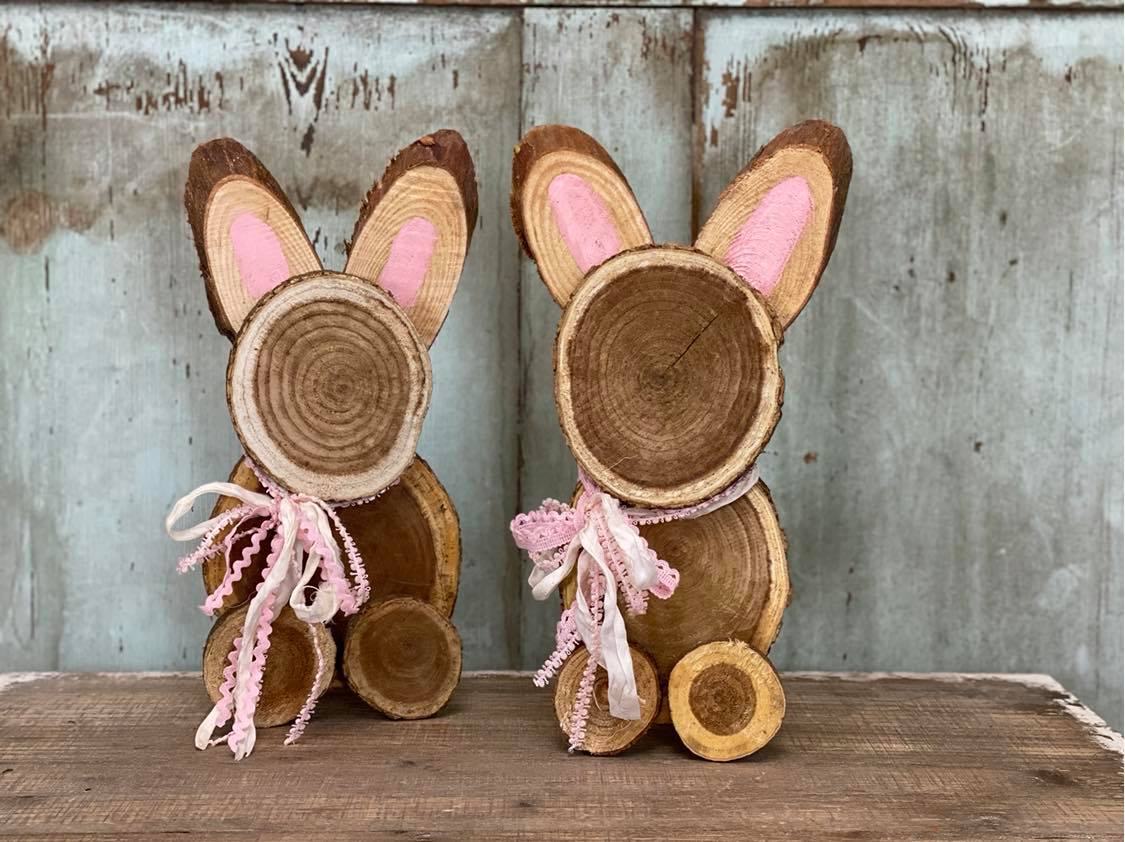
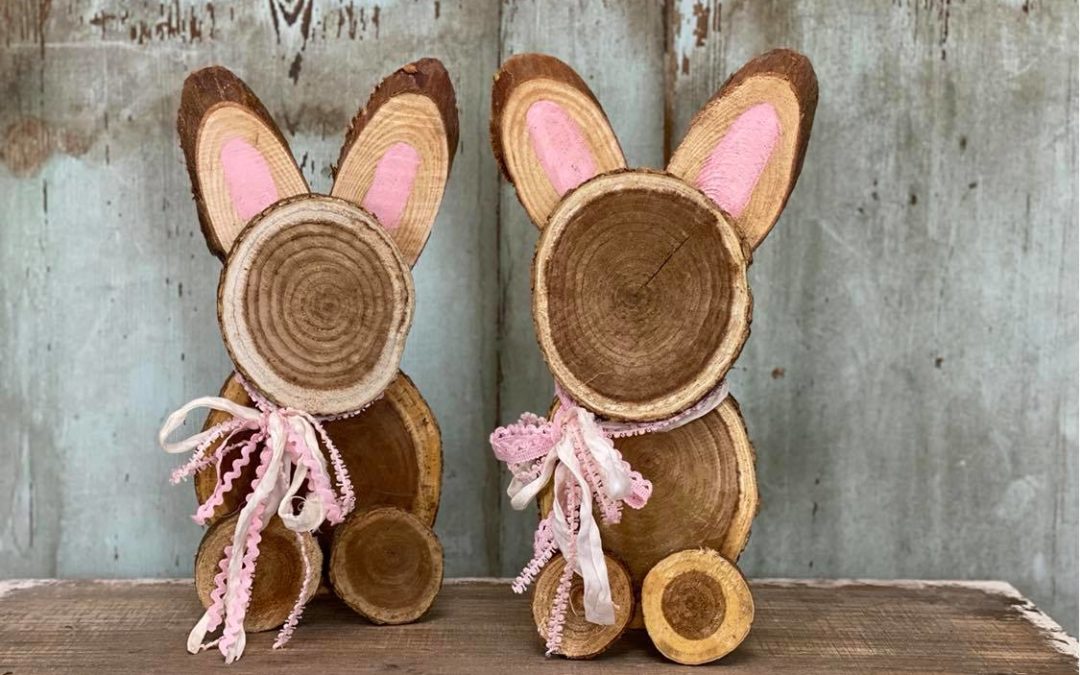
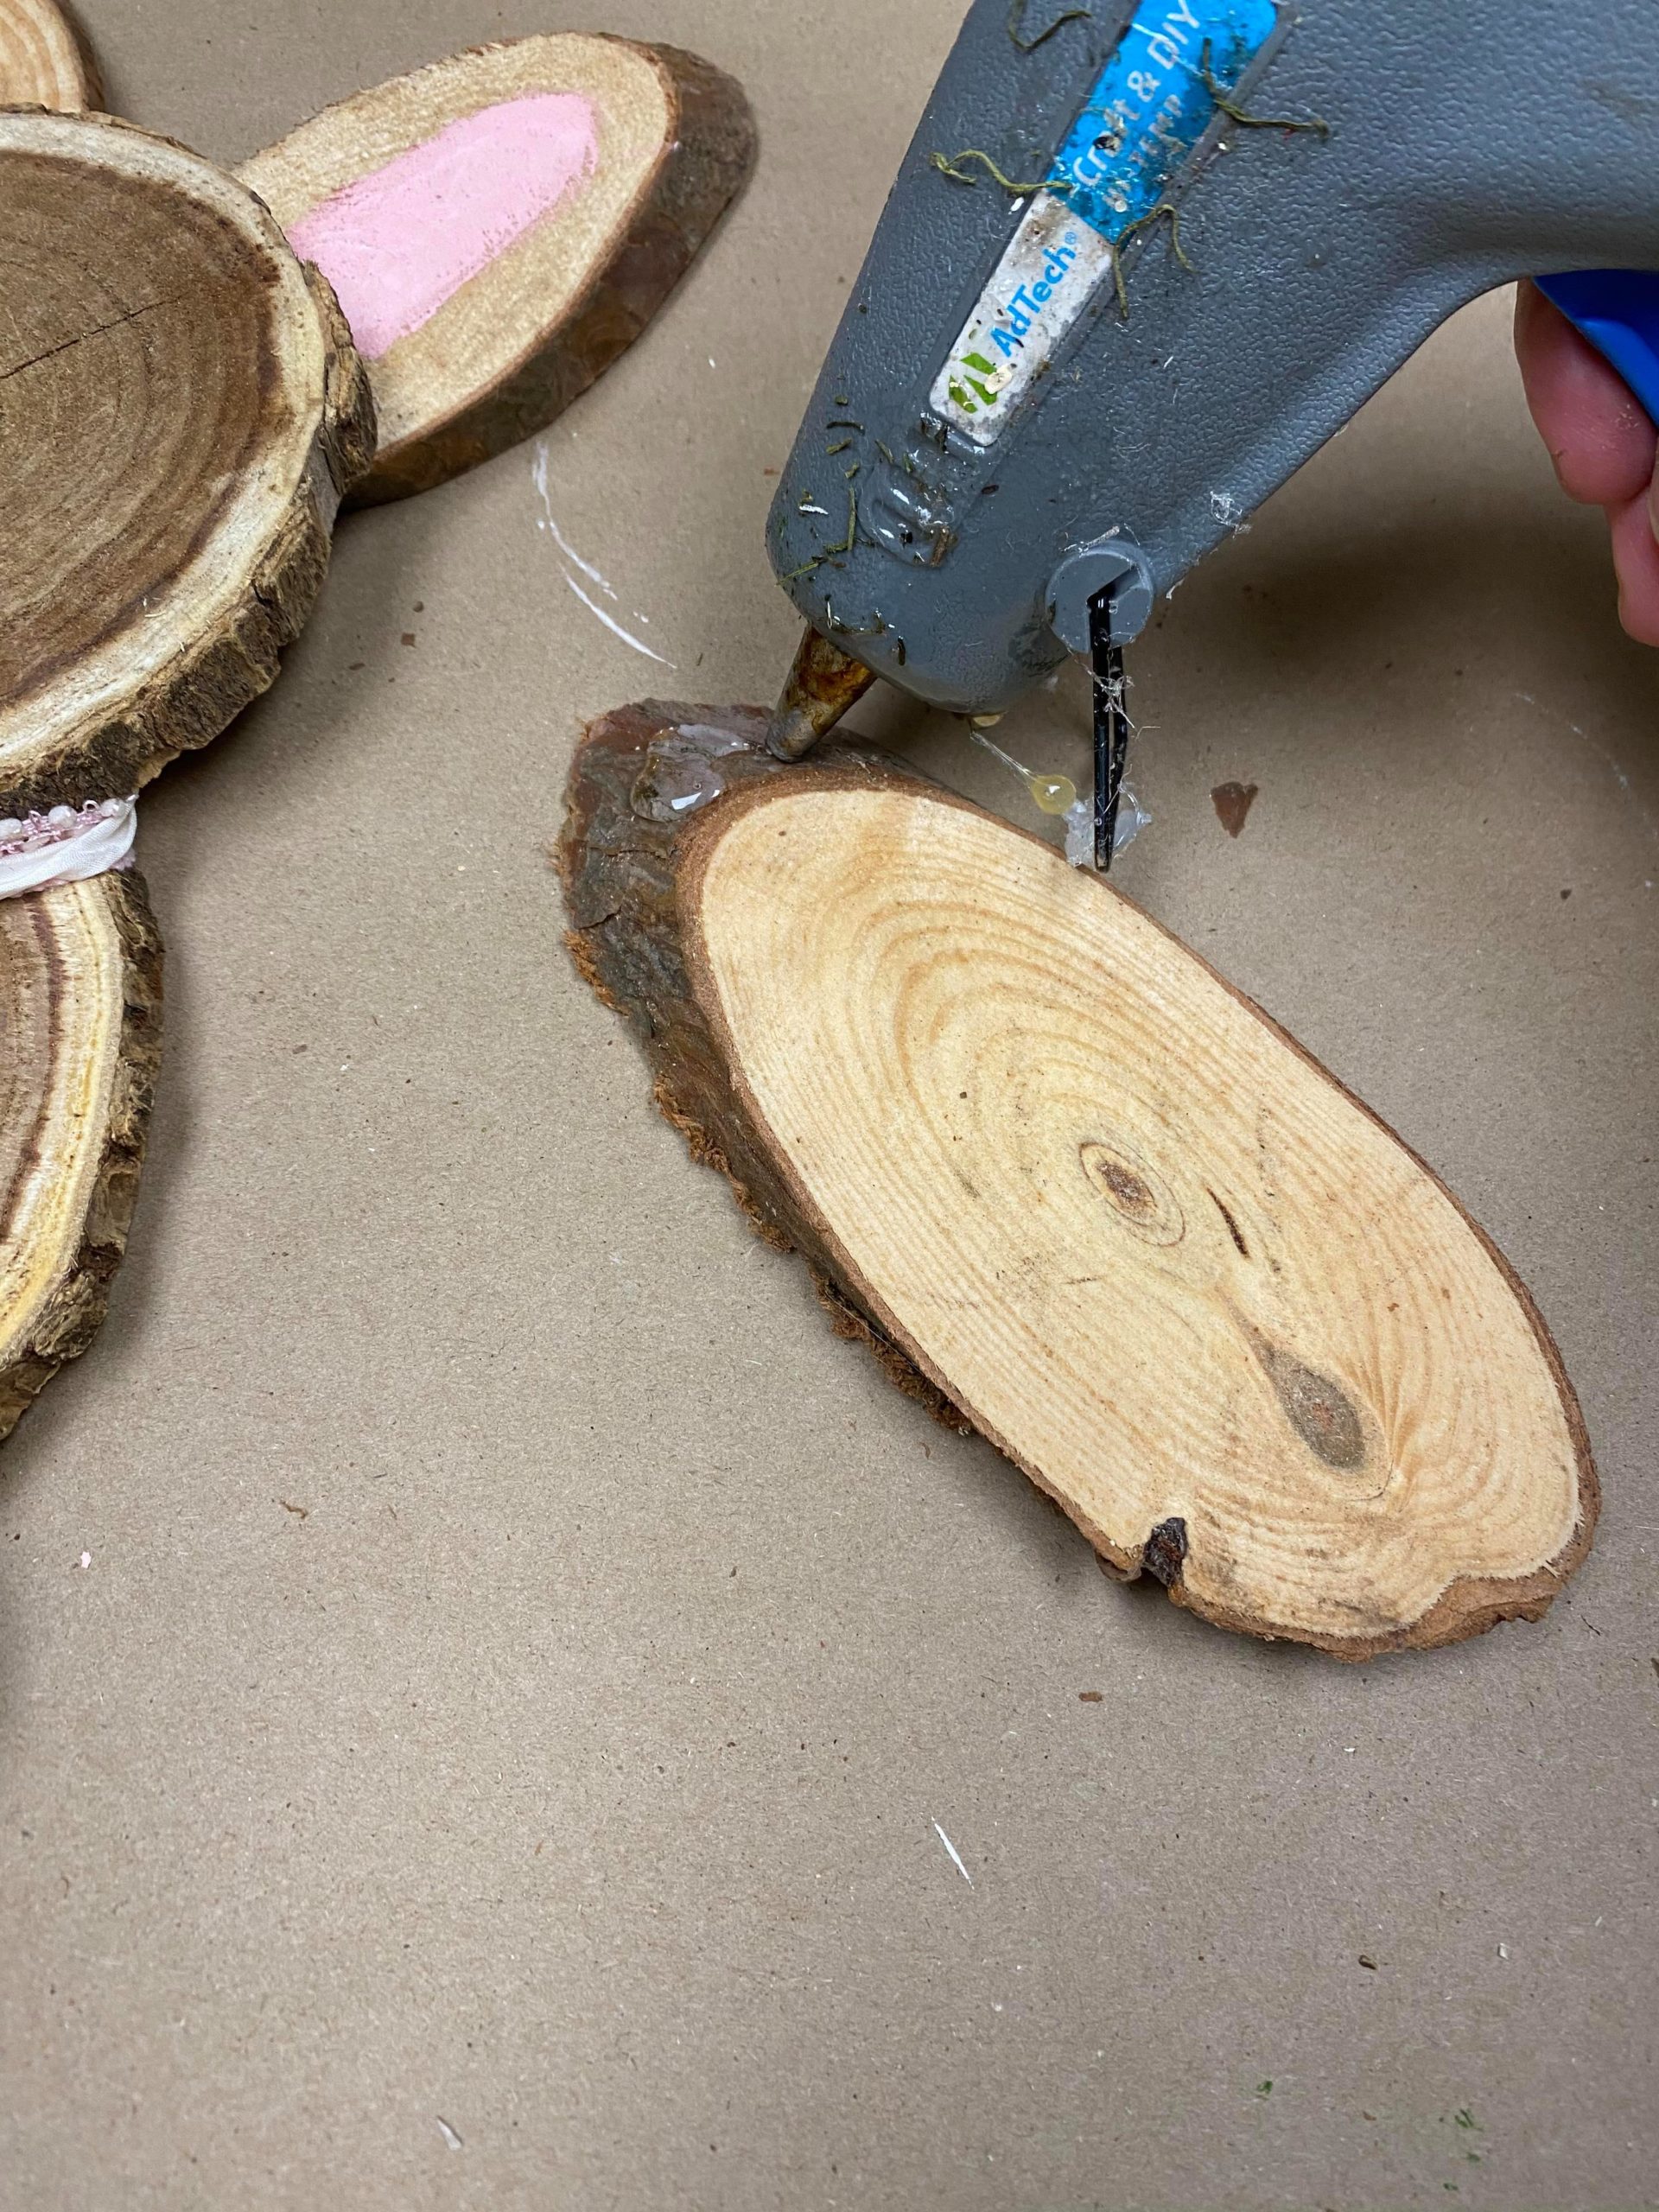
The first step is to glue your two larger round pieces together. I will use hot glue to attach the smaller piece onto the front of the larger piece.
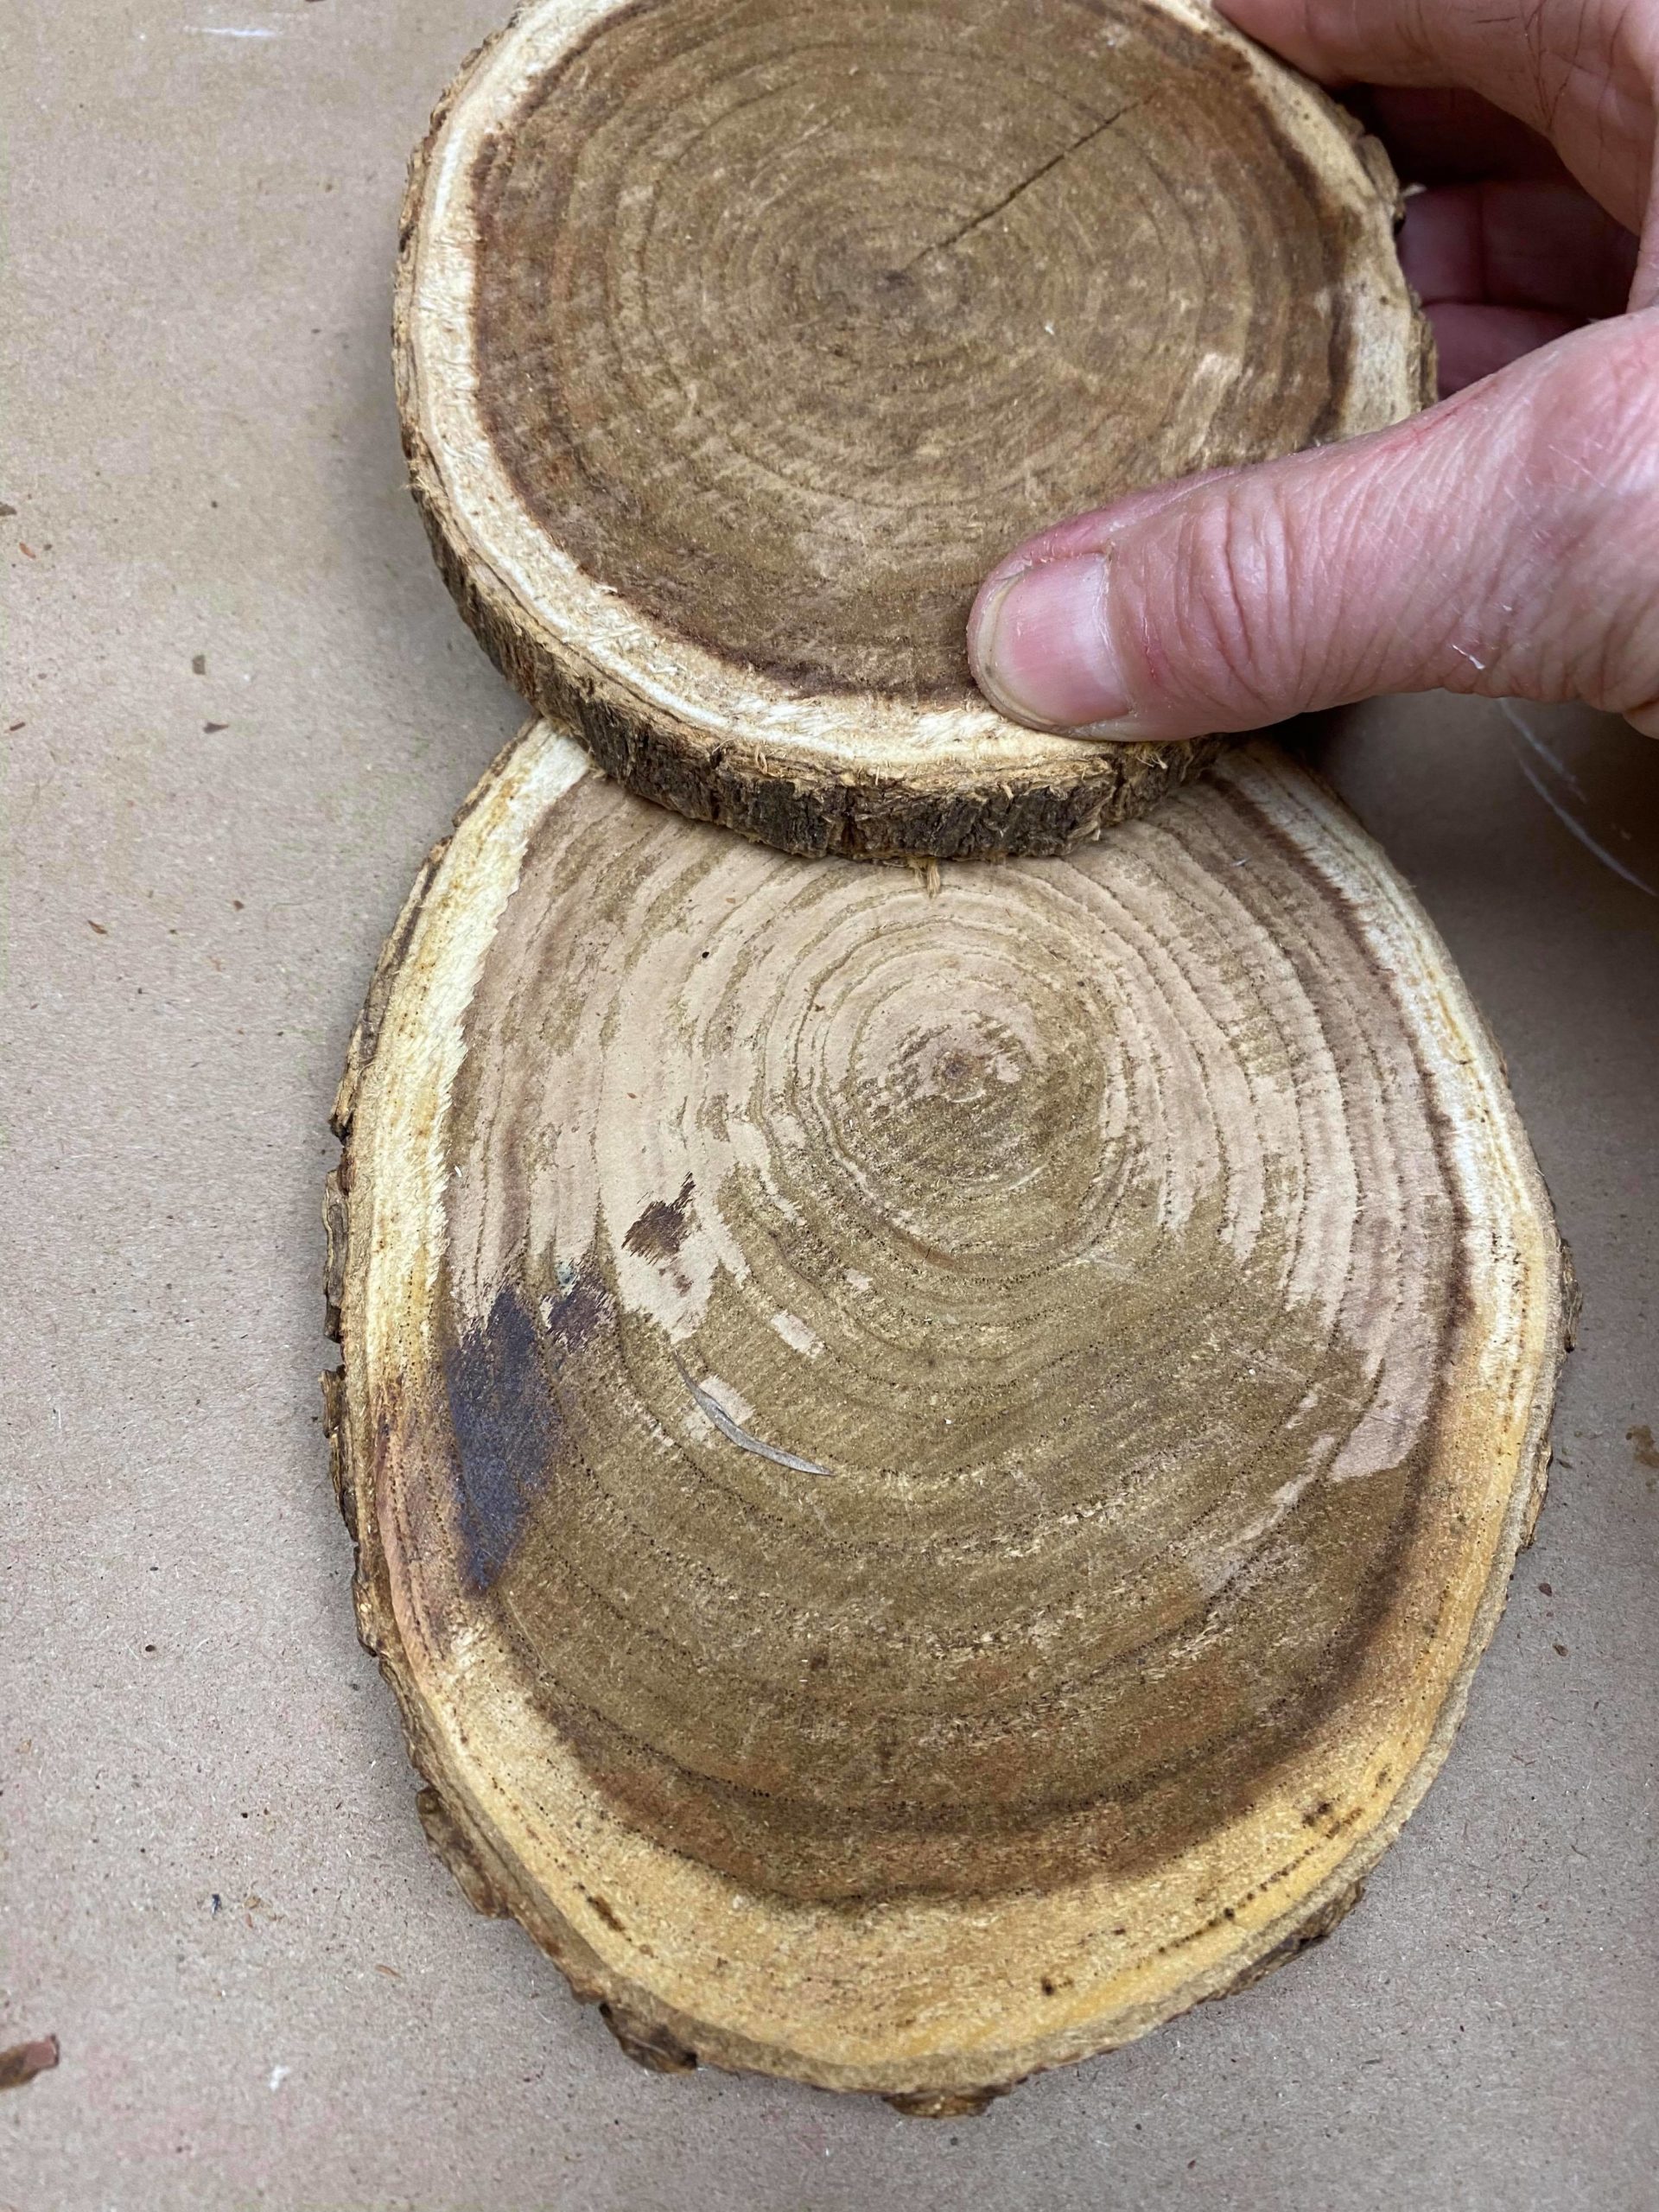
You now formed the head and body to your bunny.
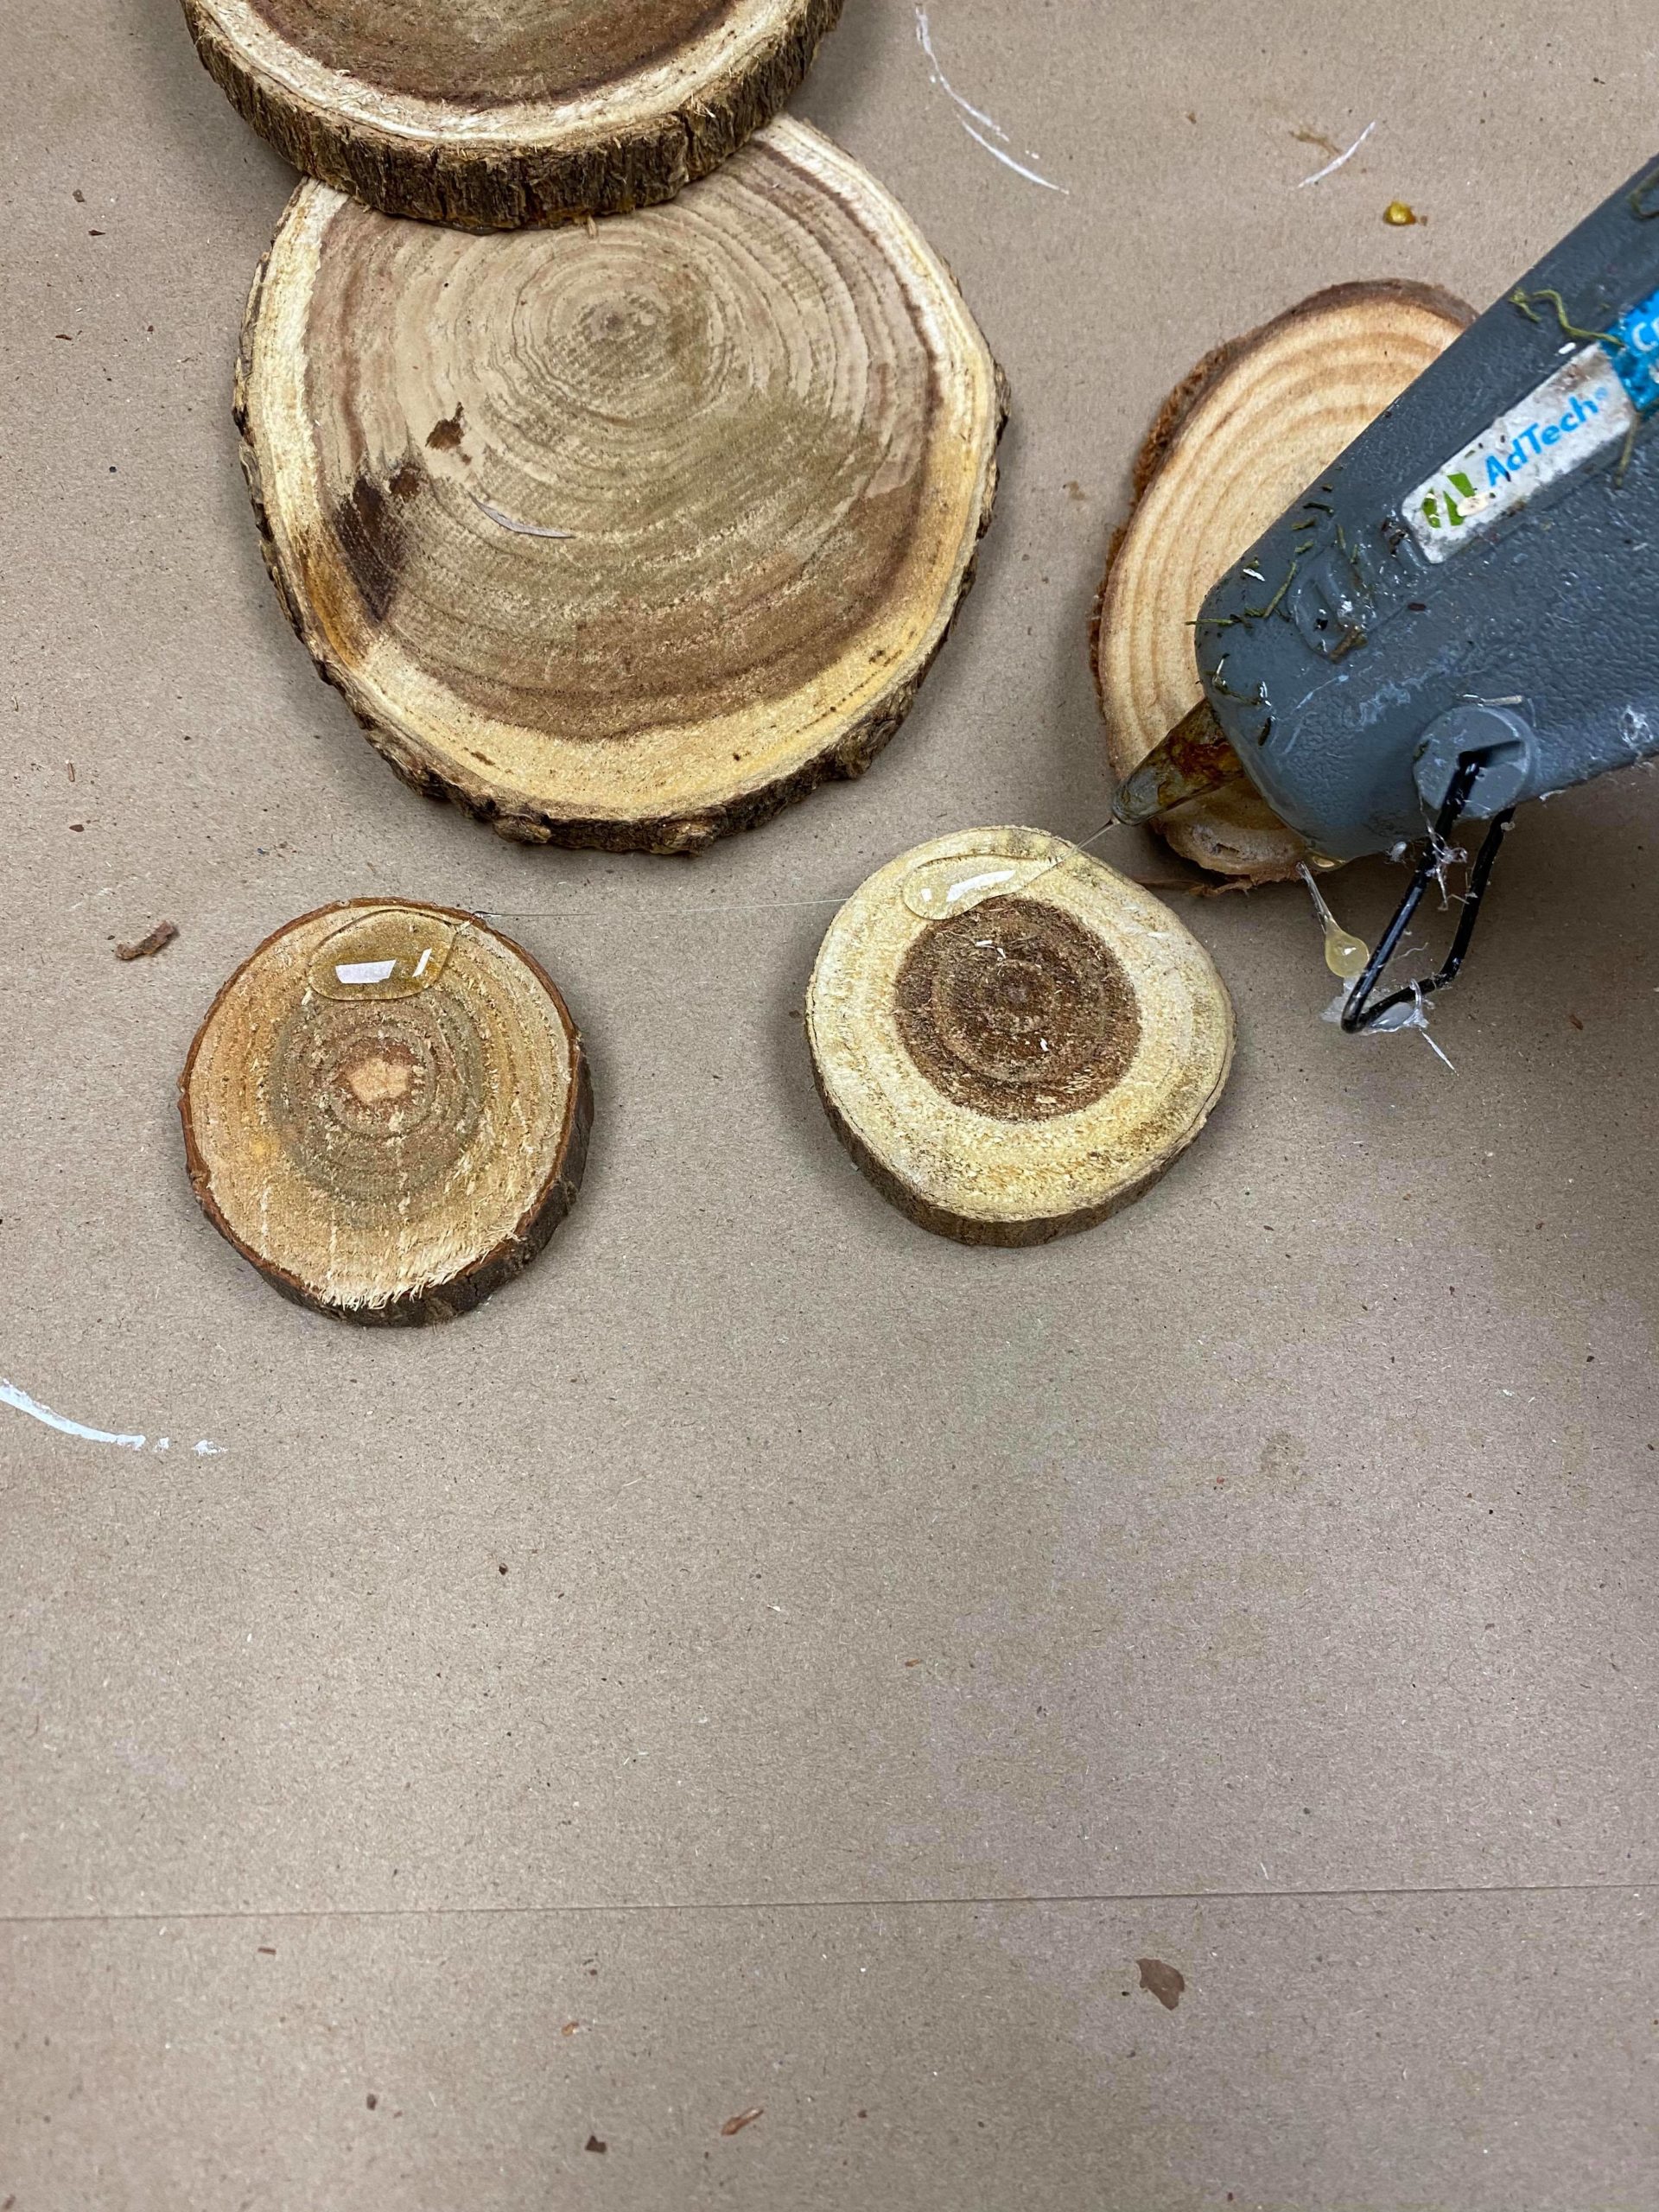
The next step is to attach the two smaller circles to the bottom for the feet of your bunny.
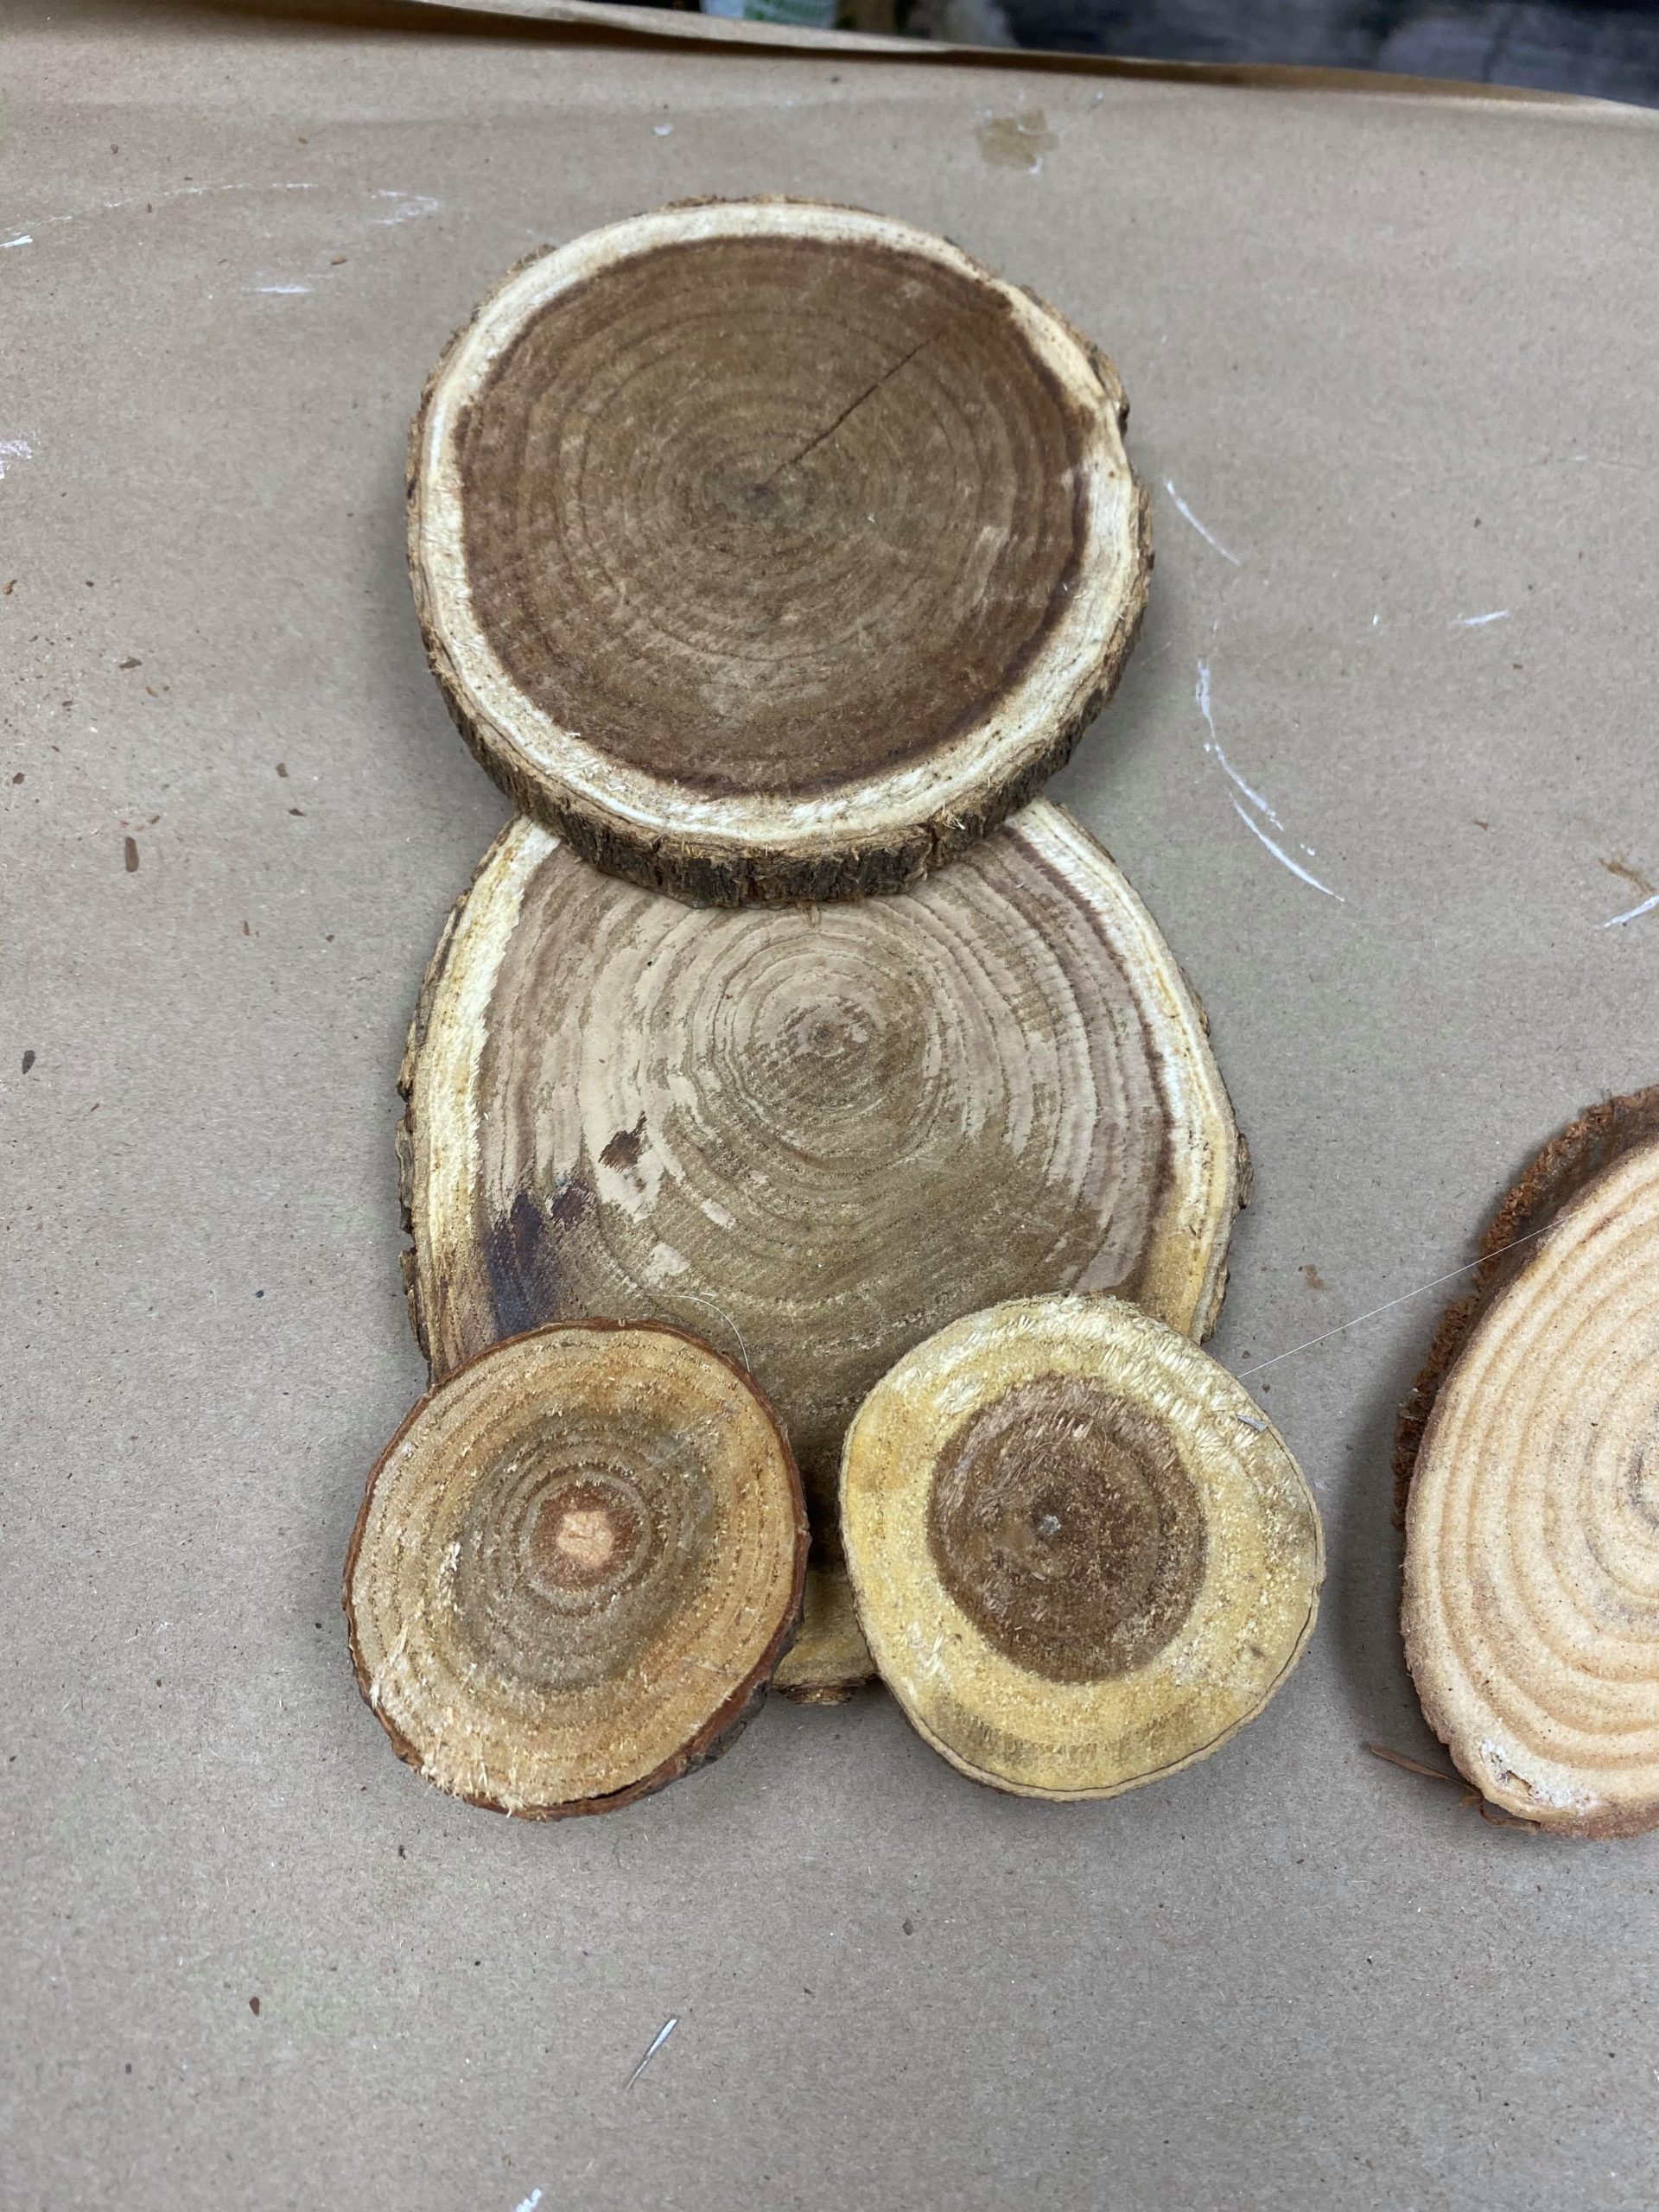
You should now have two oval pieces left for the ears.
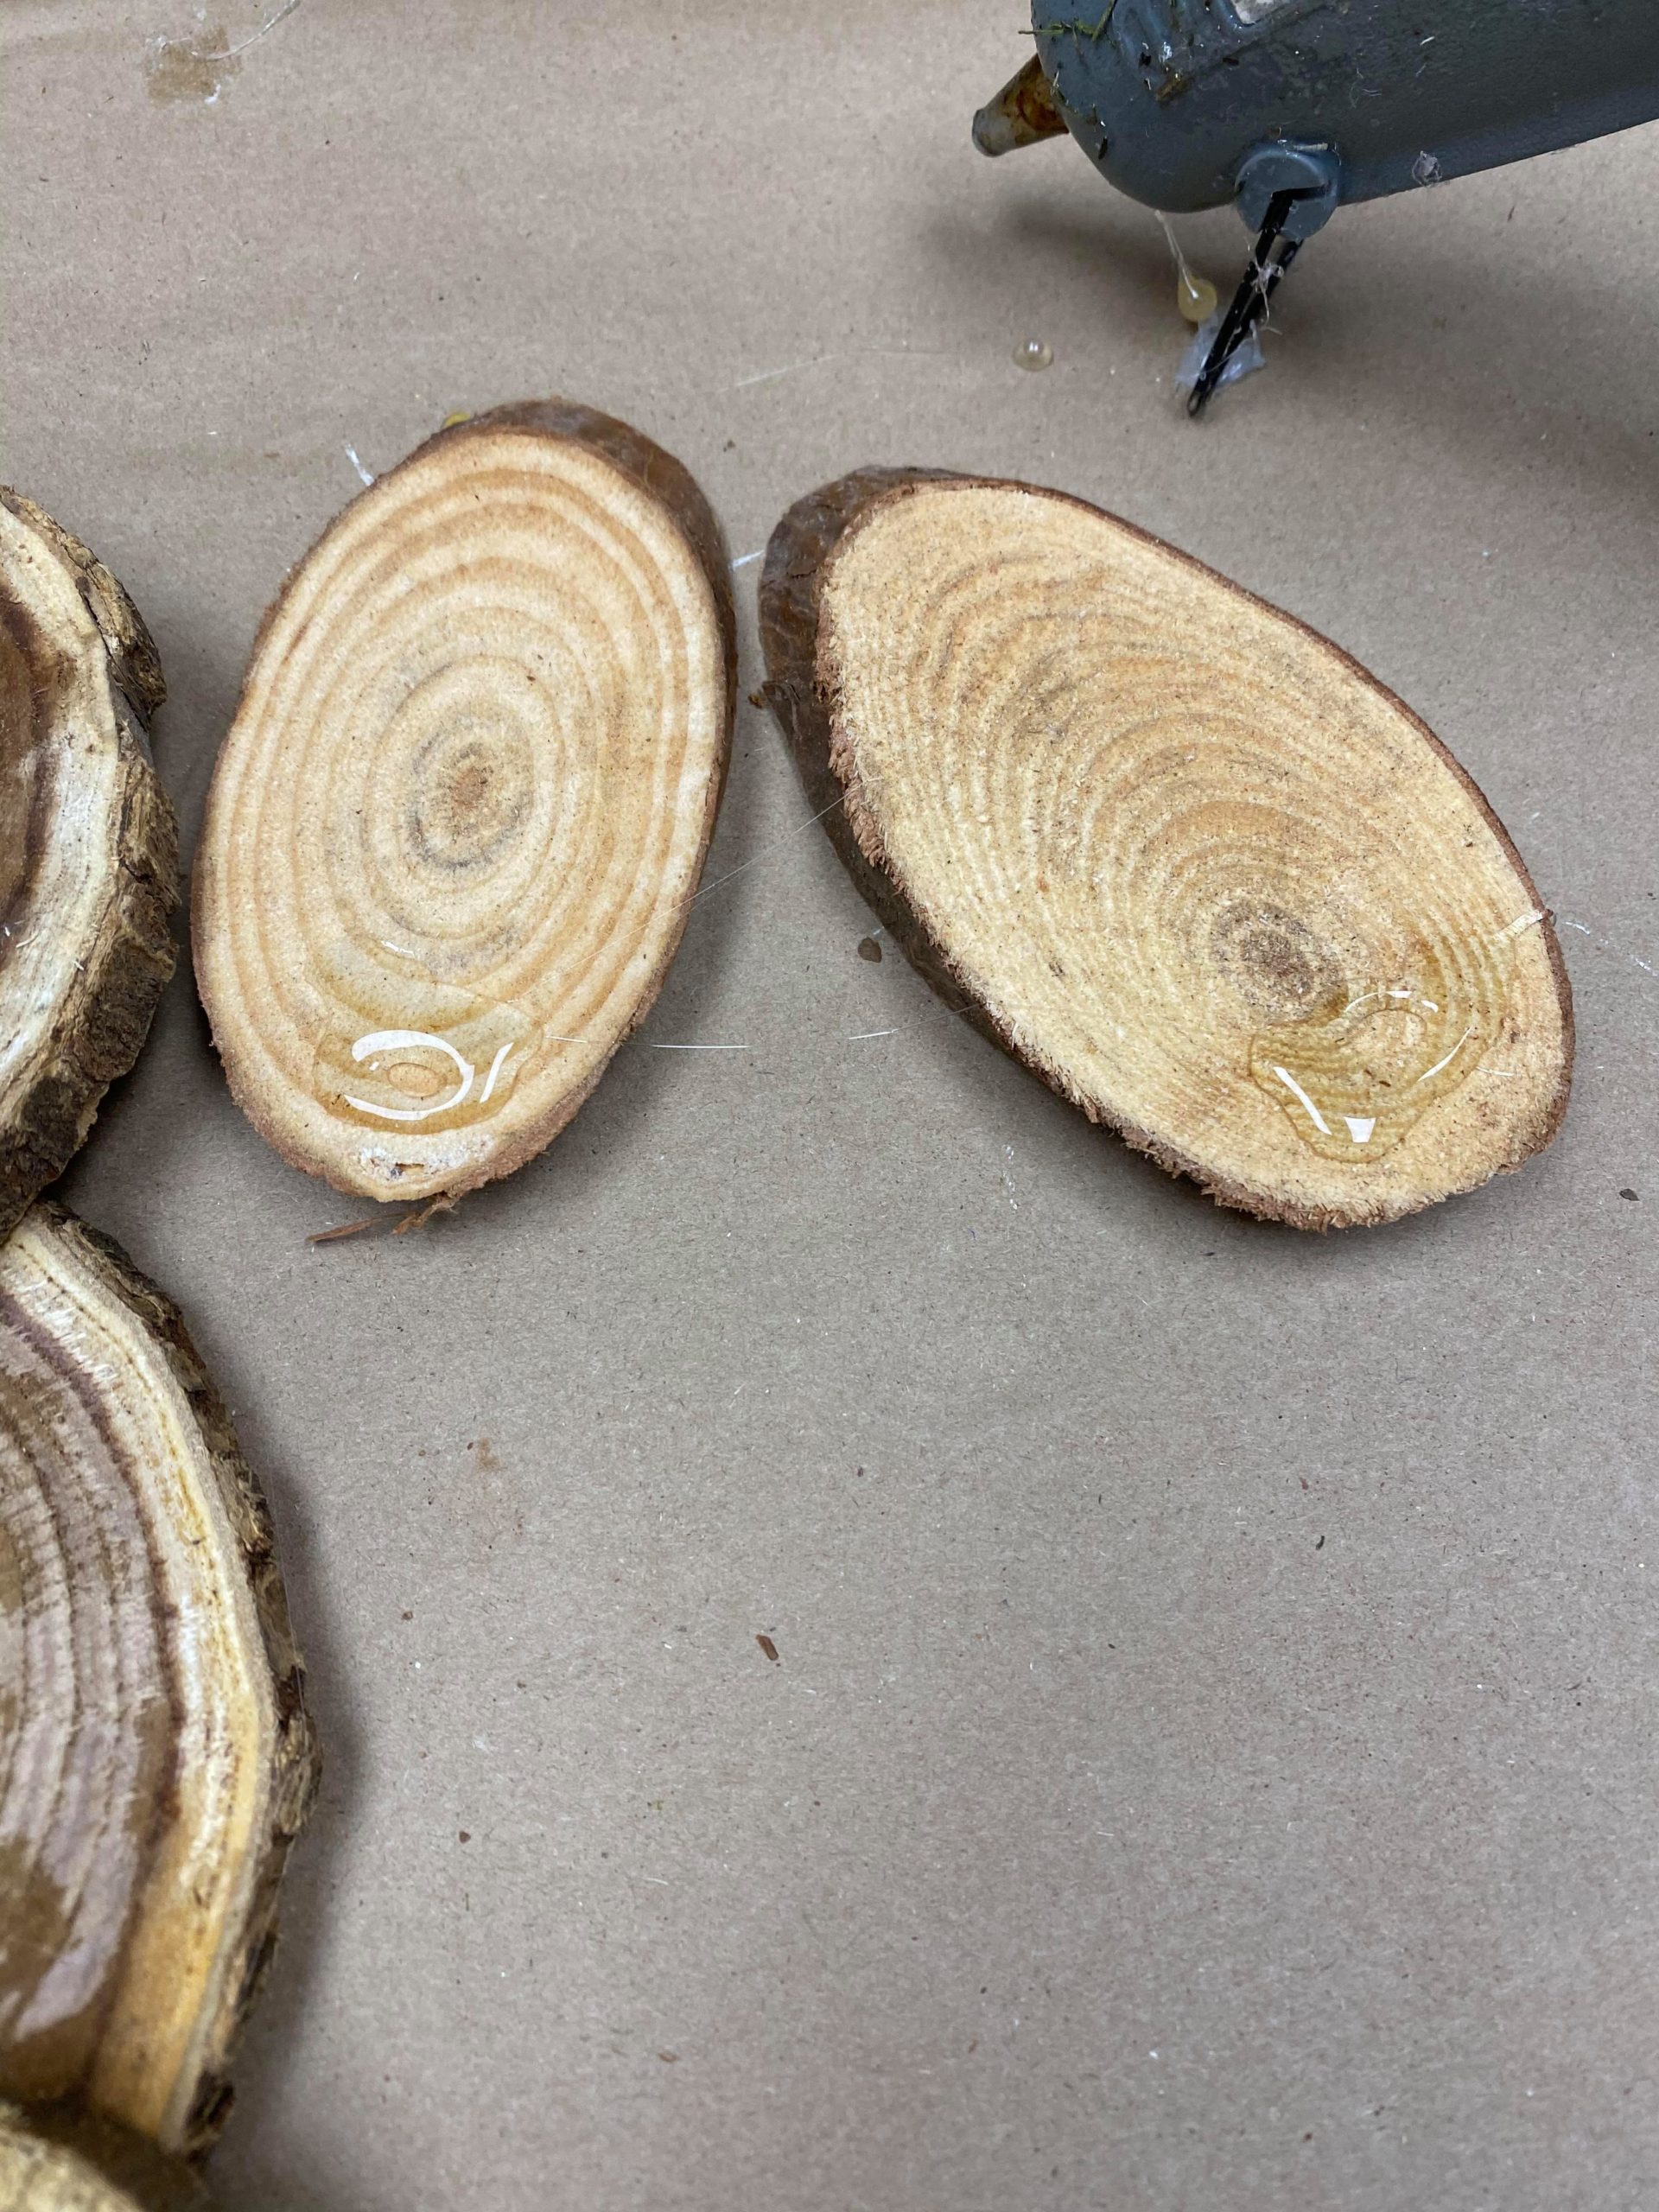
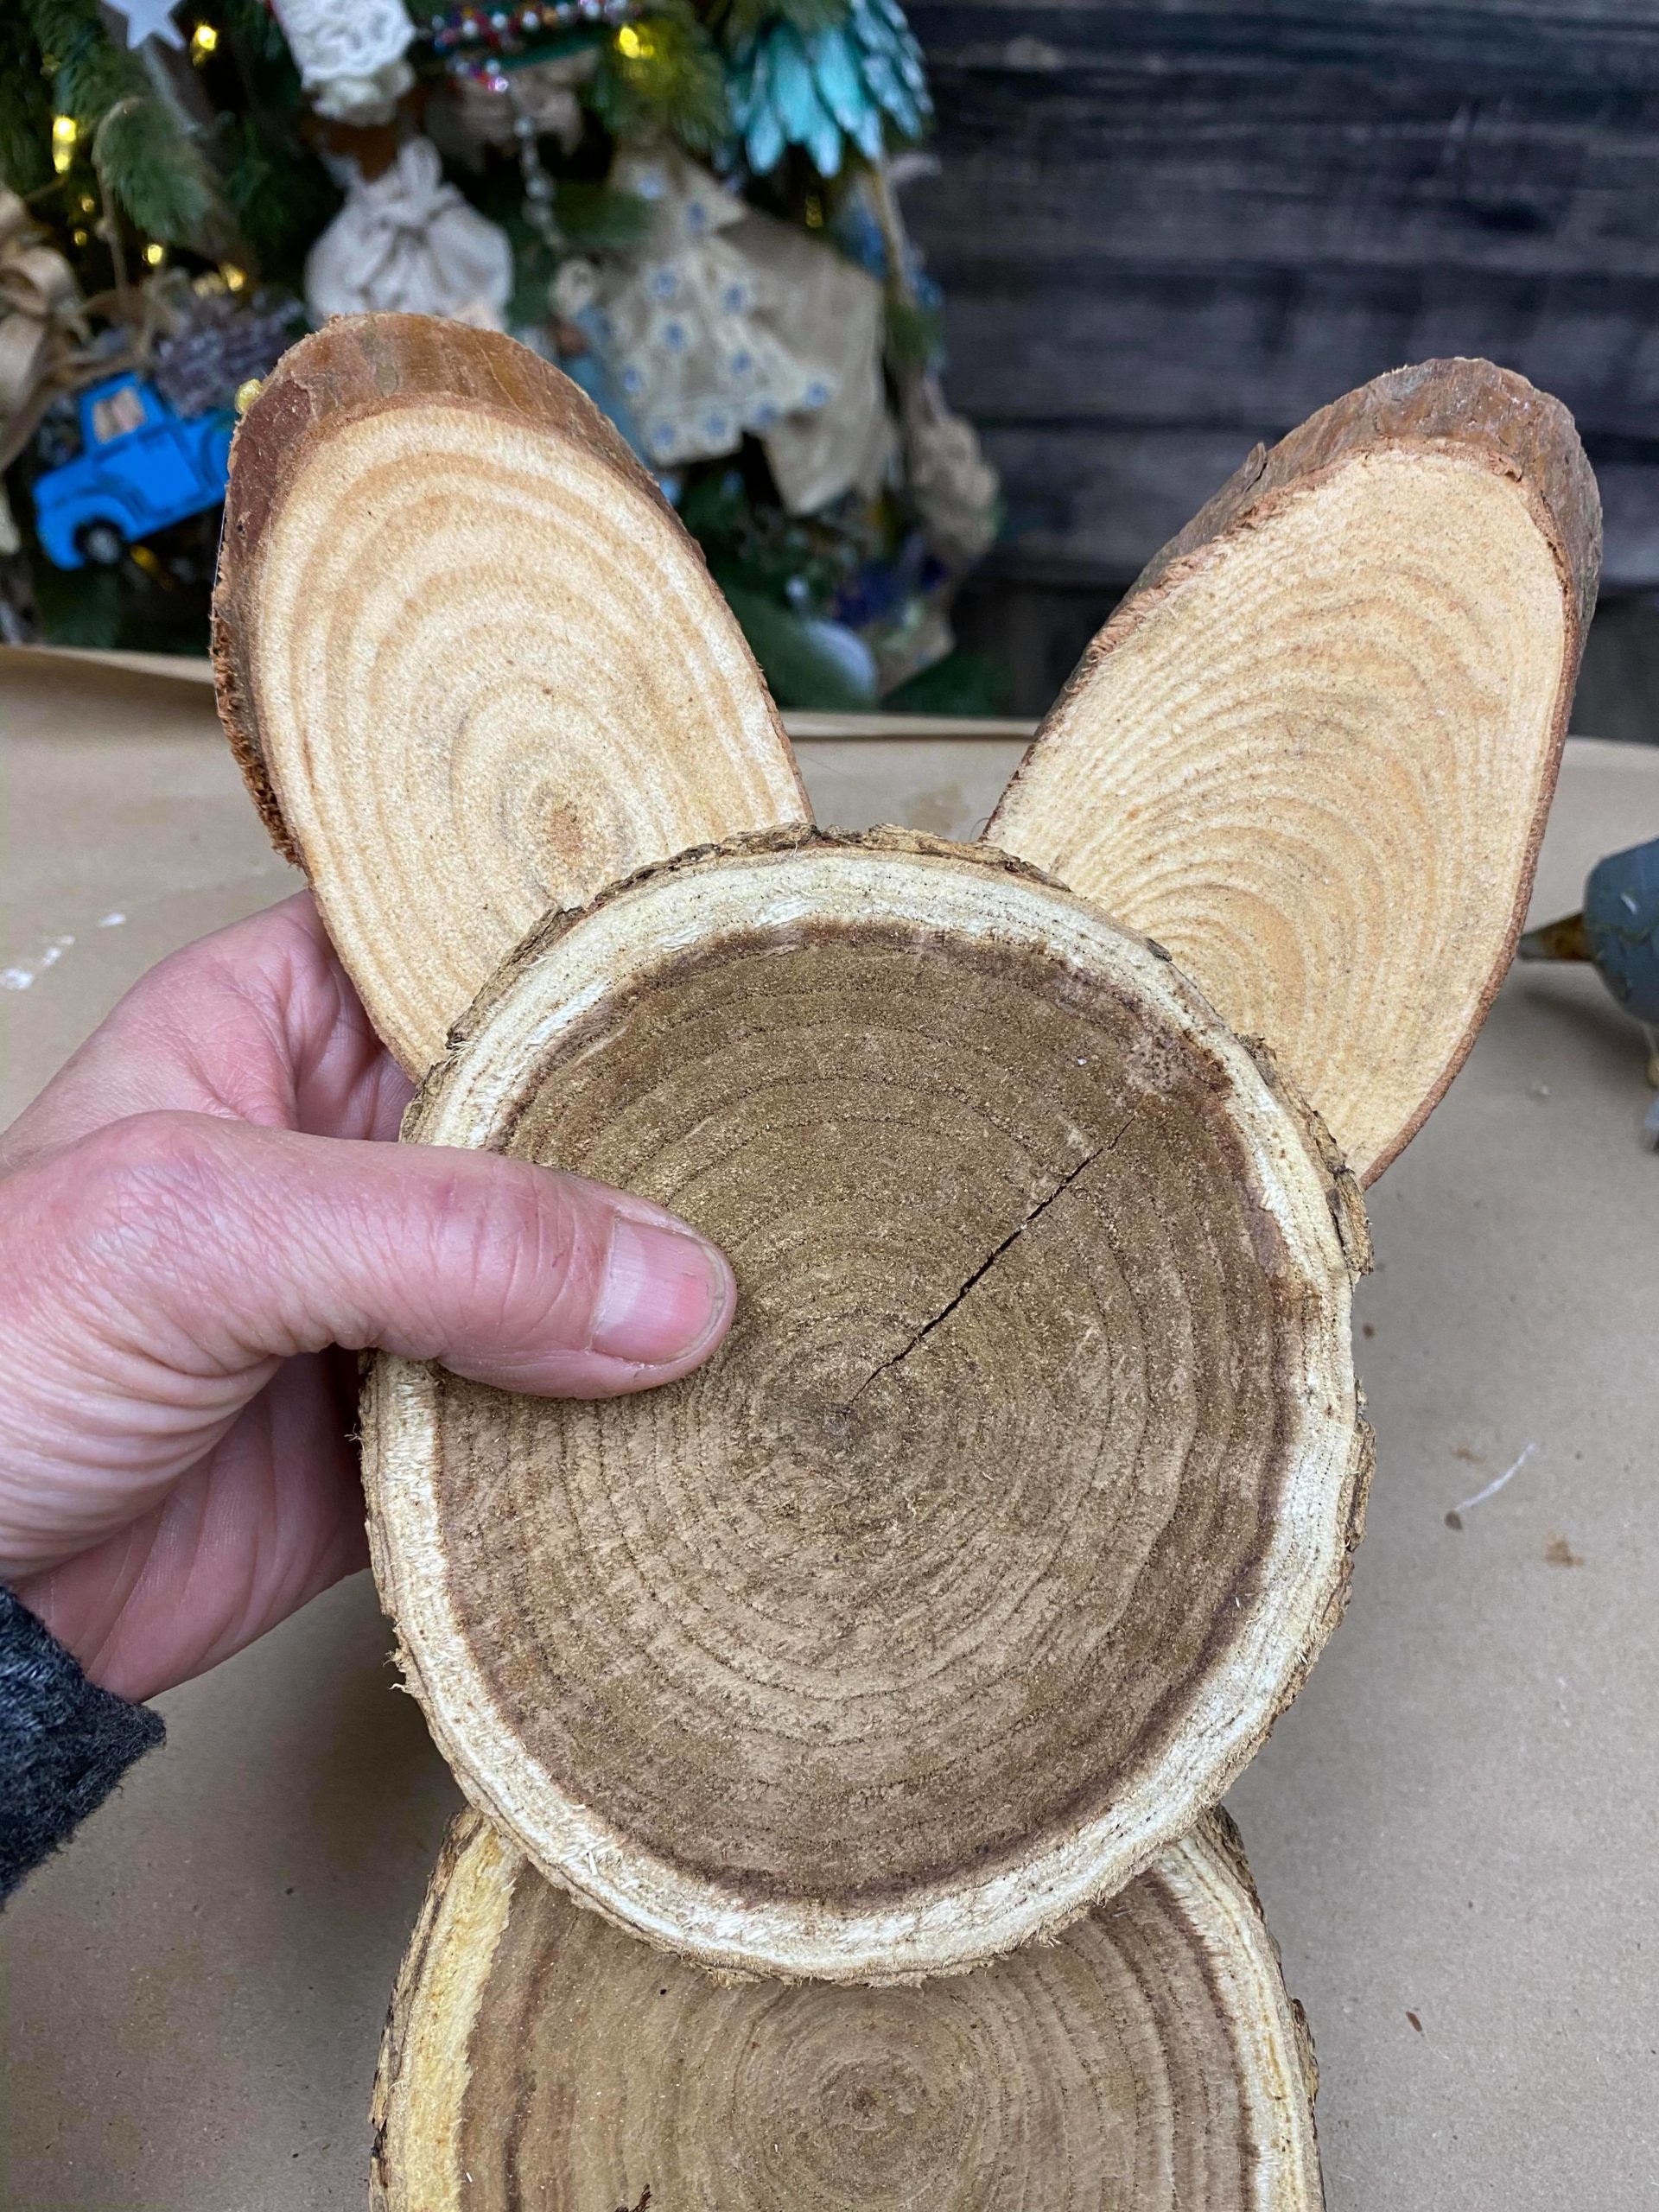
Be sure to glue the ears to the back side of the head.
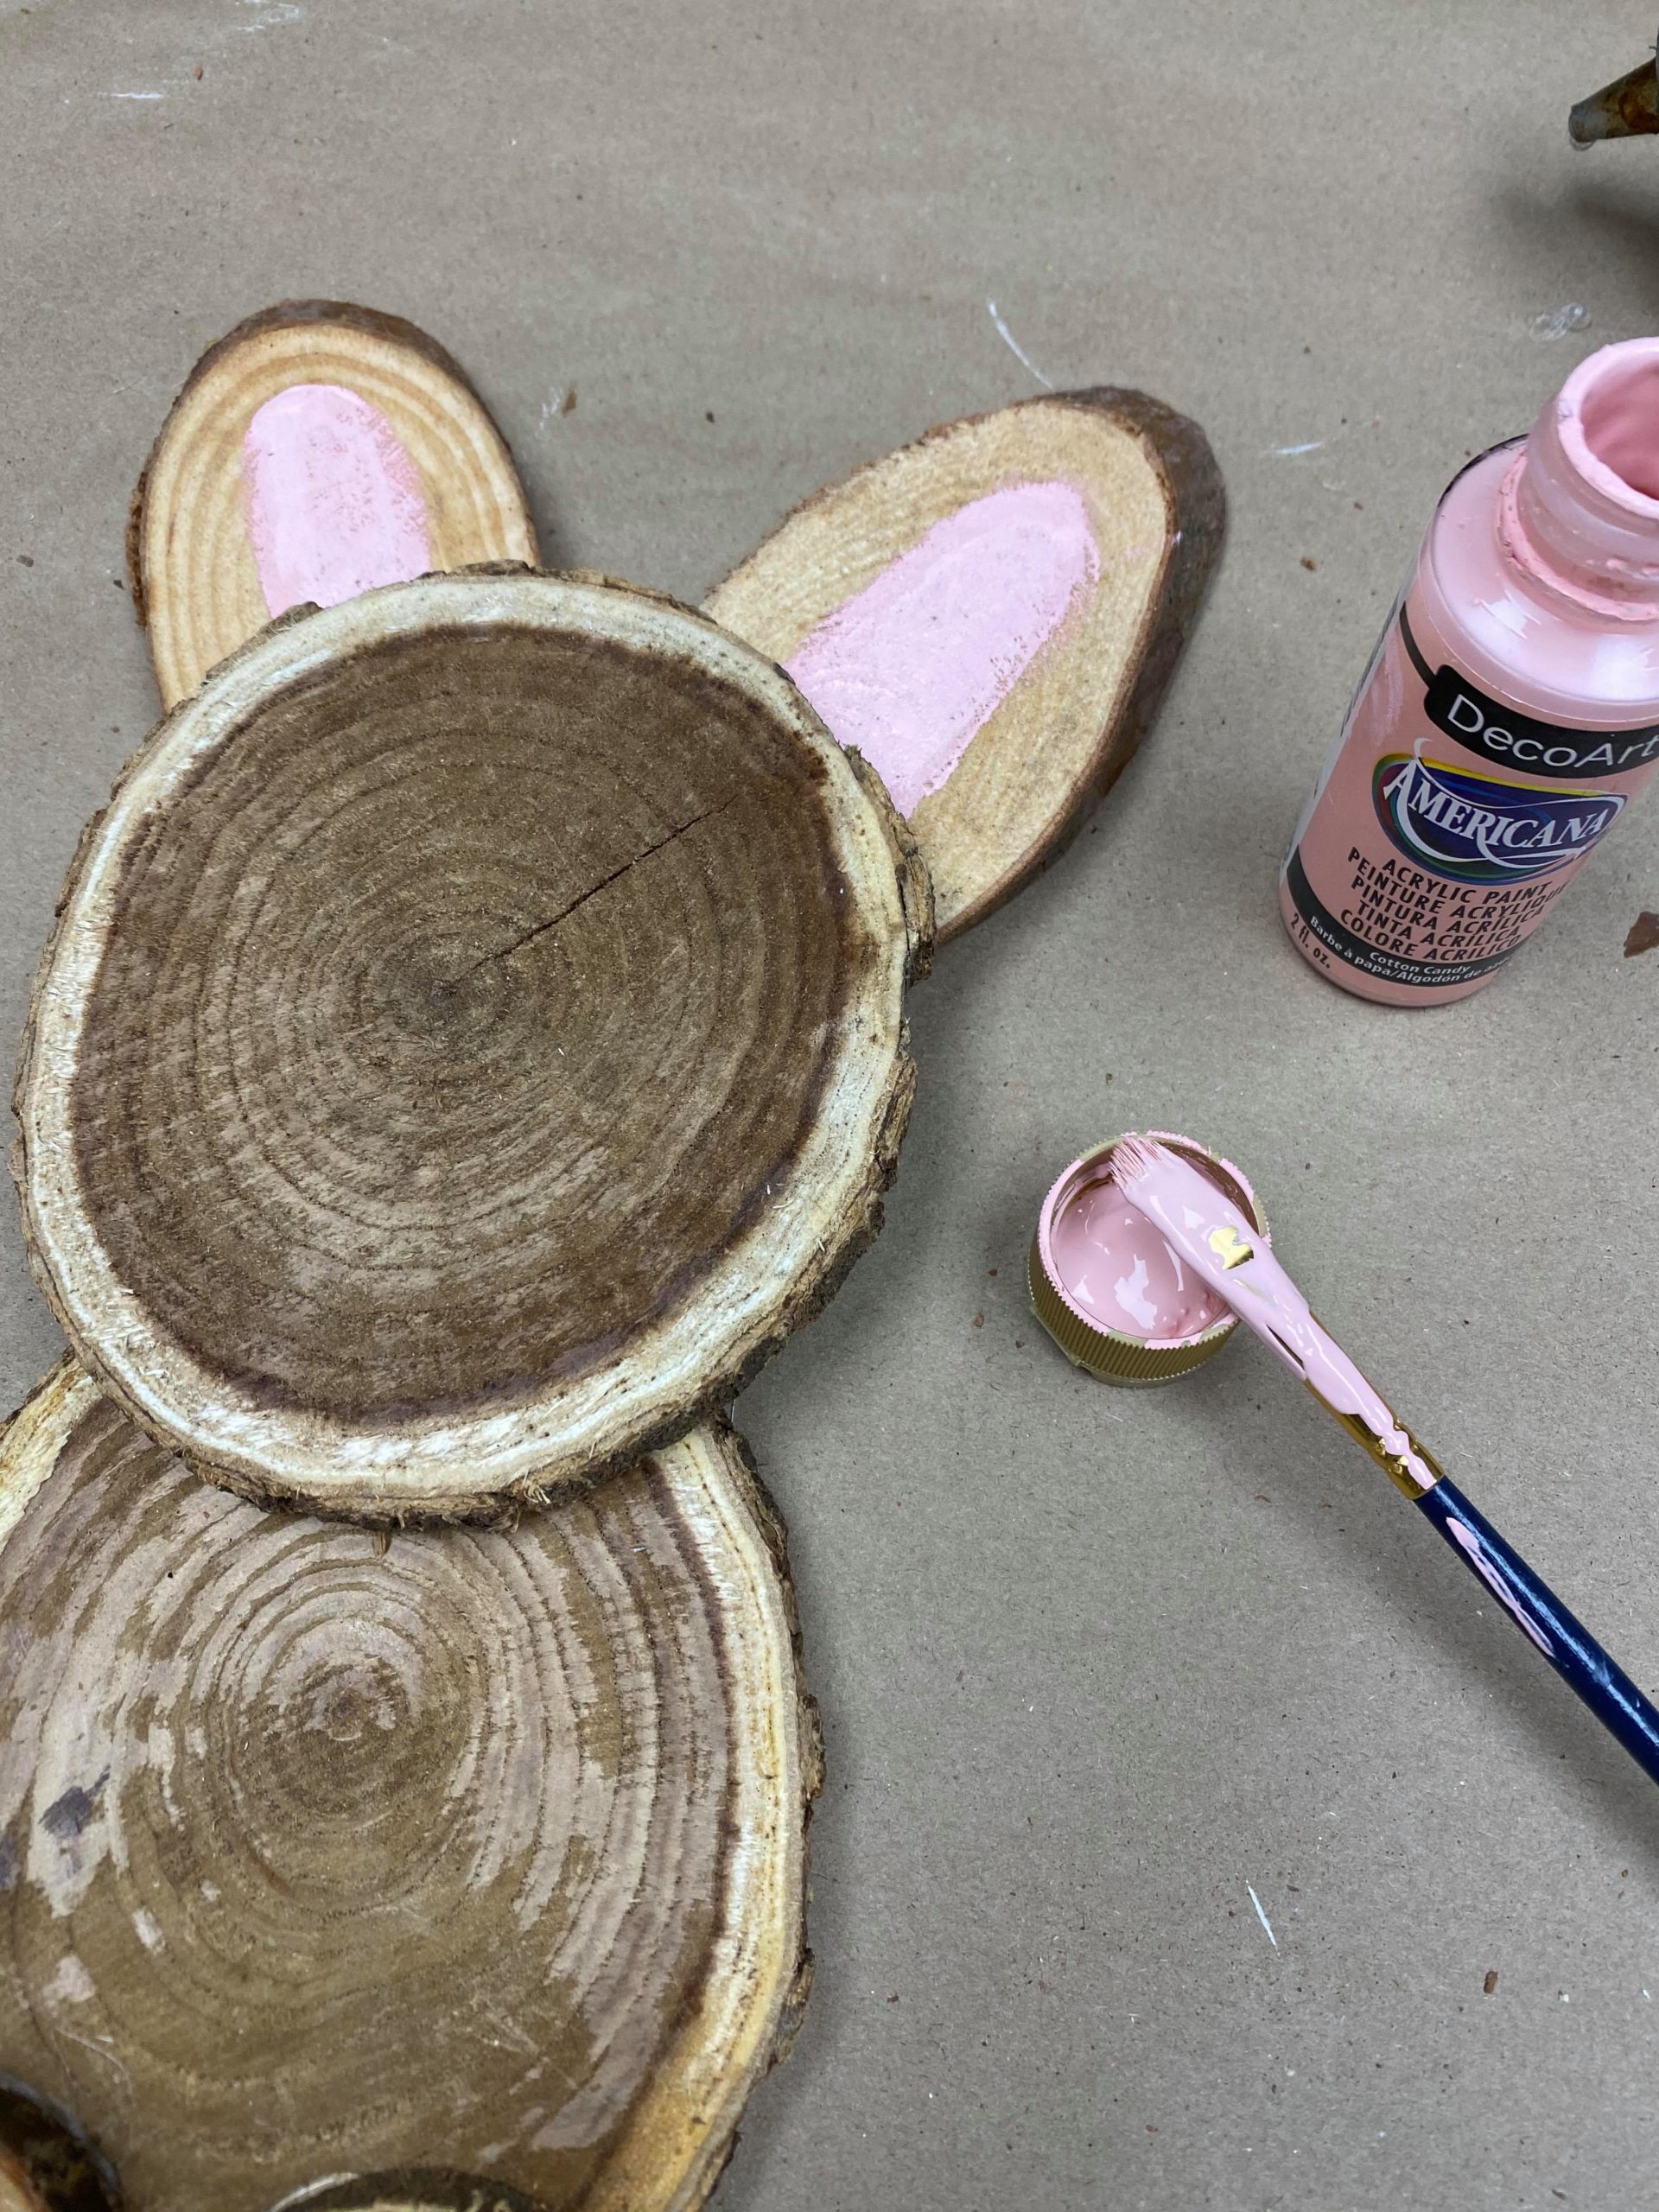
I added some pink paint to the ears. If you want your bunny to stand up you can glue an oval piece to the back side of your bunny.

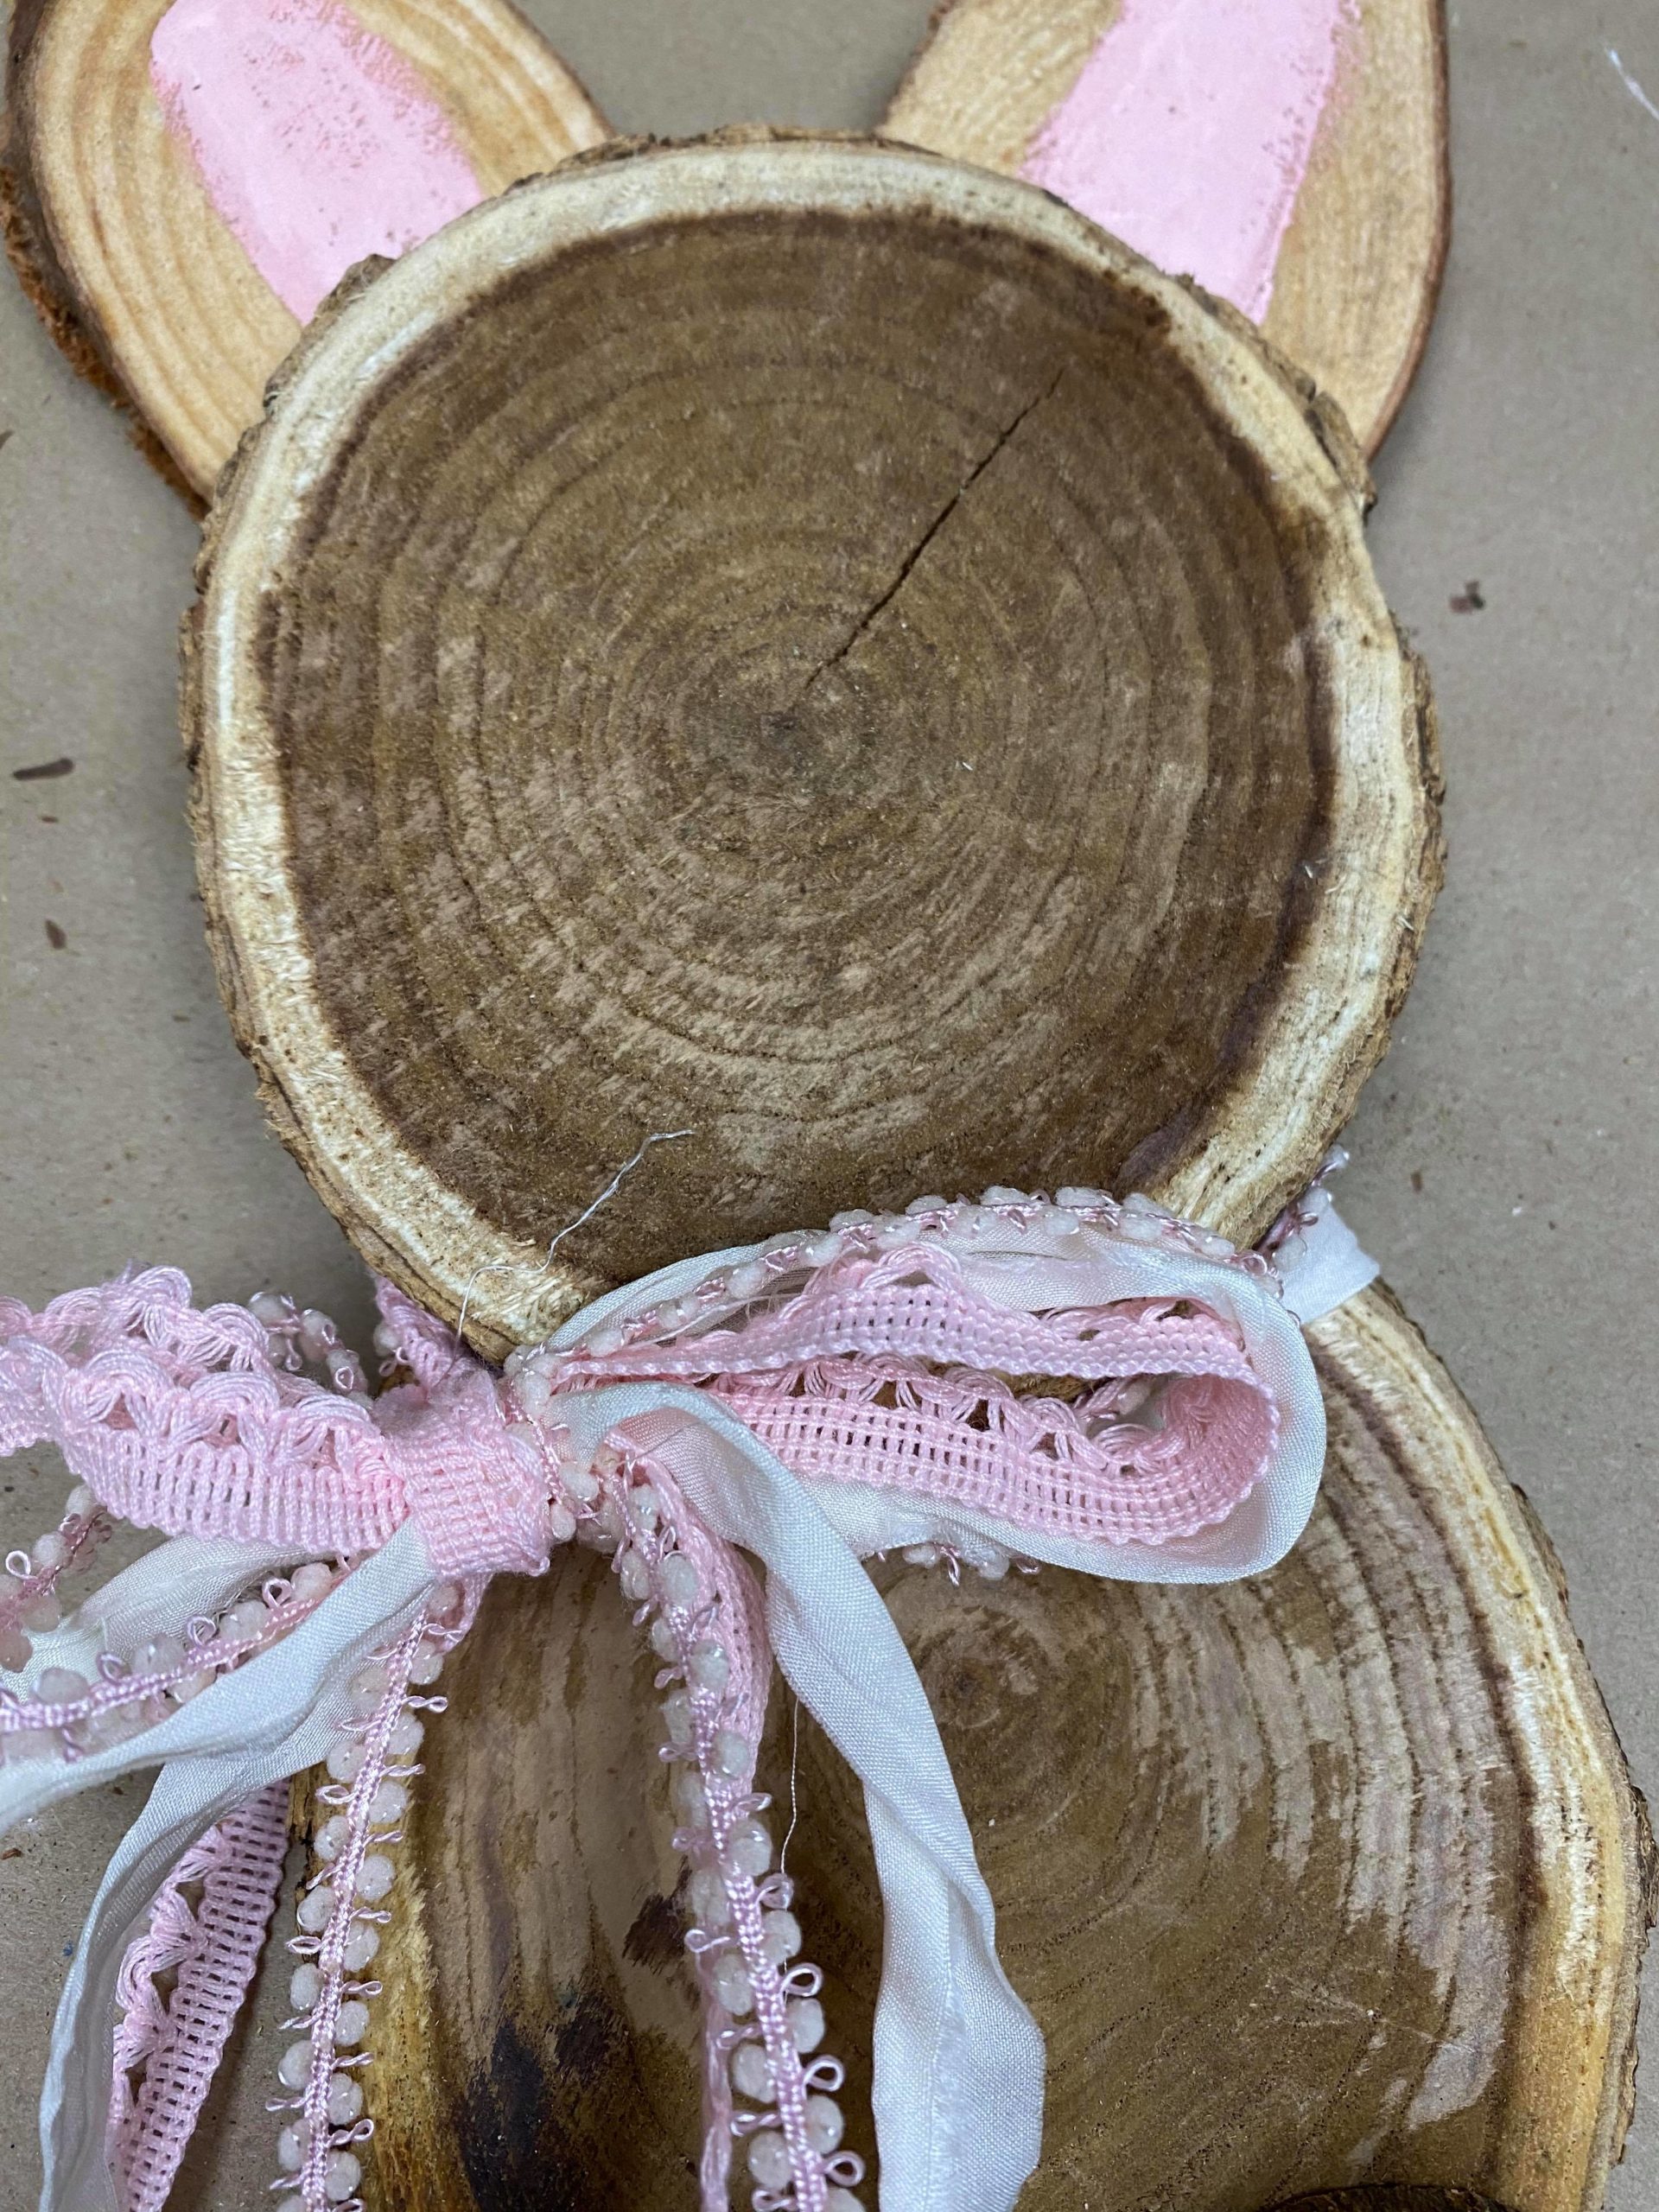
I tied a few strands of ribbon around the neck of my bunny.
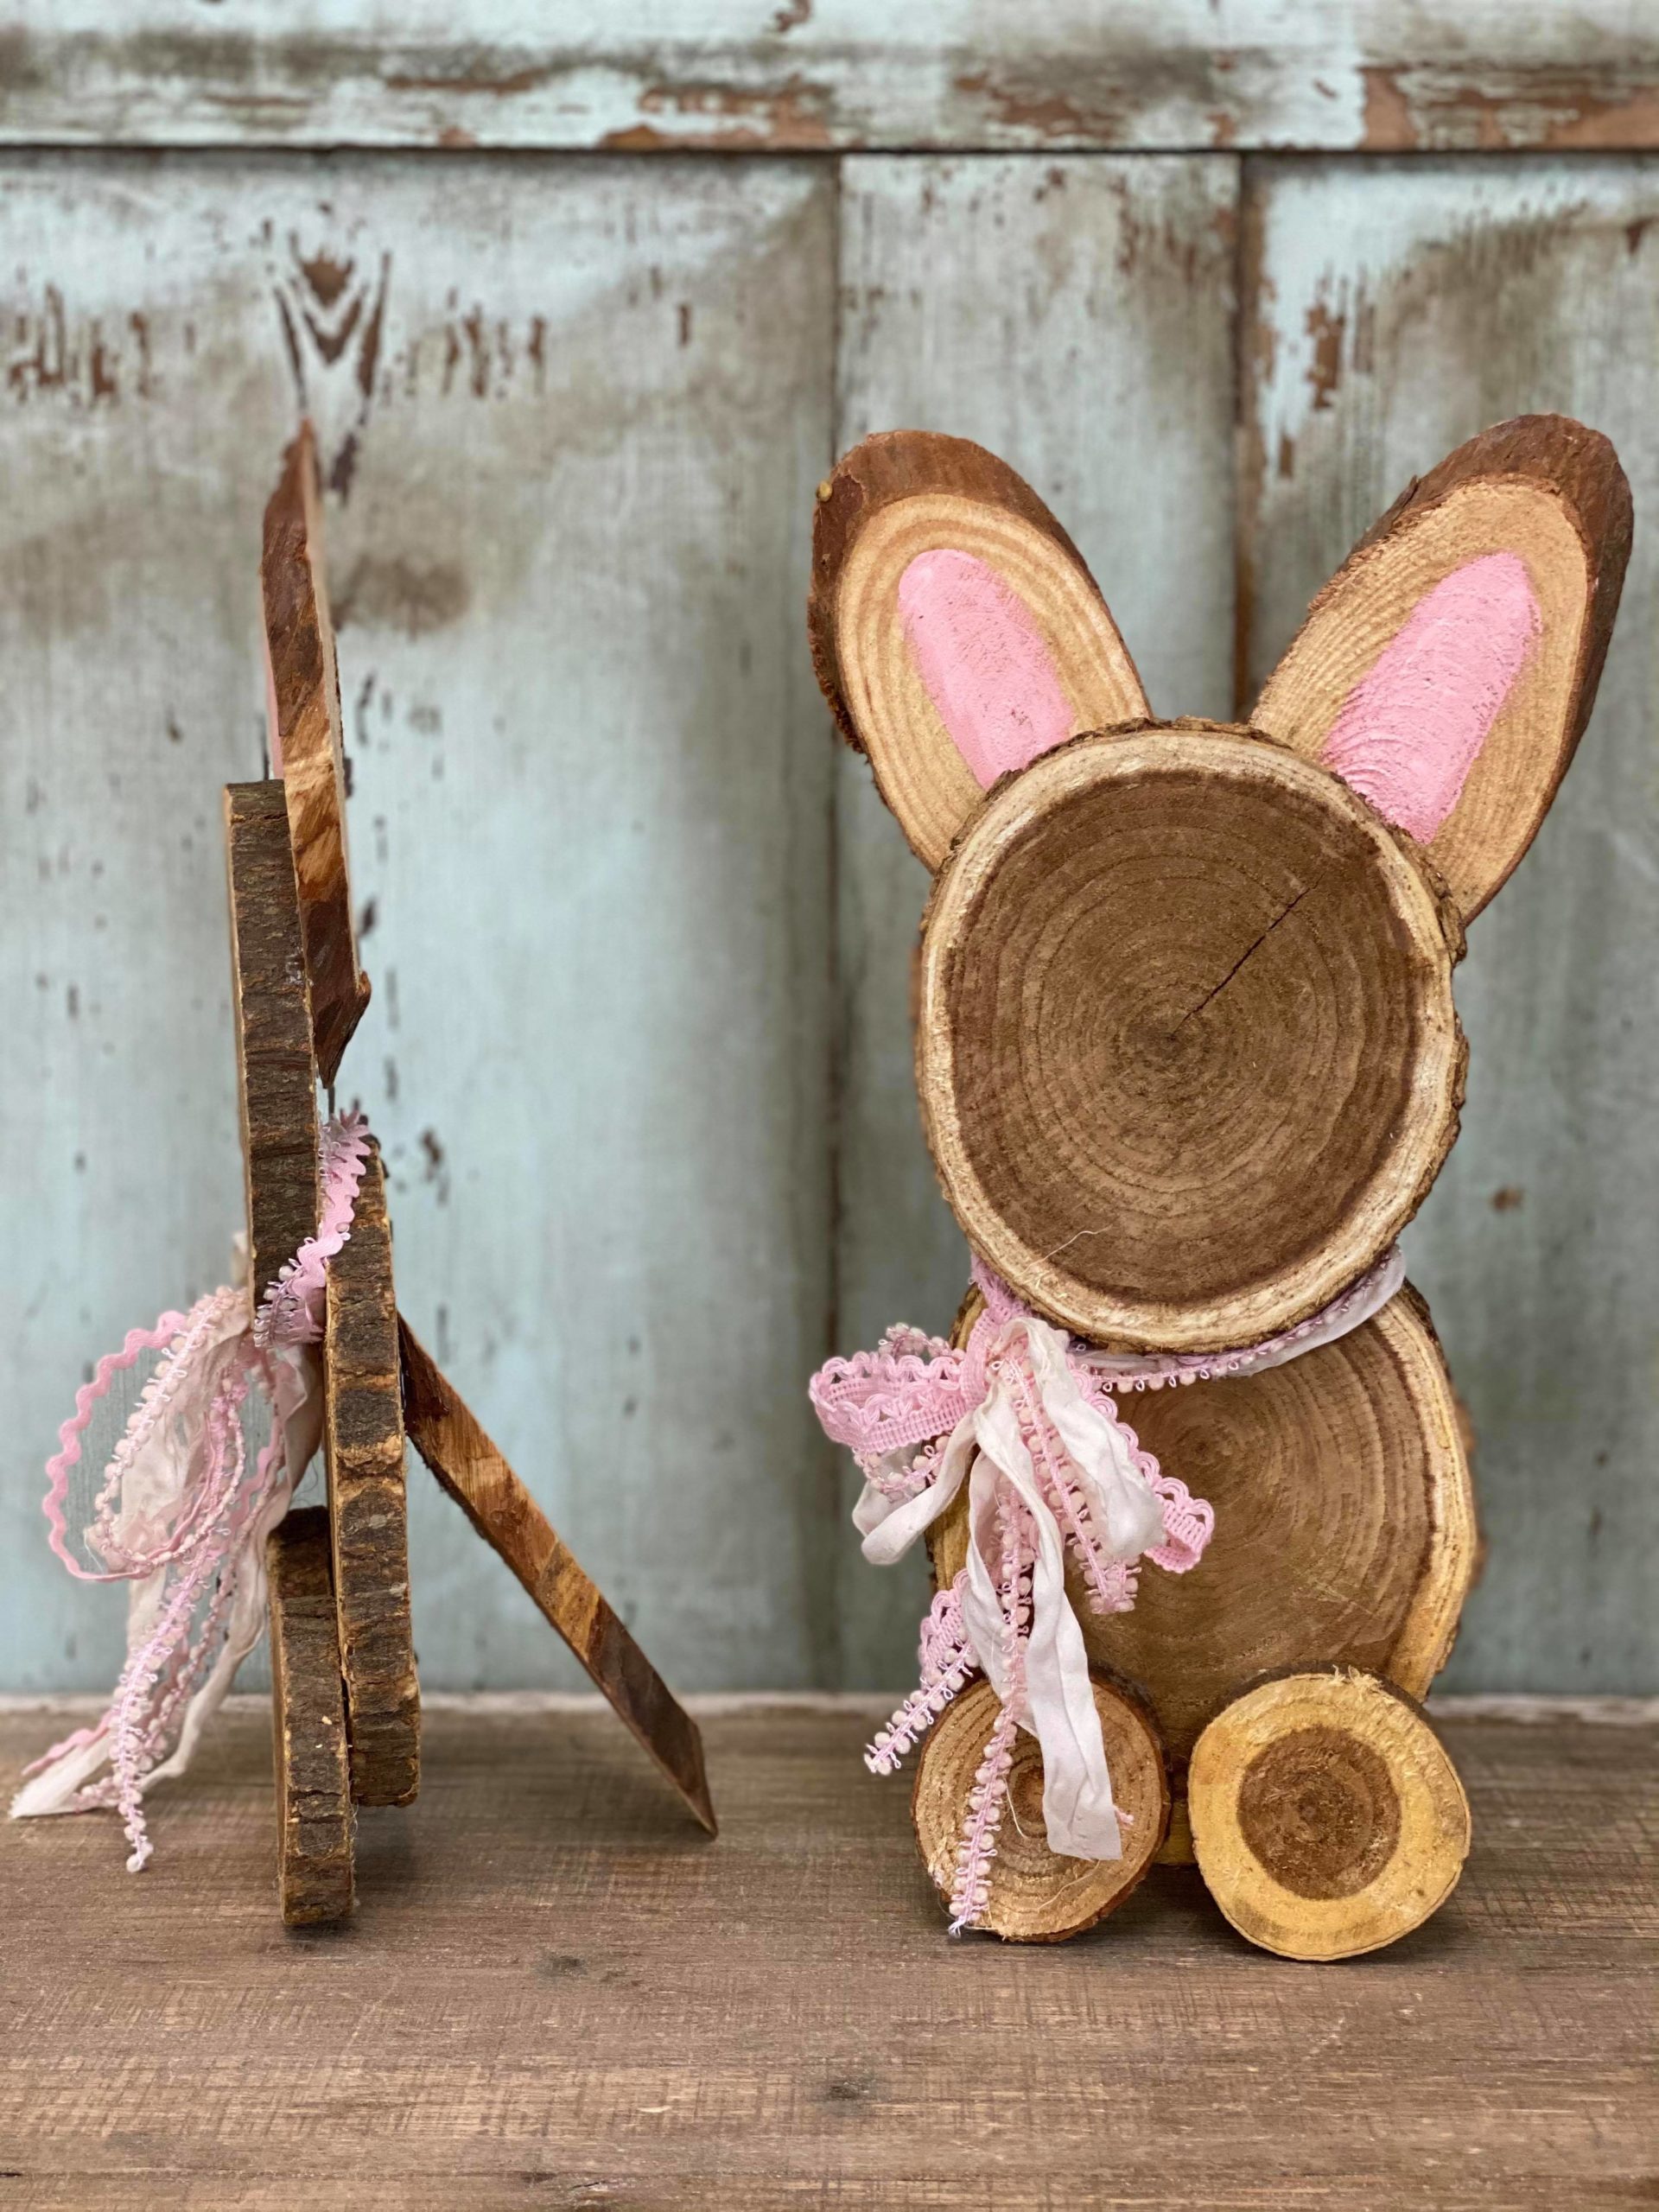
These are so easy to make and you can make them in a variety of sizes.