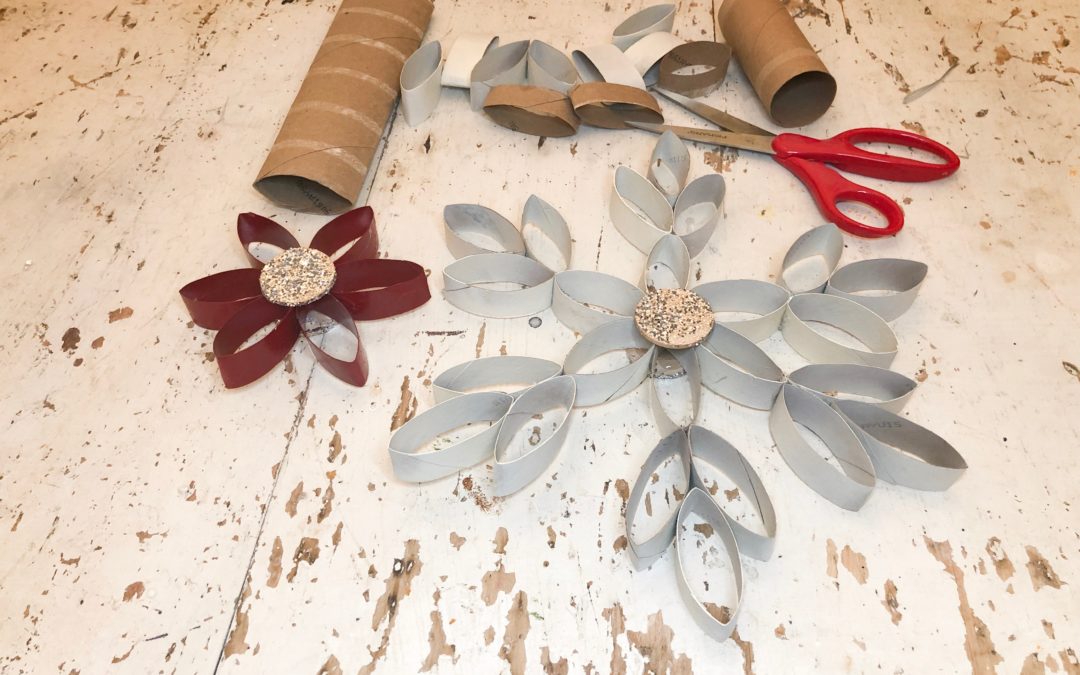
The supplies you will need to make this snowflake are:
- three cardboard tubes from paper towels
- a pair of scissors
- a pen or pencil
- a ruler
- ribbon of your choice
- a glue gun
- bling of your choice
- spray paint of your choice
- rust-oleum spray glitter


First thing you will need to do is flatten each tube with your hands.

Next, take your ruler and place it on the flattened tube and start making marks one inch apart across the entire tube.


Then take your scissors and cut straight across the tube at each mark you made. This will give you 11 one inch pieces.
Repeat the first and second step to the second tube which will give you another 11 one inch pieces. On the third tube you will only need to mark and cut 2 one inch pieces.


You should now have 24 one inch piecs. Take each piece one at a time and put it between your fingers (like the picture above) and squeeze lightly to give it some shape back.
Next, you will need to spray paint your pieces. I used rust-oleum metallic aluminum color but you can use the color of your choice. Spray lightly covering the outside and inside of each piece.


Let the pieces dry and then check them to make sure they are completely covered with paint. More than likely you will have to add another coat of spray paint and then let them dry again.
After all your pieces are dry spray paint them with the rust-oleum glitter spray. Let them dry and then do another coat making sure you cover the outside and inside of each piece. Let them dry one more time.

Take six of your pieces and arrange them like the photo below. It should look like a flower.

Now take two of the six pieces and add glue to one side of one of the pieces.

Then press the side with glue to one of the sides of the other piece. It should look like the photos below.


Now take another piece and add glue to it.

Add this piece to the pieces you’ve already glued together (like the photo below).

Keep gluing the pieces together until you have all six pieces glued together and it looks like the flower below.

Next, take two pieces and add glue to one piece and then connect the two together so they look like the photo below.
You need to do this five more times so that you end up with six pairs total (just like the photo below).

Next, take one of your six pairs and add some glue to the bottom.


Then glue to one of the tips of your flower

Repeat this step with the other five pairs adding one to each point of the flower.


It will look like the photo below once you are done.

Next, take your bling and add some glue to the back of the piece.


Then place it in the middle of your snowflake.

Next take your ribbon and cut a small piece and tie it together at one of the points of your snowflake. This will create a loop so you can hang the snowflake on a tree or on a nail above a window.


You can get creative and make these all different sizes and colors. I hope you enjoyed this blog post and will give these adorable snowflakes a try!
I love this!! Absolutely beautiful! My granddaughter will love Making these with me.
Love this
I love the ideal, you are so talented 😊❤️
I absolutely love this idea!! So creative and pretty