If you’ve followed me for a while, you know I love taking something simple and turning it into something truly special! I recently found the cutest little tree at Walmart and knew right away I could give it a whole new look. With a few glass pieces I grabbed from Amazon and some resin, I was able to create a one-of-a-kind decoration that shines beautifully when the light hits it. This project is easy, fun, and perfect if you love adding a touch of sparkle to your home decor.
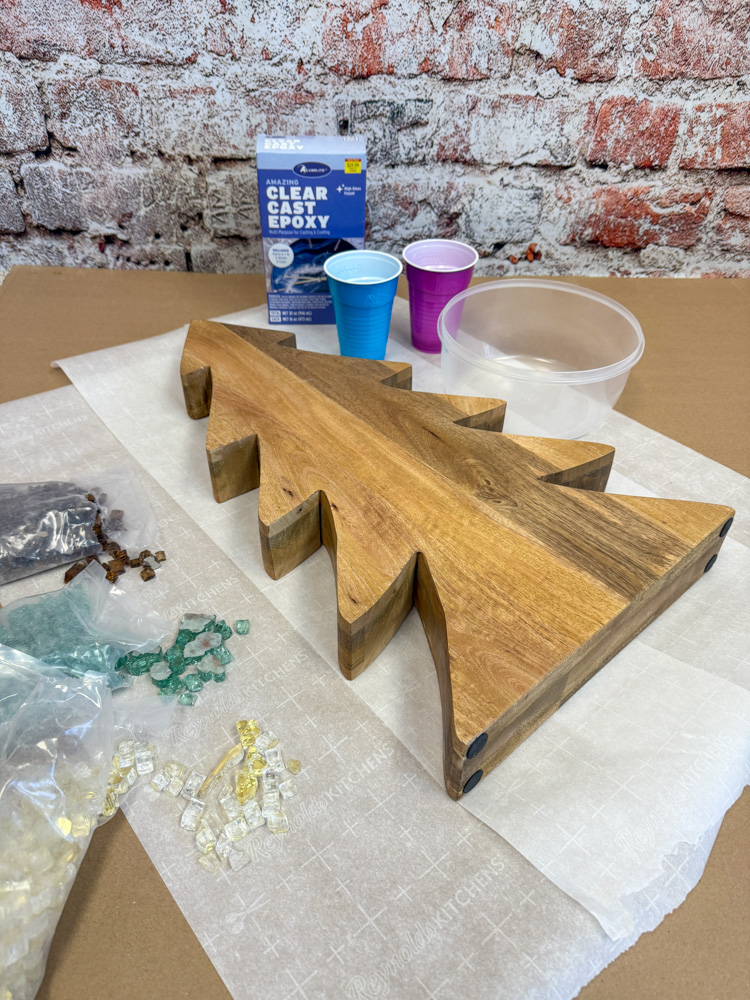
Here are the supplies you will need for this DIY:
1. Wooden Tree From Walmart – You can find it on my storefront: https://walmrt.us/4gDVsve
2. Glass Pieces From Amazon – You can find those here: https://www.amazon.com/dp/B07C3JQ88X?linkCode=ssc&tag=onamztheshabb-20&creativeASIN=B07C3JQ88X&asc_item-id=amzn1.ideas.3P1T9U2GJA6TW&ref_=aip_sf_list_spv_ons_mixed_d_asin&th=1
3. Alumilite Amazing Clear Cast Epoxy Resin 32oz – https://walmrt.us/4ngJl8Q
4. A big bowl to mix the epoxy in
5. Gloves
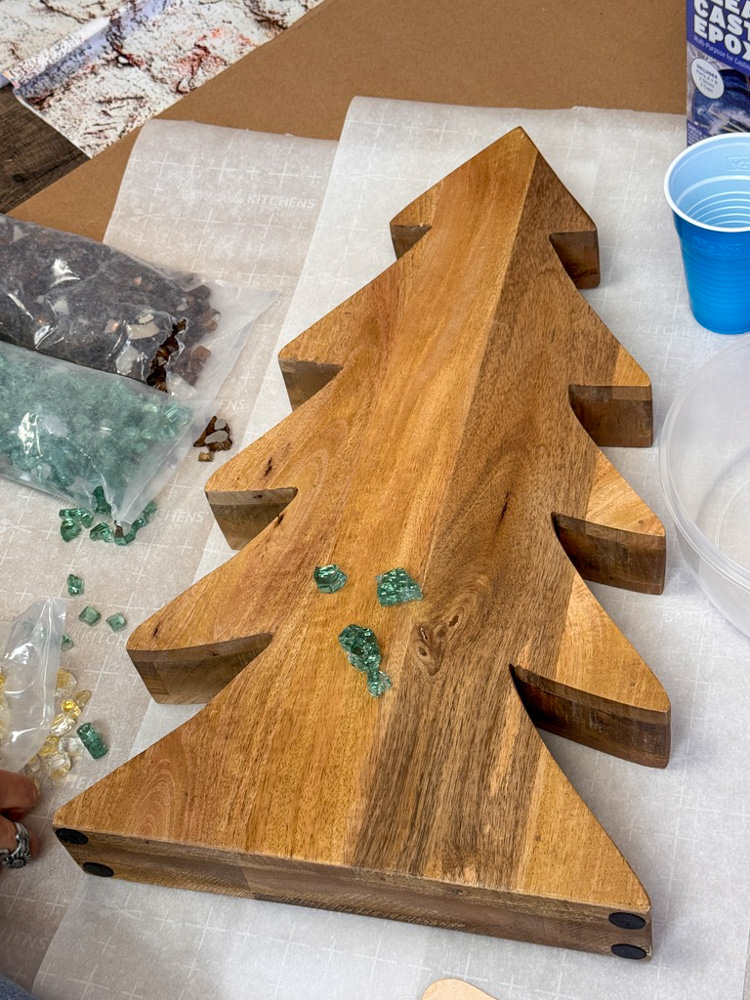
I started with this simple wooden tree I found at Walmart. It already had a great shape, so I knew it just needed a little sparkle to make it stand out. I gathered my glass pieces from Amazon and began planning where I wanted everything to go before pouring the resin.
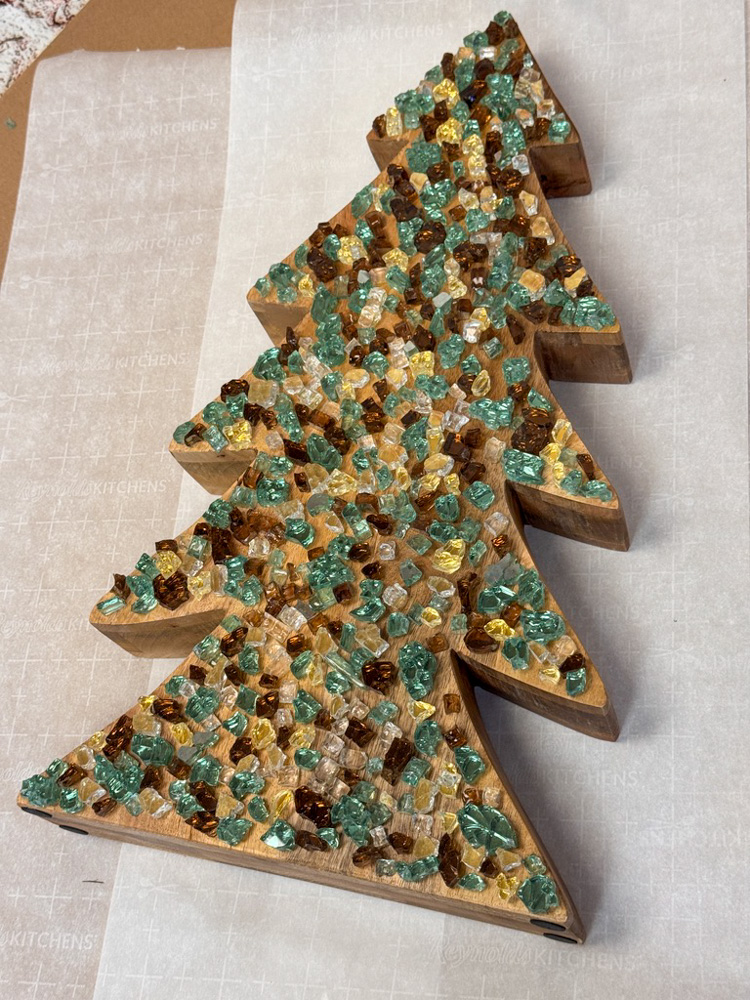
Next, I started spreading out a mix of glass pieces across the tree. I played around with different color combinations — the greens, ambers, and clear tones all blended beautifully against the natural wood.
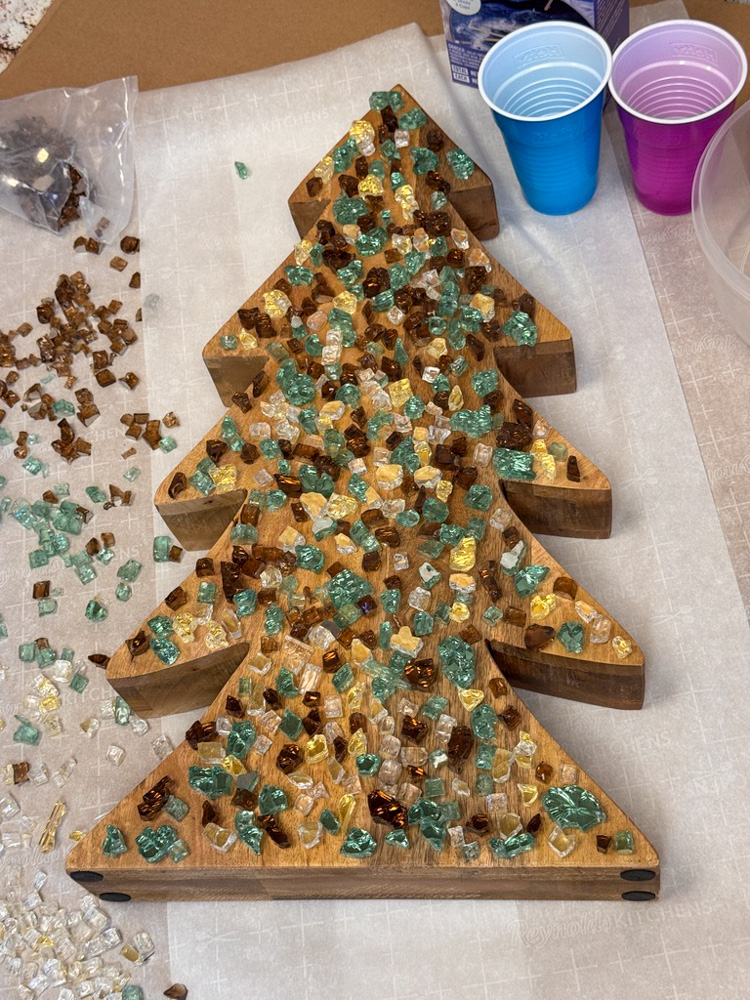
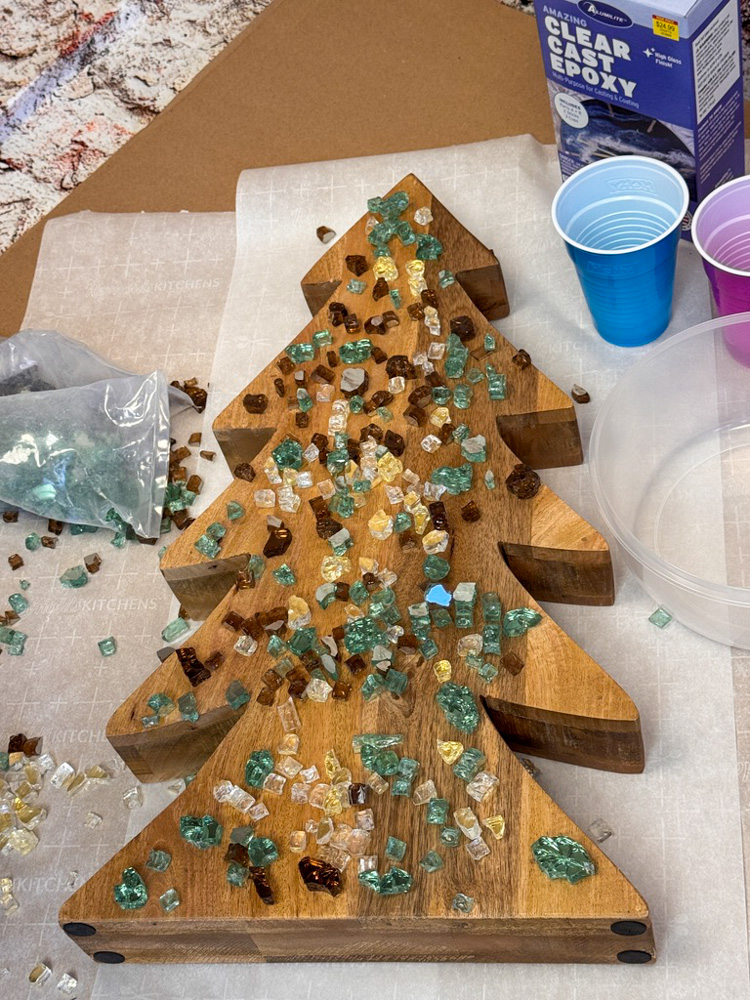
Once I had more pieces in place, the design really started to come together! I tried to balance the colors evenly, adding a little extra shimmer toward the center for depth. This step is all about finding the look you love before the resin locks everything in.
Here’s how it looked once everything was laid out! I was so happy with the mix of colors and textures. The glass catches the light perfectly, and I knew the resin would make it even more vibrant once cured.
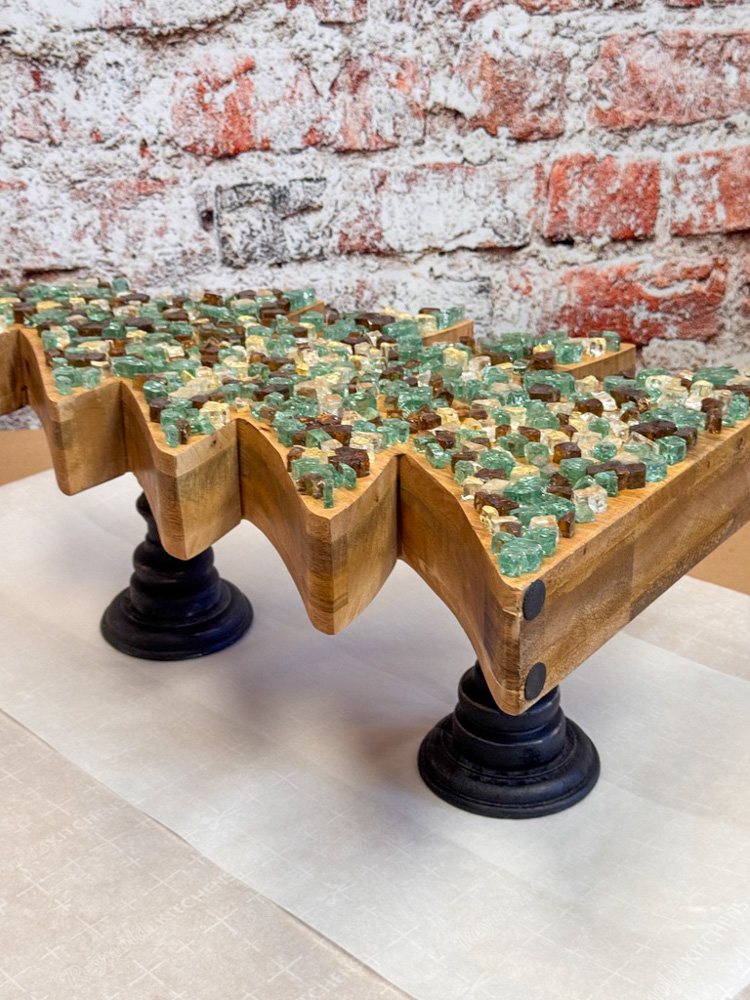
Once I had all of the glass pieces in place, I carefully lifted the tree and set it on top of two risers. This gave me room for any resin to drip off the sides without sticking to the surface underneath.
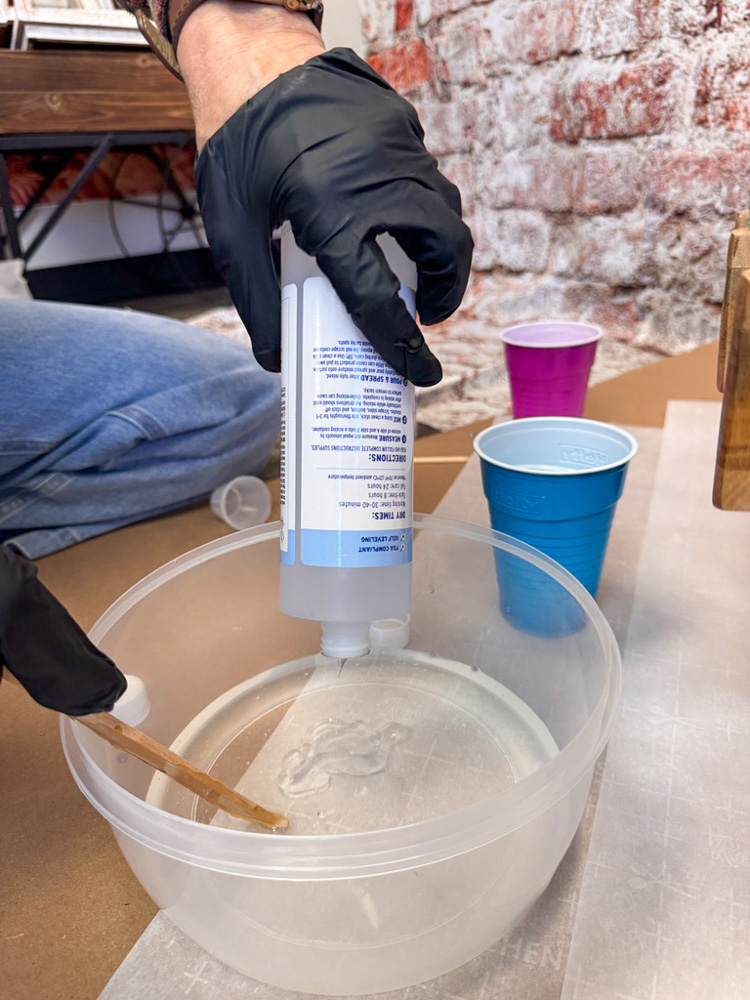
Next, it was time to mix the resin. I followed the directions on the box and combined the two parts in a disposable bowl, stirring slowly with a wooden stick until it was well blended and clear. I used all 32 ounces for this DIY.

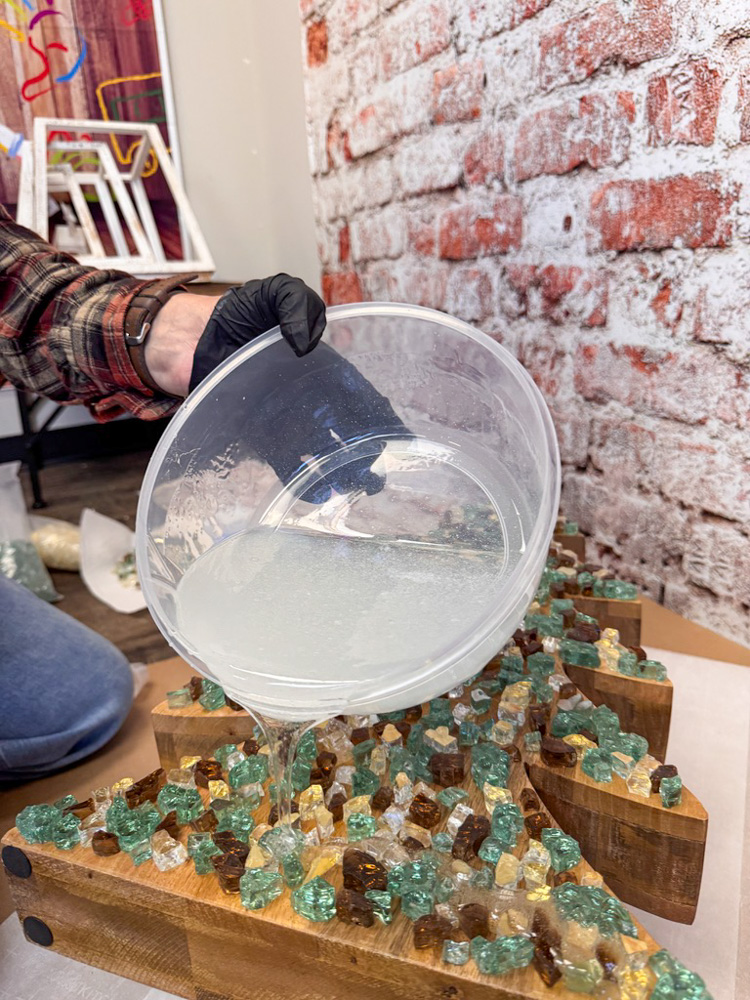
You’ll want to take your time with this part. I started by slowly pouring the resin right in the middle of the tree so it could naturally spread between the glass pieces.
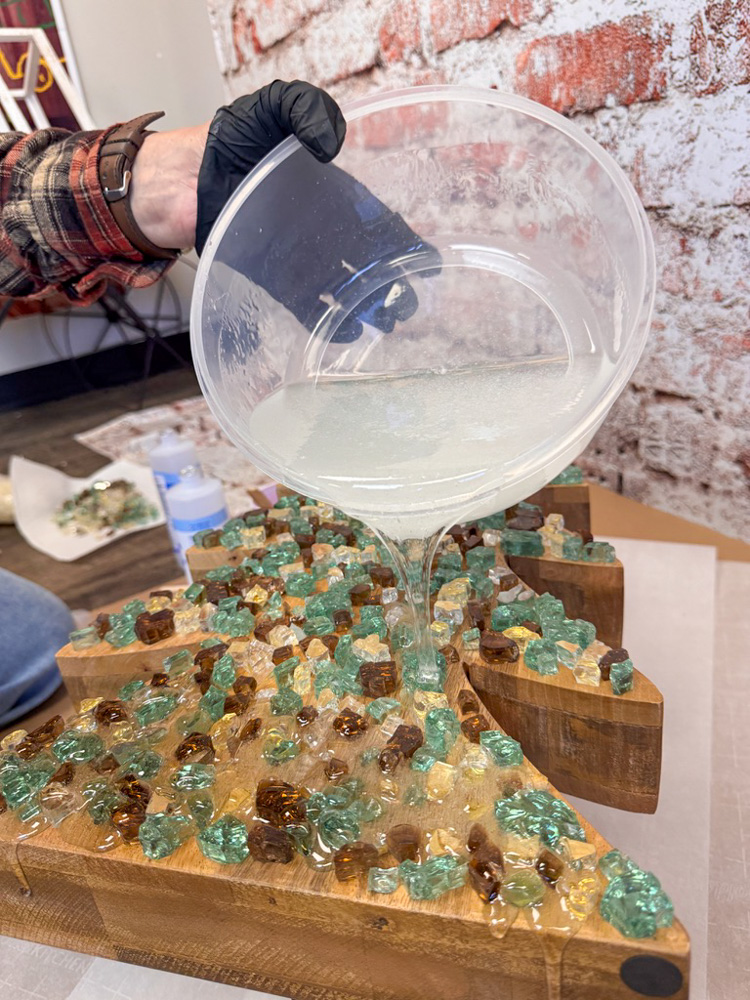
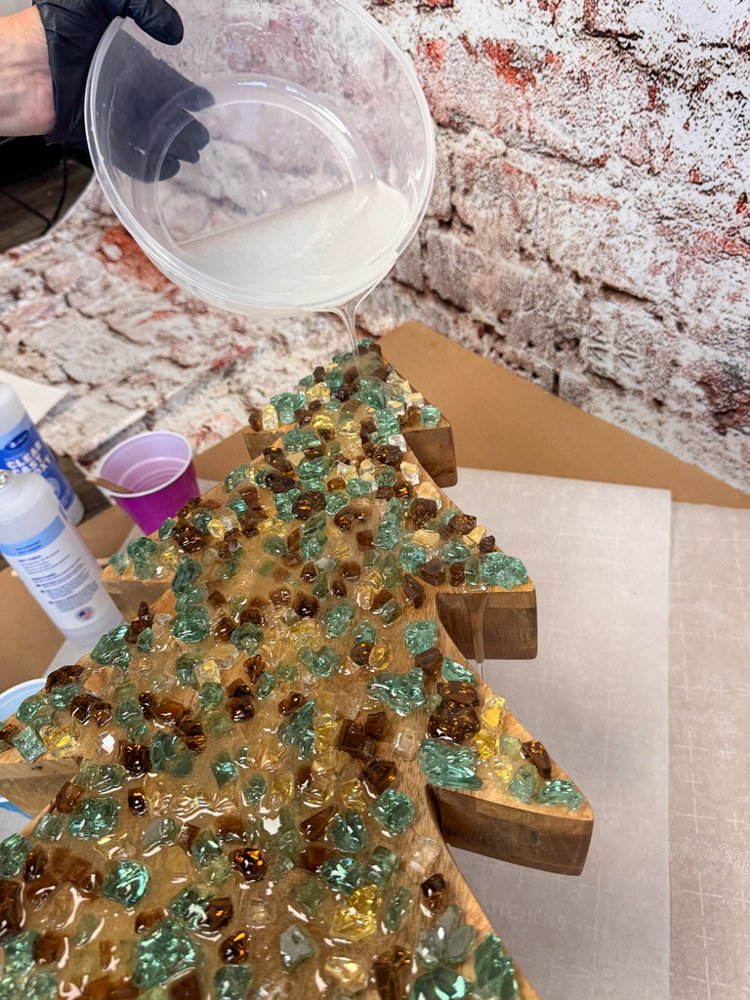
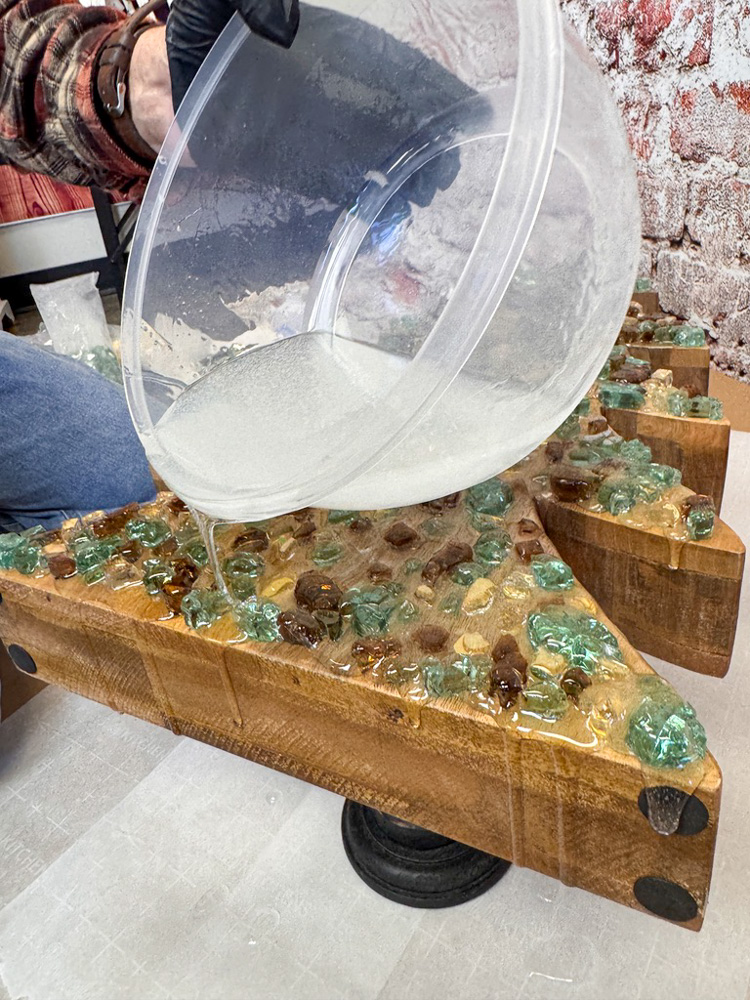
Once the center was covered, I gently worked my way toward the edges. Pouring slowly helps control how the resin flows and keeps it from running over too quickly.
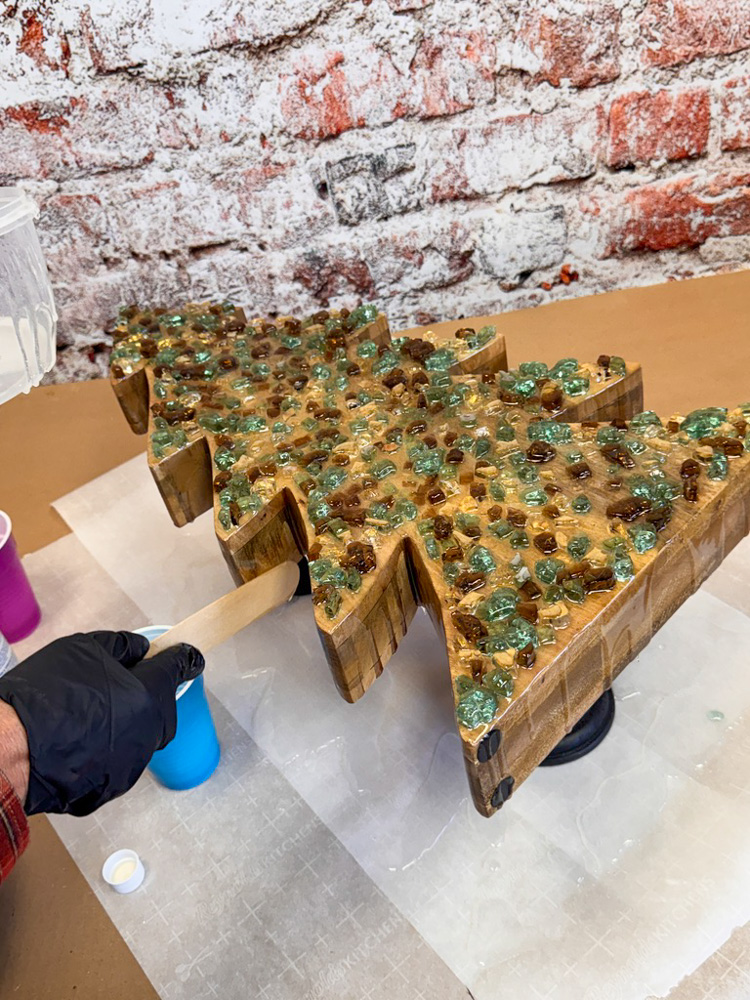
After the resin had a chance to settle, I used a wooden stick to smooth out any drips along the sides. This helps the edges look neat and prevents hardened drops once it dries.
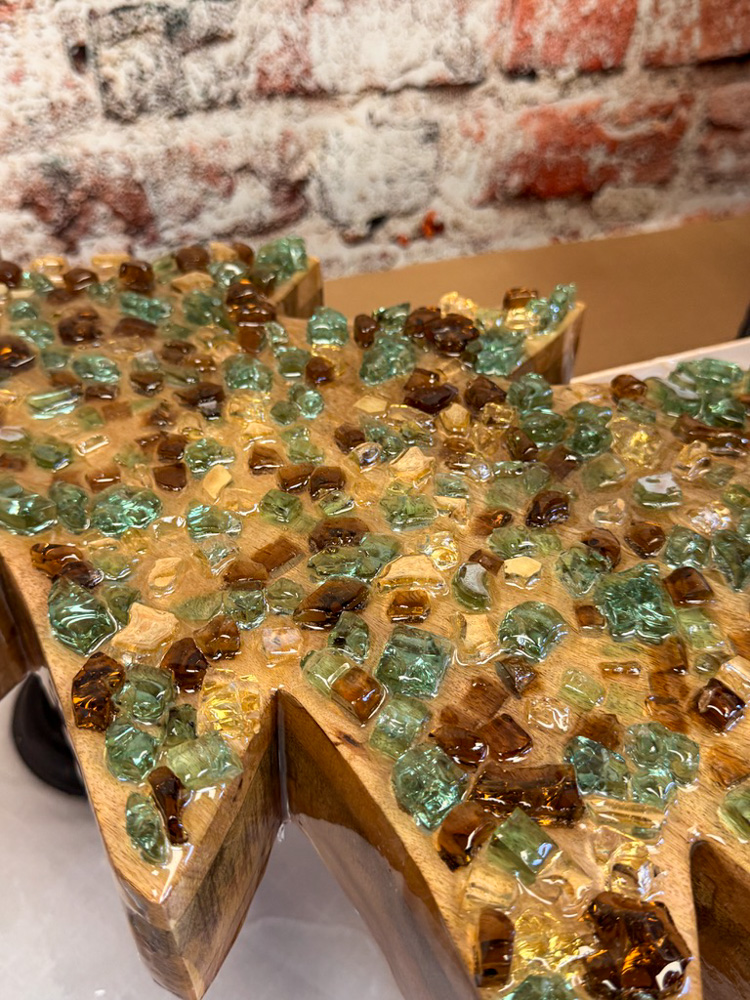
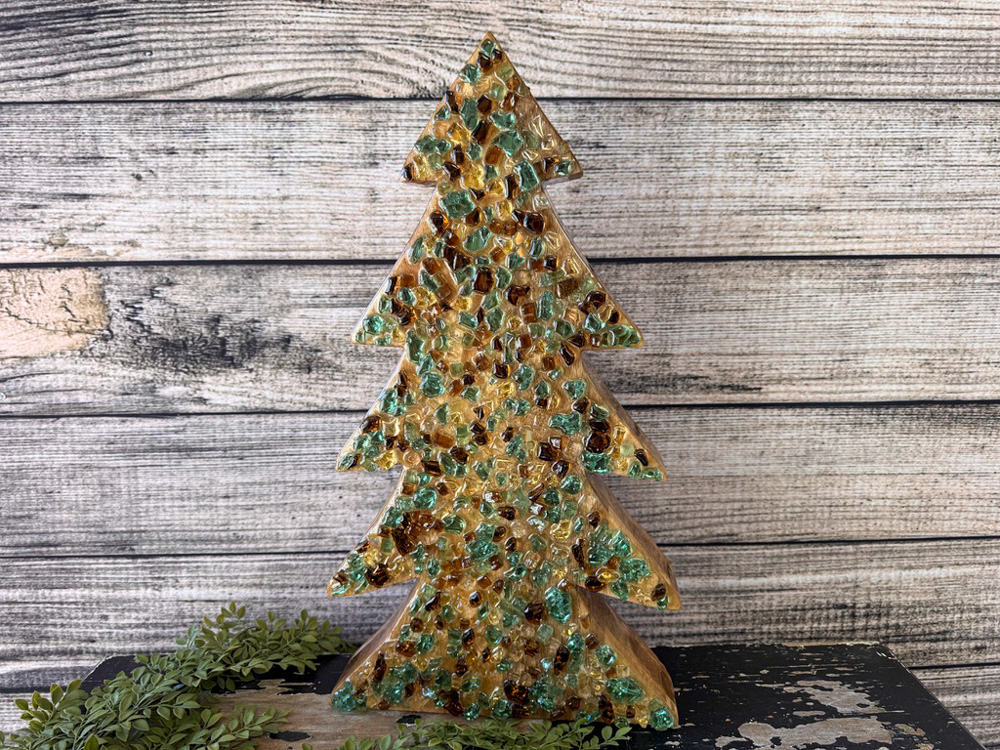
Here you can see how beautifully it’s starting to come together! The resin really makes the glass colors pop, adding a shiny layer that catches the light perfectly.
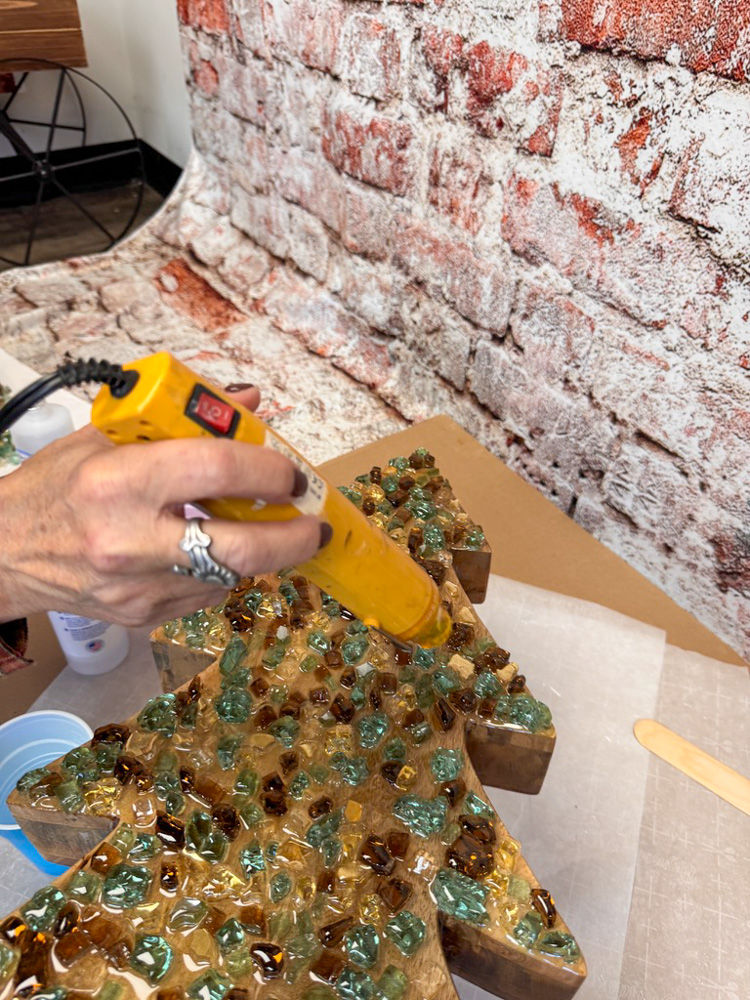
After everything was evenly covered, I did take my heat gun to it to make sure there was no air bubbles in the resin.
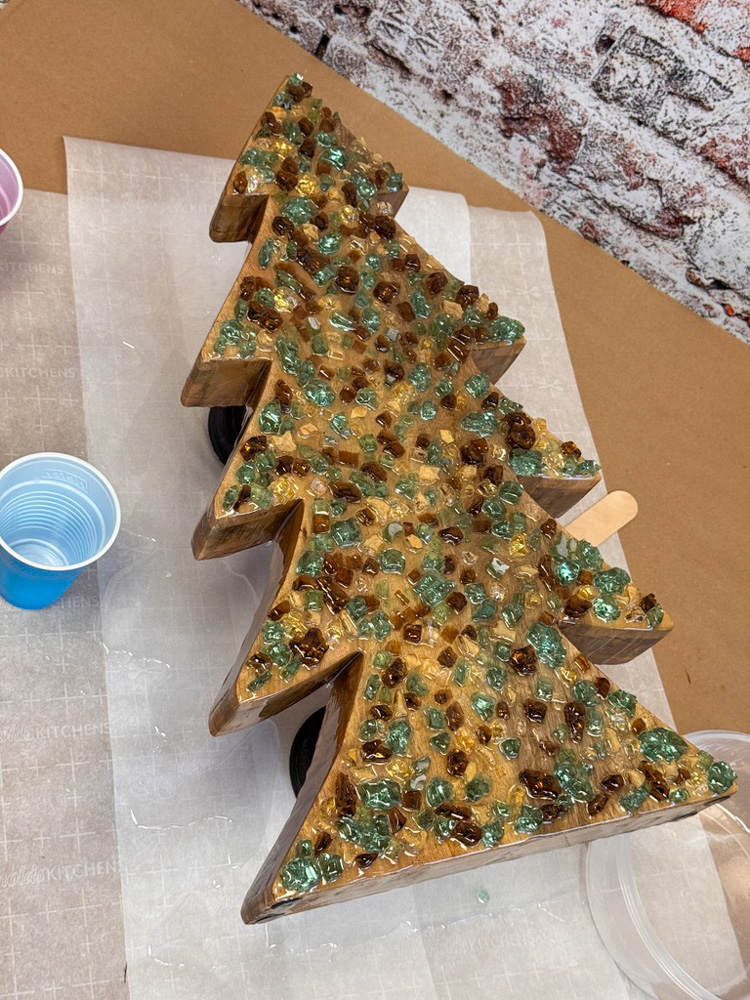
Once everything was covered and smoothed, I let it sit to cure. It’s always so satisfying to see how the resin transforms a simple wooden base into something that looks completely custom. It took about 24 hours to cure.
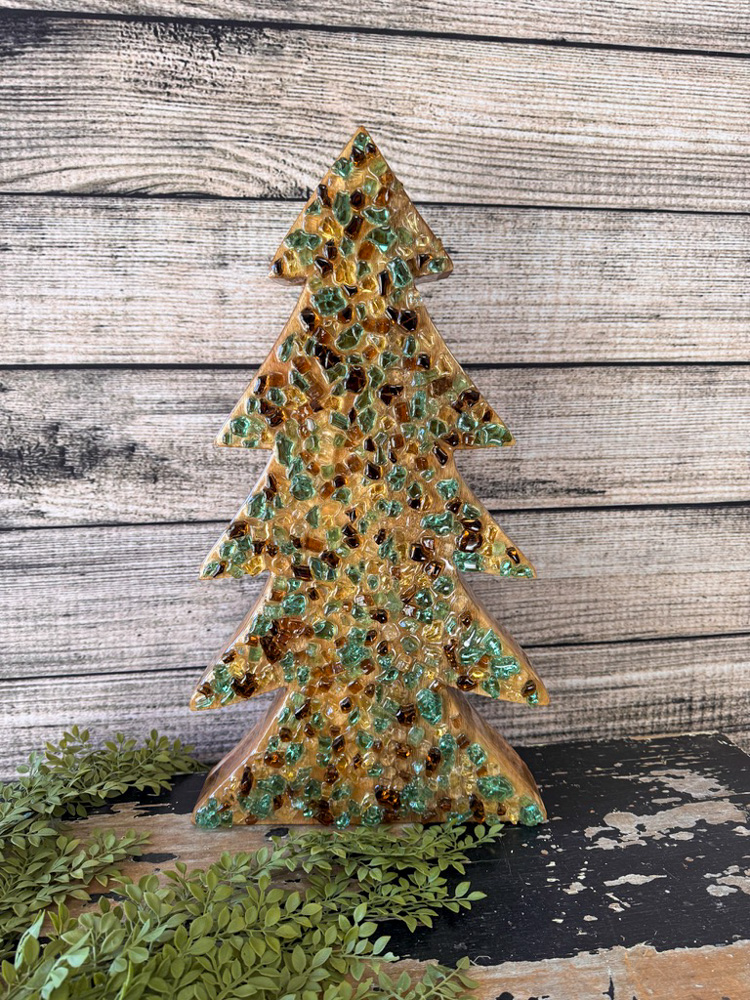
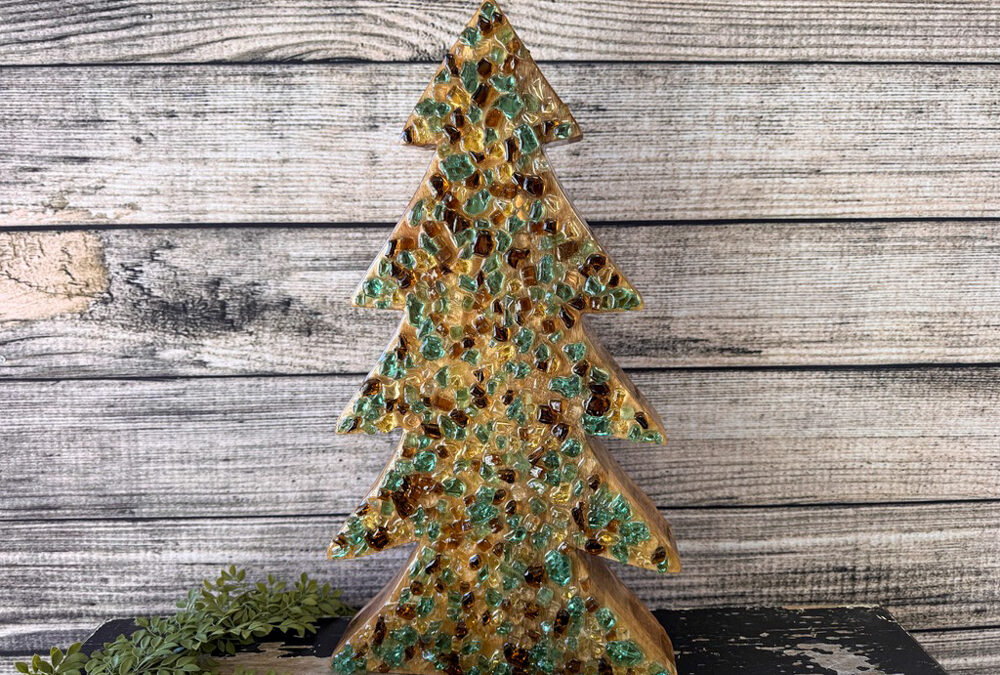
Once the resin was fully poured and smoothed out, I just let it sit and cure overnight. Watching it transform as it hardened was so exciting—the glass pieces looked like little gemstones sealed inside crystal! This project turned out even prettier than I imagined, and I love how the resin gives the whole tree a glossy, finished look. It’s such a fun way to take a simple find from Walmart and turn it into a beautiful, one-of-a-kind decoration for the holidays.
I actually missed this live and forgot to catch it on replay so thank you for posting it. It’s beautiful!!!
Love the tree makeover! So beautiful!
Barb I love this ! I’am working on my tree now watering 💦💦💦❤️❤️