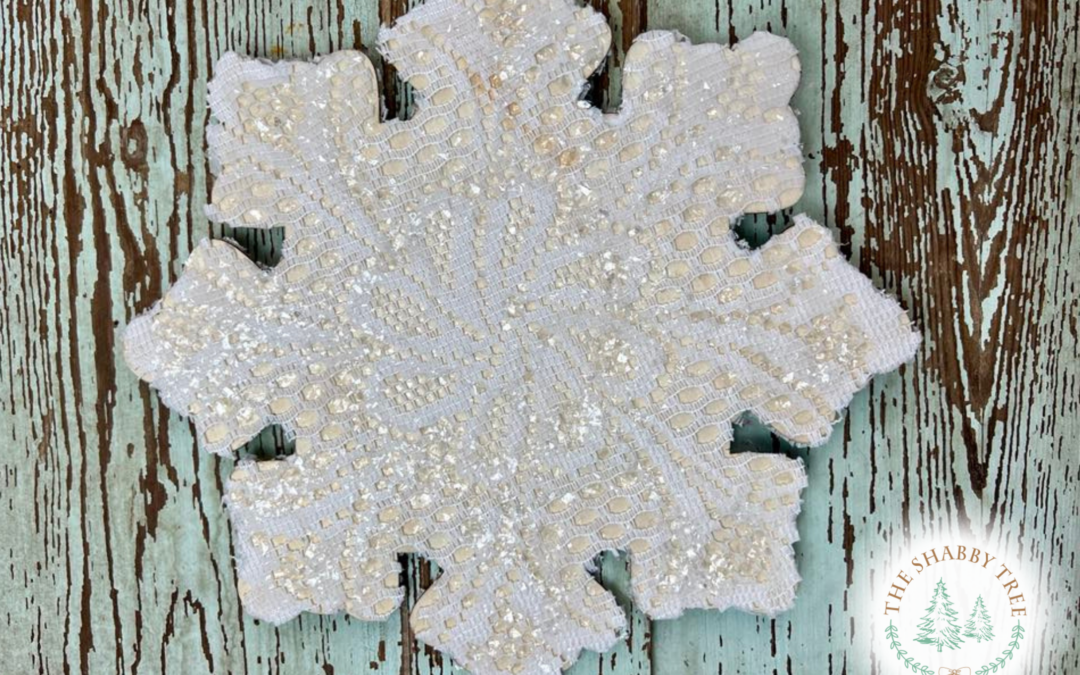
With Christmas quickly approaching, I’m planning to decorate with more snowflakes this year. Dollar Tree has started putting out their Christmas items, and I found a simple wooden snowflake that I can’t wait to get creative with!
You can find a list of other items I’ll be using with this wooden snowflake listed below, so you can easily gather everything you need for this fun DIY project.
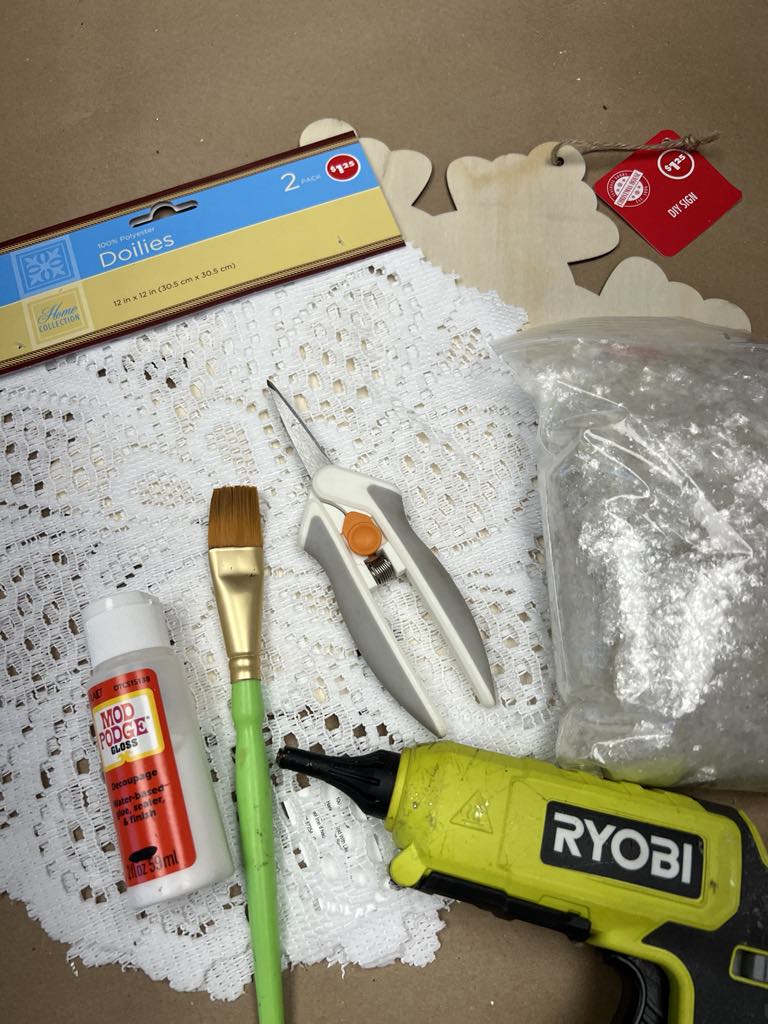
The supplies that I’ll be using are:
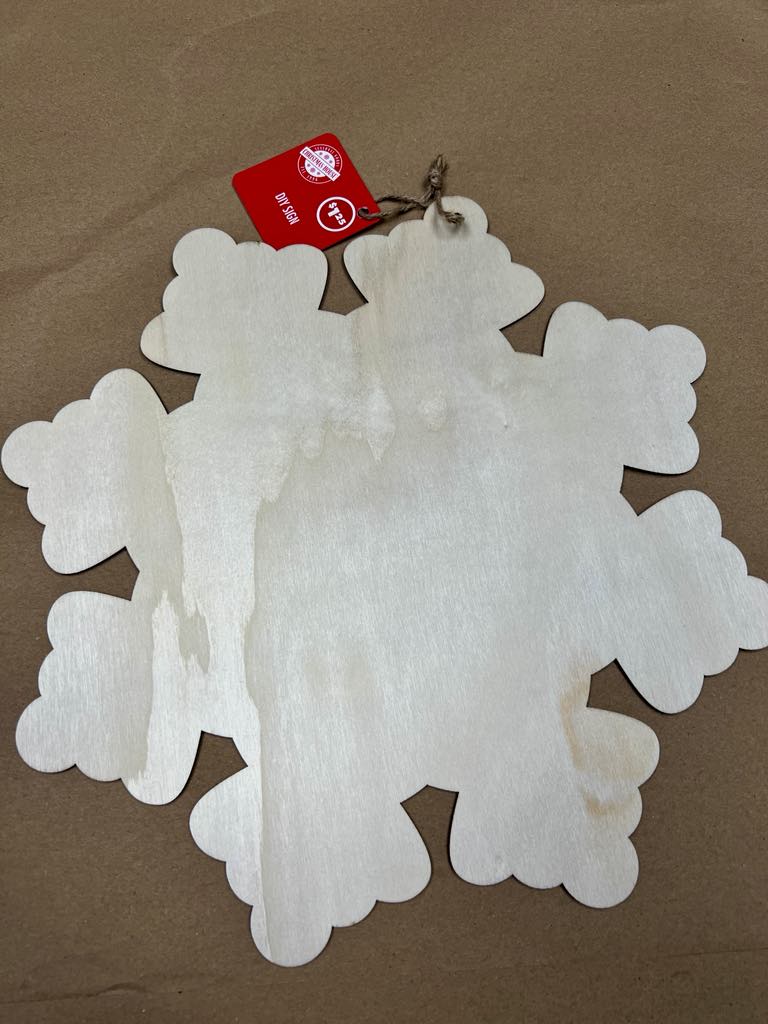
1. One wooden snowflake from the Dollar Tree
2. Doilies from the Dollar Tree
3. Hot glue
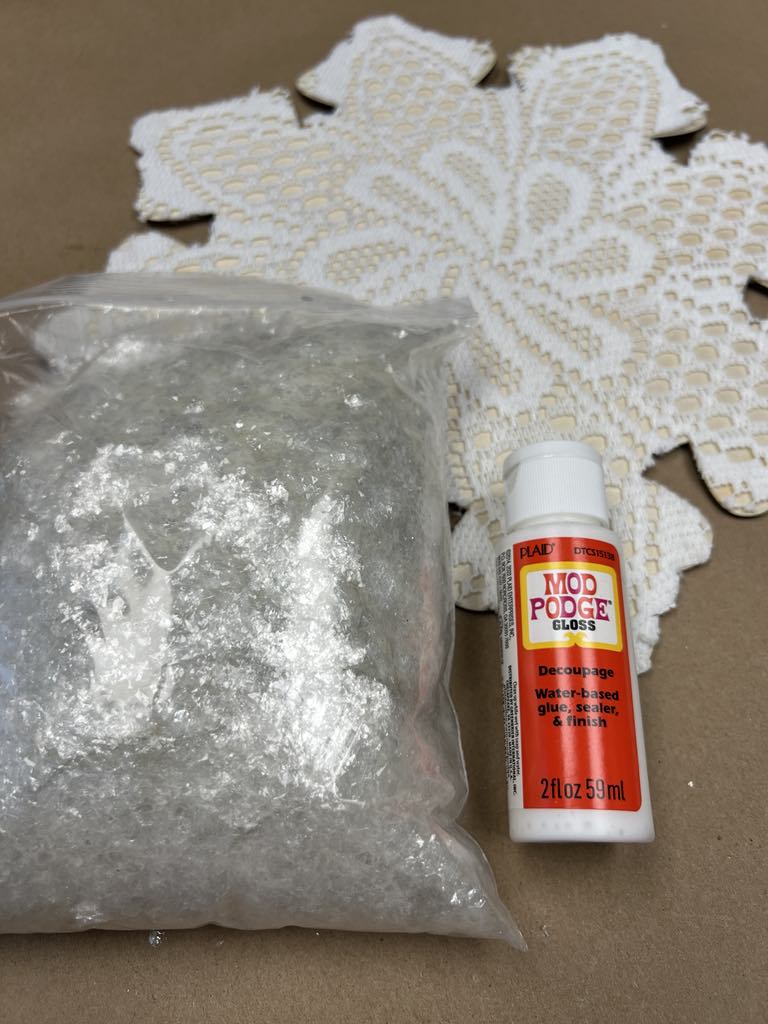
4. Mod Podge
5. Scissors
6. Paint brush
7. Mica flakes
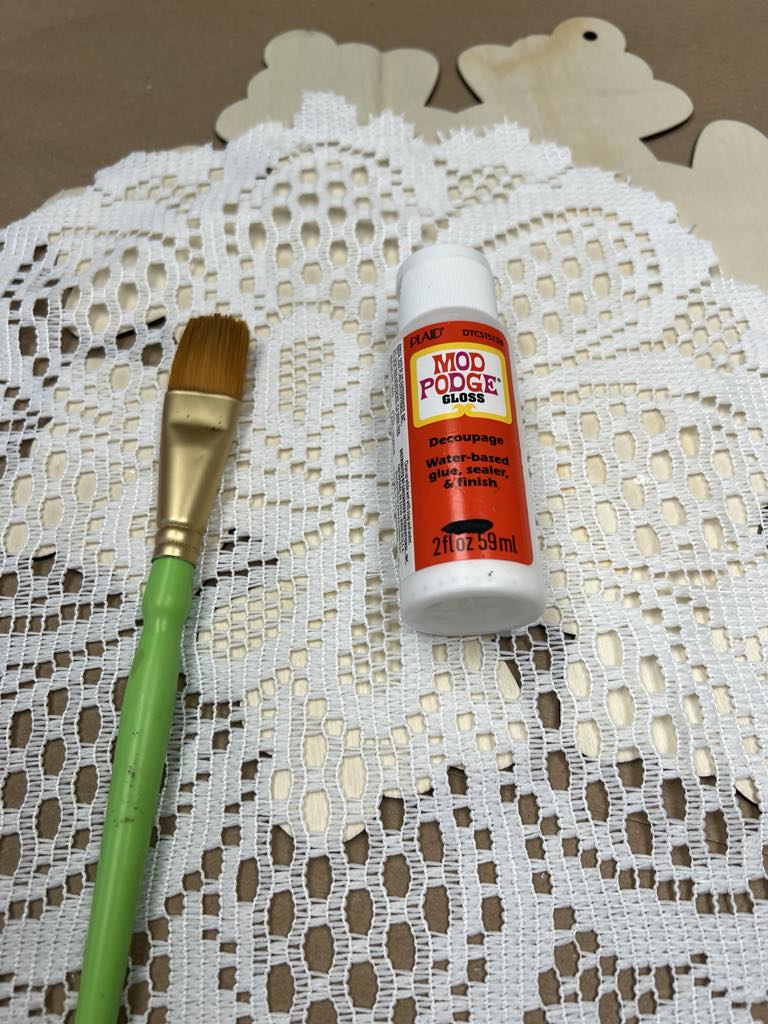
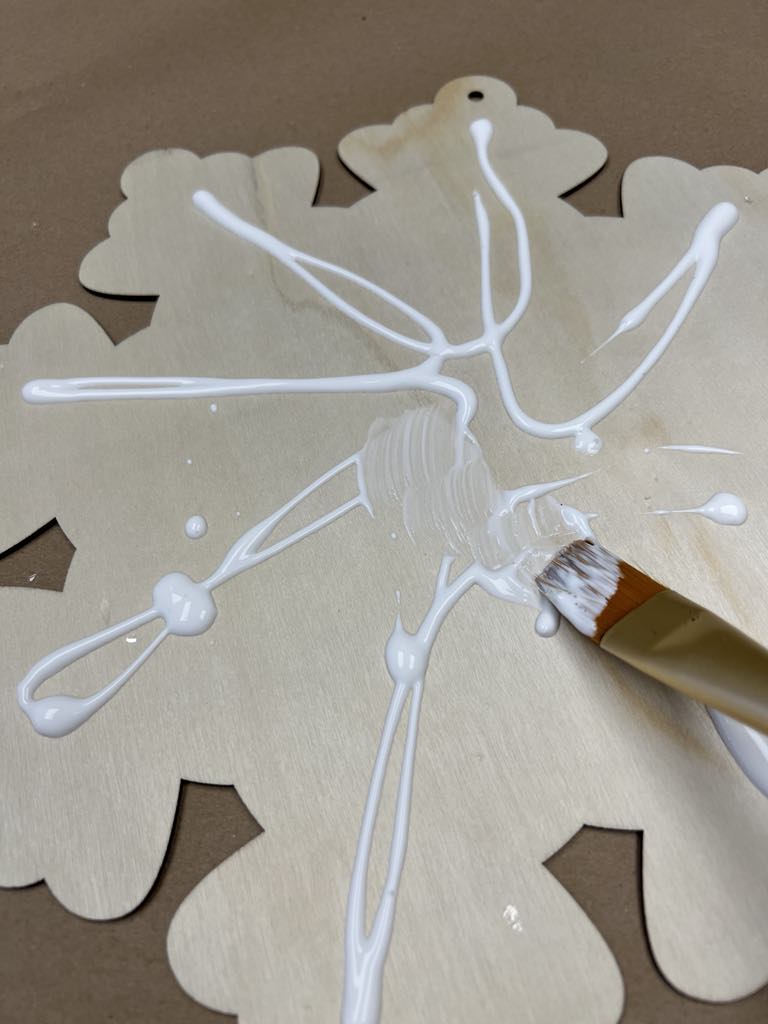
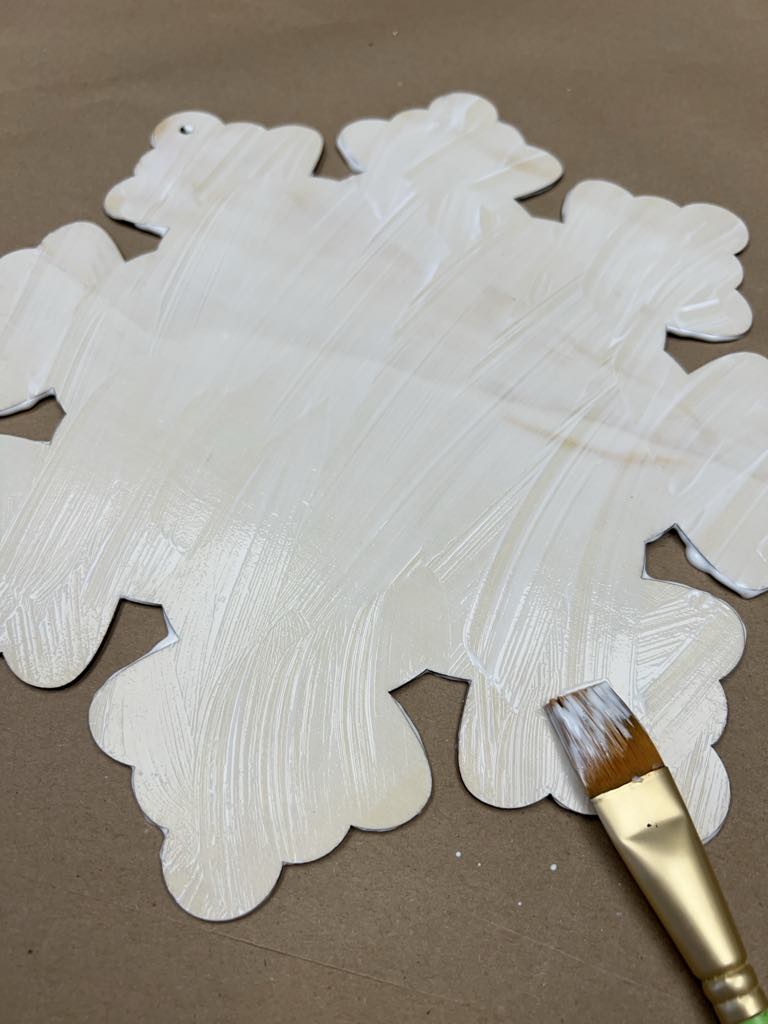
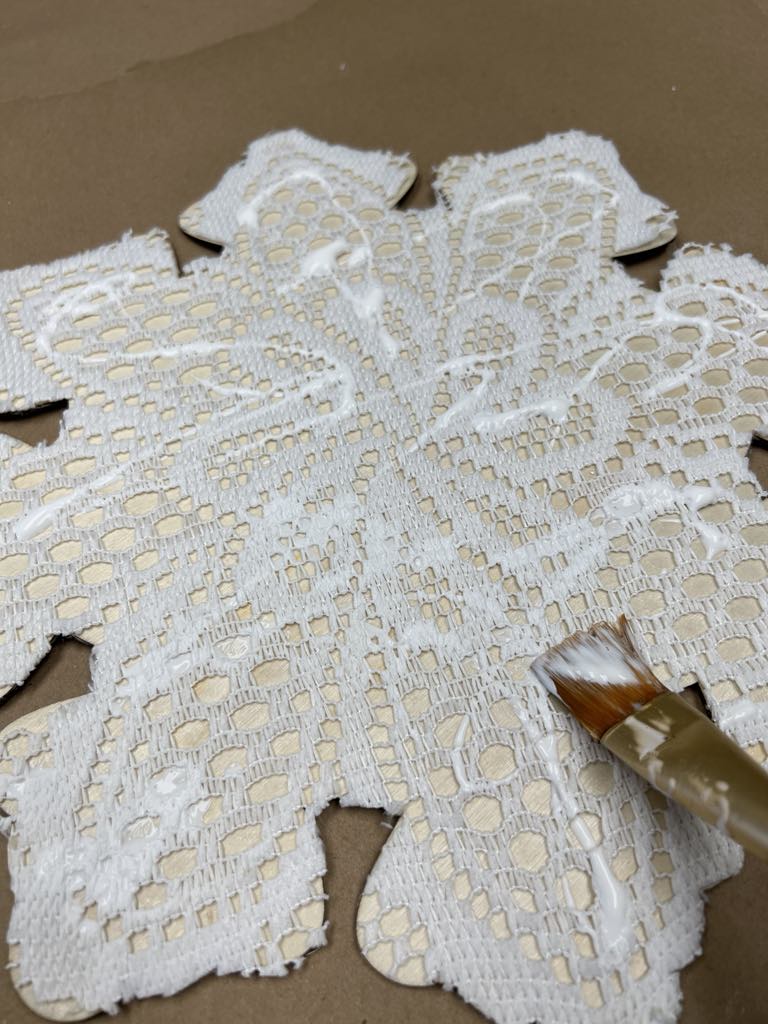
Step 1: Apply Mod Podge to the Wooden Snowflake
The first step is to apply a layer of Mod Podge to the wooden snowflake. This will help secure any embellishments and give the surface a nice, smooth finish.
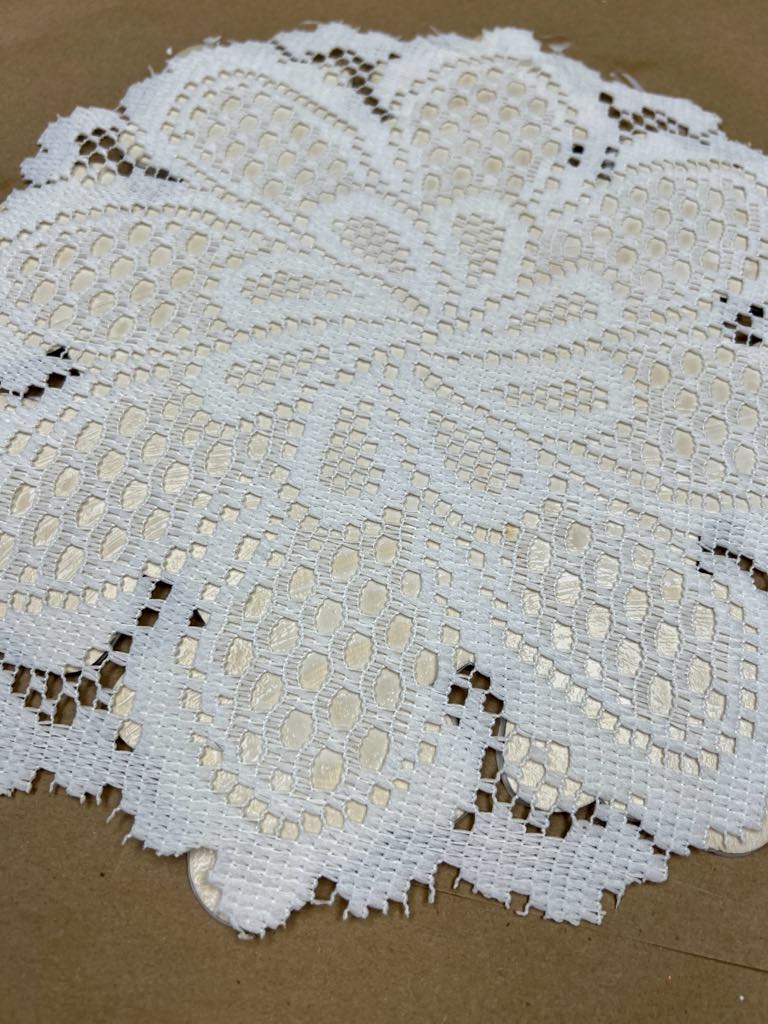
Step 2: Add the Doily
Once you’ve applied the Mod Podge to the snowflake, carefully place the doily on top. Press it down gently to ensure it adheres smoothly to the surface.
Step 3: Secure the Doily with Hot Glue
After positioning the doily, add small dabs of hot glue to the ends of the snowflake. This will ensure the edges are securely attached and prevent any lifting.
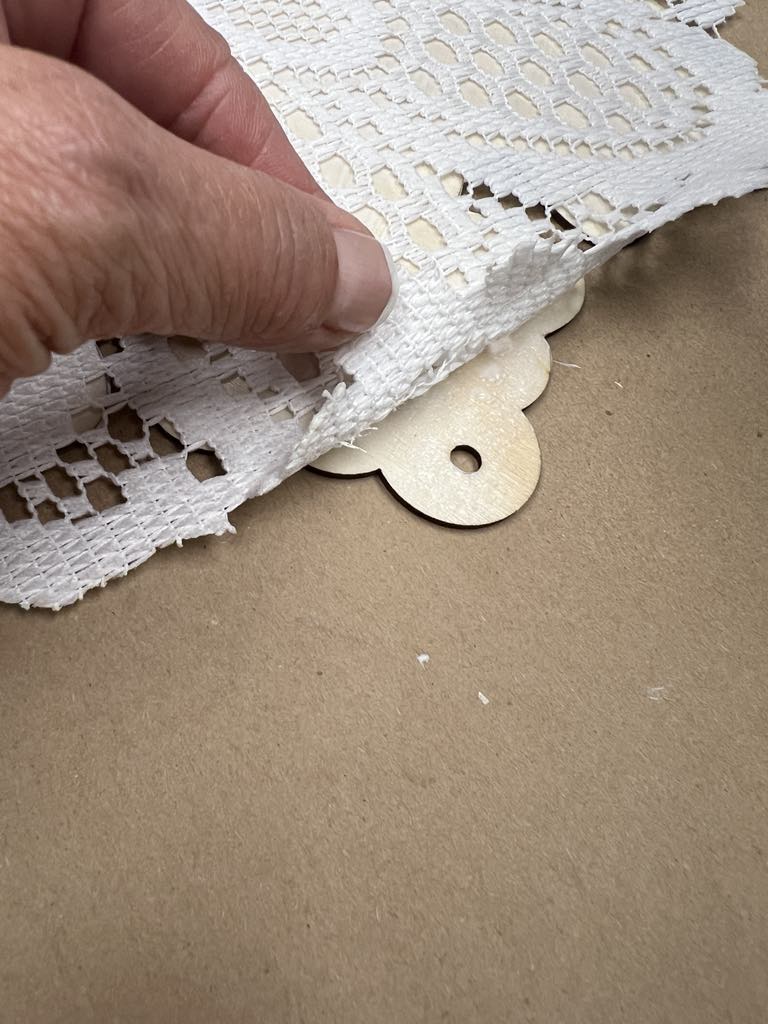
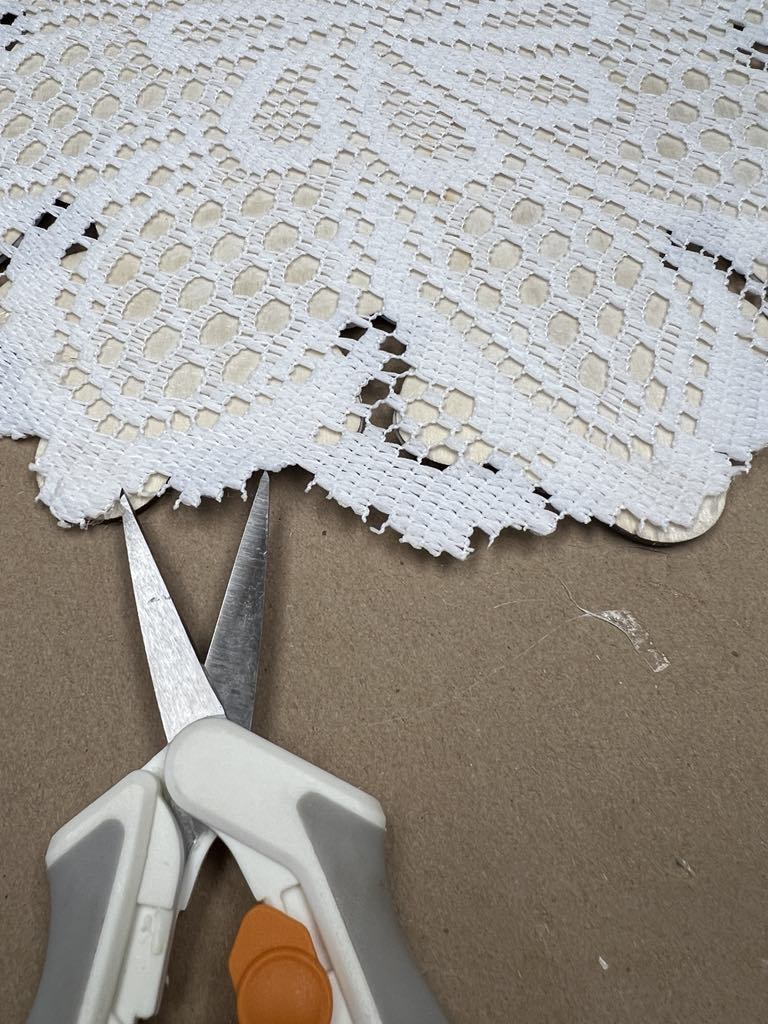
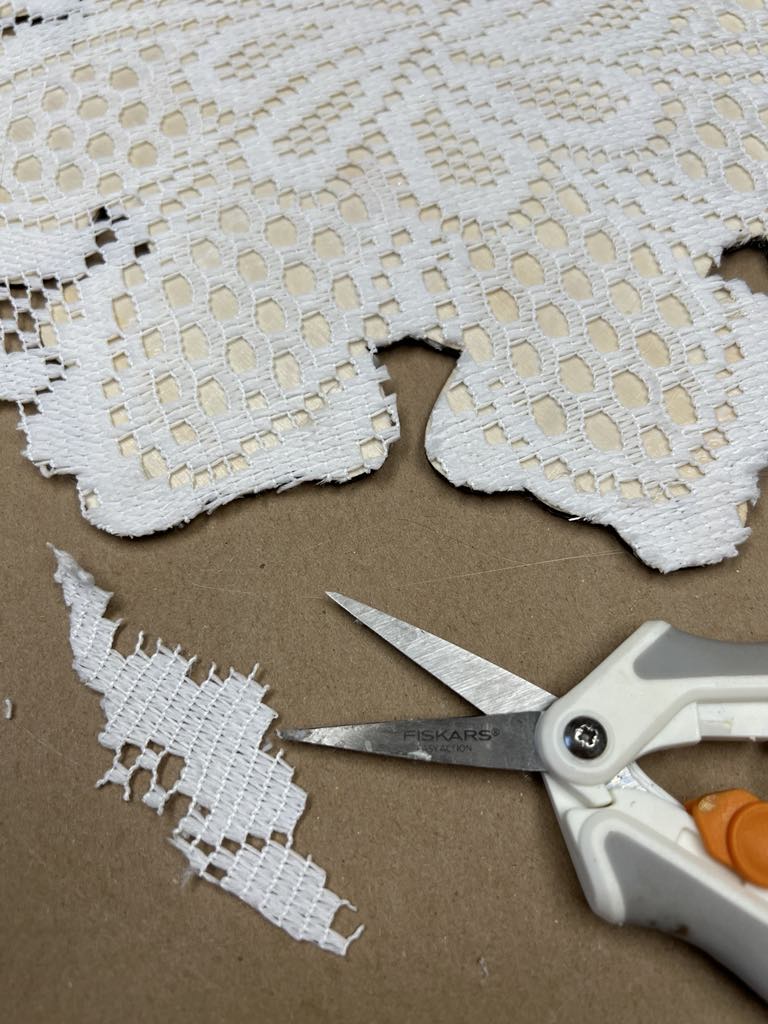
Step 4: Trim the Excess Doily
Once the doily is securely in place, carefully trim off any excess material around the edges of the snowflake for a clean, polished look.
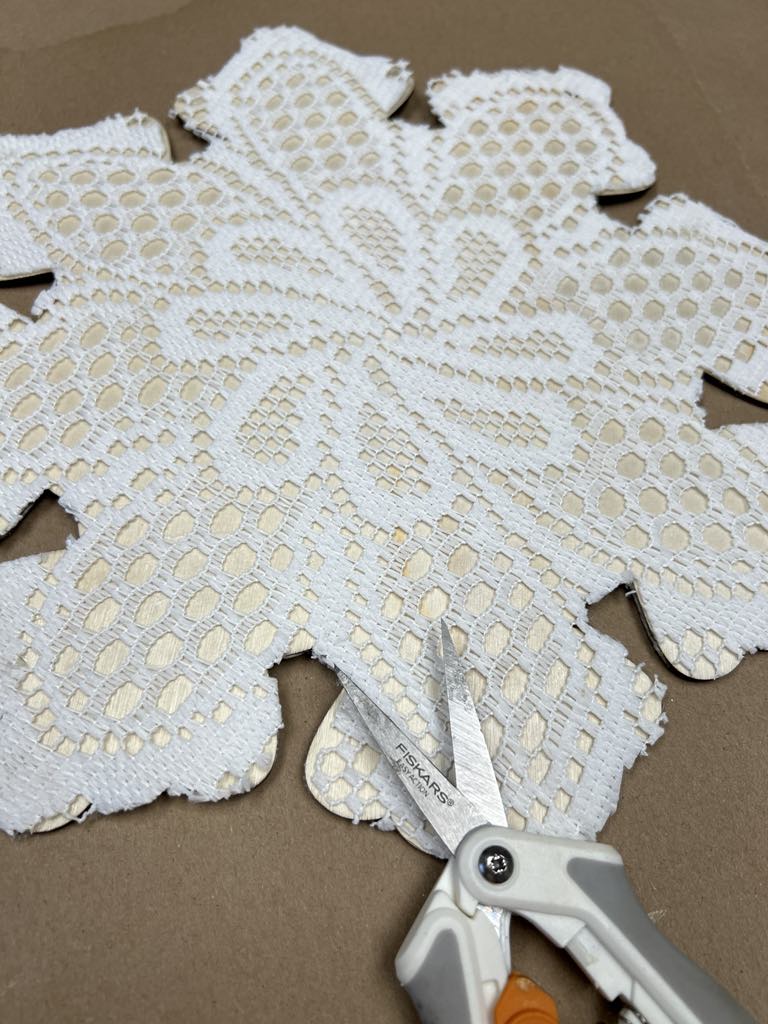
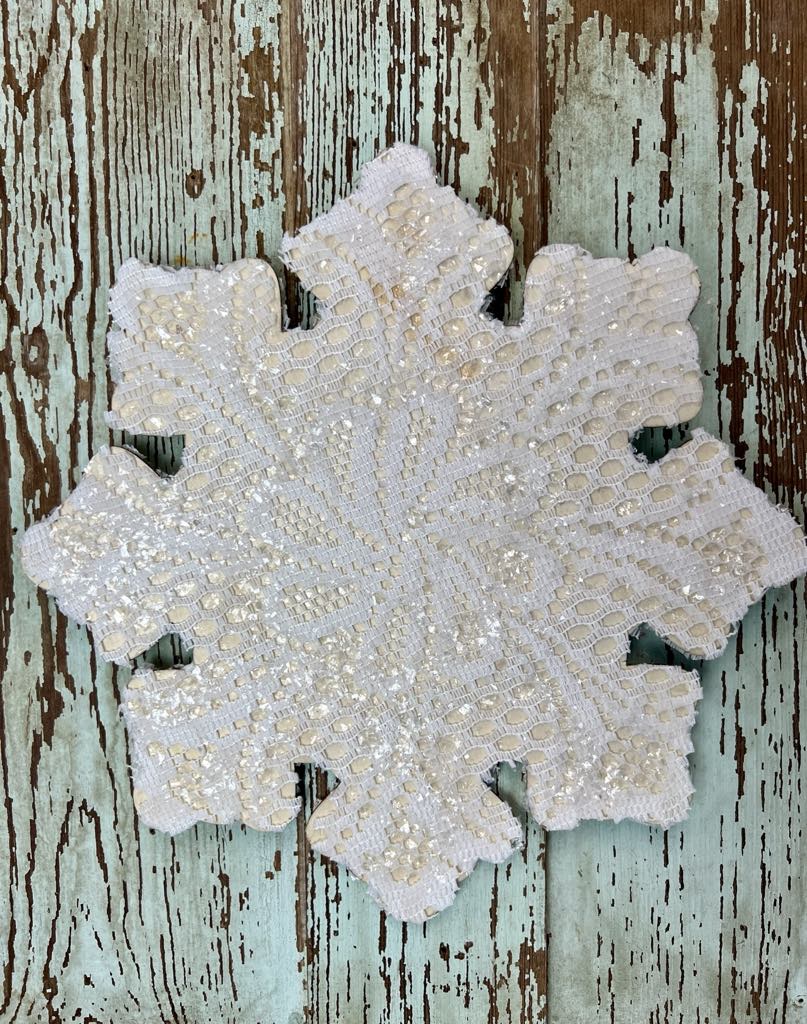
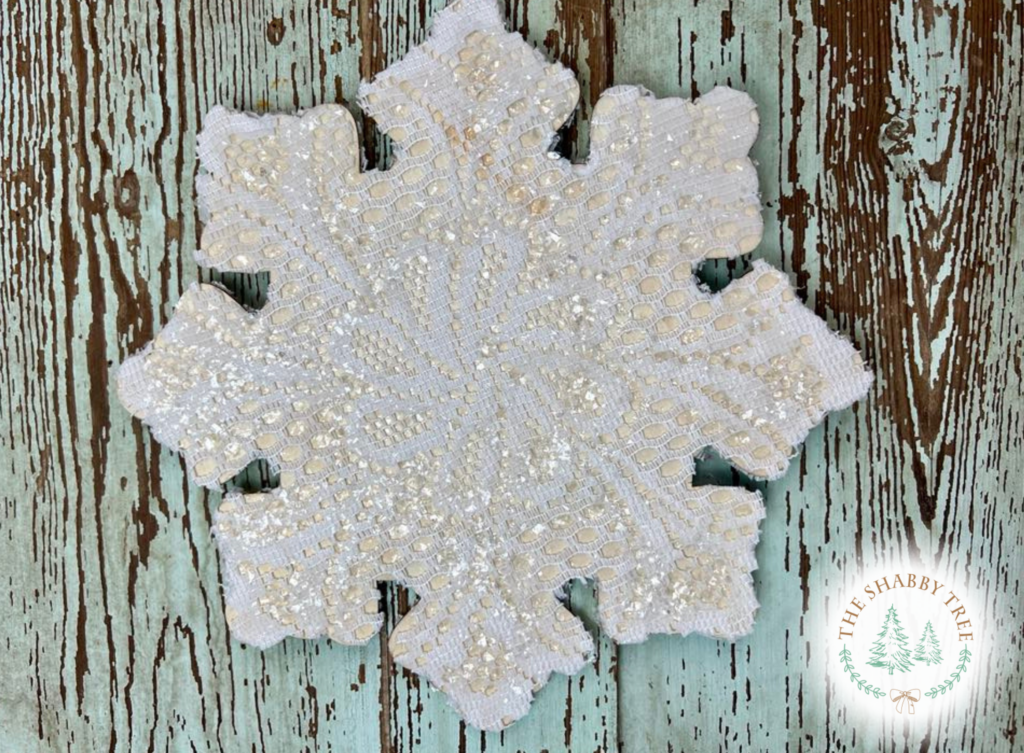
Step 5: Apply a Final Layer of Mod Podge

Love this! So pretty!
I love these snowflakes ❄️ ♥️♥️♥️
Love these! I have all the supplies!! Now to get them made!
I will be making this tonight. I just got all my items together.
I can’t wait to make mine! I’m going to hang them from my front porch under the roof to dangle and leave them up all Winter!
Barb, this is just beautiful ❄️❄️❄️💖💖💖 can’t wait to try it! Watering the Shabby Tree 🎄💧💞
Gotta go to the DT
Oooohh nice idea. And easy for me. I can do this.
Easy, pretty
I caught the live when you decorated the snowflake ❄️ It turned out really cute.
Barb I love how these snowflakes turned out!! I’m so going to make them!!❤️❤️❤️
Love this idea and will try to make several. Thanks for all that you do.
So pretty and sparkly!
This will look beautiful hung on a porch.
Beautiful will try this enjoyed watching you make the snowflake
I love this project. I will do this one
Another great craft Barb 🤍….will look for the DT supplies to make a few of these soon….ordered the Mica Flakes recently, can’t wait to use them 😊❄️. Thk you for always inspiring us to get creative , and have fun while doing it 😊🥰❤
I can’t wait to make some of these snowflakes!❄️❄️❄️
❄️❄️❄️GORGEOUS ❄️❄️❄️