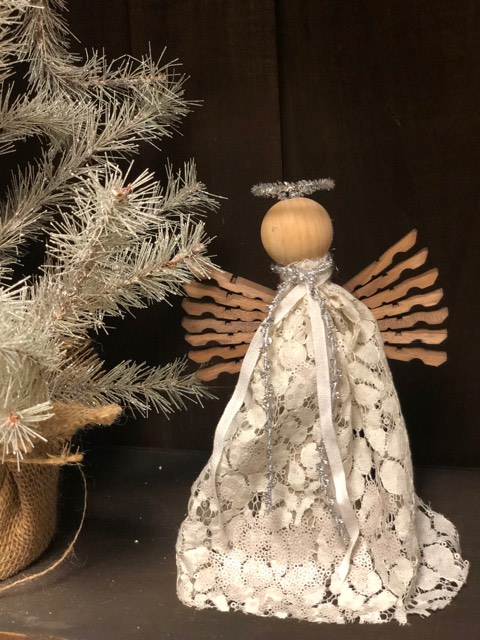
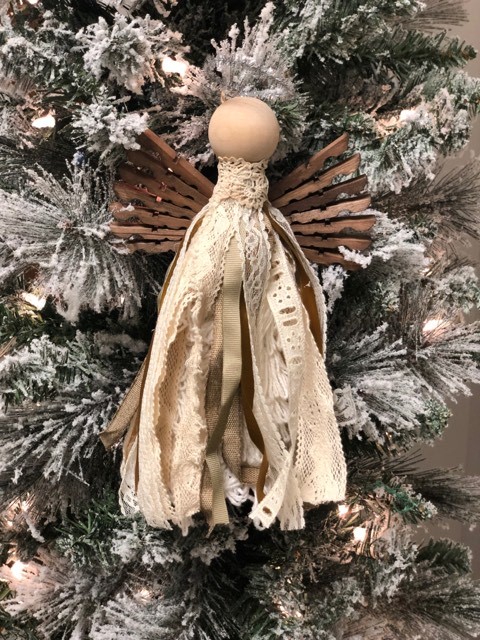
I love angels and I have been wanting to make some smaller ones that can be used as ornaments or just as decoration throughout your home. These are very simple to make and I love that you can create them to go with your decor.
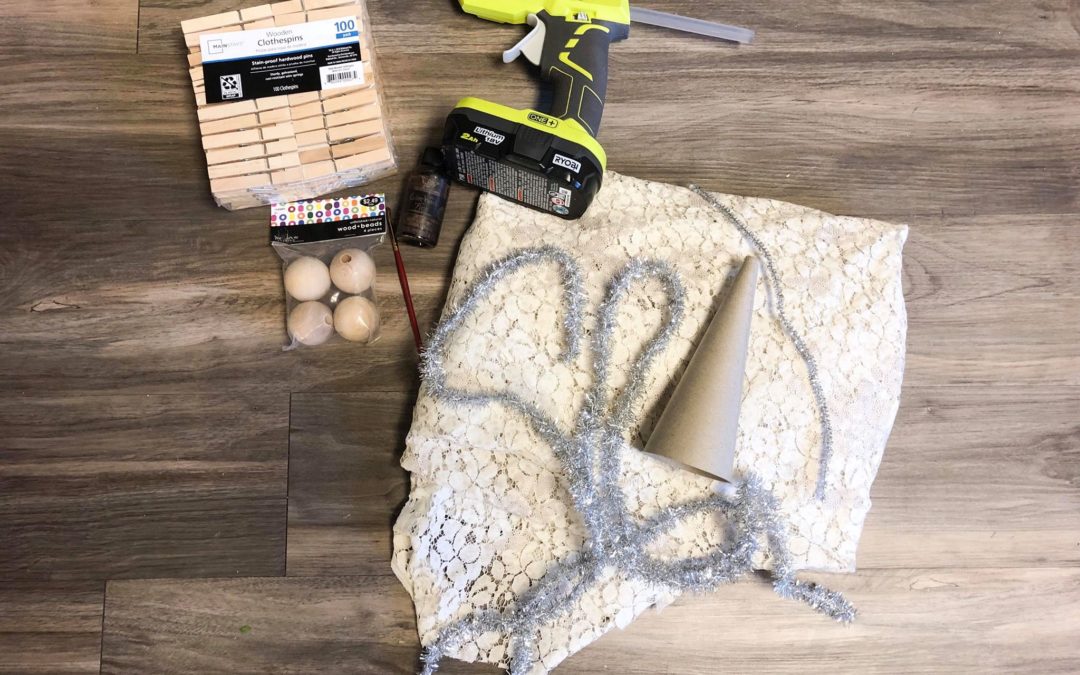
The supplies you will need are:
1. Paper mache cone ( I got this one from Hobby Lobby and it is 7 inches tall)
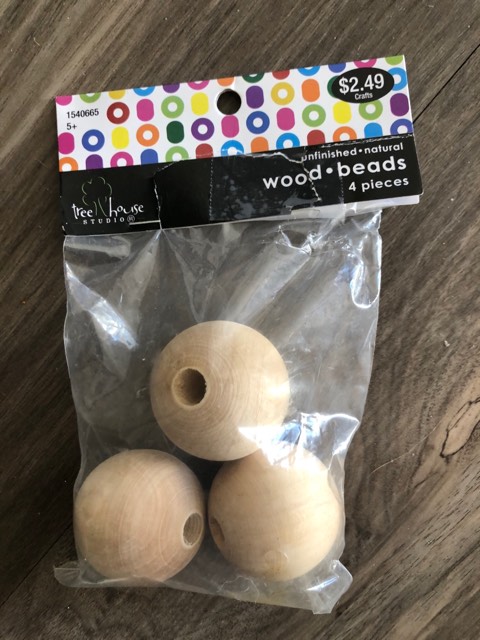
2. Wooden bead with hole ( this bead is from Hobby Lobby)
3. Fabric of your choice ( I am using a piece that is 8 inches wide and 14 inches long)
4. Hot glue
5. Silver pipe cleaner
6. Some scrap ribbon or tinsel
7. Scissors 8. Twine ( if you want to make a hanger for angel)
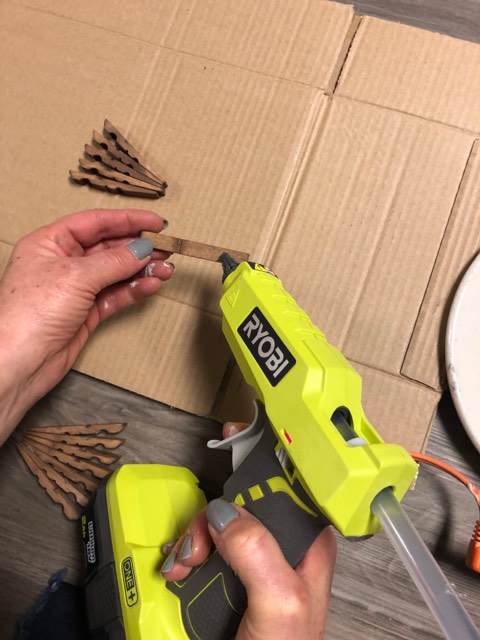
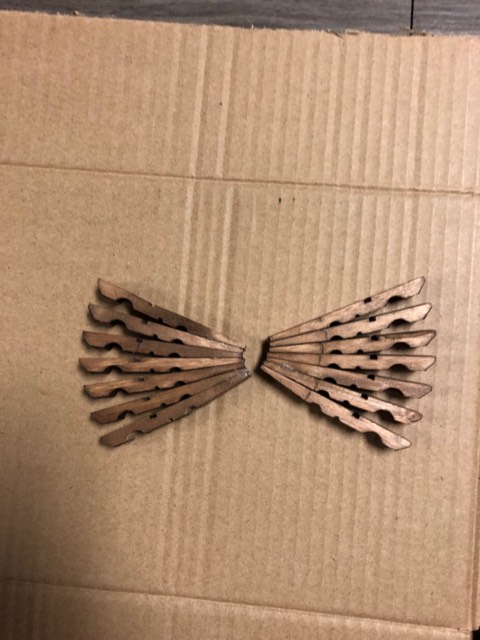
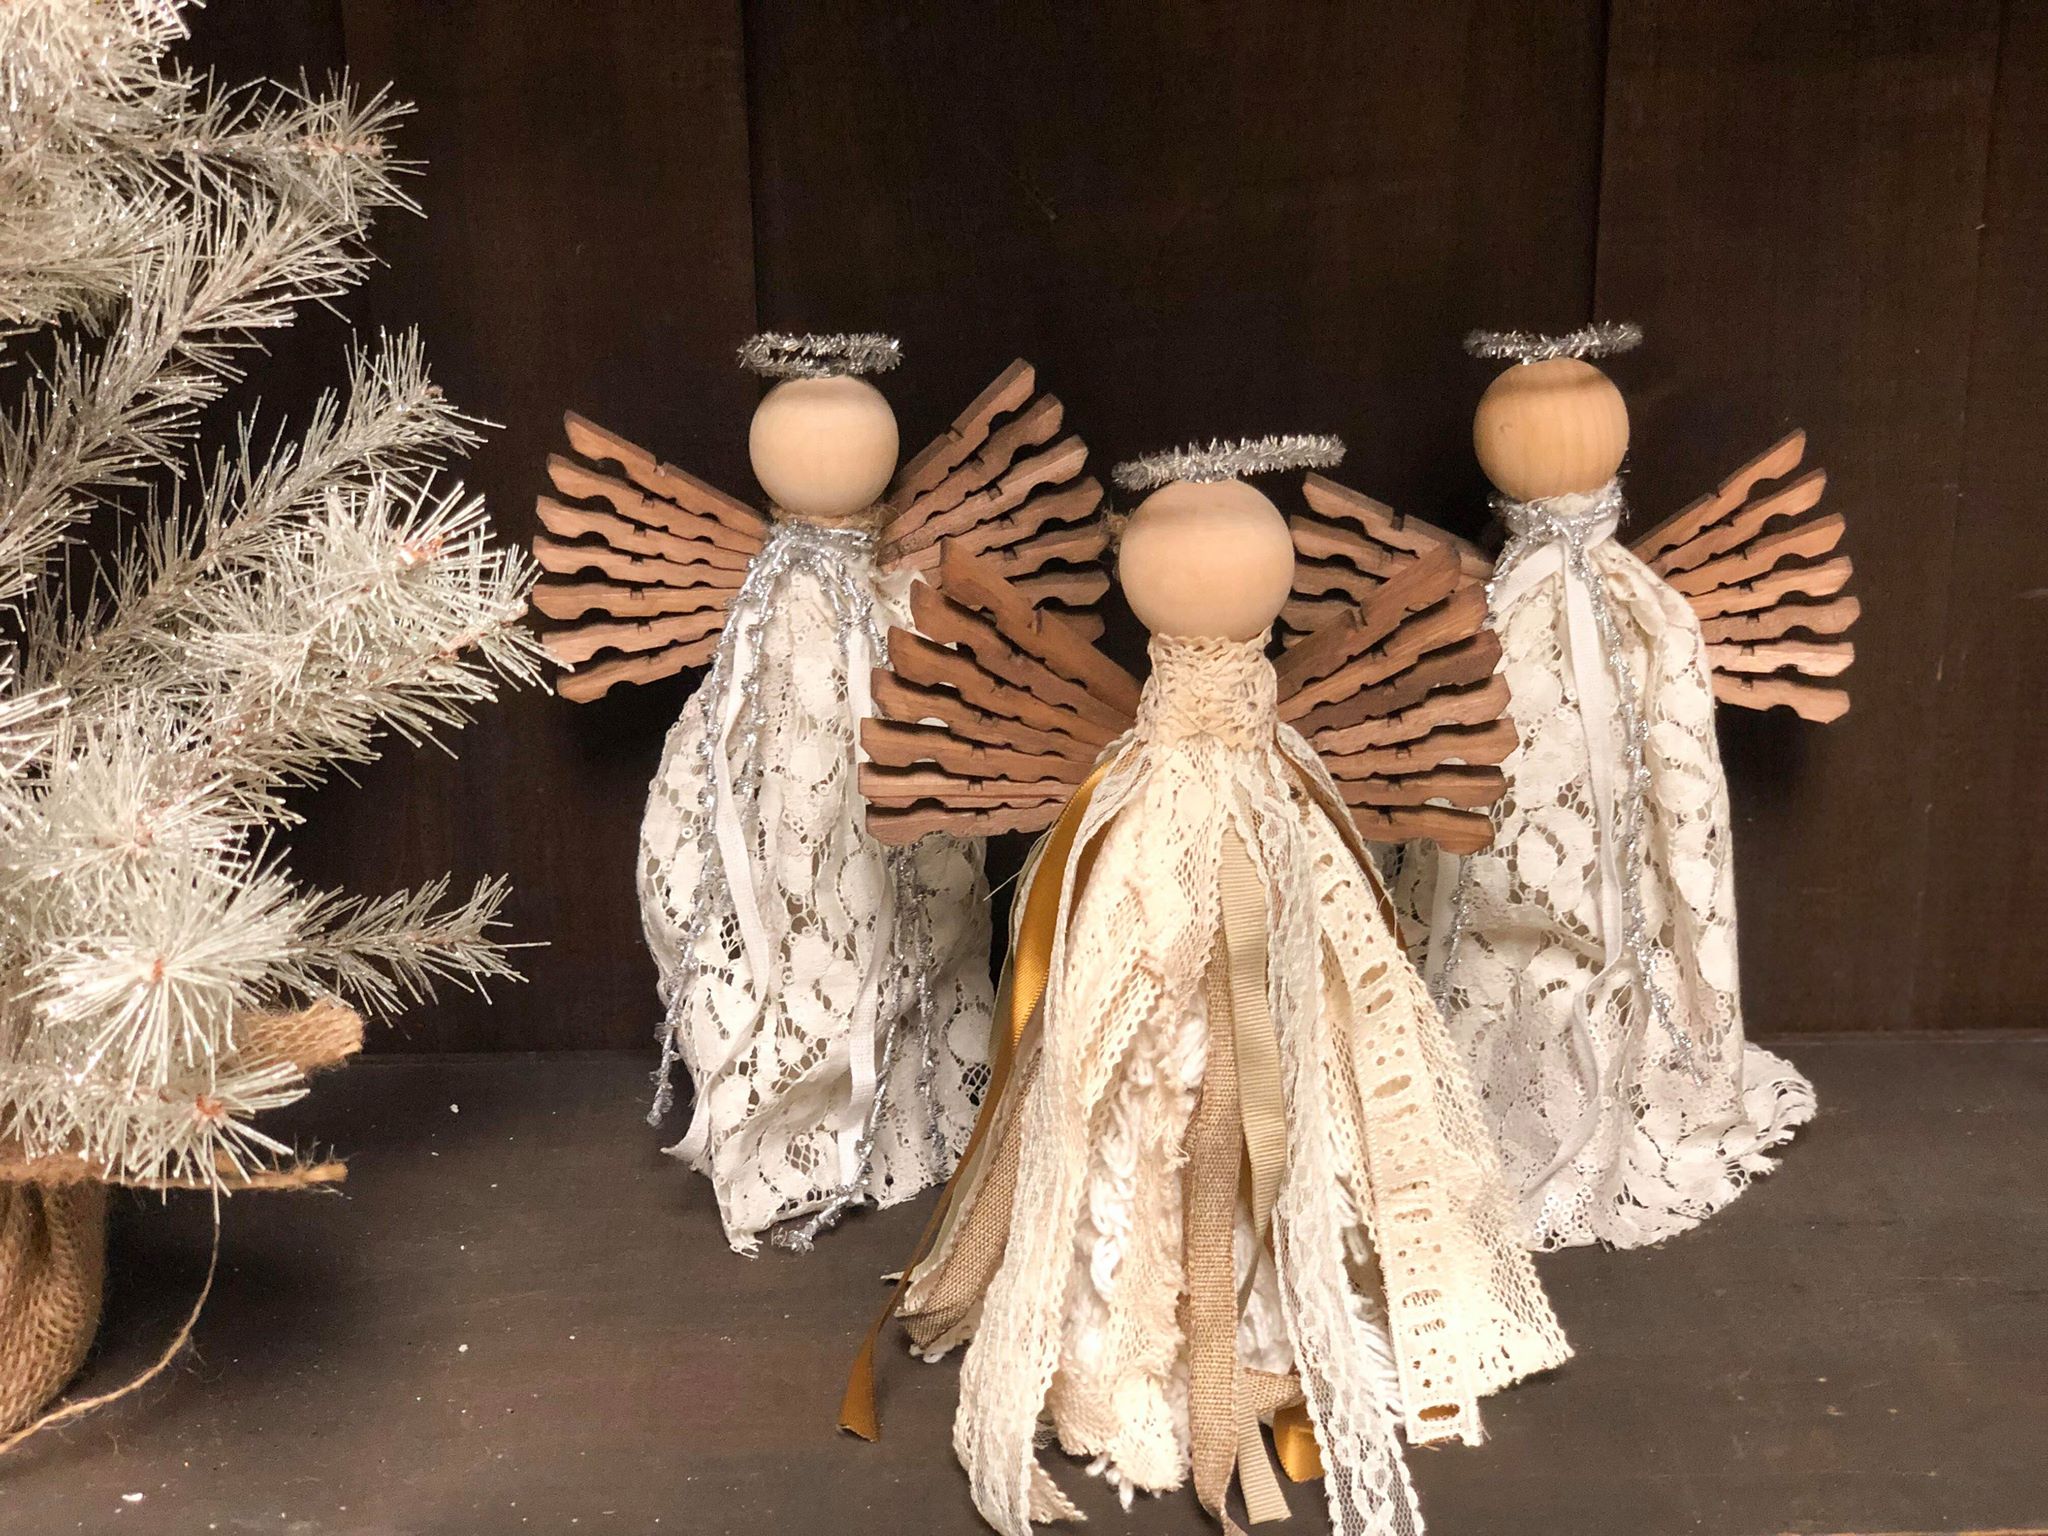
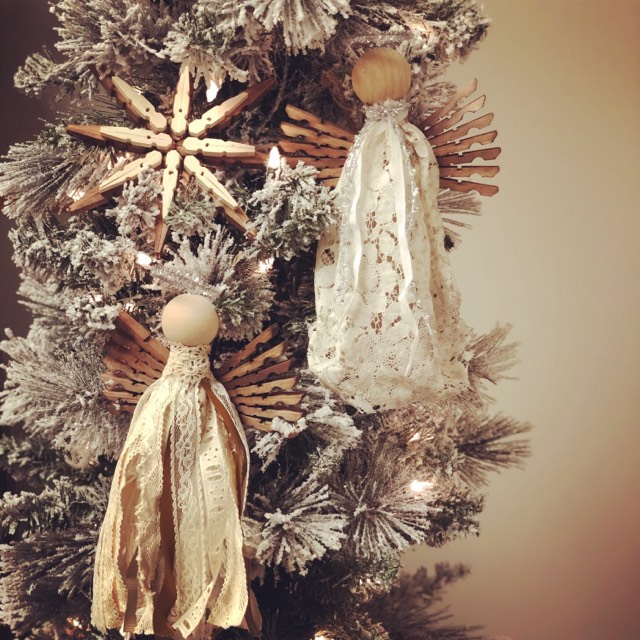
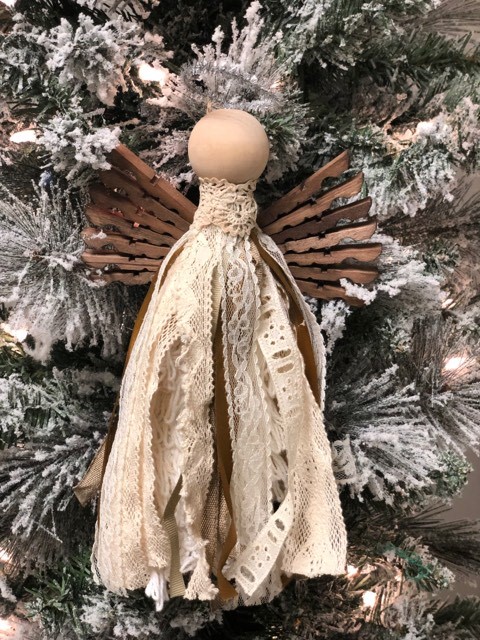
8. Clothespins ( you will be using 7 clothespins)
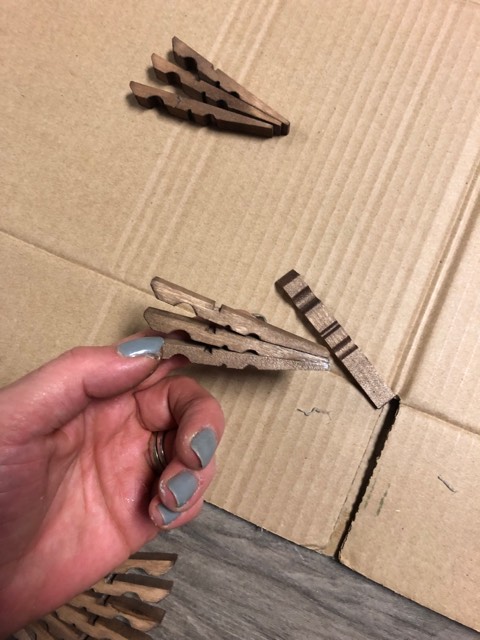
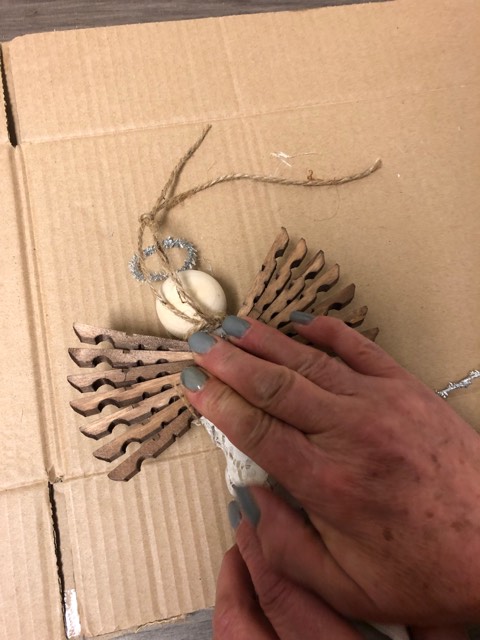
The first step is to seperate the 7 clothespins which will now give you 14 pieces. These are the pieces we will be using for our angel wings. You can leave them plain , stain or paint them. I am using a stain on mine. You will now start to glue 7 pieces together . Each wing will use 7 pieces of the clothespins.
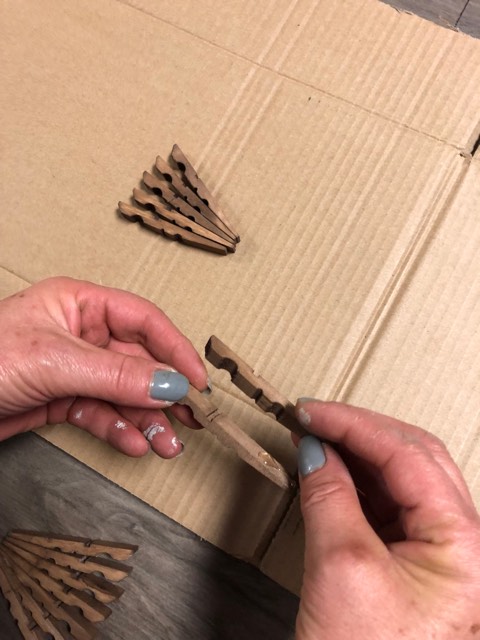
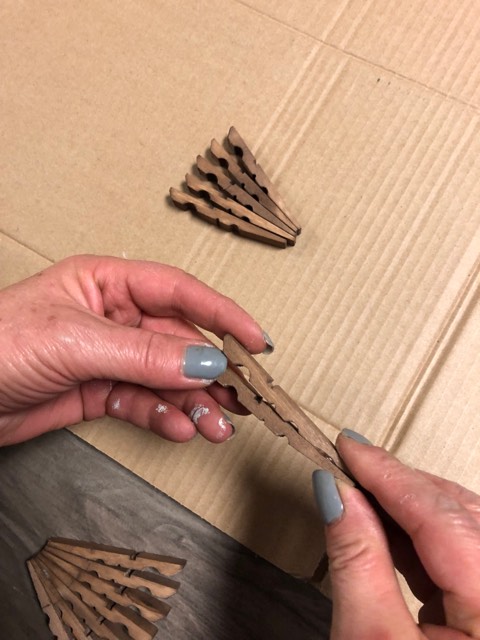
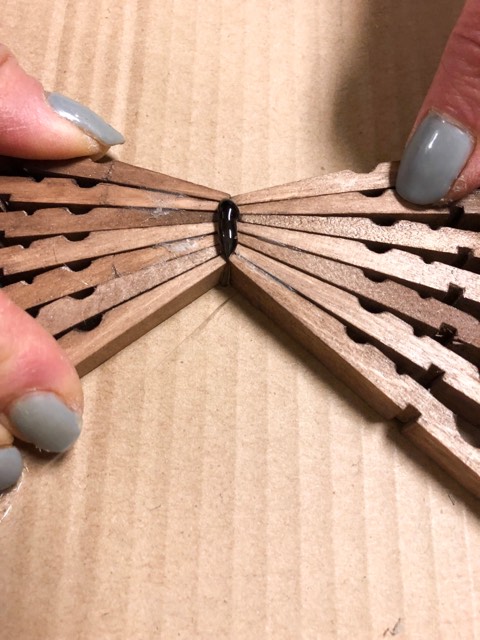
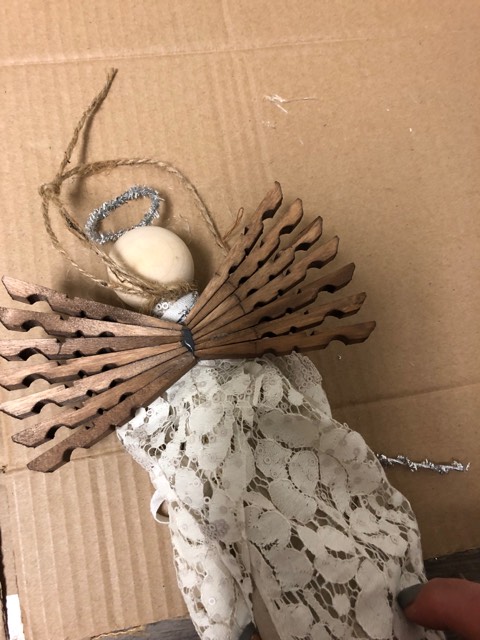
Once you have each wing glued you will then glue the two wings together.
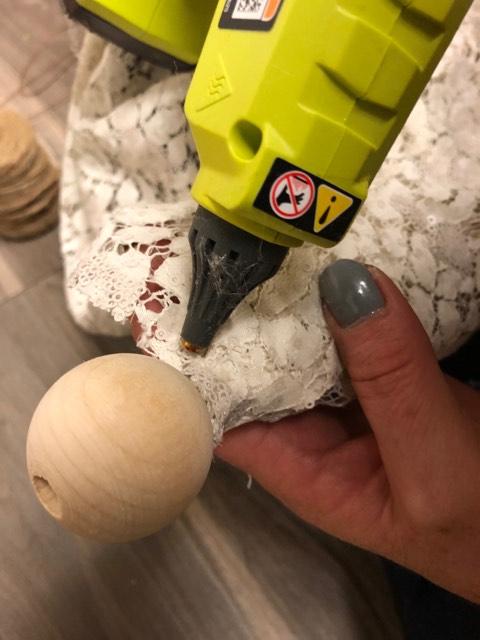
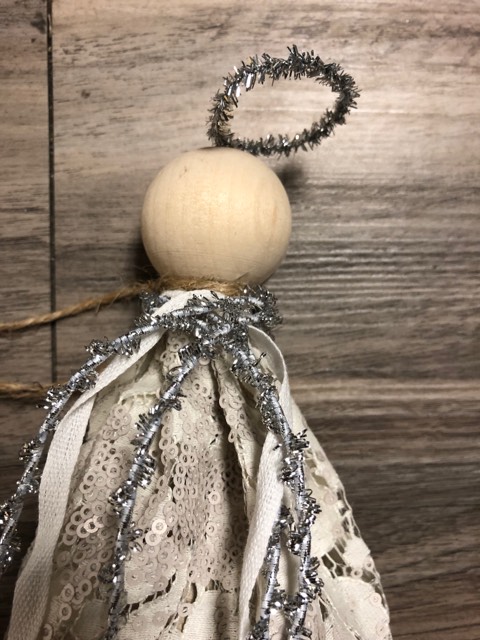
Next glue your wooden bead to the top of your paper mache cone. You can take the silver pipe cleaner and firm into a halo. I just stuck the base of halo into the home of wooden bead.

The next step is to start gluing your material into the cone. I’m doing this at base of the bead and I’m gathering it as I glue around.

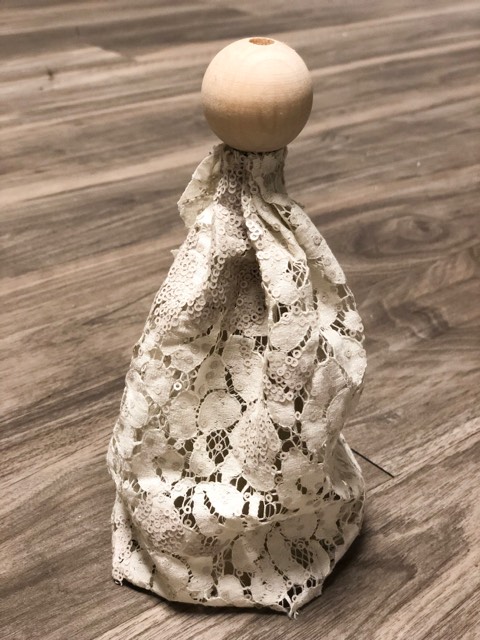
I added some lace and tinsel around the neck and draped down the front of angel. I also took a piece of twine and tied around the neck and made a loop to have a hanger for hanging onto my tree. The last step is to glue your wings into the back.
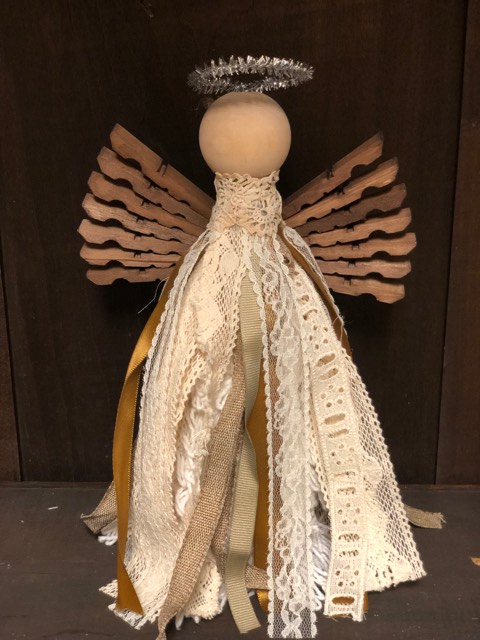
You can get creative and make this angel with any kind of material or even strips of ribbon. The one above is made from strips of ribbon. I just took each strip and glued to the top of cone. I just kept adding pieces of ribbon until I thought it was full enough.
I hope you all enjoy this Diy angel and give it a try.
Here is a photo of the bead I used from Hobby Lobby.
Hi Barb I started watching you in early Spring of this year. And I’m so blessed to have found you. You have made our 2020 more bearable with your smiles, giggles and wonderful crafts. I look forward to seeing you each day, as you are the bright spot of my day. This angel is beautiful and I’m so going to make. Love The Shabby Tree family.
Barb, I started watching you early last year. Wow you have so many sweet followers that love what you do and watching you do it. I know I do. It is my get away, and I love Soul Sisters too. Every chance I get I am thinking of what I can make next, I want to make the snowmen out of salt and pepper shakers this year. Mine didn’t look so good last year. You do make everything so easy for us to follow. Thank you for being you!❤. May God bless you and your sweet family. How wonderful it is to have them all working with you. A house is lonely when your children leave, you have made mine not so lonely.
I live in Australia, I have never crafted, you inspired me so much I went to our local craft stores and variety stores and bought as much as I could to start crafting. I’m a huge Angel person, so I will be trying one of those first. You are a beautiful soul Barb, Thank you for inspiring me. God bless you and your family💜🙏
I Just Love The Shabby Tree!!! You give me hope, that I can craft and make something beautiful. Thank You!!!
I’m making candy canes and next I’m going to make the clothes pin snowflake.
I love watching you and your sister you make everything so easy for us to follow, I know your gonna miss your sister when she leaves but I bet she can use the rest haha, please keep up the great work you do for all of us may God watch over you and your family!!! Thanks again for sharing everything with us, love Harriet!!!
I love the one made from strands of ribbons! Happy crafting! Thanks for sharing!
You could use cinnamon sticks for the wings and have a scented Angel