I have been going to the Dollar Tree a lot lately and waiting for all the new Fall items to hit the shelf. The Dollar Tree is a great place to walk around and find ways to get creative. I recently picked up a few paper back books from the Dollar Tree and I just know we can create a few fun and unique pumpkins with them.
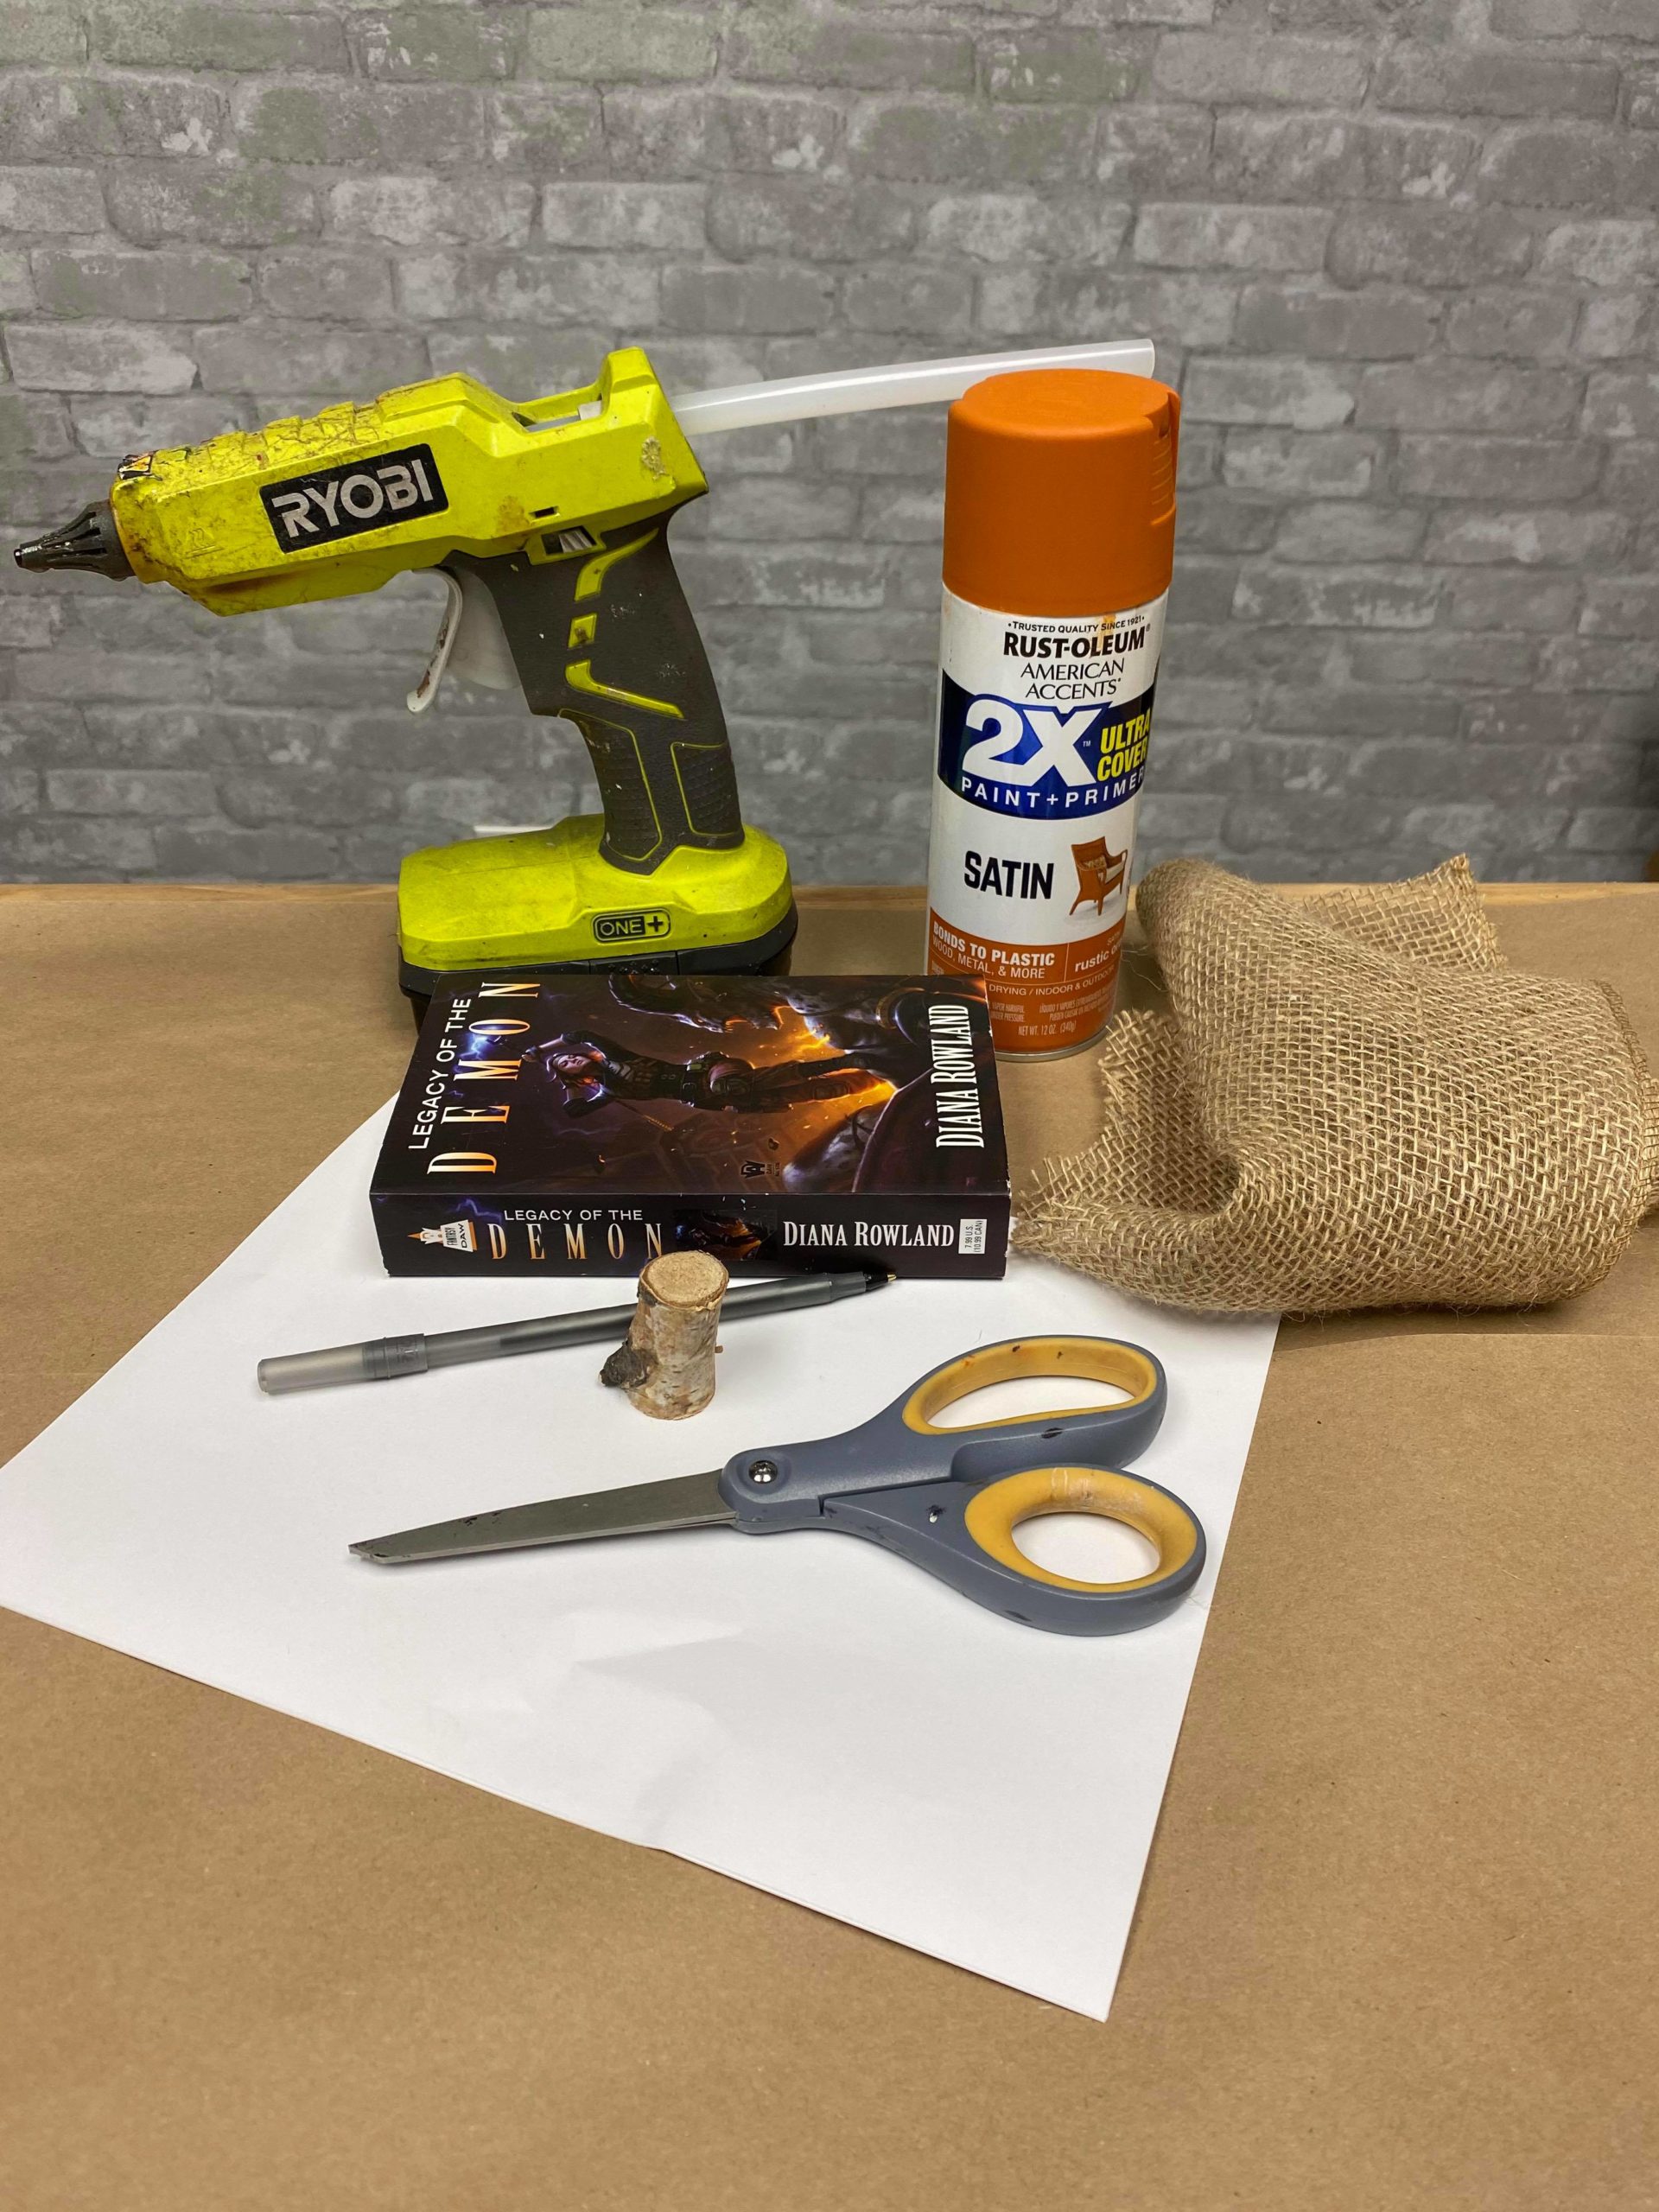
The supplies I will using are:
1. Paper back book from the Dollar Tree
2. Hot glue
3. Scissors
4. Ink pen and paper
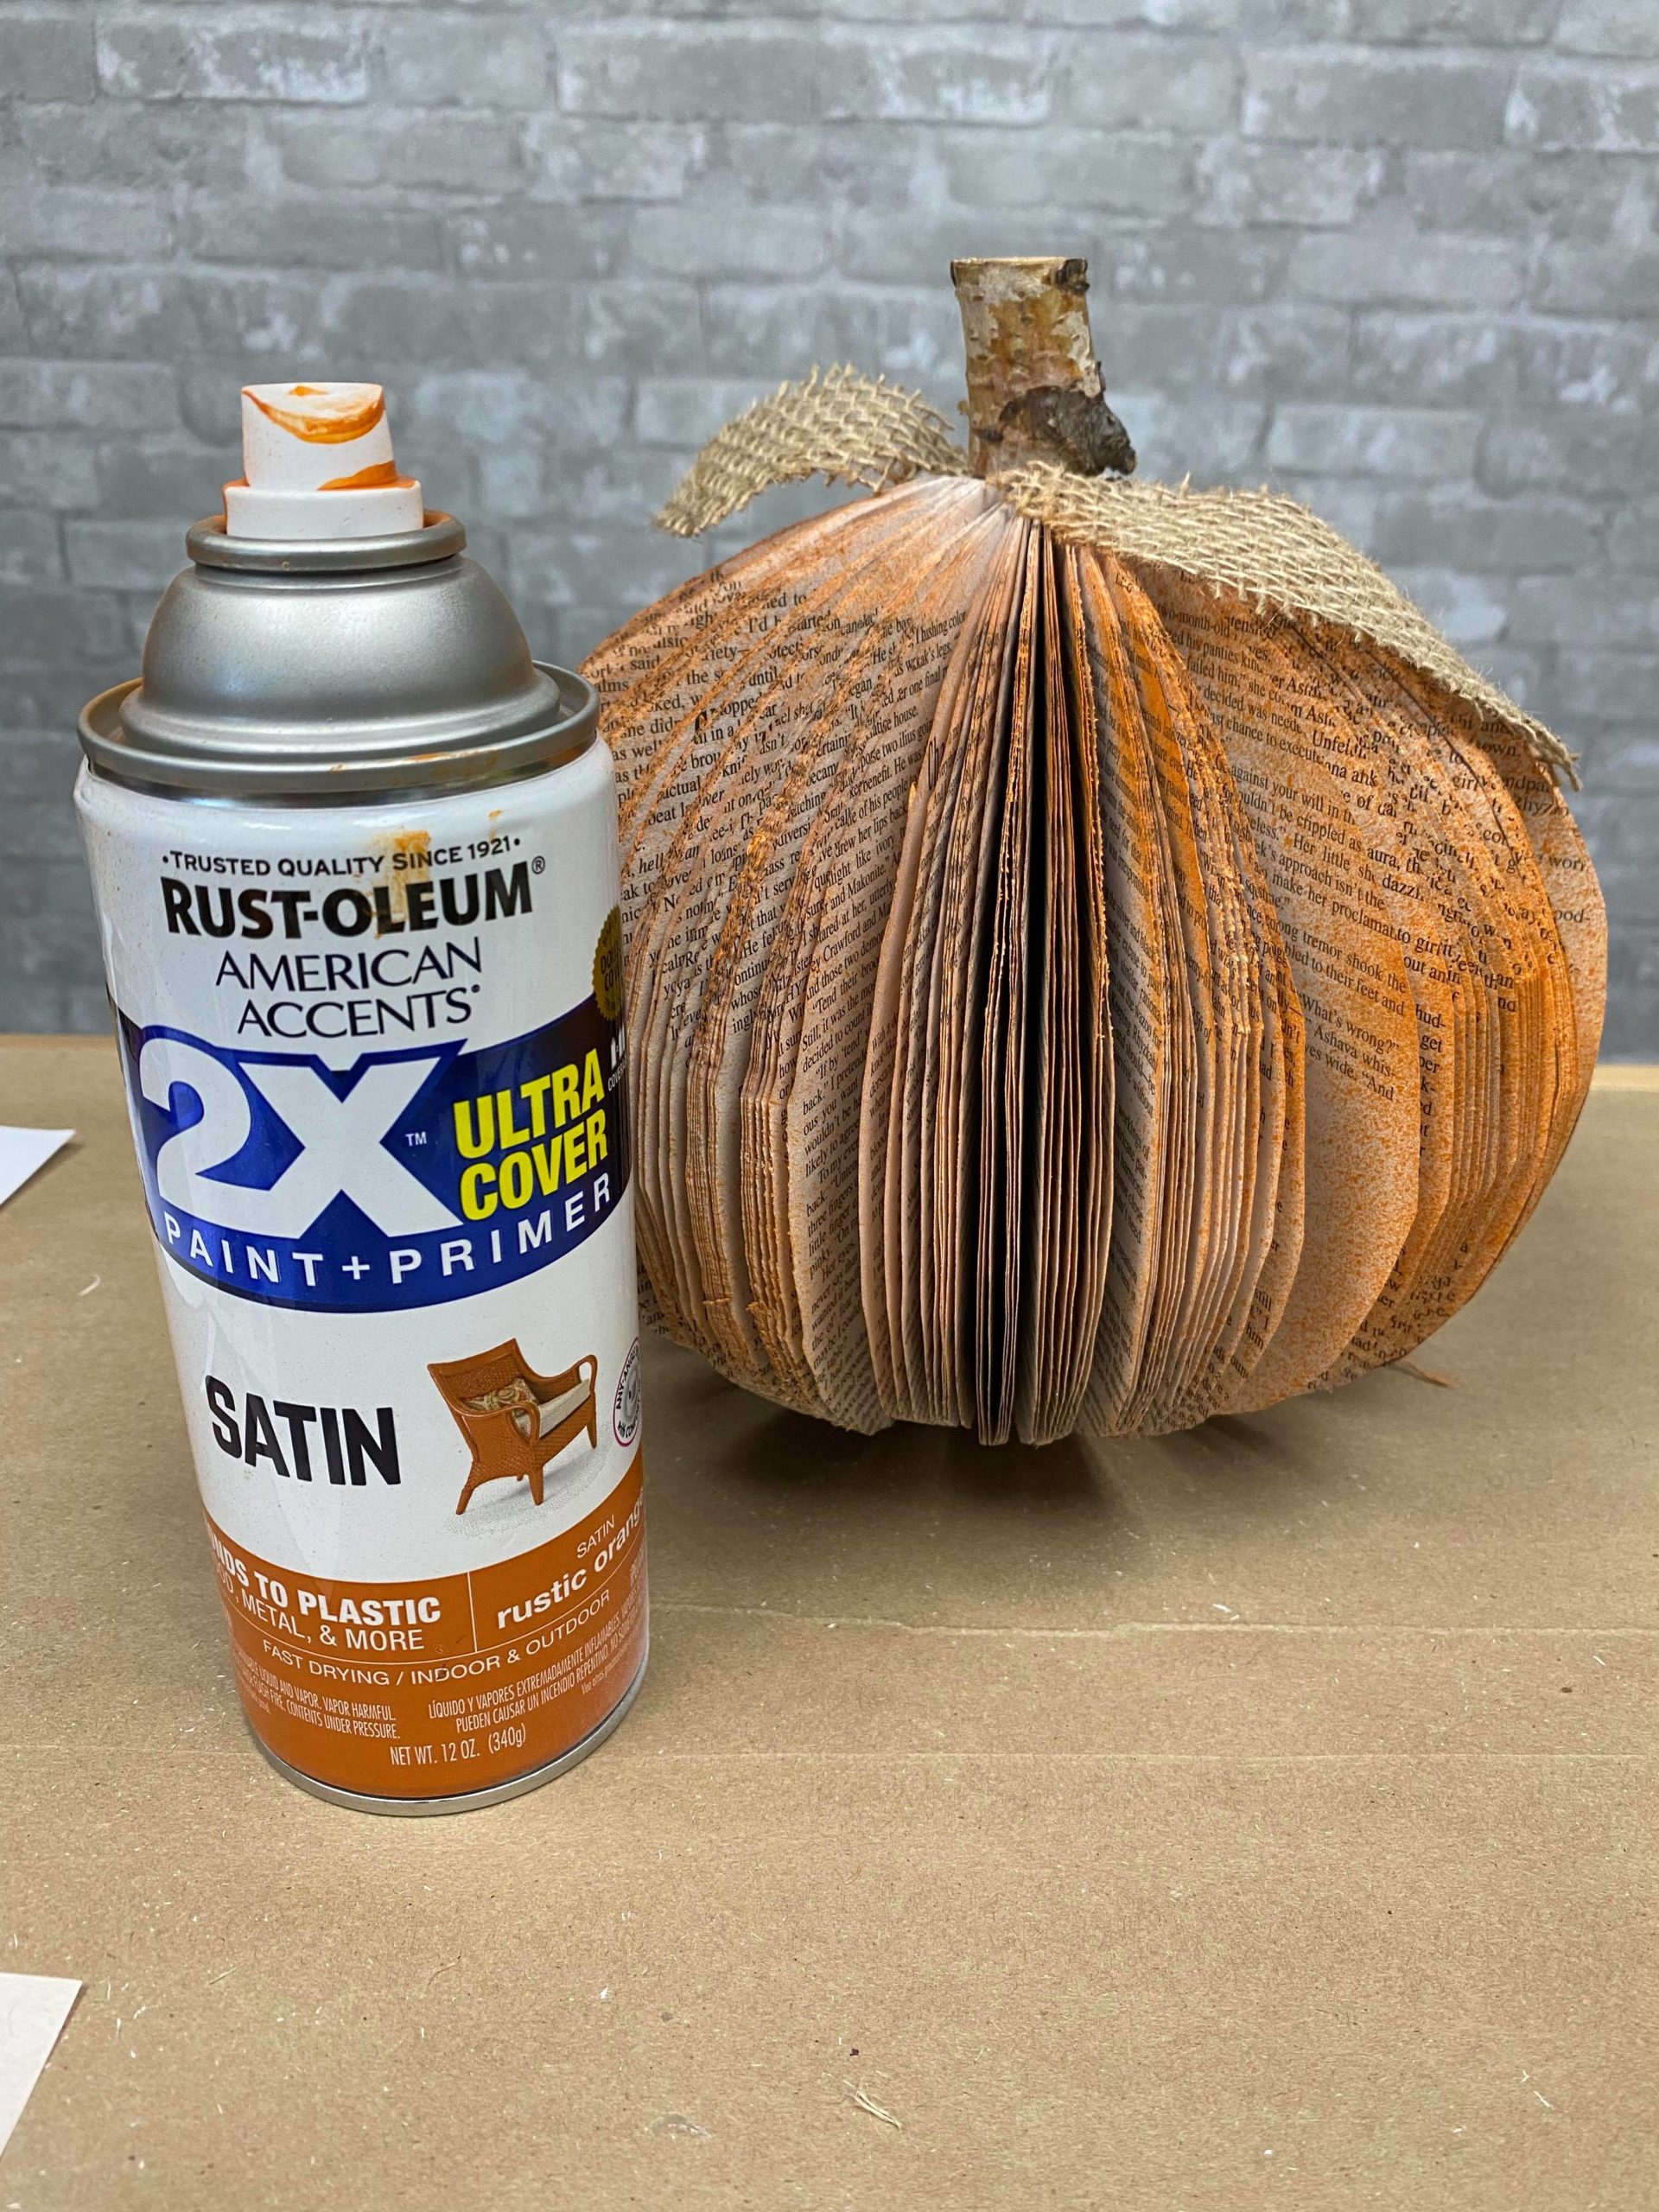
5. Orange spray paint (optional)
6. Piece of burlap
7. A small stick from a tree
8. Spanish moss (optional)
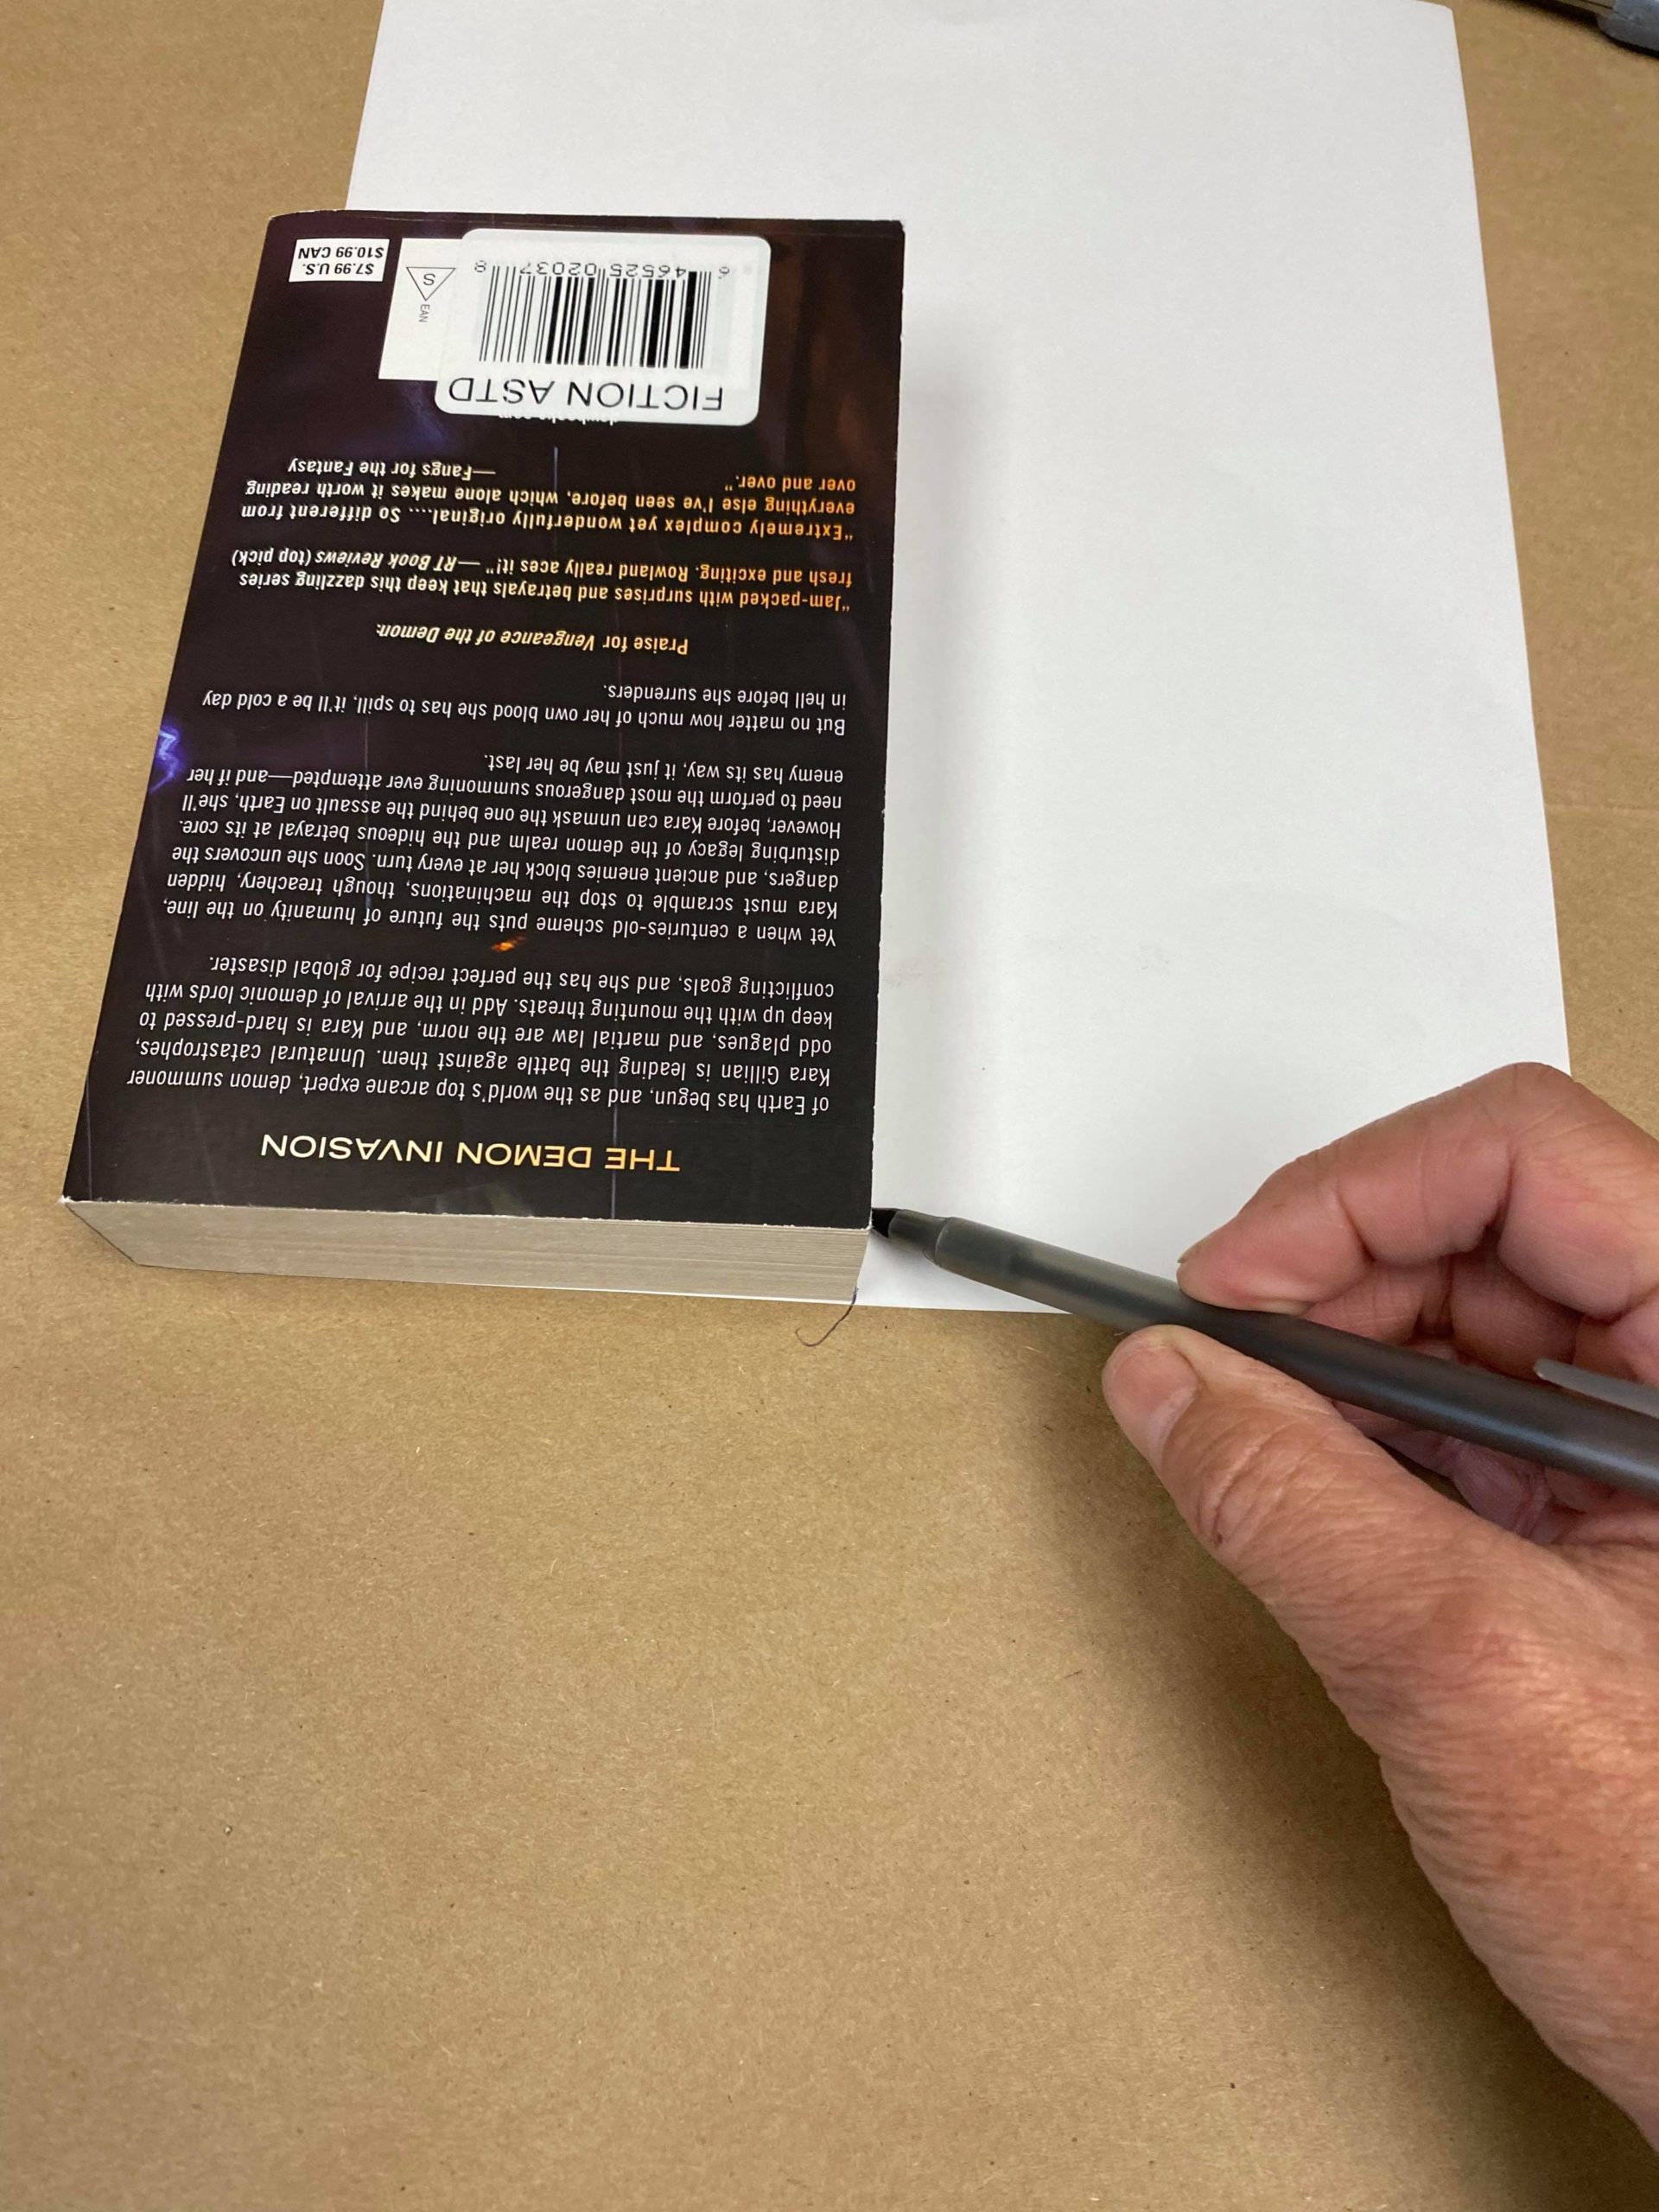
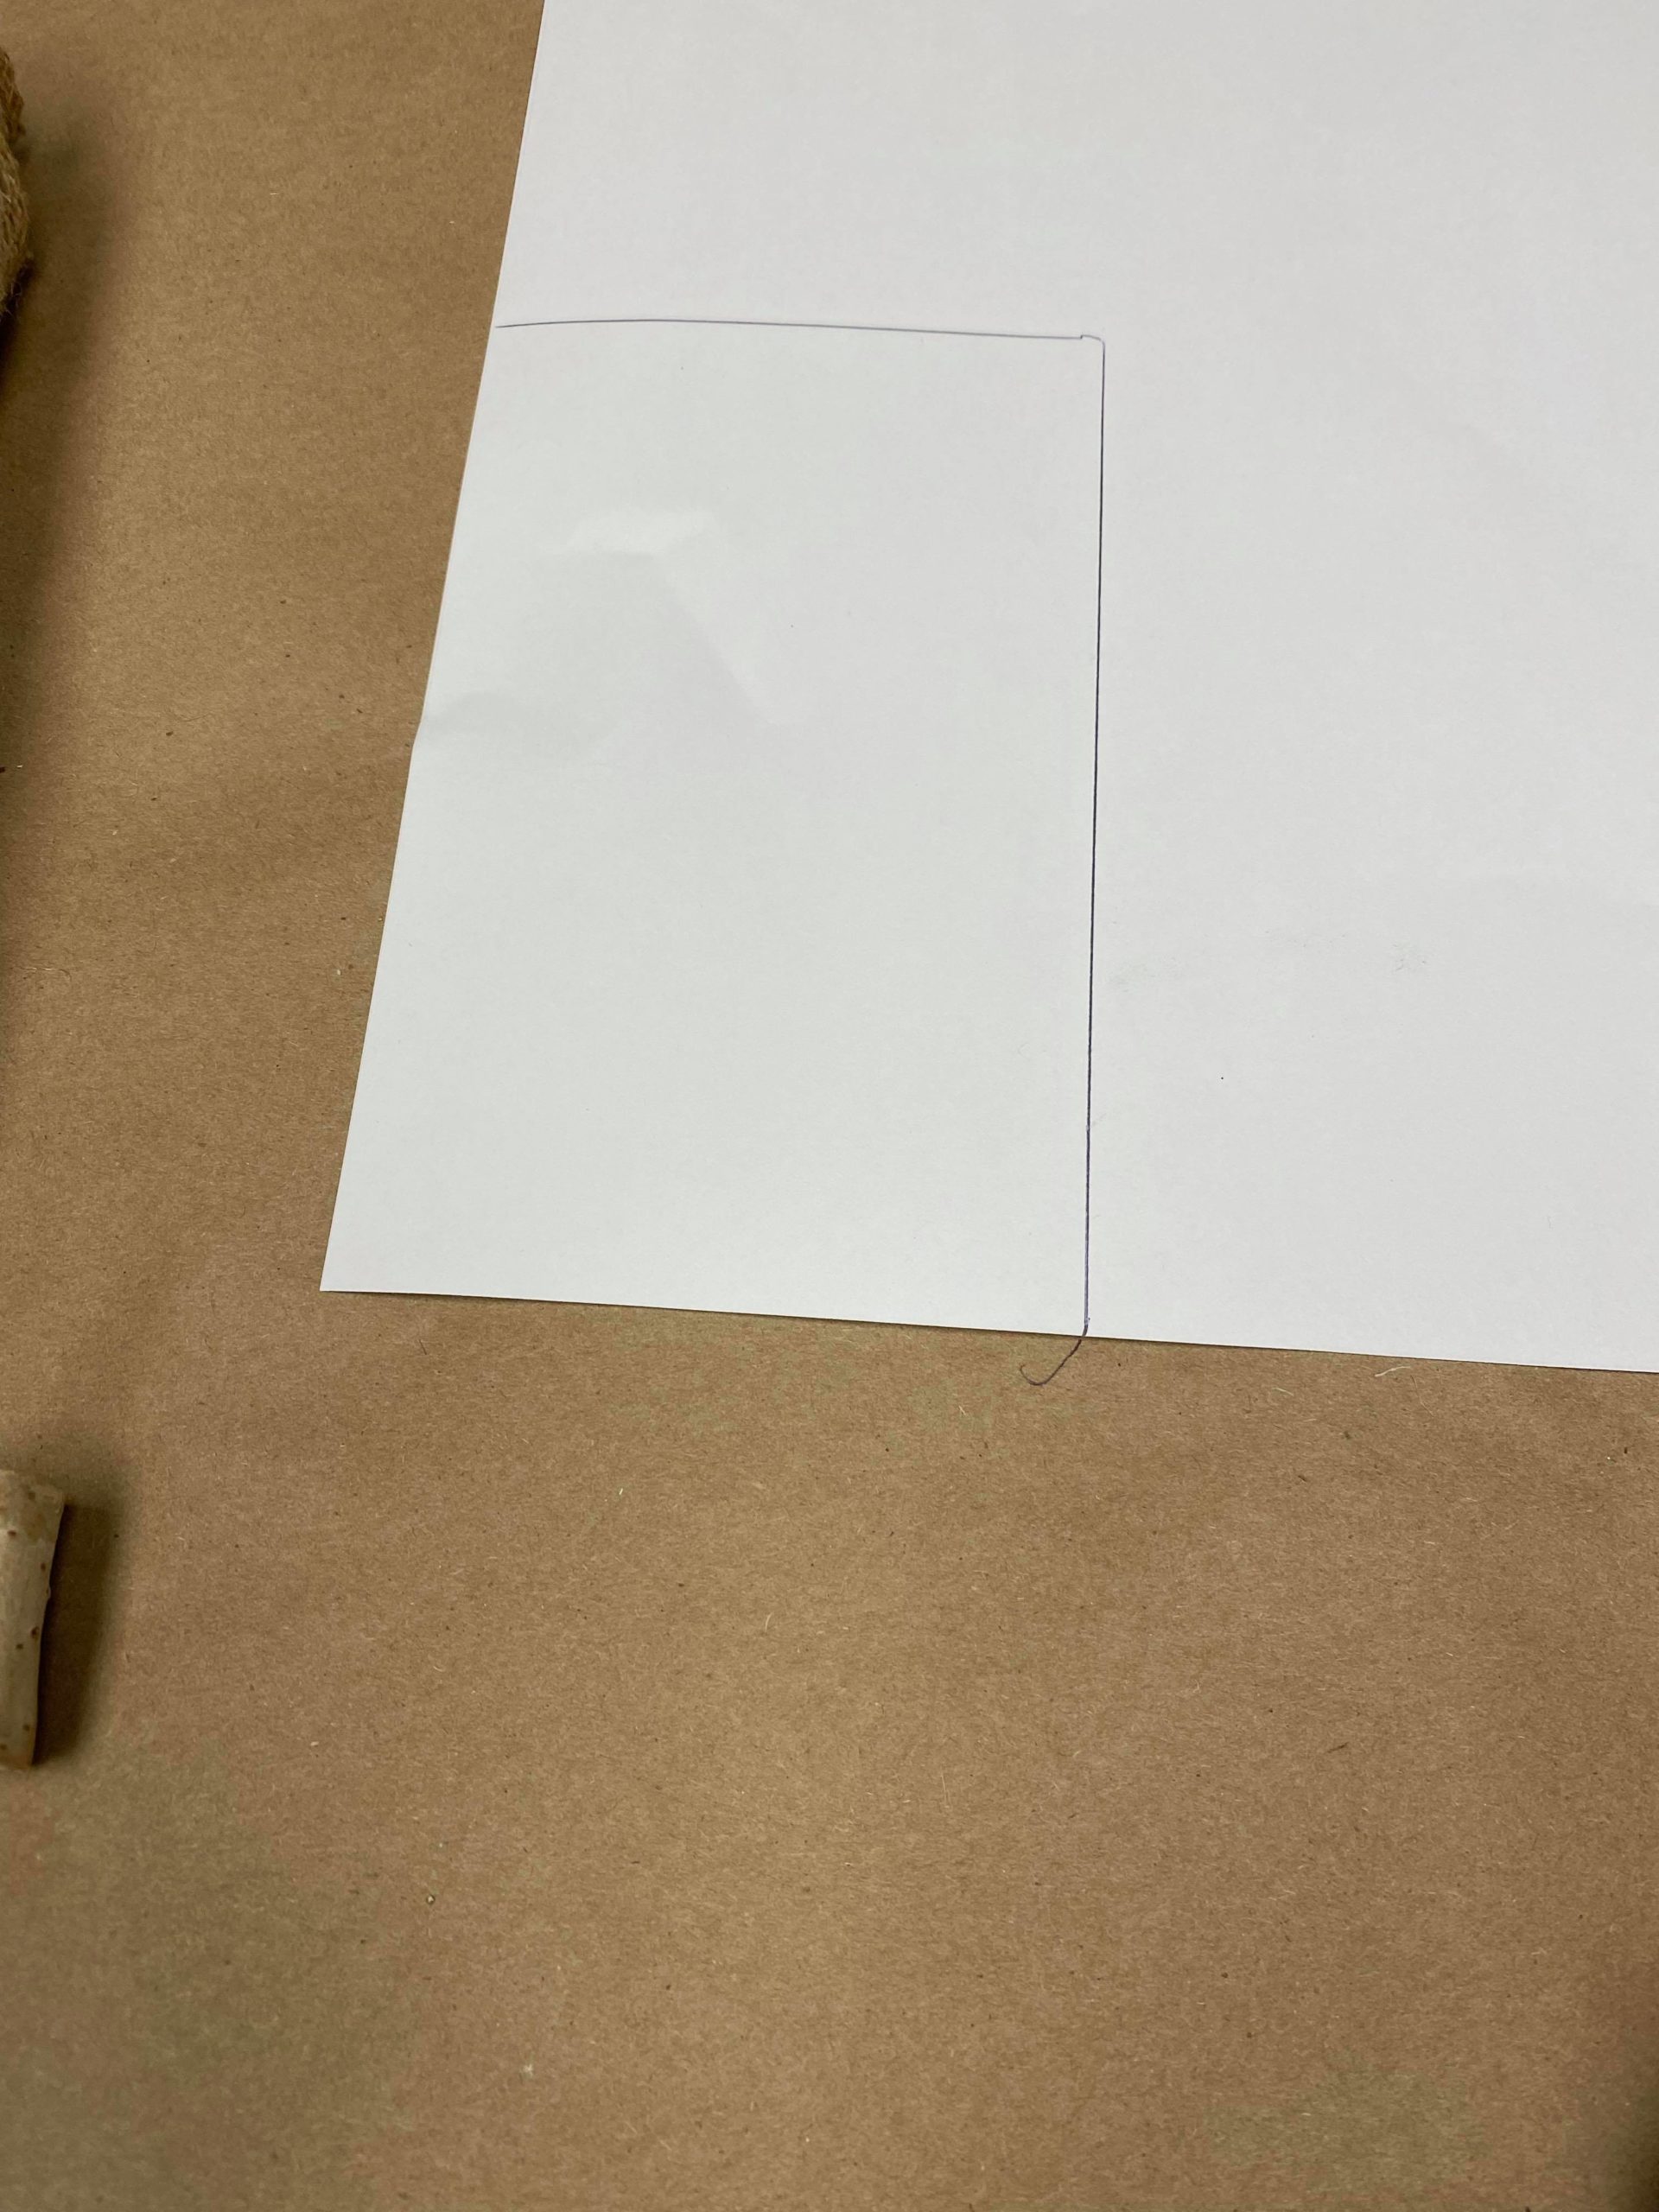
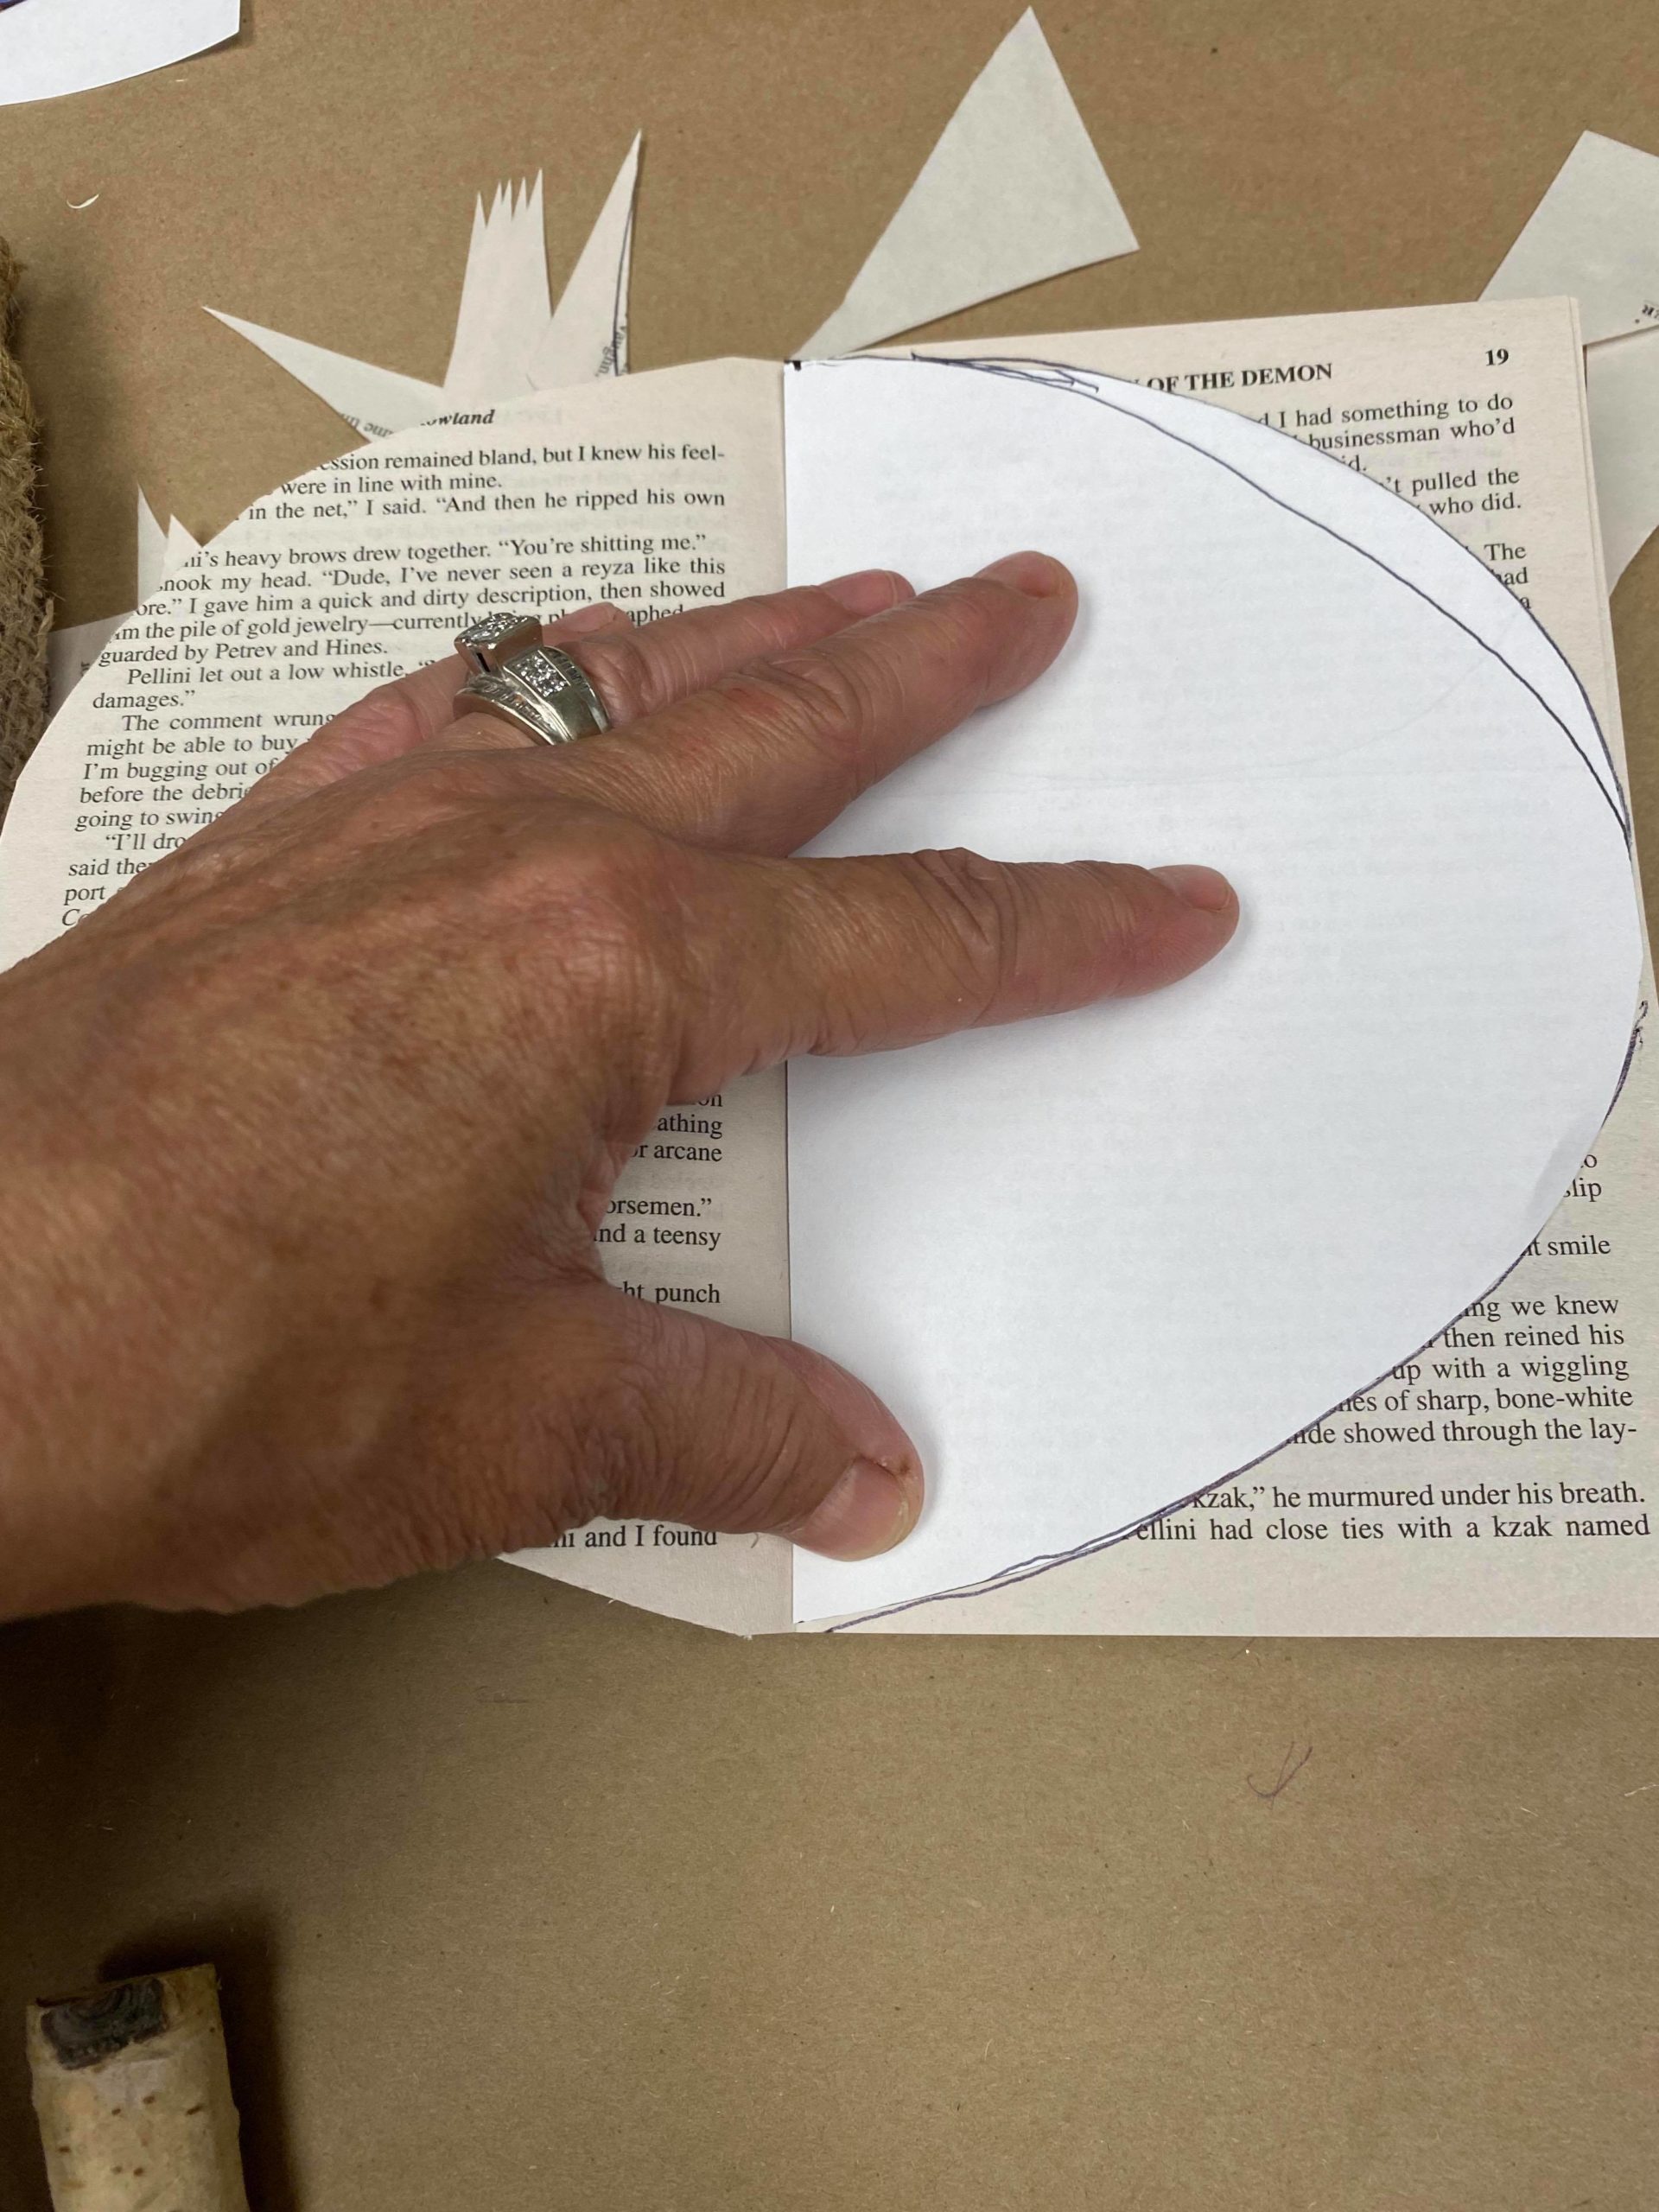
The first step is to trace the book onto a sheet of paper. This will help to cut out the right size pattern for the pumpkin.
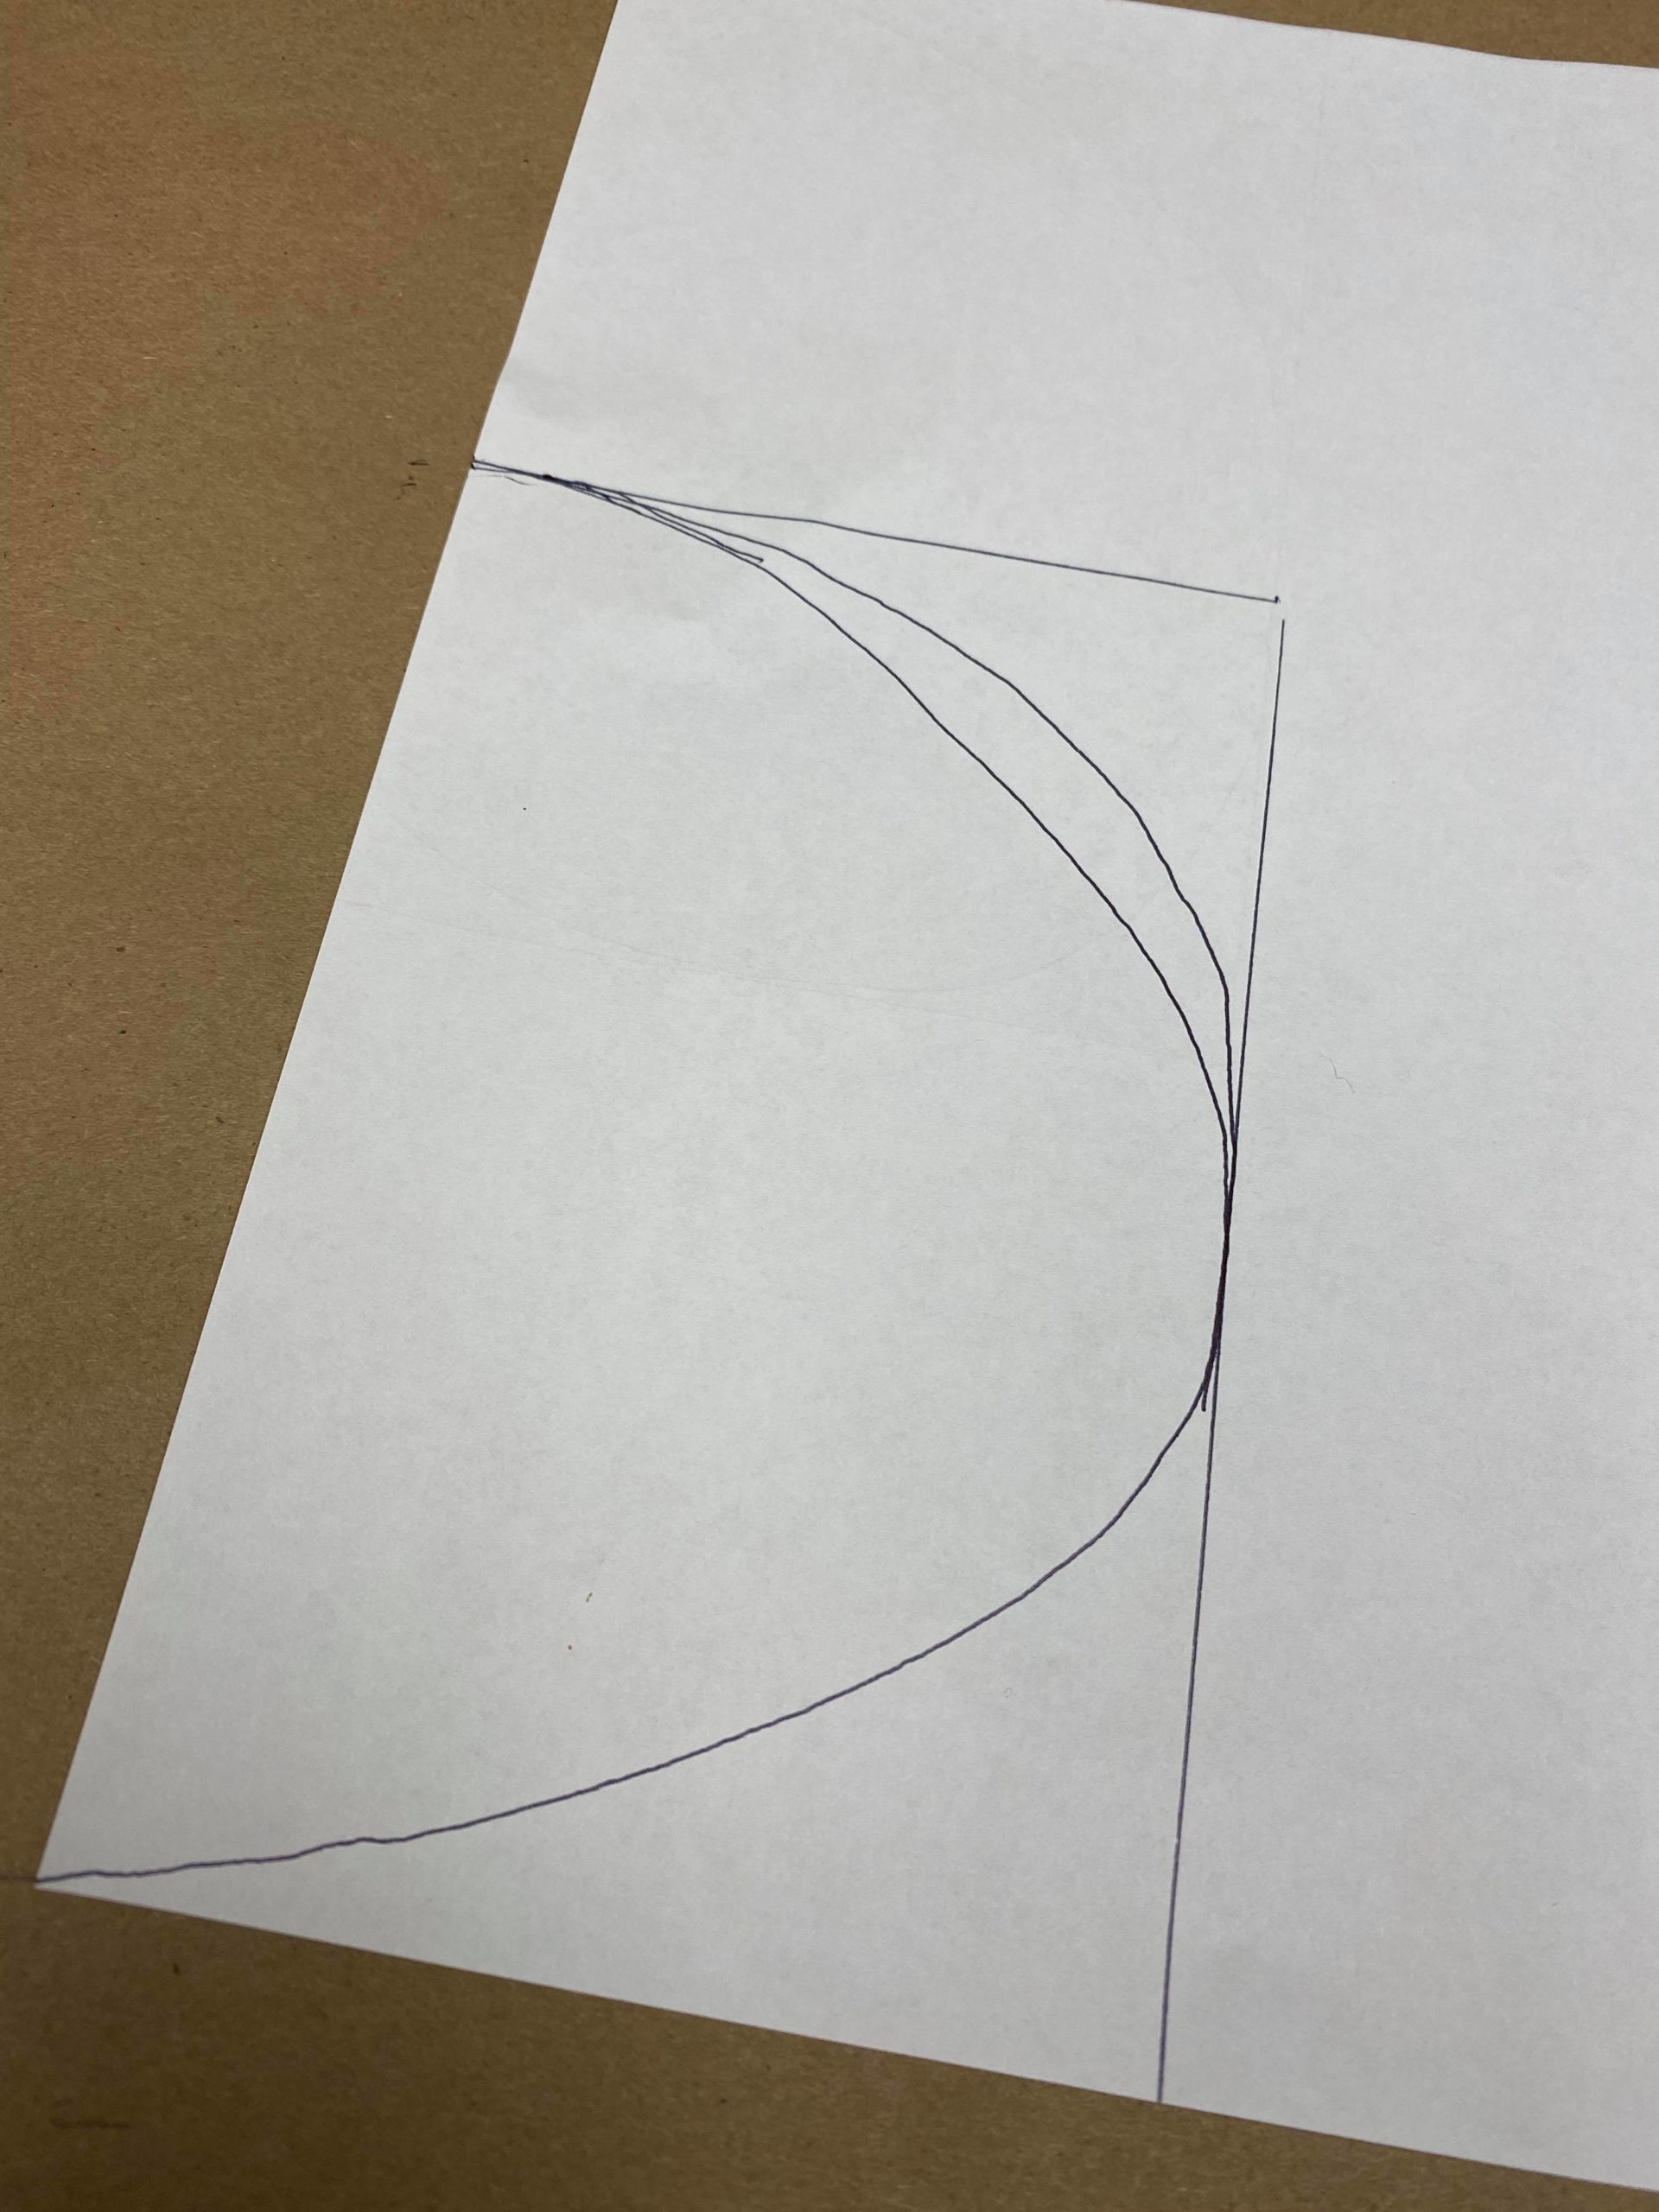
I then drew a pattern for the pumpkin. You will want to create a half of a circle that will fit the page of the book.
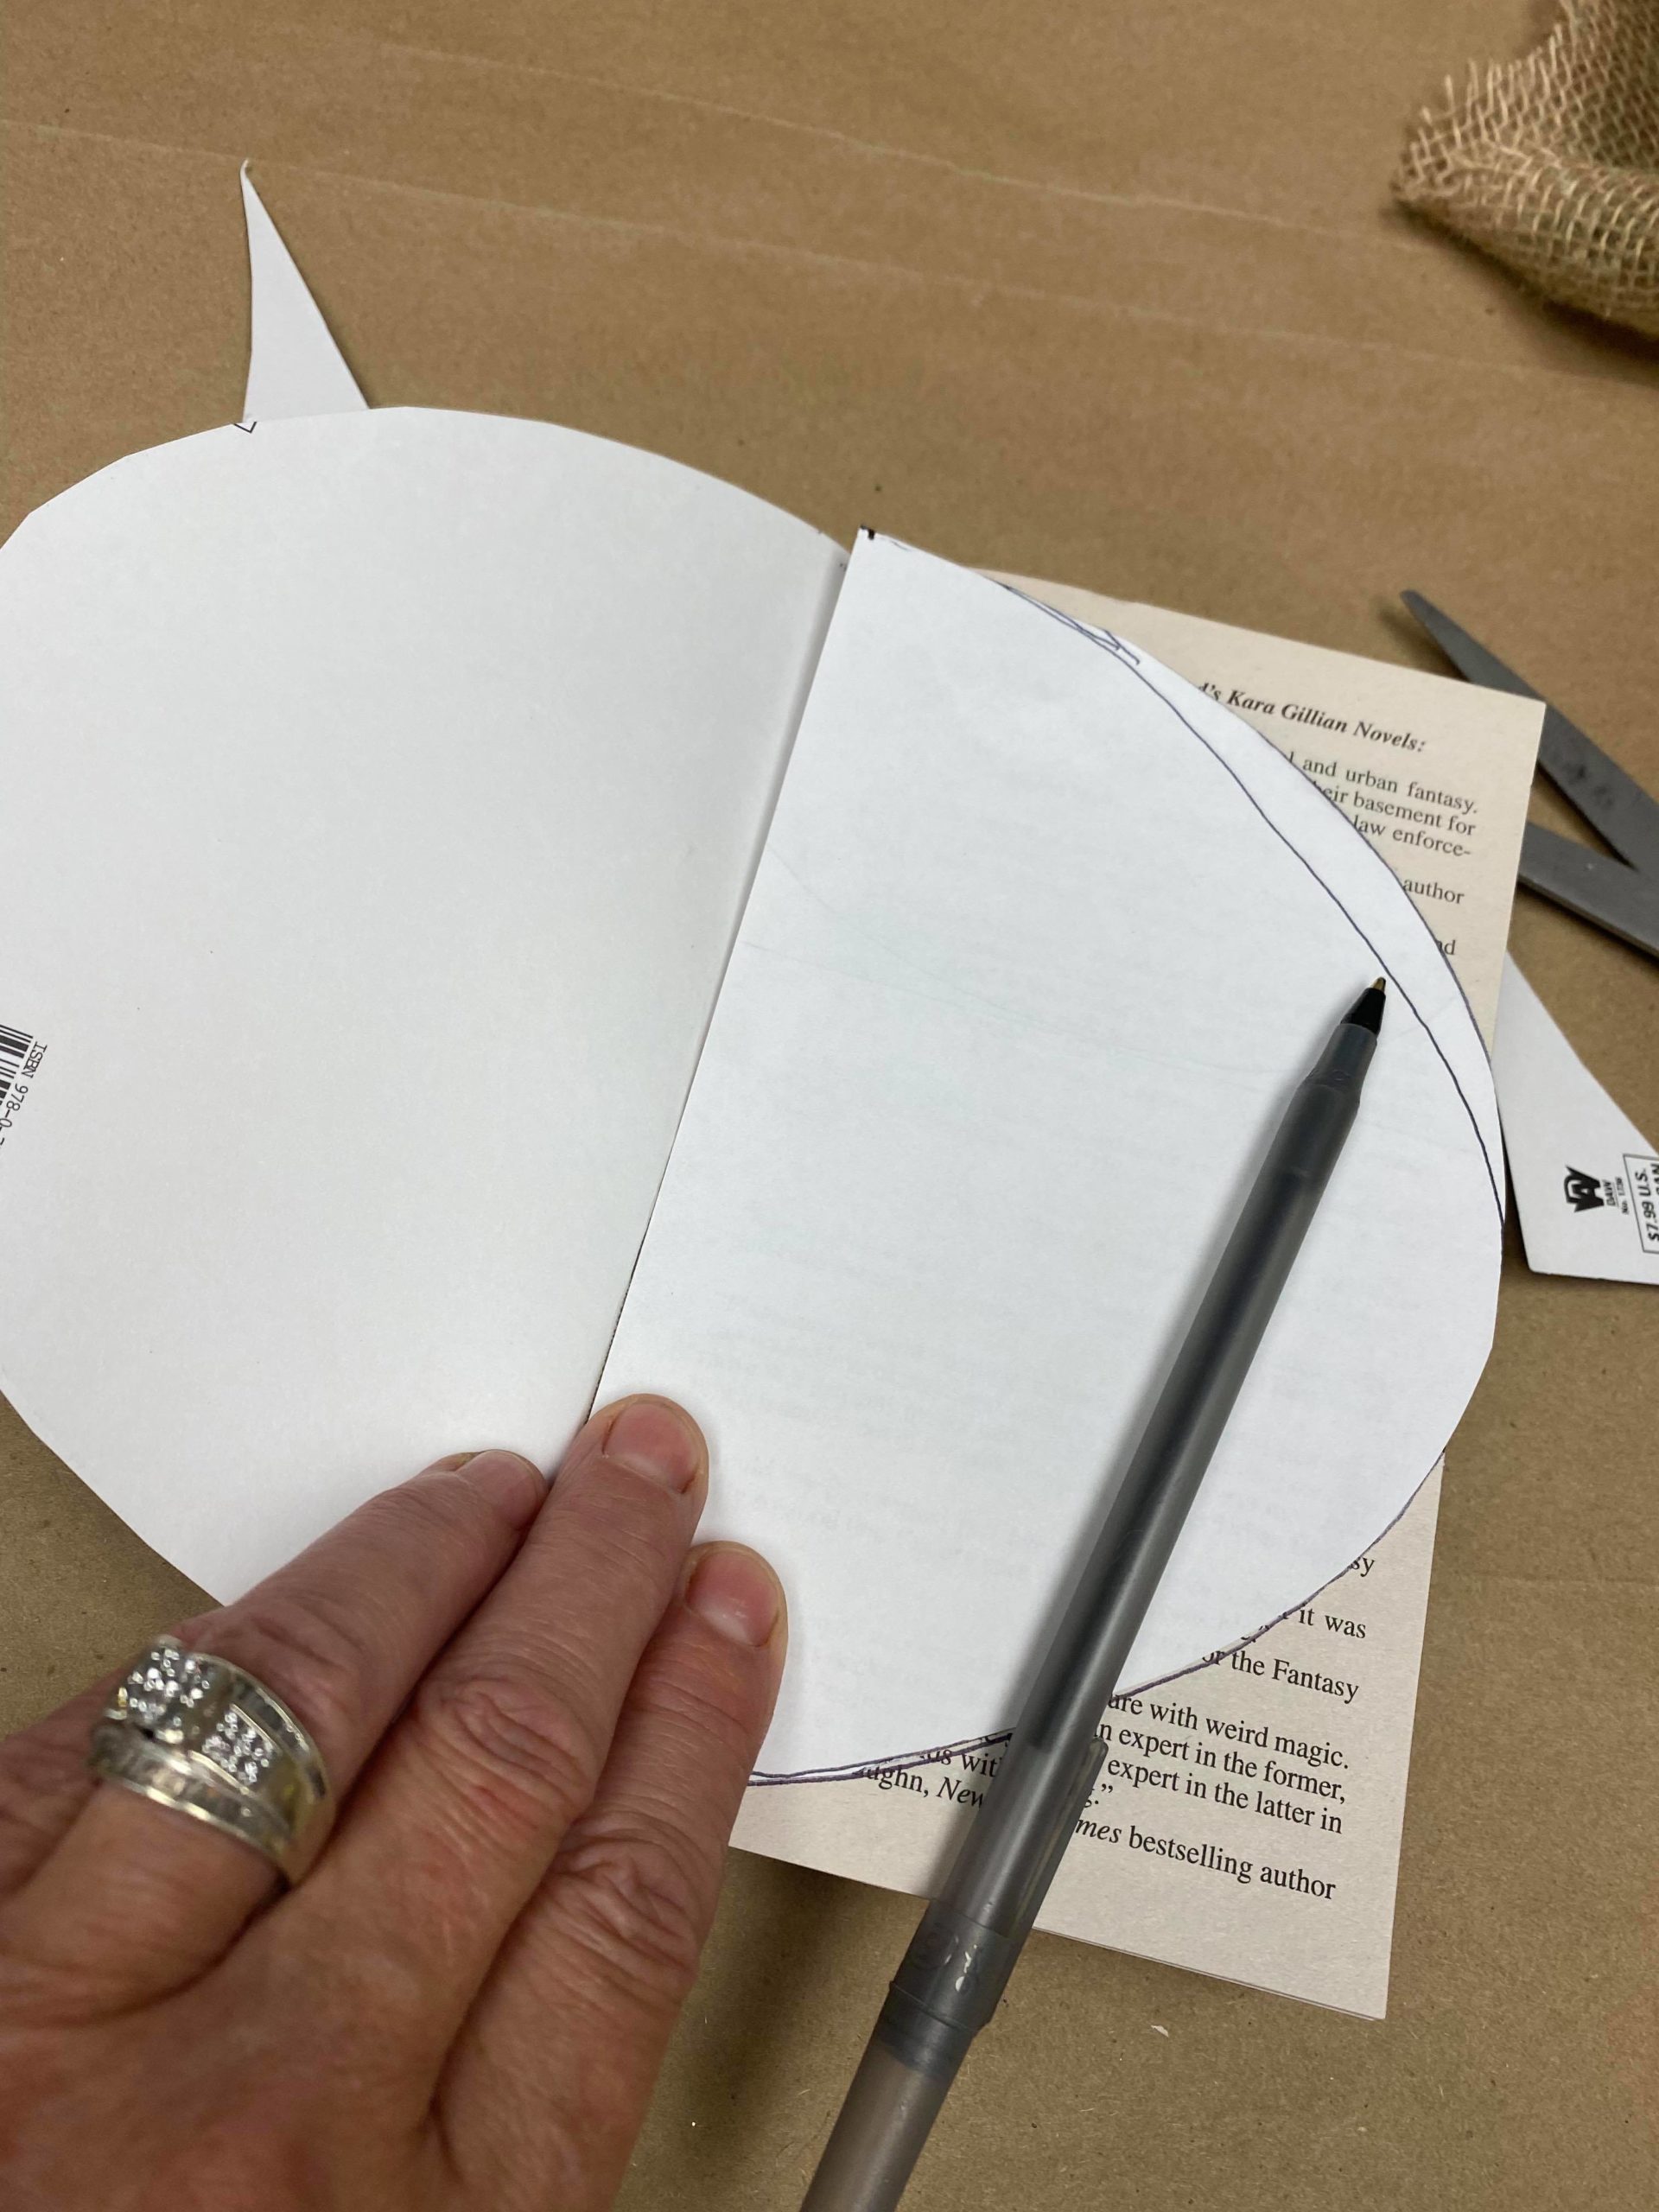
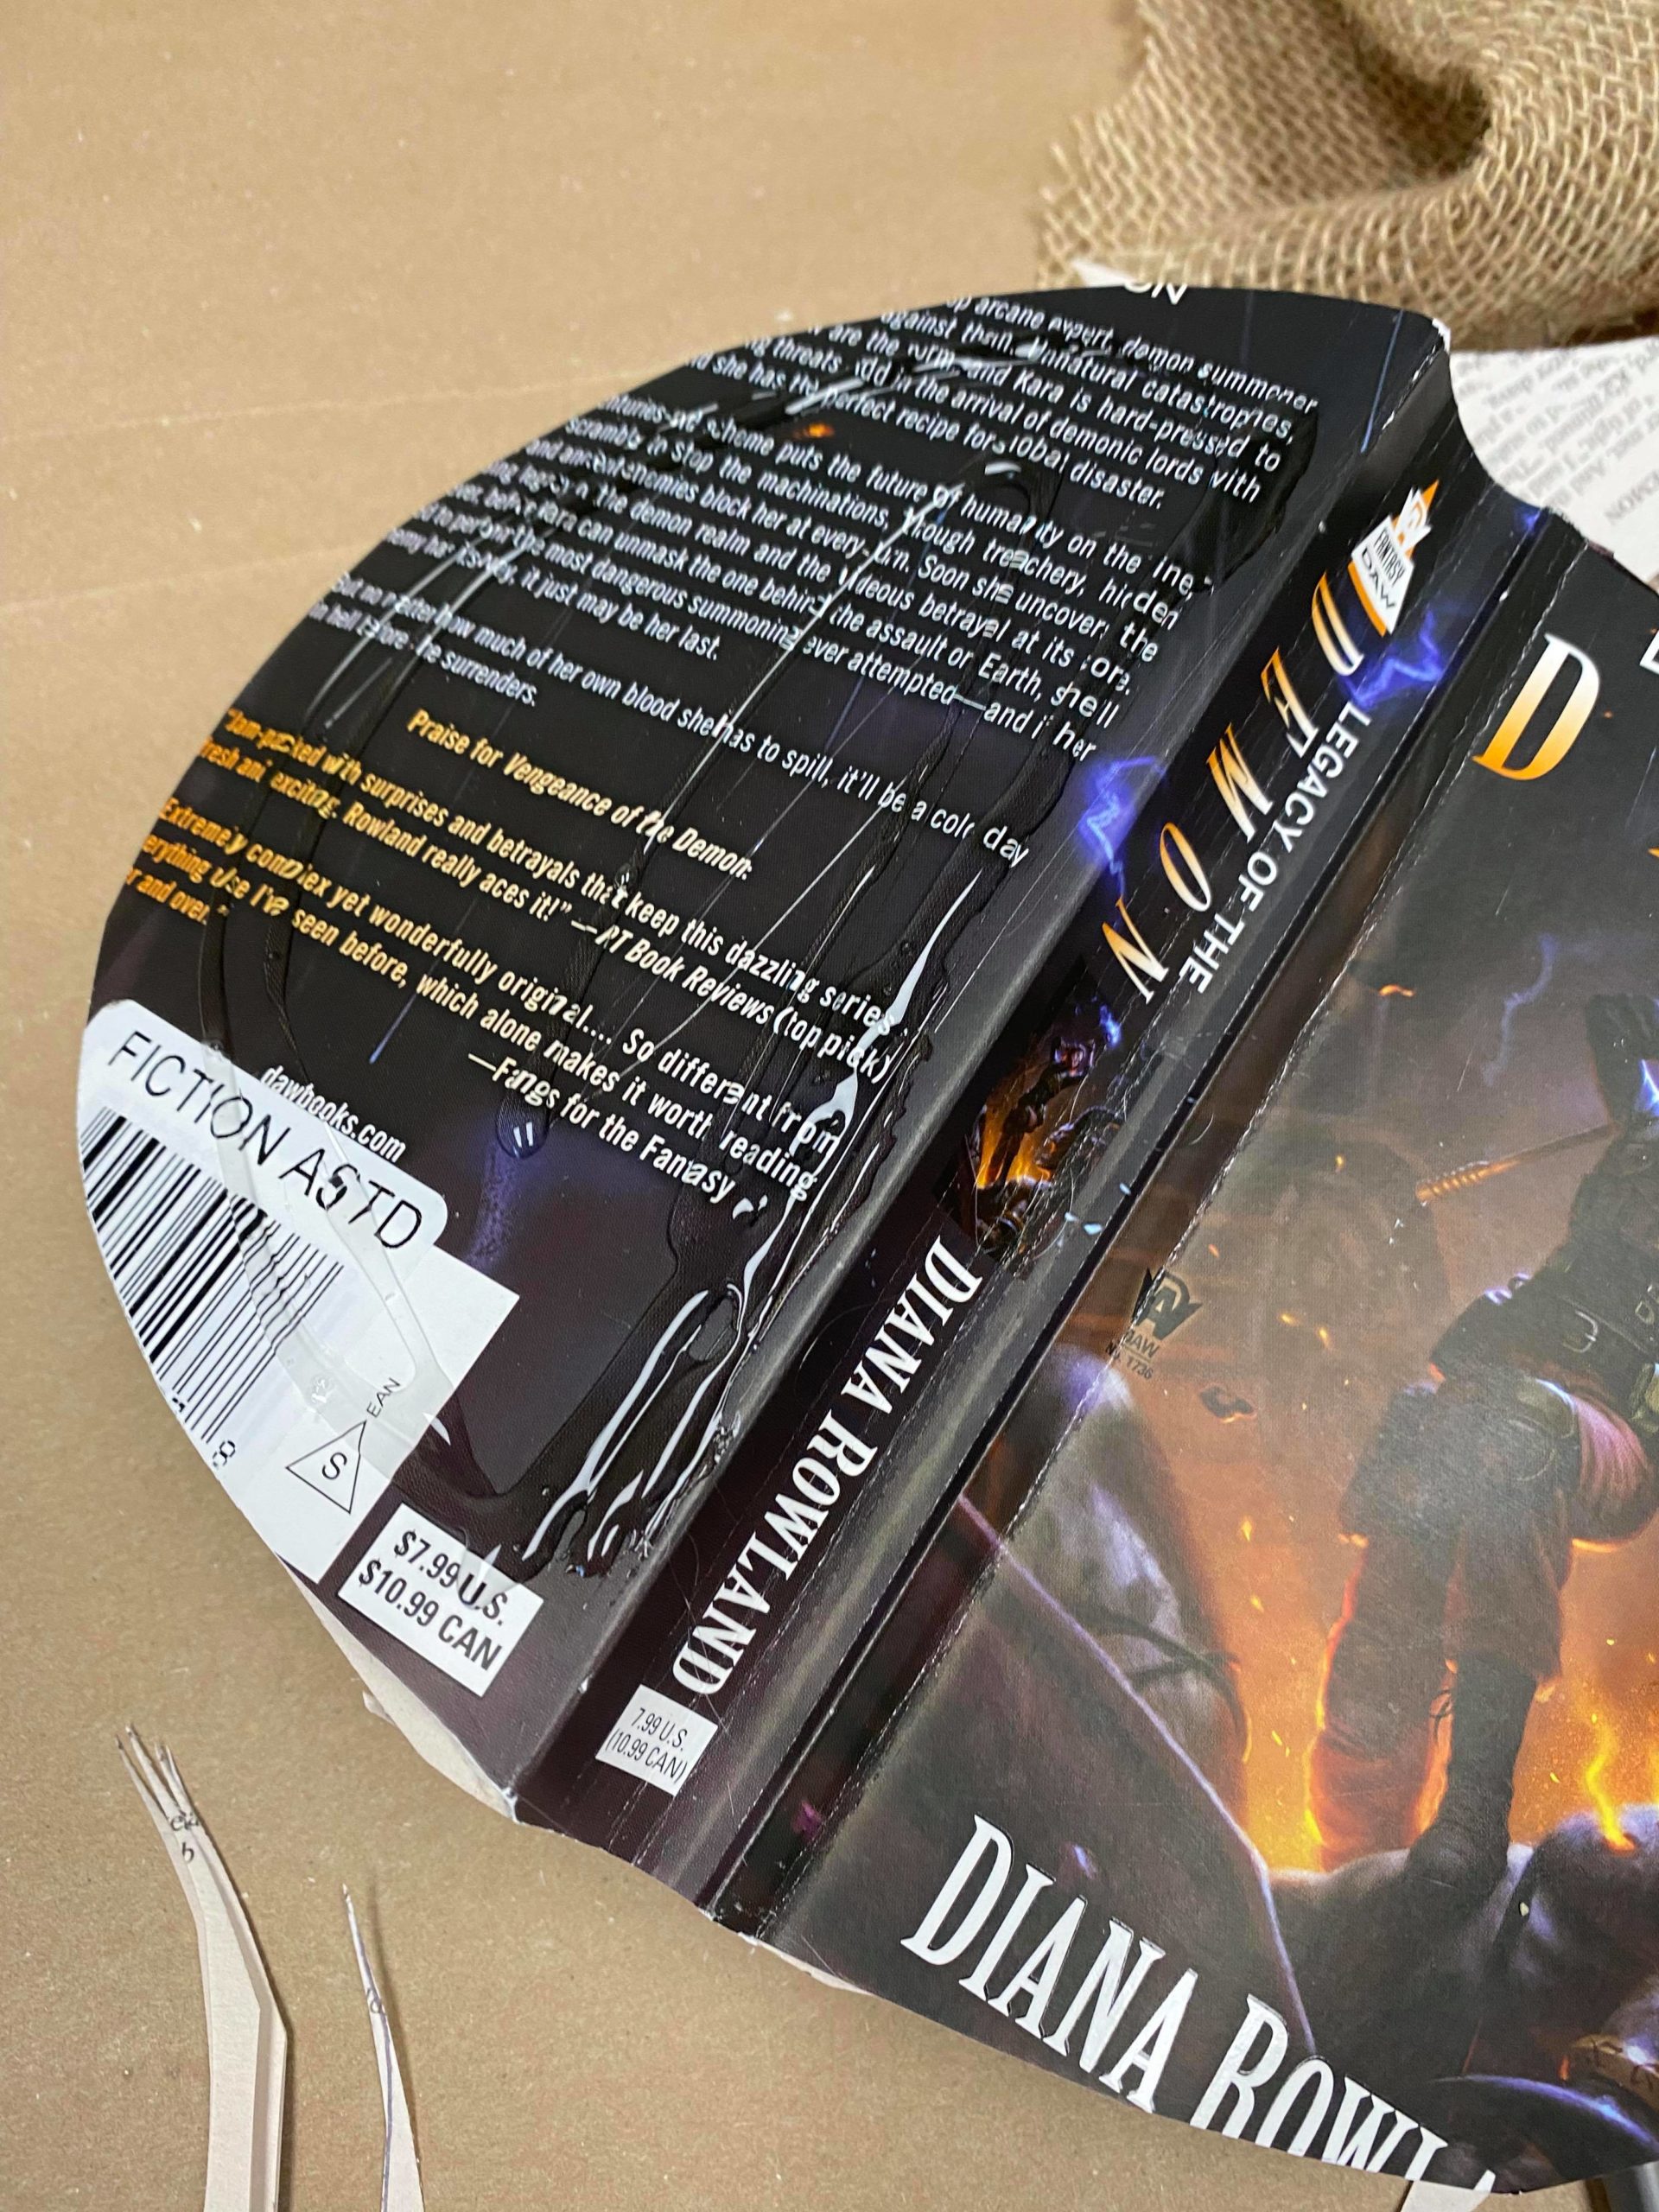
You will want to trace the pattern onto the book and start cutting. I cut the cover first and then continued tracing and cutting. You can trace the pattern onto a page and then cut a bunch at once.
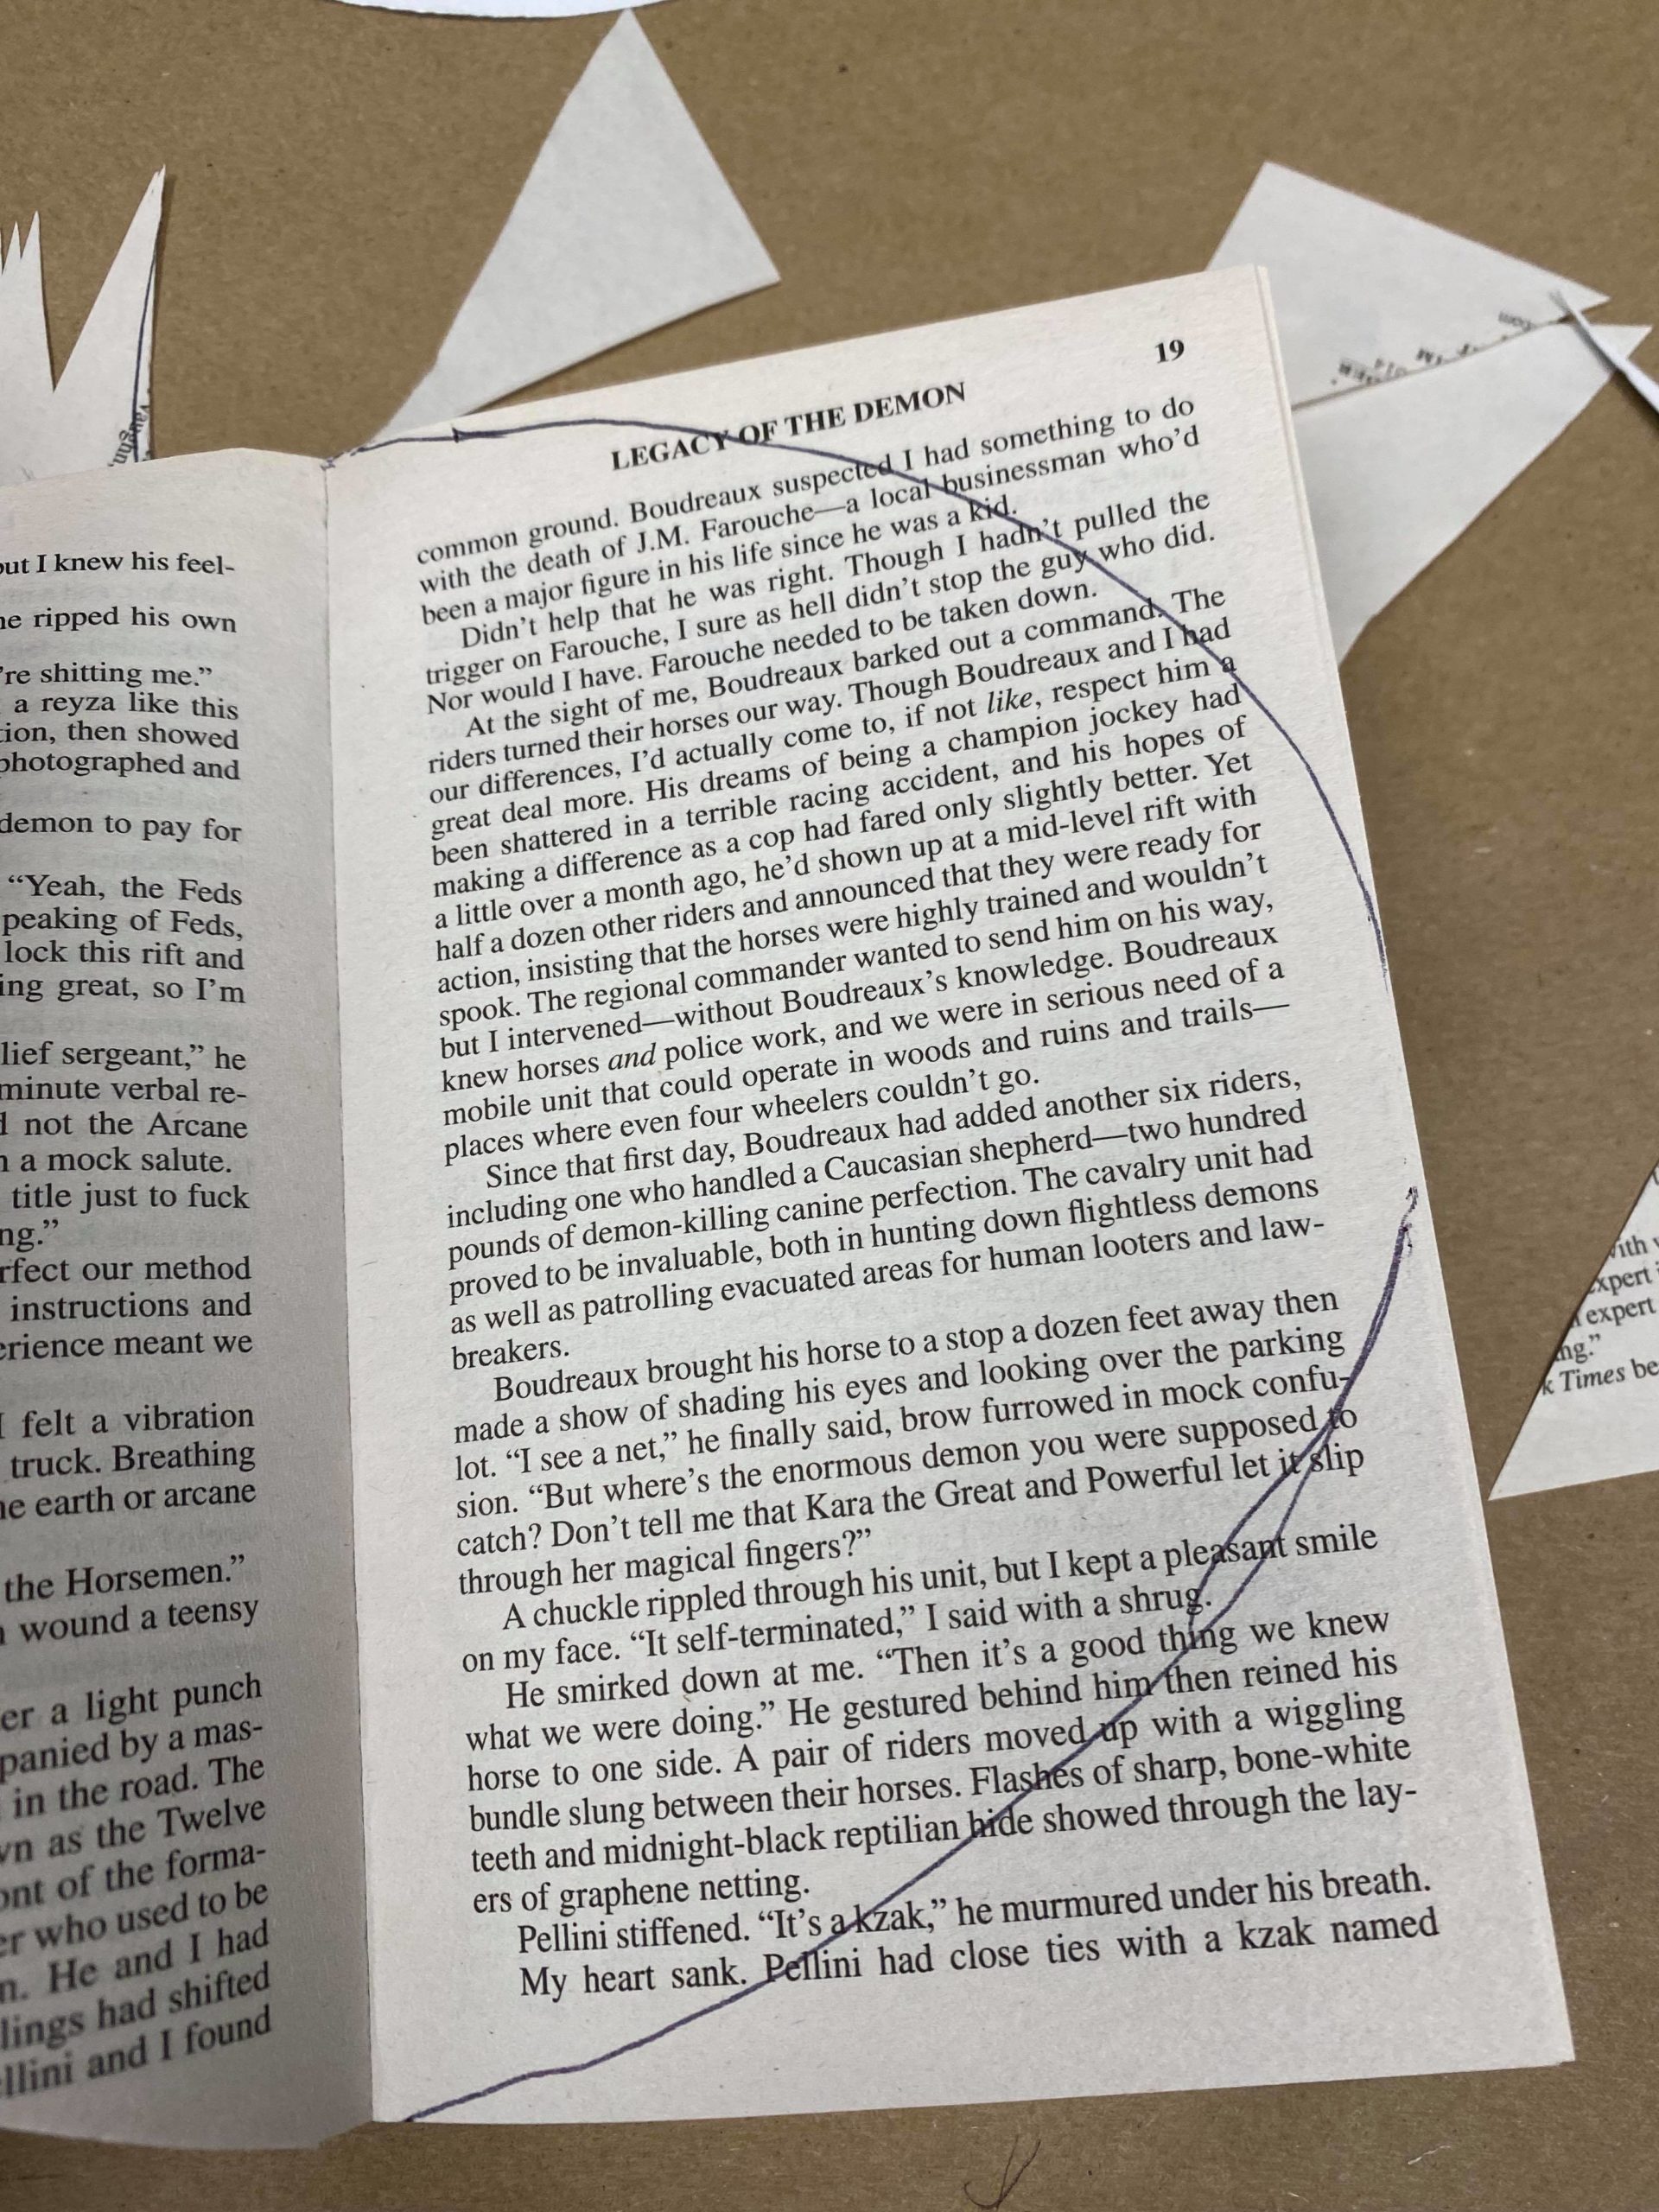
You will continue tracing and cutting until the whole book is cut to the shape of the pattern.
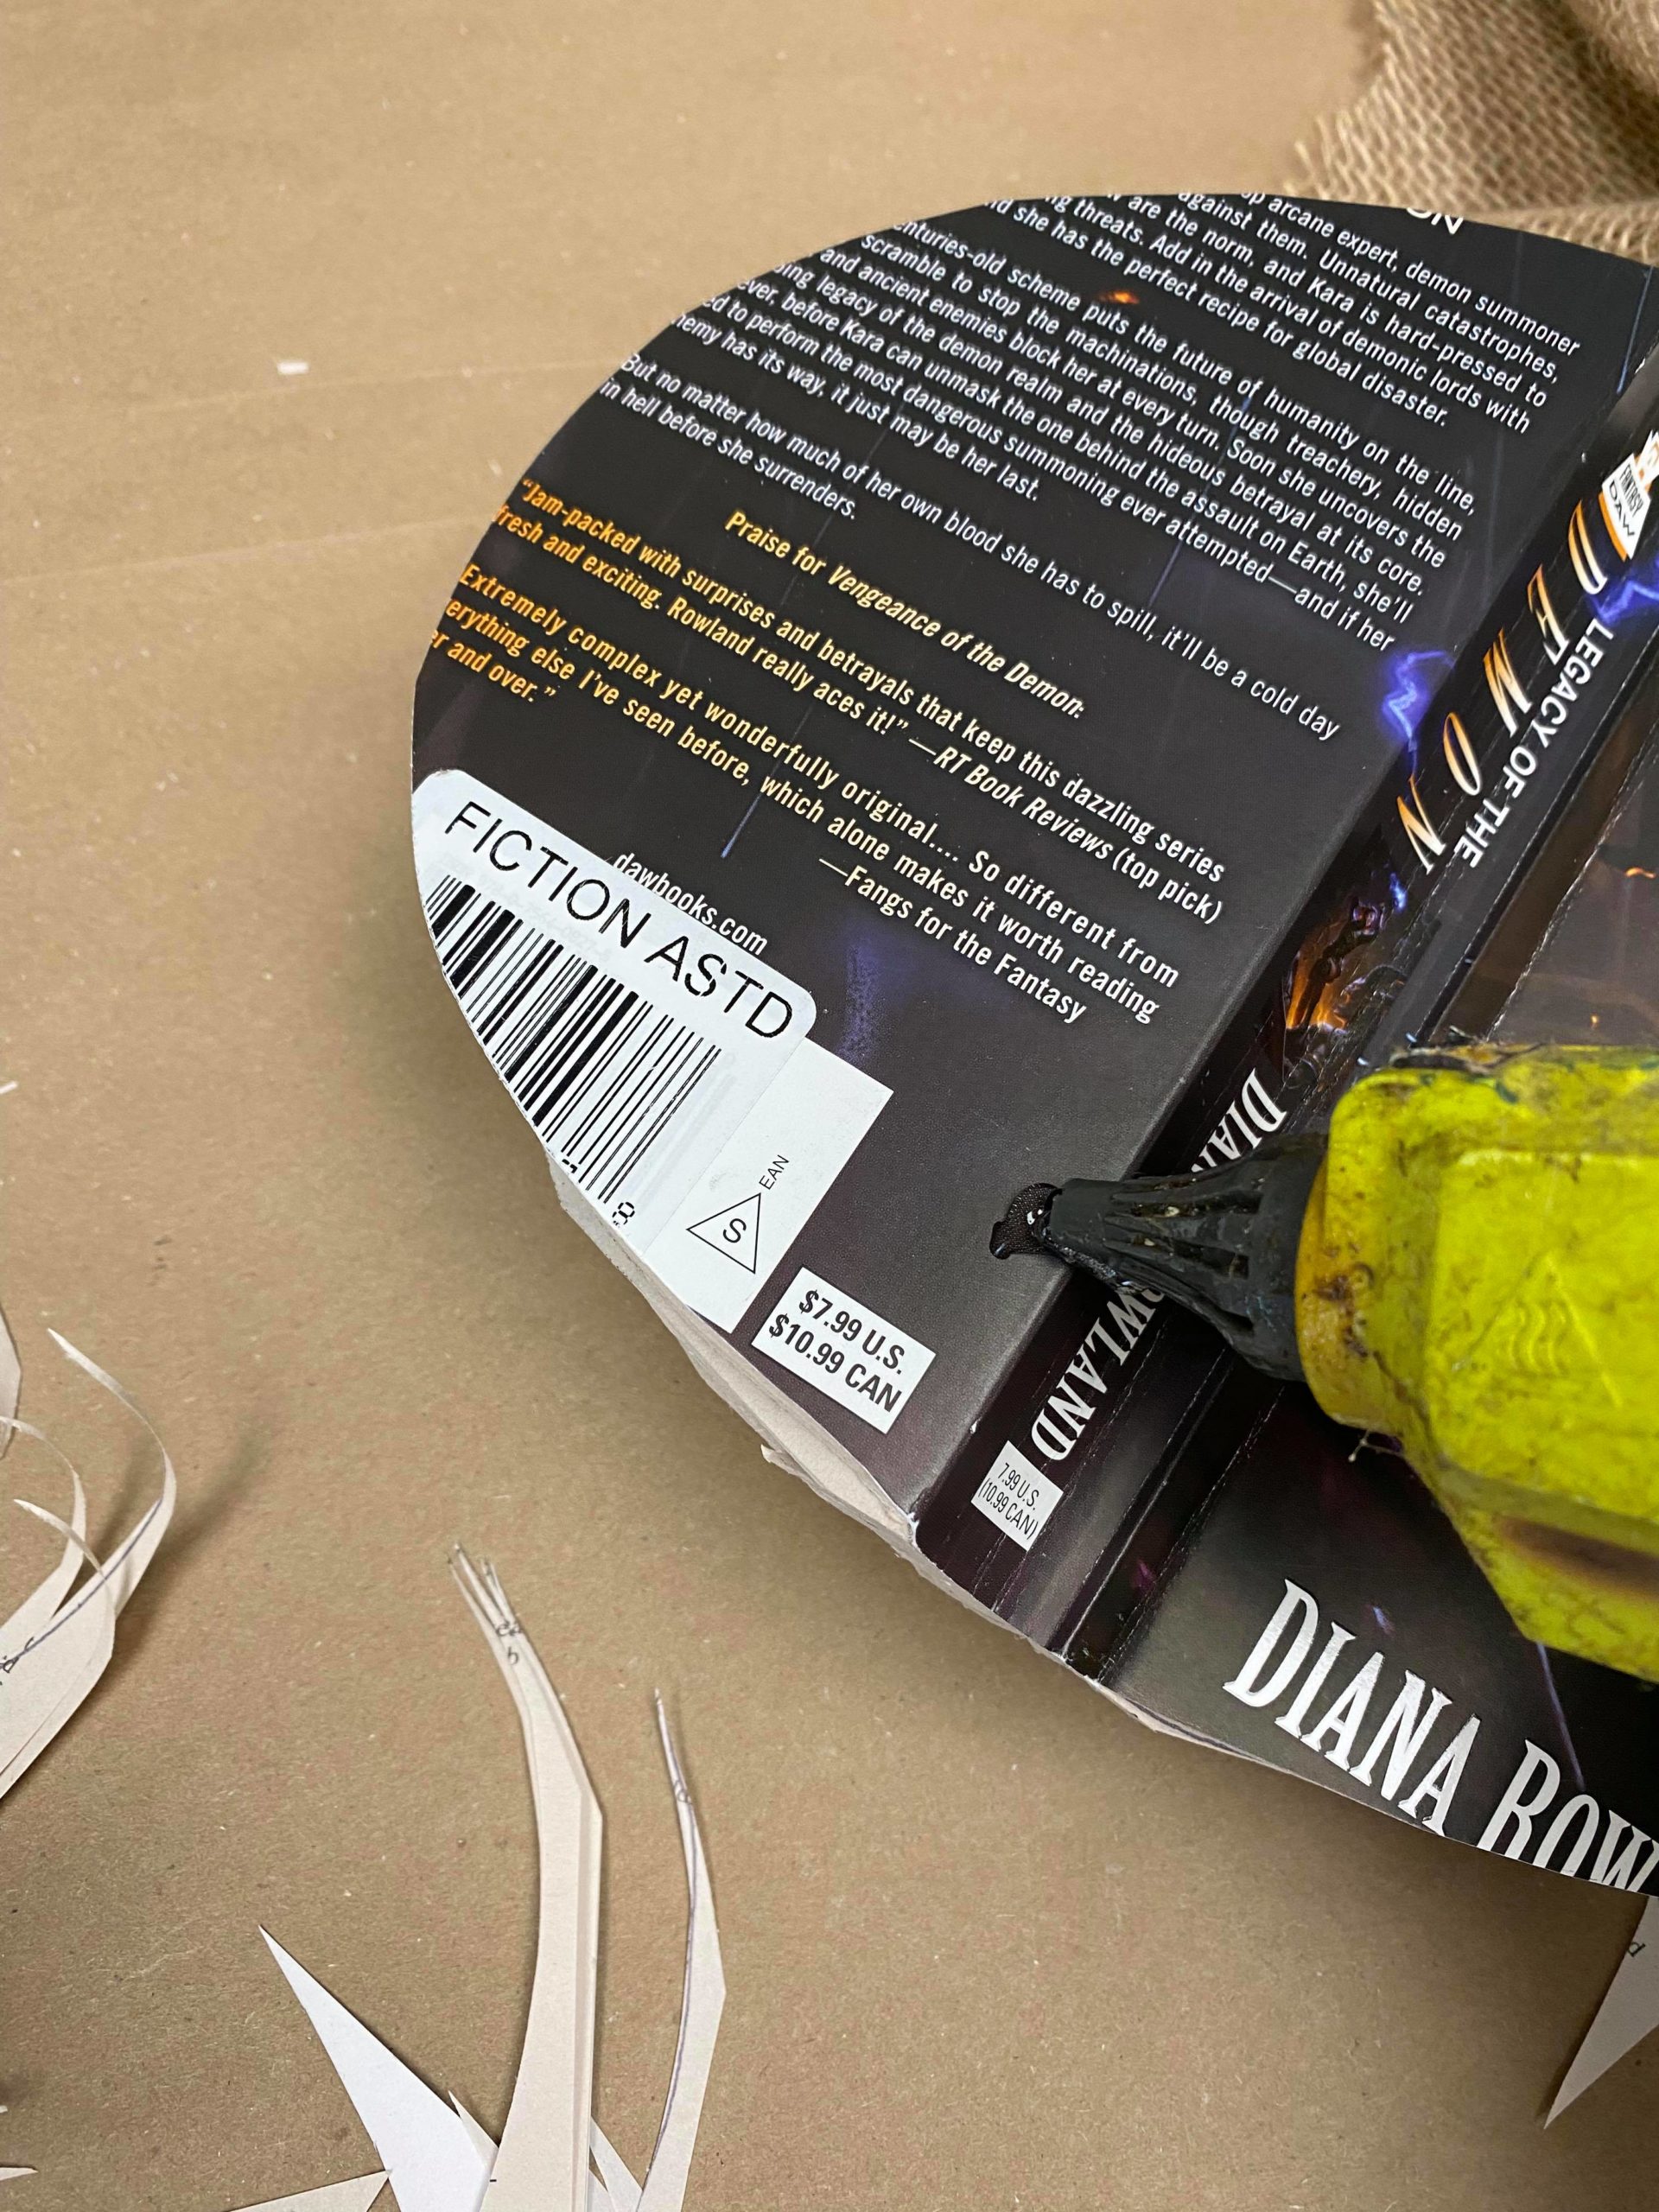
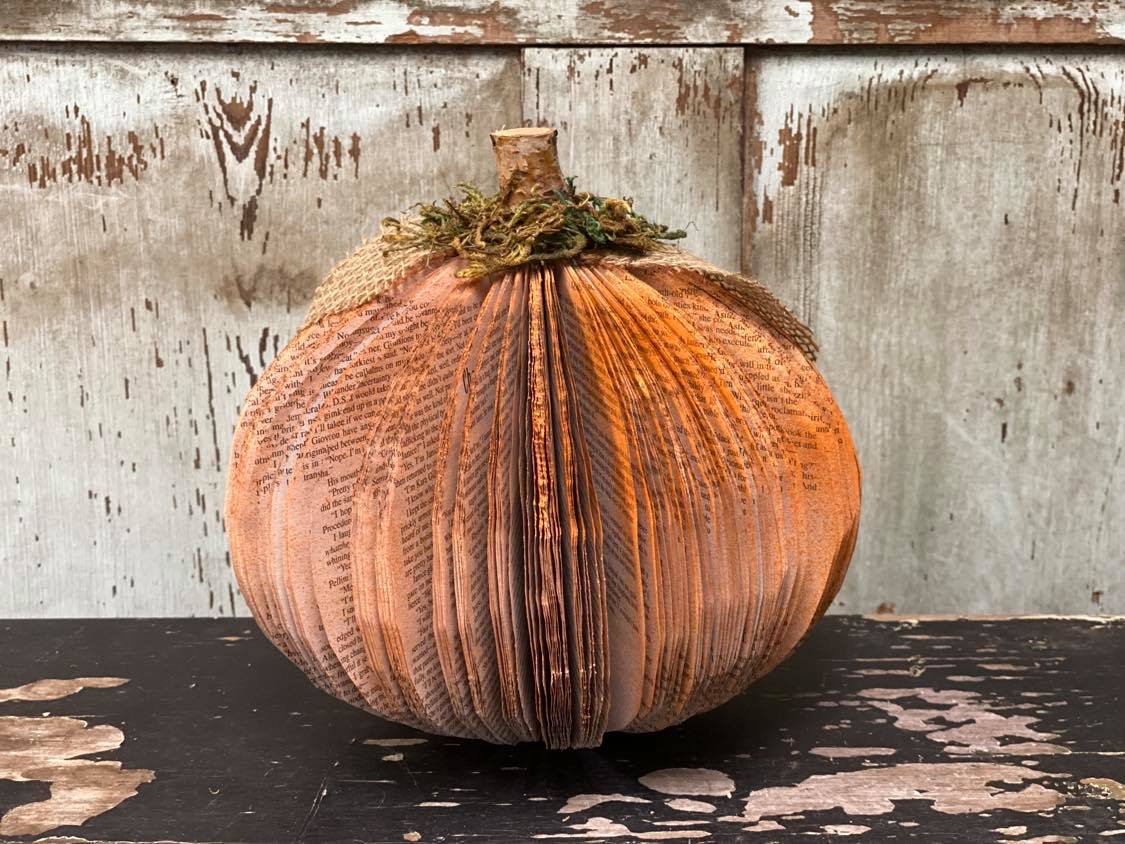
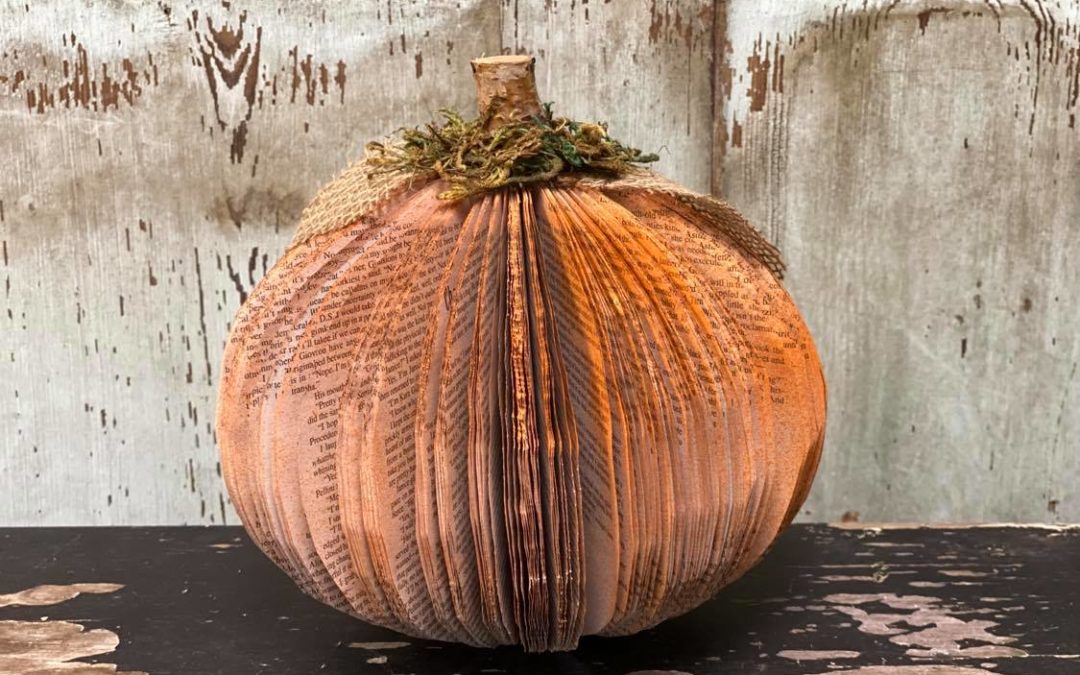
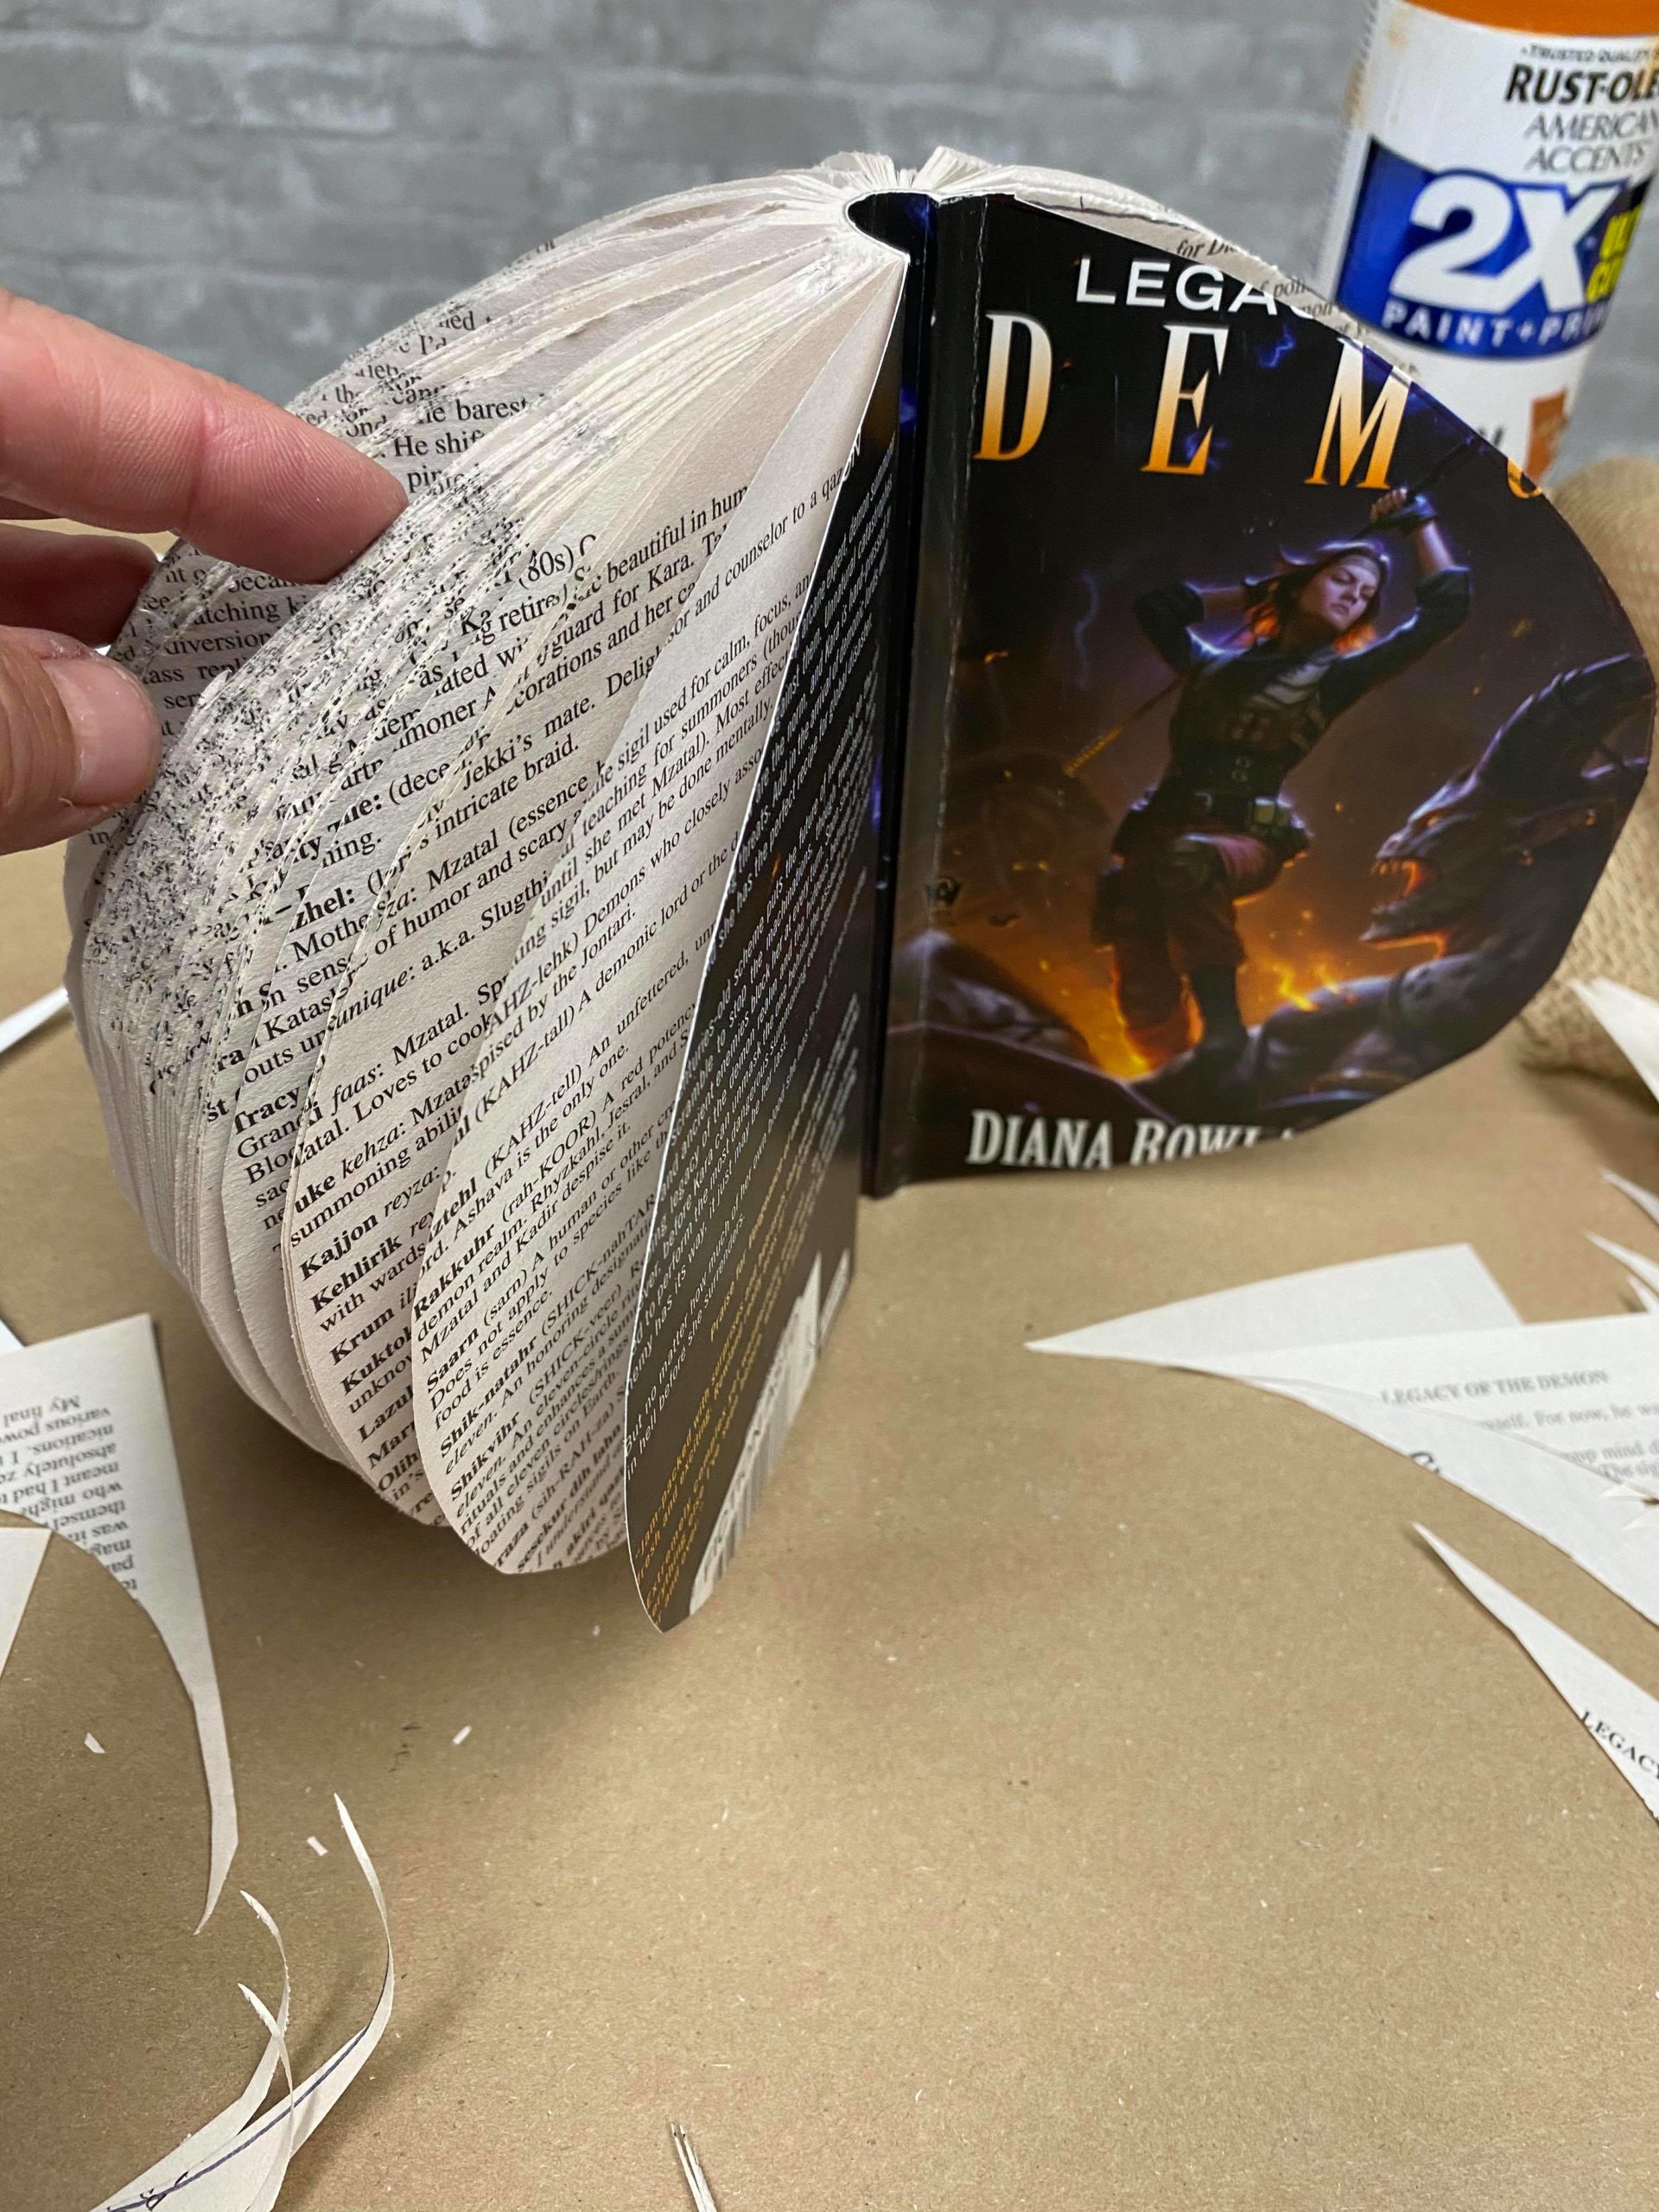
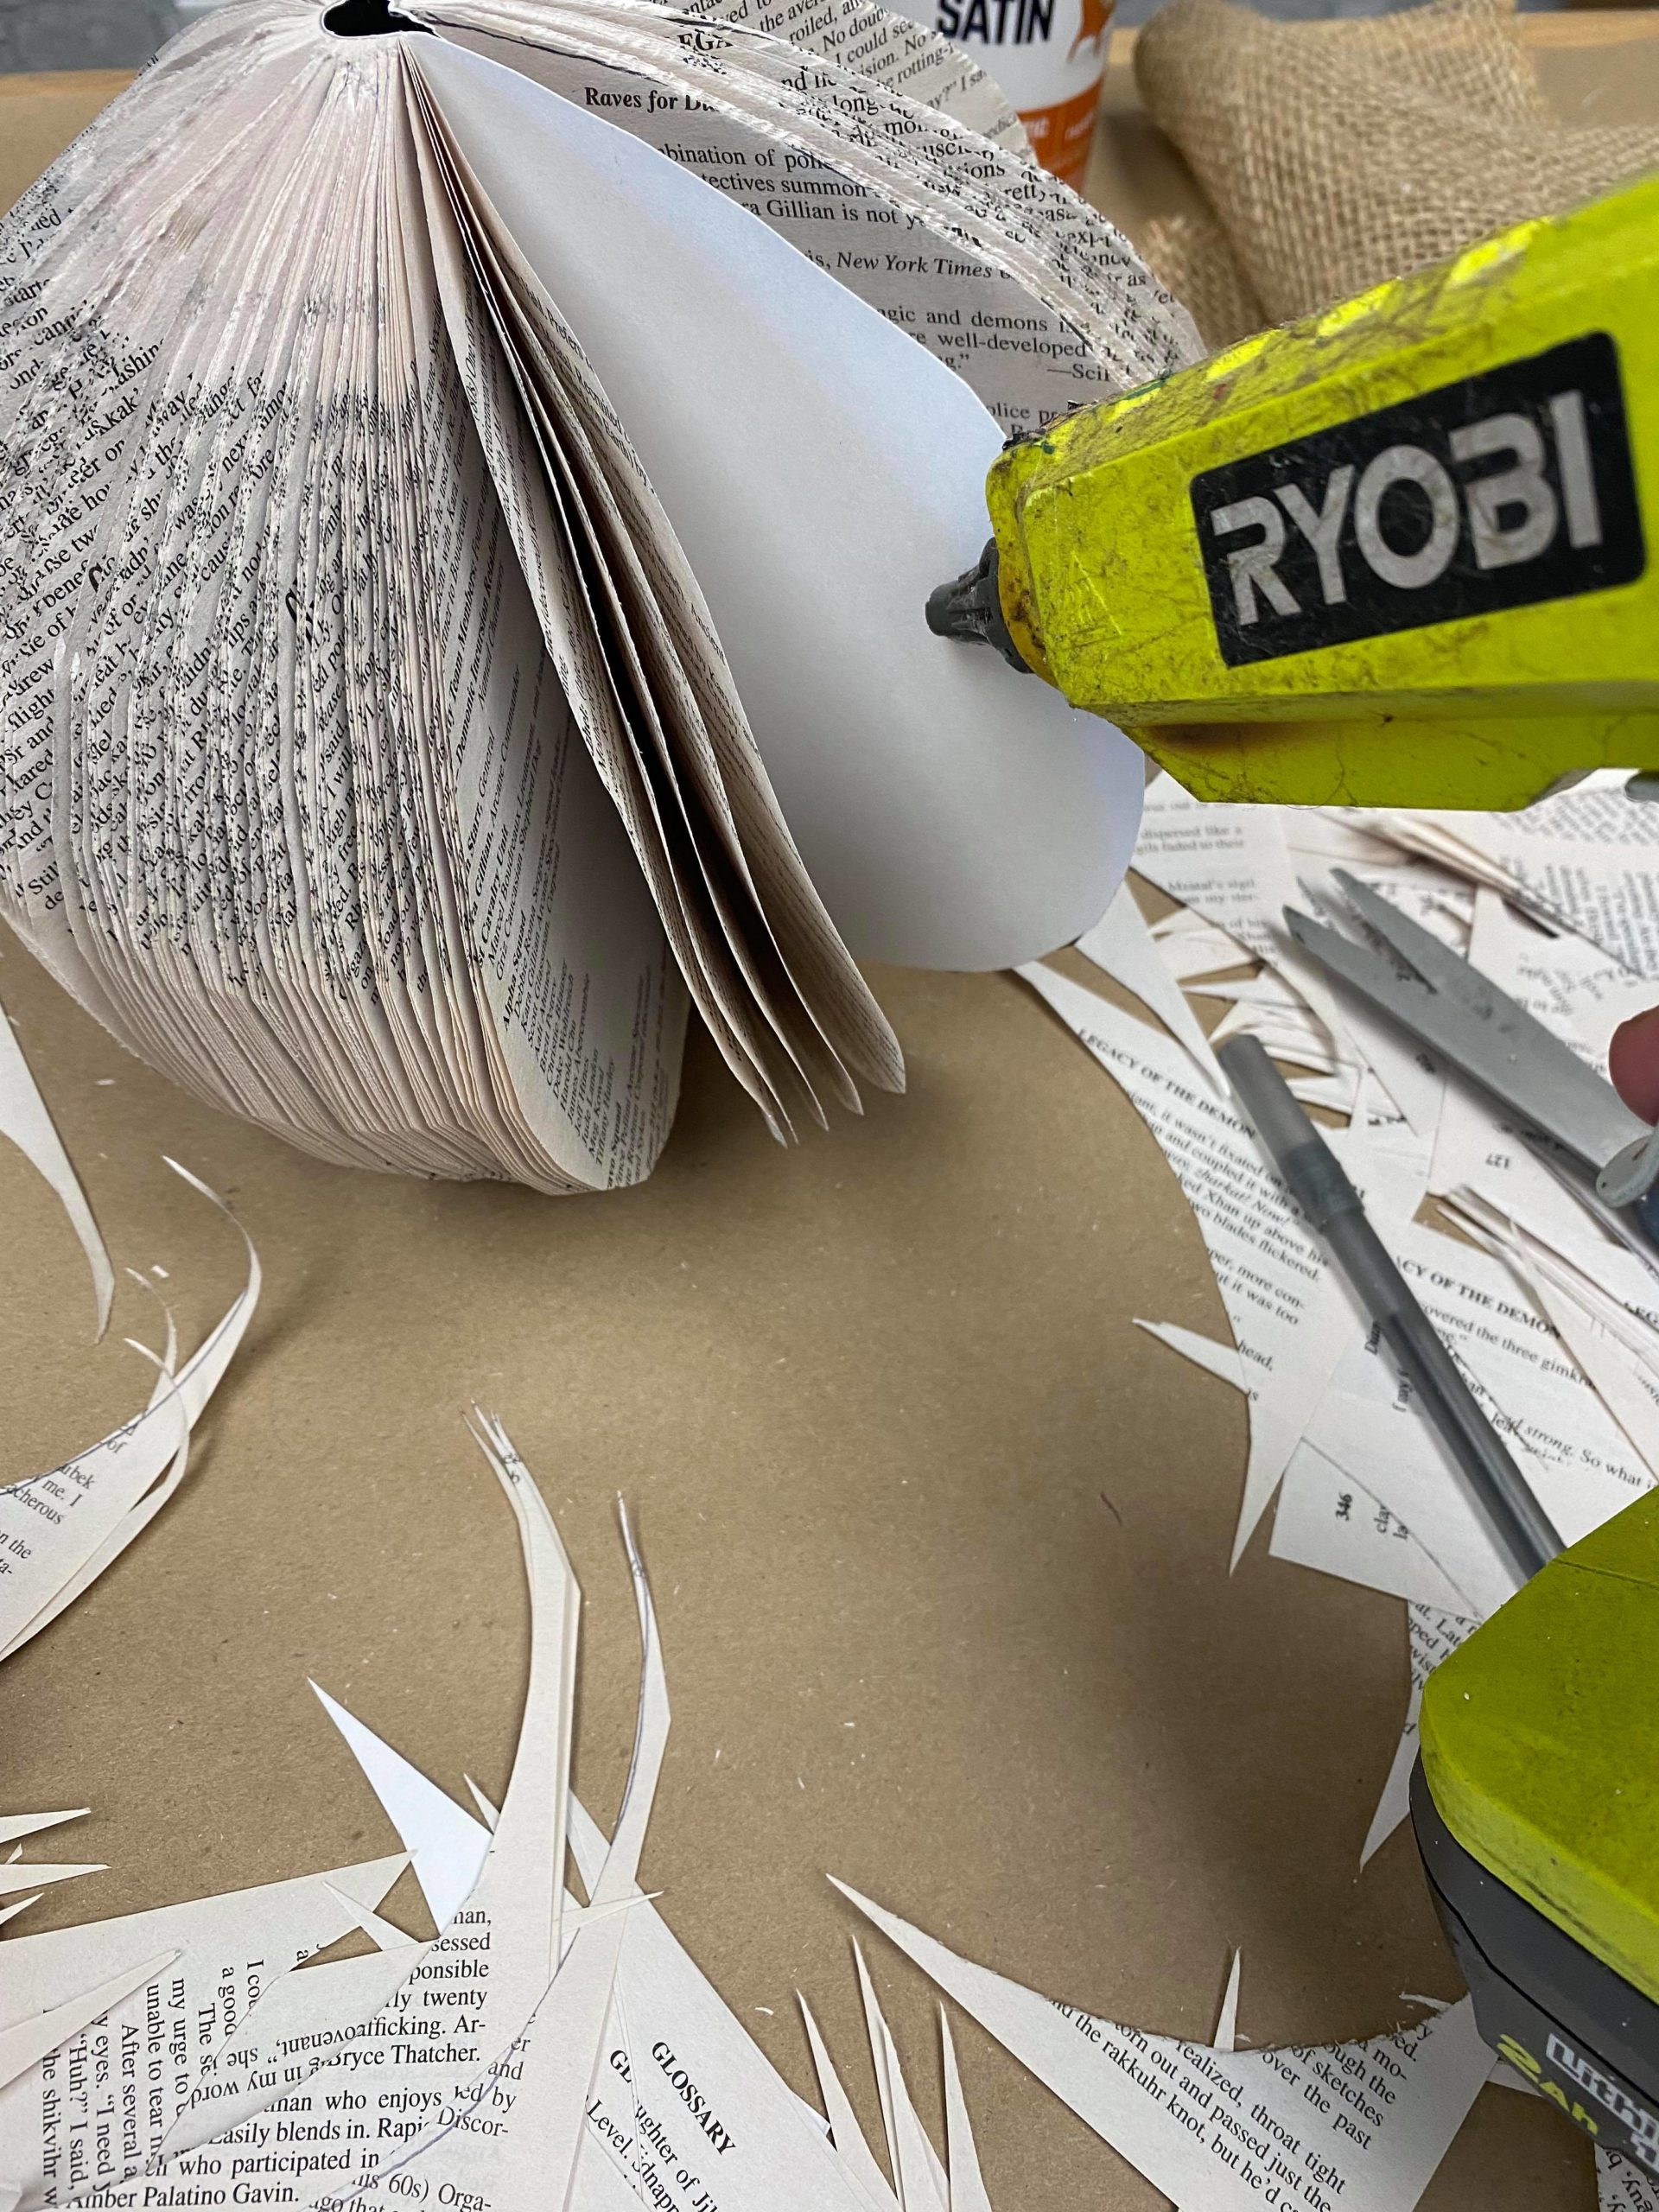
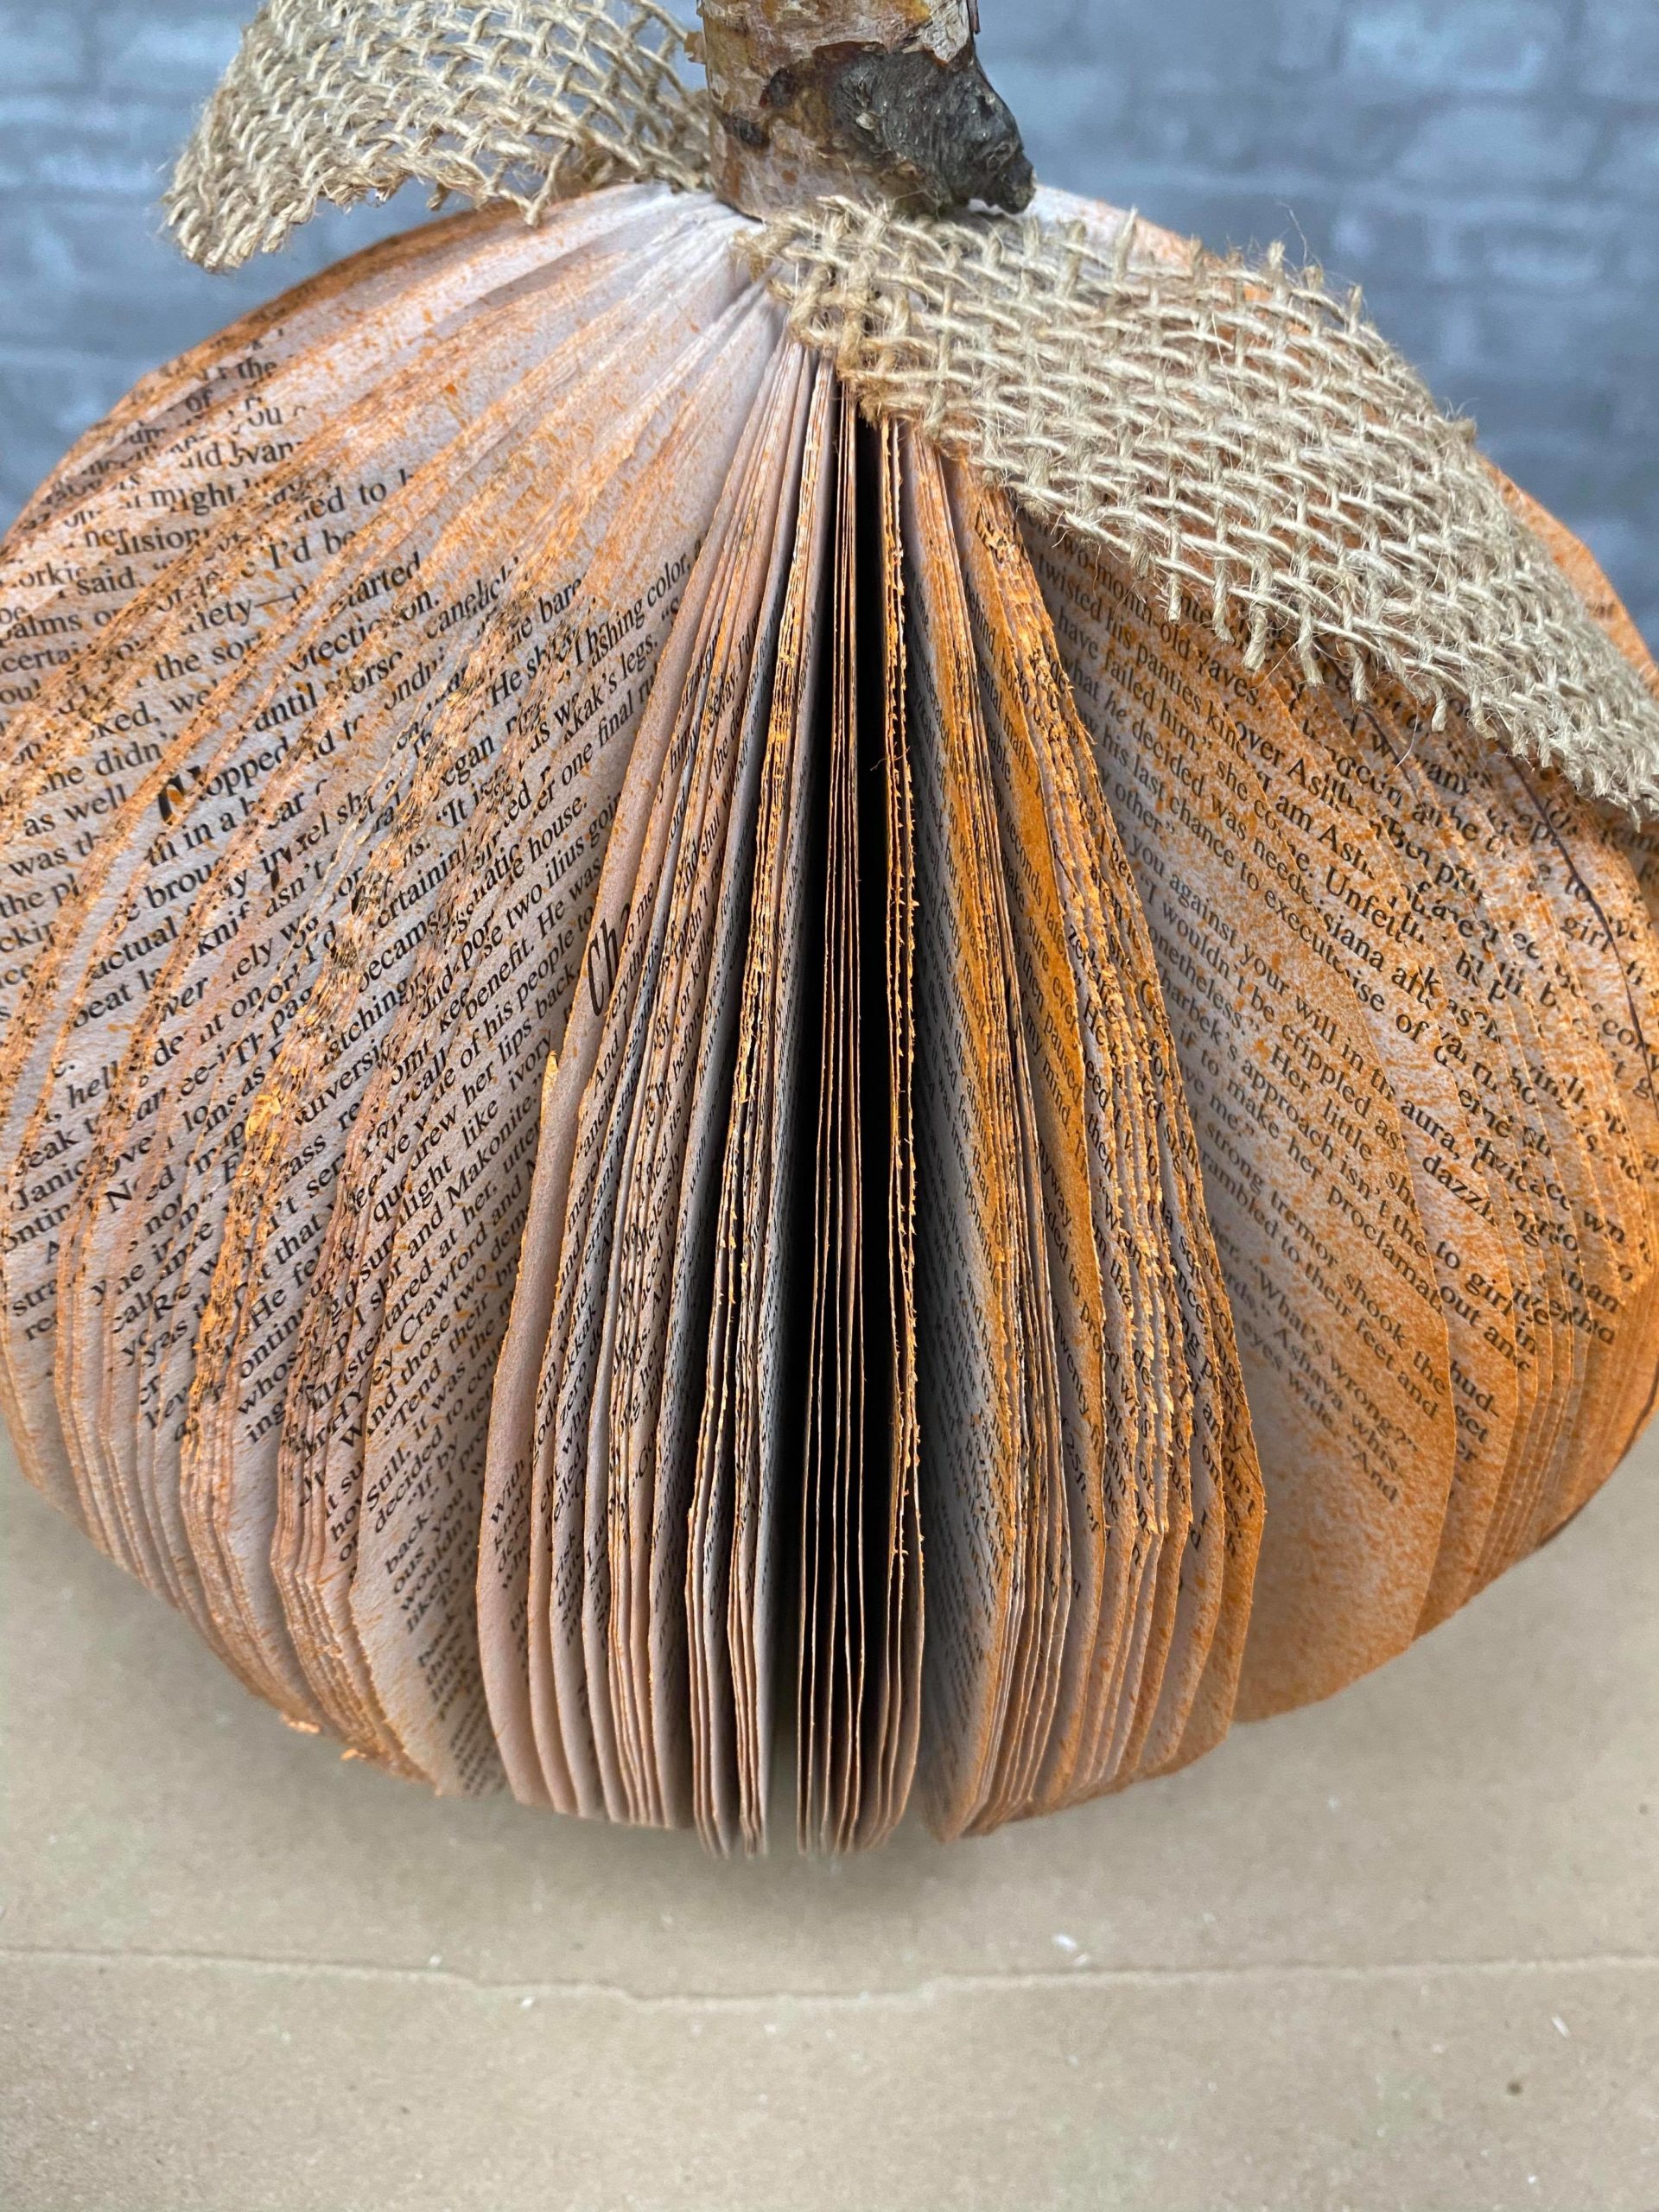
I added hot glue to the cover and back and secured them together.
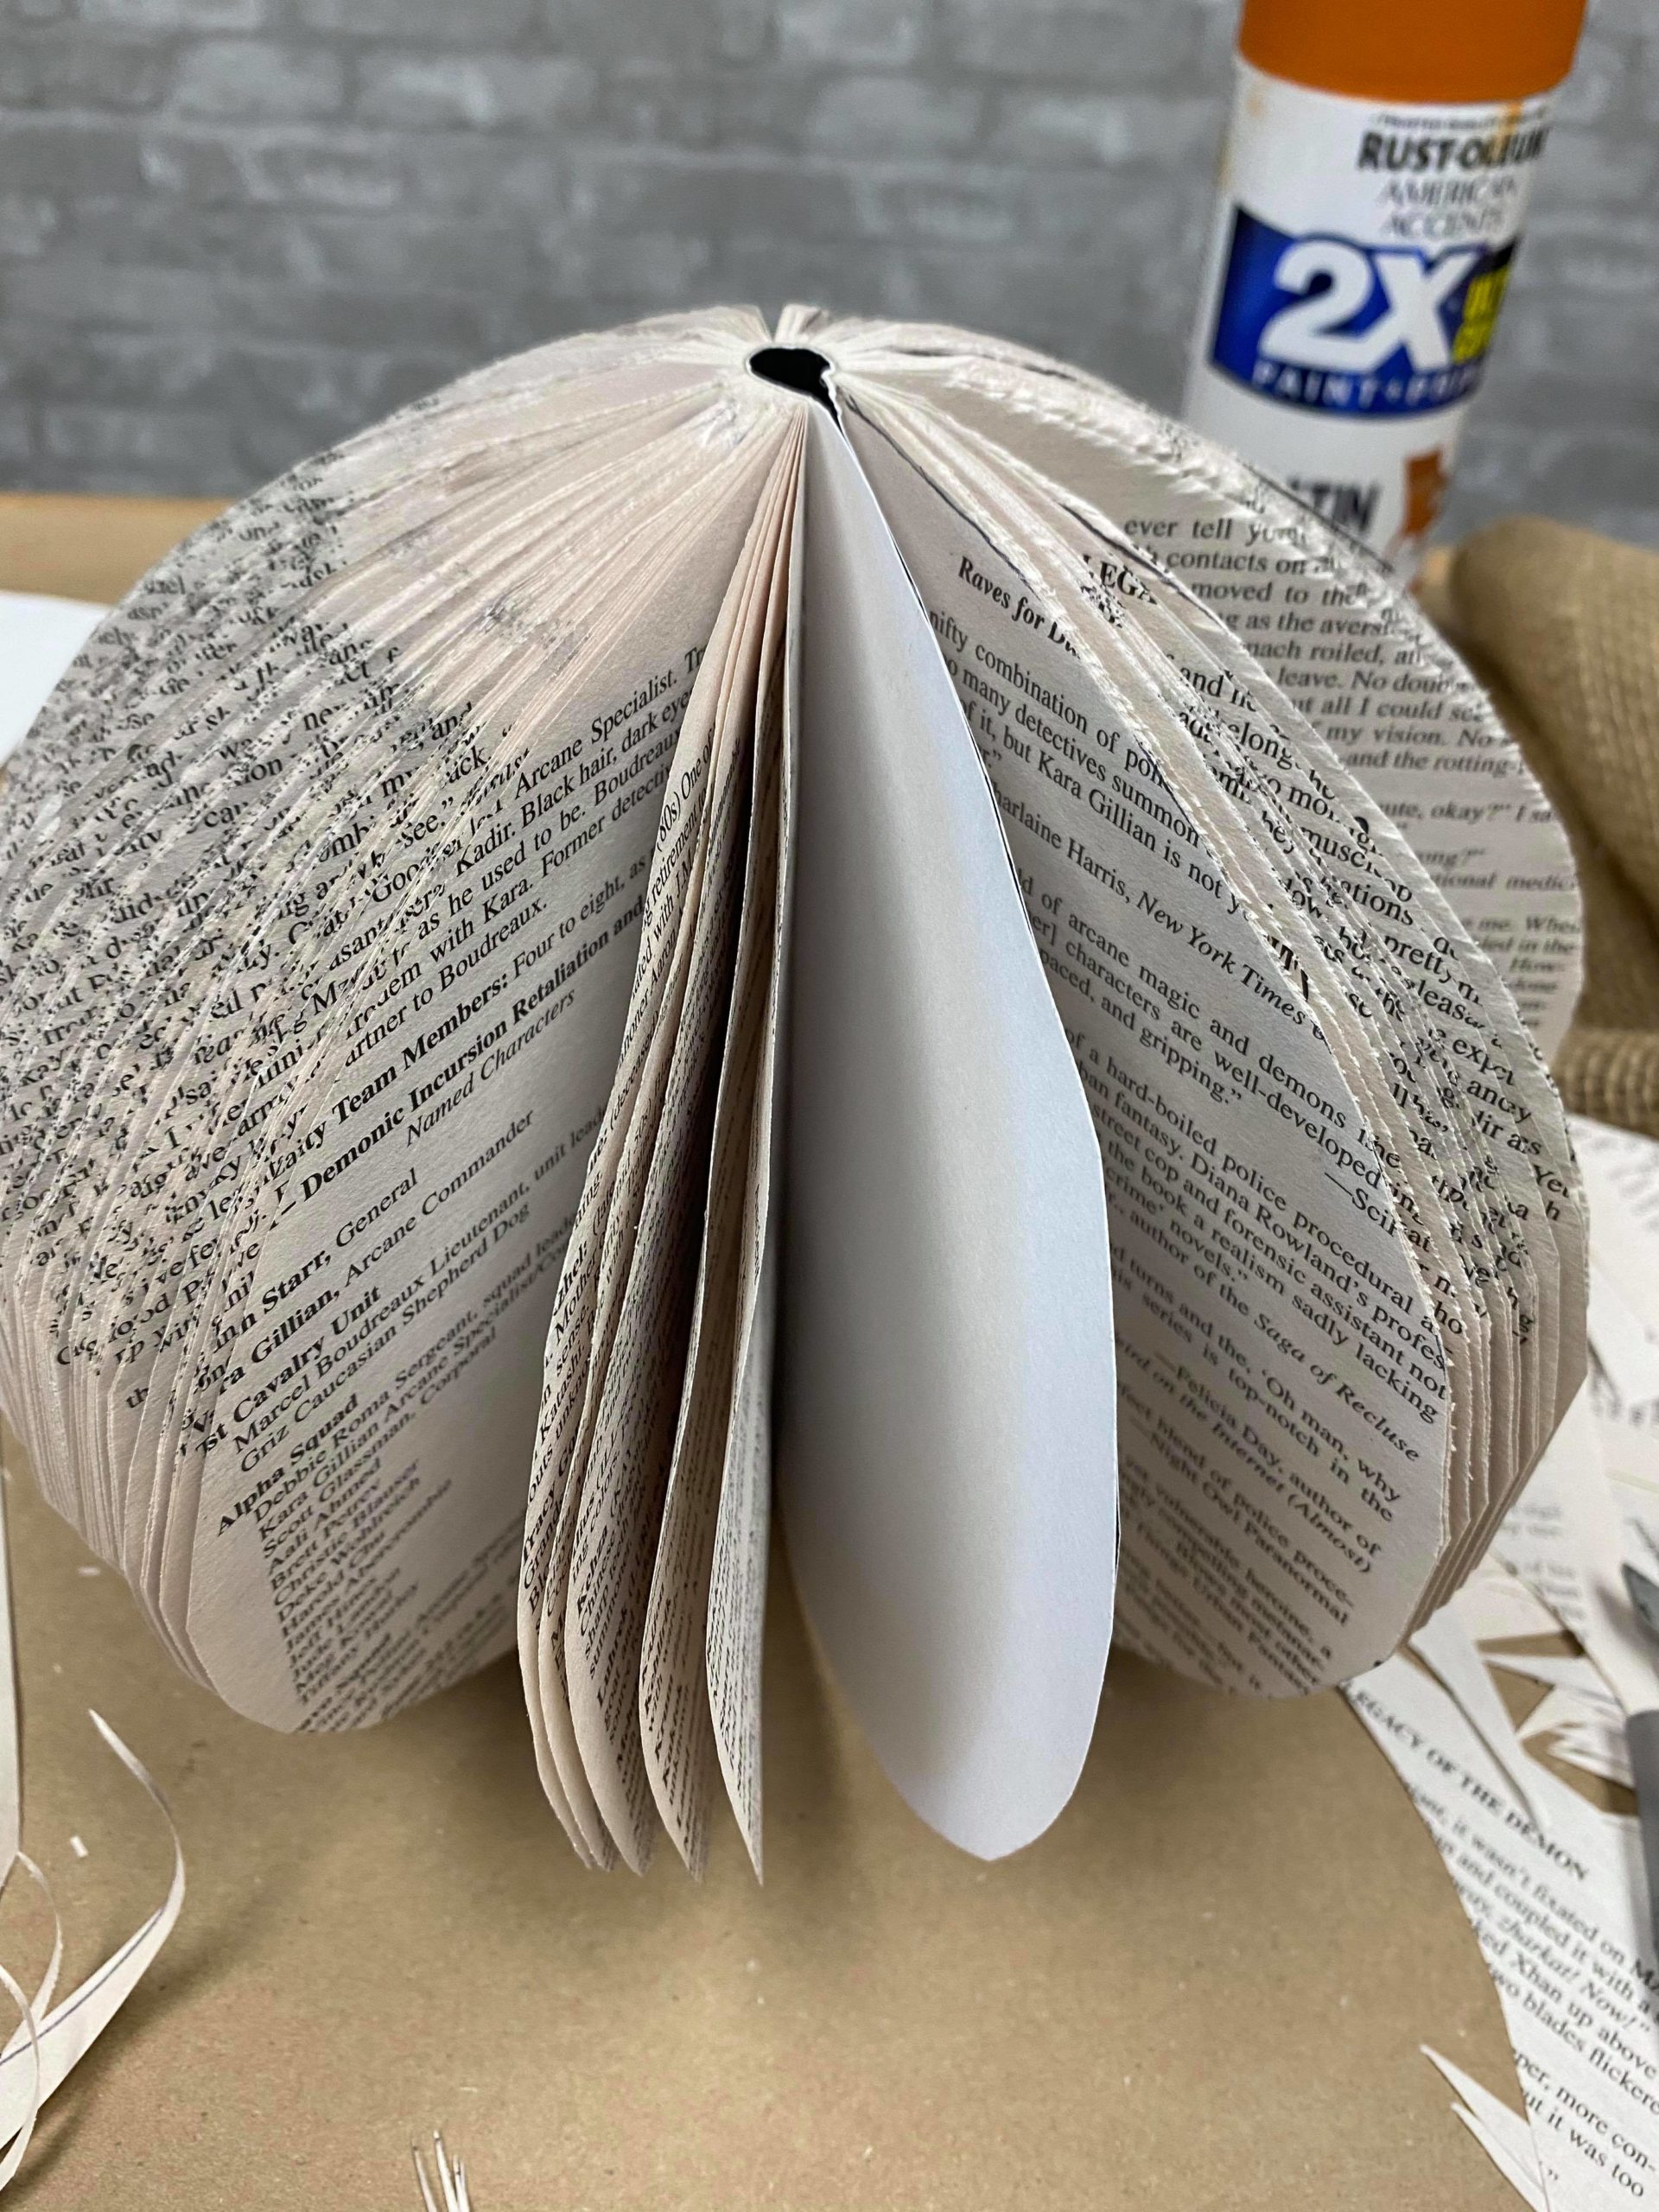
This will form the shape of the pumpkin. I added hot glue to the back side of the cover so that I could attach a page of the book.
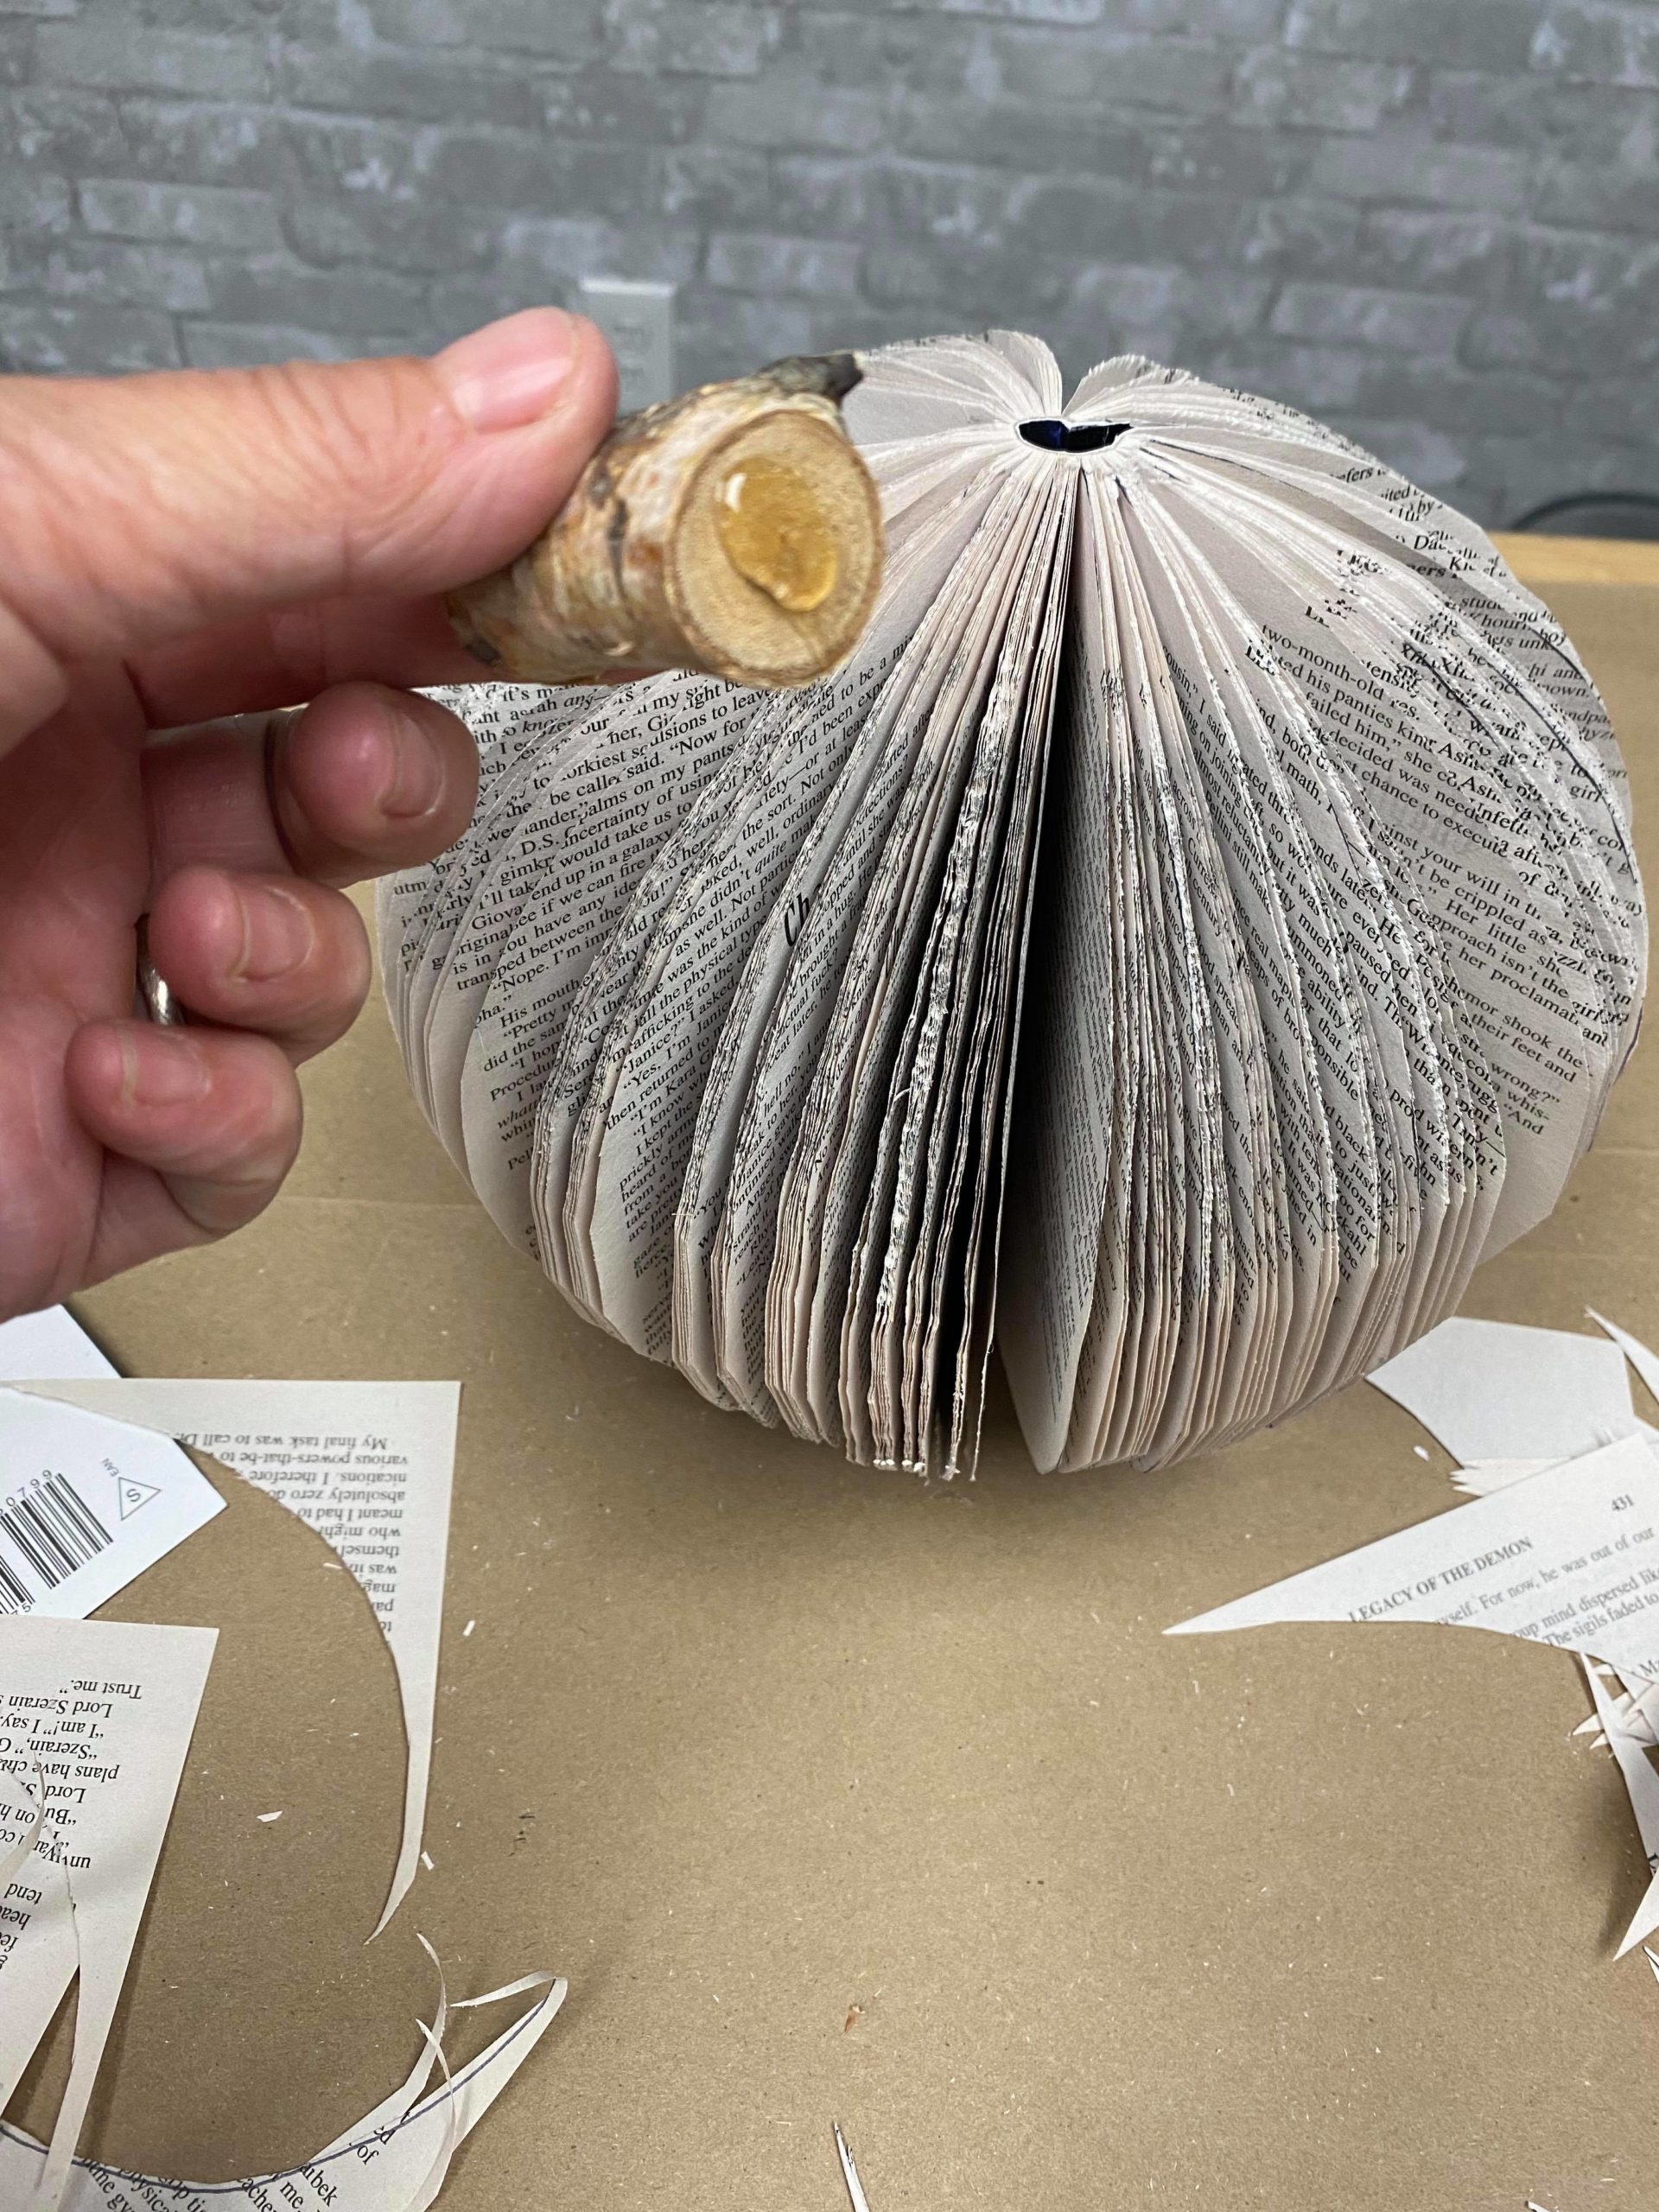
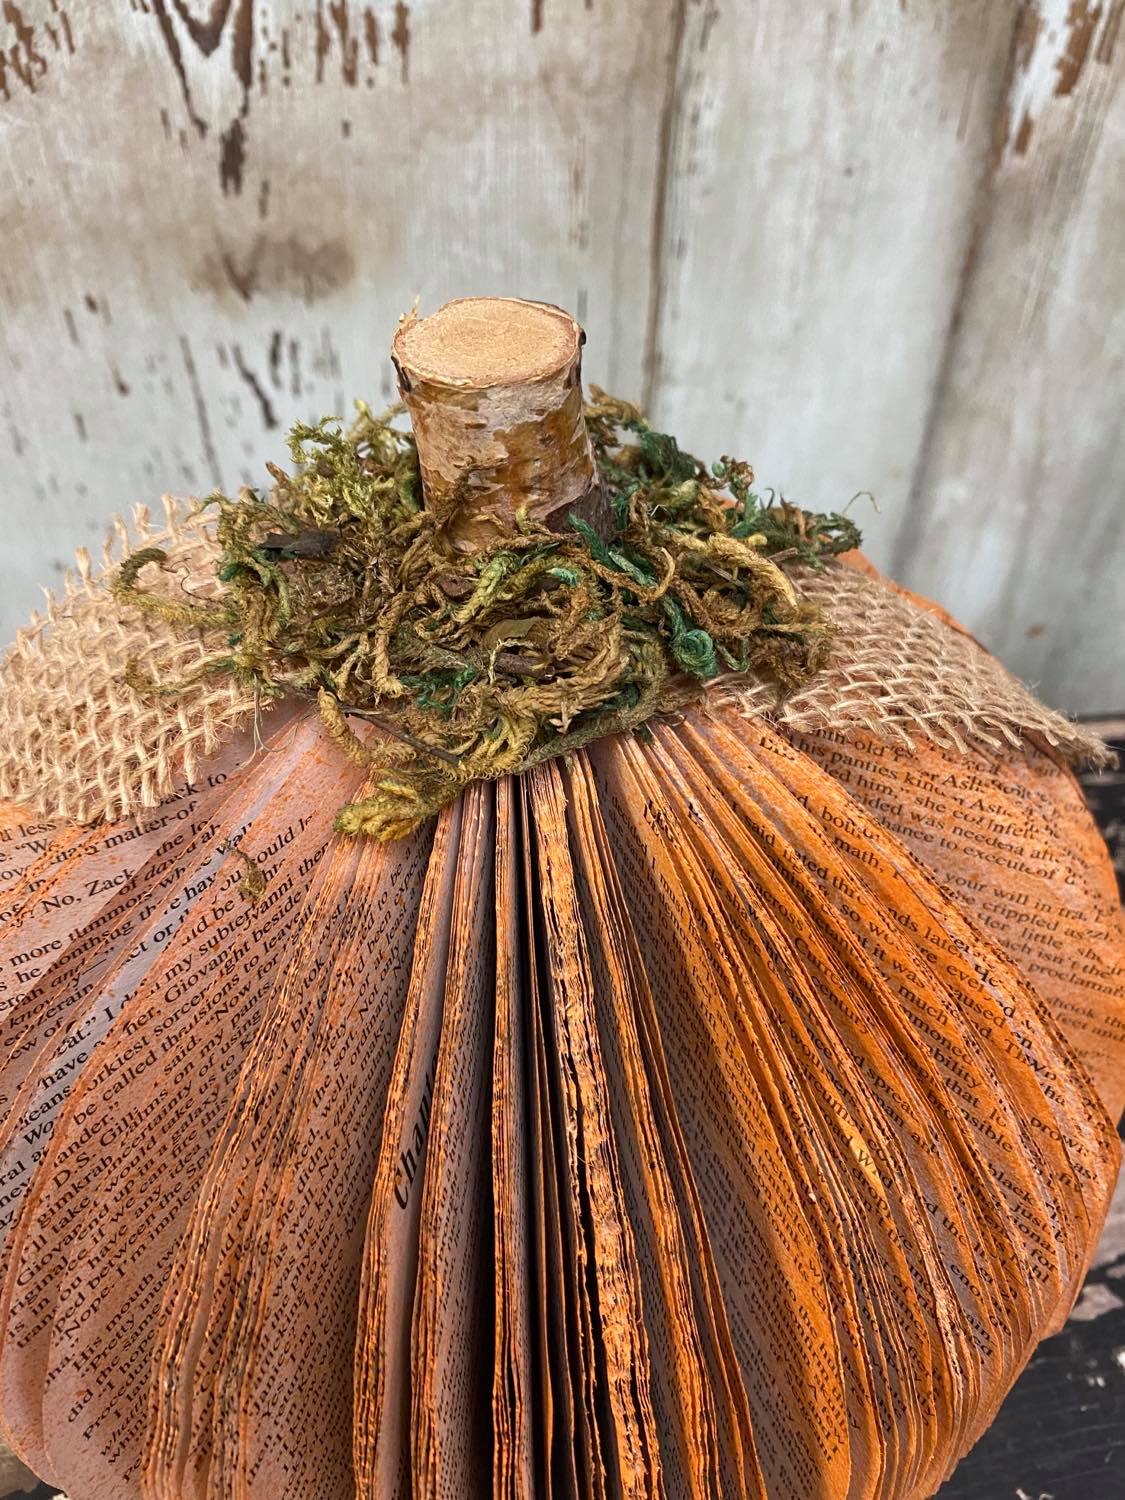
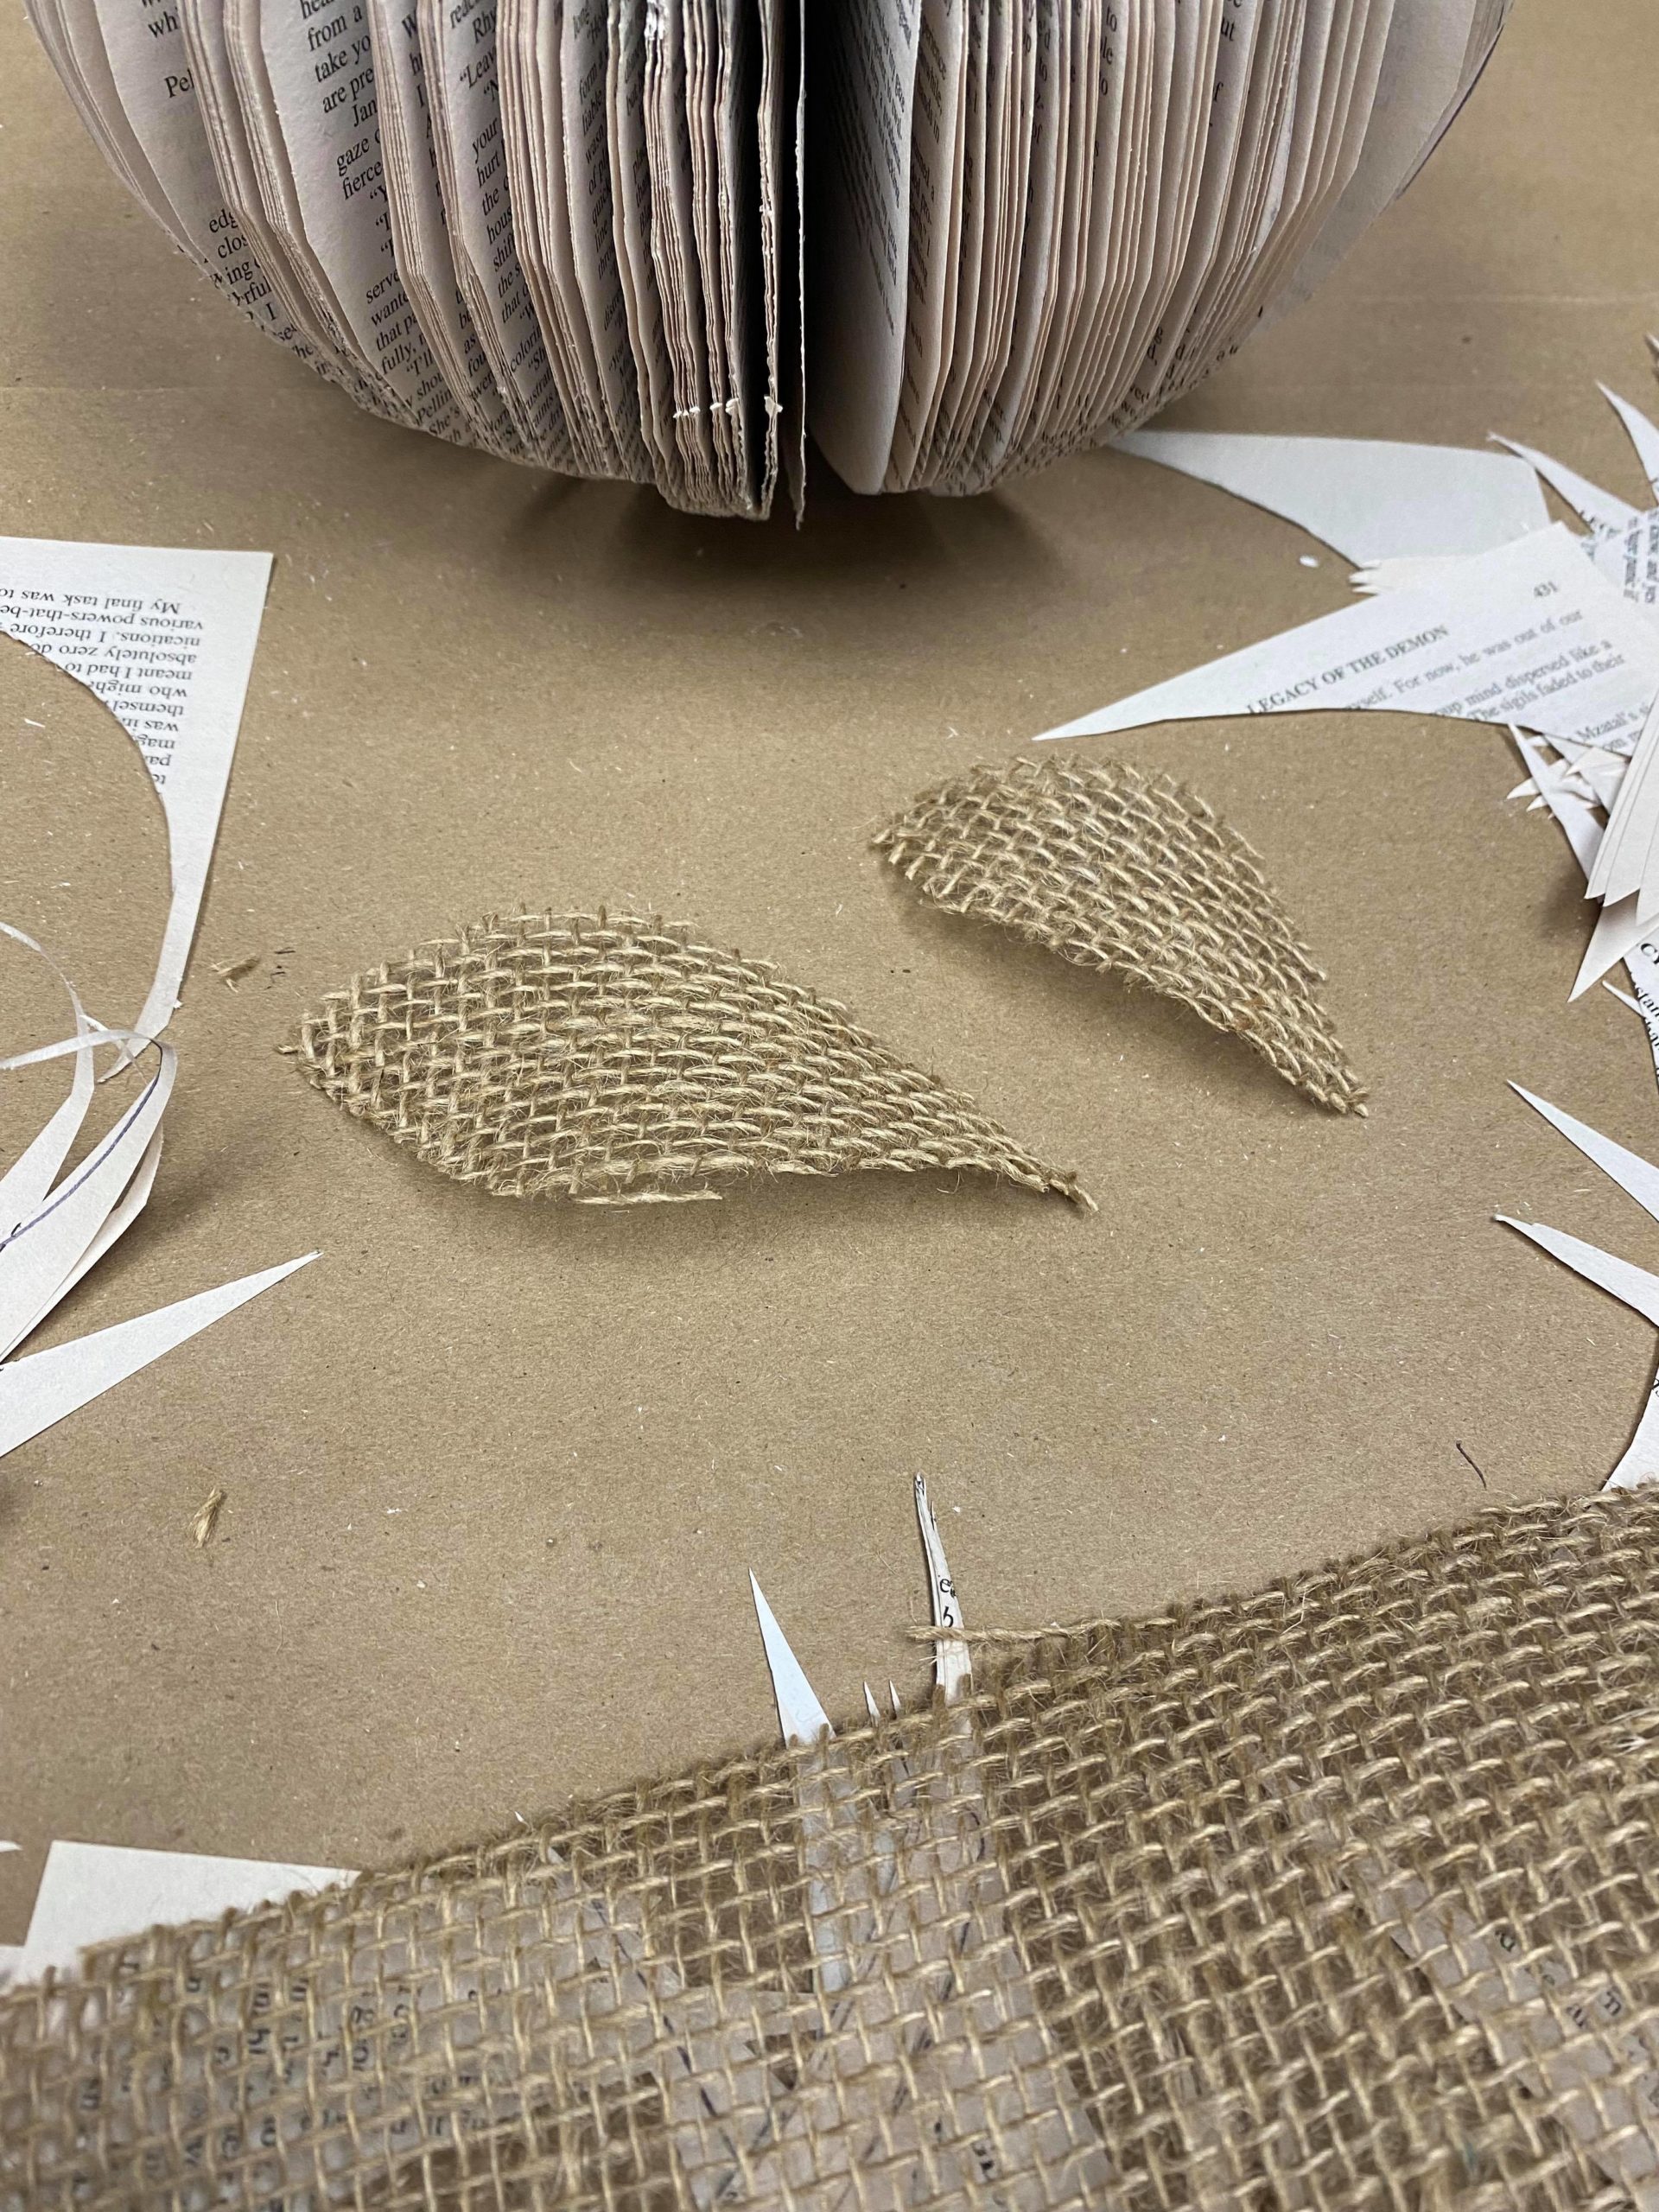
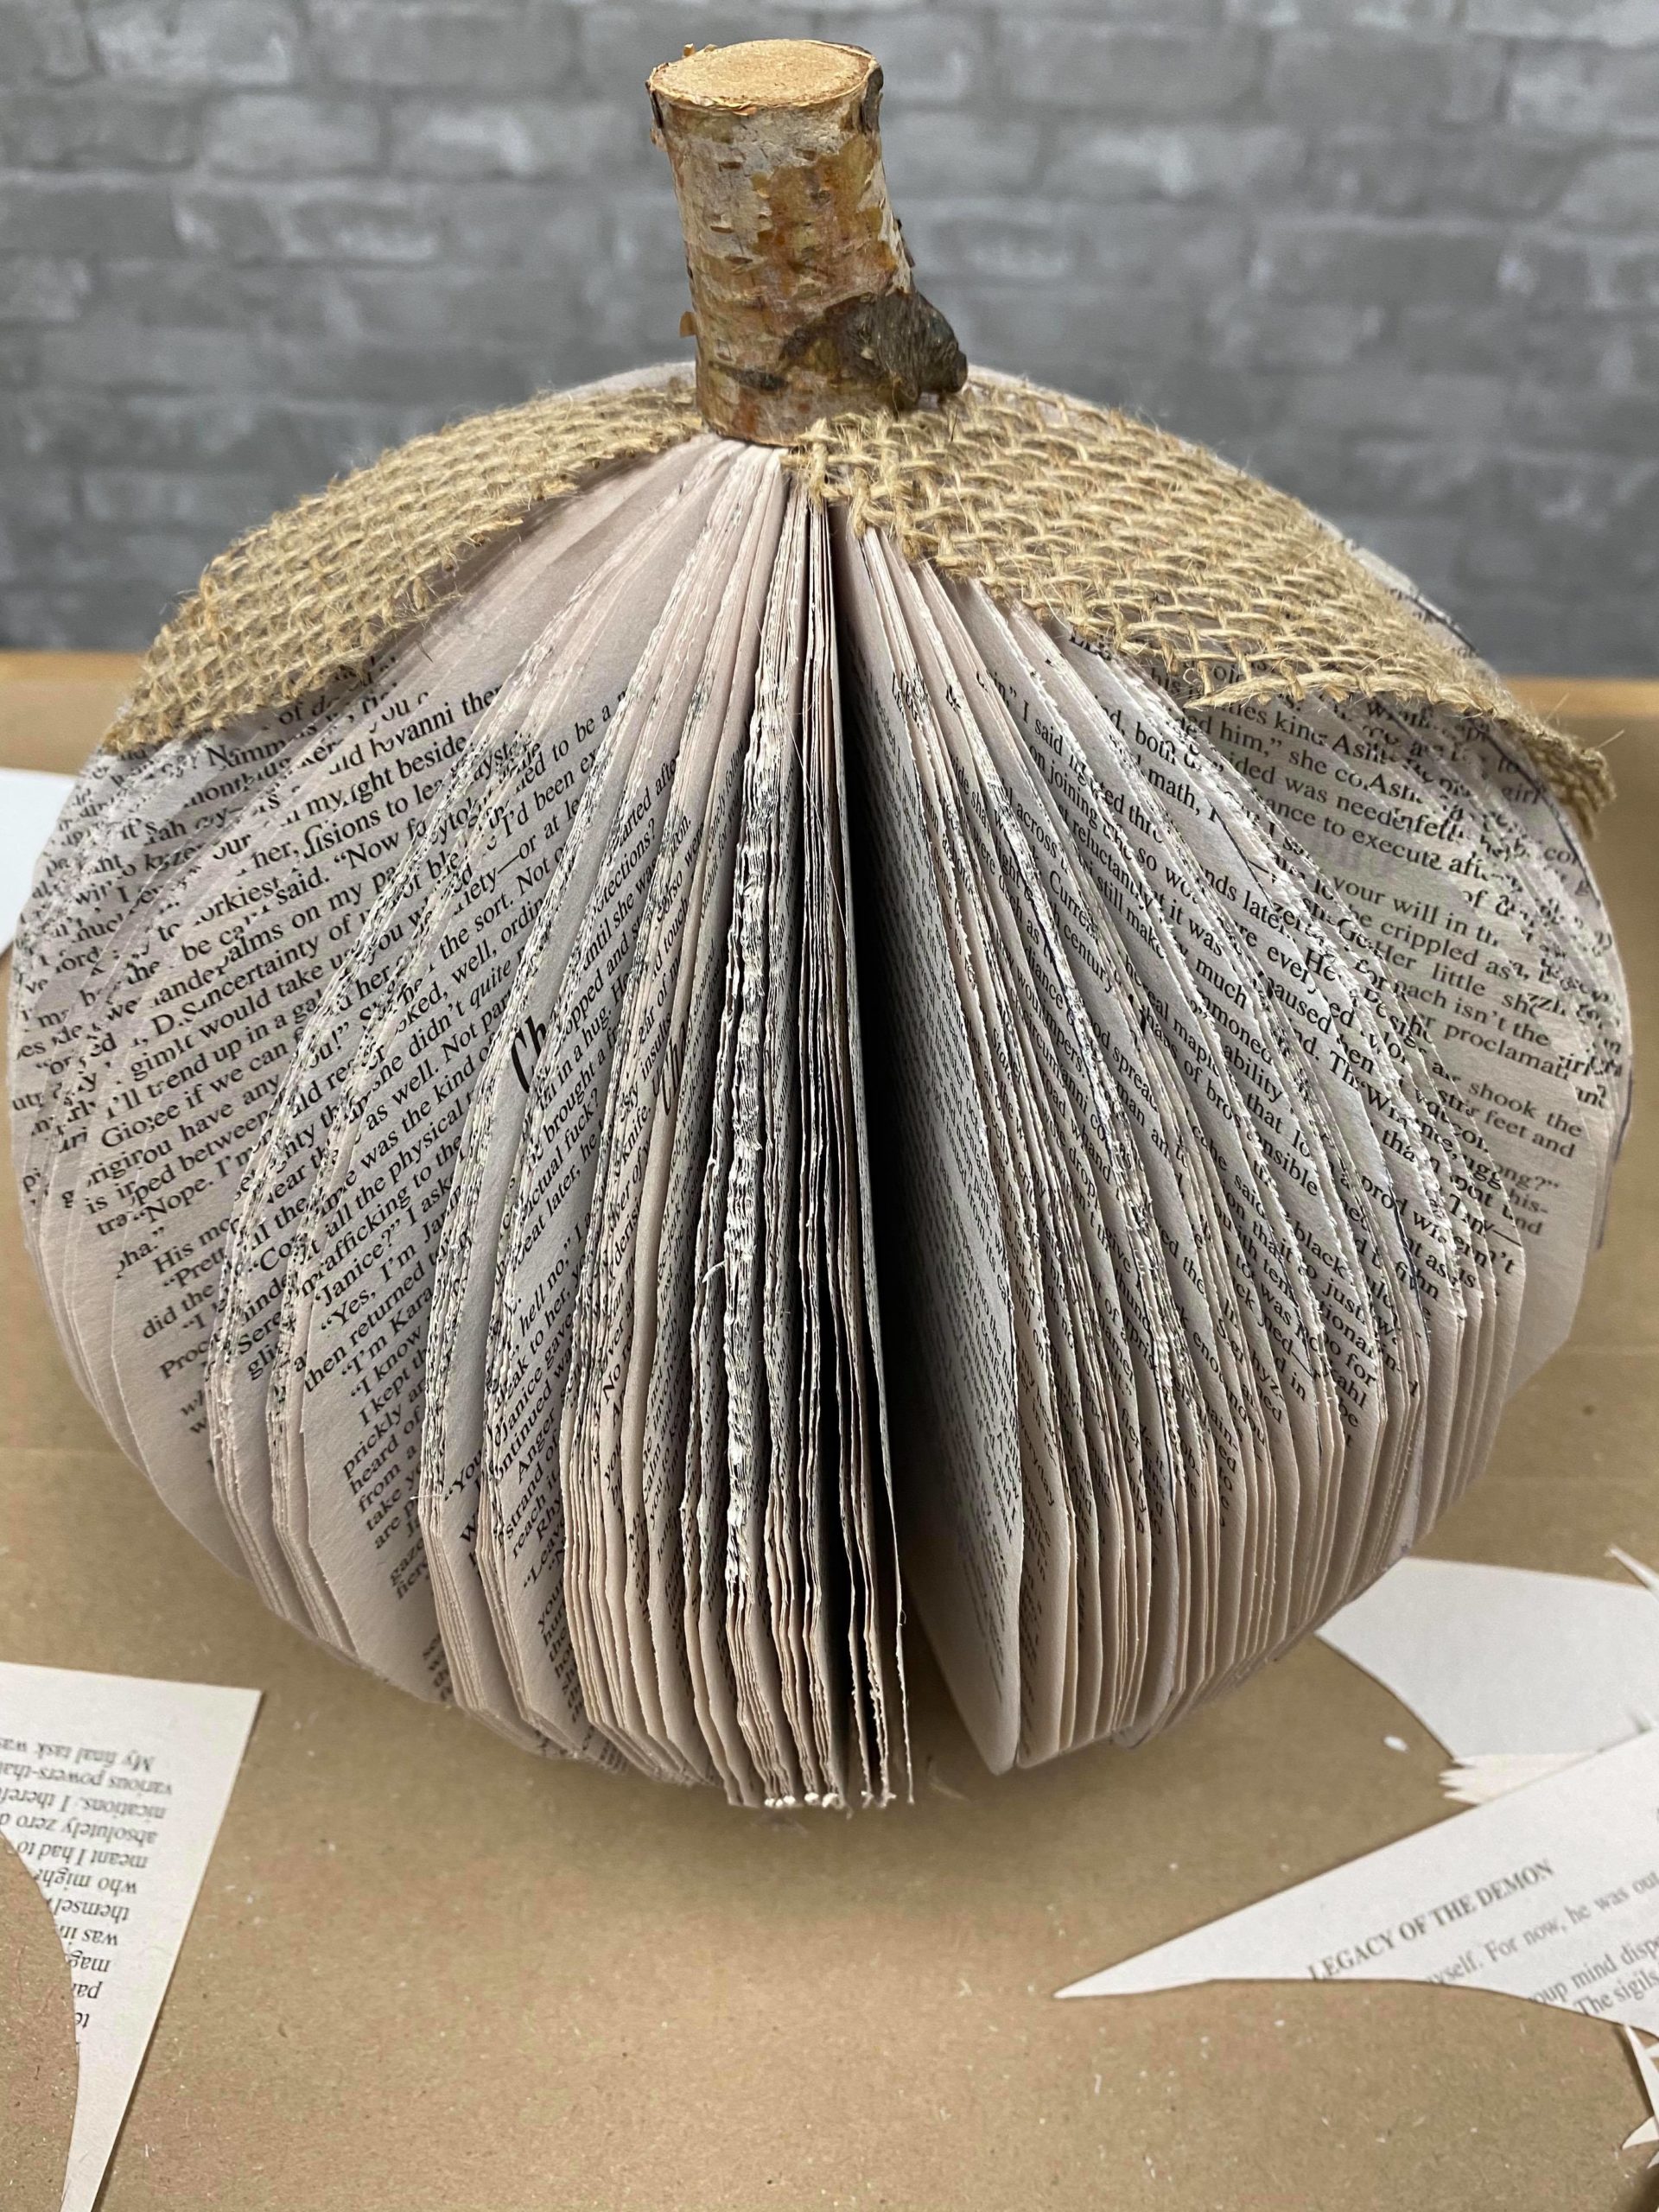
I added a stem to the top and cut out two leaves from the burlap.
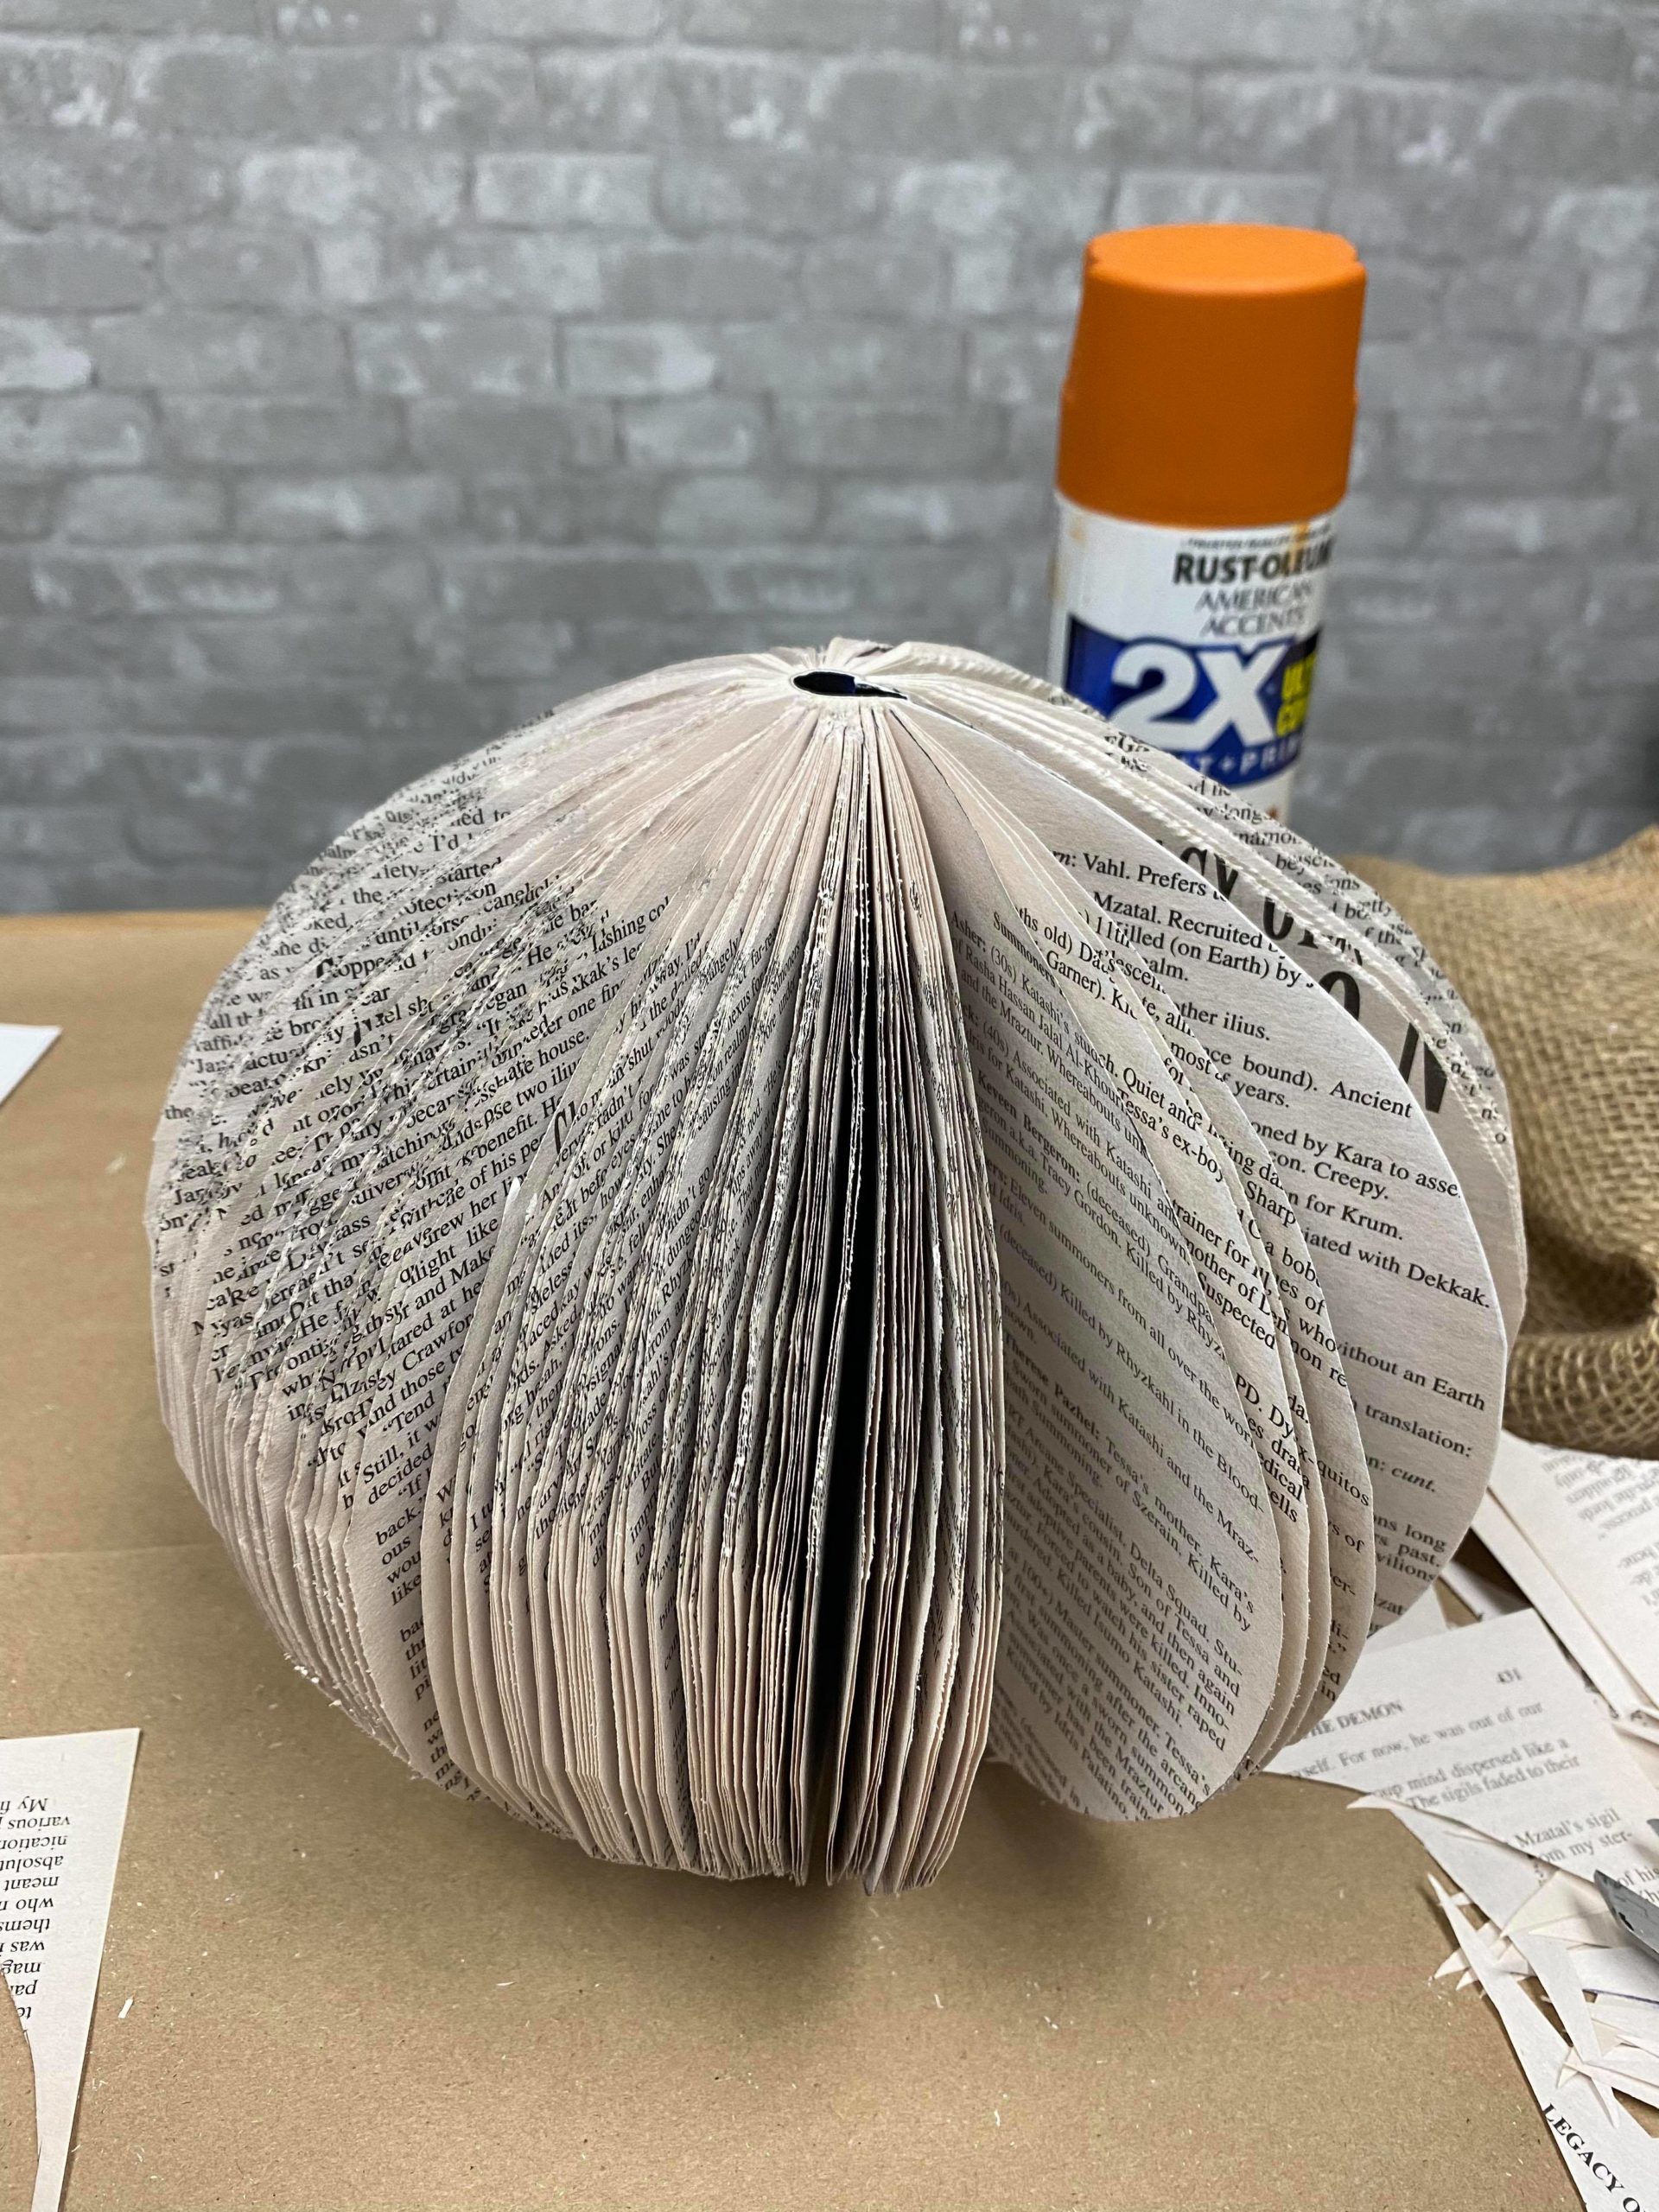
I decided I wanted a touch of orange so I added a light coat of an orange spray paint.
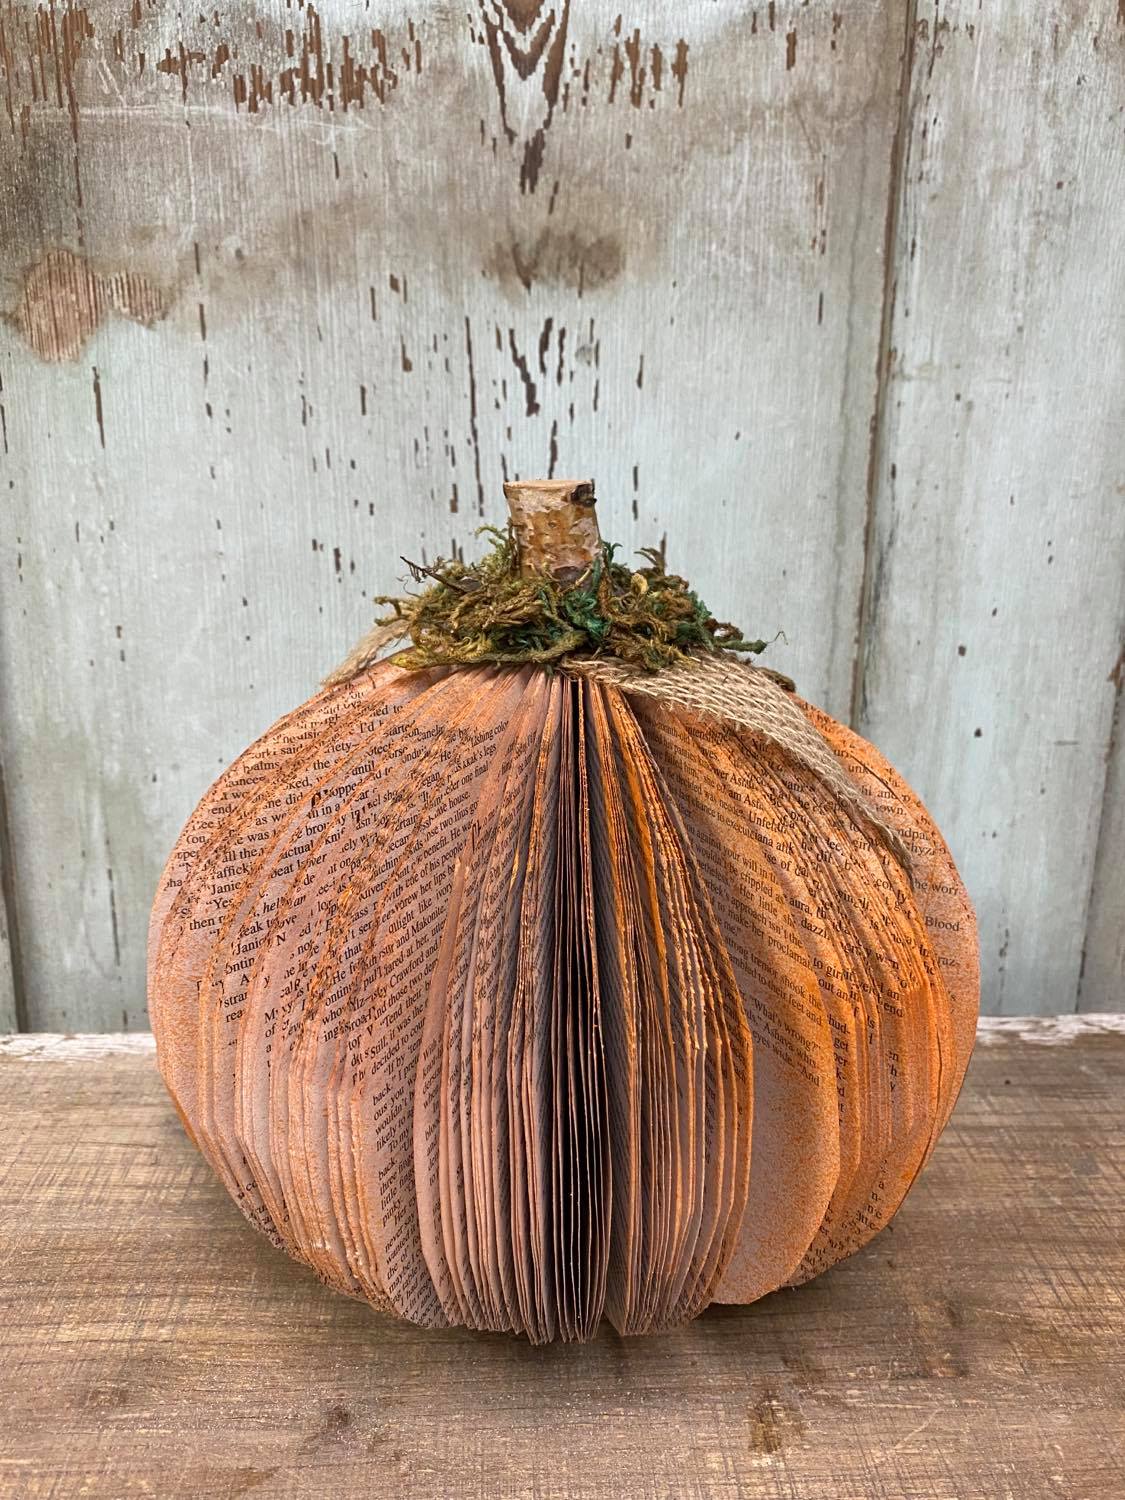
I glued a little moss to the top of the pumpkin. This pumpkin is so easy to create and I hope you will give it a try. You can find books in the thrift store, yard sale or Dollar Tree.