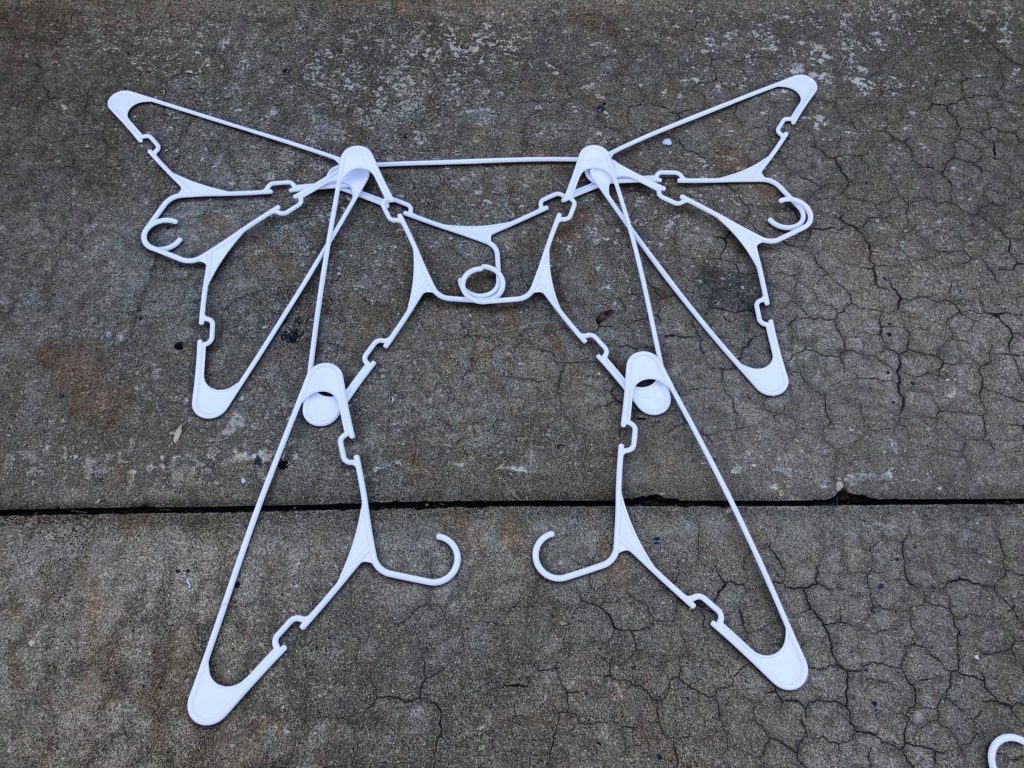
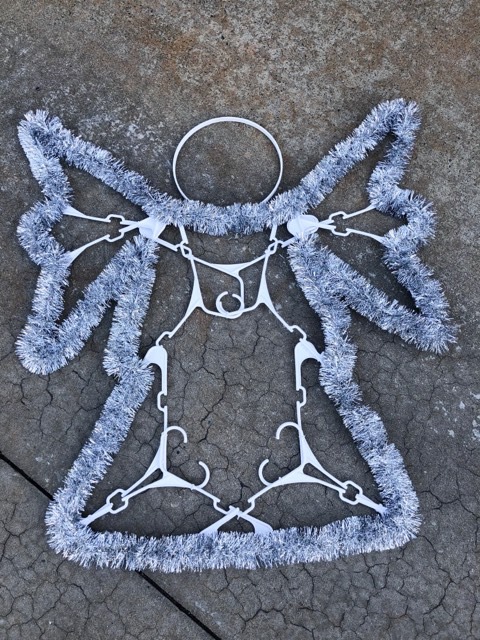
I have been making larger Christmas decor to hang outside and when I saw this angel I knew I had to give it a try. We have been making a few things out of hangers here at The Shabby Tree and some of my followers have been sending me ways to make an angel. I told them I would give it a try and here it is. There are so many things to make out of these plastic hangers and they are all quick and easy.
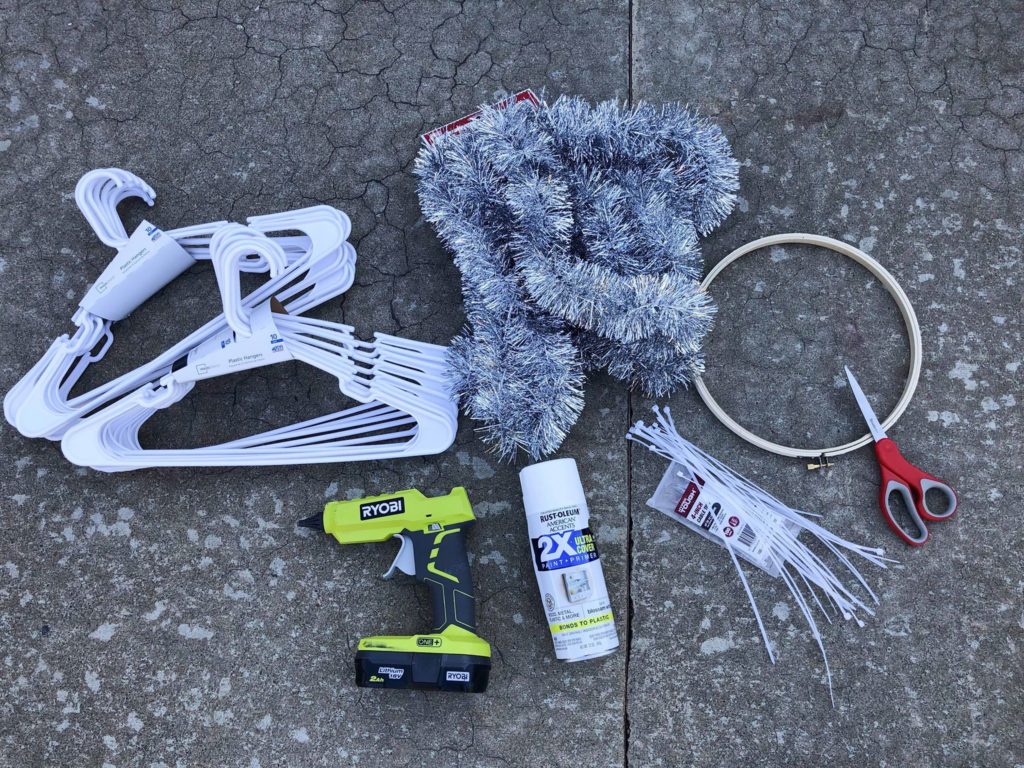
The supplies you will need are:
1. Plastic hangers ( you will need 11 and I got mine from Walmart)
2. Zip ties
3. Scissors
4. Embroidery hoop ( size depends on how big you want the head of your angel to be)
5. Tinsel (optional step)
6. White spray paint ( optional al step)
7. Hot glue gun ( optional)
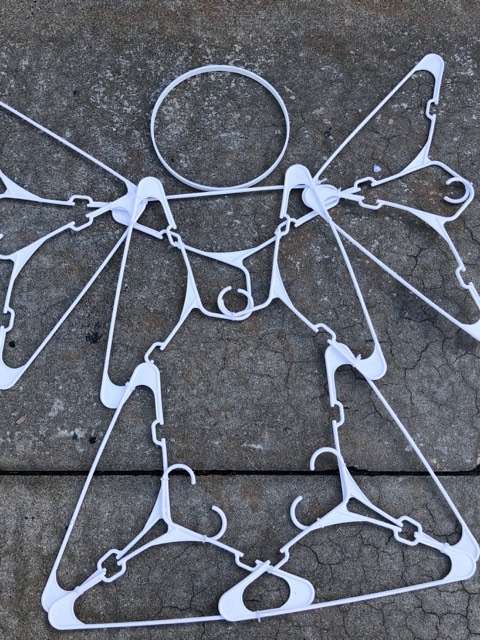
You will start placing your hangers in order of photos below.
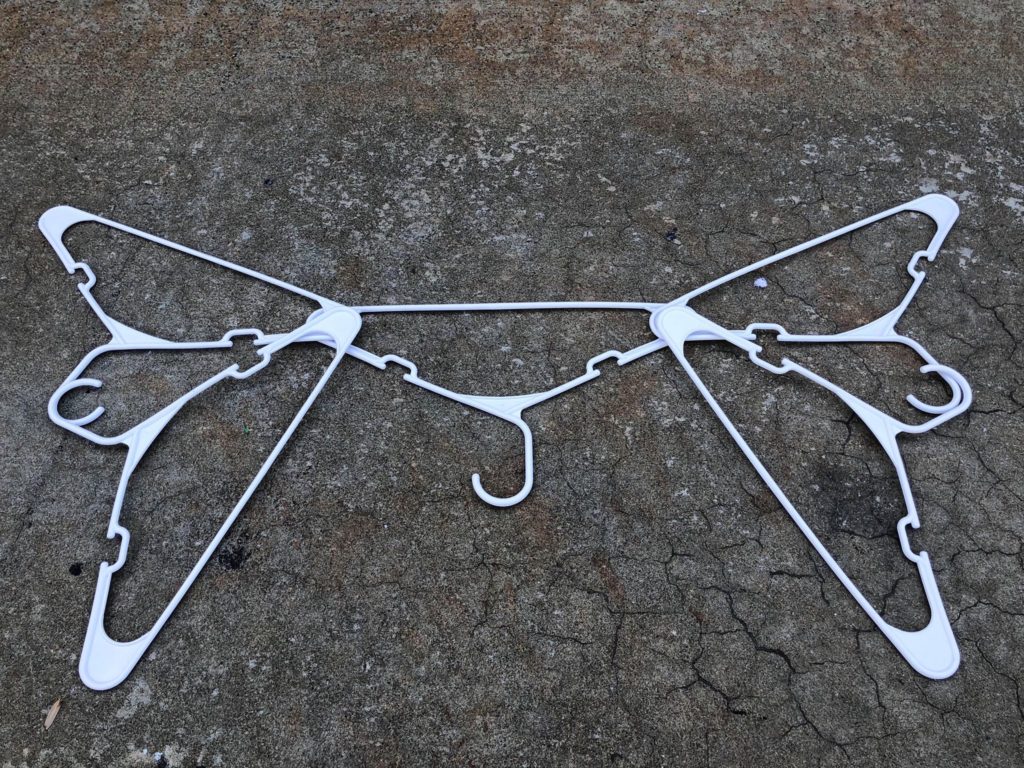
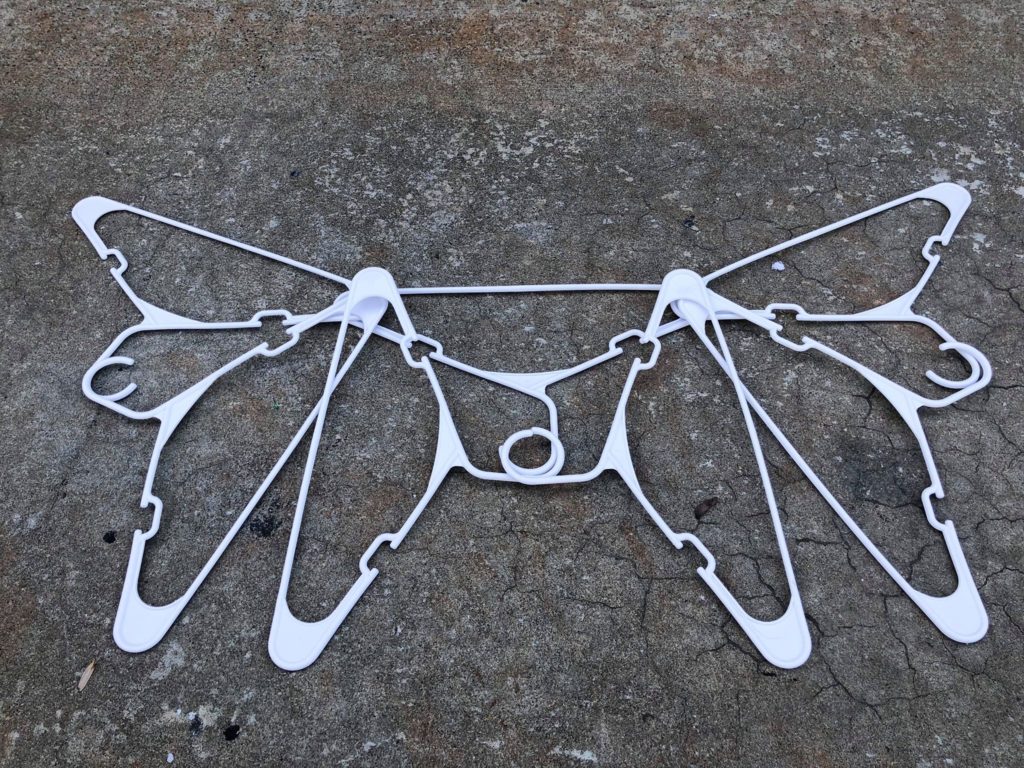
Once you have all your hangers in place and your angel formed it is time to start to zip tie it all together. You will place your zip ties at all your connecting points. I can’t really tell you every place to add a zip tie, you just need to add them where ever you think it needs it in order to secure all your hangers in place.

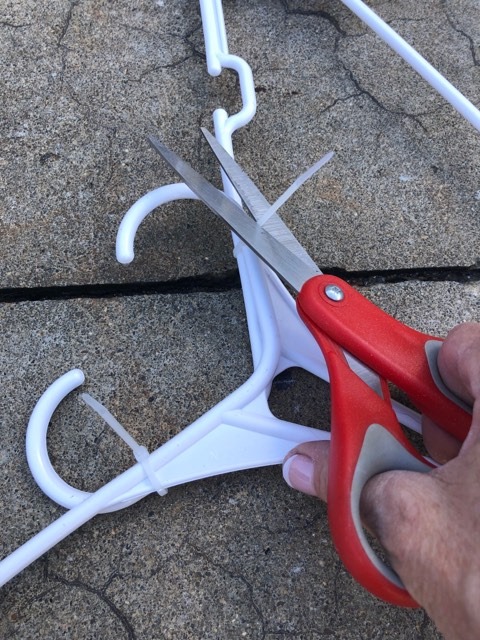
Once I have all my zip ties on and all tightly secured I then cut the ends off.
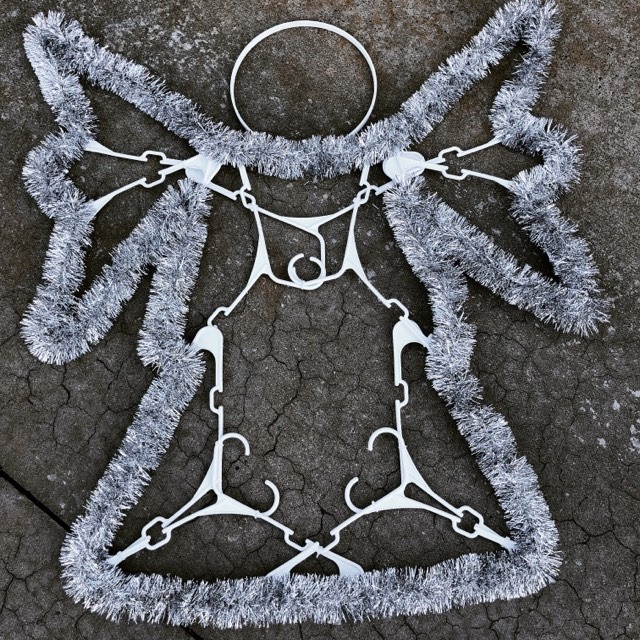
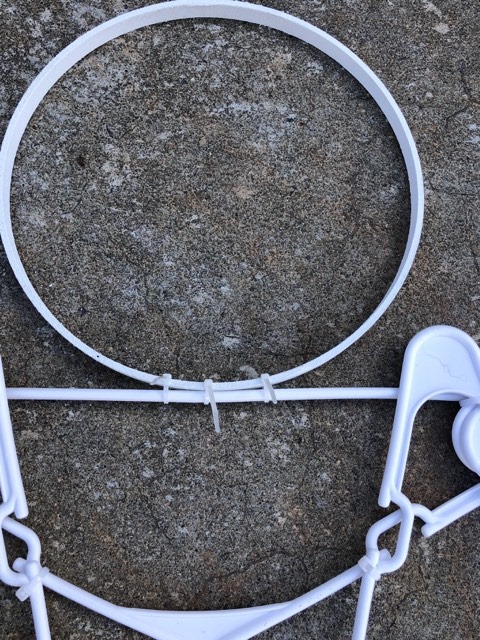
It is now time to take your embroidery hoop and zip tie in place for your angels head. I spray painted my embroidery hoop white to match all my white hangers.

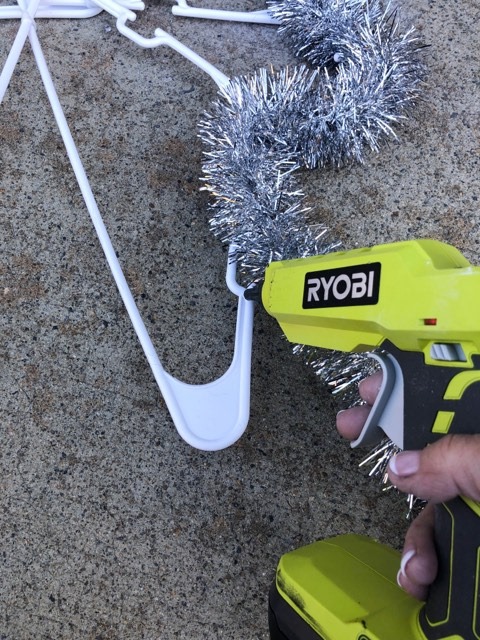
Now it is time to add your tinsel. This is an optional step but I am adding tinsel to the outside of my angel. I’m securing this onto my angel with basic hot glue.
This is a fun and very creative DIY and I hope you all give her a try.
I like what you have done. I would like to see the star. I’m going to try to make them
I like to be ahead of the craft world game how would you make heart and cross bunny with plastic hangers
I like all of these angel. Do you have a Christmas tree pattern
My granddaughters n i made our angel lastnight n they loved it.
I cannot find the video of how to make a top hat 🎩?
Great idea. Love it
I love that!!! But what is the spray paint used for?
Lights would be nice to. Looks great I am so doing this too I made 2 snowflakesca few days ago.
Have you ever made one from baby clothes hangers? Do you think it would work and what changes would have to be made?
I have made the big snowflake, trimmed in blue lights and garland, and in the center, put a dollar blue wreath and white lights that are led, so when they are on, they look like they are flickering, pretty. I made the star, it turned out good, and now I made the angel, fixing to put the garland on it. Did you put hair on the head?
Great to watch
I Love The Angel, Star n The Globe Decoration. You Are So Crafty n Its Inexspensive. Ty.
please let me know how to see star
Going to try this I like home made easy.
Just a real fun project. A little hard for me with the zip ties as I have arthritis. But I got it done. Thanks for sharing all of you DIY’S.
Im so glad you gave it a try Lynn! I hope you are doing well and I would love to see some of your crafts on “Crafting with the Shabby Tree”