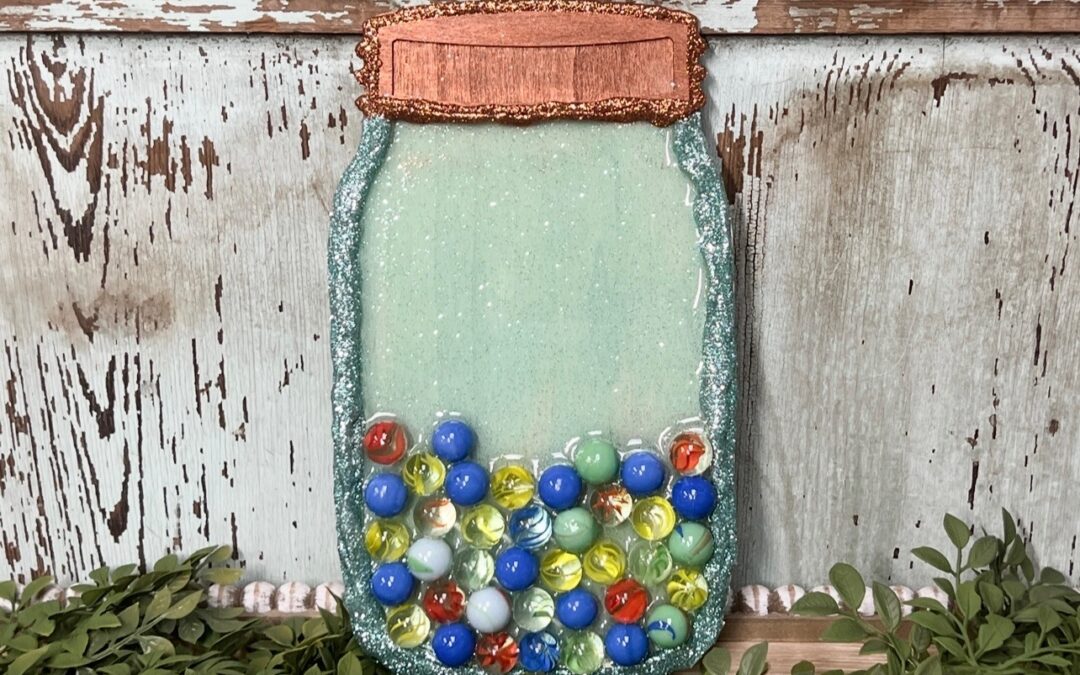
On my live, I got creative with the wood mason jar from Walmart! I knew that I wanted to use resin with it, but I wasn’t sure how the resin would do with such a shallow border! I am happy to say I found a way to make it work! Keep reading to see how it came out!
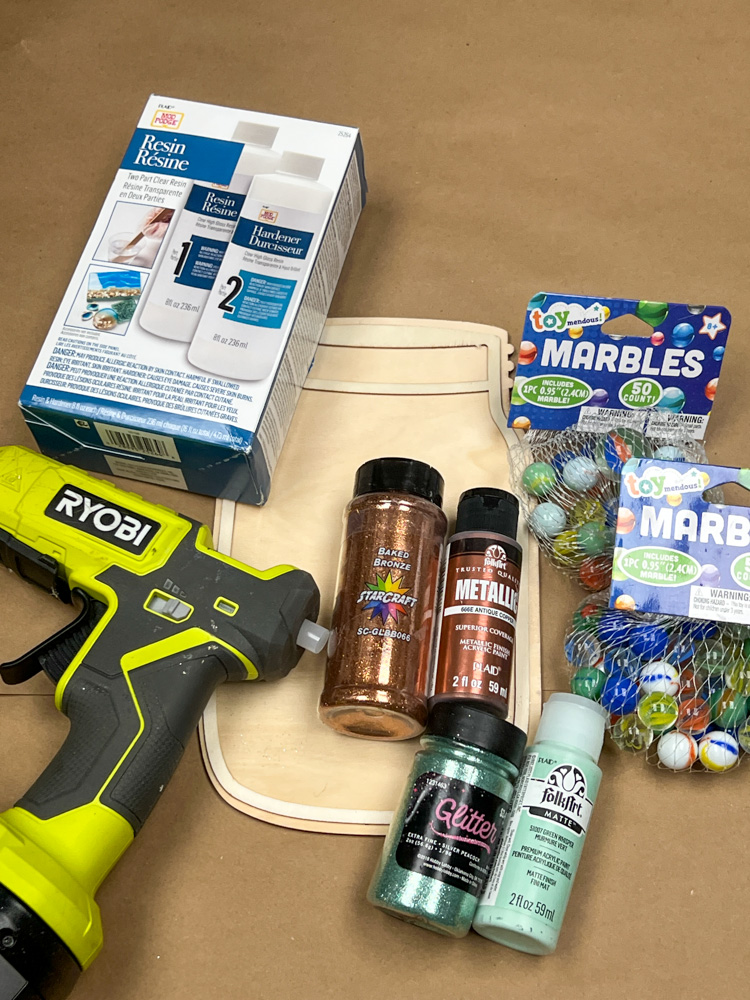
For this craft you will need:
1. Wooden Mason Jar From Walmart
2. Resin
3. Marbles
4. Green Whisper
5. Copper Metallic Paint
6. Glitter
7. Hot Glue Gun
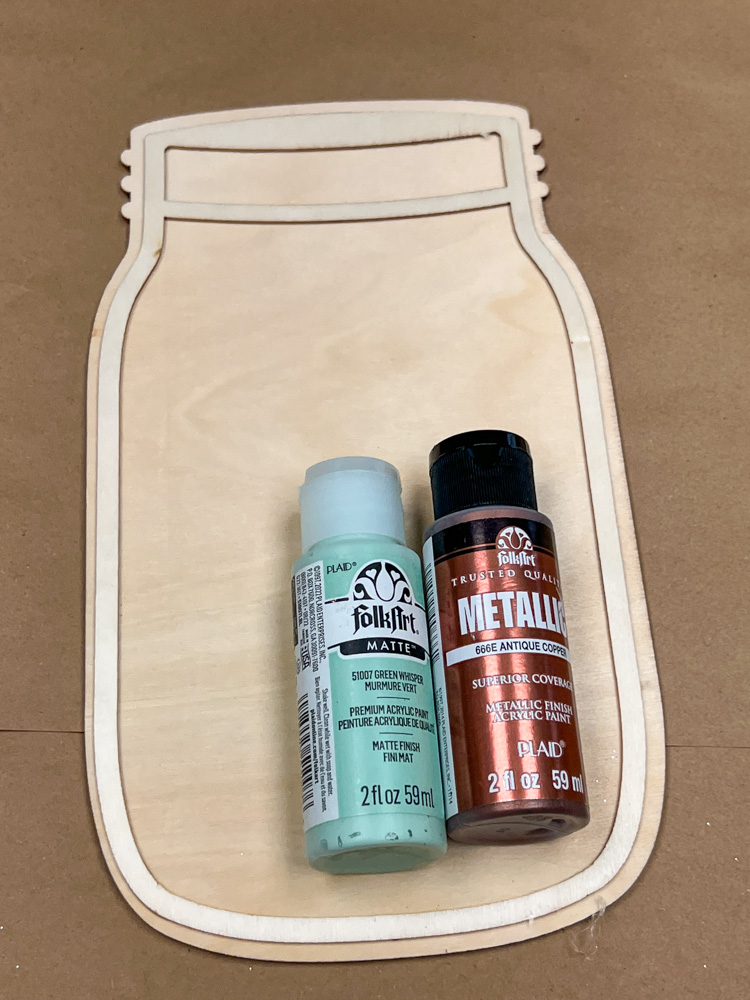
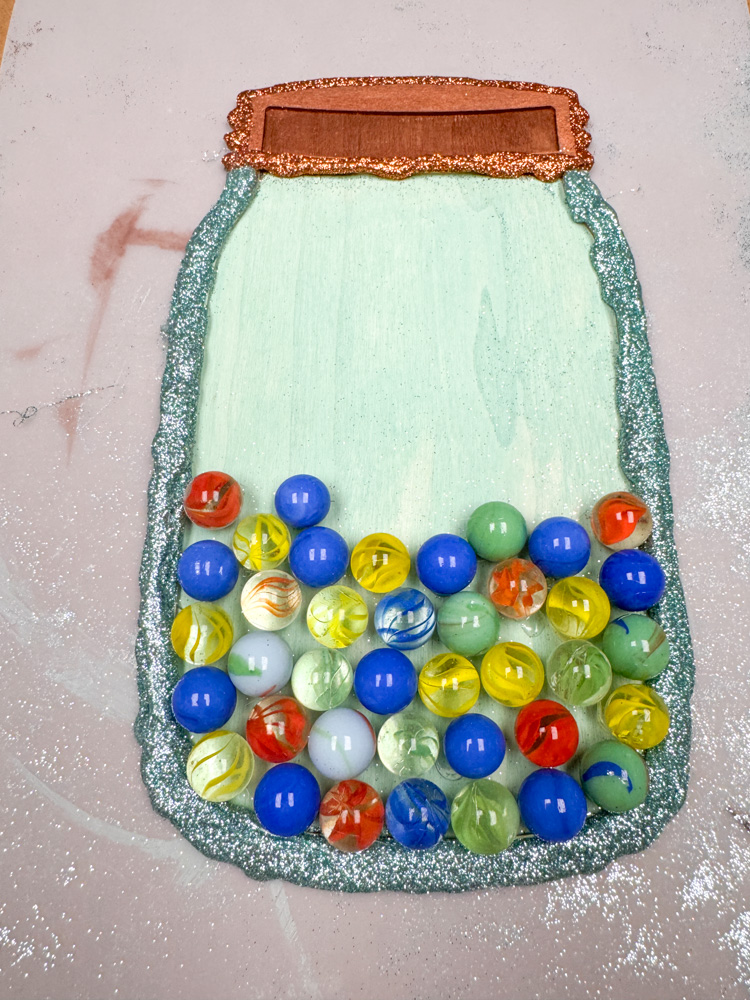
I wanted to give it a light coat of paint to make it look like the teal mason jars
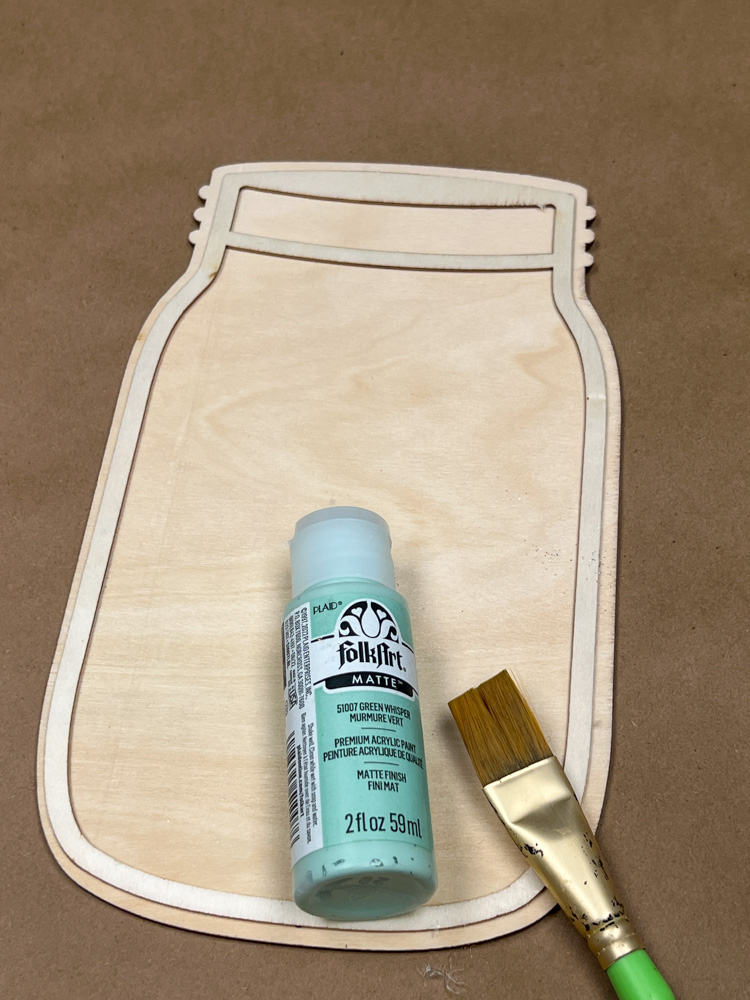
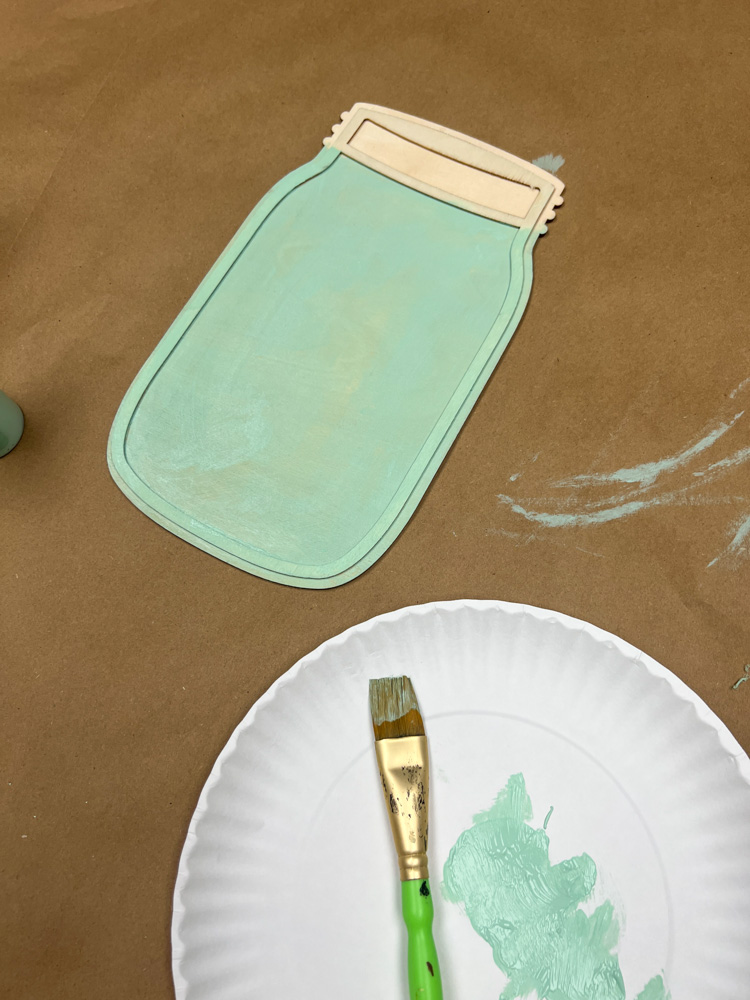
I did only one coat and it was very thin so you could see the wood grain through it.
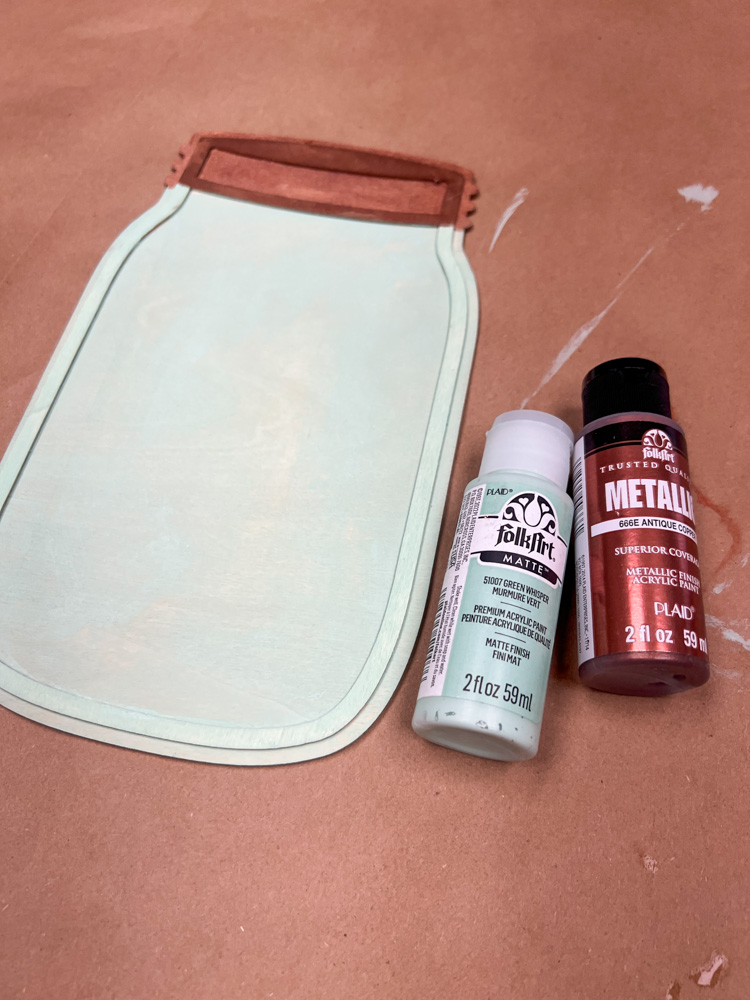
After that, I gave the top part of the mason jar a coat of a coppery metallic color.

If you wanted to, you could do silver for this part.
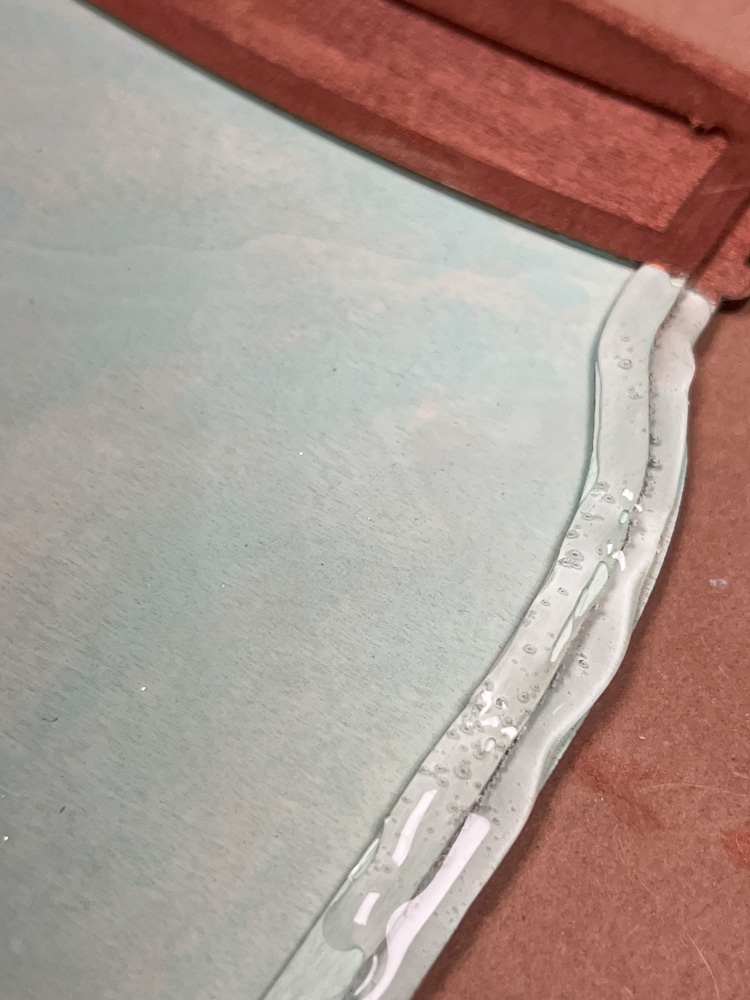
Next, I grabbed my hot glue gun and went around the perimeter of the mason jar. I went over the raised part and off to the side to make sure that it had a good seal so the resin wouldn’t seep through.
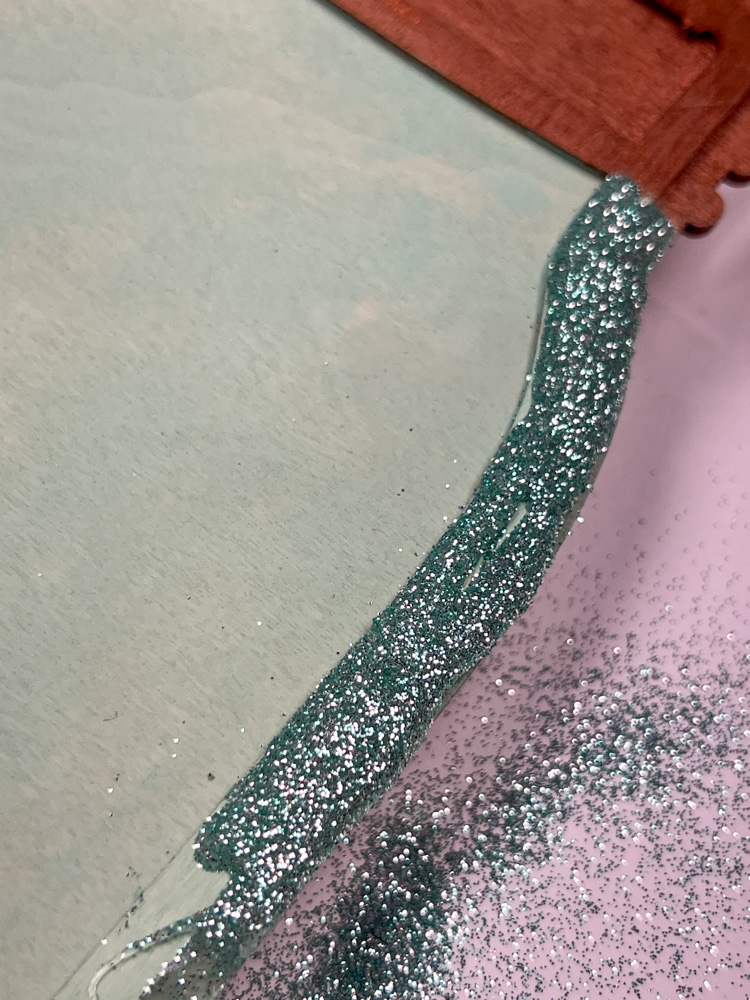
While the glue was still tacky, I sprinkled glitter around to make it pop!
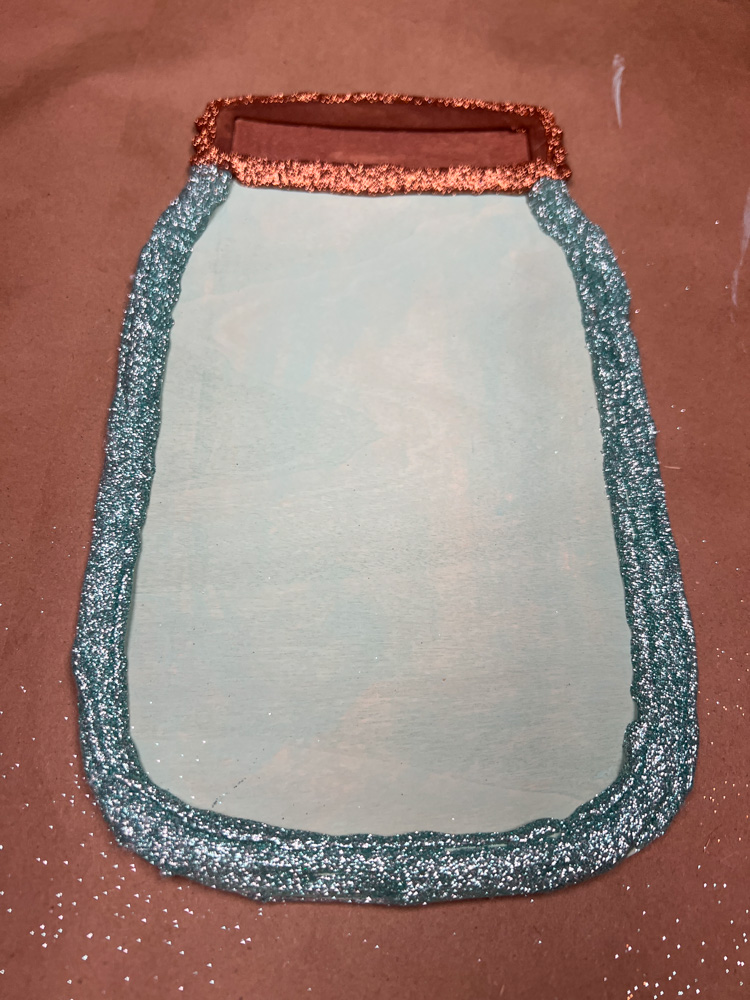
I ended up doing two layers of the glue and glitter to really build up that border! I did that teal of the jar and the copper for the lid.
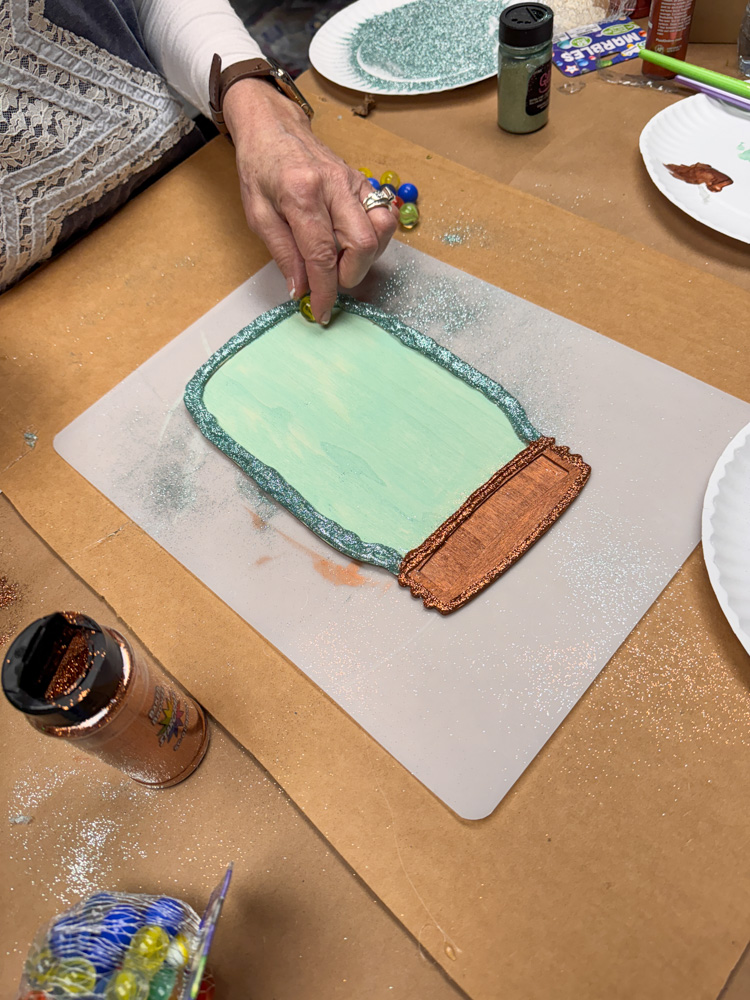
Now it’s time to glue on the marbles!
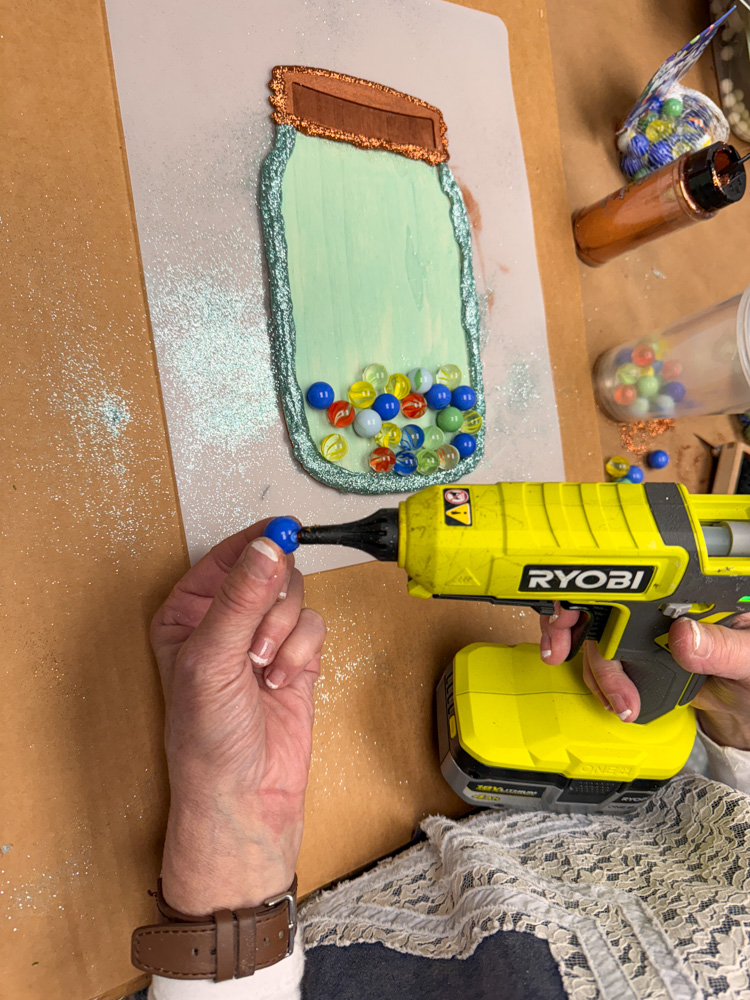
Go ahead and lay them out on the board to get an idea of where you want your marbles to be.
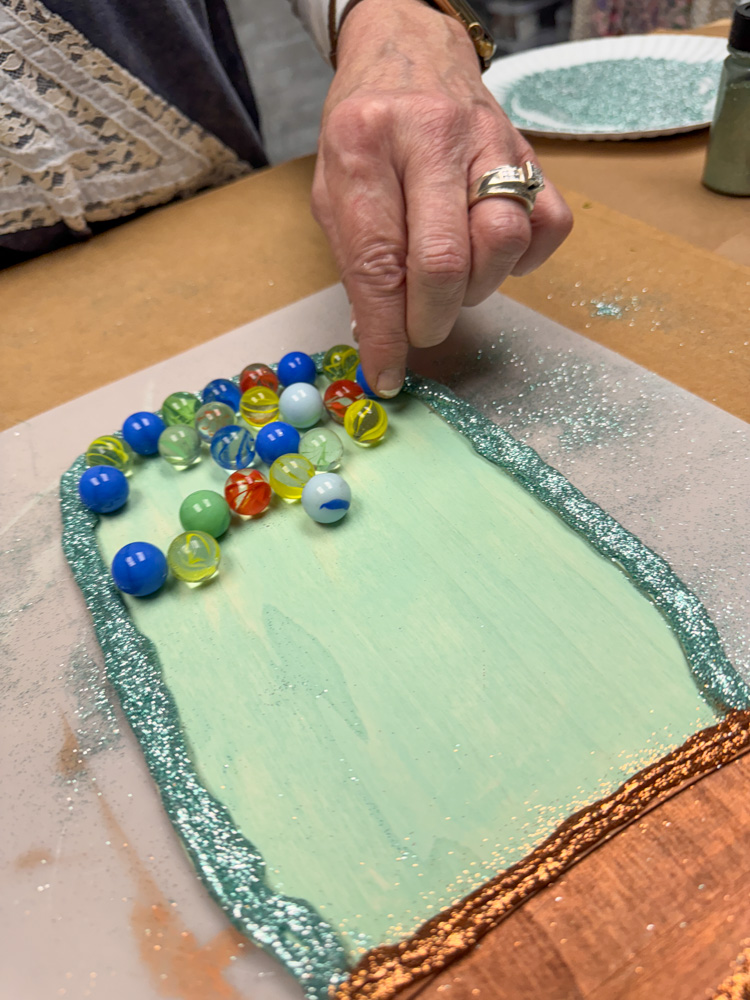
Once you have them all glued down, it’s time for the resin!

Now I know that some people are intimidated by resin, but I am telling you, it is so fun and easy!
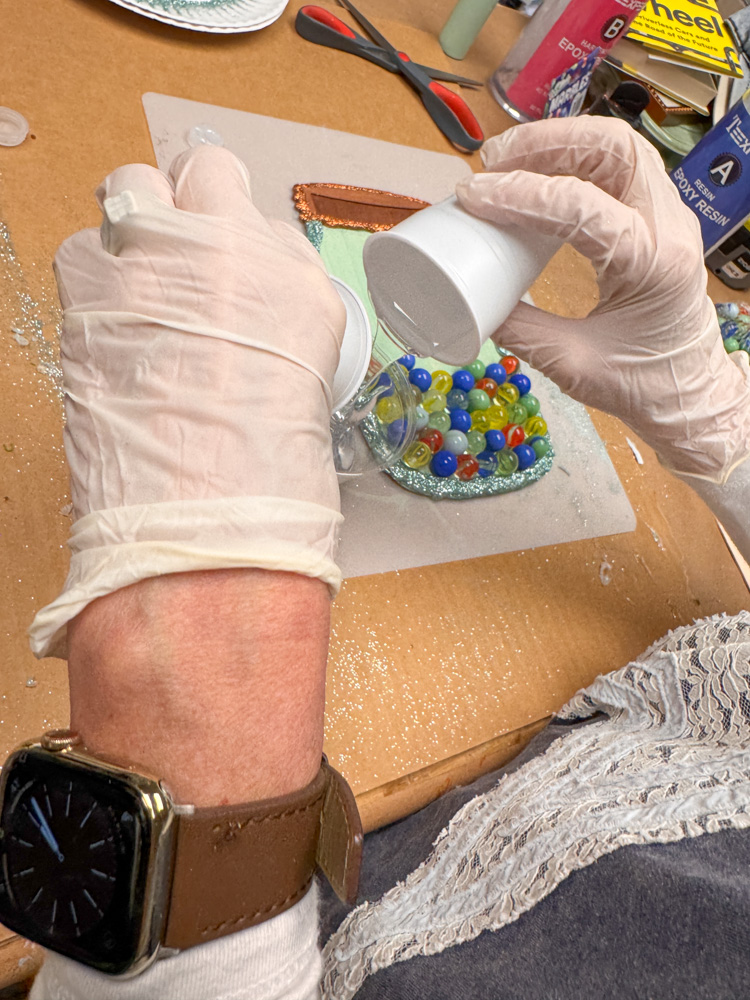
You just have to make sure that you use equal parts of A and B. I used little cups with ridges in them to make sure I had even amounts!
You want to make sure that it stirred up very well to make sure that your resin will set correctly!
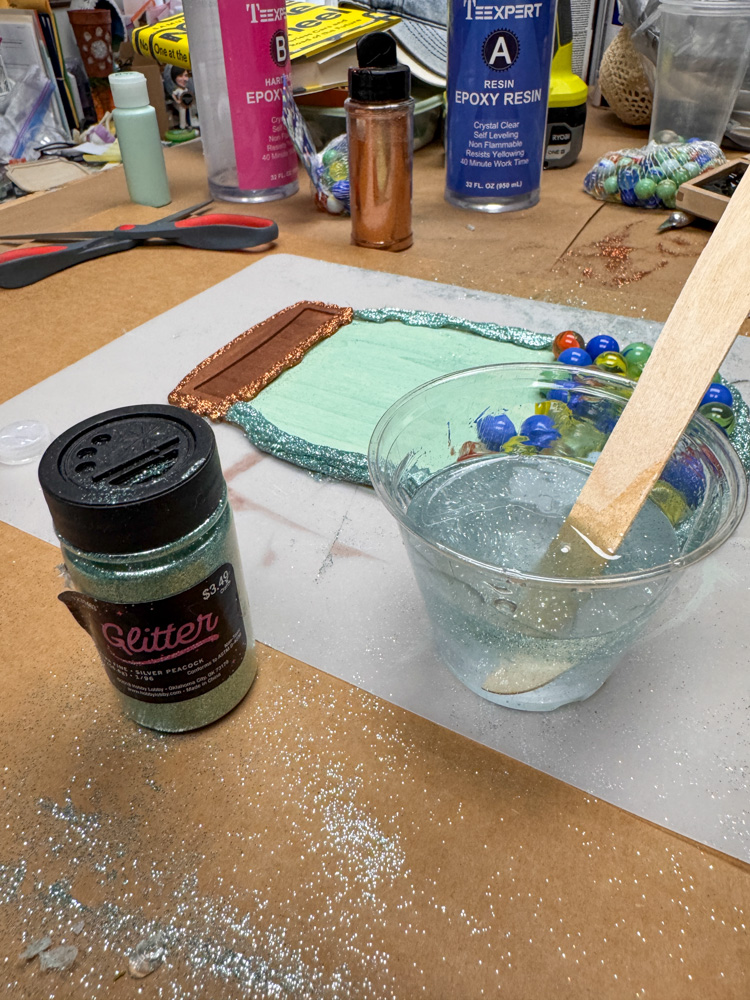
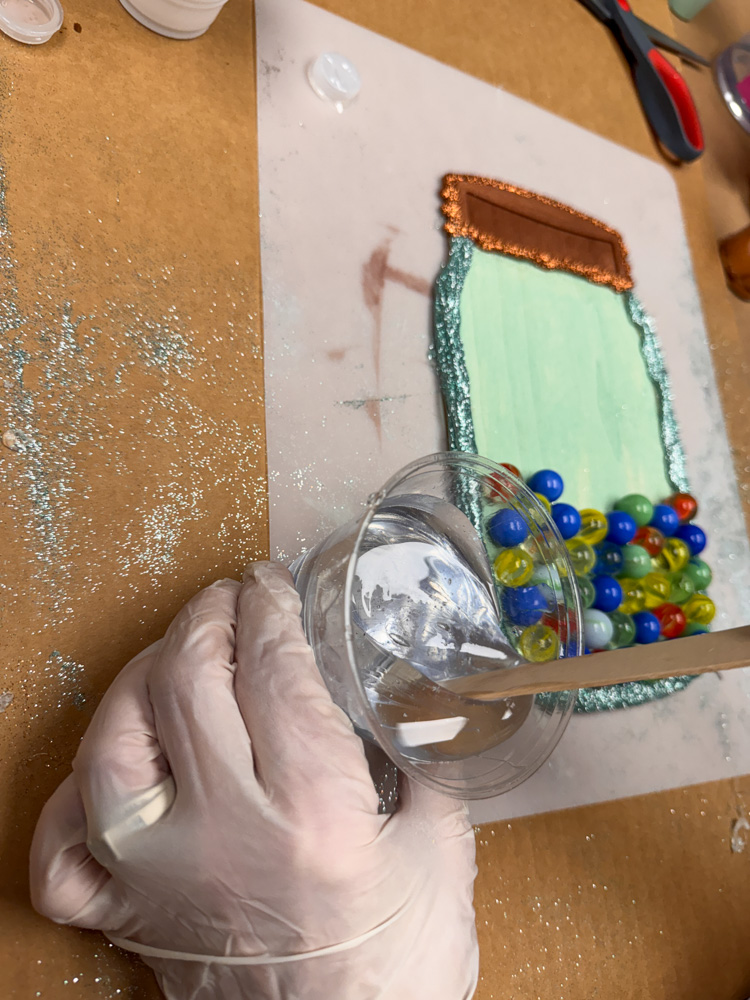
To add a little bit of fun, I added some glitter to the resin! I didn’t add a ton, just enough to give it a little shine!
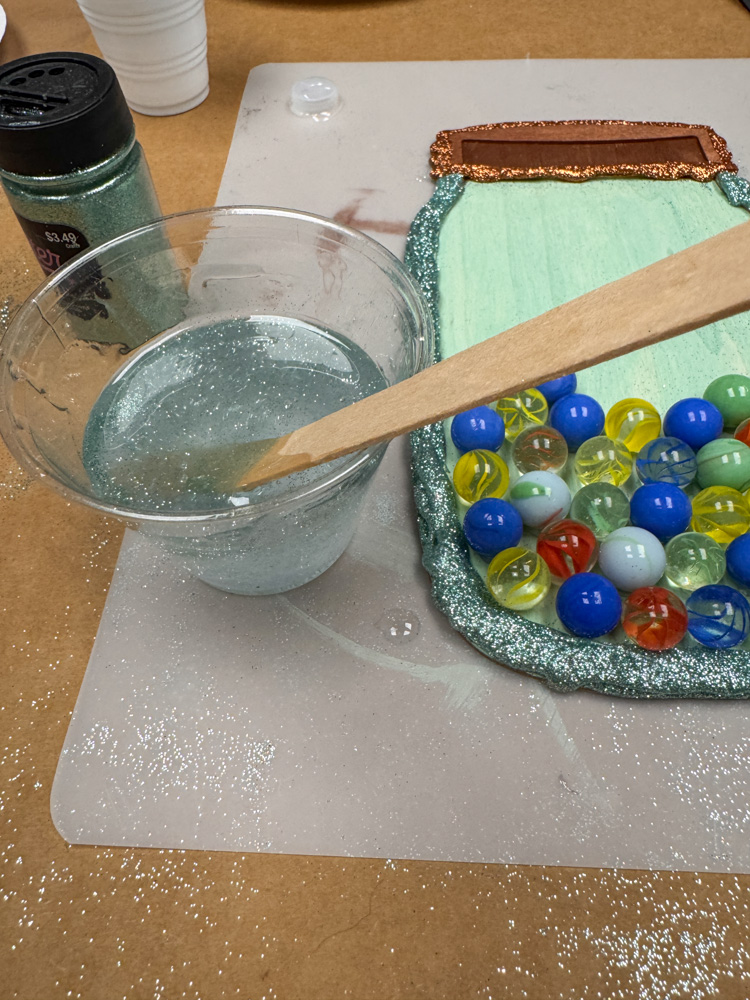
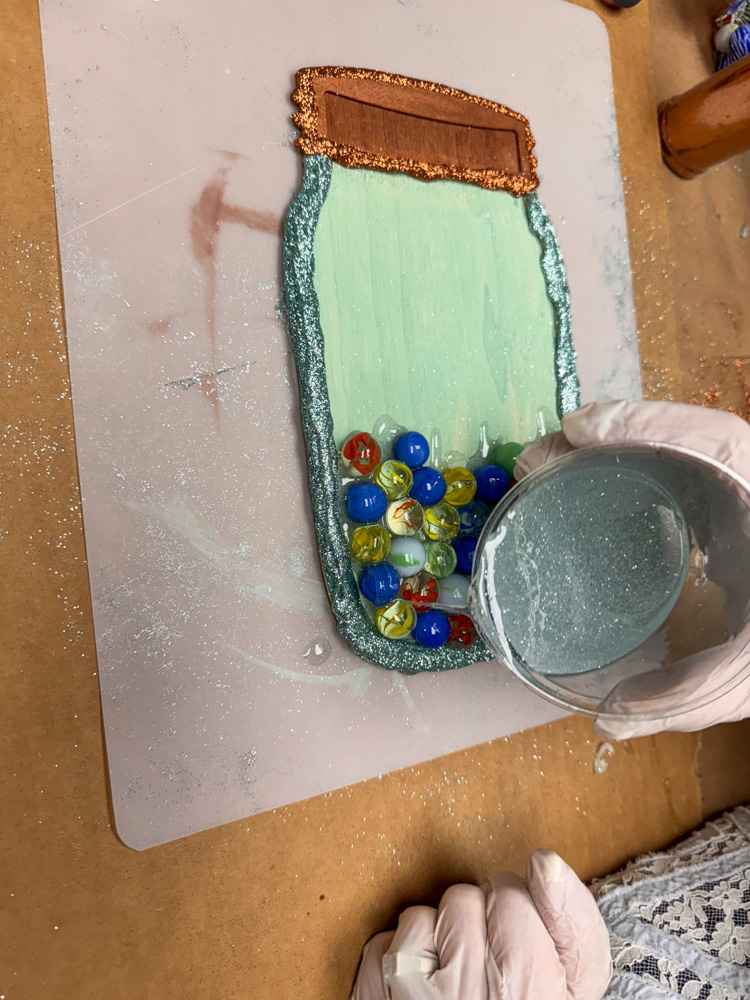
I slowly started pouring the resin on. I started on the part with the marbles because I wanted to make sure that it would seep through and cover the marbles and the base of the marbles.
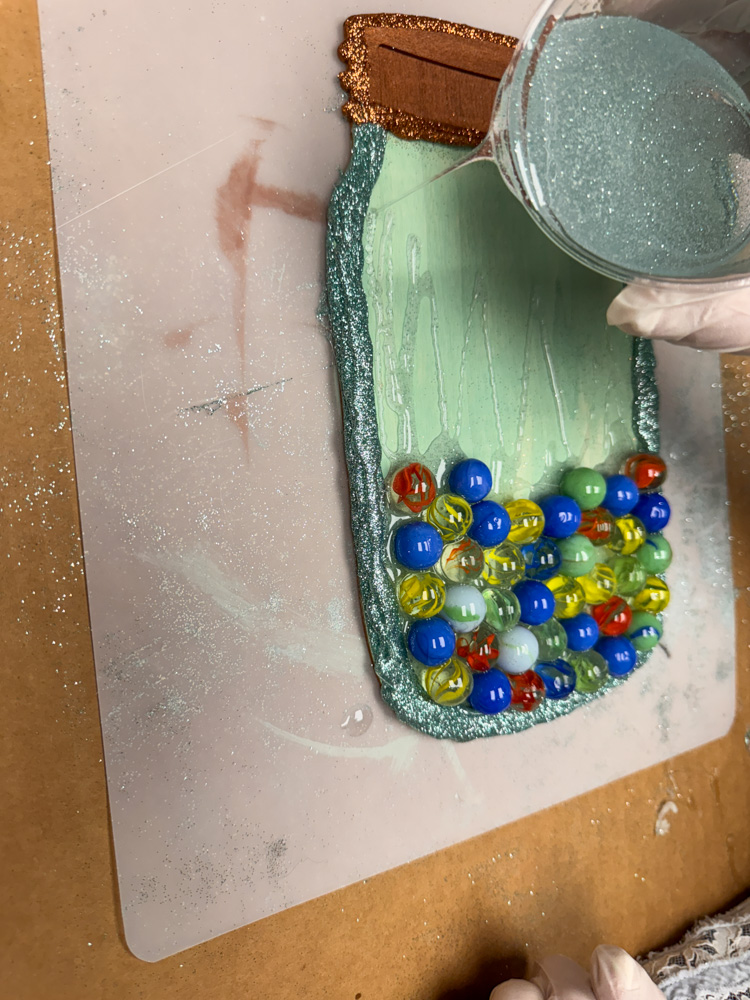
Now I slowly started pouring the resin up towards the top. I wanted to make sure it did not run over the edge.
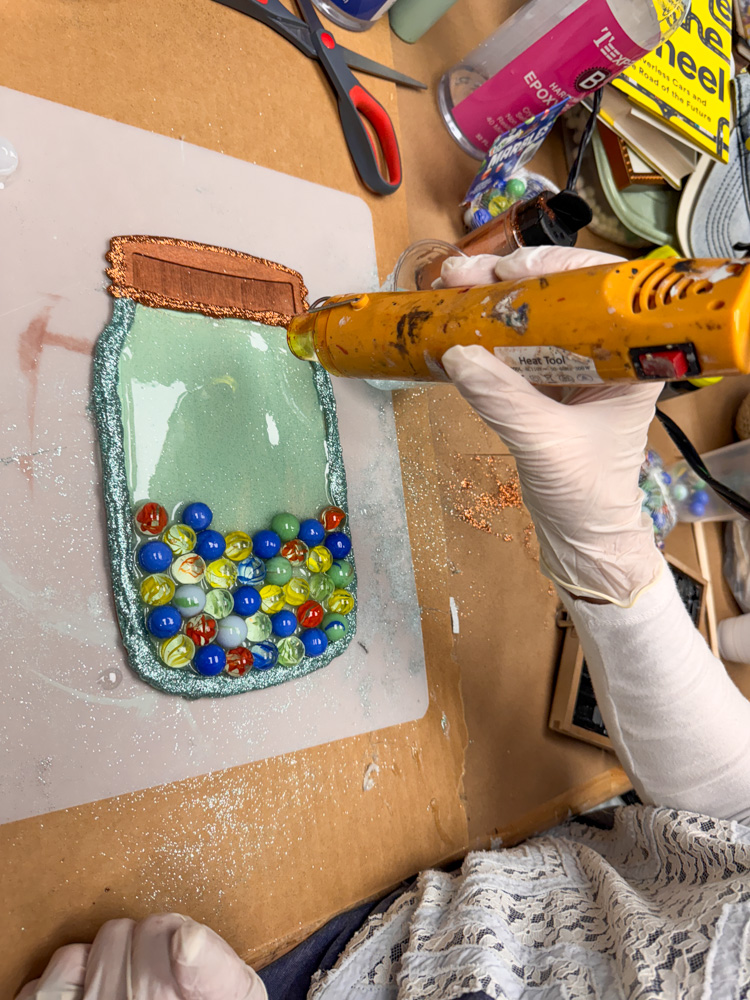
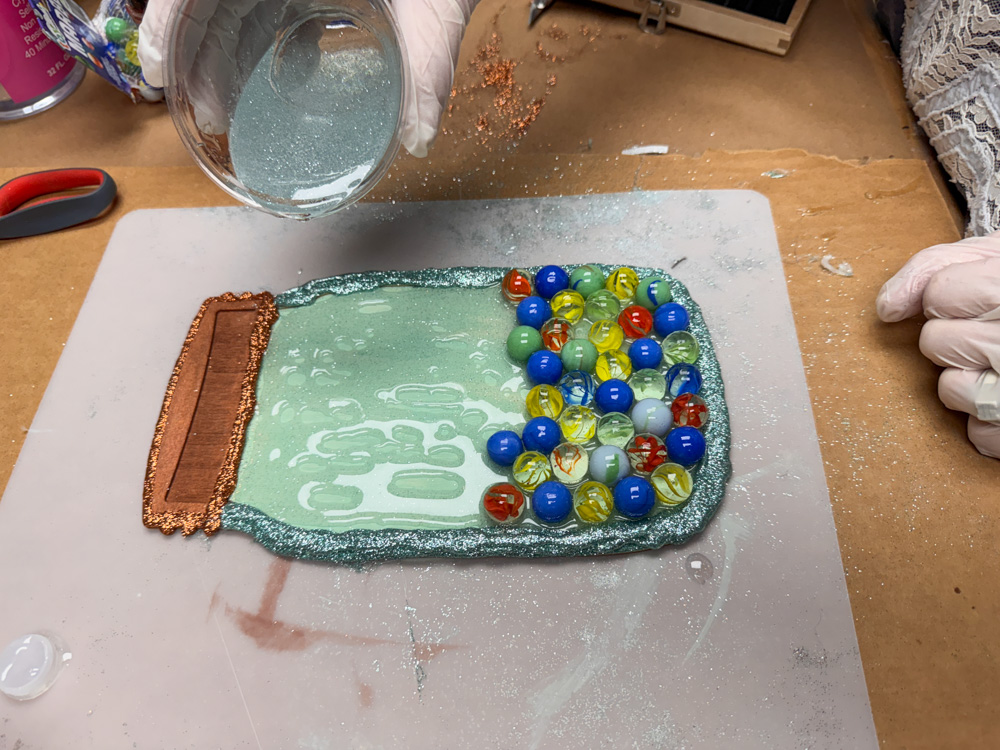
To help spread out the resin and pop any bubbles, I grabbed my heat gun! It worked perfectly! Once it is all laying flat, you want to set it somewhere safe for the resin to cure!
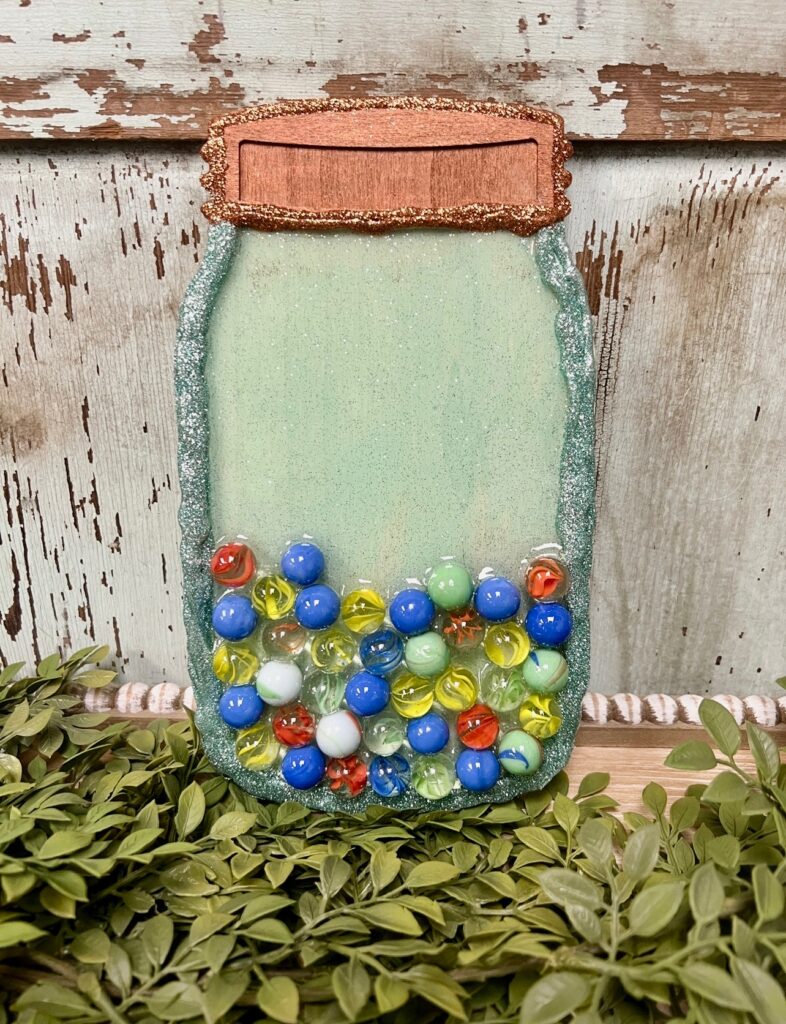
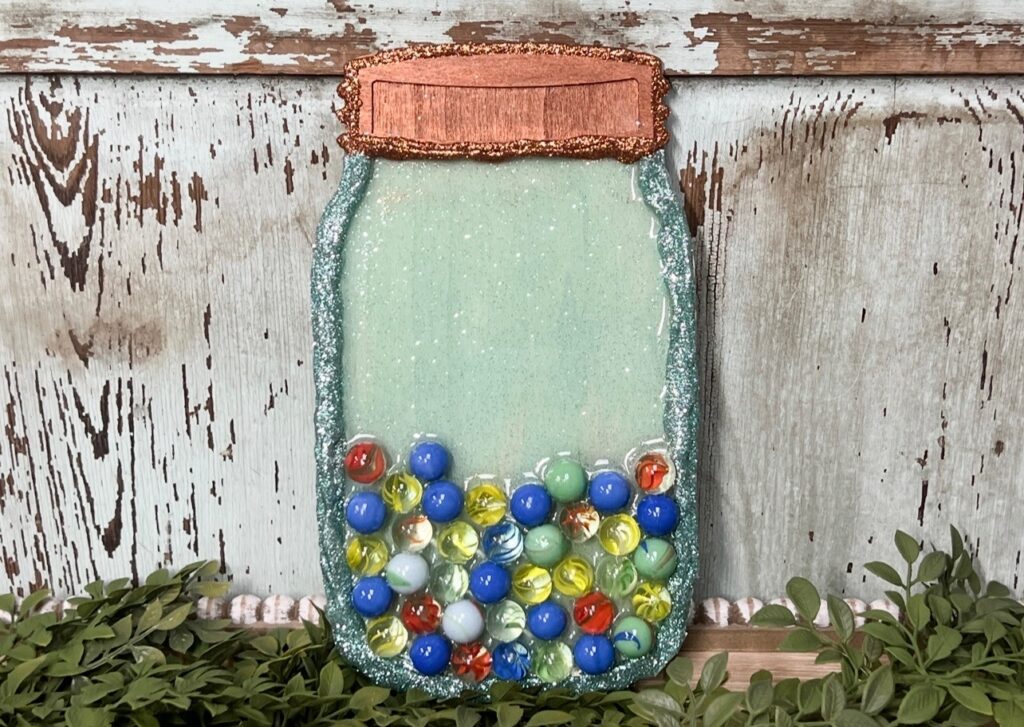
Once the resin is cured, you have such a fun and unique decoration! I had so much fun making this and it has my mind going on what else we can create with this technique! I hope you give it a try!
Super cute Mason jar! Love it!!!
Love this idea 💡 watch you make it can’t wait to see finish when it drys . Watering 💦
I enjoyed watching you do the marble craft with resin. It was so fun all the unique Crafts you make are just amazing. I love it. Love you guys.
I LOVE THIS!!! GREAT CRAFT IDEA🥰
This is a very unique craft. Love the Mason jar and the marbles put together. This would be nice if you had family marbles to hand down to family members and put the name on the top part of jar.
I like the live action shots!
This is just too cute Barb…love it
Wow Barb, it turned out really cute! Reminds me of when my grandma had a jar of old marbles in her cupboard.